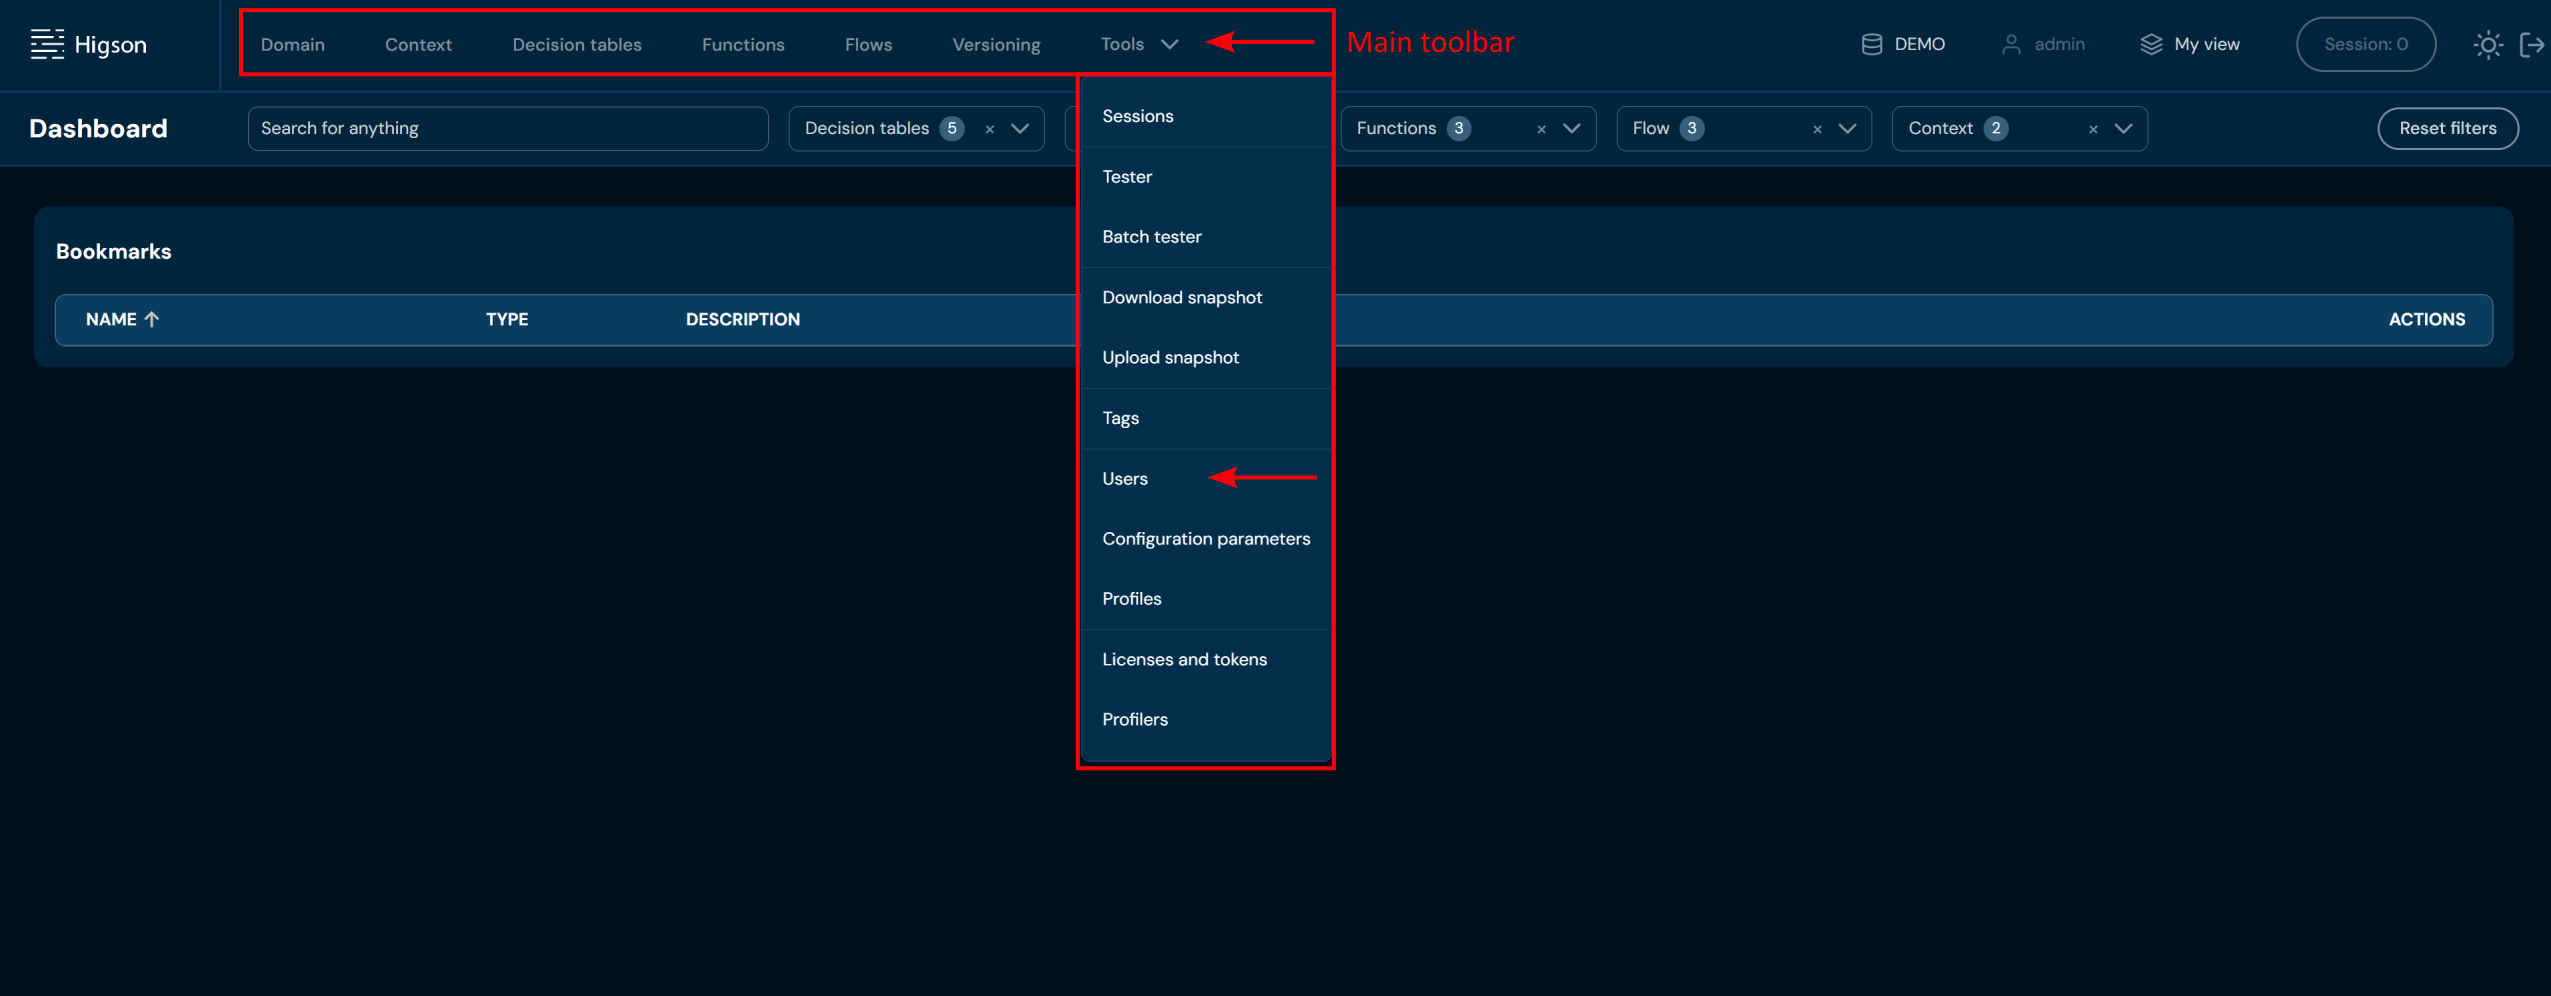
Users’ screen contains information about all users that are created. Only those users have access to Higson module that you are working on. In order to see Users, select Tools → Users in Main Toolbar.
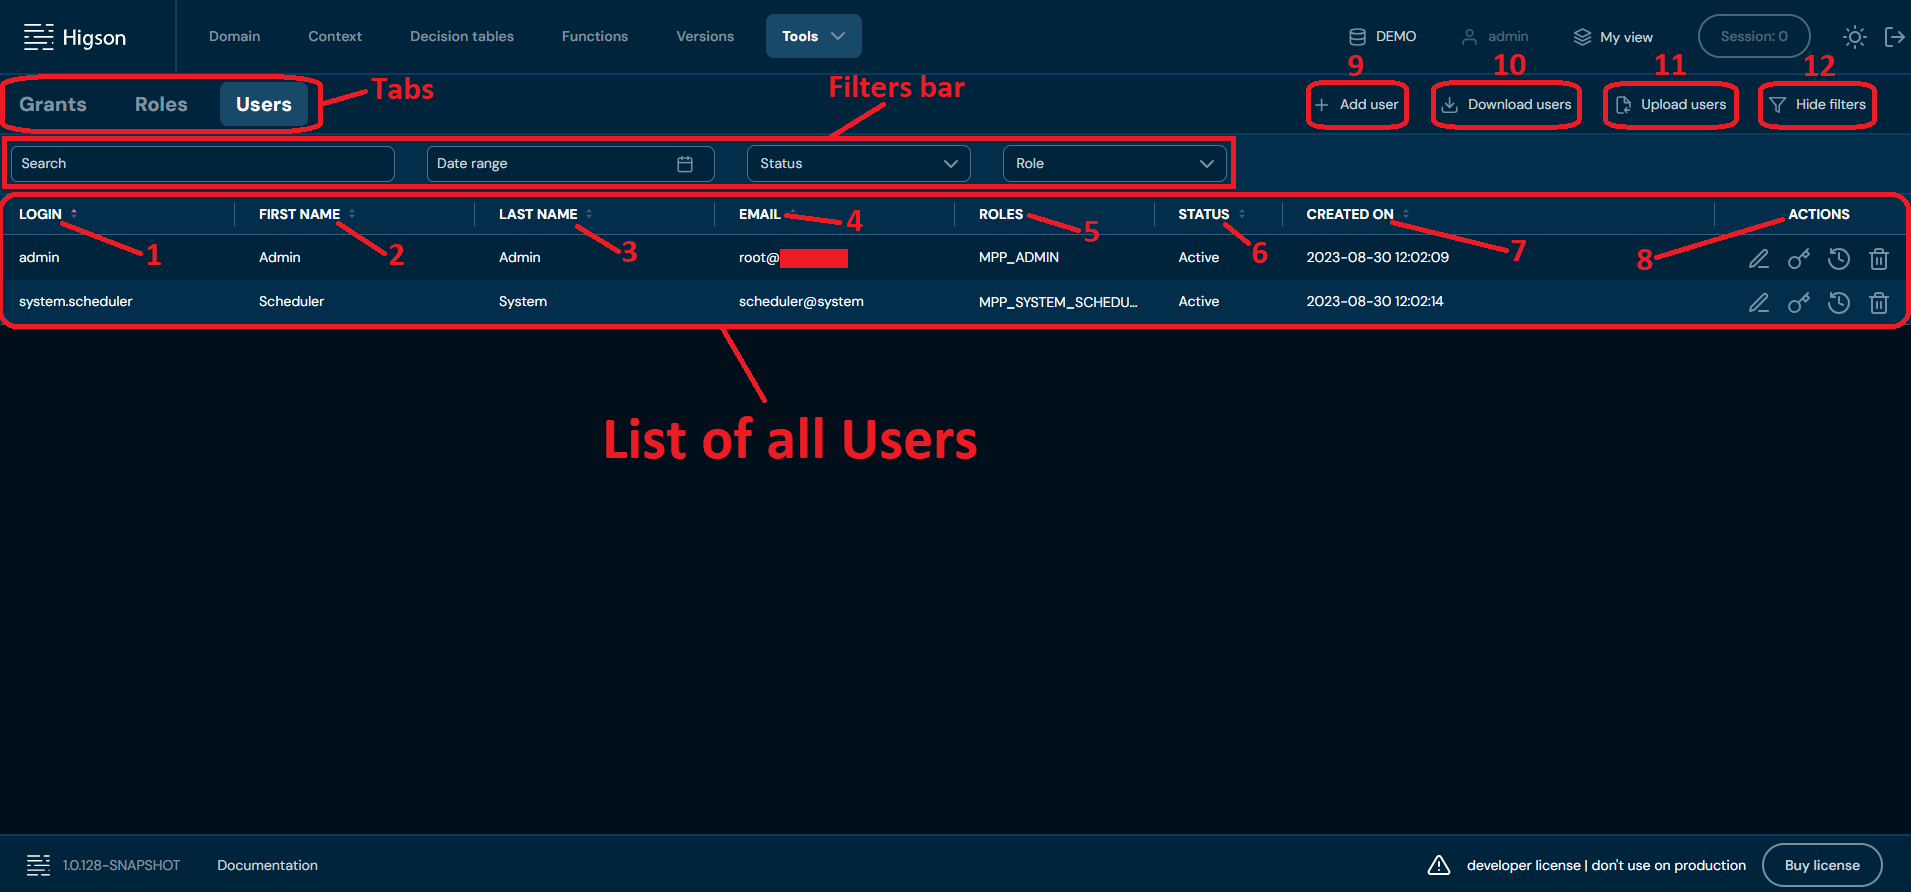
 After you enter Users you will see screen of all Users:
| No. | Column/Action | Description |
|---|---|---|
| 1 | Login | Login associated with the account. Used for logging in to your Higson module. You can sort this column by left-clicking on the arrows visible next to the label. |
| 2 | First name | First name of the user associated with the account. You can sort this column by left-clicking on the arrows visible next to the label. |
| 3 | Last name | Last name of the user associated with the account. You can sort this column by left-clicking on the arrows visible next to the label. |
| 4 | E-mail address of the user associated with the account. You can sort this column by left-clicking on the arrows visible next to the label. | |
| 5 | Roles | All roles assigned to the account. You can sort this column by left-clicking on the arrows visible next to the label. |
| 6 | Status | Current status of the account: - New, inactive - Active - Blocked - Closed You can sort this column by left-clicking on the arrows visible next to the label. |
| 7 | Created on | Date of creation of a user. You can sort this column by left-clicking on the arrows visible next to the label. |
| 8 | Actions | List of quick access actions available for each user. Available actions are: - Edit - Update password - Show login history - Delete user |
| 9 | + Add user | Allows creating new Users. To learn more about adding Users, go here. |
| 10 | Download users | Downloads an XLSX file that contains data of all Users currently on the environment. To learn more about downloading Users, go here |
| 11 | Upload users | Allows uploading Users from an XLSX file. To learn more about uploading Users, go here. |
| 12 | Hide/Show filters | Hides or reveals Filters bar accordingly. If Filter bar: - is visible, then action Hide filters is available. - is hidden, then action Show filters is available. |
You can switch between Grants, Roles and Users screens by left-clicking on the desired Tab.
 You can see all Filters available in Users tab below:

| No. | Filter Name | Description |
|---|---|---|
| 1. | Search text field | Filter by any string provided by the user. Filtered by the Login column. |
| 2. | Date range | Filter by created on date in the format YYYY/MM/DD-YYYY/MM/DD. |
| 3. | Status | Filter by the user’s account status. |
| 4. | Role | Filter by assigned roles. |
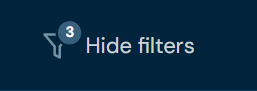
Number in Hide/Show filters action indicates how many filters are active.
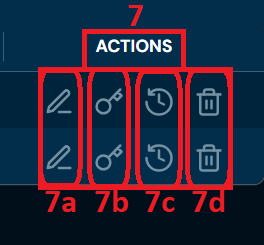
All actions visible in a quick access action list are listed below:
| No. | Name | Description |
|---|---|---|
| 7. | Actions | List of quick access actions available for each user. |
| 7a. | Edit | Allows to edit user data. To learn more about editing user data go here. |
| 7b. | Update password | Allows updating the user’s password. To learn more about updating the user’s password go here. |
| 7c. | Show login history | Shows login history. To learn more about login history go here. |
| 7d. | Delete user | Deletes user. To learn more about deleting the user go here. |
Add User#
If you want to add a new user, follow these steps:
-
Choose Tools → Users in Main toolbar.
-
Choose Add user
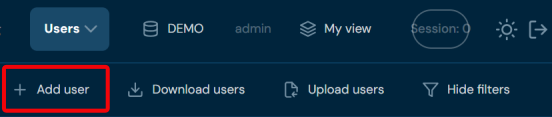
a. Choosing Add user opens a step-by-step Add a new user wizard.
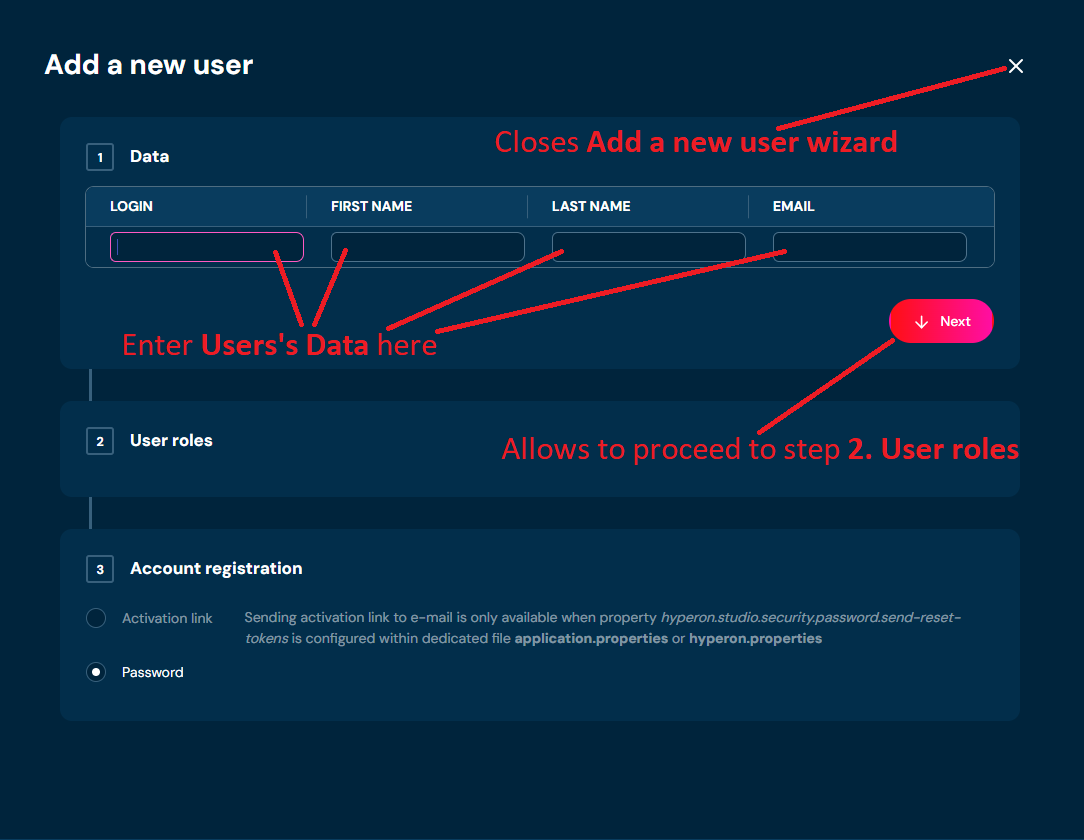
-
In step 1. Data, you:
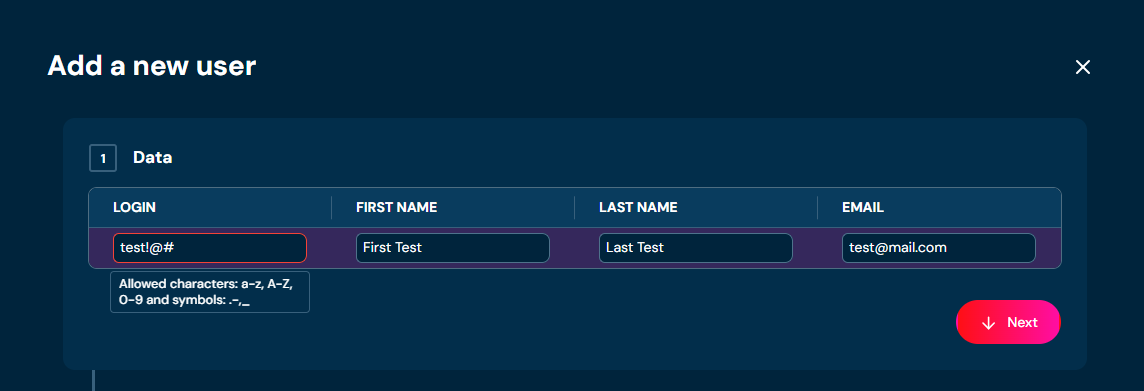
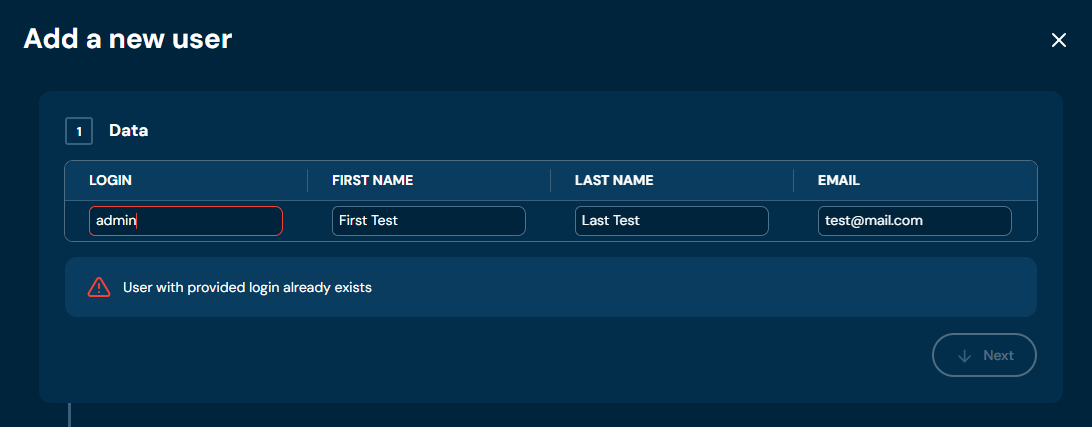
a. need to provide unique user’s login. Login can contain only characters from collection a-z; 0-9; “.”; “-”; “_” and it can’t start with “@”.
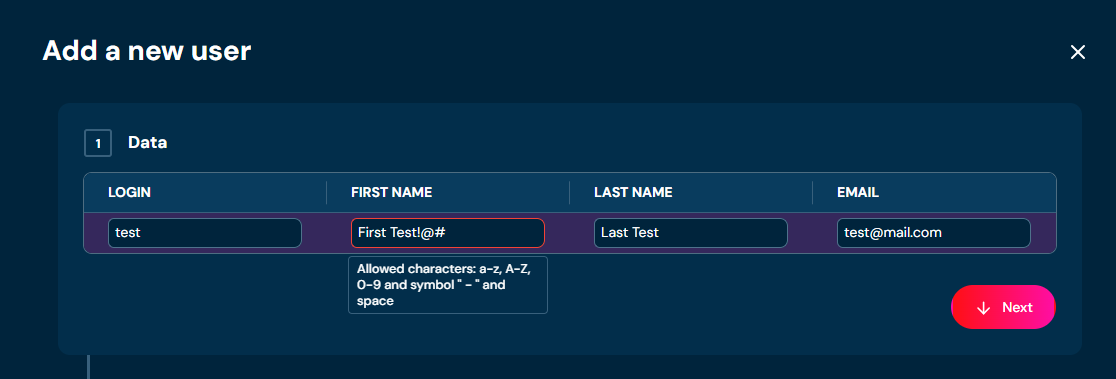
b. need to provide user’s First name. First name can contain only characters from collection a-z; diacritical marks; space; “-”.
c. need to provide user’s Last name. Last name can contain only characters from collection a-z; diacritical marks; space; “-”.
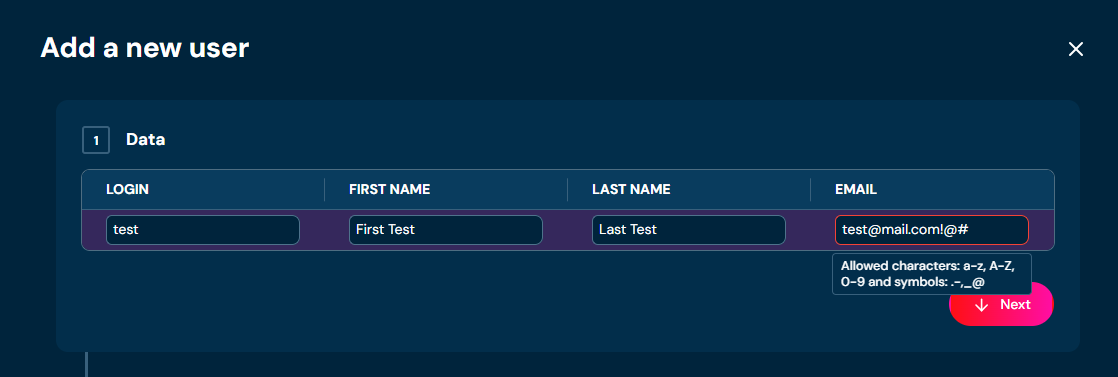
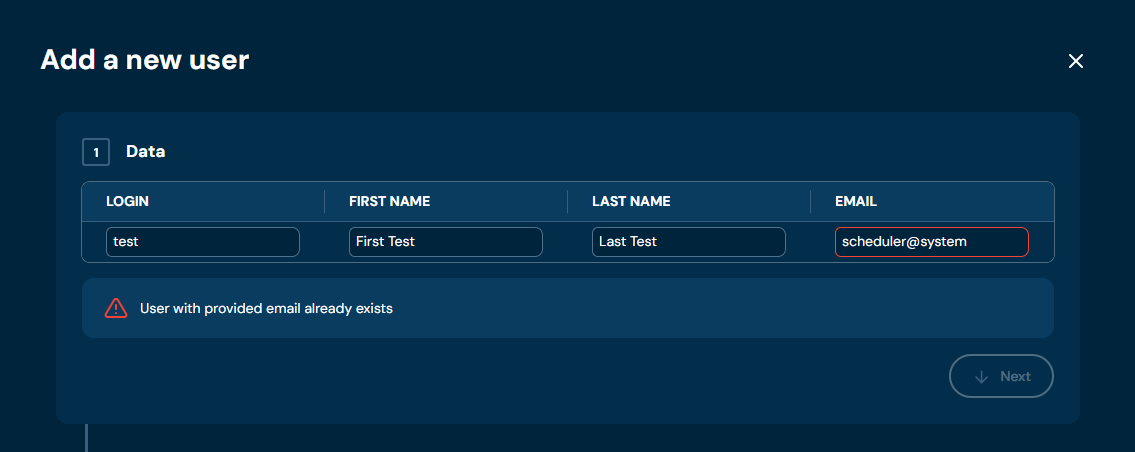
d. need to provide unique user’s e-mail address. E-mail address can contain only characters from collection a-z; 0-9; “.”; “-”; “_”; “@”.
-
Choose Next.
a. If you enter illegal characters in any field, then adequate validation error will appear.
i. For Login field
ii. For First name field
iii. For Last name field
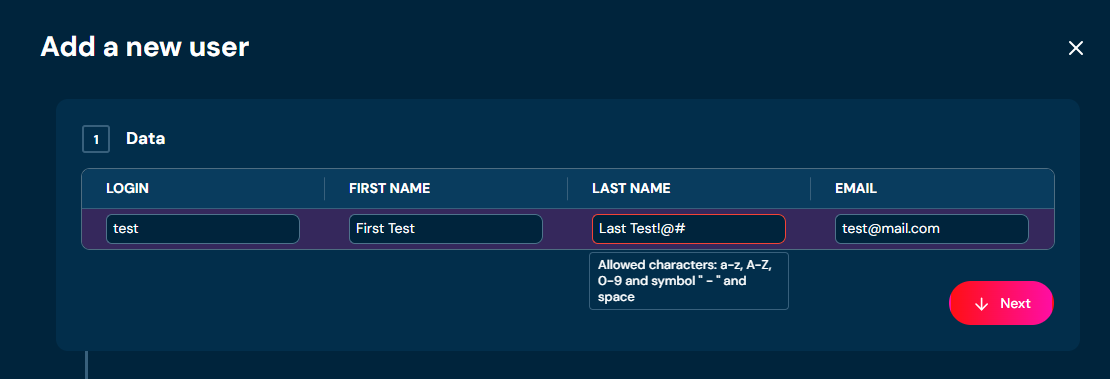
iv. For Email field
b. If you enter Login or Email already used by another account, then adequate validation error will appear.
i. For Login field
ii. For Email field
-
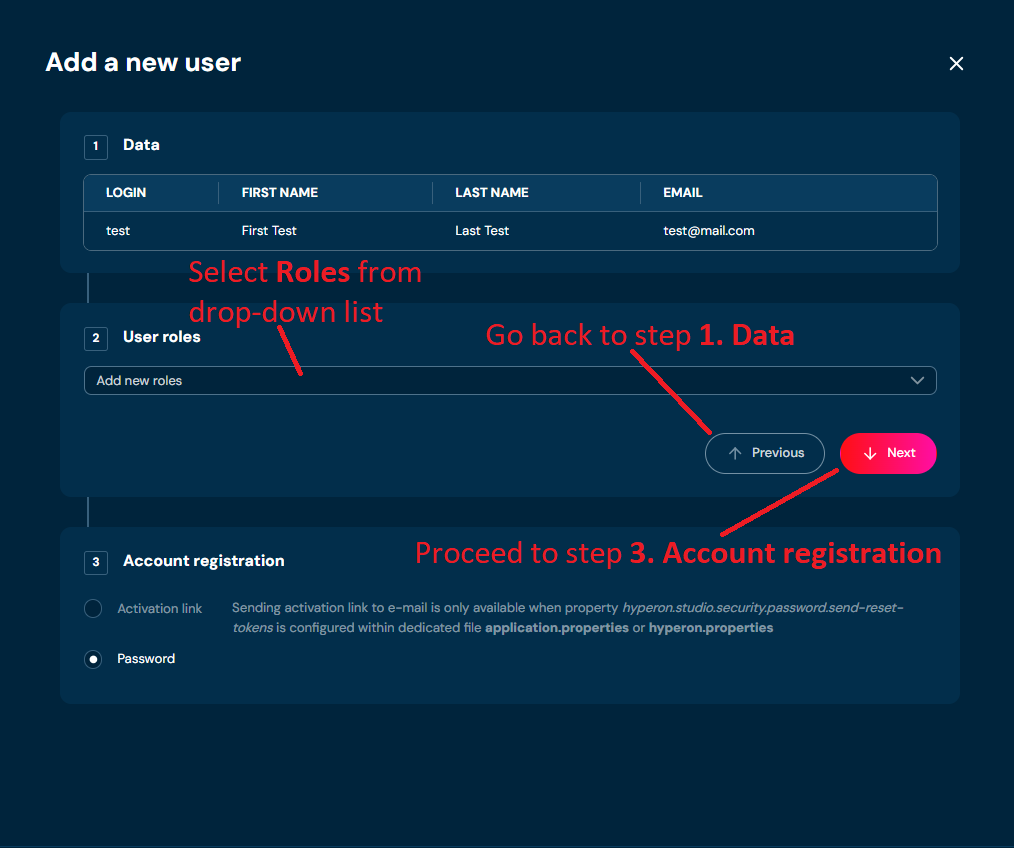
In step 2. User roles you can assign Roles from a drop-down list. You can select multiple roles. This step is optional to add user.
-
Choose Next.
-
In step 3. Account registration you can select if you want to manually set password for user, or you can send activation link to the e-mail address entered in step 1. Data.
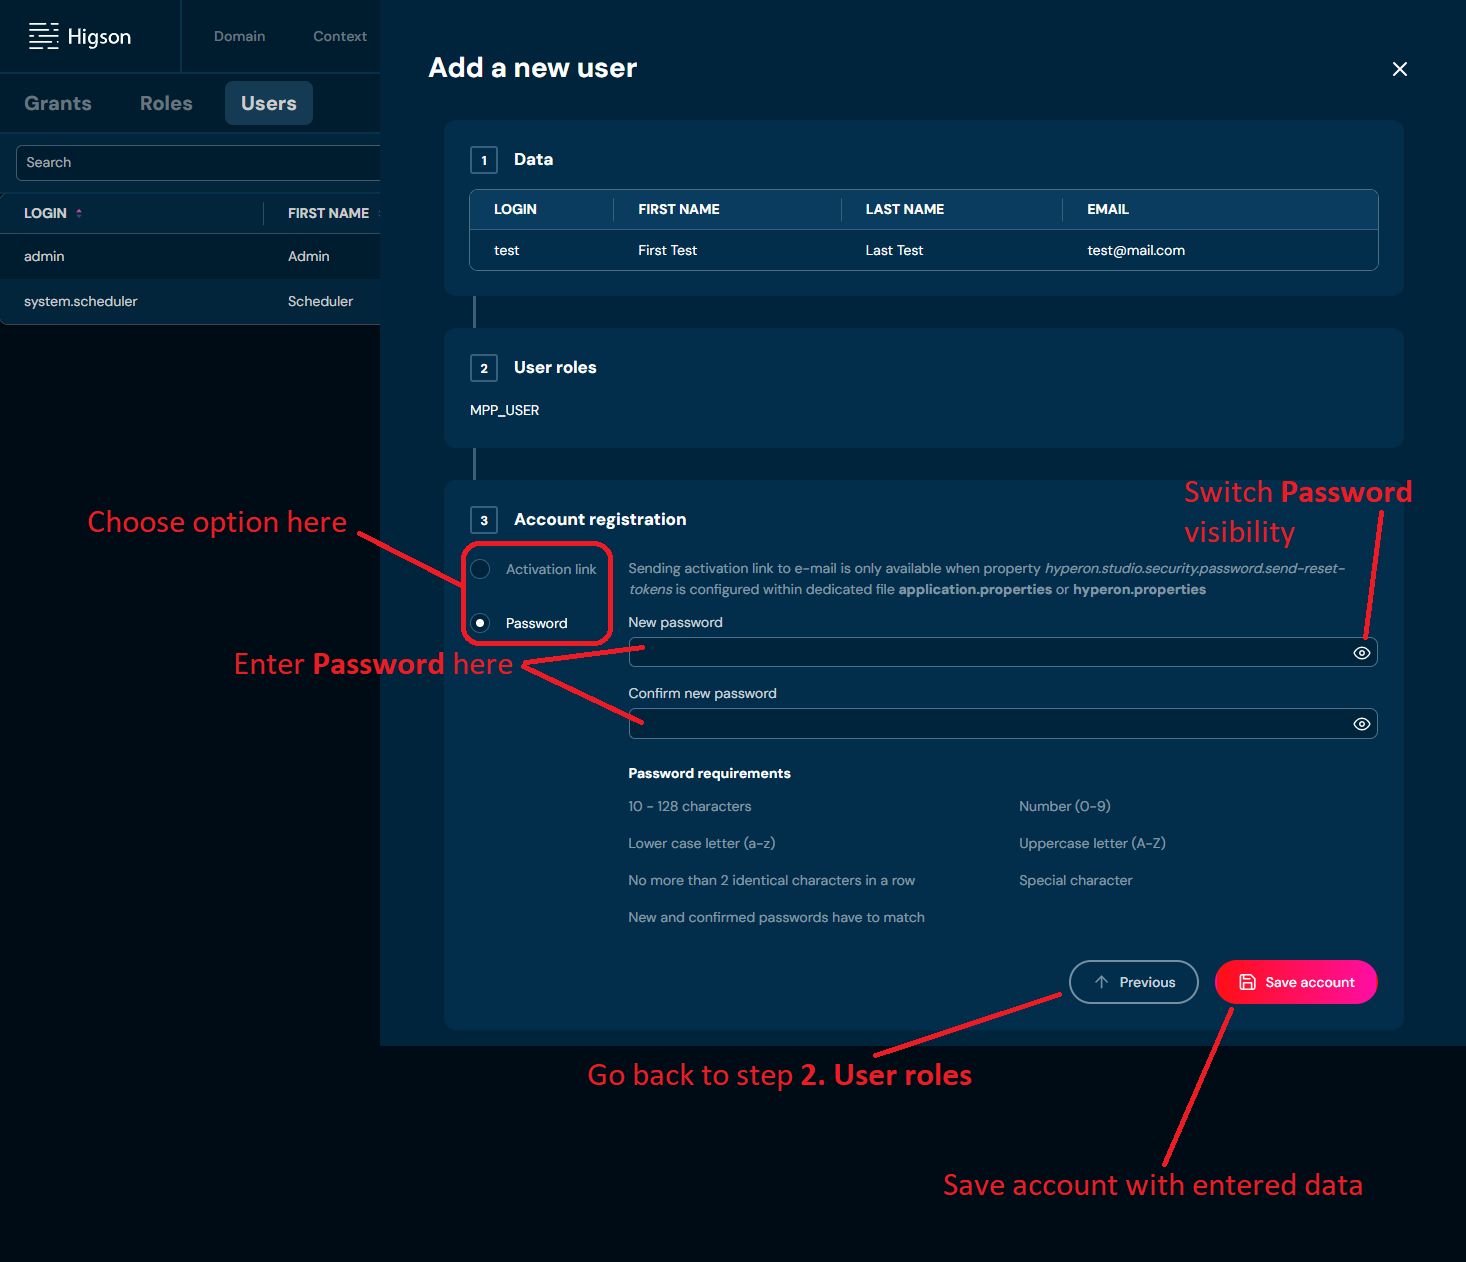
a. Bear in mind, that Activation link option is only available when property higson.studio.security.password.send-reset-tokens is configured within dedicated file application.properties or higson.properties
b. If you choose the Password option, then there are a few Password requirements that need to be met in order to save an account. These requirements are:
i. 10-128 characters—password can’t be shorter than 10 characters and can’t be longer than 128 characters
ii. Lower case letter (a-z) - password must contain at least one lower case letter
iii. No more than 2 identical characters in a row - you can’t type more than two identical characters in a row i.e. CC; cc; Cc is acceptable but CCC; ccc; CcC is not
iv. New and confirmed password have to match - password typed in New password and Confirm new password must be exactly the same.
v. Number (0-9) - password must contain at least one number
vi. Uppercase letter (A-Z) - password must contain at least one upper case letter
vii. Special character - password must contain at least one special character i.e. !; @; #; $; %; etc.
-
Choose Save account.
a. Account with entered data is created.
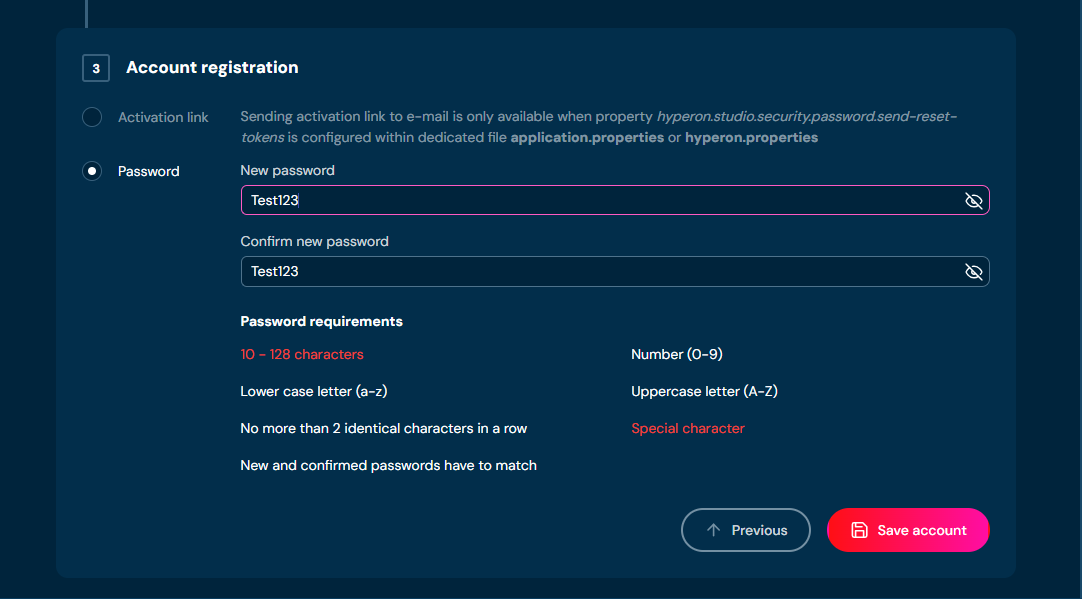
b. If Password requirements aren’t met, then adequate requirement will be highlighted with red color, and you will not be able to save an account.
Download Users#
If you want to download data of all users currently in the environment, follow these steps:
-
Choose Tools → Users in Main toolbar.
-
Choose Download users.
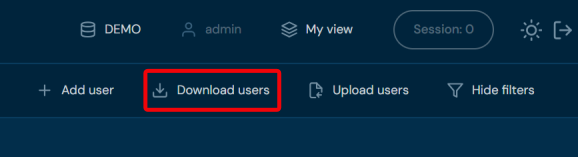
a. Choosing Download users downloads a XLSX file, that contains data of all users currently in the environment.
Upload Users#
If you want to upload users, follow these steps:
-
Choose Tools → Users in Main toolbar.
-
Choose Upload users.
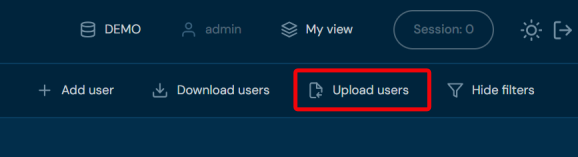
a. Choosing Upload users brings up Upload users screen.

-
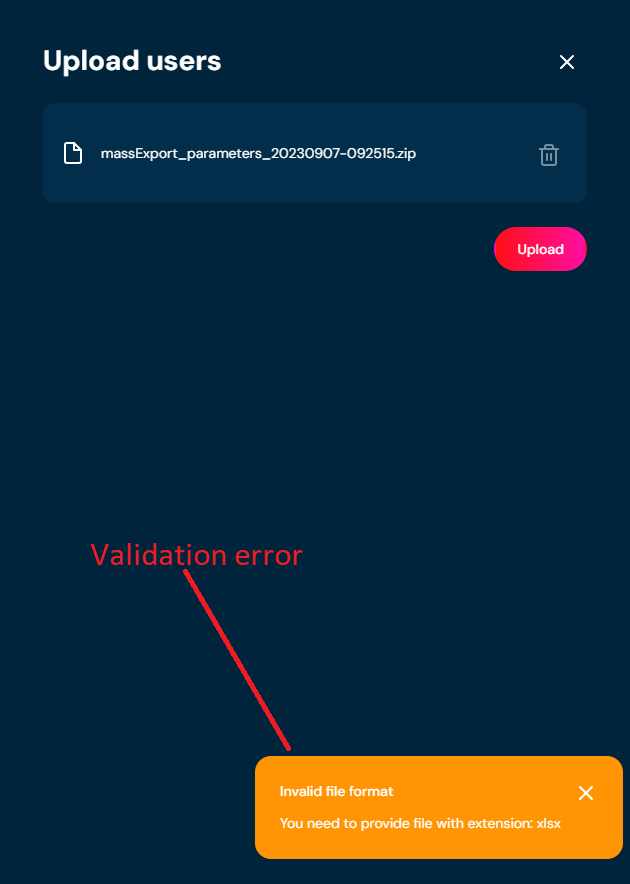
Drag&drop desired file or Click to upload a file and choose file in File explorer.
a. If you choose a file with extension other than XLSX, then validation error will pop up.
-
Choose Upload.
-
When the progress bar reaches 100%, it means that file was uploaded correctly.
a. If a validation error occurs (see above), then an upload process is being aborted.
Edit User#
If you want to edit data of a specific user, follow these steps:
-
Choose Tools → Users in Main toolbar.
-
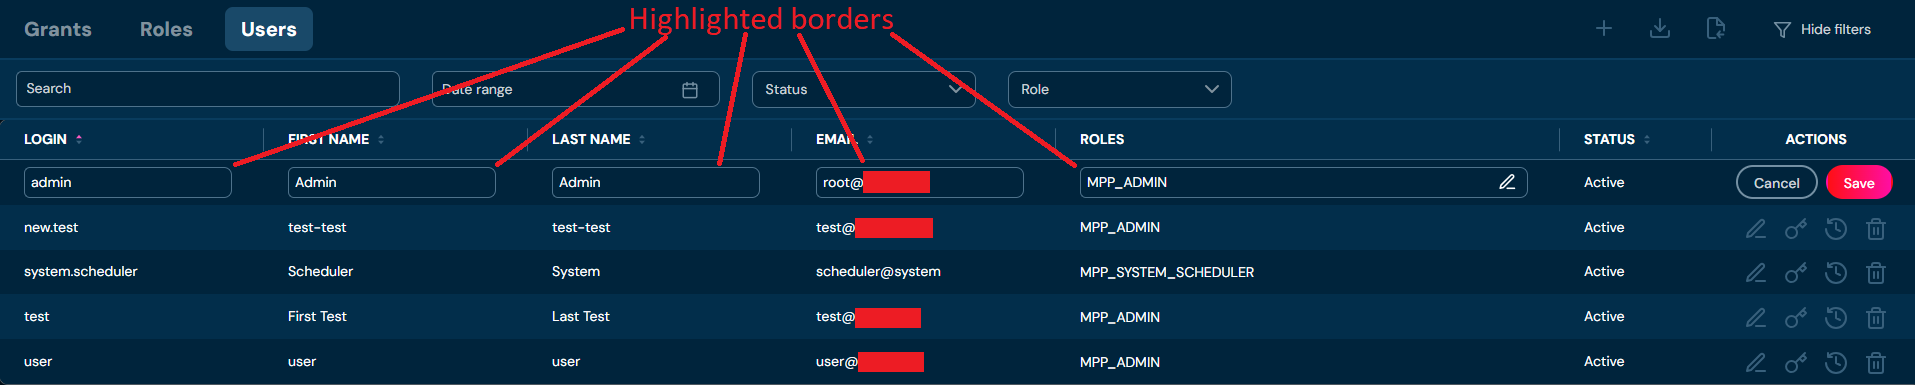
Choose Edit action for the desired user.
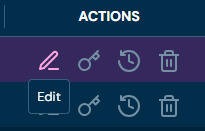
a. Highlighted borders indicate that edit mode is active
-
Edit any data you need:
a. Login can contain only characters from collection a-z; 0-9; “.”; “-”; “_” and it can’t start with “@”.
b. First name can contain only characters from collection a-z; diacritical marks; space; “-”.
c. Last name can contain only characters from collection a-z; diacritical marks; space; “-”.
d. E-mail address can contain only characters from collection a-z; 0-9; “.”; “-”; “_”; “@”.
-
Choose Save.
a. User’s account data is being updated.
b. If you enter illegal characters in any field, then adequate validation error will appear.
i. For Login field

ii. For First name field

iii. For Last name field

iv. For Email field

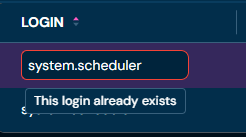
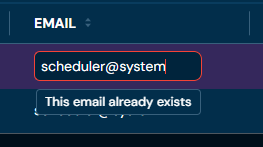
c. If you entered Login or Email already used by another account, then adequate validation error will appear.
i. For Login field
ii. For Email field
Update User’s Password#
If you want to update the password of a specific user, follow these steps:
-
Choose Tools → Users in Main toolbar.
-
Choose Update password action for desired user.
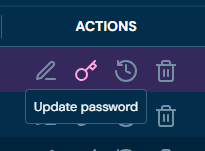
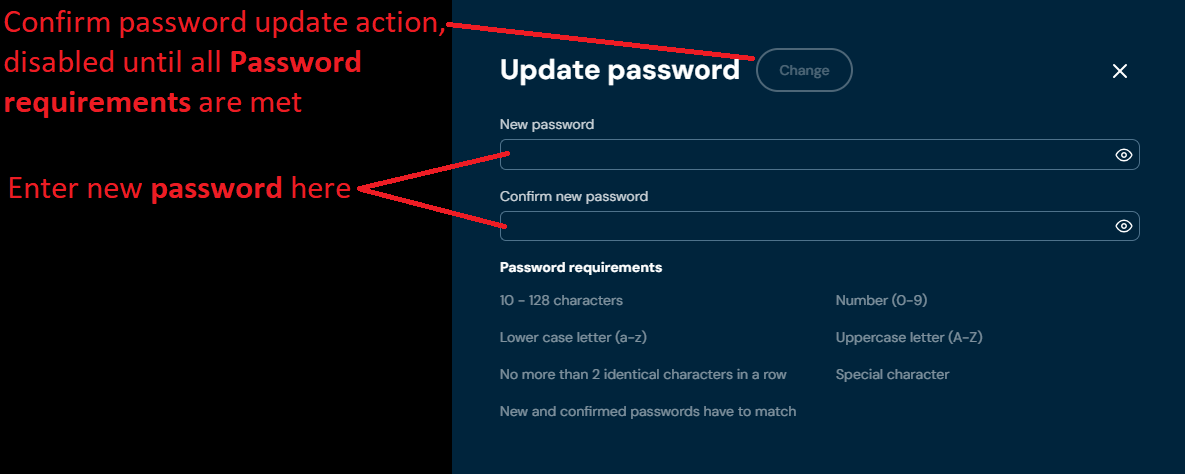
a. Choosing Update password brings up Update password screen.
-
Enter new password in New password and Confirm new password fields.
a. There are a few Password requirements that need to be met in order to update password. These requirements are:
i. 10-128 characters - password can’t be shorter than 10 characters and can’t be longer than 128 characters
ii. Lower case letter (a-z) - password must contain at least one lower case letter
iii. No more than 2 identical characters in a row - you can’t type more than two identical characters in a row i.e. CC; cc; Cc is acceptable but CCC; ccc; CcC is not
iv. New and confirmed password have to match - password typed in New password and Confirm new password must be exactly the same.
v. Number (0-9) - password must contain at least one number
vi. Uppercase letter (A-Z) - password must contain at least one upper case letter
vii. Special character - password must contain at least one special character i.e. !; @; #; $; %; etc.
-
Choose Change.
a. The Password to the user’s account is being updated.
Show Login History#
If you want to check the login history of a specific user’s account, follow these steps:
-
Choose Tools → Users in Main toolbar.
-
Choose Show login history action for desired user.
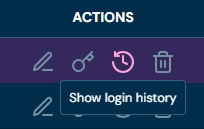
a. Choosing Show login history brings up Login history screen.
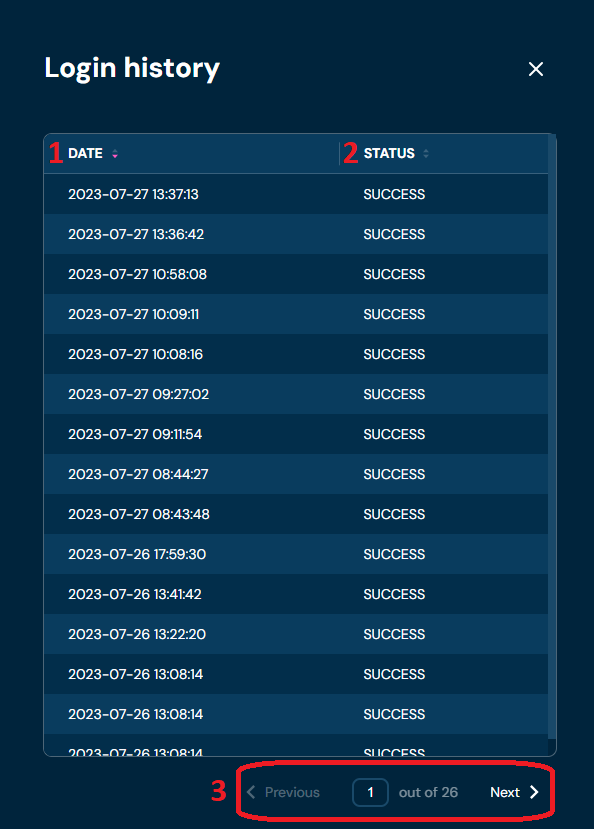
| No. | Name | Description |
|---|---|---|
| 1 | Date | Day and precise hour of login attempt. You can sort this column by left-clicking on the arrows visible next to the label. |
| 2 | Status | Status of login attempt. Available statuses are: - Success - login attempt was successful. User logged in to Higson system. - Bad_credentials - login attempt failed. User provided the wrong password and was not able to login to Higson system. You can sort this column by left-clicking on the arrows visible next to the label. |
| 3 | Page | Allows cycling through pages. Use buttons < Previous and Next > to change pages one at a time or type a specific page number in the text field to move directly to it. |
Delete User#
If you want to delete a specific user, follow these steps:
-
Choose Tools → Users in Main toolbar.
-
Choose Delete user(bin icon) action for user you wish to delete.
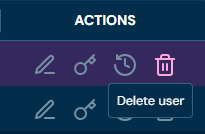
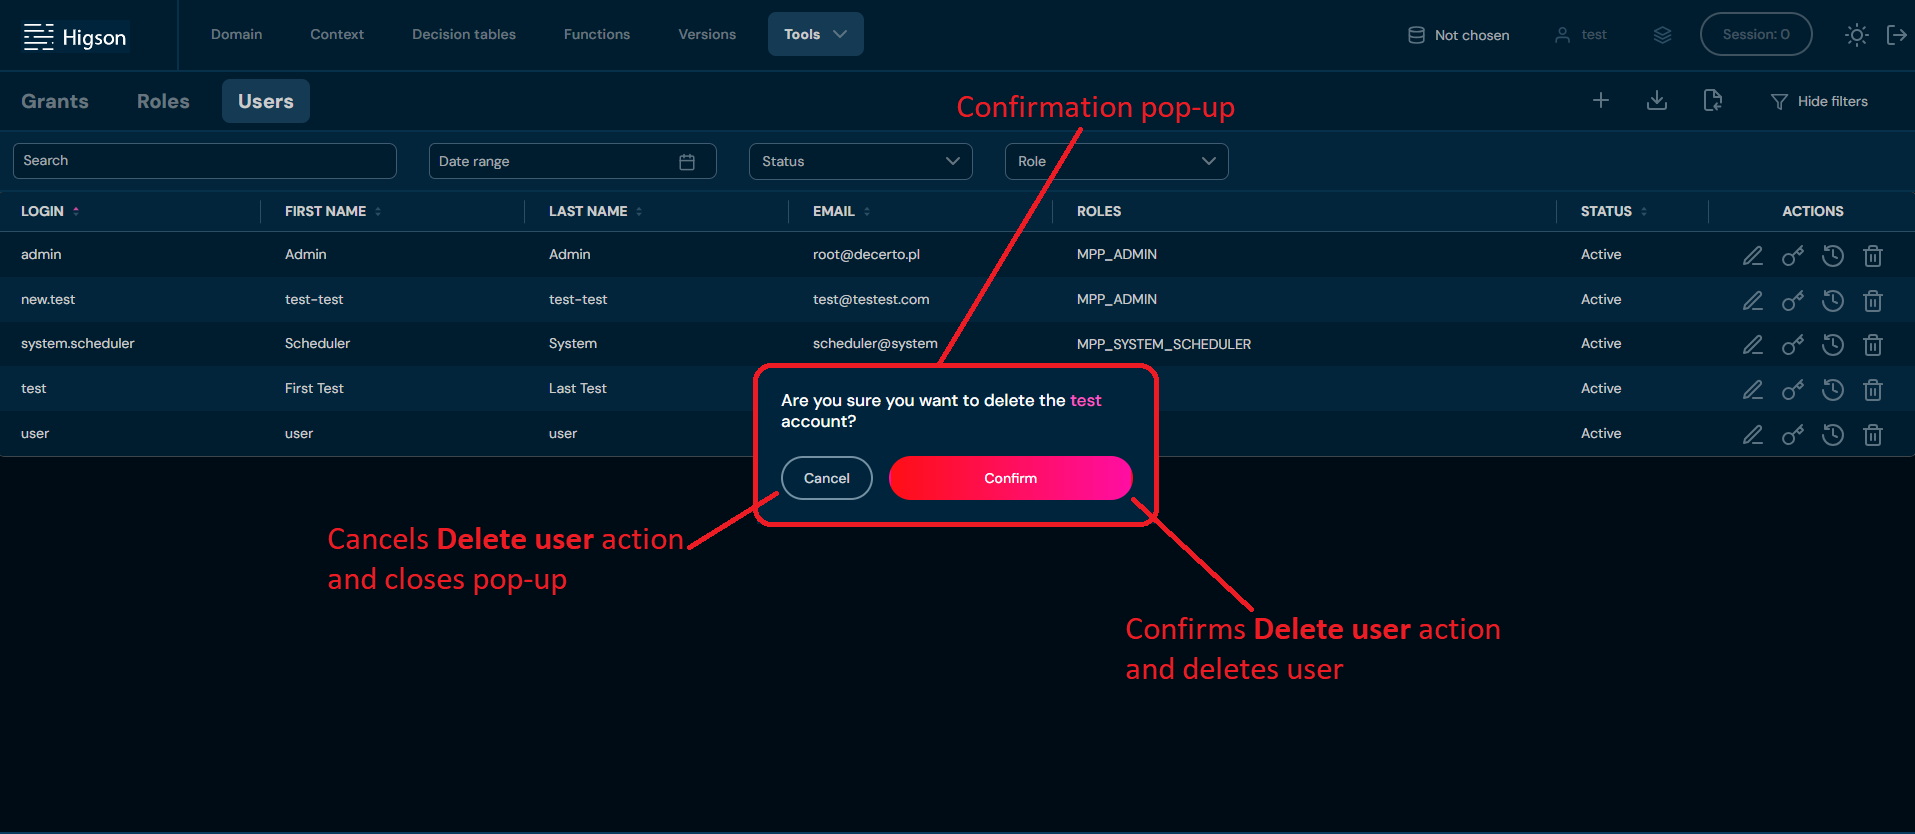
a. After choosing Delete user action, confirmation pop-up will appear.
-
Choose Confirm.
a. Specific User is being deleted from the environment - this user’s status changes to closed. This action is irreversible.