Introduction
Higson as a Business Rules Management System is a system that helps organizations to manage, execute, and optimize their business rules from a centralized platform.
It is designed to easily handle large decision tables. Higson stands out for its extremely high performance and a designed matching algorithm to search large decision tables (1M rows and more) in a few microseconds.
What Higson offers?:
Higson offers a scripting language that allows users to write short functions that expand the capabilities of decision tables. Both software developers and operational staff can modify such functions or decision tables without touching the application’s code. The changes are immediately reflected in any application that uses the Higson engine.
Key features:
- Higson Studio - Web UI that lets users to manage easily their business rules
- Higson Runtime - engine embeddable as a lightweight jar to your business app
- High performance – all rules are stored in in-memory caches so higson provide immediately access and possibility to invoke them
- Time Versioning - create multiple versions of the business logic and schedule them in a timeline
- Domain Designer - design any domain you want to configure with business logic
- Decision tables - tabular representations for specifying which decisions are made using pre-defined conditions
- Functions – help define more complex logic in Groovy language
- Flows – visual role modeling help manage logic through intuitive flow diagrams.
Additional features:
- Context - rules use the context to reference actual business data needed to evaluate a rule
- Private session - there is no limit to the number of users working simultaneously; changes are not visible to other users before publishing
- Dev Mode - special mode to speed up the initial phase of the development; each change is immediately visible to the outside world.
- Built-in Profiles - monitor the usage of decision tables and DSL scripts or functions
- Import and Export from/to Excel - import and export configuration and tets cases from/to Excel.
- Multiple Databases support - Higson uses databases for storing rule configurations; supported databases: Oracle, MS SQL Server, PostgreSQL, MySQL
- Test features (tester, batch tester) - before publishing changes, user can tests whether the rules work as desired and check the impact on other rules by using a mass tester to perform regression tests
Who and how will use Higson?
There are 3 groups of users, that will use Higson:
- End User - application business end-user, which may modify values of previously configured domain.
- Developer - Developer codes your business application with higson support. Needs to prepare appropriate domain model at your app. Perform initial configuration which business user prepared firstly. Developer may mix higson features: domain, decision tables, functions to reflect business domain configuration.
- Business User – main designer of your domain. Initially Business User input final parameters values. Experienced Business User can perform highly sophisticated parameter redesigns without the necessity of application code change.
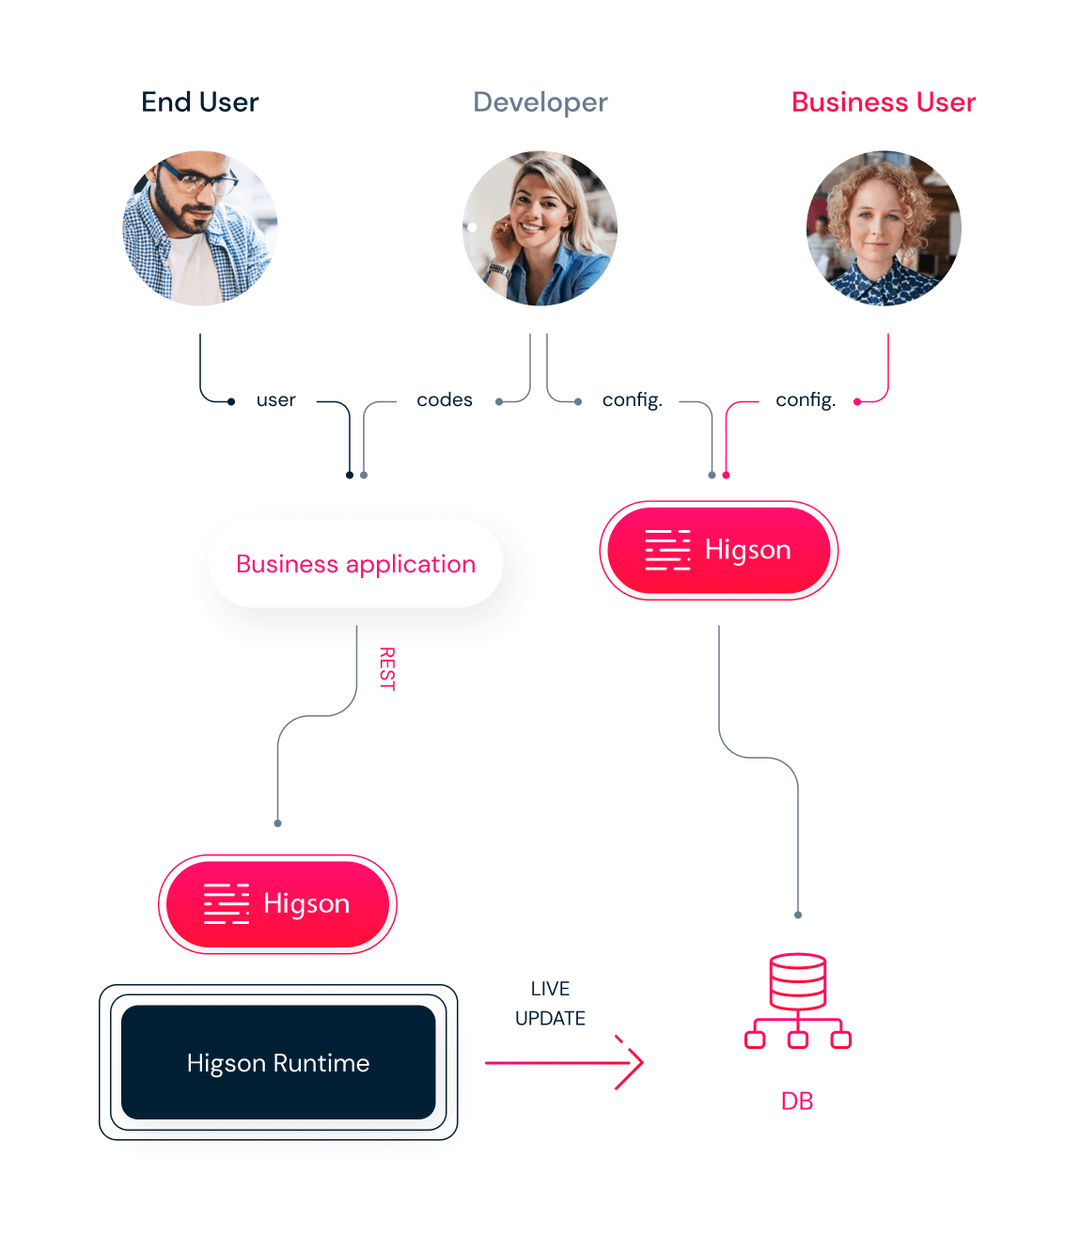
Here are short descriptions of components in the diagram:
- Higson Studio - the complex web-based user interface for setting up parametrization. The tool includes decision tables, functions and flows repository, domain definition and configuration, testing, and export-import capabilities.
- Business Application - Java application that has its business logic, parametrization externalized to Higson. The application is e.g. sales portal, product management system, policy life system. The parametrization is accessed via Higson Runtime.
- Higson Runtime – as an embedded jar library provides to your Business Application robust java API for decision tables/function/flows/domain access. The library is responsible for retrieving data from Database schema and caching it as an in-memory index within the Business Application. At fixed intervals the library checks for changes alterations and updates itself asynchronously. That approach significantly expedites parametrization calls.
- Database - storage for Higson externalized parametrization repository. Data is altered via Higson Studio. Higson Runtime Library accesses the schema in fully read-only mode. Higson supports the most popular SQL Databases.
How Higson can support organizations?
Insurance Industry
Higson helps insurers to start leveraging and embracing data in managing products and offering highly personalized solutions to customers, in real-time. Business and non-IT users can make instant changes and market new products in a matter of minutes. Higson has proved its usage in:
- insurance underwriting
- tariff management
- insurance claims management, etc.
Banking & Finance
Banks also use rules engines to develop new financial products while maintaining pricing accuracy and compliance. As a result, new products enter the market in a matter of days instead of weeks or months. Higson can empower financial institutions to streamline important processes such as:
- product eligibility
- credit scoring
- customer self-service, etc.
Telcom & Media
Telecoms have thousands of products comprising pricing, customer segments, distribution channels, packages, promotions, and subscriptions. Managing such complex portfolios can quickly become difficult and inefficient as new products and variations are introduced. Higson is a powerful product catalog that empowers non-technical business users to build, update, and manage all of their complex products with a single user-friendly interface. As a result, Higson drastically shortens time-to-market, cuts down on expenses, and eliminates potentially costly mistakes.
Industries, such as:
- Retail
- Airlines
- Travels, and even more as a dictionary module.
The numbering of the software version is carried out using numerical designations: “x.y.z”. The numbers “x.y” indicate the version number of the software in Major and Minor notation (e.g. 1.21, 2.1).
The number “z” indicates a Patch version that does not affect the functional scope of the released version, and is intended for technical improvements or removal of noticed bugs.
Software versions marked as LTS (Long-Term-Support) are maintained for at least 18 months from release.
Technical support includes maintenance of LTS versions only.
Current list of LTS versions: 4.1, 4.2, 4.3
Try it out!
The demo project includes:
- Demo application
- Higson Studio
- Higson Runtime-Rest
The demo application is used to collect input data from the end user and show output data from Higson Studio, where all algorithms and business logic is kept. Higson is designed to allow real-time changes in configuration, impacting results returned by the demo app. Higson Studio included in this set has no functional limitation compared to the full version.
Higson Studio
Higson Runtime-Rest
Demo application
Login credentials:
Login: admin
Password: admin
All documentation about Studio REST API can be found here
Instruction
Logging in is necessary to use Higson features and functionalities. Once Higson Studio is opened, you will be directed to the login page automatically.
Before logging in, ensure that you have the following:
- A registered account: You must have a valid account created within Higson. If you have not signed up yet, please contact your system administrator.
- Username and password: Make sure you have your unique username and password associated with your account. If you do not remember your credentials, there is a Forgot Password option available on the login page. Utilize this option to reset your password.
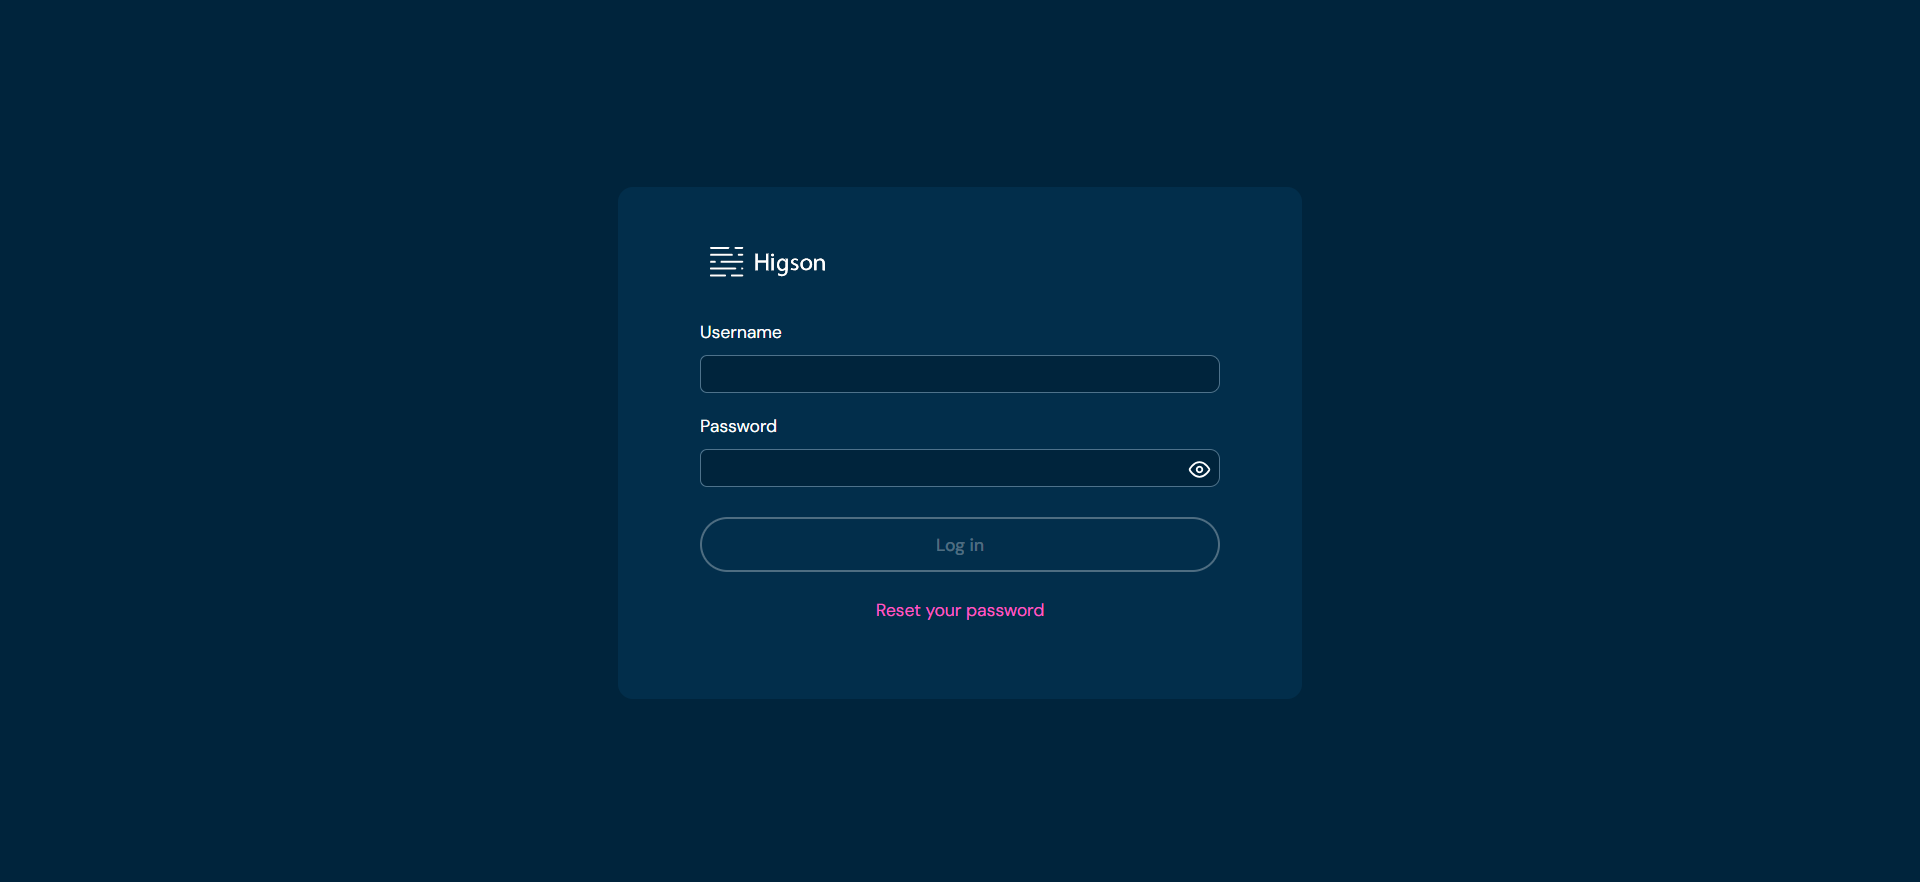
Logging in steps
- Launch Higson Studio
- In Username field, enter your unique username.
- In Password field, enter the password associated with your account.
- Click on Log in button
Resetting password
If you have forgotten your password or need to change it for any other reason, you can utilize the password reset option. The password reset process involves the following steps:
-
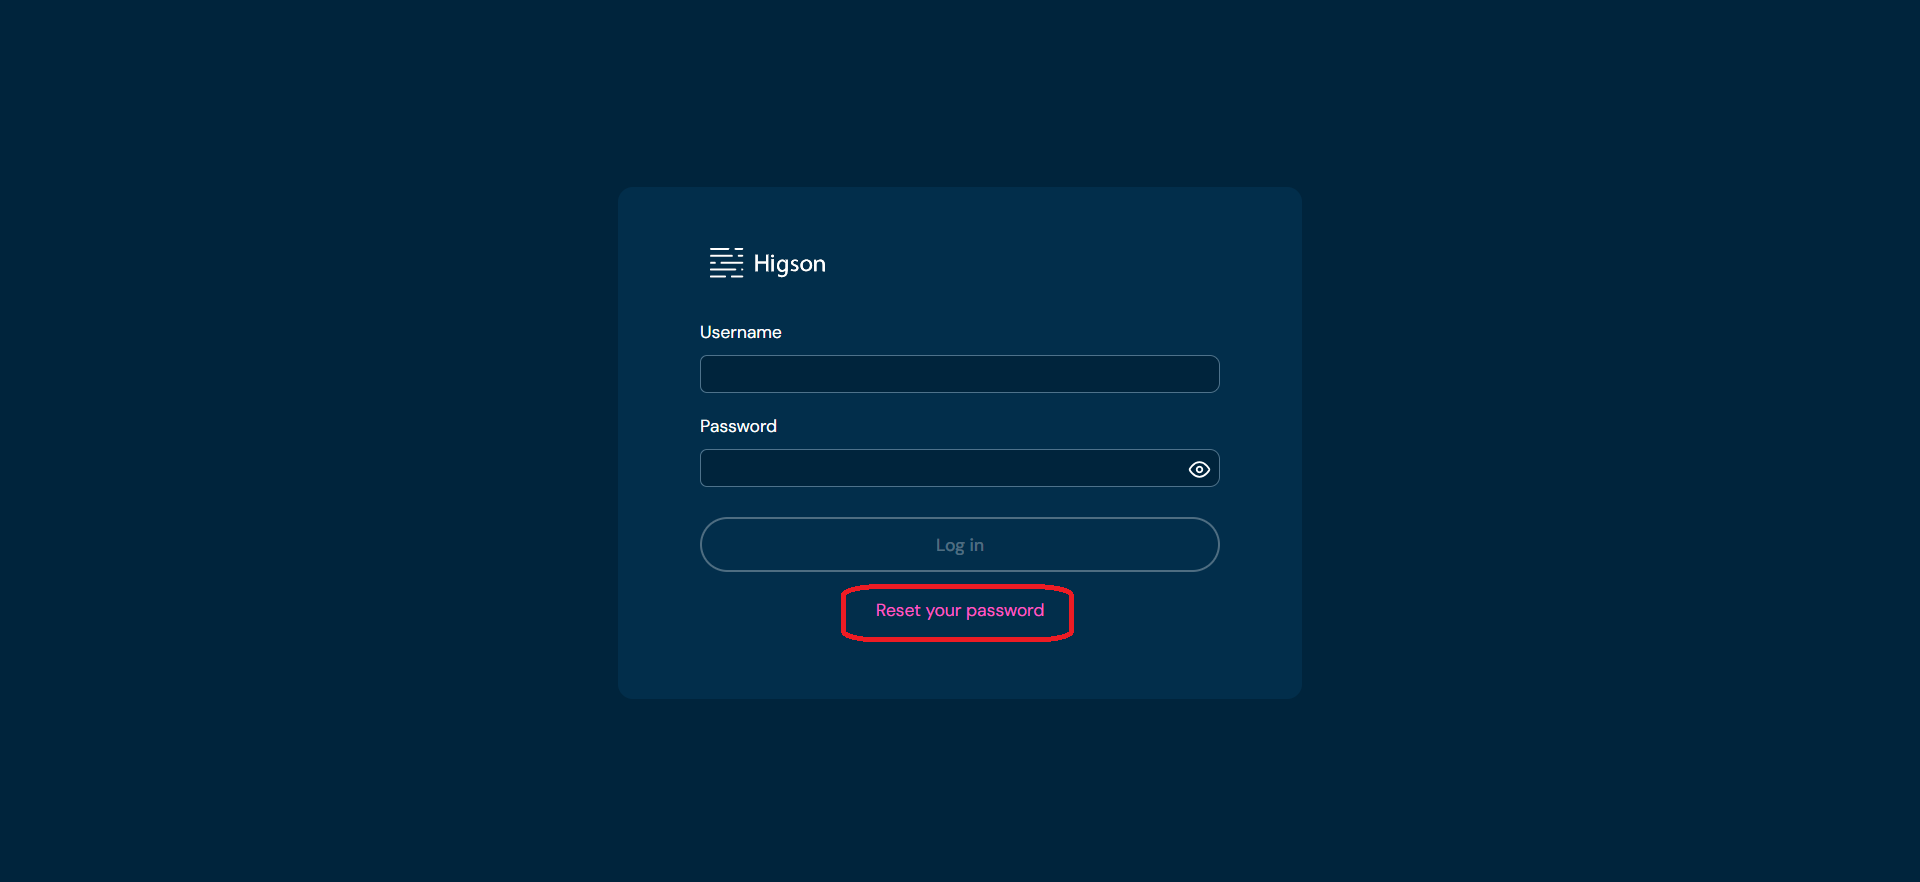
Click Reset your password.
-
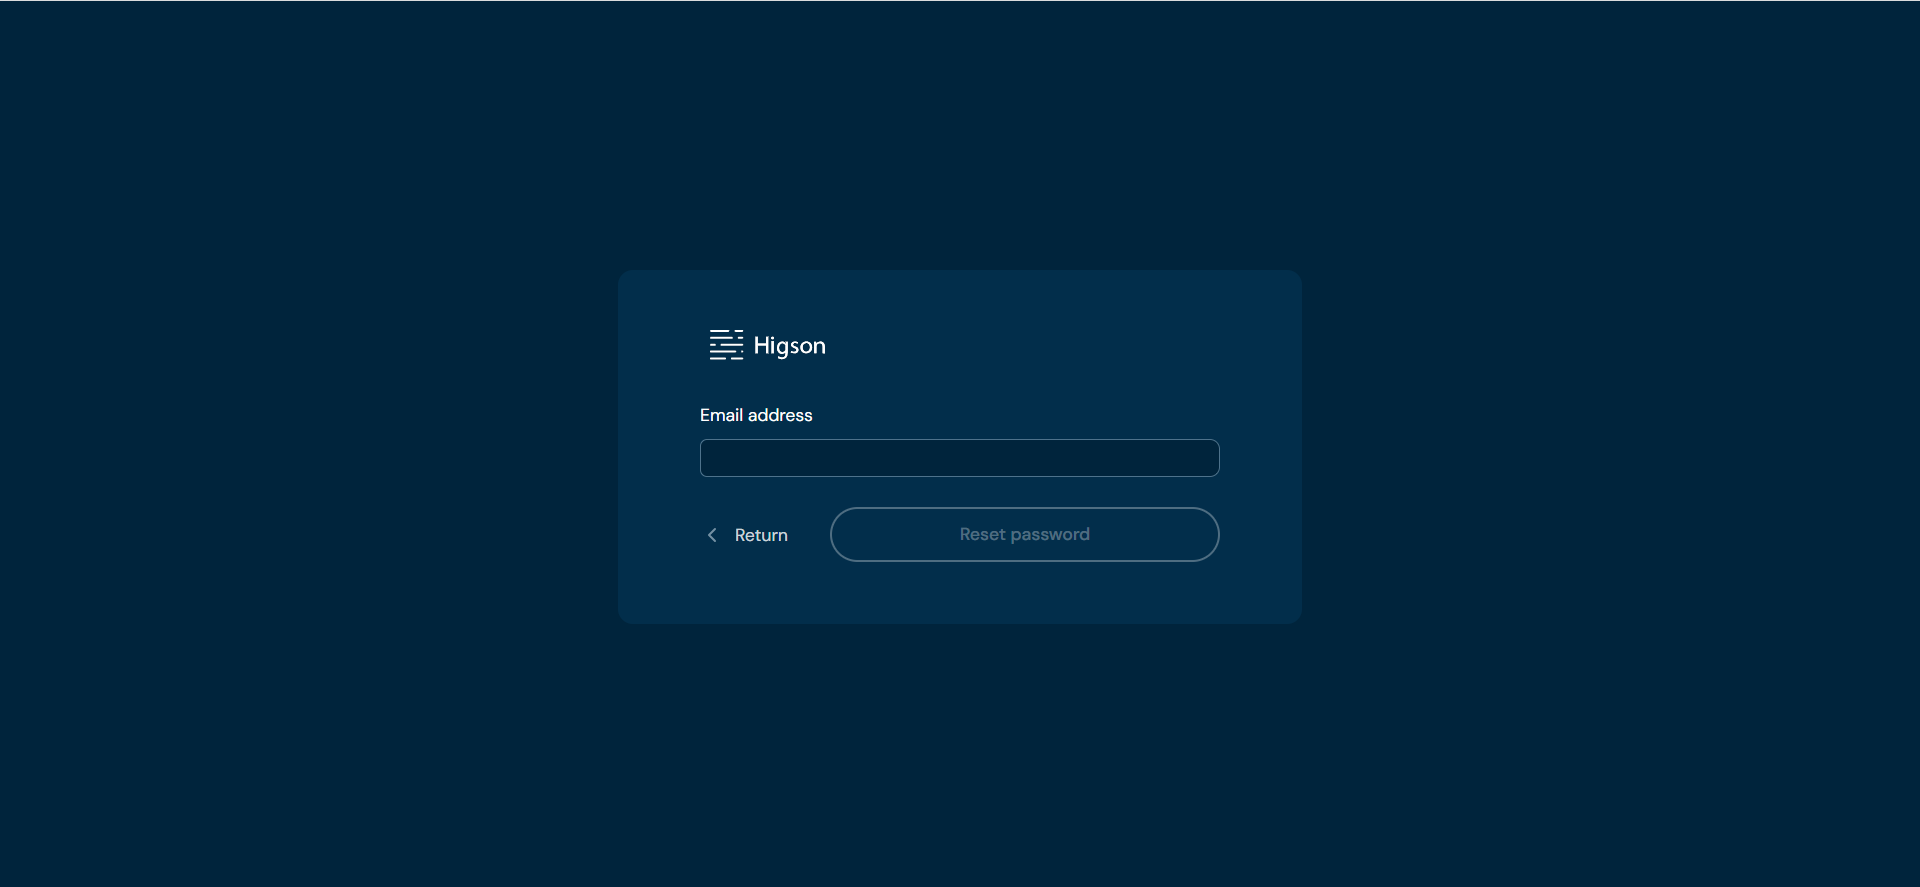
Enter email linked to your Higson account. Check your email inbox, including the spam or junk folder, for the password reset email.
-
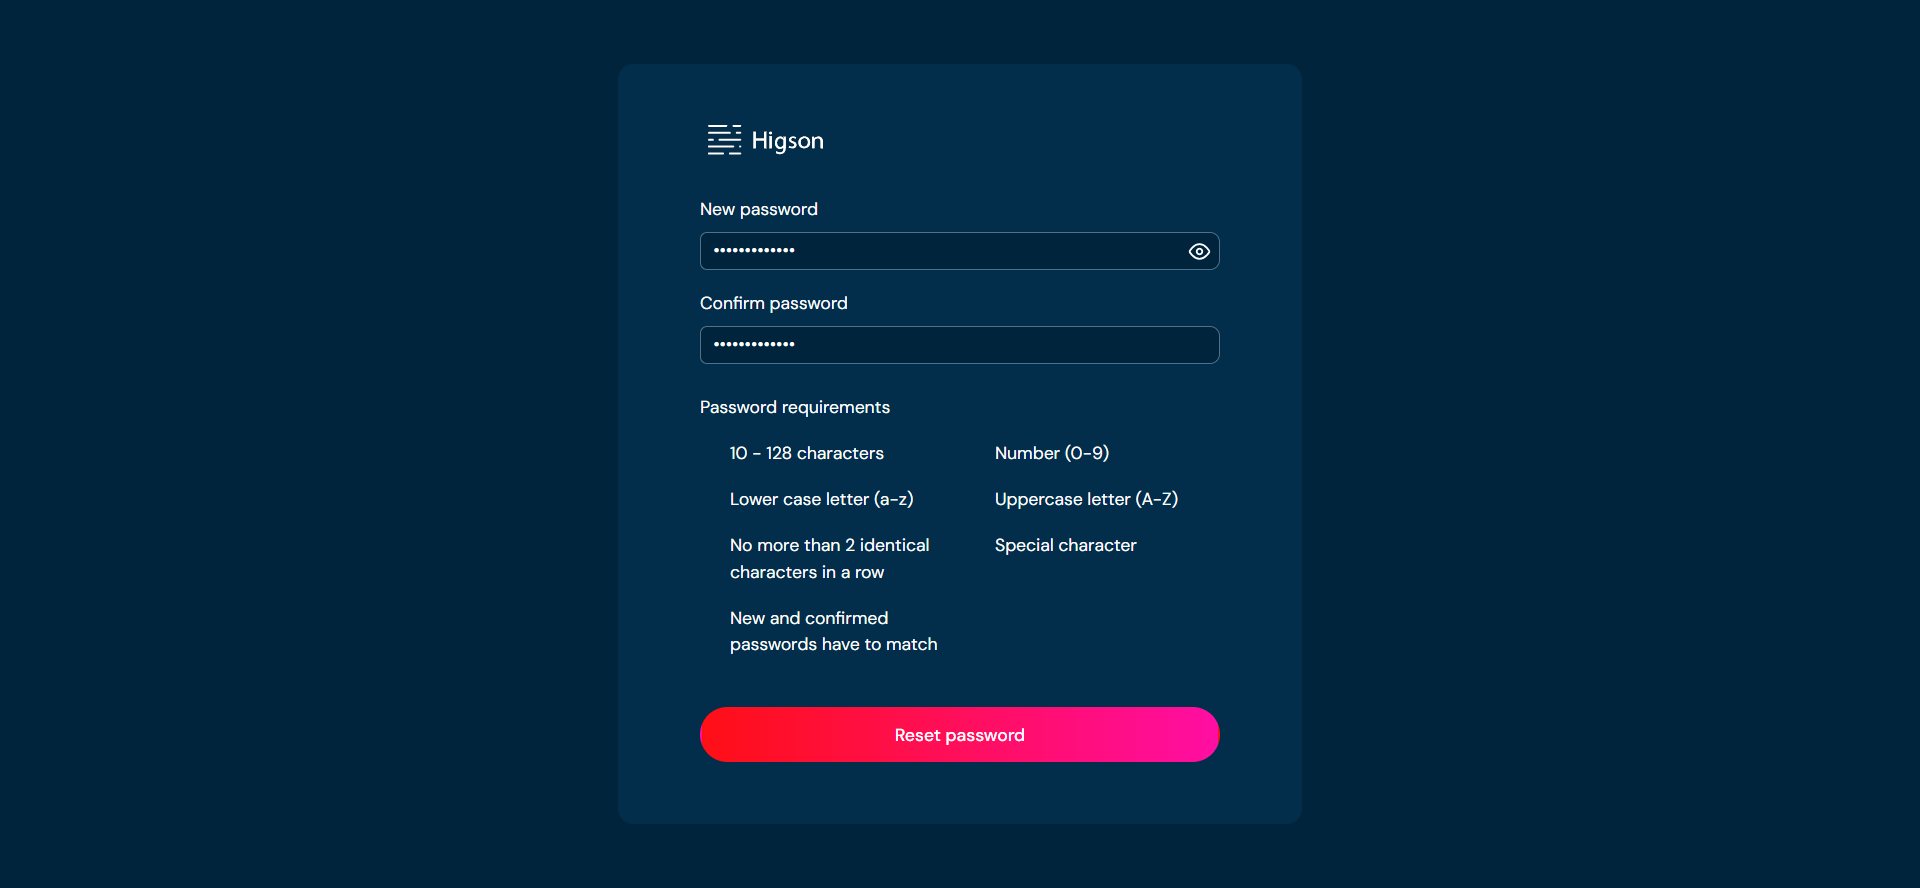
Upon clicking the hyperlink provided in the email, you will be directed to a page where you can set a new password for your account. Enter a new password. Retype it in the confirmation field.
-
Once you have entered and confirmed your new password, click Reset password button to save your new password.
Higson is a business rules engine and a business logic management system focused on performance. It enables a modification of business logic without touching the application’s code. Despite such flexibility Higson searches huge decision tables (1M rows and larger) in microseconds. Higson also provides a domain-specific language that allows developers to create complex logic as well as modules like domain designer, simulation, regression tests, data persistence engine and much more.
Before we get into the details, let’s explore Higson most essential building blocks.
So, the most important concepts include:
- decision tables (also known as parameters)
- functions (custom algorithms)
- context (input data)
- domain (domain organizer)
Below is an introductory description of all these concepts.
Introduction to Decision Tables#
Higson is designed to let developers make any part of their application configurable on the fly. The easiest way to do that is make application’s code dependent on decisions or parameters. This is what we call parameterization.
Therefore, the decision table is a fundamental concept in Higson.
Each decision table is defined as a matrix or table in which we can configure how the outcome depends on the input data. The decision table is unlimited in size and performs fast whether it has 1000 rows or 1 million rows.
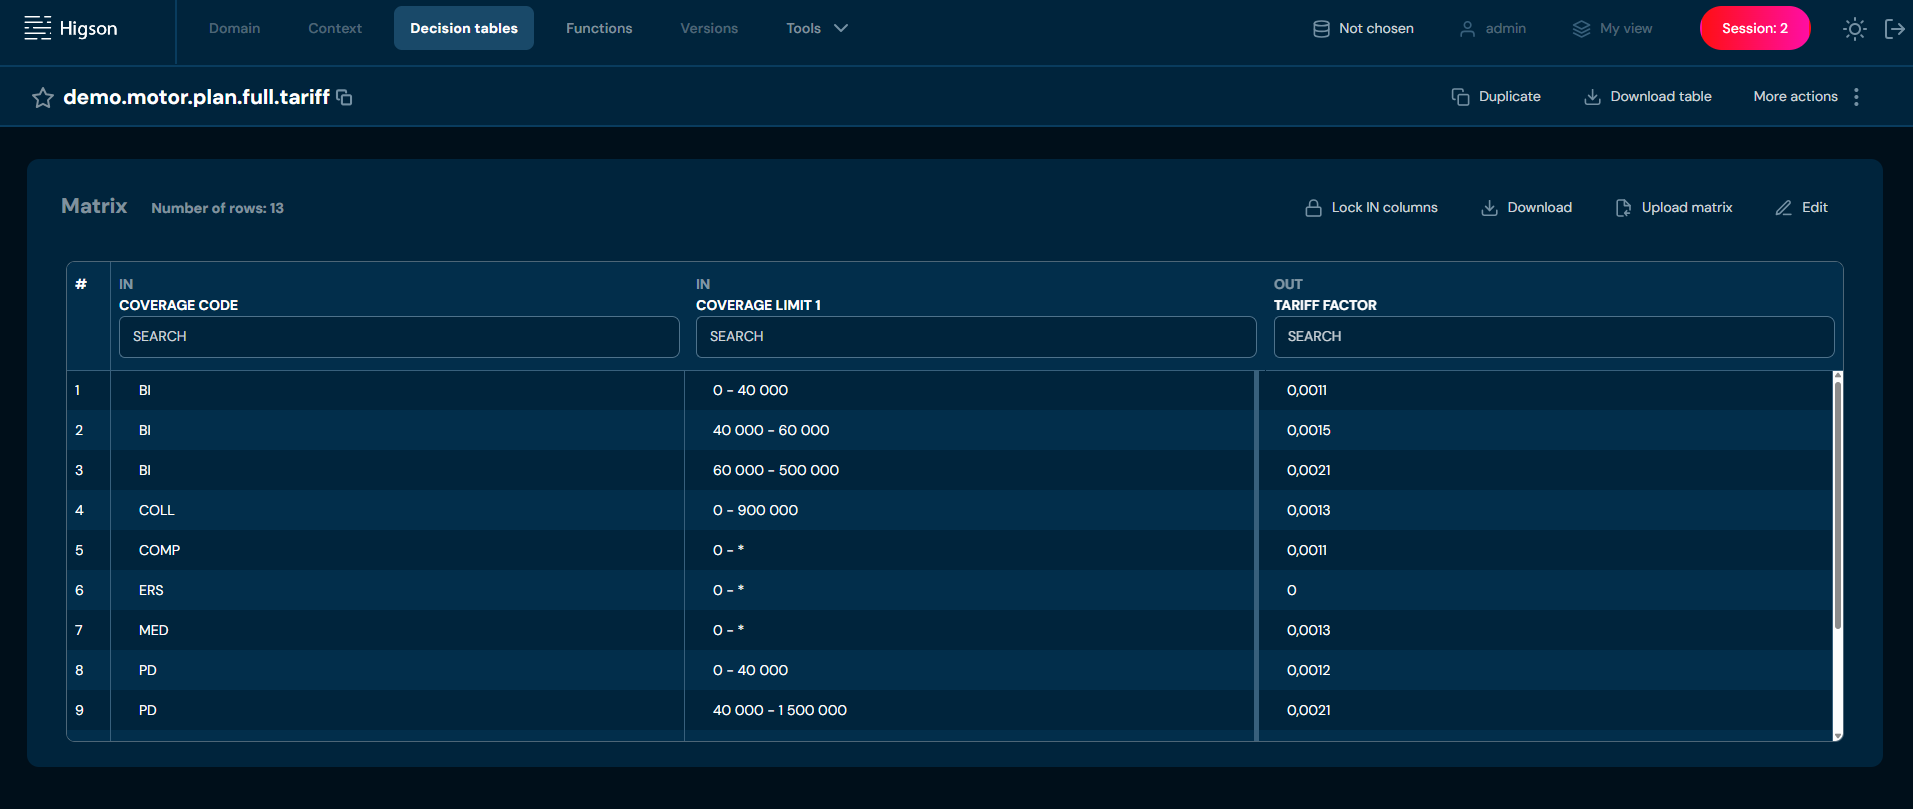
Below you can see decision table called tariff which returns tariff factor
depending on the some input data (coverage code and coverage limit).
Now you can use this decision table in your application code.
For example, you can create insurance premium calculation formula that depends on tariff_factor - a value returned by the tariff
decision table:
premium_value := tariff_factor * insurance_sum + ...
Tariff decision table is defined in Higson, outside of the application’s code.
You can say that decision table is the basic concept that allows to separate business logic from application’s code.
Each decision table has its unique name, configured conditions (input columns) and output value. It can return single value, multiple values or even sub-matrix.
For detailed information on defining and working with decision tables, see Decision Tables.
Introduction to Functions#
Another key concept that helps move business logic outside of the application is function. Functions enable you to write code snippets in a regular programming language, which allows you to implement any logic you want. You can write functions where a decision table is not enough.
Functions can contain logic based on:
- any input data (any element from context),
- result of any decision table,
- result of another function.
Below you can see sample function that uses context (input) data and depends on two decision tables:
def age = ctx.getDecimal( 'customer.age' )        // reads customer's age from input

def factor = 1.5
if (age > 40) {
  factor = math.log(10, age)
}

def tariff  = higson.getNumber('tariff', ctx)     // get value from tariff decision table
def baseFee = higson.getNumber('base.fee', ctx)   // get value from base.fee decision table

def fee = baseFee * tariff * factor

return math.round(fee, 2)                         // return fee rounded to 2 digits
Higson functions provide a convenient API that allows you to:
- read input data (context),
- get result of a decision table,
- invoke other functions,
- operate on dates and texts,
- perform math operations,
- perform type conversions,
- log statements to the log file,
- read domain configuration objects.
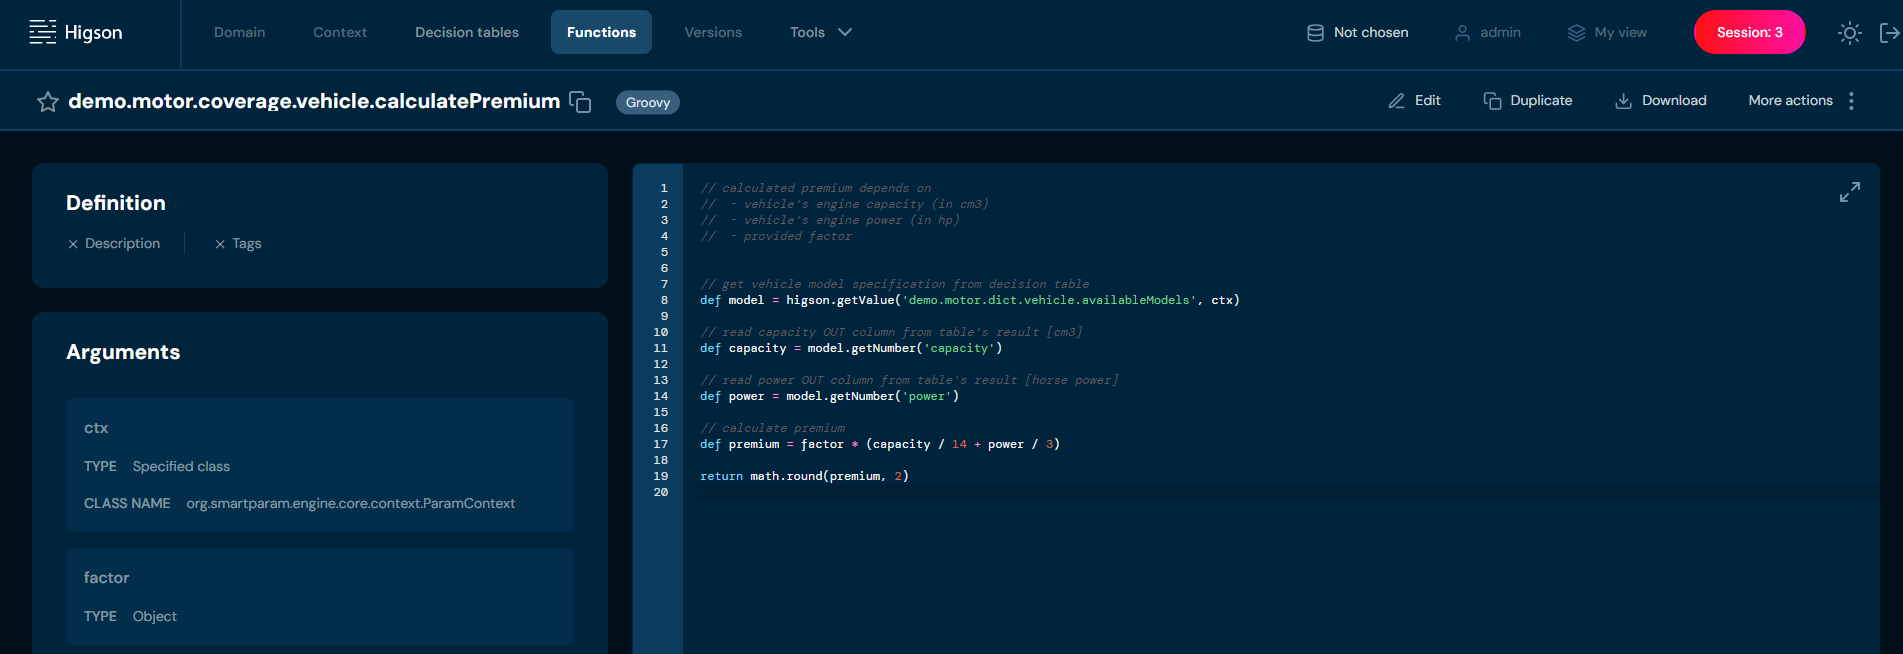
The following image shows real function defined in Higson Studio (click to enlarge).
For detailed information on defining and working with functions, see Functions section.
Introduction to Context#
When application uses decision table or function, it’s result depends on the context. In other words - context is an object model containing all data that may affect evaluation of any decision table or function. Once we design a context model, we can make our parameterization dependent on any input value from the context.
Below is an example context definition:
[ROOT]                                  // root elements in context
 - policy          : Policy
 - cover           : Cover

[Policy]                                // Policy type definition
  - policyNo       : string
  - productCode    : string
  - insured        : Client
  - year           : integer
  - covers         : Cover[]

[Client]                                // definition of Client type
  - firstname      : string
  - lastname       : string
  - gender         : string
  - age            : integer
  - professionCode : integer
  - address        : Address
  ...

[Cover]                                 // definition of Cover type
  - code           : string
  - sumInsured     : number
  - basePremium    : number
  - startDate      : date
  - endDate        : date
  ...
The following list shows some valid paths for this example context:
policy.productCode
policy.insured.lastname
policy.insured.address.zipCode
policy.insured.age
cover.sumInsured
Each valid path represents some input value available to the logic of the decision table or function.
A context designed inside Higson Studio is a kind of interface or contract for the input data model. It should be abstracted from the application or database model. Context design should focus on business needs. Such context will be a conceptual bridge between the development team and the business analysts.
A context designed in abstraction from the application allows you to test business logic directly in Higson Studio, even if the application is not ready yet. Read Tester to learn how you can test the behavior of a decision table or function using the built-in simulator. On the other hand, the Batch Tester allows you to run multiple test cases at once.
For detailed information on defining and working with context, see Context.
Introduction to Domain#
Decision tables and functions answer the question of how you want to parameterize. Context answers the question of what the parameterization may depend on. And last but not least - domain answers the question of what you want to parameterize.
Indeed, domain model is what we want to be configurable.
- Using
Menu-Domain-Definitionwe can design domain types, their relationships and attributes. - Using
Menu-Domain-Configurationwe can create instances of domain types and configure their attributes with use of functions or decision tables.
To explain what domain definition and configuration is, it is best to use an example. Imagine we want to configure life insurance products:
- Each life insurance product consists of covers and funds,
- Each cover has different maximum insurance sum, availabilty logic, premium logic etc.,
- Each fund has different transfer fee etc.
We can use Domain definition to define types for our domain, for instance:
type:       Product
attributes: none
elements:
  - covers: Cover[]     // each Product has a collection of Cover elements
  - funds:  Fund[]      // each Product has a collection of Fund elements

type:       Cover
attributes:
  - max_insurance_sum   // value we want to configure
  - is_available        // boolean - we want to make cover unavailable for some contexts
  - base_premium        // decimal value that we want to calculate with our tariff algorithm

type:       Fund
attributes:
  - transfer_fee
  - ...
The above example domain definition says that:
- would be able to configure transfer_fee for each Fund
- would be able to configure max_insurance_sum for each Cover
- would be able to configure is_available for each Cover
- would be able to configure base_premium for each Cover.
Next, we can use Domain configuration to create configuration tree with domain elements and their attributes:
Product [code = PR1]
  covers
    * Cover[CA]
       - max_insurance_sum   =  10000
       - is_available        =  yes
       - base_premium        =  50.0
    * Cover[CB]
       - max_insurance_sum   =  from decision table : 'pr1.covers.maxInsuranceSum'
       - is_available        =  yes
       - base_premium        =  from function       : 'pr1.premium.calculate'
     ...

Product [PT3]
  covers
    * Cover[DB]
       - max_insurance_sum   =  from function       : 'default.maxInsuranceSum'
       - is_available        =  from decision table : 'pt3.cover.isAvailable'
       - base_premium        =  from decision table : 'pt3.tariff.basePremium'
     ...

and so on...
Now an application connected to Higson can use any defined logic solely through the domain layer. Here are some example scenarios:
- getting all products from domain tree,
- getting all covers for product
PR1, - getting all covers for product
PT3with attributeis_availableequal totrue, - calculate premium for given cover - just by getting value from
base_premiumattribute.
For larger projects, we do not recommend using decision tables and functions directly in your application code. Instead, we recommend using parameterization only through the domain layer.
This approach, which we call polymorphic configuration, makes the application even better decoupled from the business logic.
For detailed information on defining and working with domain, see Domain Definition and Domain Configuration.
Introduction to Testing Modules#
Higson Studio offers built-in testing modules: Tester and Batch Tester, which enable the verification of configurations before they are published in a session or deployed to the production environment. These modules allow testing of decision tables, functions, and domain elements.
- Tester allows for the validation of a single test case.
- Batch Tester enables the testing of multiple cases simultaneously, making it particularly useful for larger data sets.
The Higson Studio interface provides an intuitive way to select elements for testing and input relevant data. Users can also specify an expected value for each test case. This feature allows test results to be compared against expected business values, ensuring accurate configuration verification. Once a test or batch test is executed, a clear test report is generated, allowing users to quickly determine which test cases have passed and which have failed. Testing in Higson Studio helps users better understand the impact of changes on results and ensures the consistency of algorithm behavior across different scenarios. It is important to note that each batch test is based on singular tests, making it easier to design and scale tests. By using Tester and Batch tester, users gain full control over the quality and stability of business configurations.
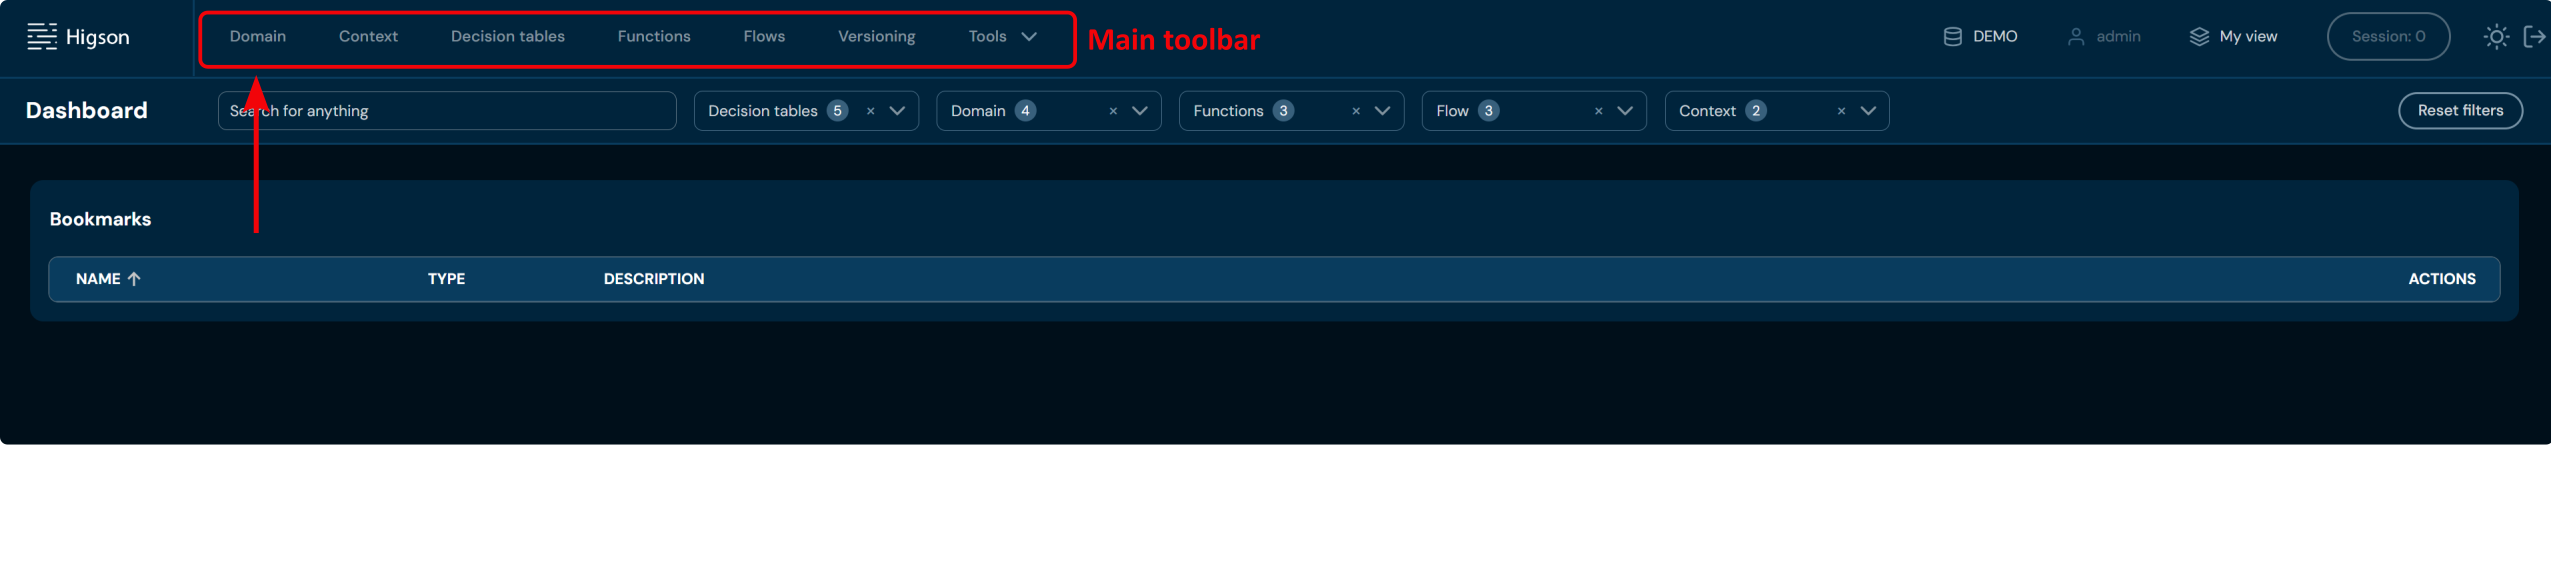
After logging in to Higson Studio, you are automatically redirected to the Dashboard screen. This is the central place where you can start your work and quickly access the key features of the system.
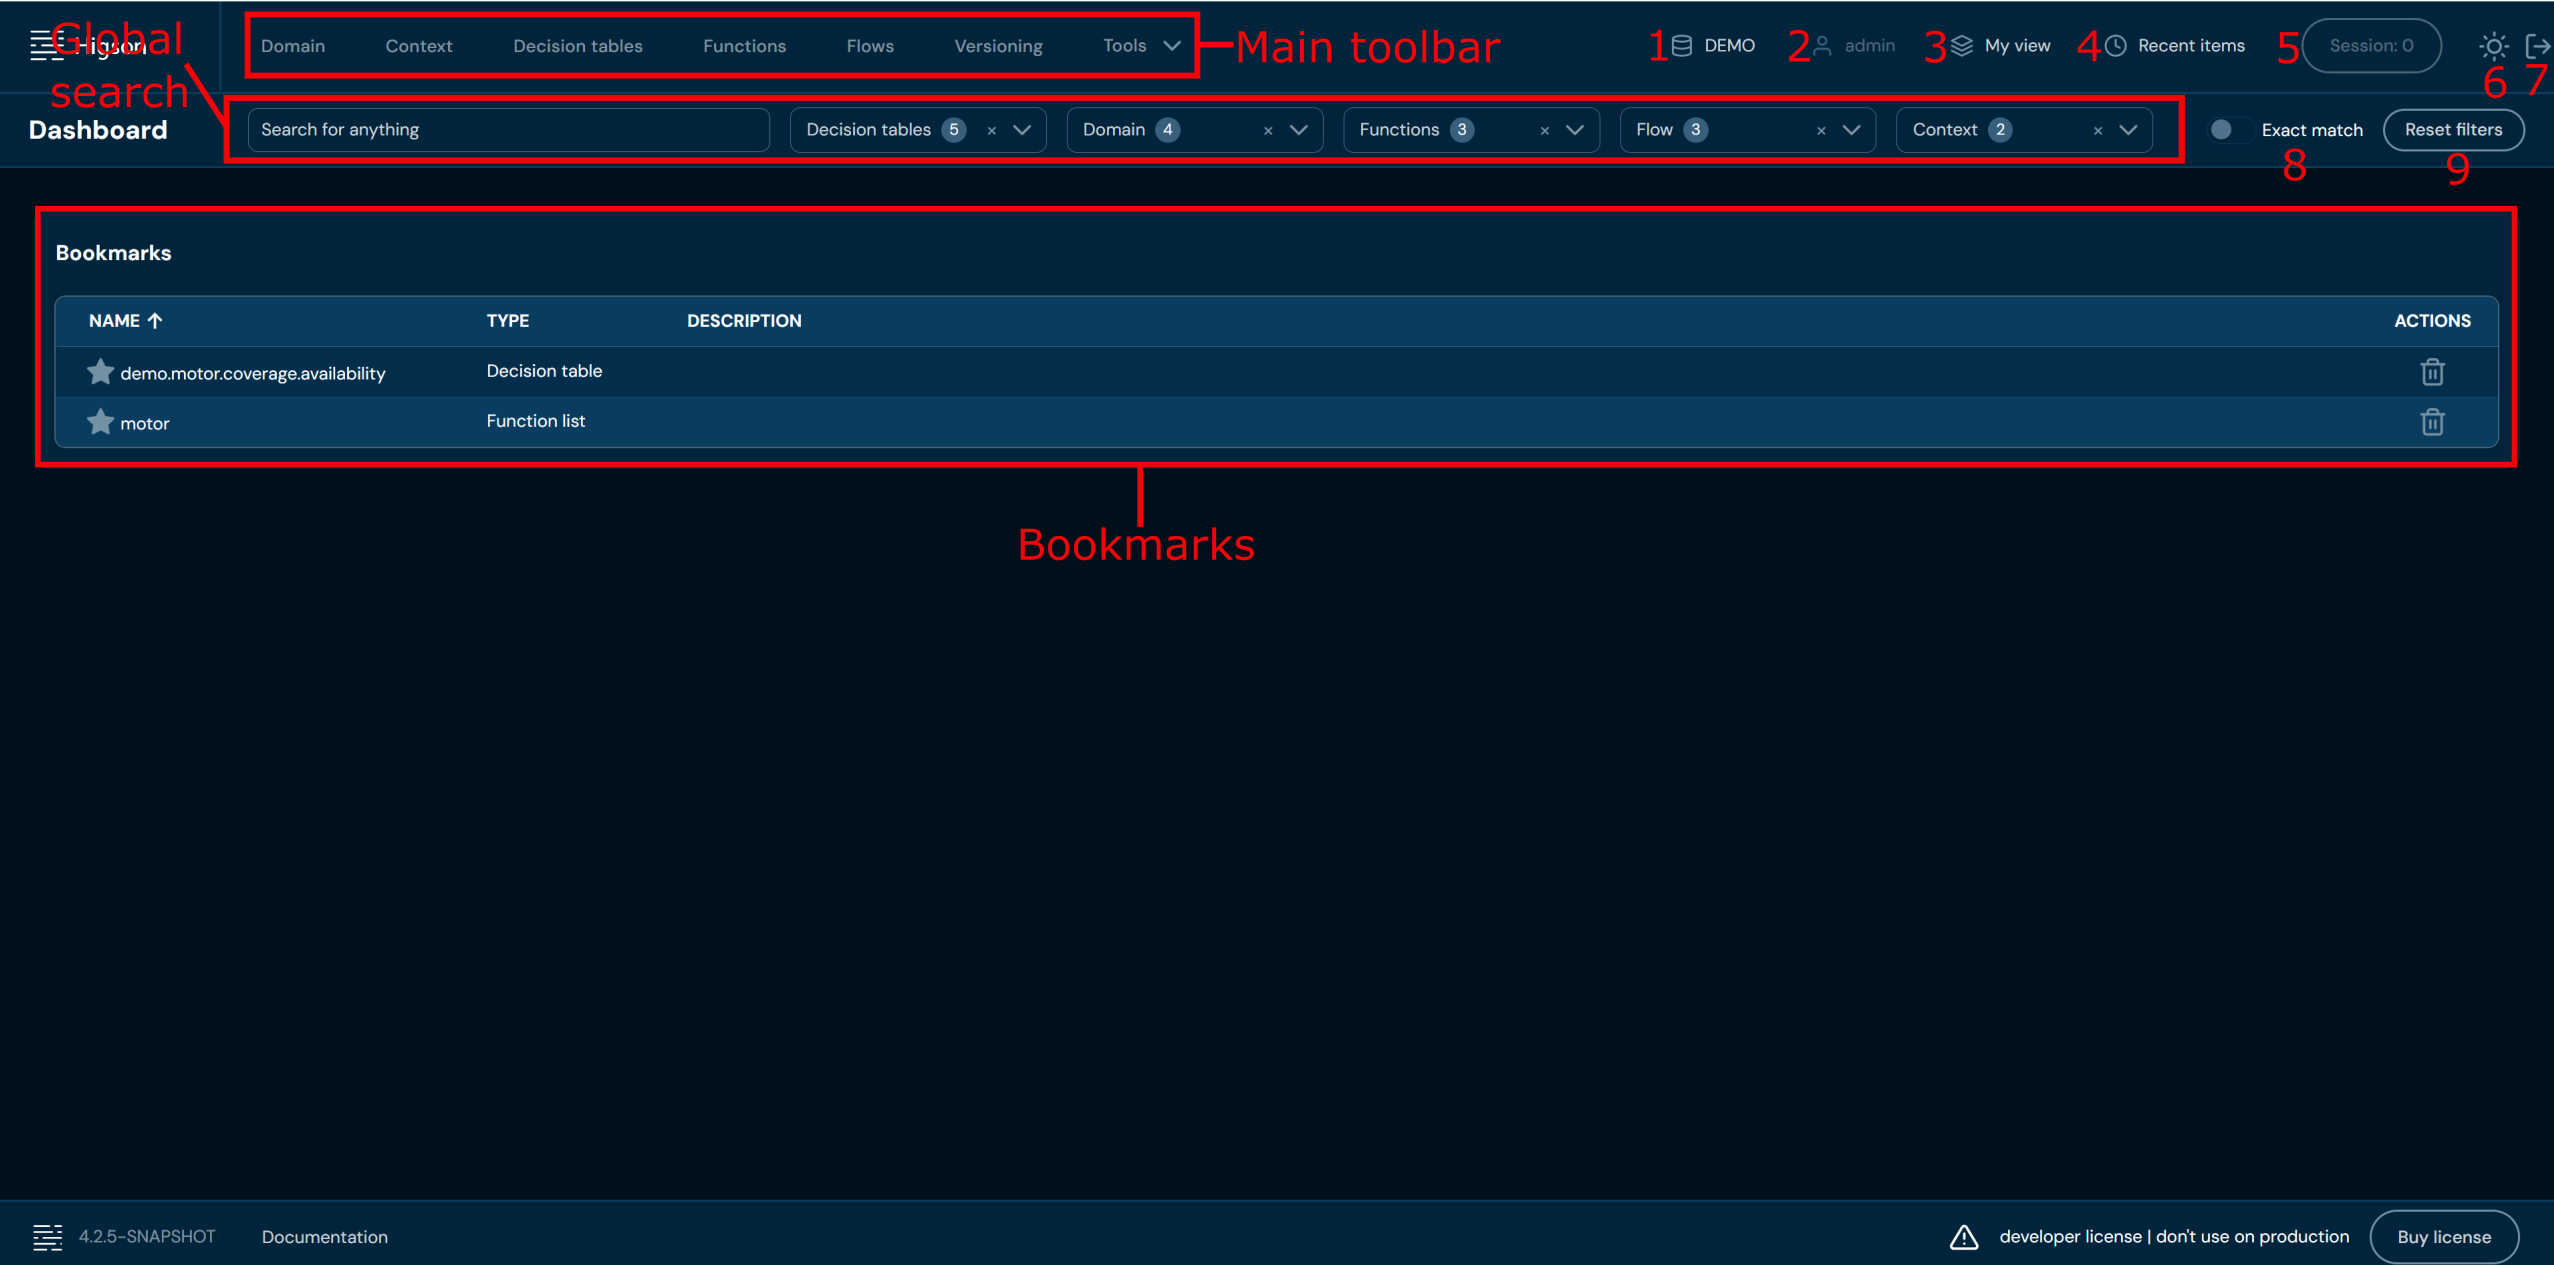
On a dashboard screen you have access to:
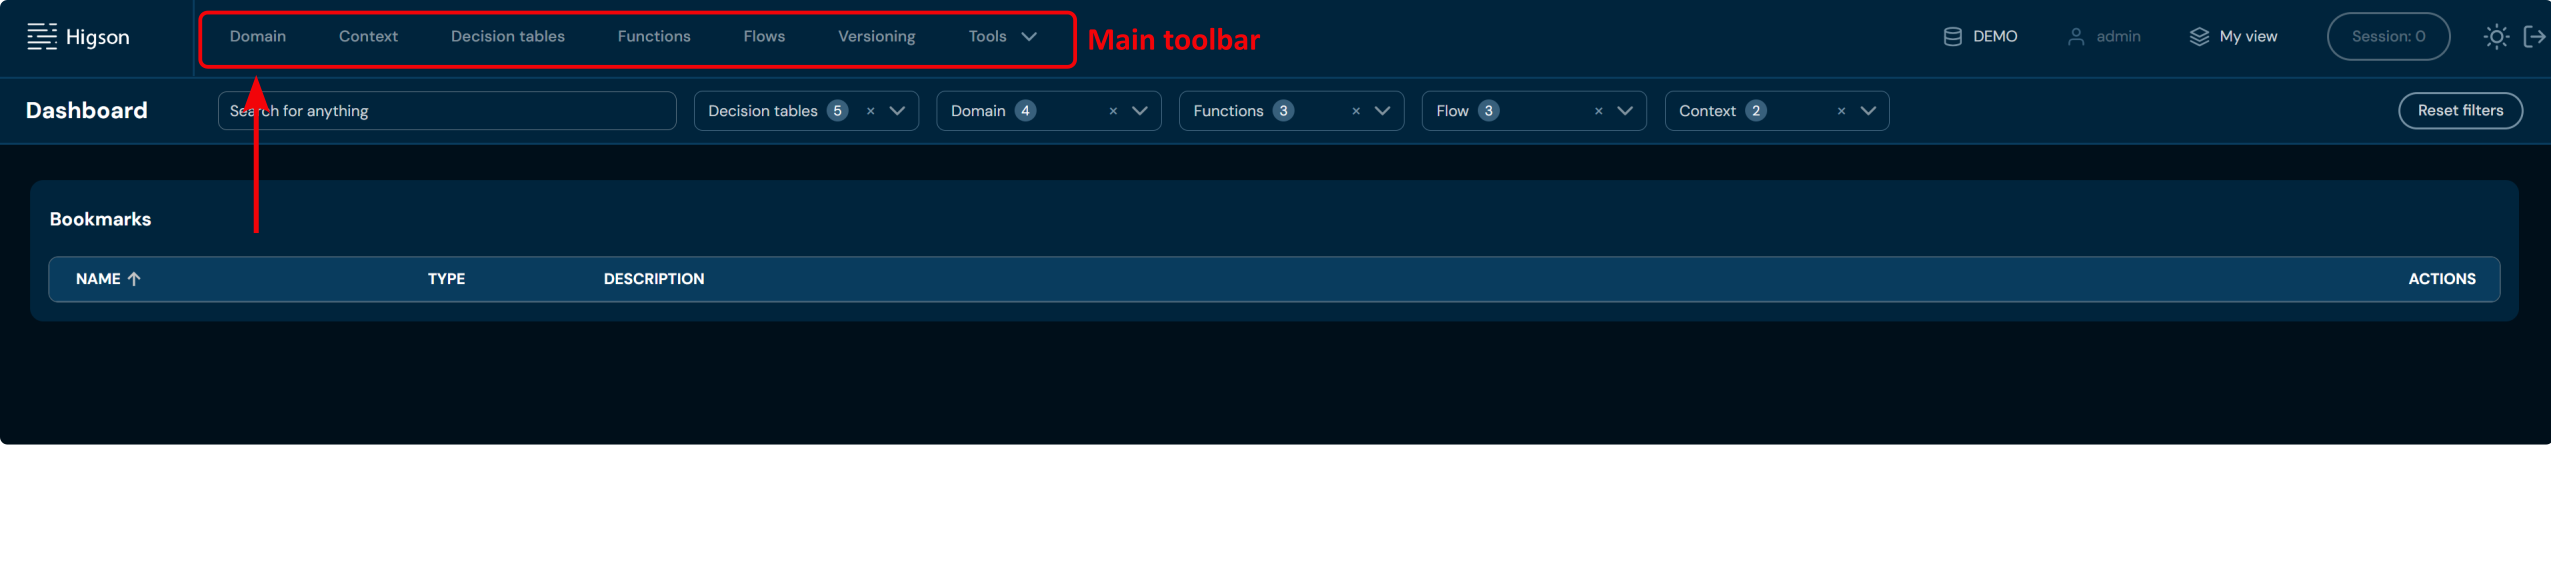
- Main toolbar – provides access to the system’s basic functions and settings.
- Global search with advanced filters – by default, the search covers the widest possible range of data. The only exception is searching through decision table matrix cells – for performance reasons, this filter must be enabled manually when needed.
- Bookmarks – provide quick access to selected items or item lists, making navigation within the project easier.
| No. | Name | Description |
|---|---|---|
| 1 | Profile | Allows to select a profile. |
| 2 | User | Shows the login of the logged in user. |
| 3 | My view | Allows to switch between regions and versions visible for user. |
| 4 | Recent items | Drop-down list with recently modified objects. |
| 5 | Session | Current session. |
| 6 | Dark/light mode | Allows to switch between dark and light mode. |
| 7 | Log out | Allows to log out. |
| 8 | Exact match | Limits results to exact phrase matches only. |
| 9 | Reset filters | Brings back the default settings of global search filters. |
When you enter a phrase in the search box, a list of results appears on the main screen:
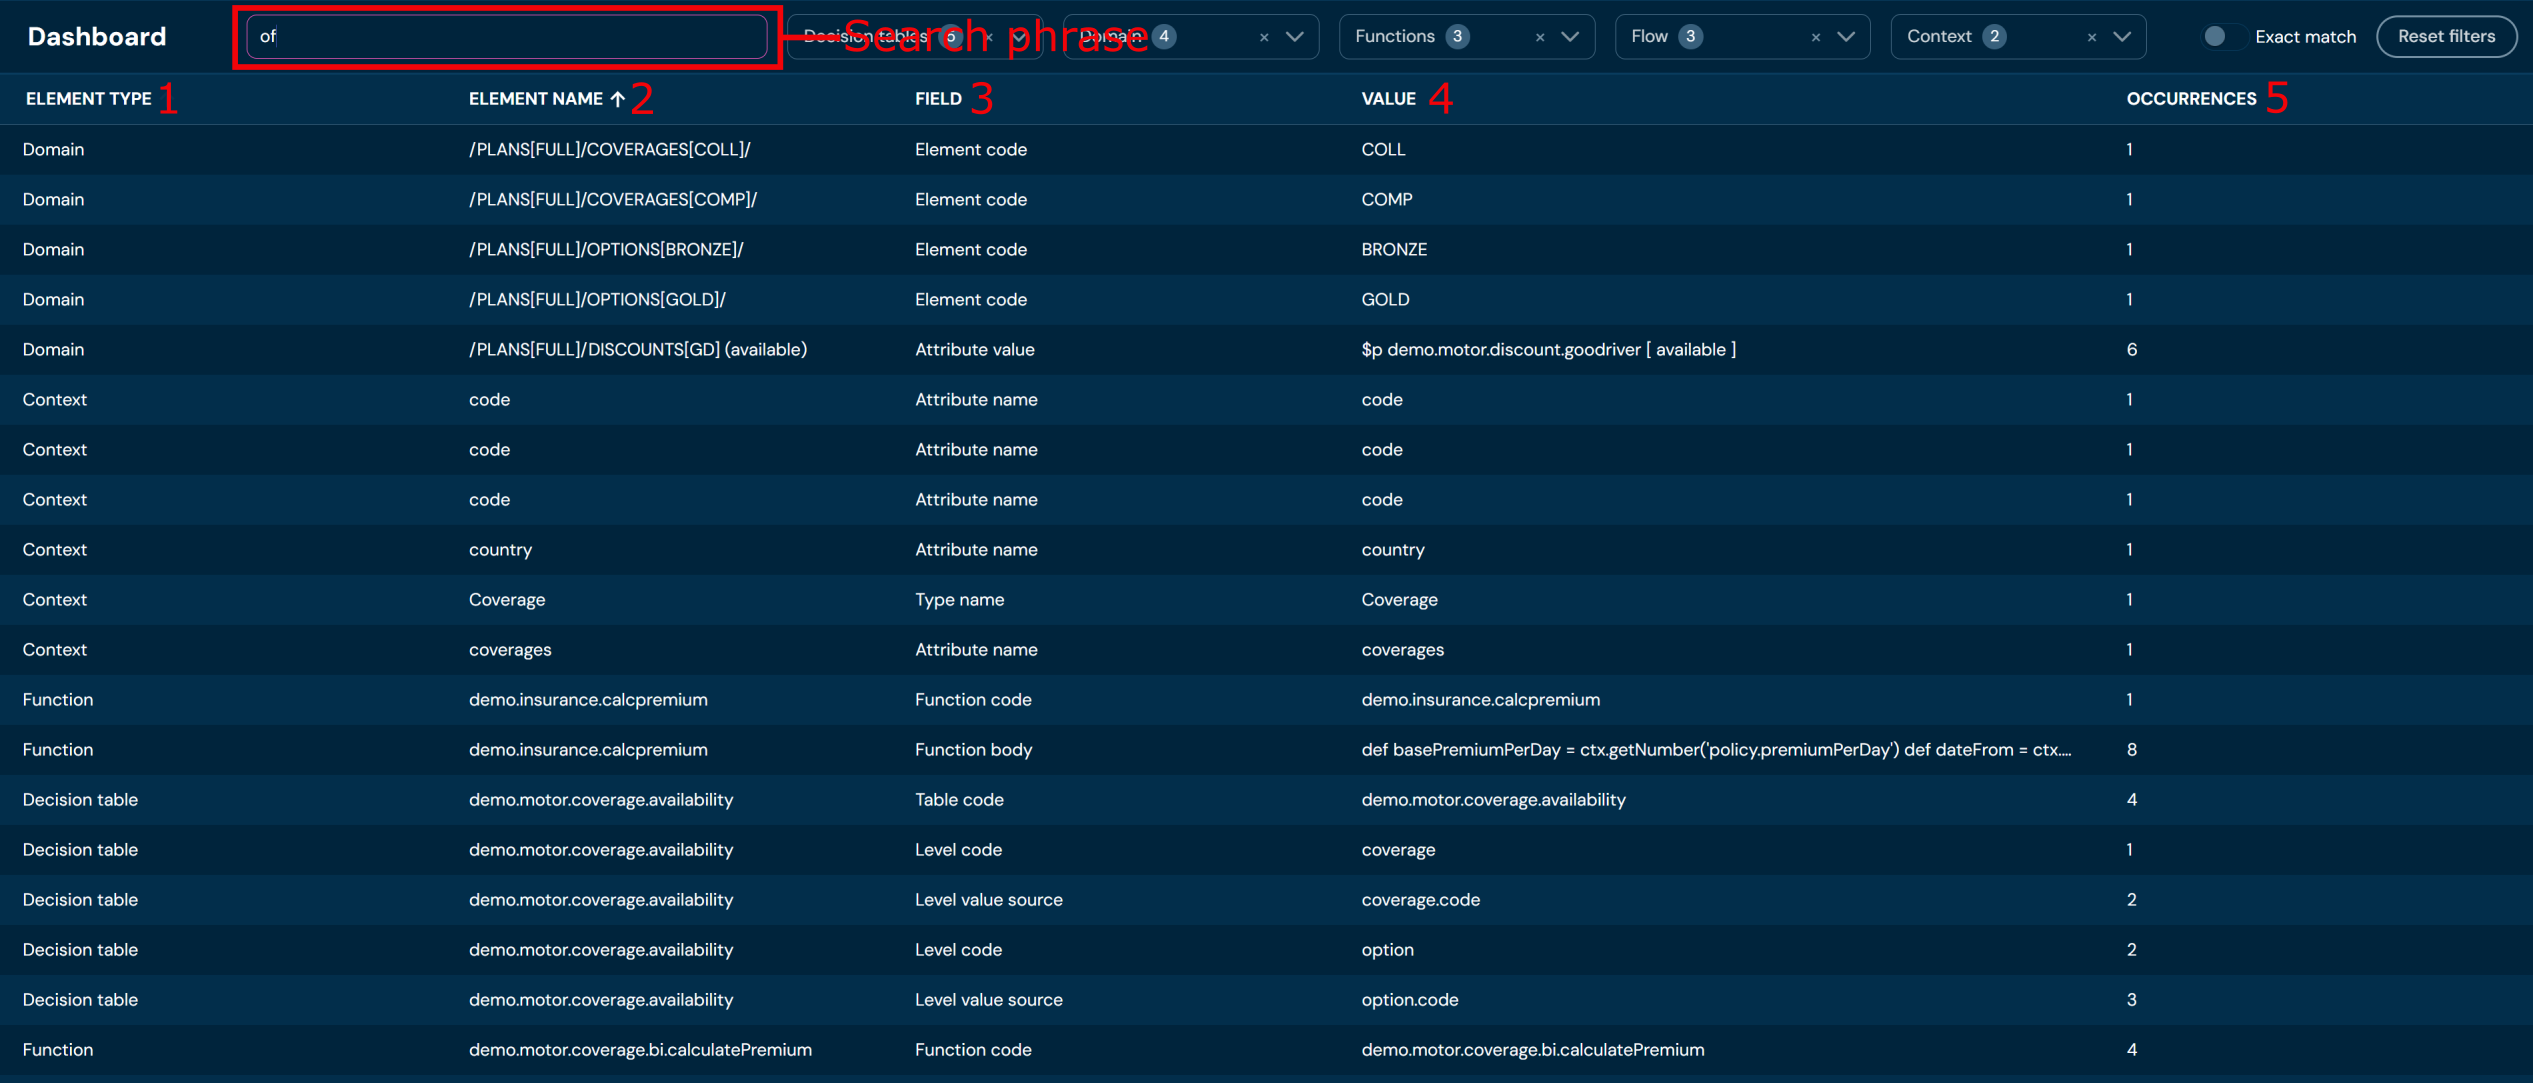
| No. | Name | Description |
|---|---|---|
| 1 | Element type | Type of the element in which the phrase was found. |
| 2 | Element Name | Name of the element in which the phrase was found. |
| 3 | Field | Field of the element in which the phrase was found. |
| 4 | Value | Value of the field in which the phrase was found. |
| 5 | Occurence | Number of occurrences of the searched phrase. |
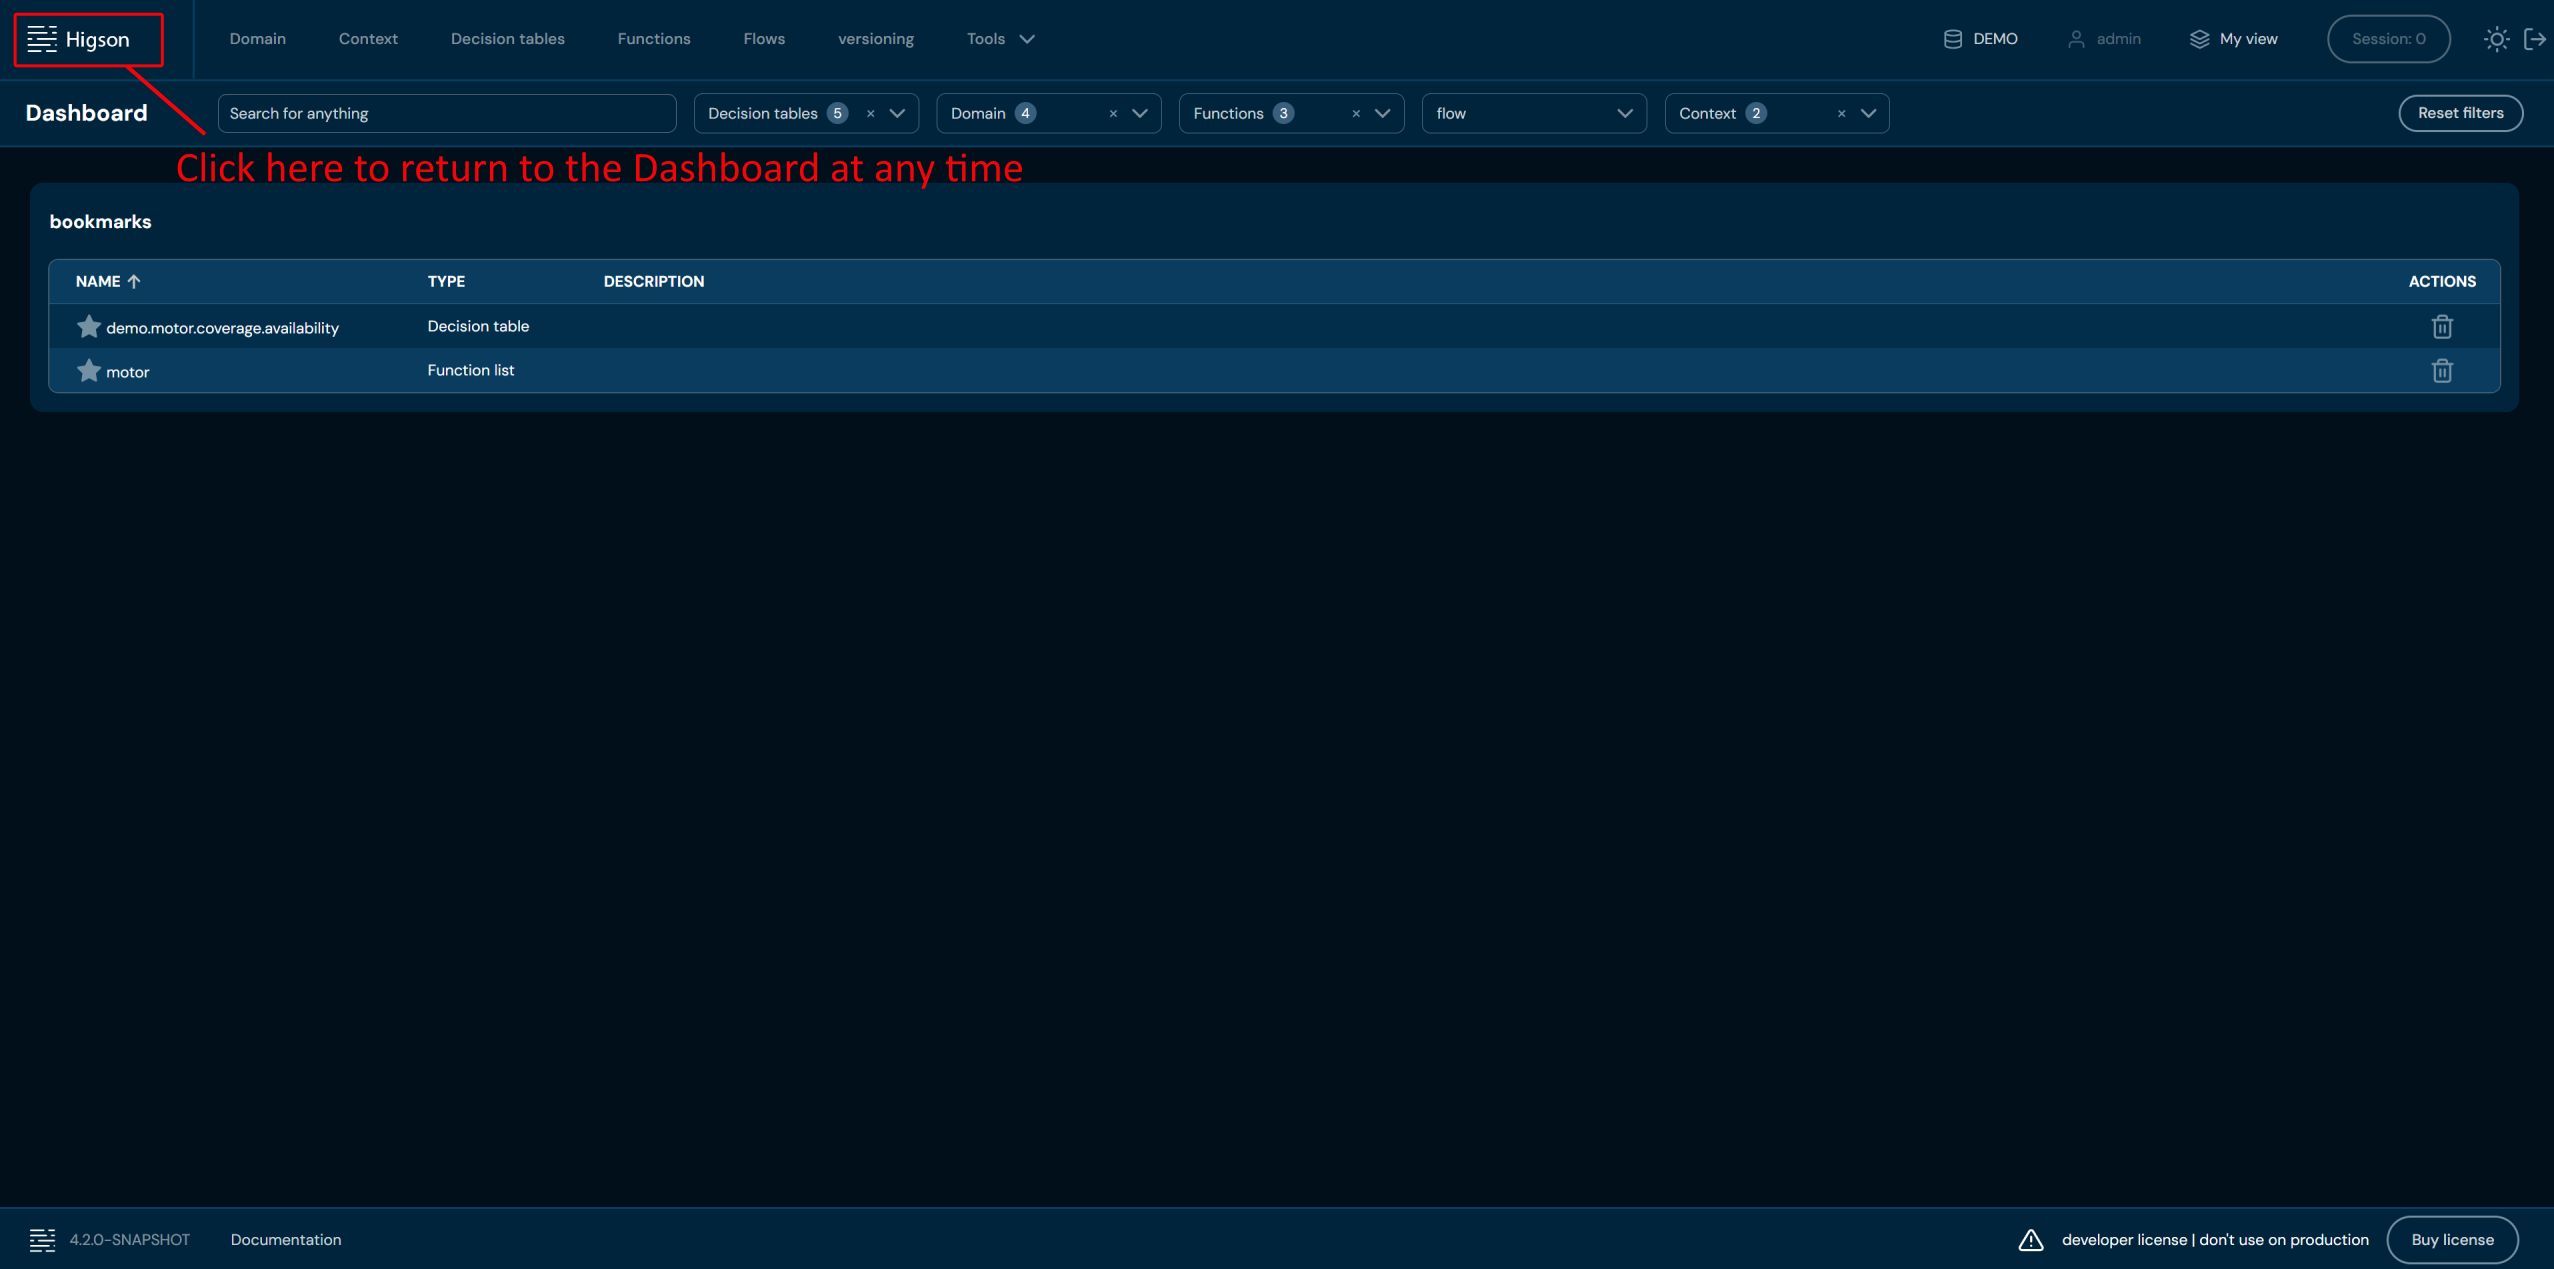
The Dashboard serves as a starting point – from here, you can browse data as well as quickly move to detailed views, configurations, or analyses. ClikYou can return to the Dashboard screen at any time by clicking on the Higson logo in the upper left corner.
Context is an object model containing all data that may affect Decision tables’ or Functions’ values. Once we design a context model, we can make our parameterization depends on any data from the context.
Let’s use an example from the Introduction to Context section:
[ROOT]                                  // root elements in context
 - policy          : Policy
 - cover           : Cover

[Policy]                                // Policy type definition
  - policyNo       : string
  - productCode    : string
  - insured        : Client
  - covers         : Cover[]

[Client]                                // definition of Client type
  - firstname      : string
  - lastname       : string
  - address        : Address
  ...

[Cover]                                 // definition of Cover type
  - code           : string
  - sumInsured     : number
  - basePremium    : number
  - startDate      : date
  - endDate        : date
  ...
The above context definition introduces 3 types: Policy, Client, Cover.
These types have attributes (or fields) that have values.
For example, Policy type has 4 attributes:
policyNoof simple typestring(text) contains insurance policy numberproductCodeof simple typestringcontains insurance product’s codeinsuredof compound typeClientcontainsClientobject with all its fieldscoversis a collection ofCoverobjects
It is important to define some concepts here:
| Concept | Meaning |
|---|---|
| simple type | one of Higson built-in data types: string, integer, number, boolean, date, datetime |
| compound type | user-defined type in context (entity type) |
| attribute | a field in user-defined type, can be of simple type, compound type or a collection of compound type objects |
| multivalue | by selecting multi value checkbox we mark attribute as a collection of compound type objects |
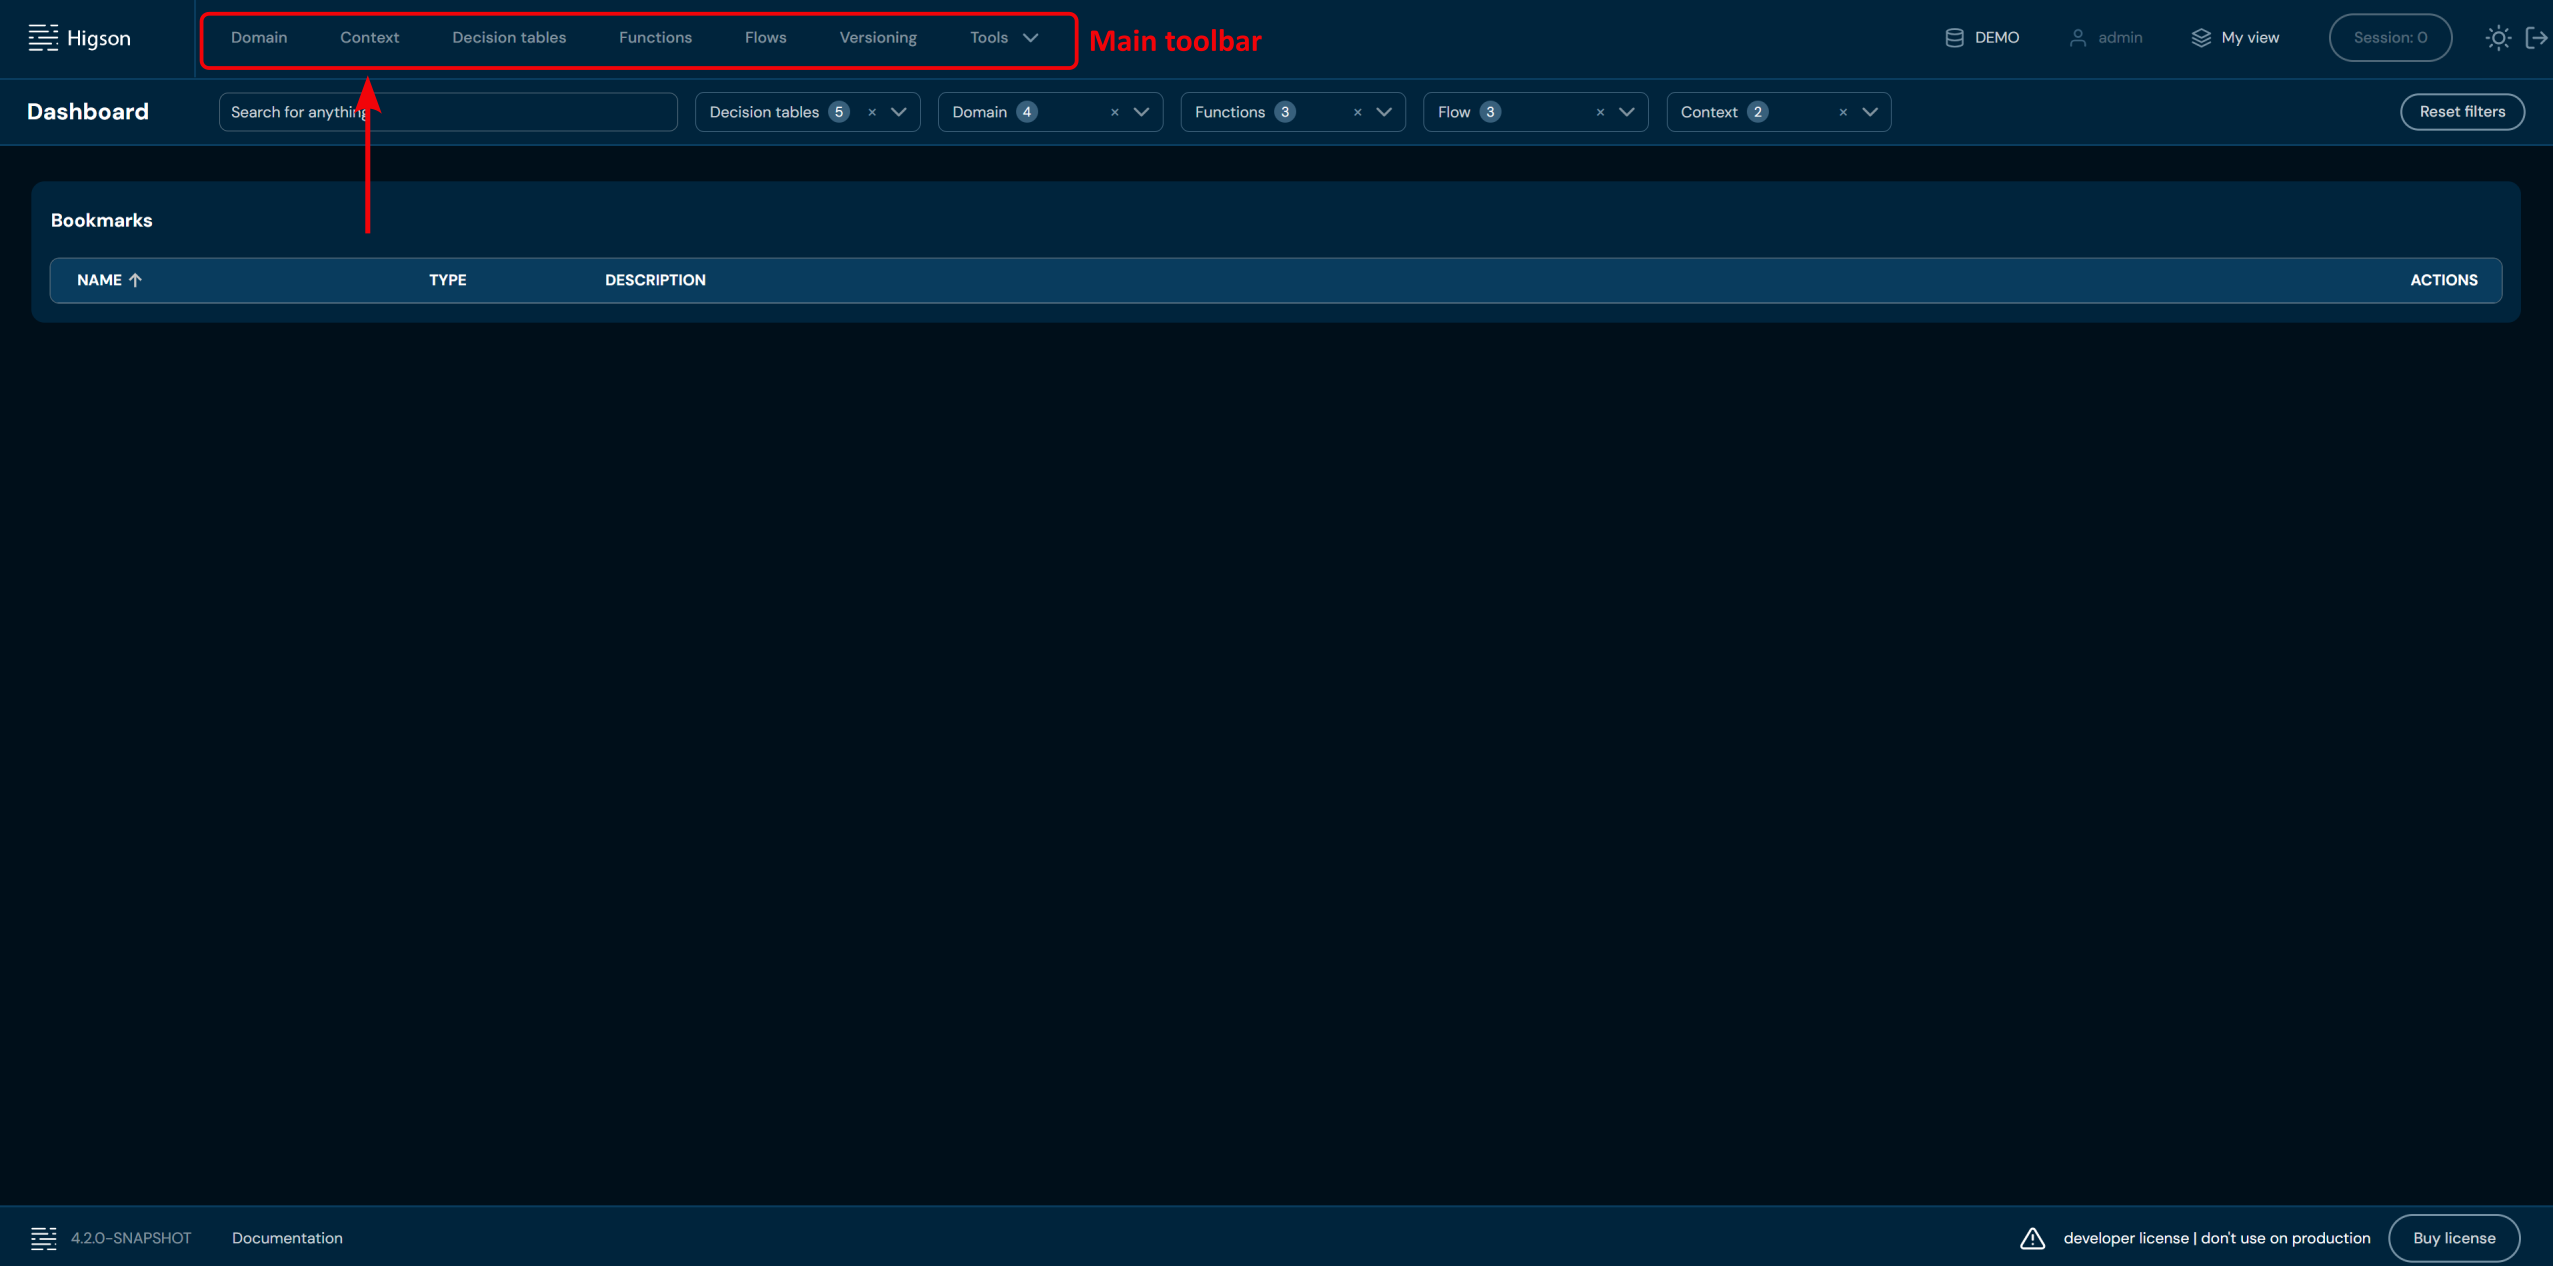
In order to see Context, select Context in Main Toolbar.
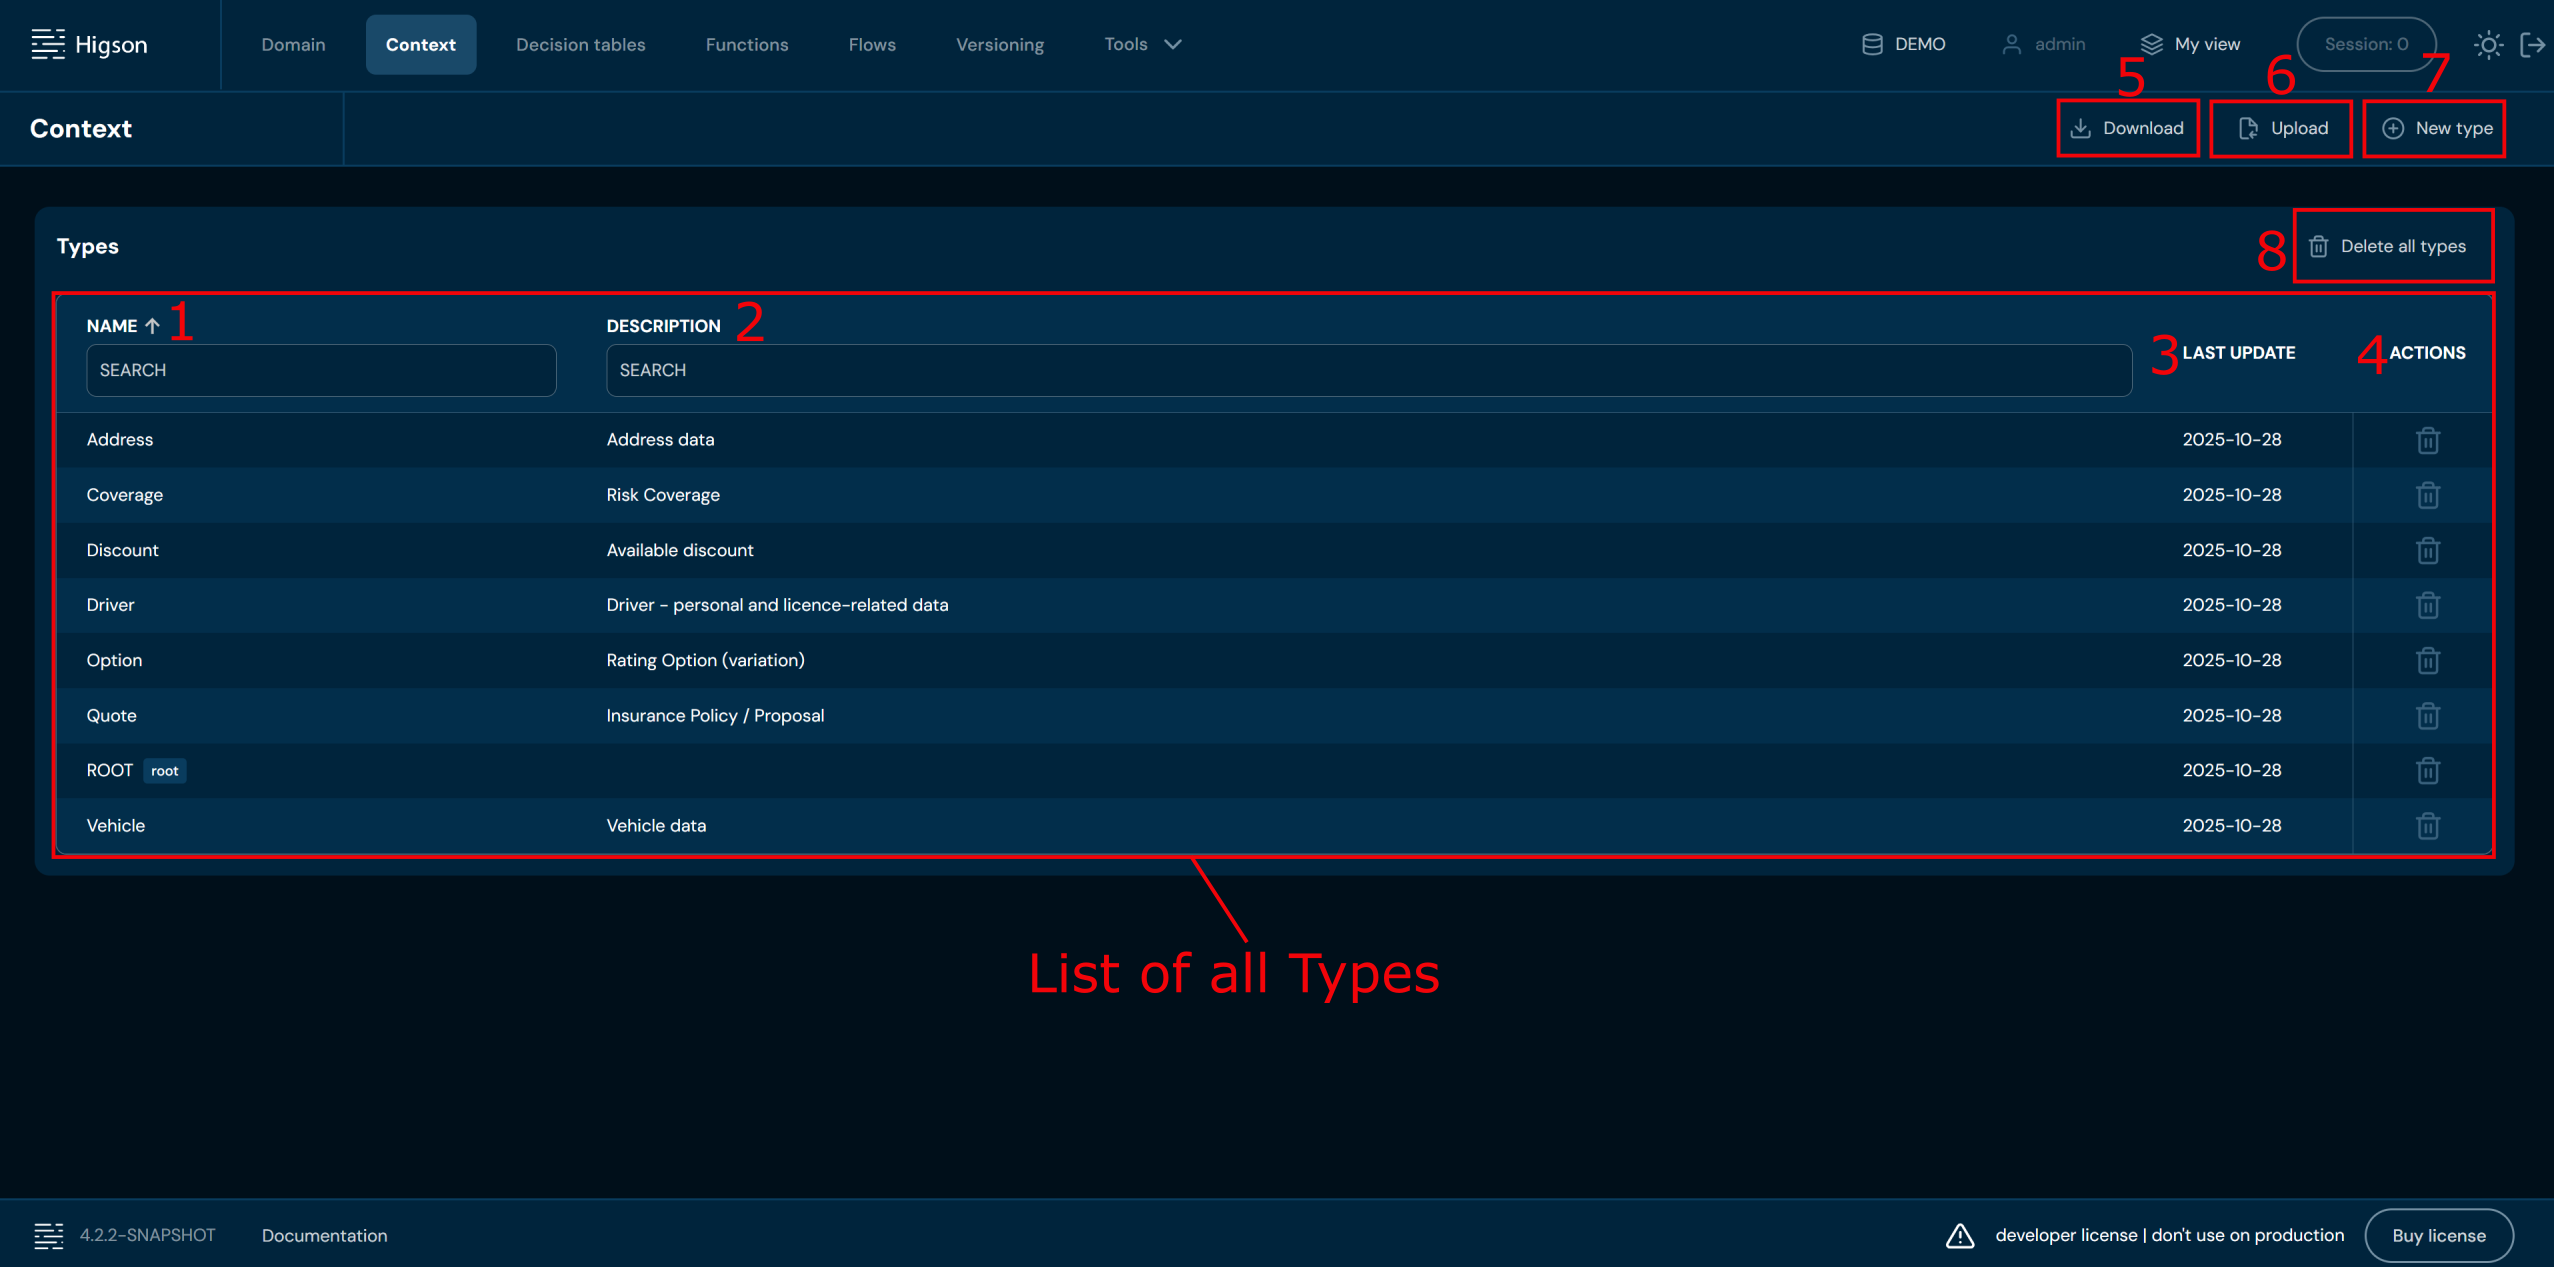
After you enter Context you will see screen of all Types:
| No. | Column / Action name | Description |
|---|---|---|
| 1. | Name | Full type name. You can filter this column by providing any string. |
| 2. | Description | Full description of type. You can filter this column by providing any string. |
| 3. | Last update | The last modification date of the type. |
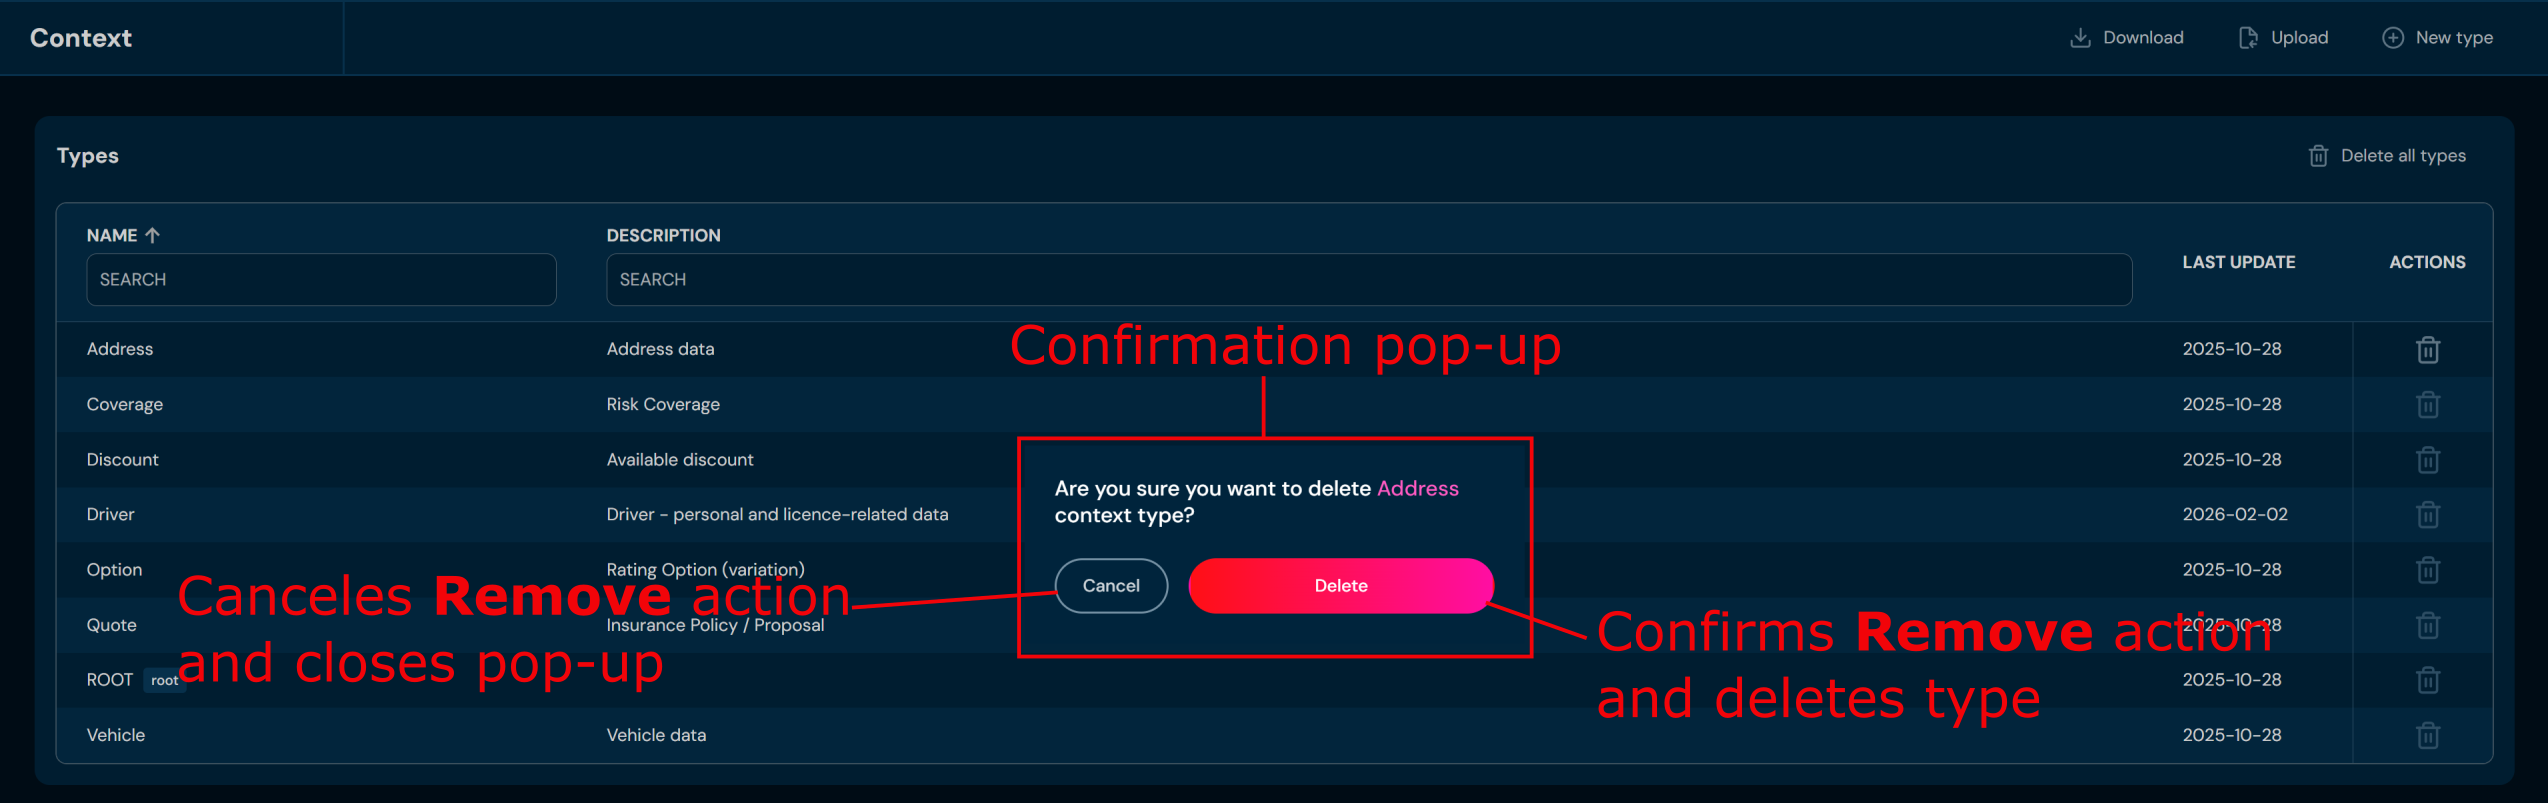
| 4. | Actions | List of quick access actions. Currently only Remove action (bin icon) is available here. Remove action deletes the desired type. To learn more about removing a specific Context Type, go here. |
| 5. | Download Types | Downloads a TXT file that contains all Types and Attributes of Types. To learn more about downloading Types, go here. |
| 6. | Upload Types | Allows uploading Types from a TXT file. To learn more about uploading Types, go here. |
| 7. | + New type | Allows creating new Types. To learn more about adding Types, go here go here. |
| 8. | Delete all types | Deletes all Context Types. |
Context - Add New Type#
If you want to add a new context type, follow these steps:
-
Choose Context in Main toolbar.
-
Choose + New type.
a. Choosing + New type opens a step-by-step Context Type wizard.
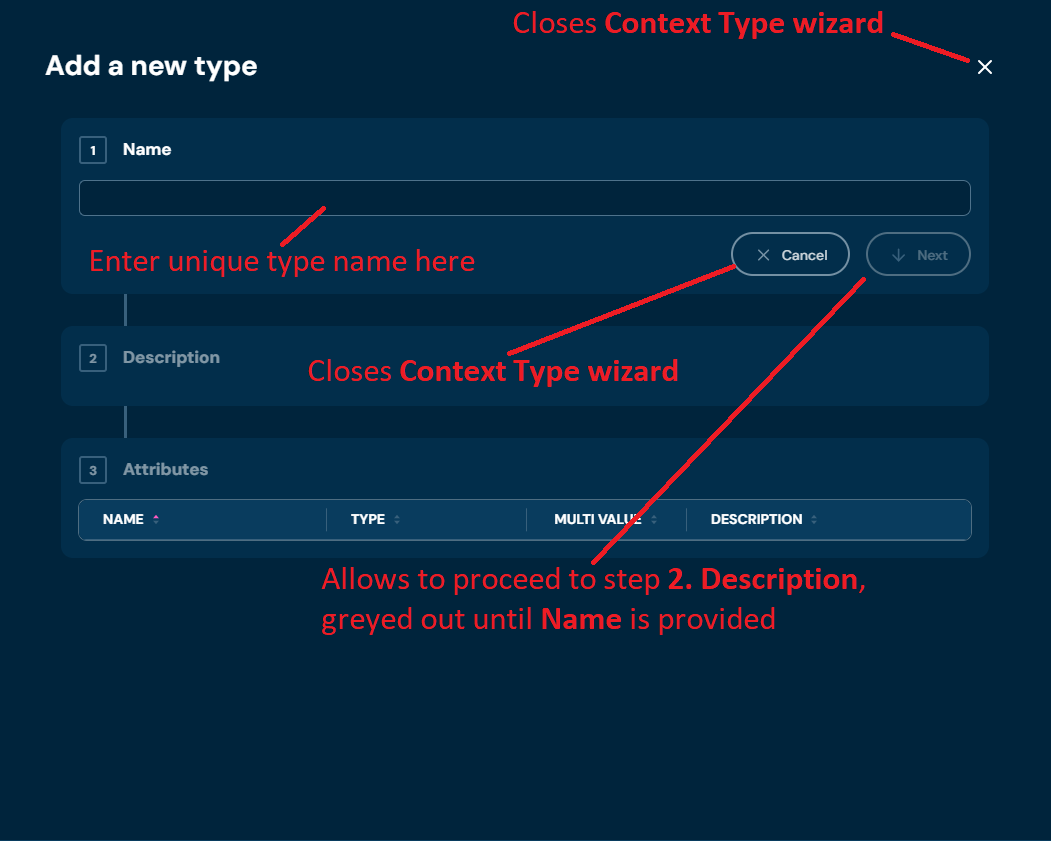
-
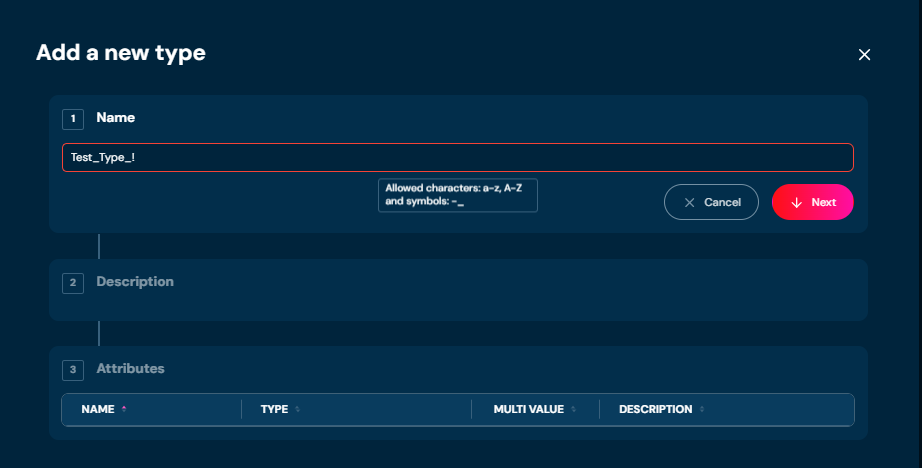
In step 1. Name you need to provide unique Type name. Name can contain only characters from collection a-z; 0-9; “-”; “_” and it can’t start with “-”.
a. If you enter illegal characters, then borders will be highlighted with red color. Hover on the field to see tooltip with more information.
-
Choose Next.
-
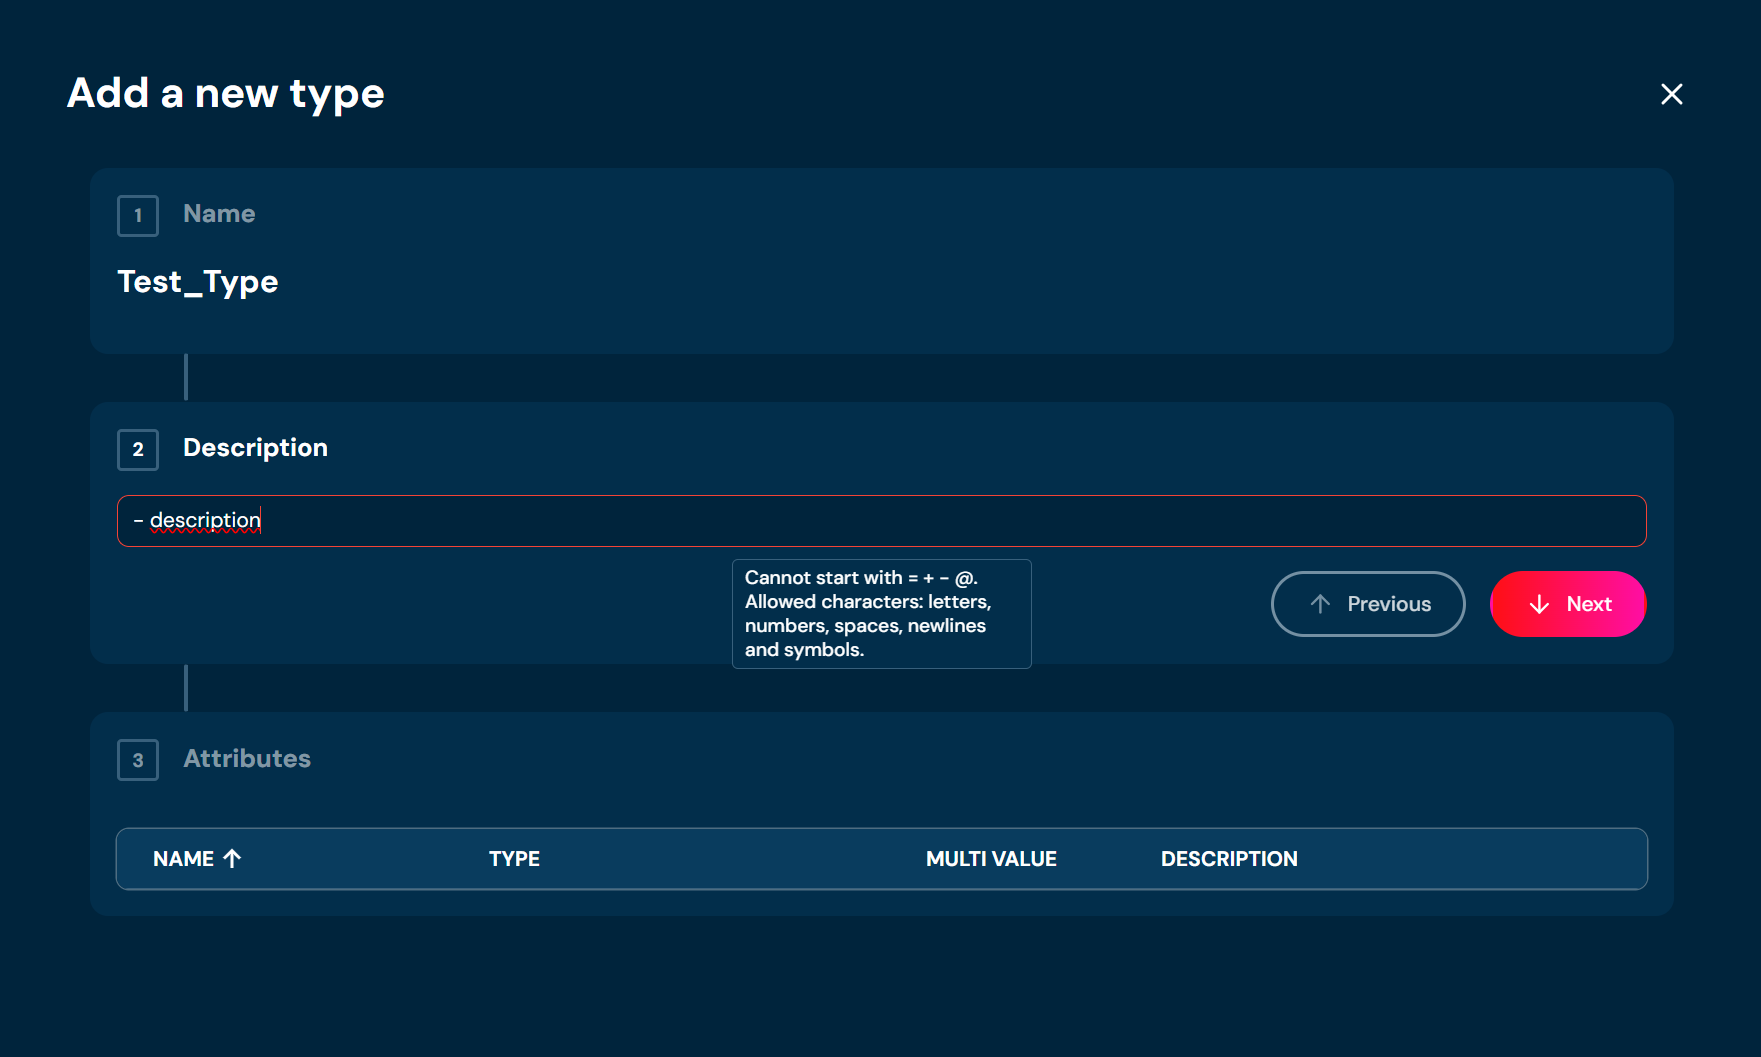
In step 2. Description you may add Type’s description. Description can contain only characters from collection a-z; A-Z; 0-9; “.”; “-”; “,”; “_” and white-space characters. This data is not
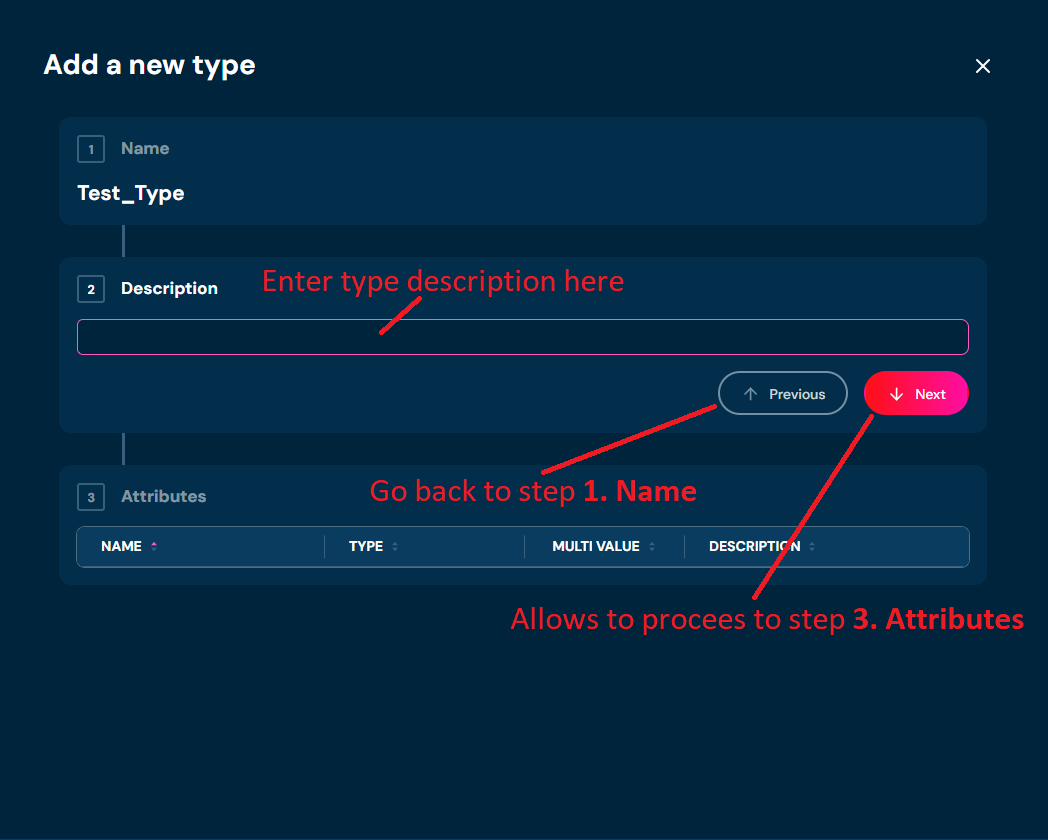
a. If you choose Previous you will go back to step 1. Name.
b. If you enter illegal characters, then borders will be highlighted with red color. Hover on the field to see tooltip with more information.
-
Choose Next.
-
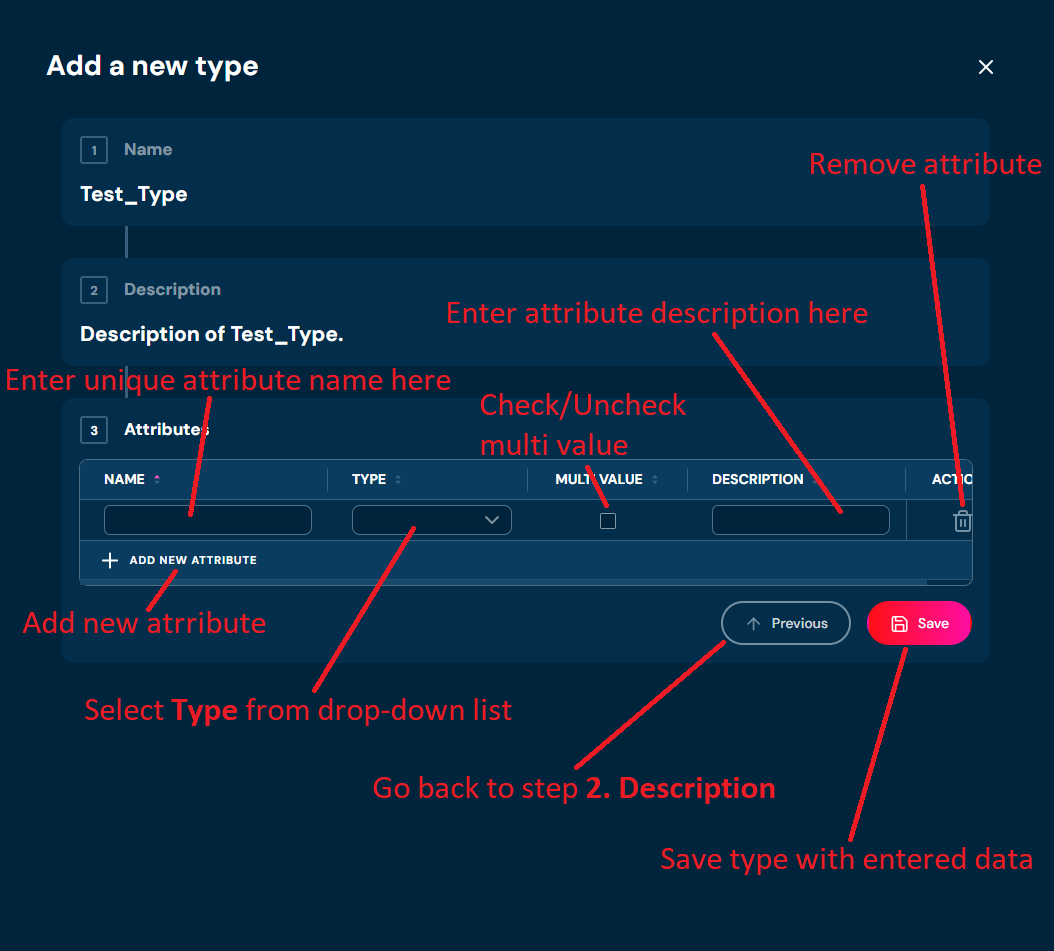
In step 3. Attributes you may add/remove attributes. This data is not necessary to save a type.
a. If you decide to add attributes, you:
i. must provide unique name. Name can contain only characters from collection a-z; 0-9; “-”; “_”; and it can’t start with “-”;
ii. must select a type from a drop-down list.
iii. can check/uncheck multi value.
iv. can provide Attribute description. Description can contain only characters from collection a-z; A-Z; 0-9; “.”; “-”; “,”; “_” and white-space characters.
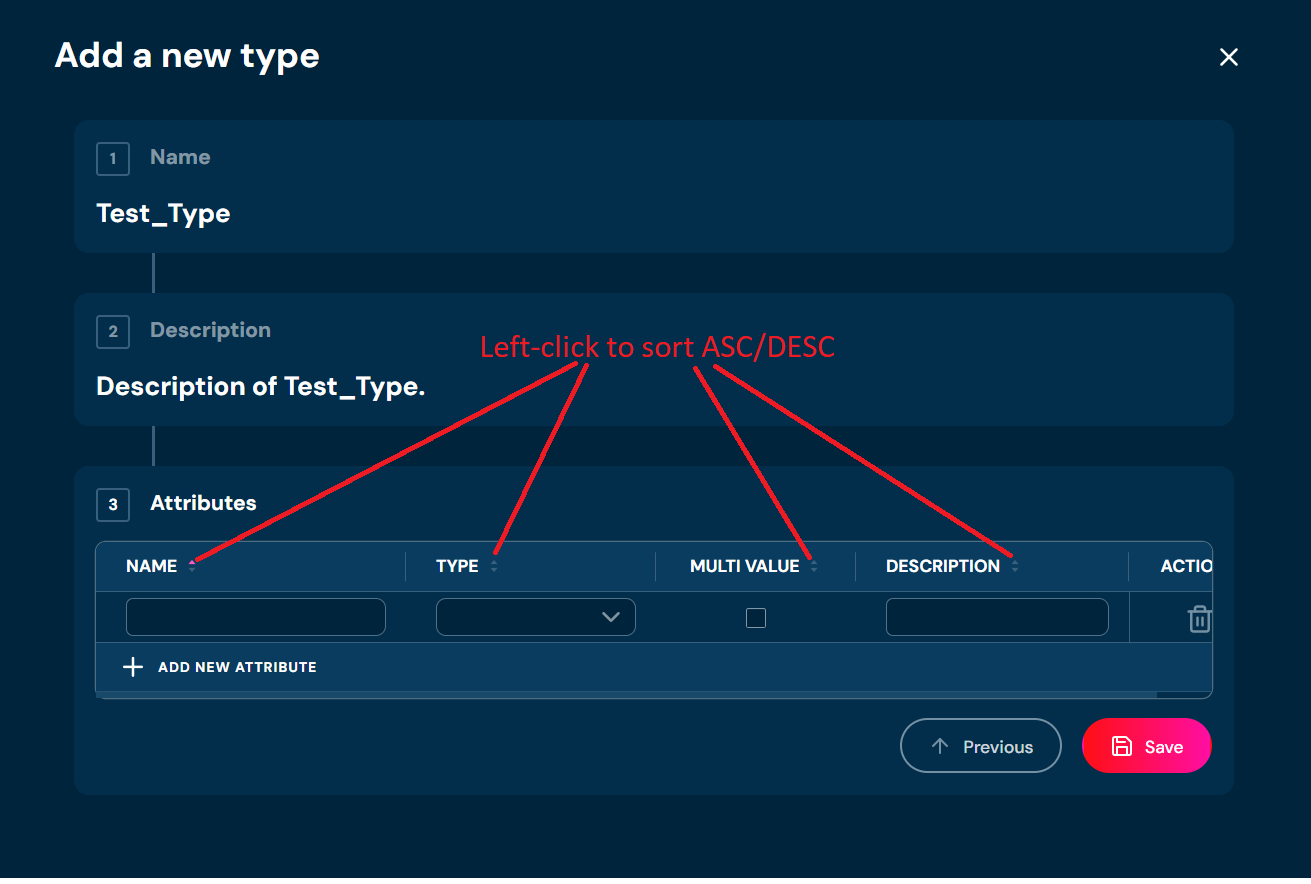
b. You can sort attributes by left-clicking on arrows next to each Column name.
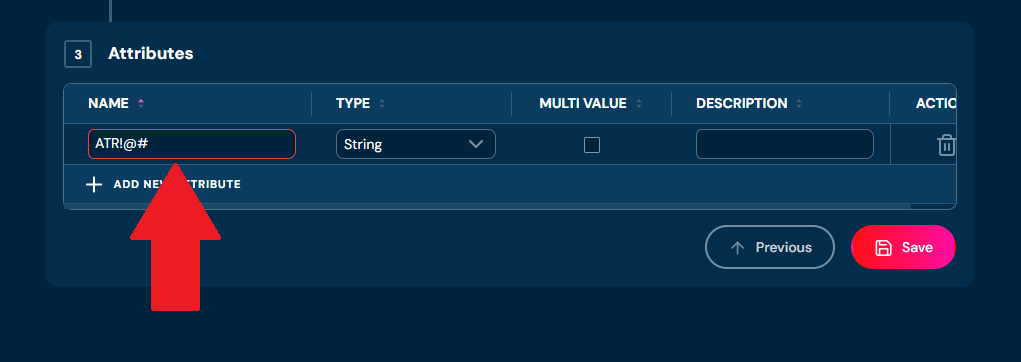
c. If you enter illegal characters in name field for any attribute, then borders will be highlighted with red color, and you will not be able to save a type.
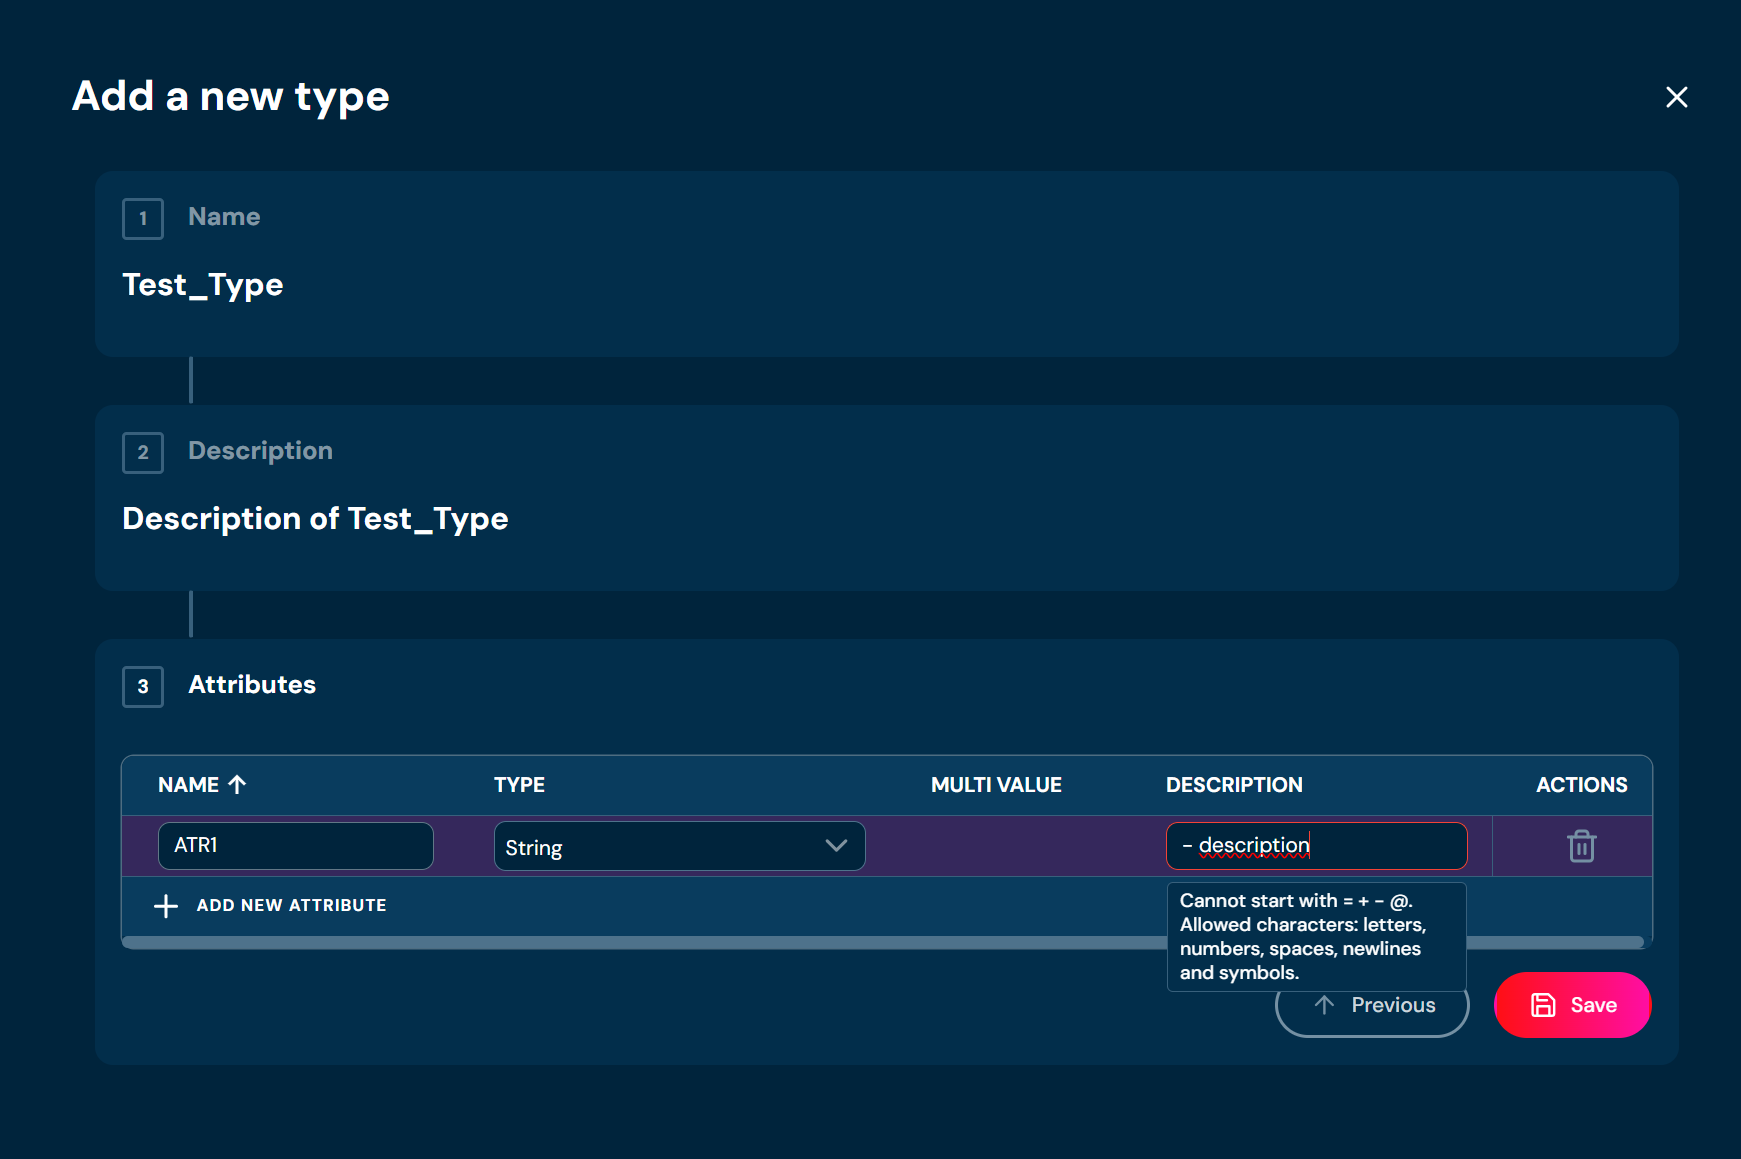
d. If you enter illegal characters in the description field for any attribute, then borders will be highlighted with red color, and you will not be able to save a type.
-
Choose Save.
a. Type with data you provided is created.
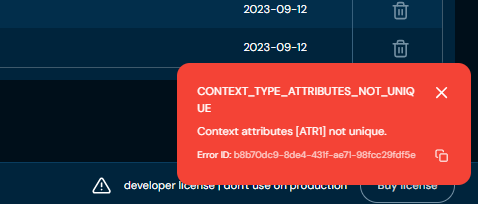
b. If in step 3. Attributes you entered the same name in at least two attributes, then validation error will appear.
Context - Remove Context Type#
If you want to remove a specific context type, follow these steps:
-
Choose Context in Main toolbar.
-
Choose Remove action (bin icon) for type you want to delete.
a. Action is greyed out for ROOT type.
b. After choosing Remove action, confirmation pop-up will appear.
-
Choose Delete.
a. Specific Type is being removed from the environment. This action is irreversible.
Context - Download Context#
If you want to download context, follow these steps:
-
Choose Context in Main toolbar.
-
Choose Download.
a. Choosing Download a TXT file that contains the whole Context.
Context - Upload Context#
If you want to upload context, follow these steps:
-
Choose Context in Main toolbar.
-
Choose Upload.
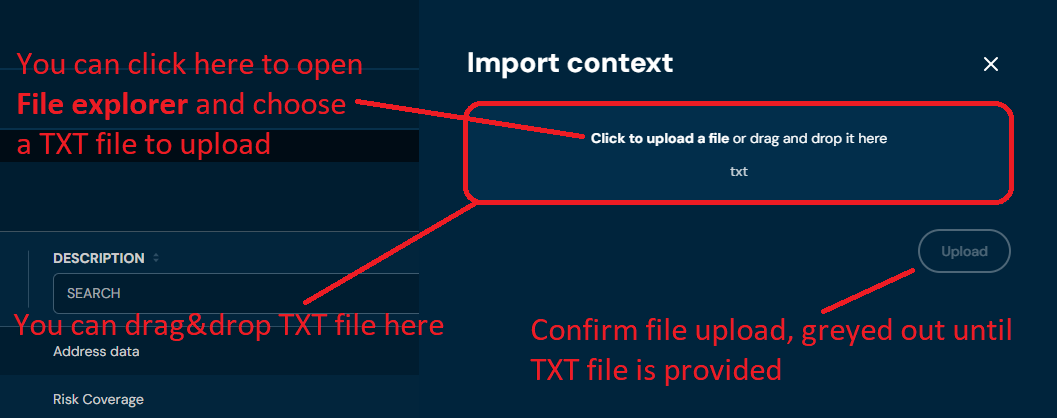
a. Choosing Upload brings up Import context screen.
-
Drag&drop desired file or Click to upload a file and choose file in File explorer.
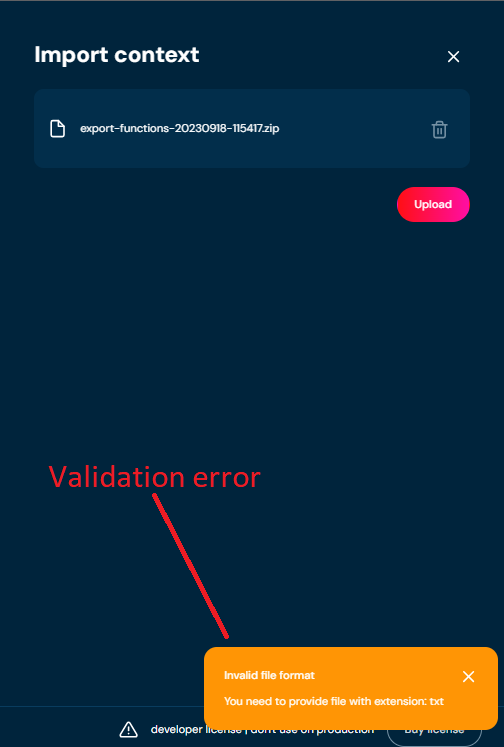
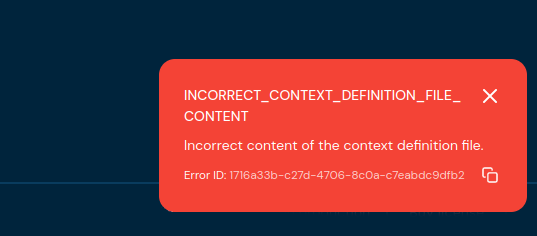
a. If you choose a file with extension other than TXT, then validation error will pop up.
b. If there is something wrong with data in TXT file, then validation error will appear.
-
Choose Upload
-
When the progress bar reaches 100%, it means that context was uploaded correctly
a. If a validation error occurs (see above), then an upload process is being aborted.
Context - Delete All Types#
If you want to delete all types in context, follow these steps:
-
Choose Context in Main toolbar.
-
Choose Delete all types.
a. After choosing Delete all types button, confirmation pop-up will appear.
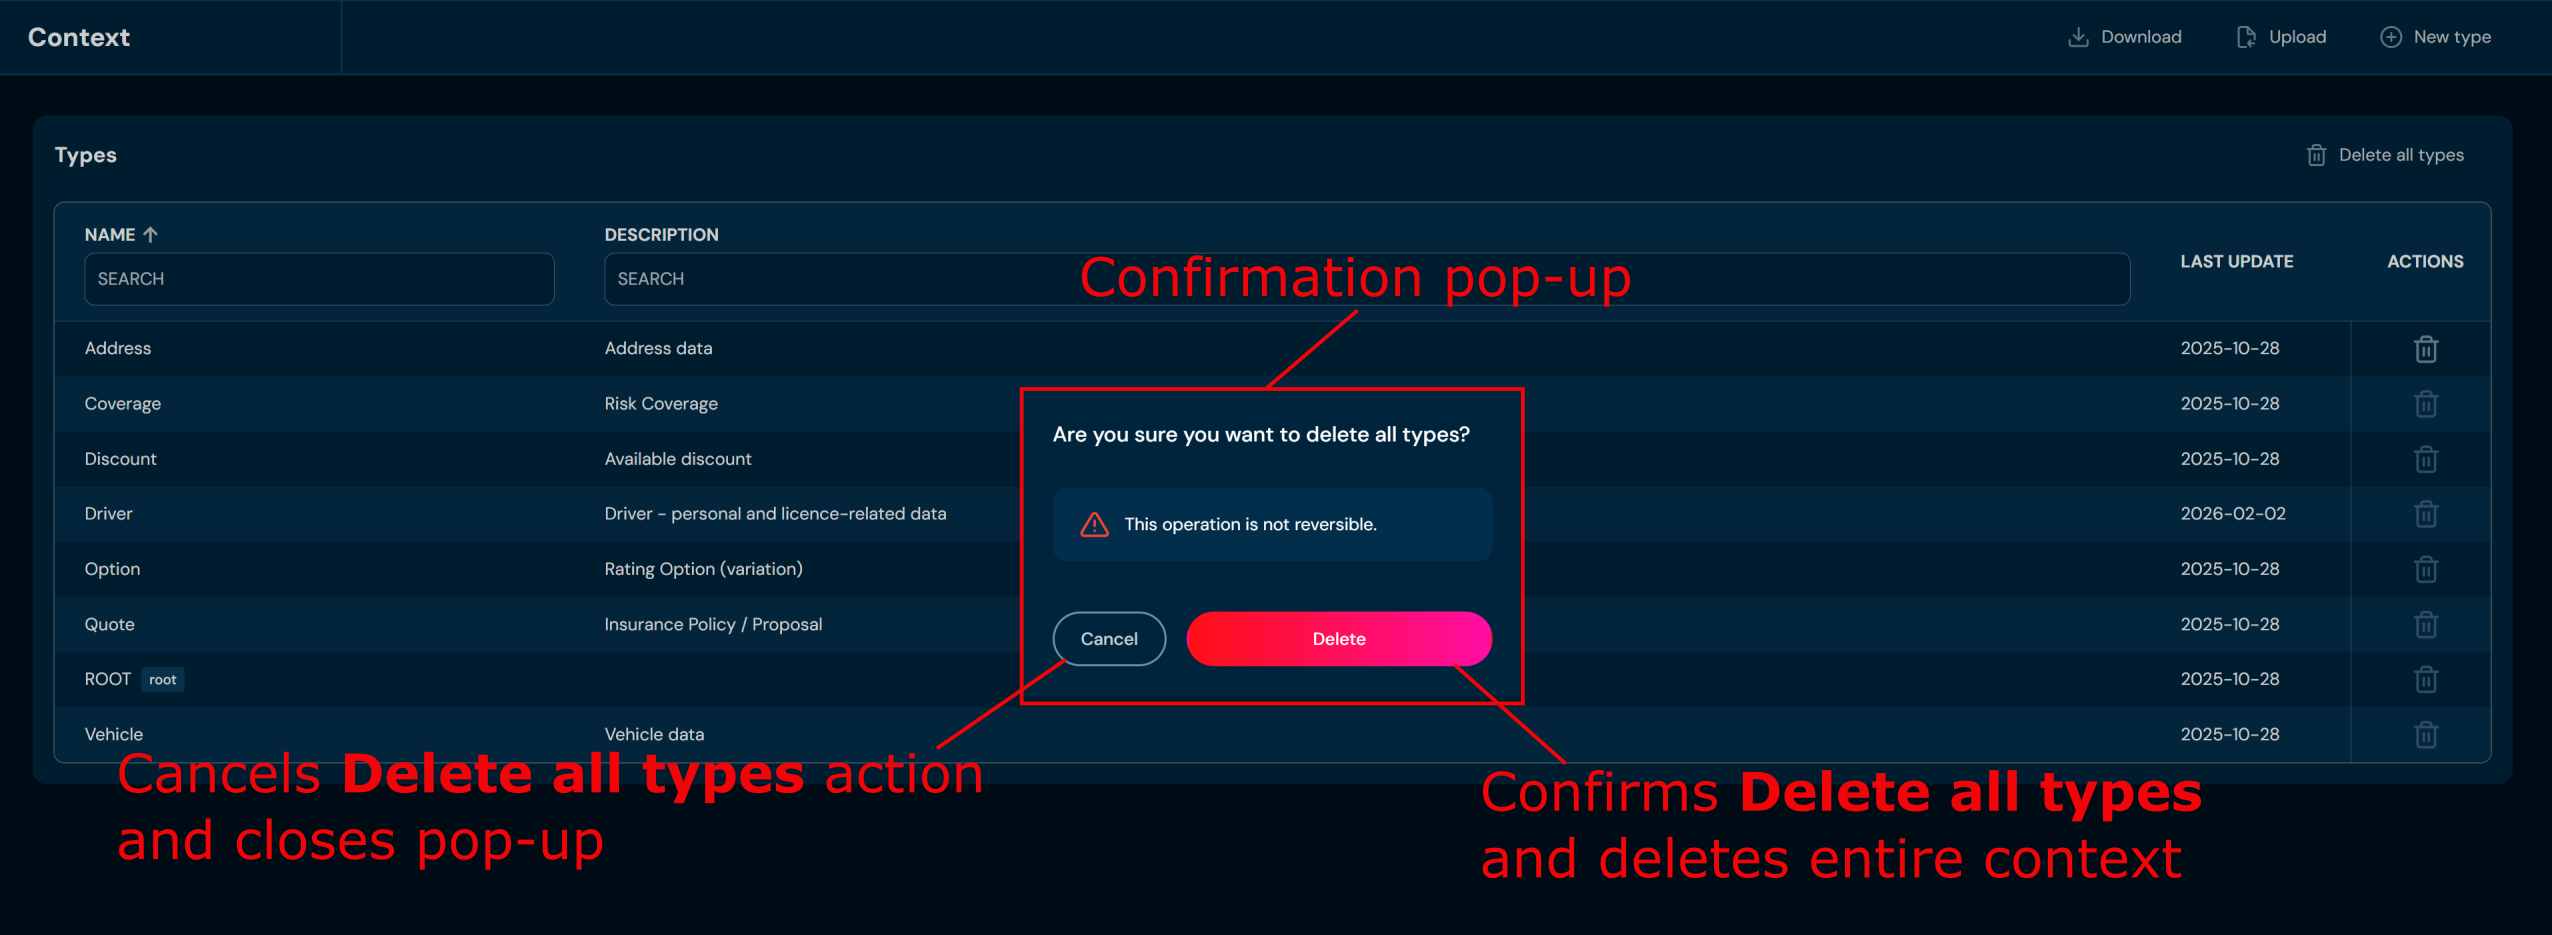
-
Choose Delete.
a. The Entire Context excluding ROOT is deleted from the environment.
Context Type Details Screen#
You can access Context Type details by left-clicking on the specific type in the screen of all Types.
An important difference in Context is that changes made in Types are instant, without session mechanism.
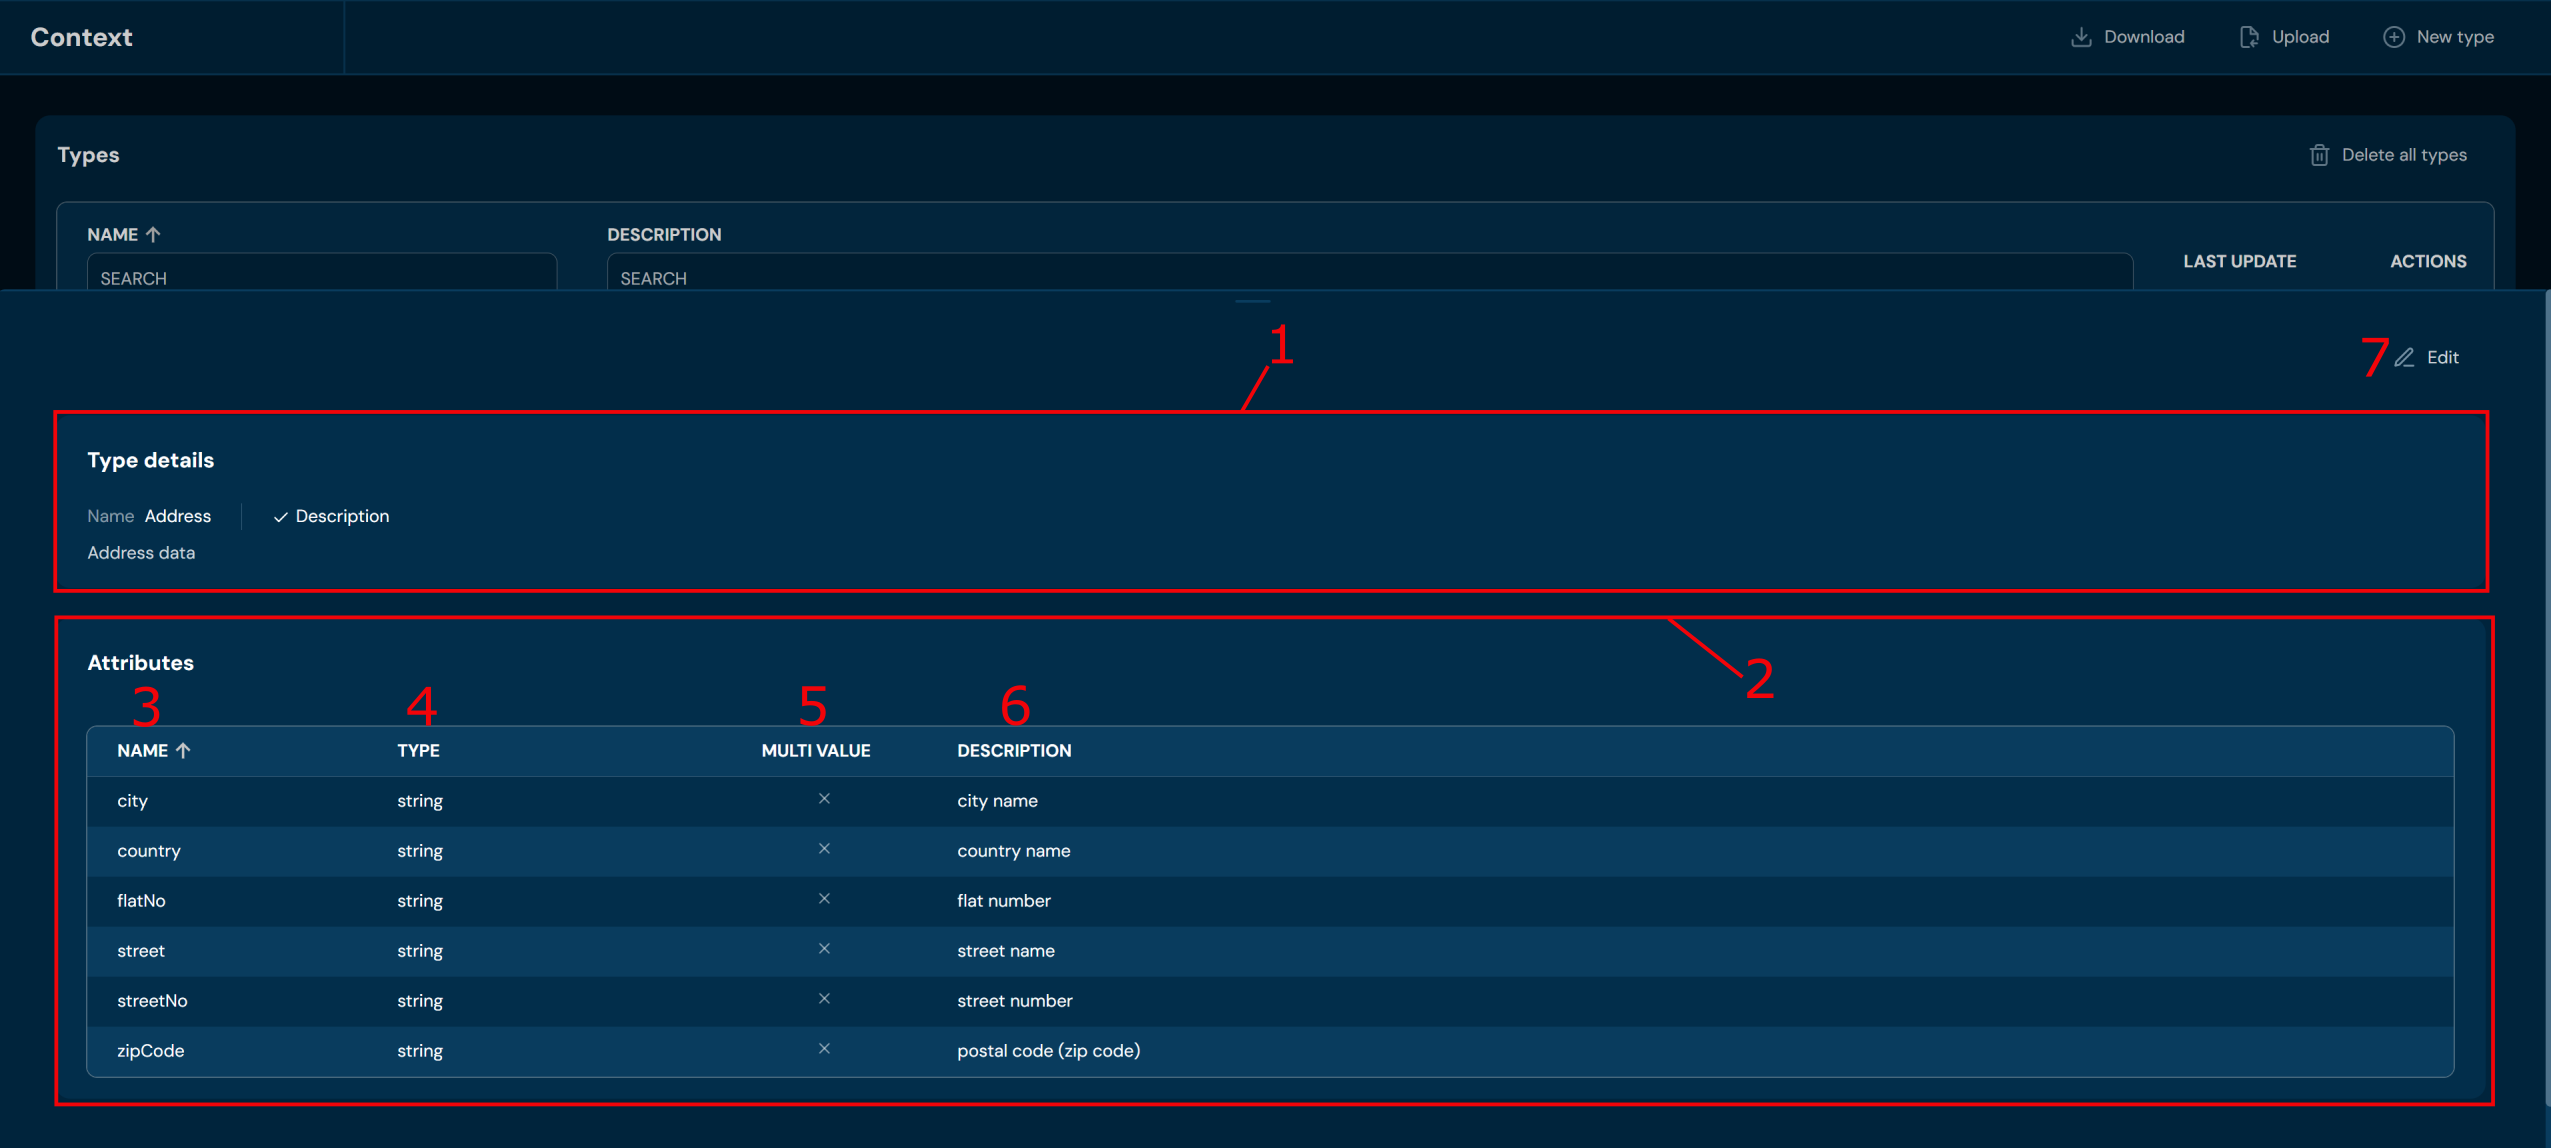
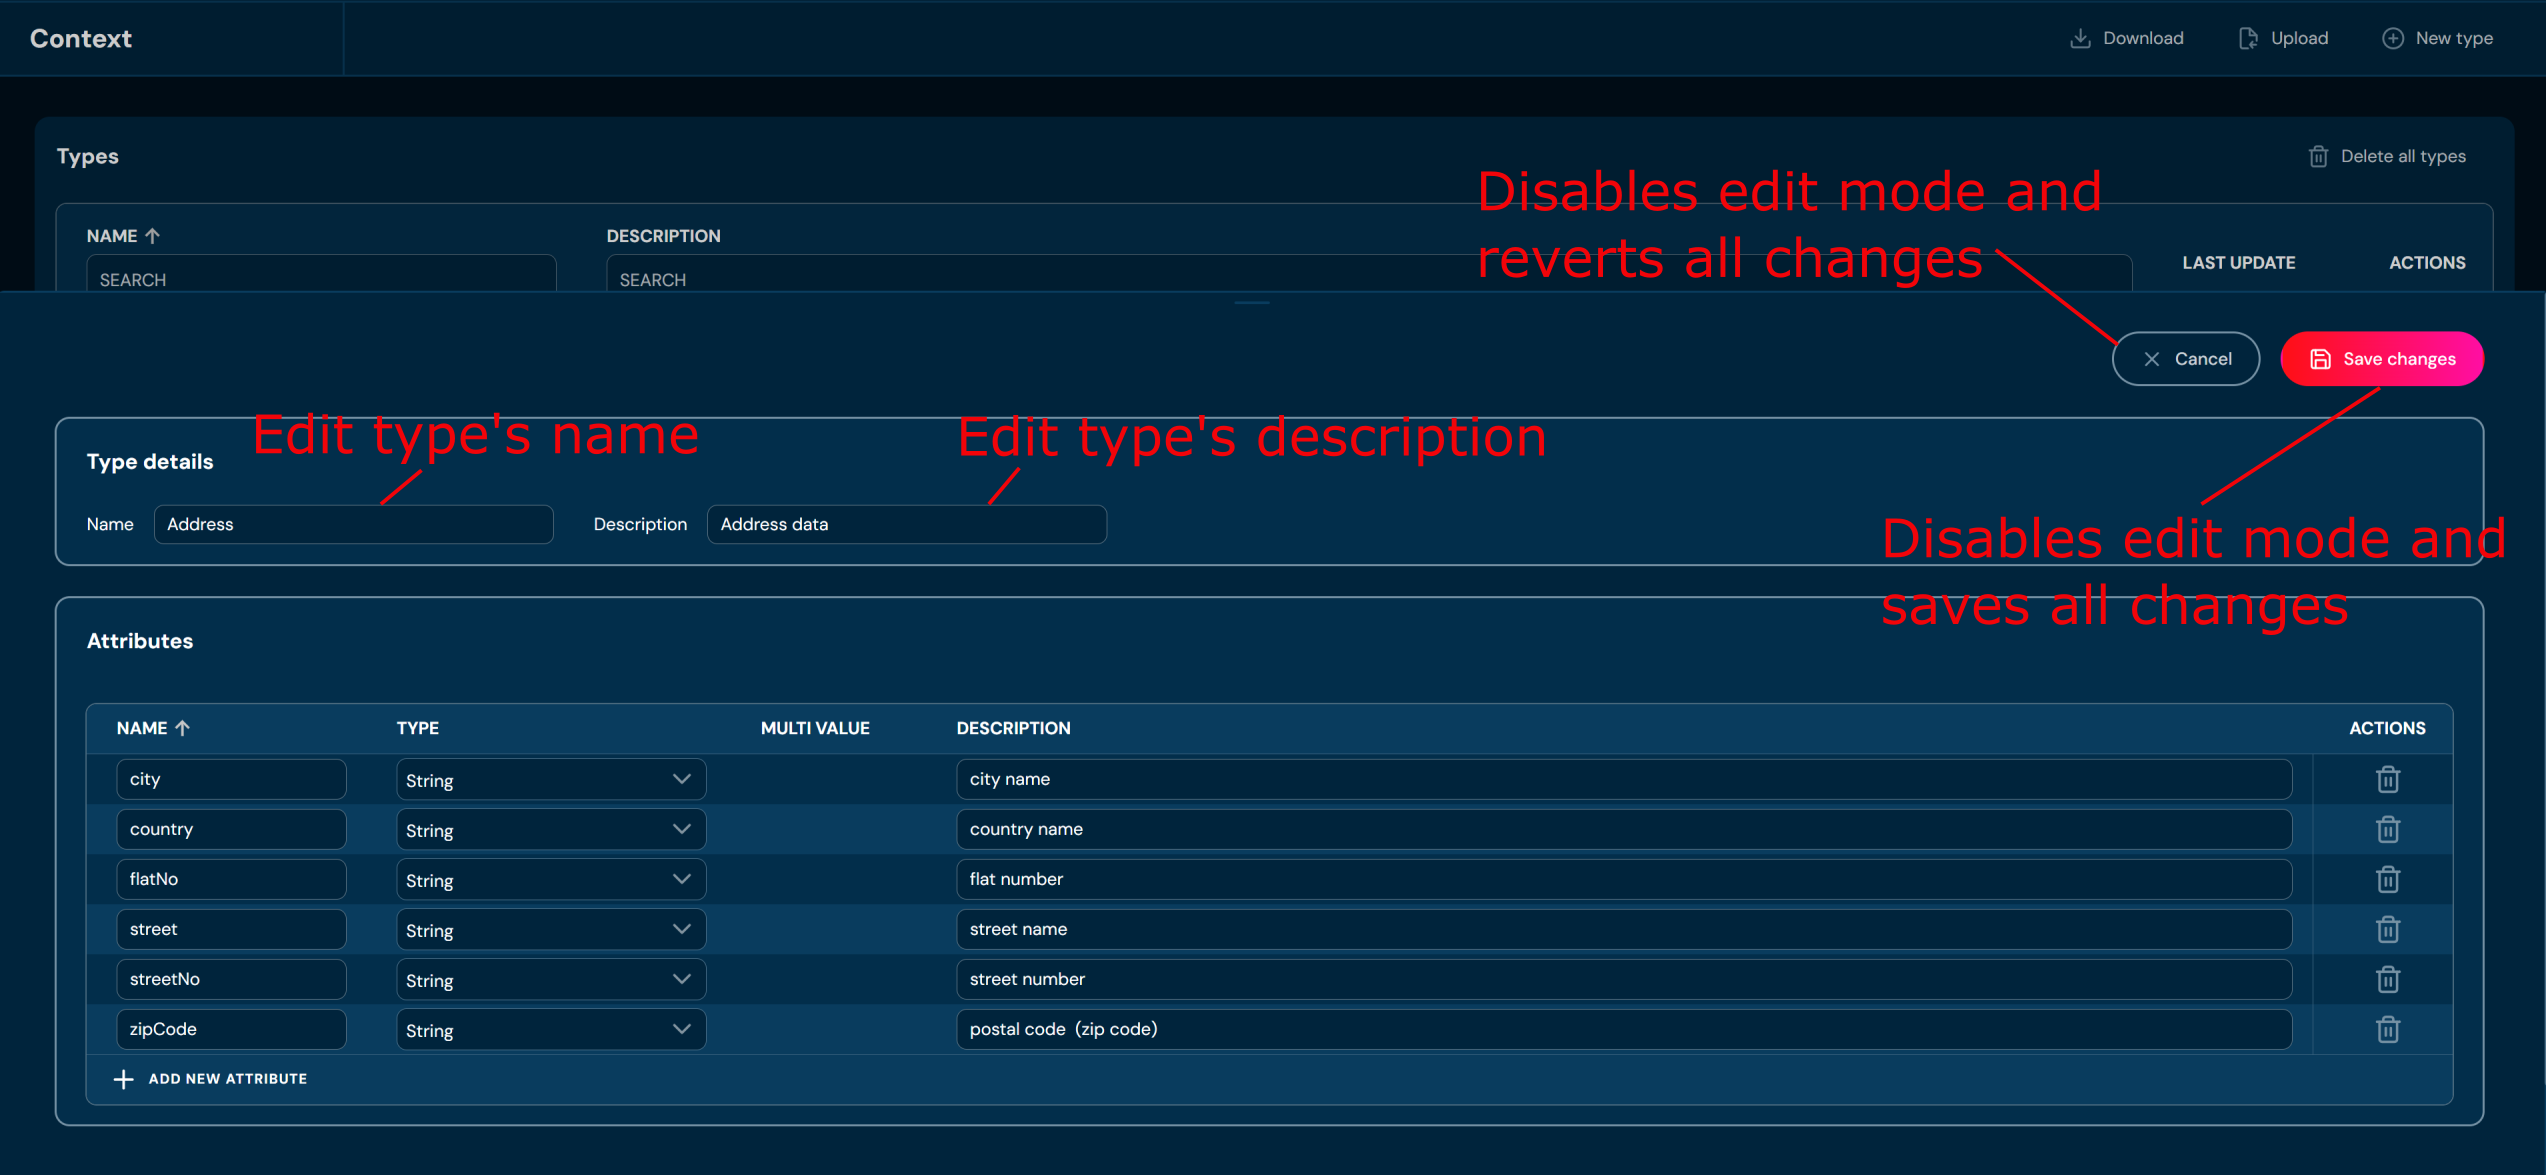
| No. | Name | Description |
|---|---|---|
| 1. | Type details section | Contains information such as: Type’s name and Type’s description. |
| 2. | Attributes section | Contains information about all attributes created in Type. |
| 3. | Name | Full attribute name. |
| 4. | Type | Data type used in the attribute. |
| 5. | Multi value | If multi-value is checked, then it allows providing a list of elements. If unchecked, then only single elements can be provided. |
| 6. | Description | Full description of the type. |
| 7. | Edit | Enables Edit mode for Type details section. To learn more about editing type details, go here. |
Context Type details - Edit Type Details#
If you want to edit data in a Type details section, follow these steps:
-
Choose Context in Main toolbar.
-
Left-click on a type you wish to edit.
a. Left-clicking on type opens Context Type details screen.
-
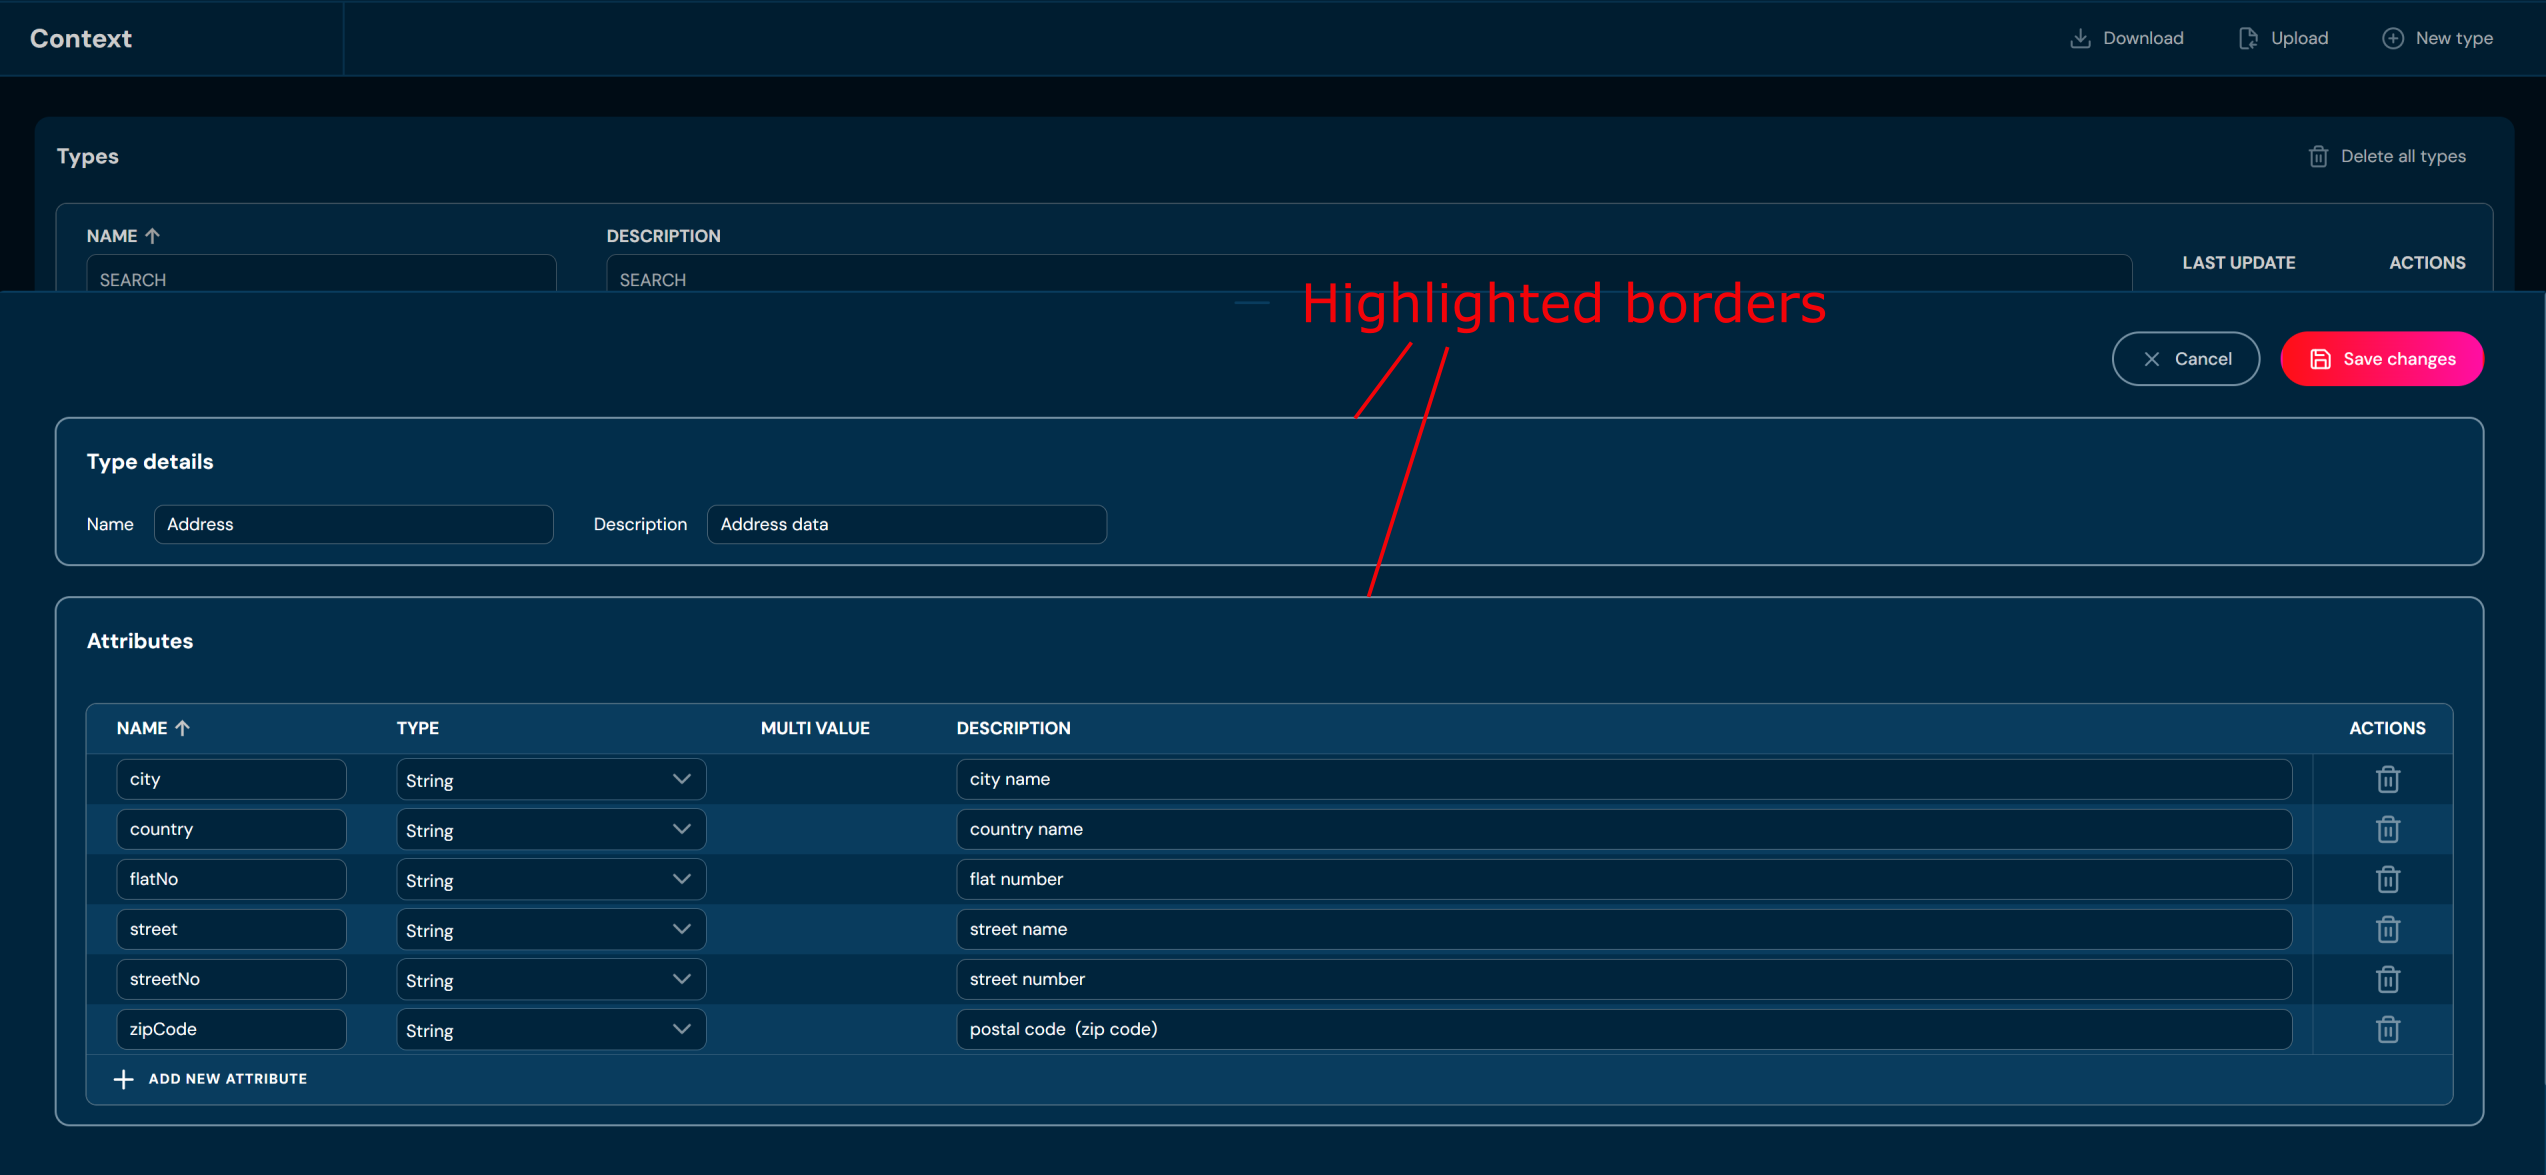
Choose Edit .
a. Highlighted borders indicate that edit mode is active.
-
Edit any data you need in Type Details section.
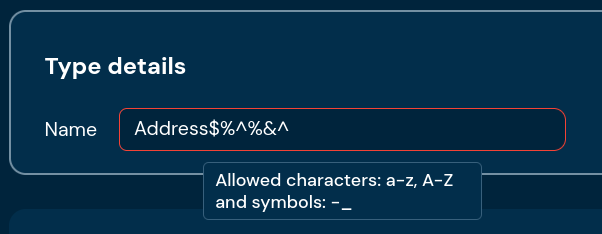
a. If you enter illegal characters in type’s name, then validation error will appear.
-
Edit any data you need in Attributes section.

-
Choose Save changes to save all changes made in context type.
a. Cancel reverts all changes made in context type.
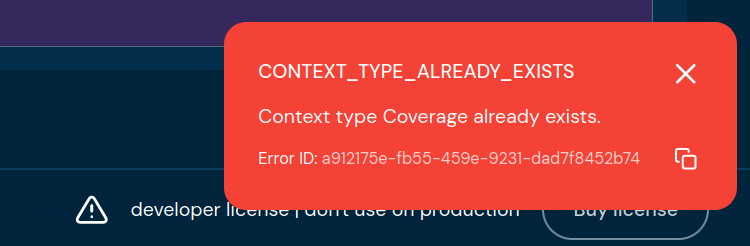
b. If you change type’s name to name that is already used by another type, then validation error will appear.
Decision tables and functions answer the question of how you want to parameterize. Context answers the question of what the parameterization may depend on. And last but not least - domain answers the question of what you want to parameterize.
Indeed, domain model is what we want to be configurable.
- Using
Menu-Domain-Definitionwe can design domain types, their relationships and attributes. - Using
Menu-Domain-Configurationwe can create instances of domain types and configure their attributes with use of functions or decision tables.
Example#
To explain what domain definition and configuration is, it is best to use an example. Imagine we want to configure life insurance products:
- Each life insurance product consists of covers and funds,
- Each cover has different maximum insurance sum, availabilty logic, premium logic etc.,
- Each fund has different transfer fee etc.
We can use Domain definition to define types for our domain, for instance:
type:       Product
attributes: none
elements:
  - covers: Cover[]     // each Product has a collection of Cover elements
  - funds:  Fund[]      // each Product has a collection of Fund elements

type:       Cover
attributes:
  - max_insurance_sum   // value we want to configure
  - is_available        // boolean - we want to make cover unavailable for some contexts
  - base_premium        // decimal value that we want to calculate with our tariff algorithm

type:       Fund
attributes:
  - transfer_fee
  - ...
The above example domain definition says that:
- would be able to configure transfer_fee for each Fund
- would be able to configure max_insurance_sum for each Cover
- would be able to configure is_available for each Cover
- would be able to configure base_premium for each Cover.
Next, we can use Domain configuration to create configuration tree with domain elements and their attributes:
Product [code = PR1]
  covers
    * Cover[CA]
       - max_insurance_sum   =  10000
       - is_available        =  yes
       - base_premium        =  50.0
    * Cover[CB]
       - max_insurance_sum   =  from decision table : 'pr1.covers.maxInsuranceSum'
       - is_available        =  yes
       - base_premium        =  from function       : 'pr1.premium.calculate'
     ...

Product [PT3]
  covers
    * Cover[DB]
       - max_insurance_sum   =  from function       : 'default.maxInsuranceSum'
       - is_available        =  from decision table : 'pt3.cover.isAvailable'
       - base_premium        =  from decision table : 'pt3.tariff.basePremium'
     ...

and so on...
Now an application connected to Higson can use any defined logic solely through the domain layer. Here are some example scenarios:
- getting all products from domain tree,
- getting all covers for product
PR1, - getting all covers for product
PT3with attributeis_availableequal totrue, - calculate premium for given cover - just by getting value from
base_premiumattribute.
For larger projects, we do not recommend using decision tables and functions directly in your application code. Instead, we recommend using parameterization only through the domain layer.
This approach, which we call polymorphic configuration, makes the application even better decoupled from the business logic.
For detailed information on defining and working with domain, see Domain Definition and Domain Configuration.
In Domain definition we can design domain types, their relationships and attributes.
If you are new to Higson Domain, you may want to read the introductory section Introduction to Domain.
In order to see Domain Definition, select Domain in Main Toolbar.
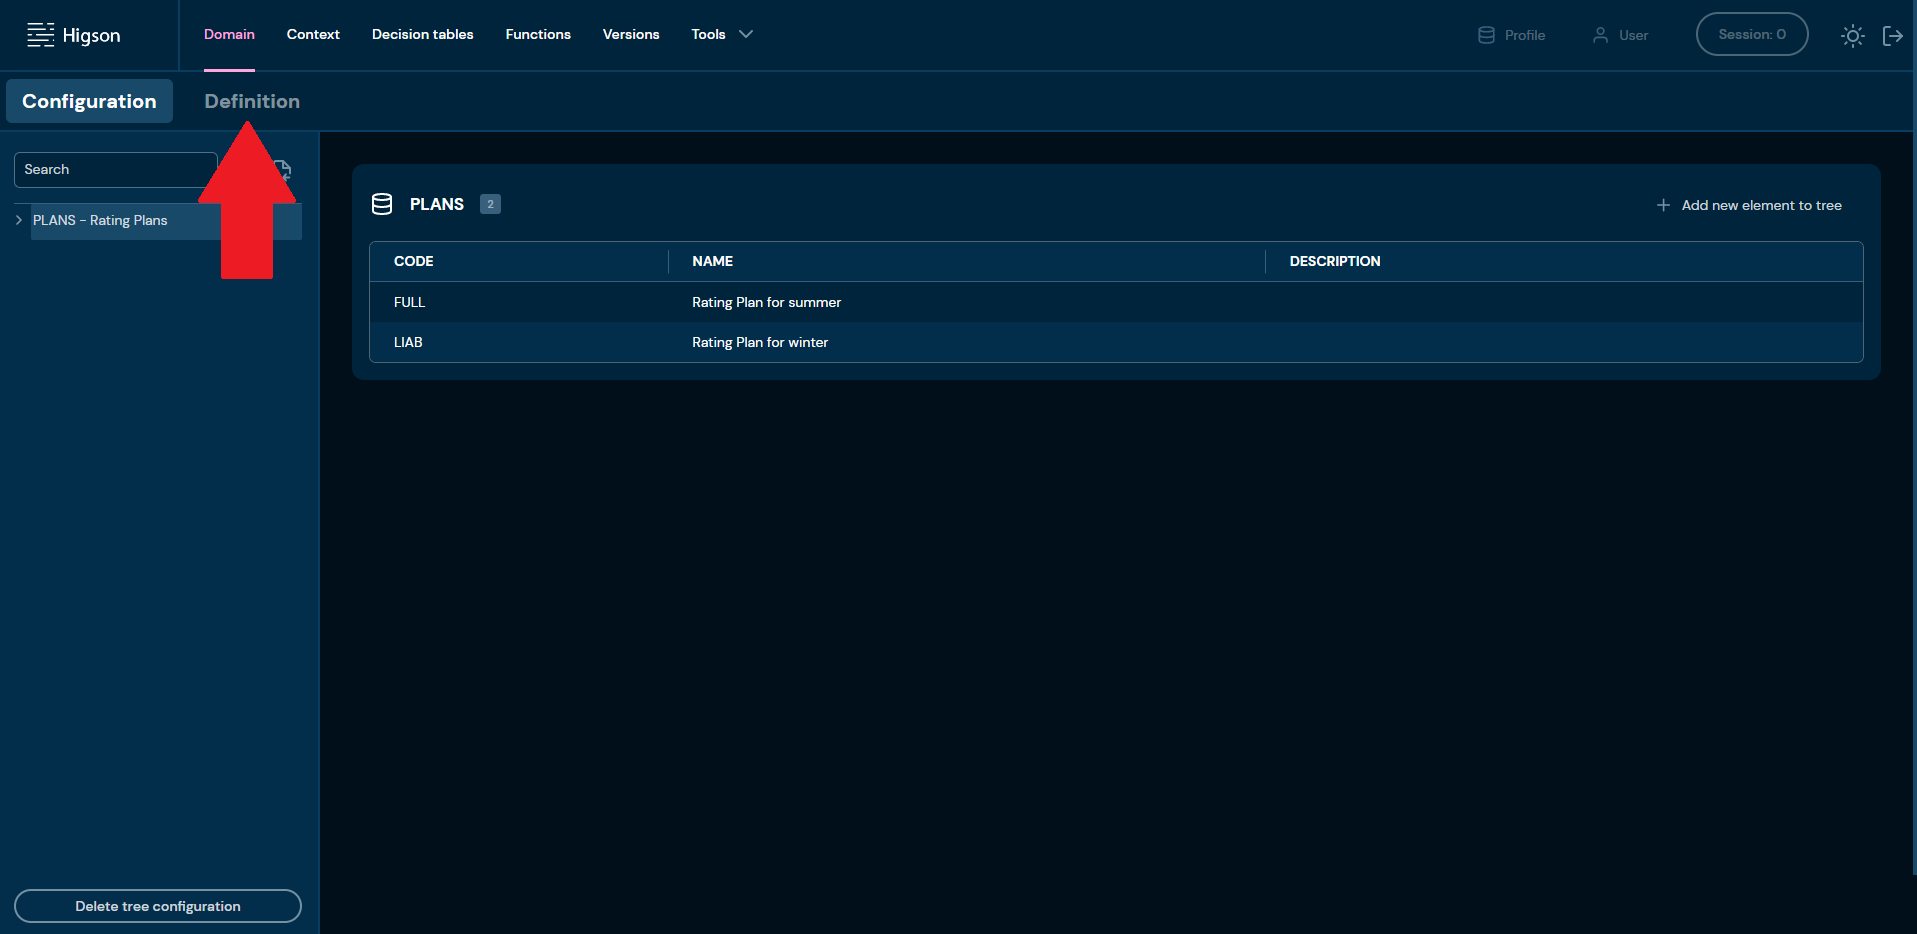
Select Definition tab.
After you enter Definition you will see screen of all definition types:
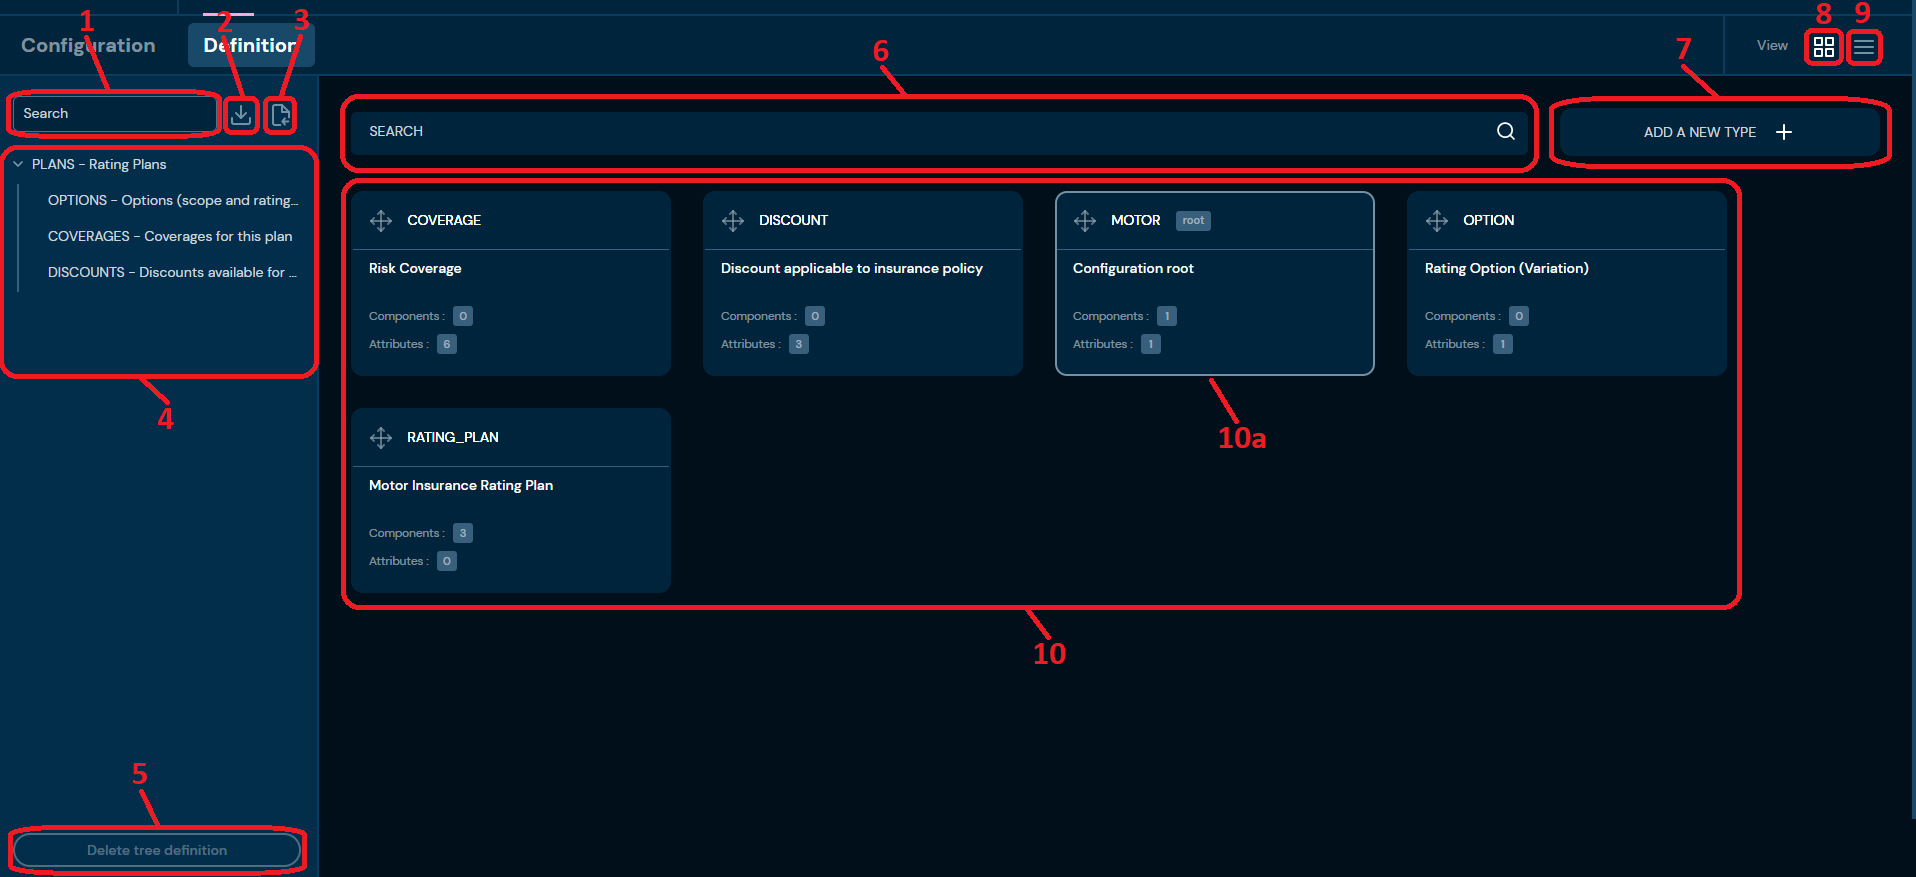
| No. | Name | Description |
|---|---|---|
| 1. | Tree search | Filter by any string provided by the user. Definition tree navigates to all Types matching the provided criteria. |
| 2. | Download | Downloads an XML file that contains the entire Domain Definition. To learn more about downloading the Definition, go here. |
| 3. | Upload Domain | Allows uploading Domain Definition from an XML file. To learn more about uploading the Definition, go here. |
| 4. | Definition tree | A visual representation of dependencies between Definition Types. |
| 5. | Delete tree | Deletes all Definition Types. Action is available only if: - User’s session is closed, - The Domain Configuration section is empty. Otherwise, the action is greyed out. |
| 6. | Types search | Type any phrase to find the right type. |
| 7. | Add a new Type | Allows creating new Definition Types. To learn more about adding Definition Types, go here |
| 8. | Tiles view | Enables viewing Definition Types as tiles. |
| 9. | List view | Enables viewing Definition Types as a list. |
| 10. | All Definition Types | Every Definition Type created is visible here. |
| 10a. | Configuration ROOT | Configuration ROOT is marked more distinctively from other Definition Types. Borders of ROOT are highlighted, and the label “root” is visible. |
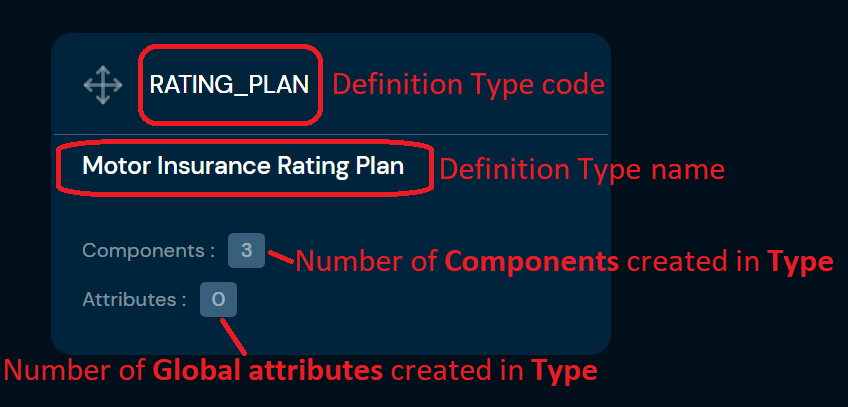
Definition Type Tile#
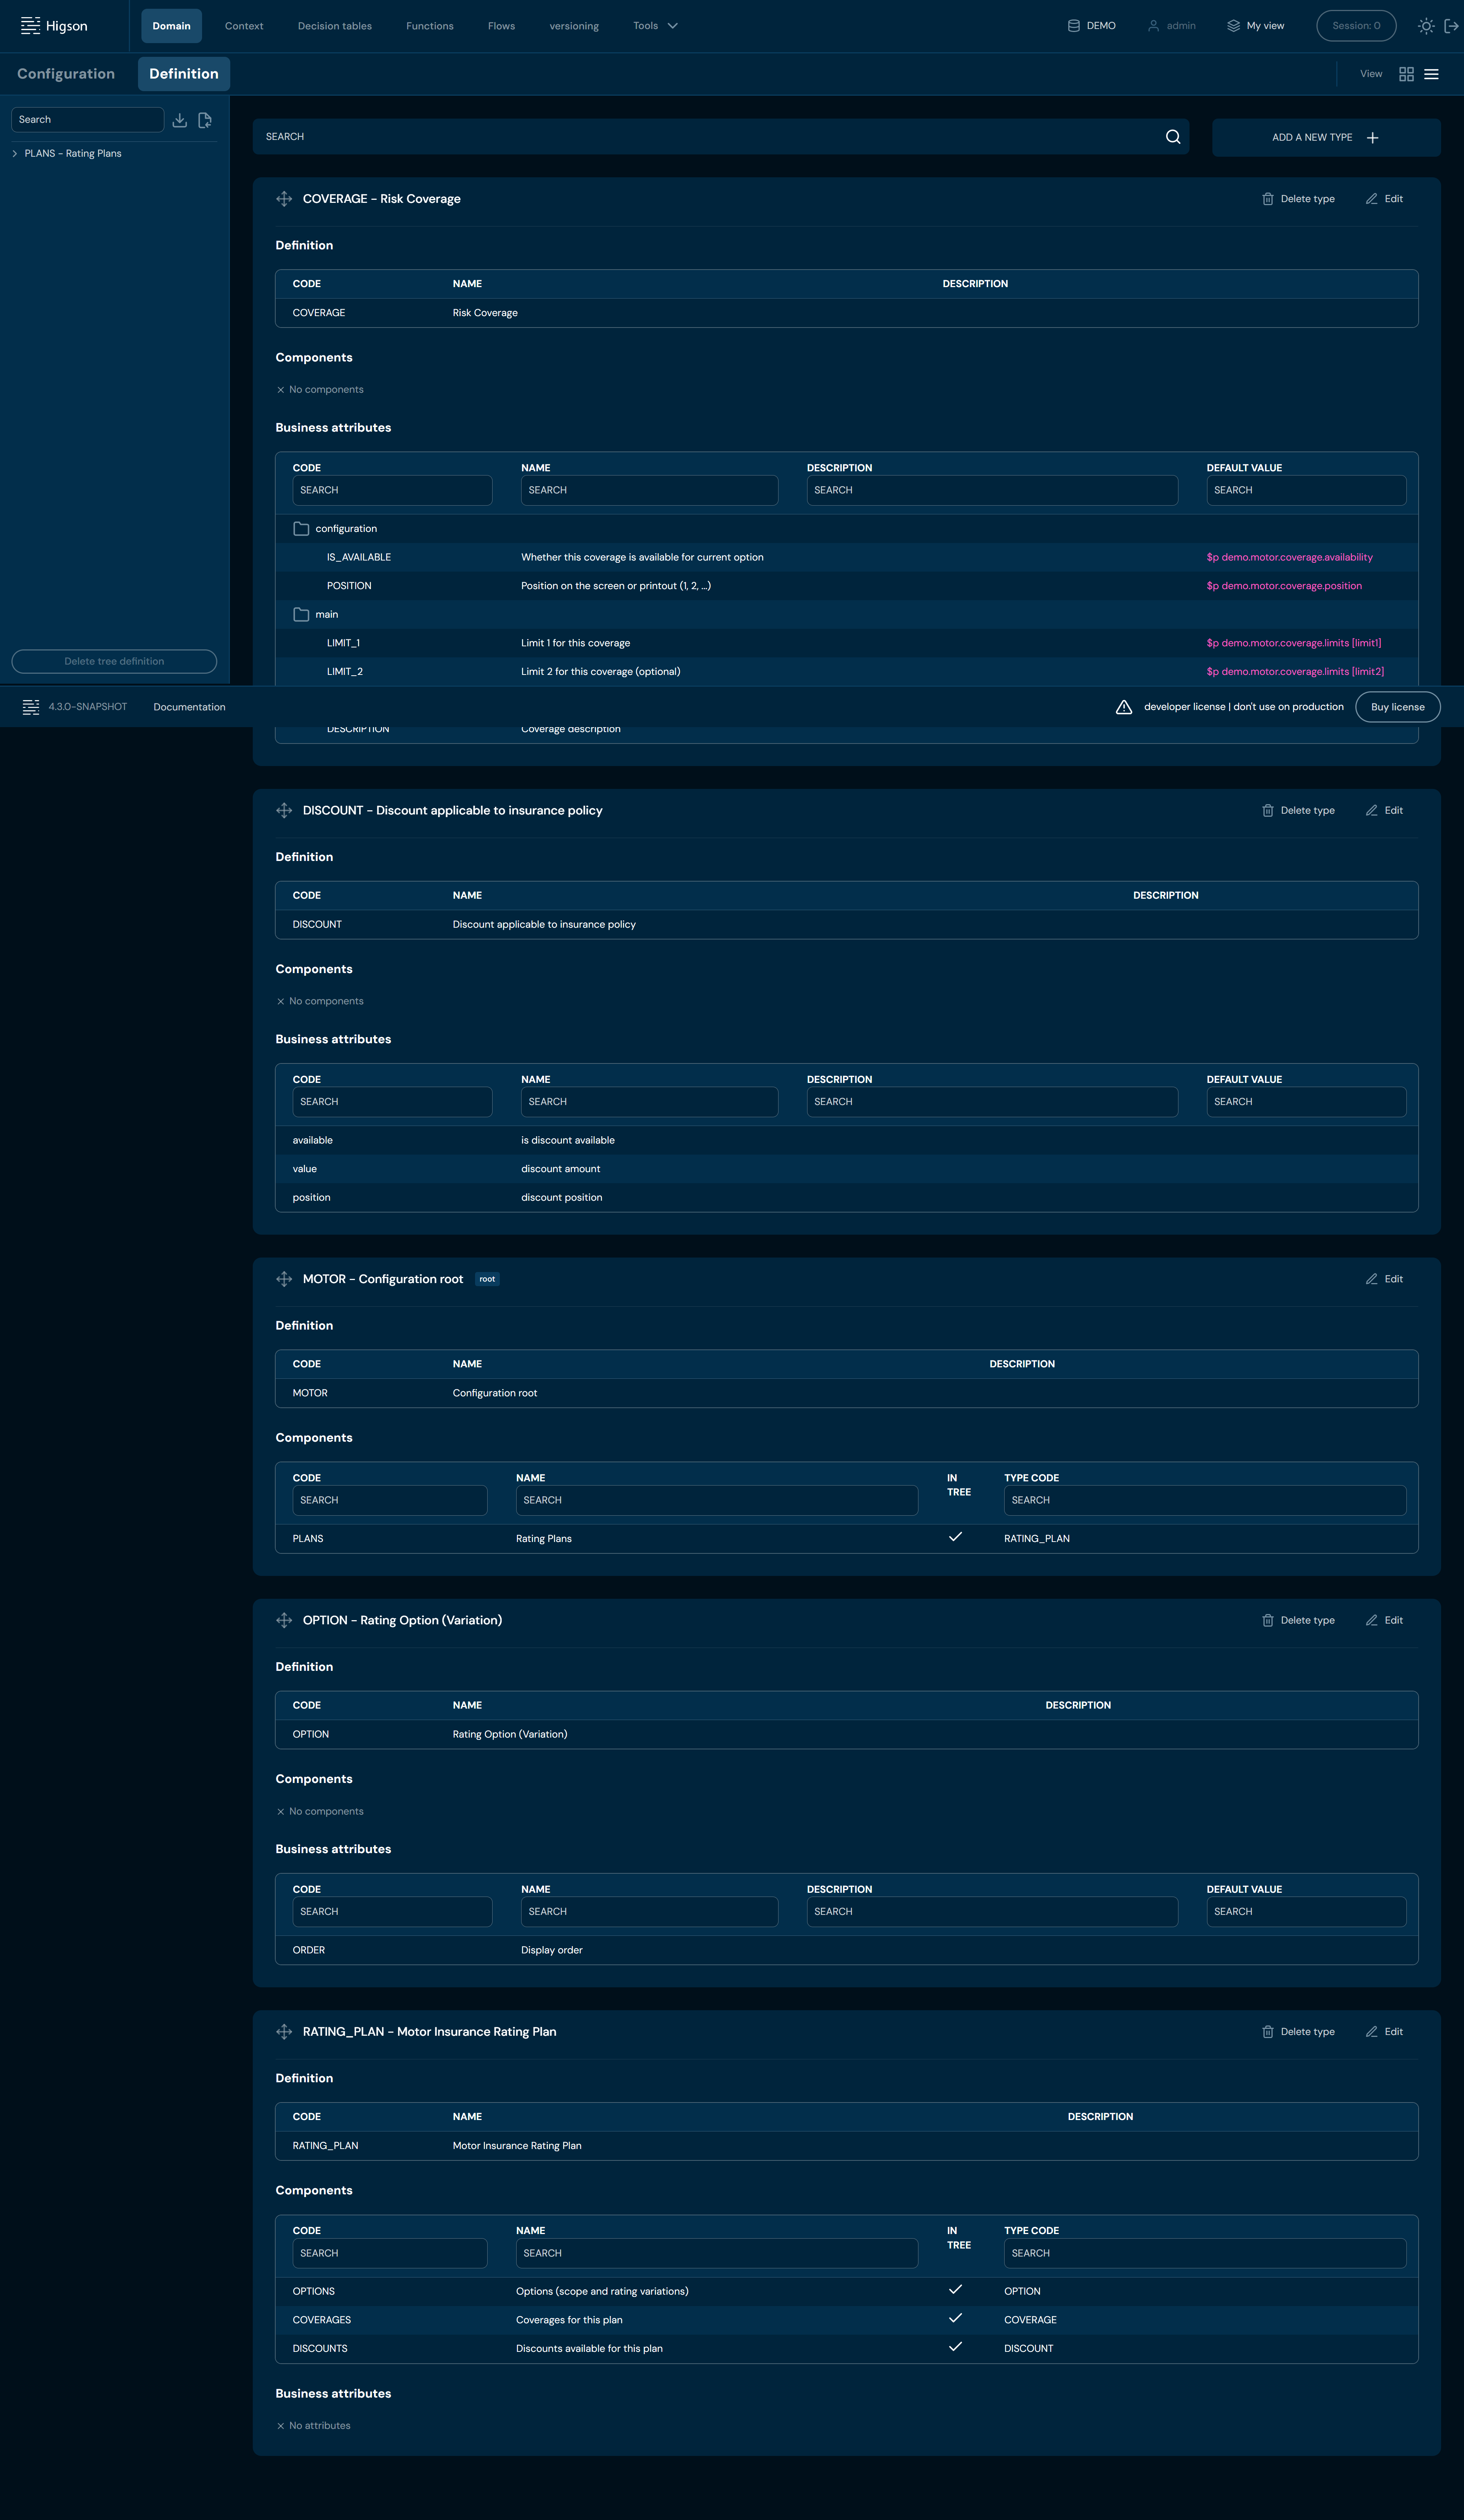
List View of Definition Types#
Add a New Type#
If you want to add a new definition type, follow these steps:
-
Choose Domain in Main toolbar.
-
Choose Definition tab.
-
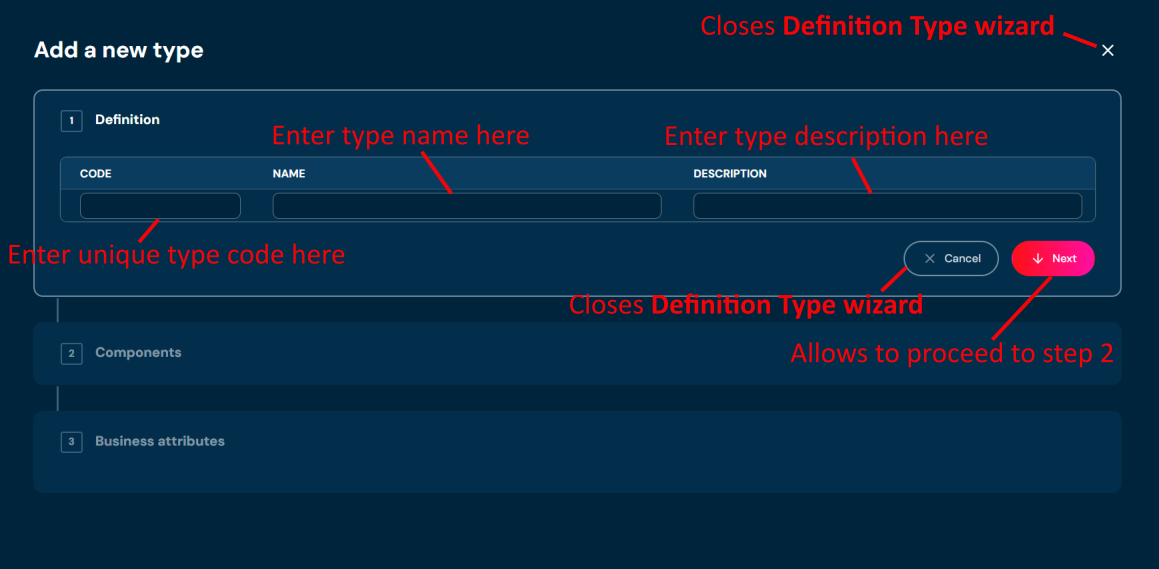
Choose ADD A NEW TYPE +
a. Choosing ADD A NEW TYPE + opens a step-by-step Definition Type wizard.
-
In step 1. Definition, you:
a. need to provide unique Type code. Code can contain only characters from collection a-z; 0-9; “-”; “_” and it can’t start with “-”.
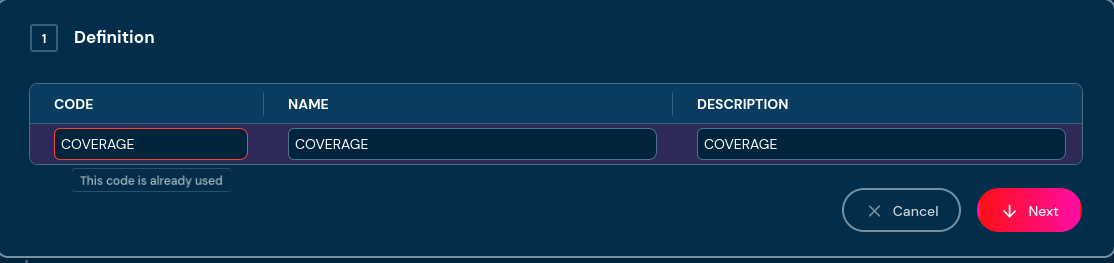
i. If entered code in step 1. Definition is already used by another type, then validation error will appear.
b. need to provide Type name. Name can contain only characters from collection a-z; 0-9; “-”; “_” and it can’t start with “-”.
c. can provide Type description. Description cannot contain characters like “<”; “>”; “@”; “$”; “|” and it * cannot* start with any “special character”, for example “!”
d. If you change your mind and don’t want to create a new type, you can choose Cancel in step 1. Definition.
-
Choose Next.
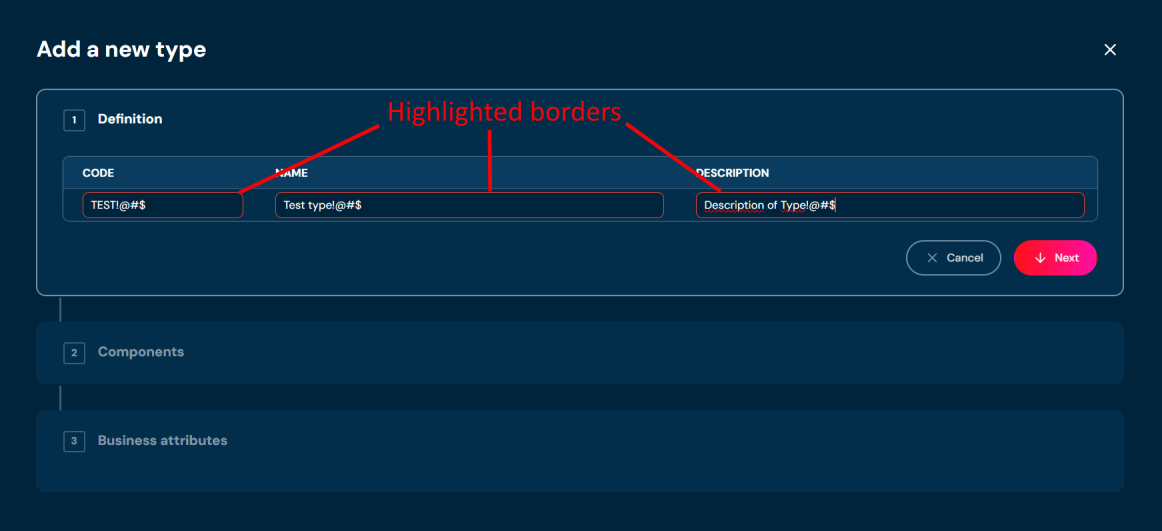
a. If you enter illegal characters in code, name or description field, then borders will be highlighted with red color, and you will not be able to proceed to the next step. Hover mouse over the field to see tooltip with more details.
-
In step 2. Components you may add/duplicate/remove components. This data is not necessary to save a type.
a. If you decide to add a component, you must provide code (unique), name and type code.
i. Type code is a drop-down list with codes of all types
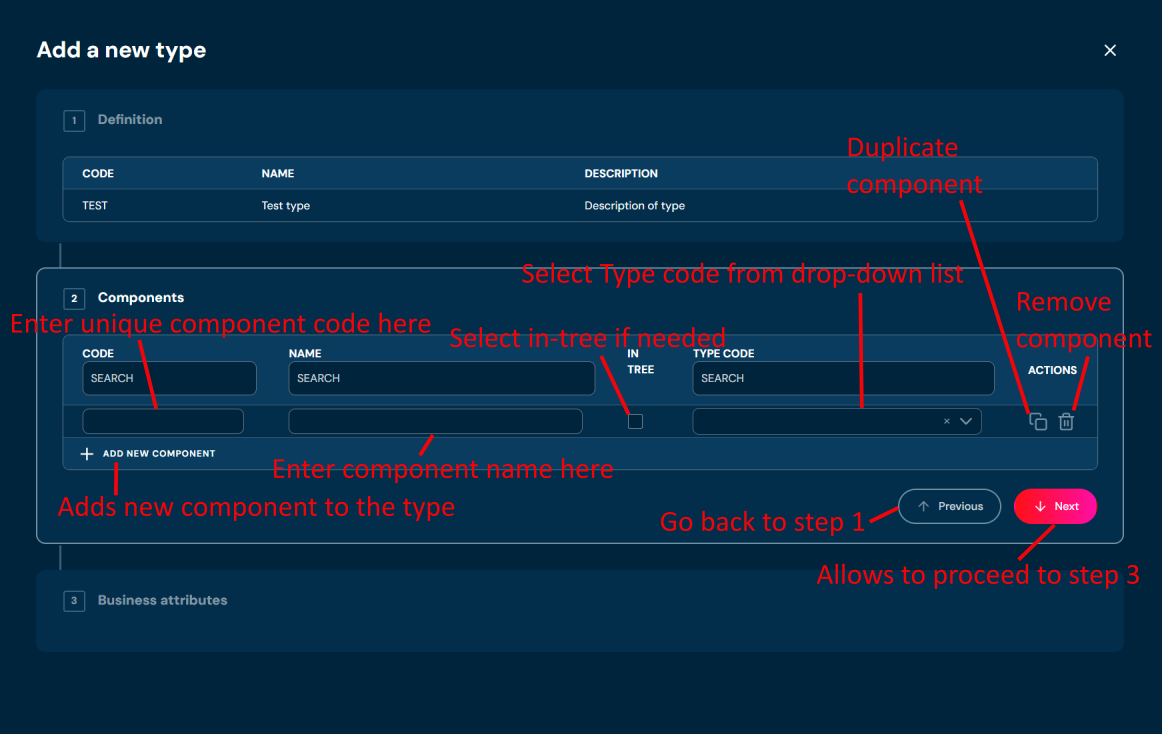
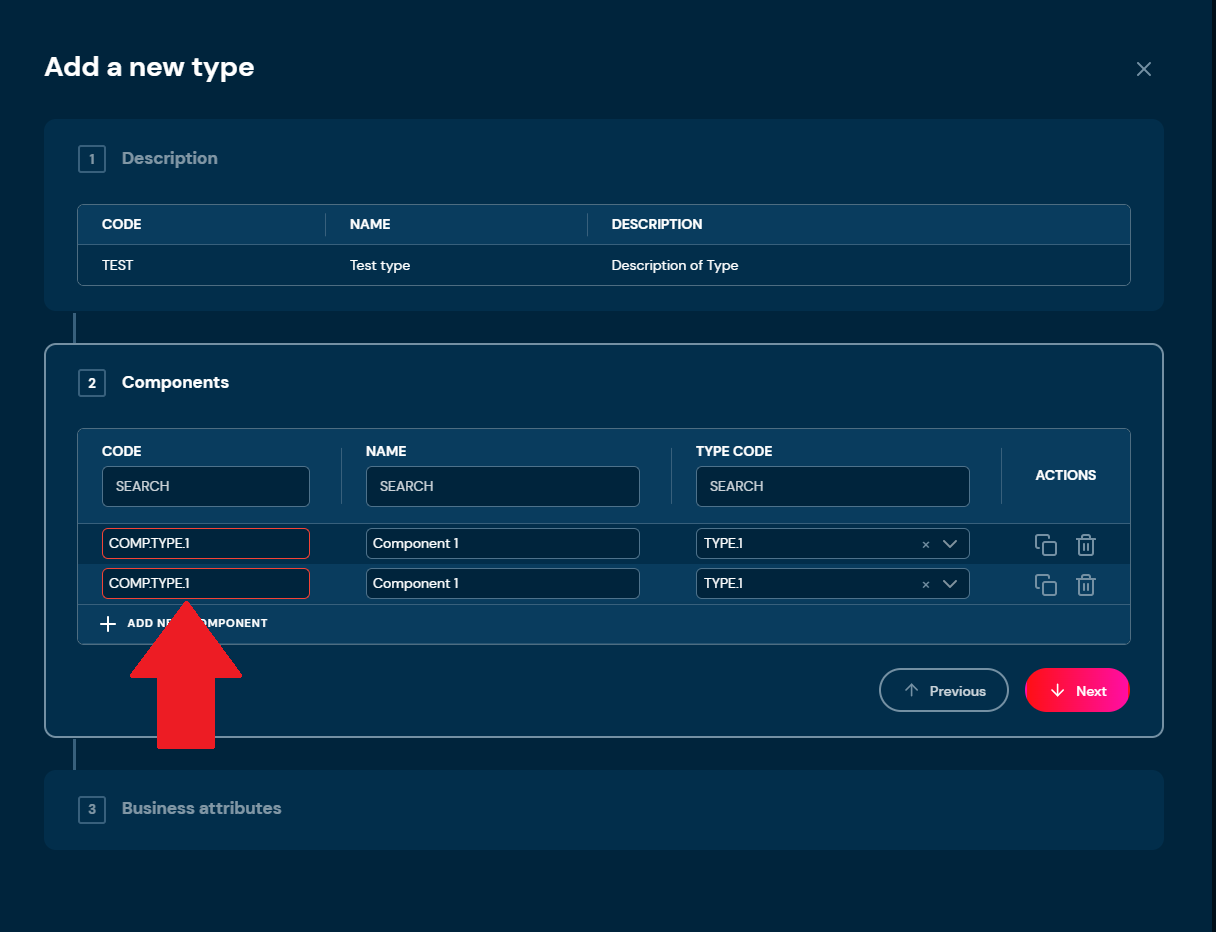
b. If you entered the same code in at least two components, then borders will be highlighted with red color, and you will not be able to proceed to step 3. Business attributes
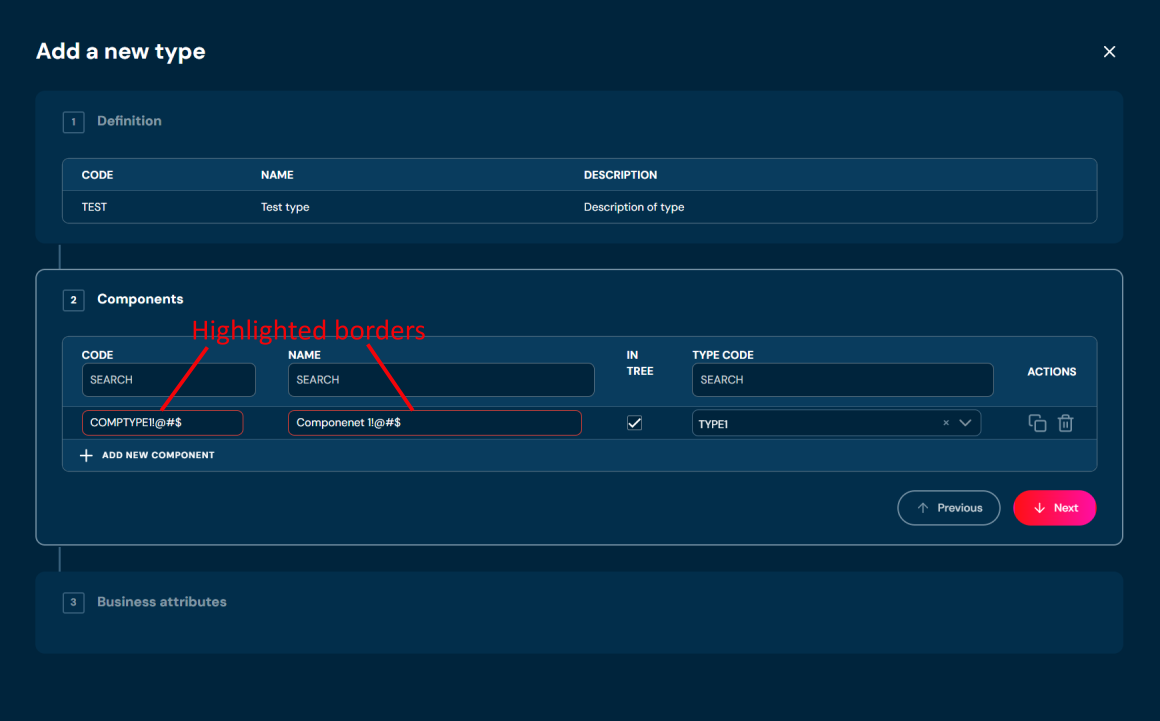
c. If you enter illegal characters in code or name field, then borders will be highlighted with red color, and you will not be able to proceed to the next step. Hover mouse over the field to see tooltip with more details.
d. If you choose Previous you will go back to step 1. Definition
-
Choose Next.
-
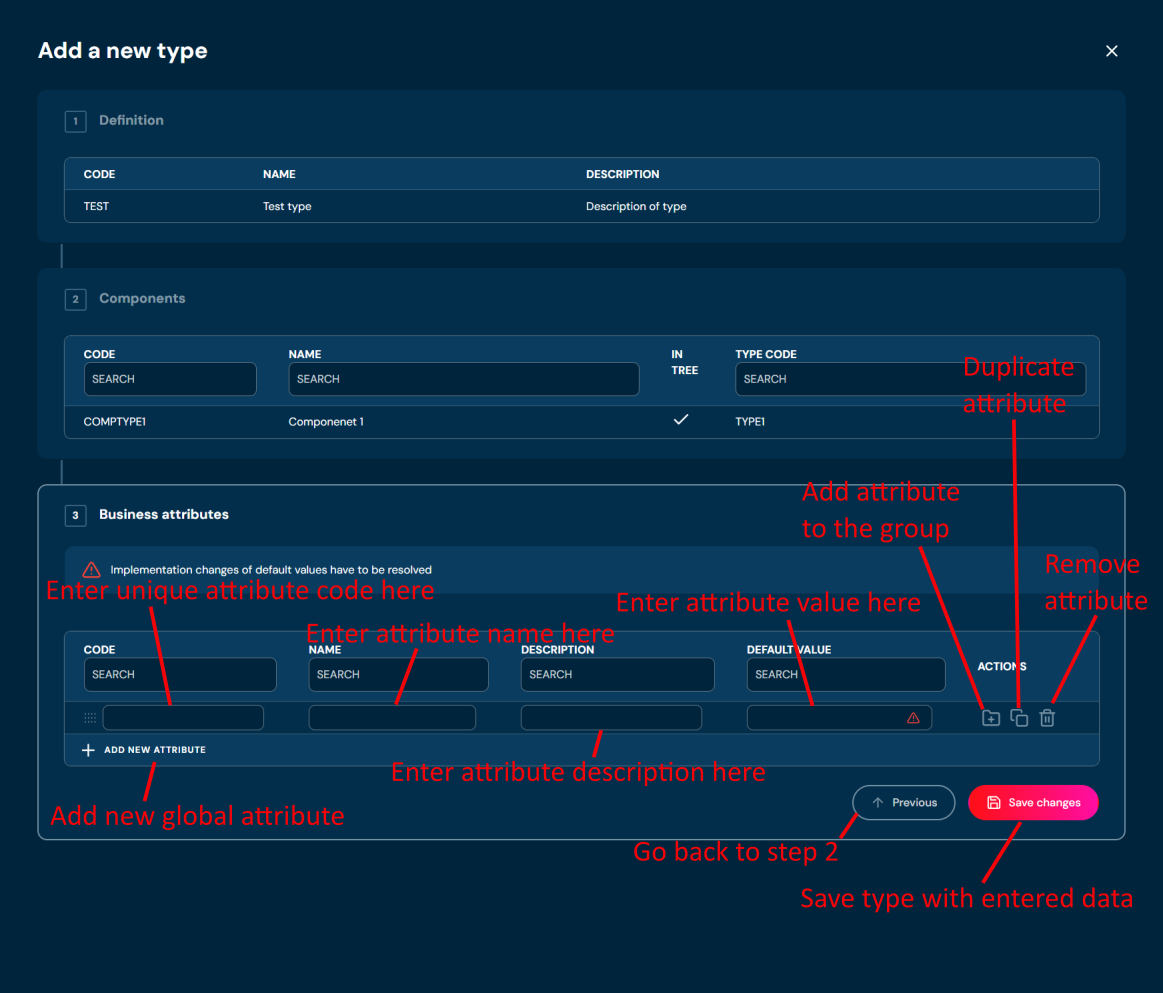
In step 3. Business attributes you may add/duplicate/remove global attributes. This data is not necessary to save a type.
a. If you decide to add business attributes, you must provide code unique name. Providing default value is optional.
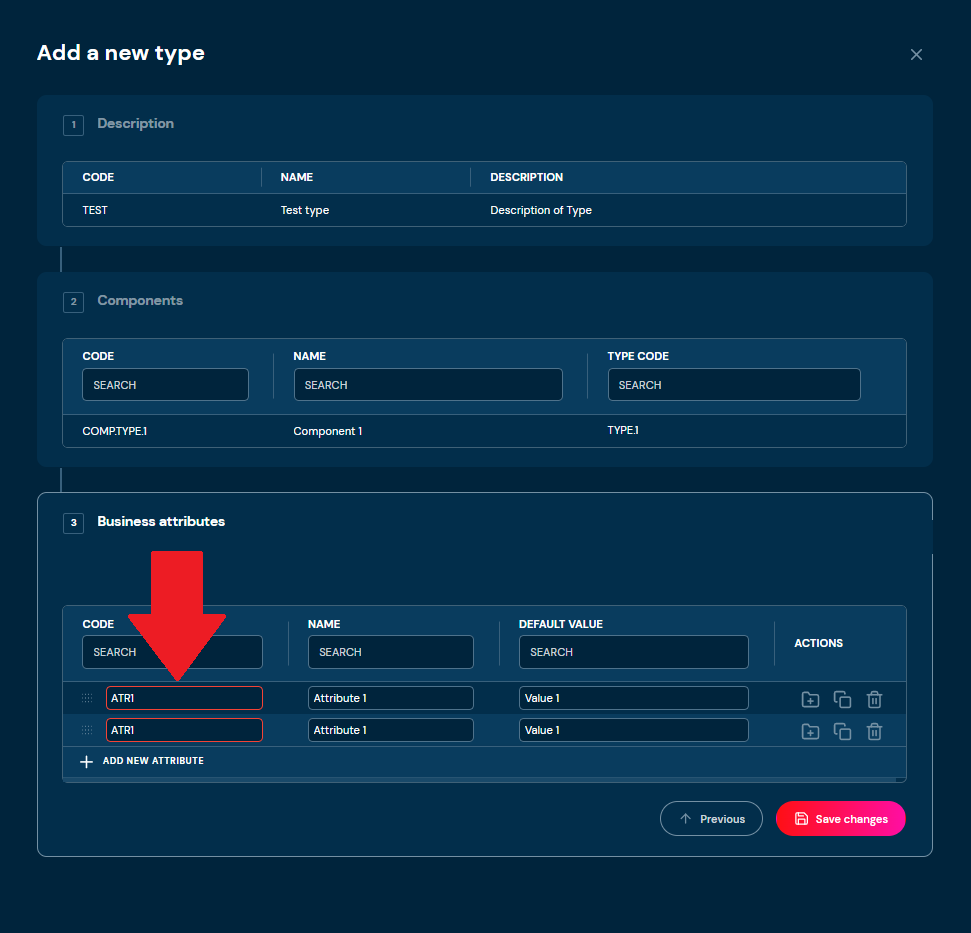
b. If you entered the same code in at least two attributes, then borders will be highlighted with red color, and you will not be able to save a type.
-
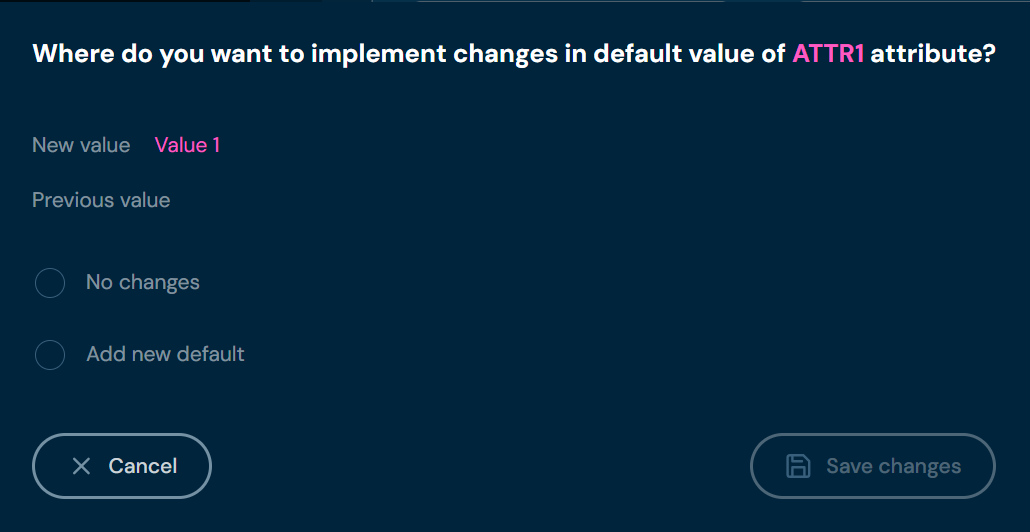
In Default Value field, you must click on red exclamation mark to indicate where do you want to implement changes.
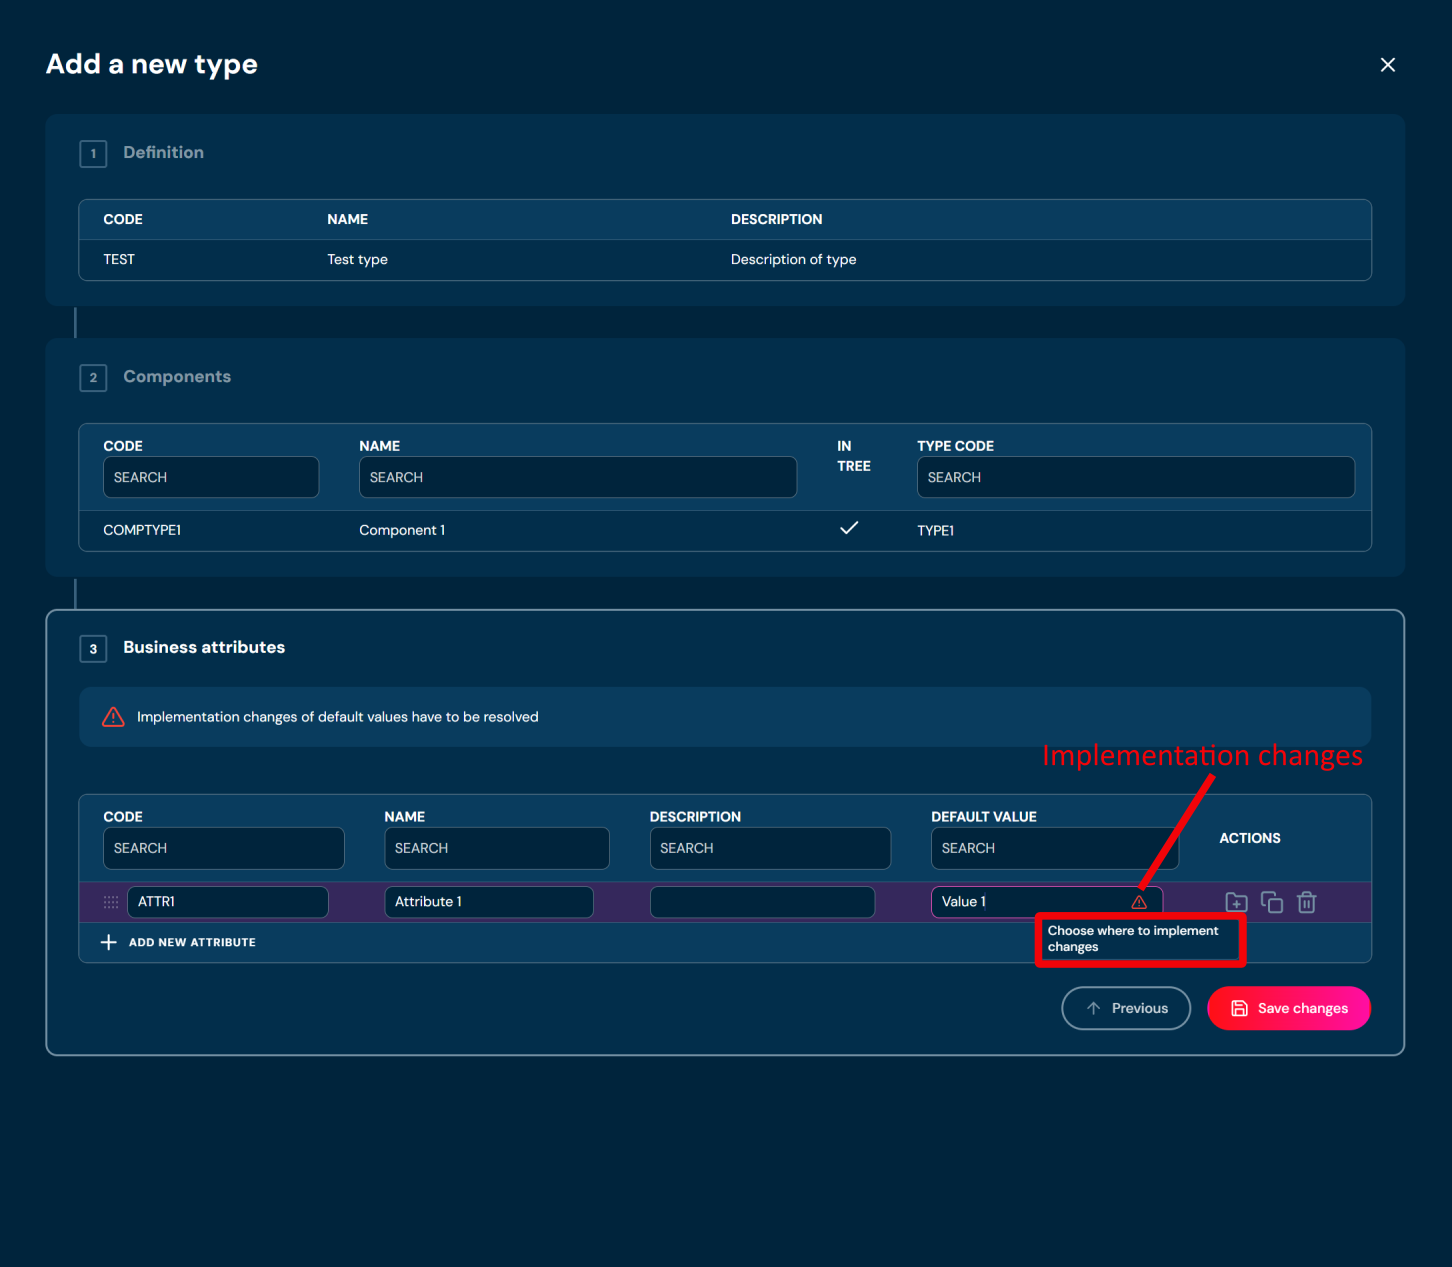
a. The pop up will appear, choose one of the available options and click Save changes
-
Choose Save changes.
Download Domain Definition#
If you want to download Domain Definition, follow these steps:
-
Choose Domain in Main toolbar.
-
Choose Definition tab.
-
Choose Download Domain Definition in Definition tree.
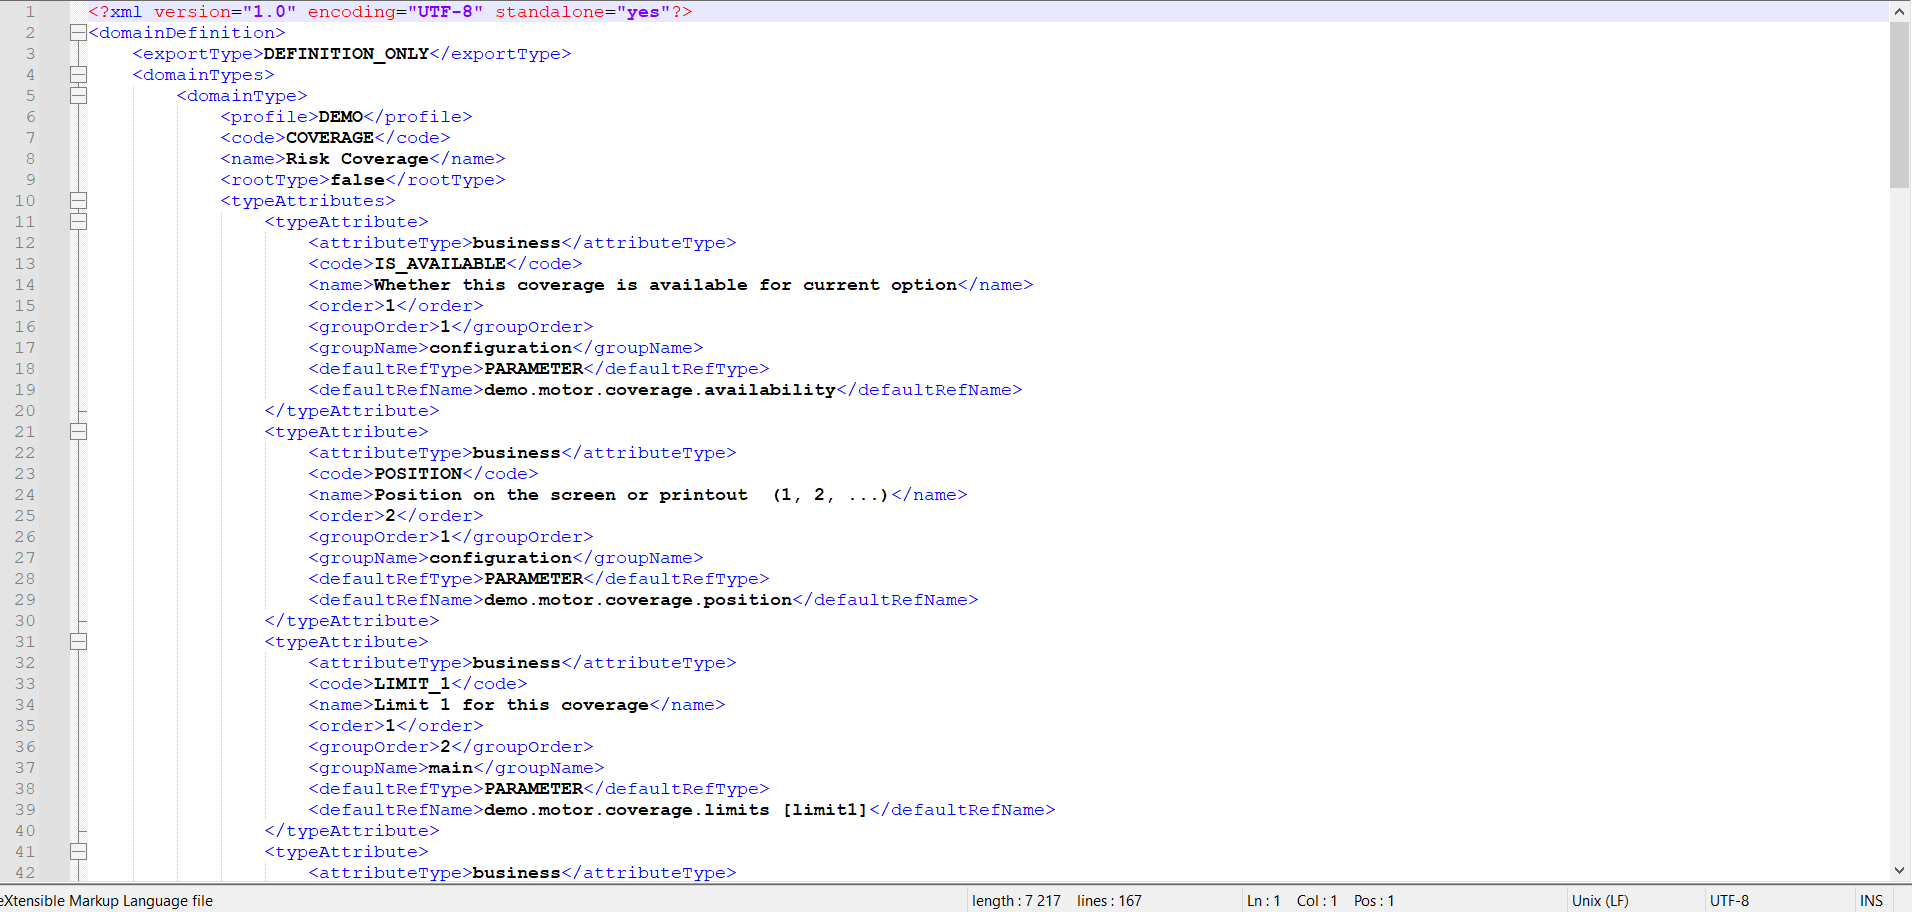
a. Choosing Download Domain Definition downloads an XML file that contains all definition types and all dependencies between definition types. Example file:
Upload Domain Definition#
If you want to upload Domain Definition, follow these steps:
-
Choose Domain in Main toolbar.
-
Choose Definition tab.
-
Choose Upload Domain Definition in Definition tree.
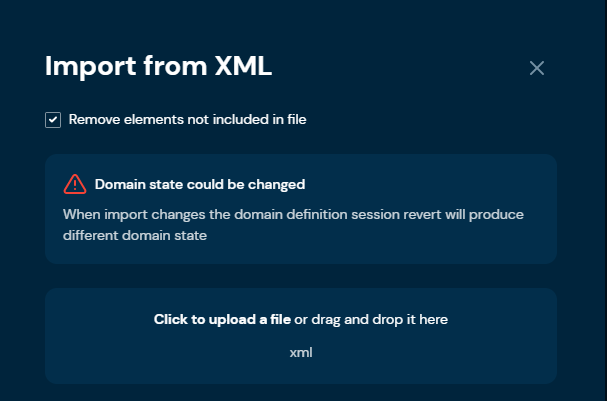
a. Choosing Upload Domain Definition brings up Import from XML screen.
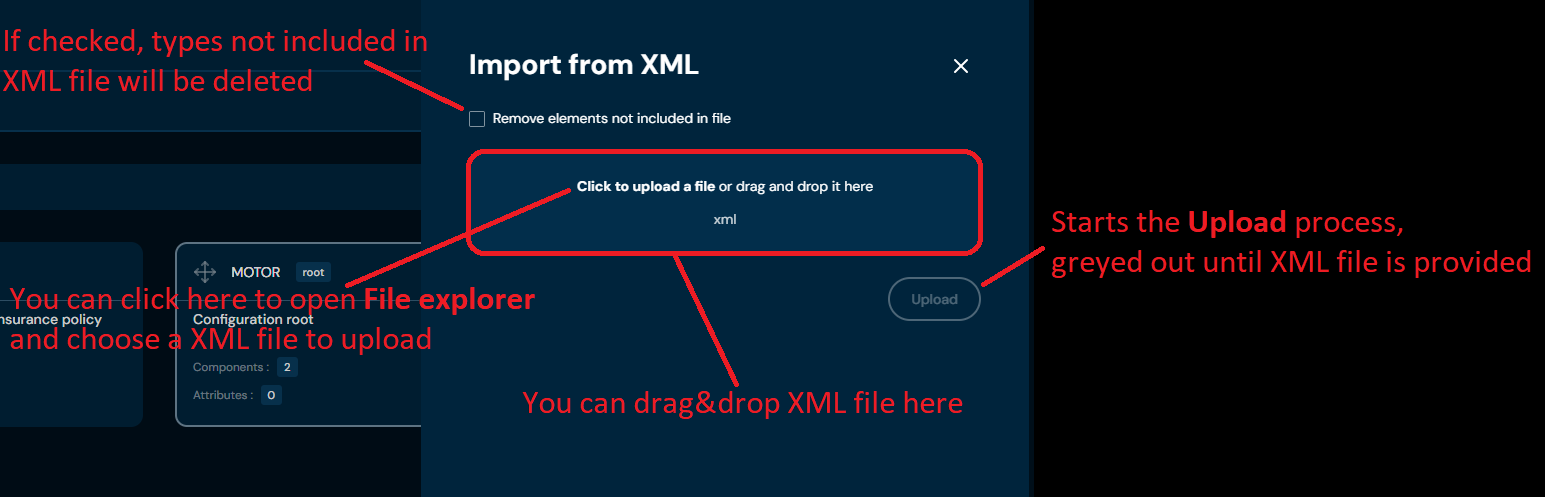
b. If you select checkbox Remove elements not included in file, then warning will appear.
-
Drag&drop desired file or Click to upload a file and choose file in File explorer.
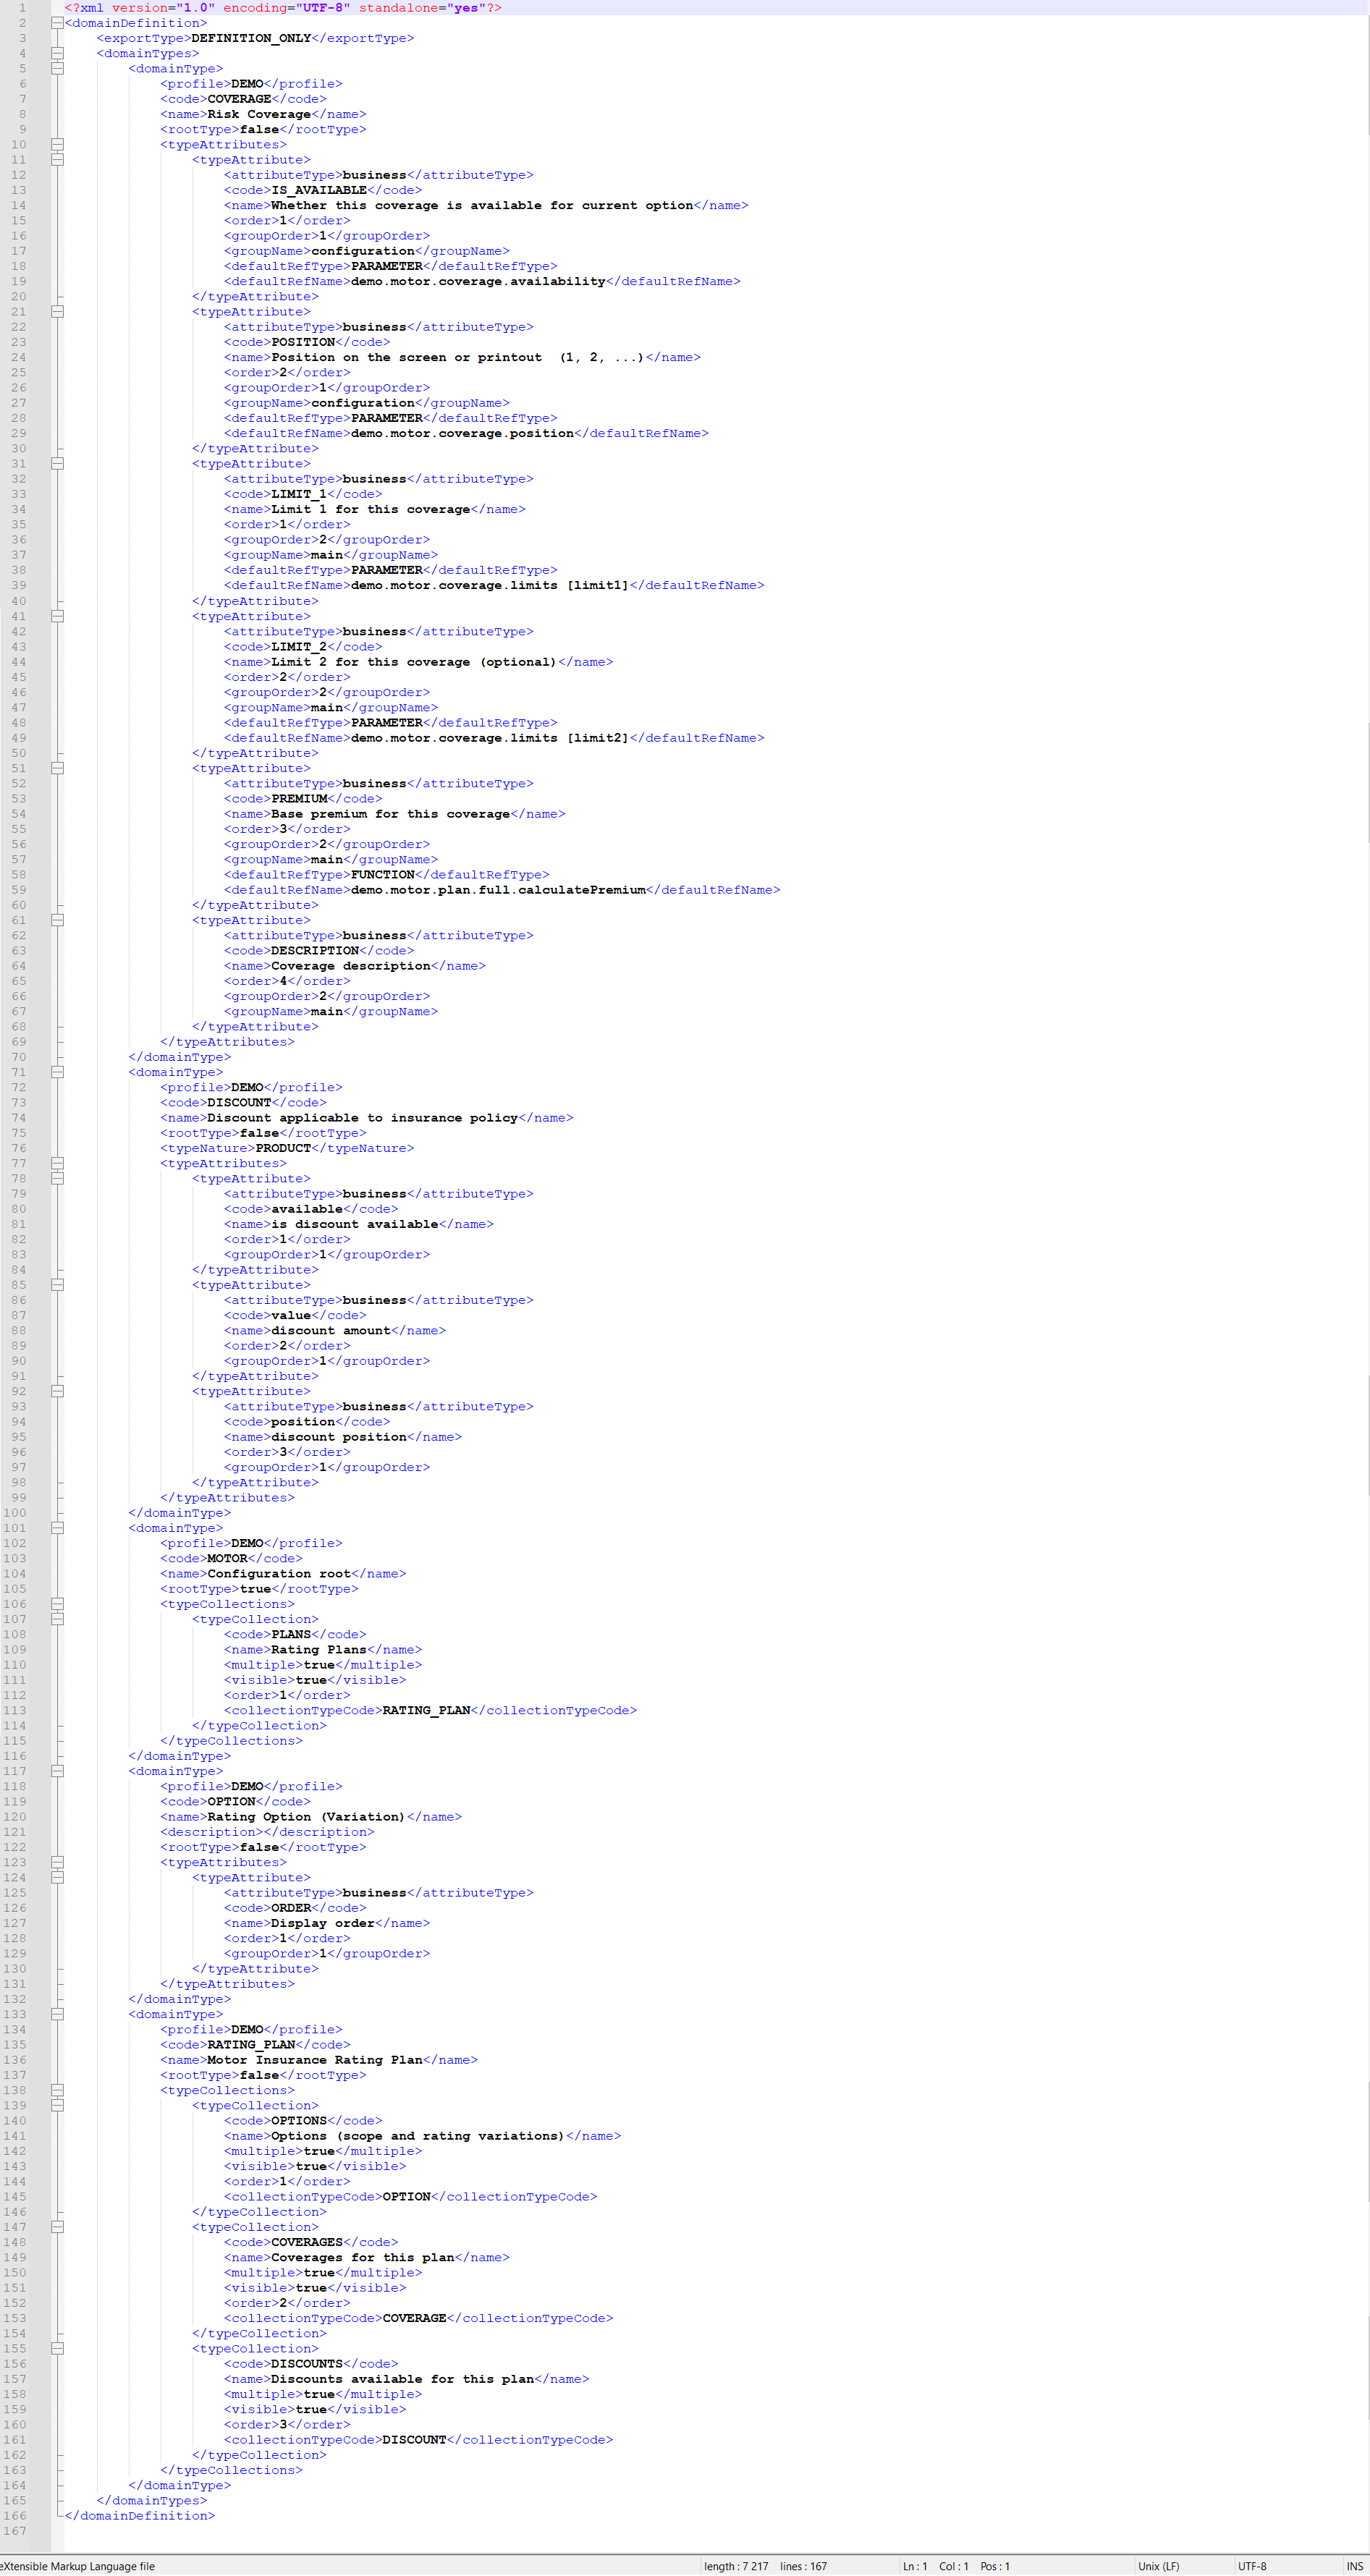
a. Correct XML file should look like this:
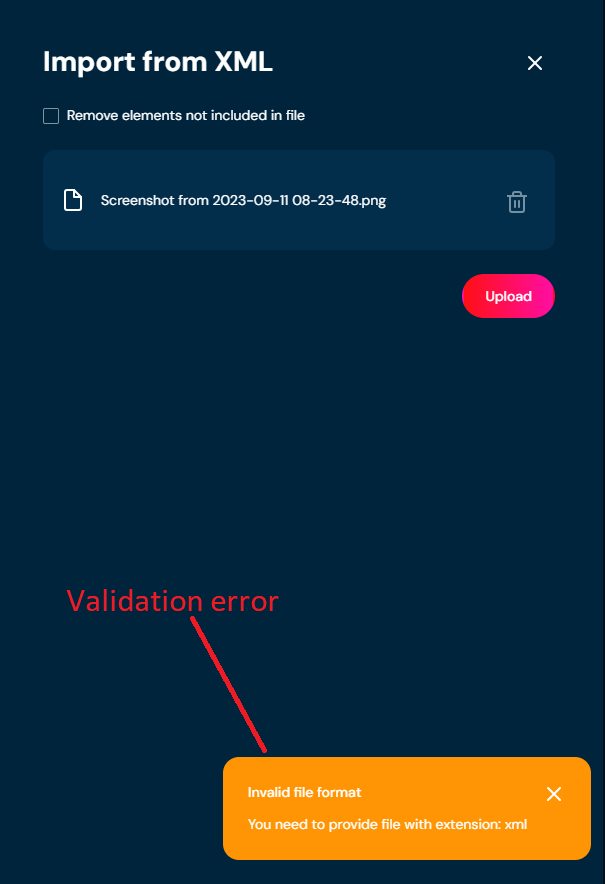
b. If you choose a file with extension other than XML, then validation error will pop up
-
Choose Upload.
-
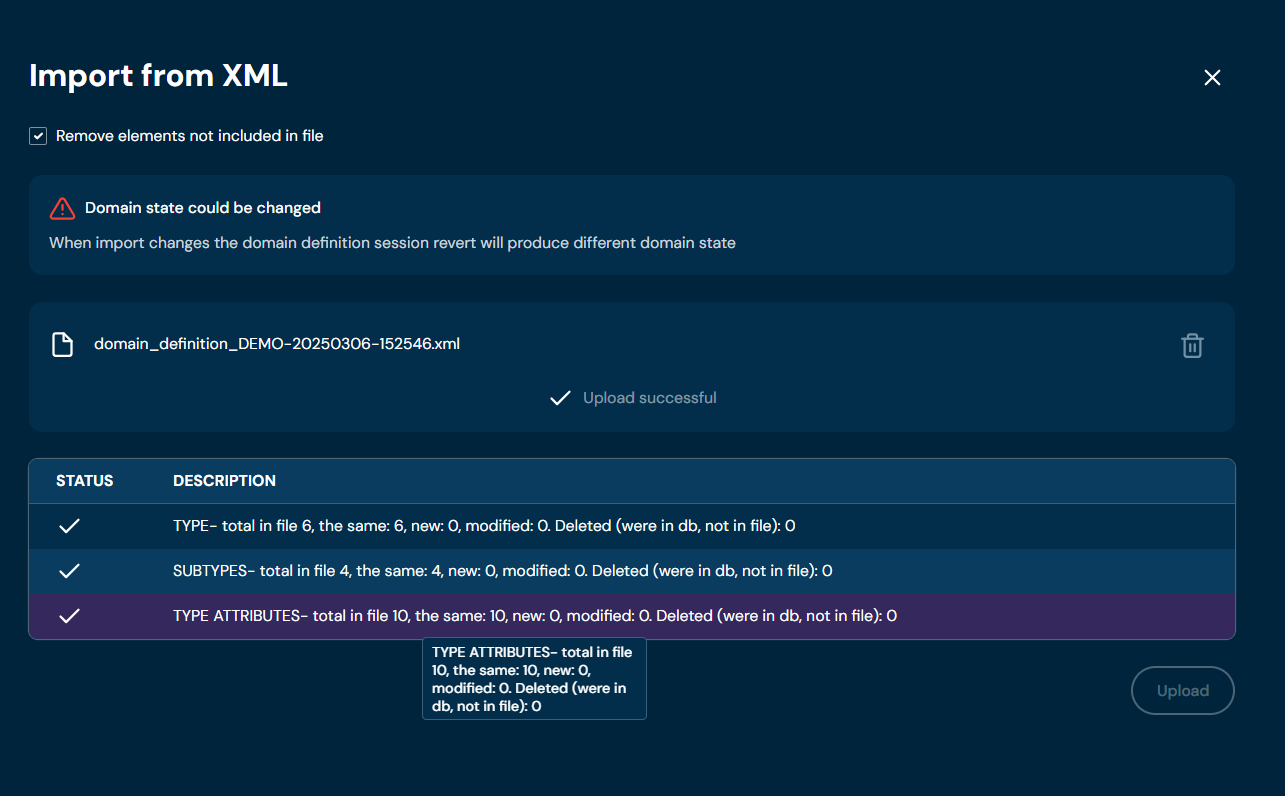
The domain definition is uploaded correctly when the message Upload successful appears, as well as a report containing import statistics.
a. If validation error occurs (see above), then an upload process is being aborted.
b. If you checked checkbox Remove elements not included in file in step 3, then adequate information about changes will appear after uploading a file.
Delete Definition Tree#
If you want to delete the entire Domain Definition, follow these steps:
-
Choose Domain in Main toolbar.
-
Choose Definition tab.
-
Check the status of Delete definition tree buton:
a. If button is greyed out, continue from step 4. Before deleting entire domain definition, you need to delete entire domain configuration first and publish session.
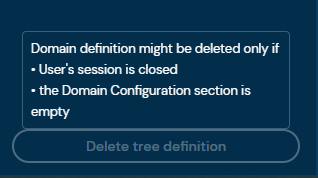
b. If buton is available, continue from step 11.

-
Choose Configuration tab.
-
Choose Delete tree configuration.
a. After choosing Delete tree configuration button, confirmation pop-up will appear.
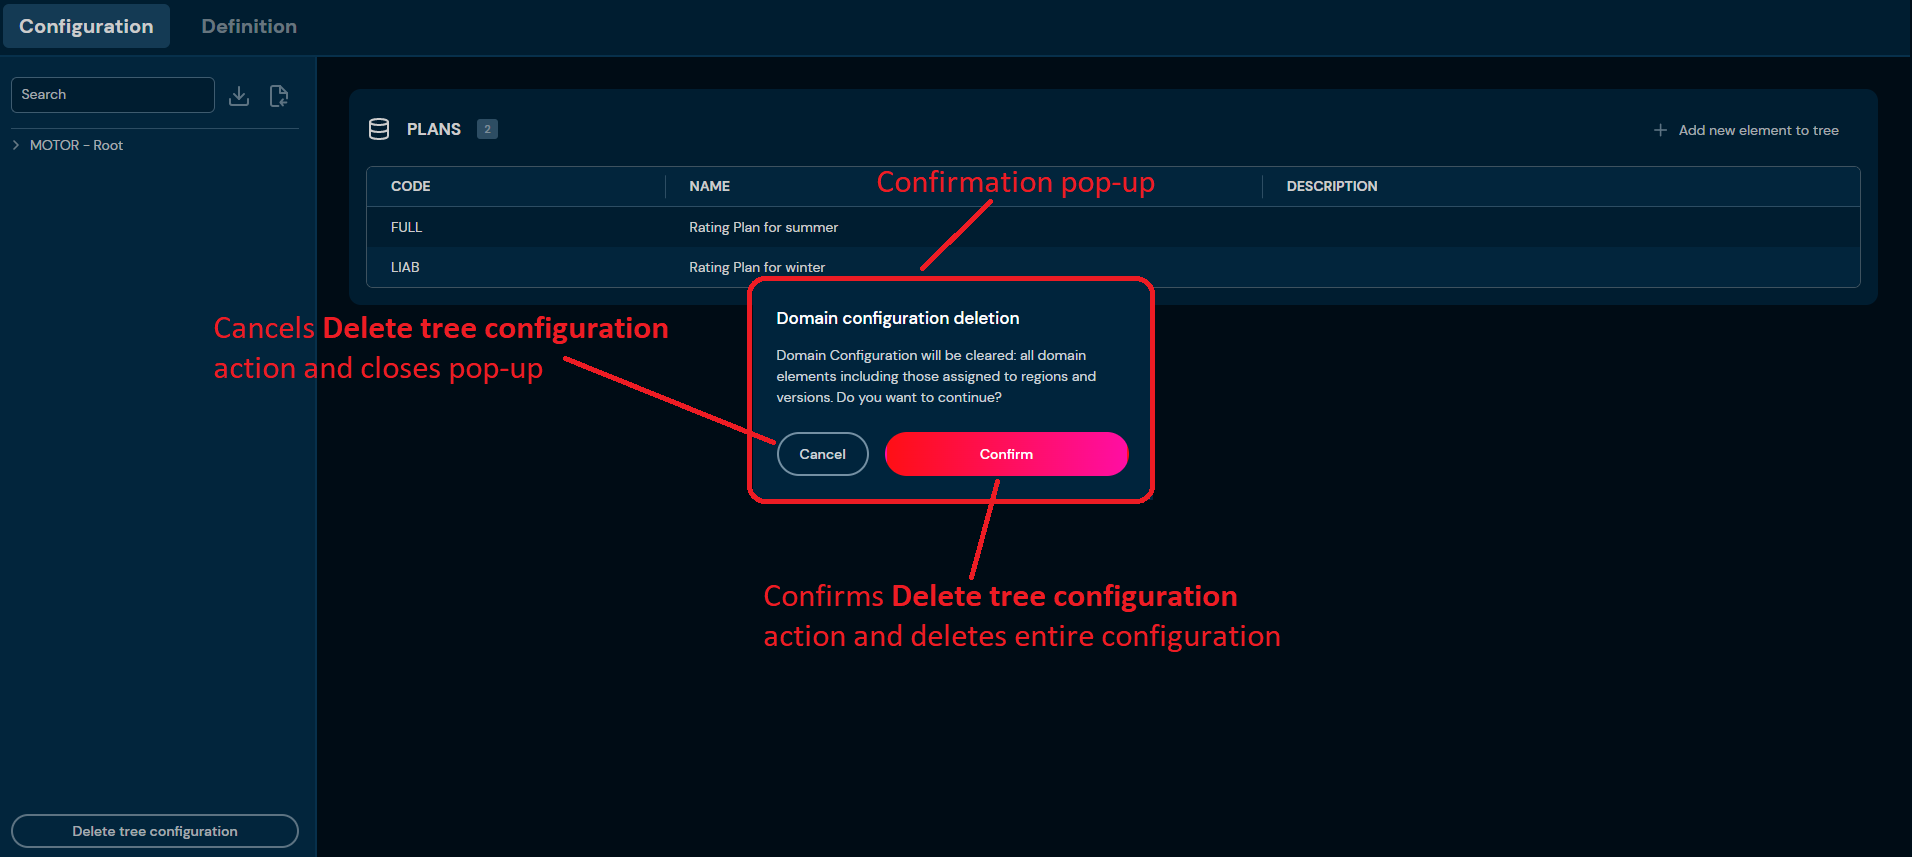
-
Choose Confirm.
a. The Entire Domain Configuration is deleted from the environment.
-
Choose Session.
a. After choosing Session button, Session preview screen will appear.
-
Choose Publish changes.
-
Choose Domain in Main toolbar.
-
Choose Definition tab.
-
Choose Delete definition tree button.
a. After choosing Delete tree configuration button, confirmation pop-up will appear.
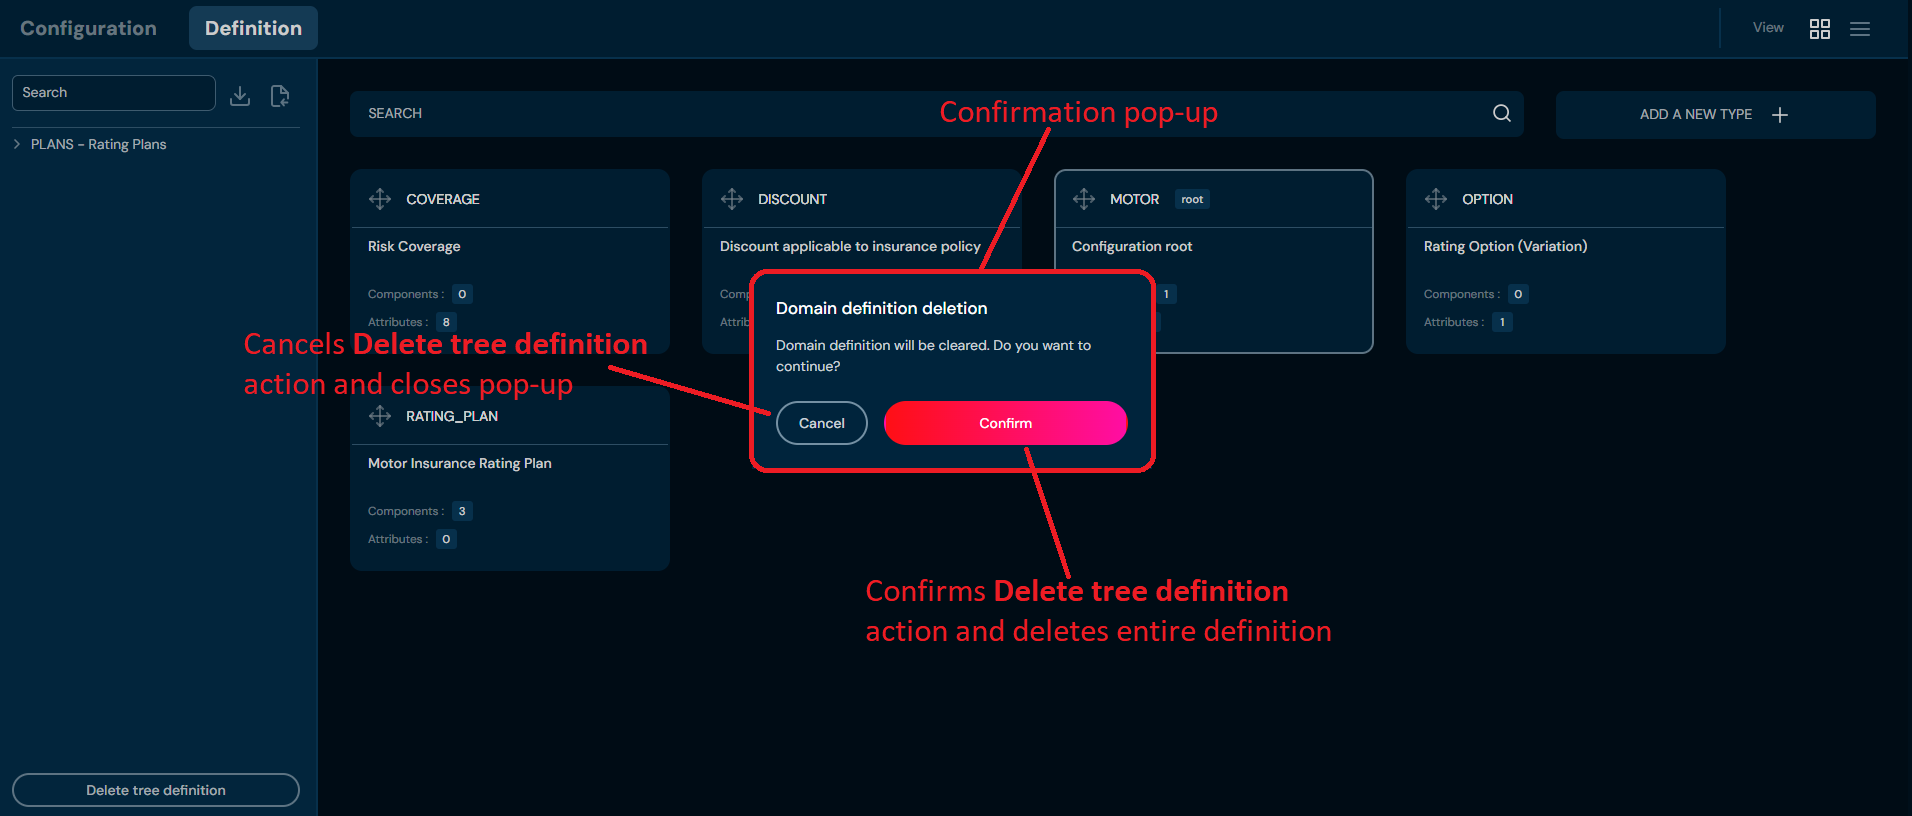
-
Choose Confirm.
a. The Entire Domain Definition is deleted from the environment.
Definition Type Details Screen#
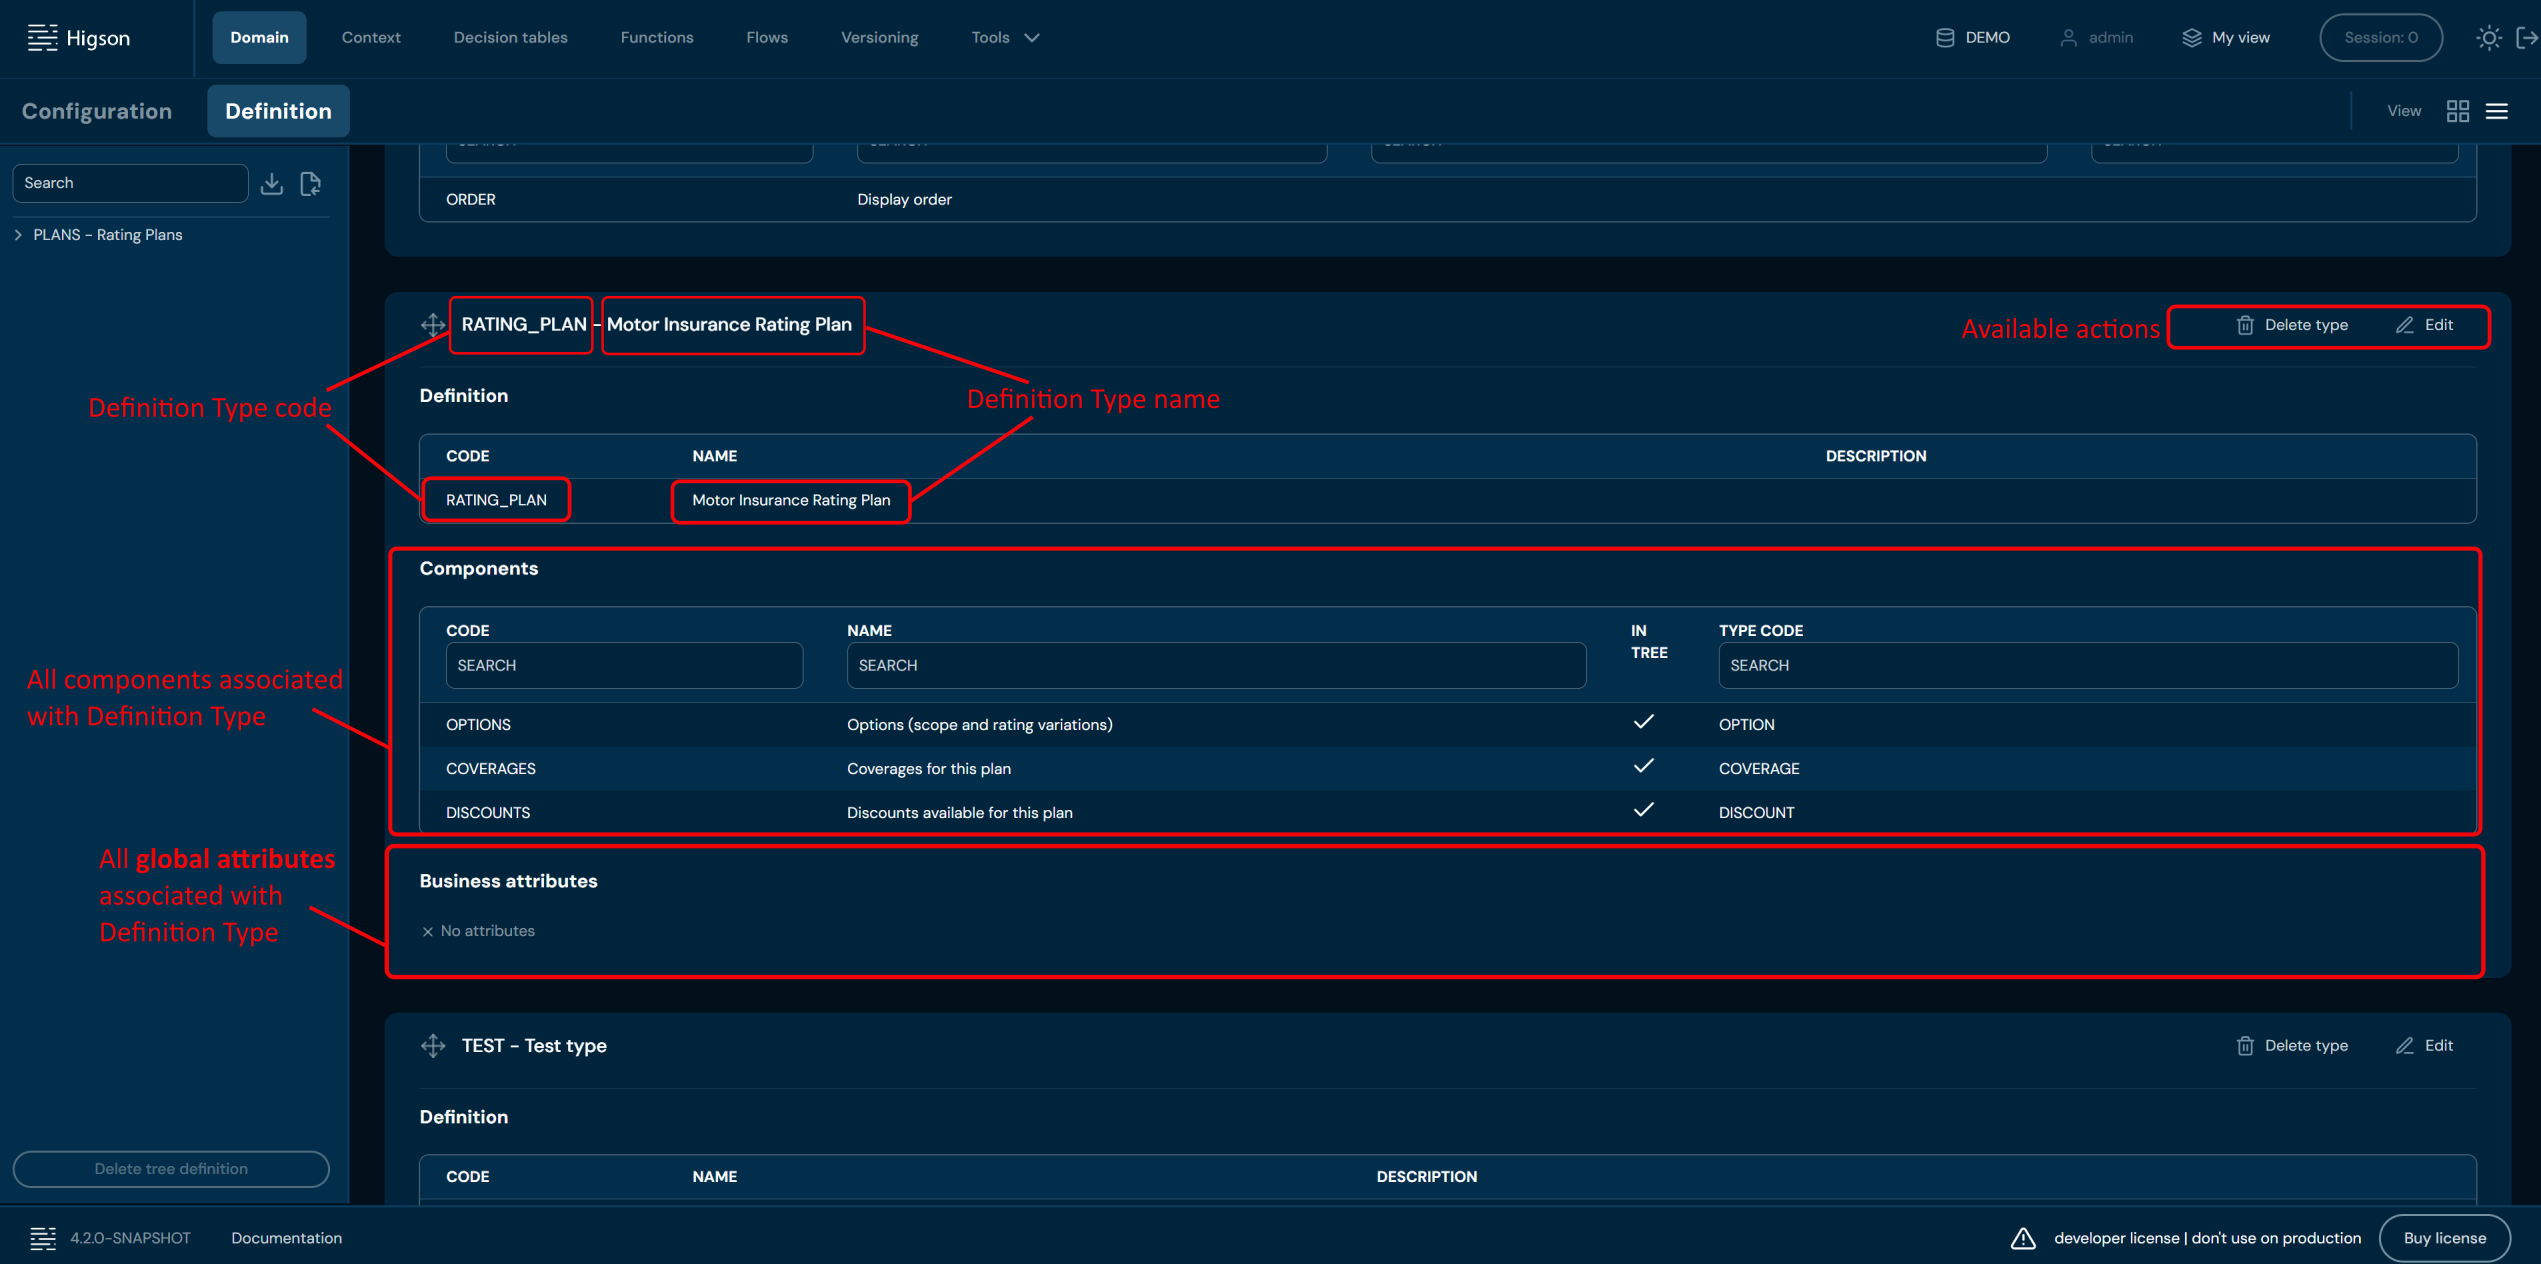
You can access Definition Type details by left-clicking on the specific type tile in the Domain Definition tab. You can also see Definition Type details by changing from Tiles view to List view.
Tiles view:
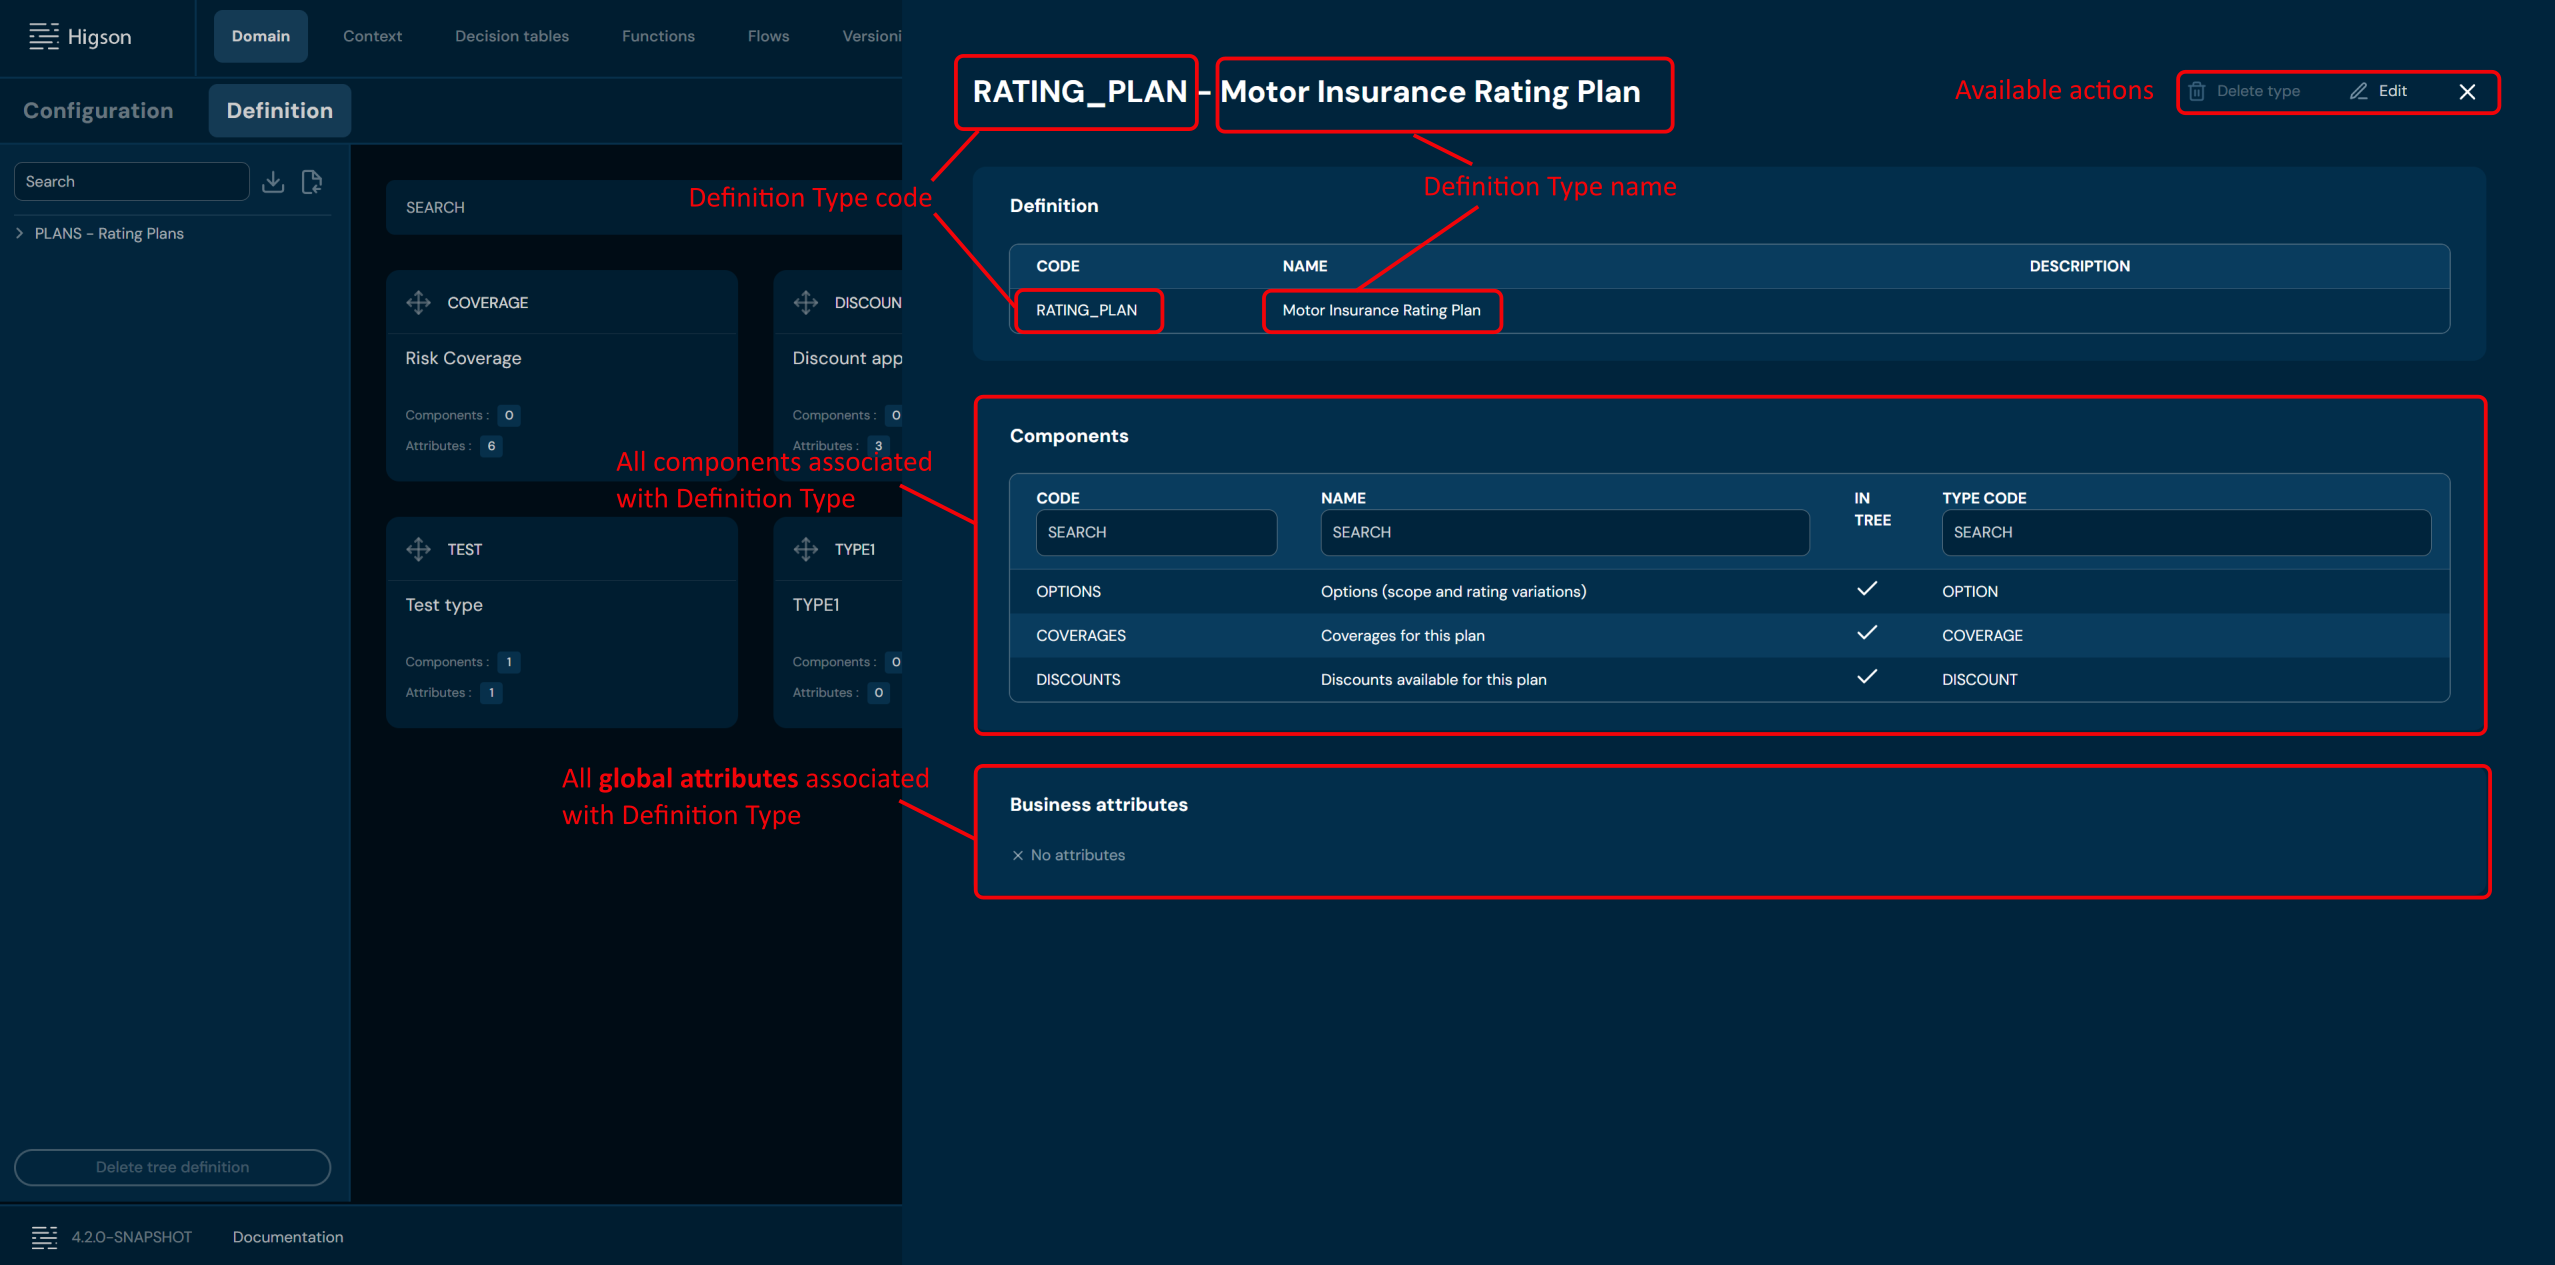
List view:
You can see Available actions for the Definition Type below:
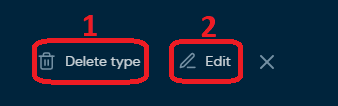
| No. | Action | Description |
|---|---|---|
| 1. | Delete type | Deletes definition type. To learn more about deleting definition type, go here. |
| 2. | Edit | Enables definition type edit mode. To learn more about editing definition type, go here |
Delete Type#
If you want to delete a specific Definition Type, follow these steps:
-
Choose Domain in Main toolbar.
-
Choose Definition tab.
-
Left-click on a definition type you wish to delete.
a. Left-clicking on a definition type brings up Definition Type details screen.
-
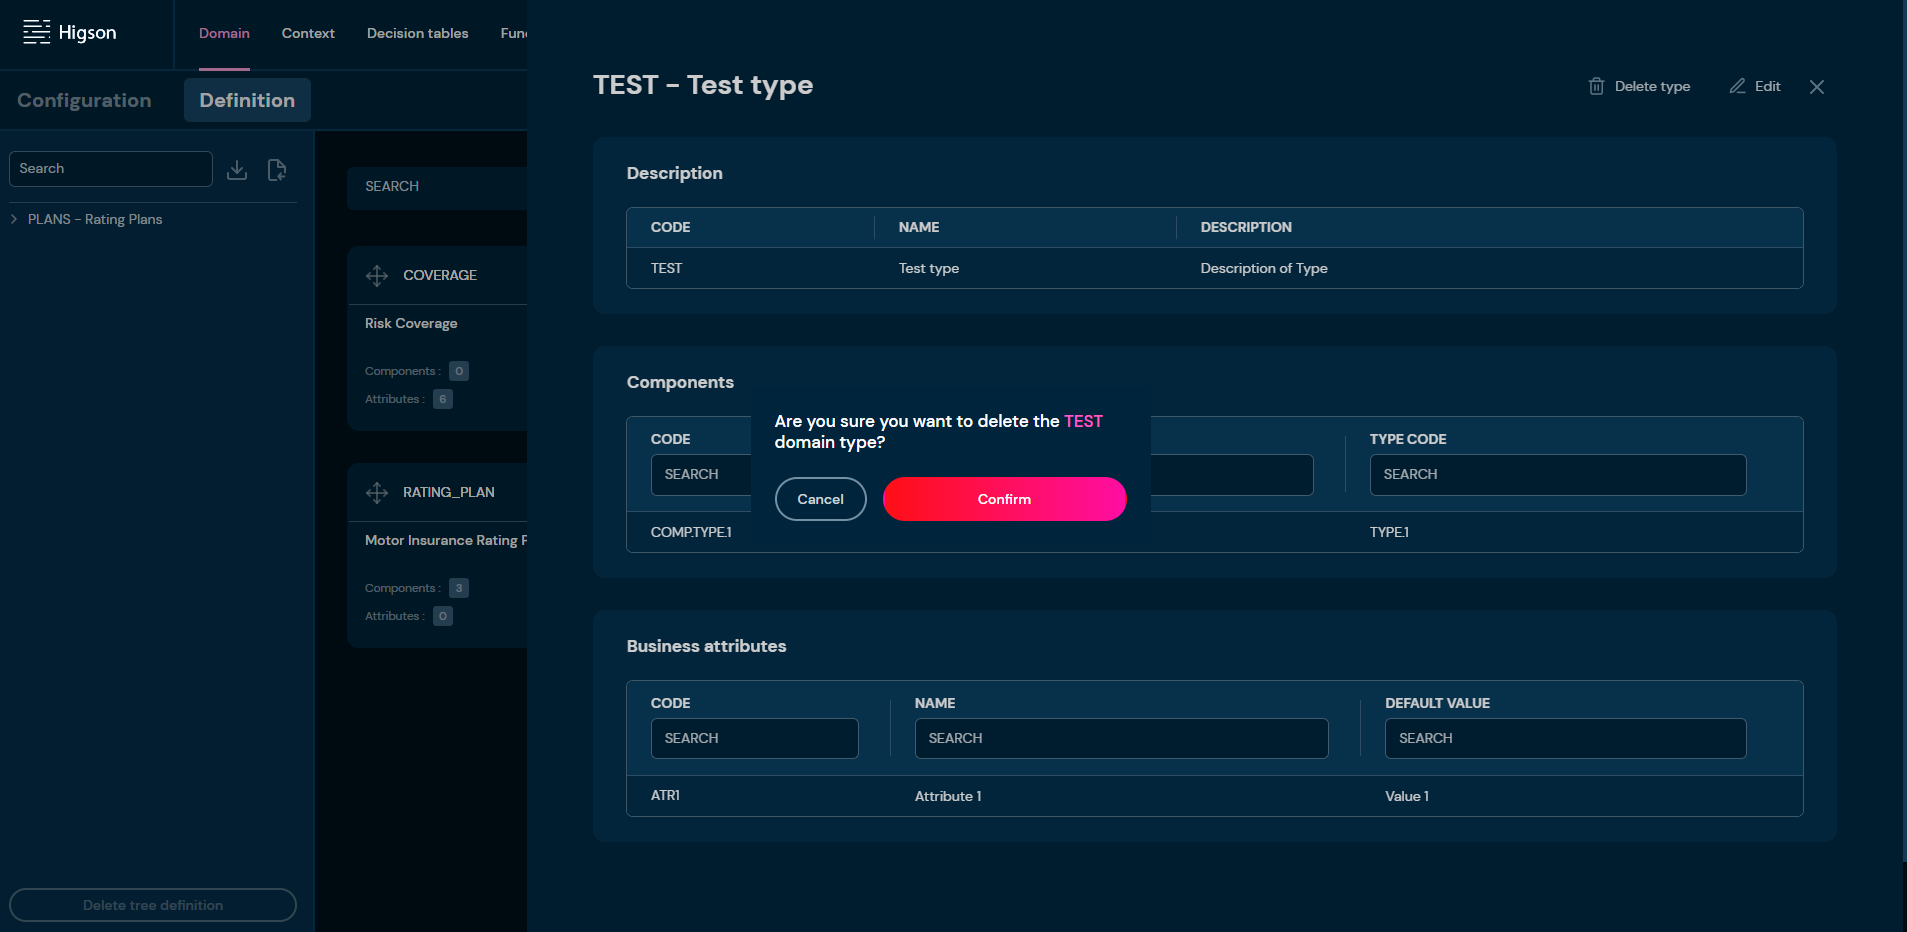
Choose Delete type.
a. After choosing Delete type action, confirmation pop-up will appear.
-
Choose Confirm.
a. Definition type is deleted from the environment.
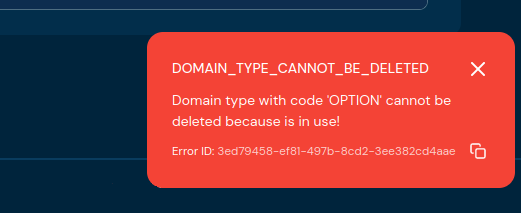
b. If a definition type is used in the Domain Configuration, then validation error will appear.
Edit Type#
If you want to edit data in specific definitione type, follow these steps:
-
Choose Domain in Main toolbar.
-
Choose Definition tab.
-
Left-click on a definition type you wish to edit.
a. Left-clicking on a definition type brings up Definition Type details screen.
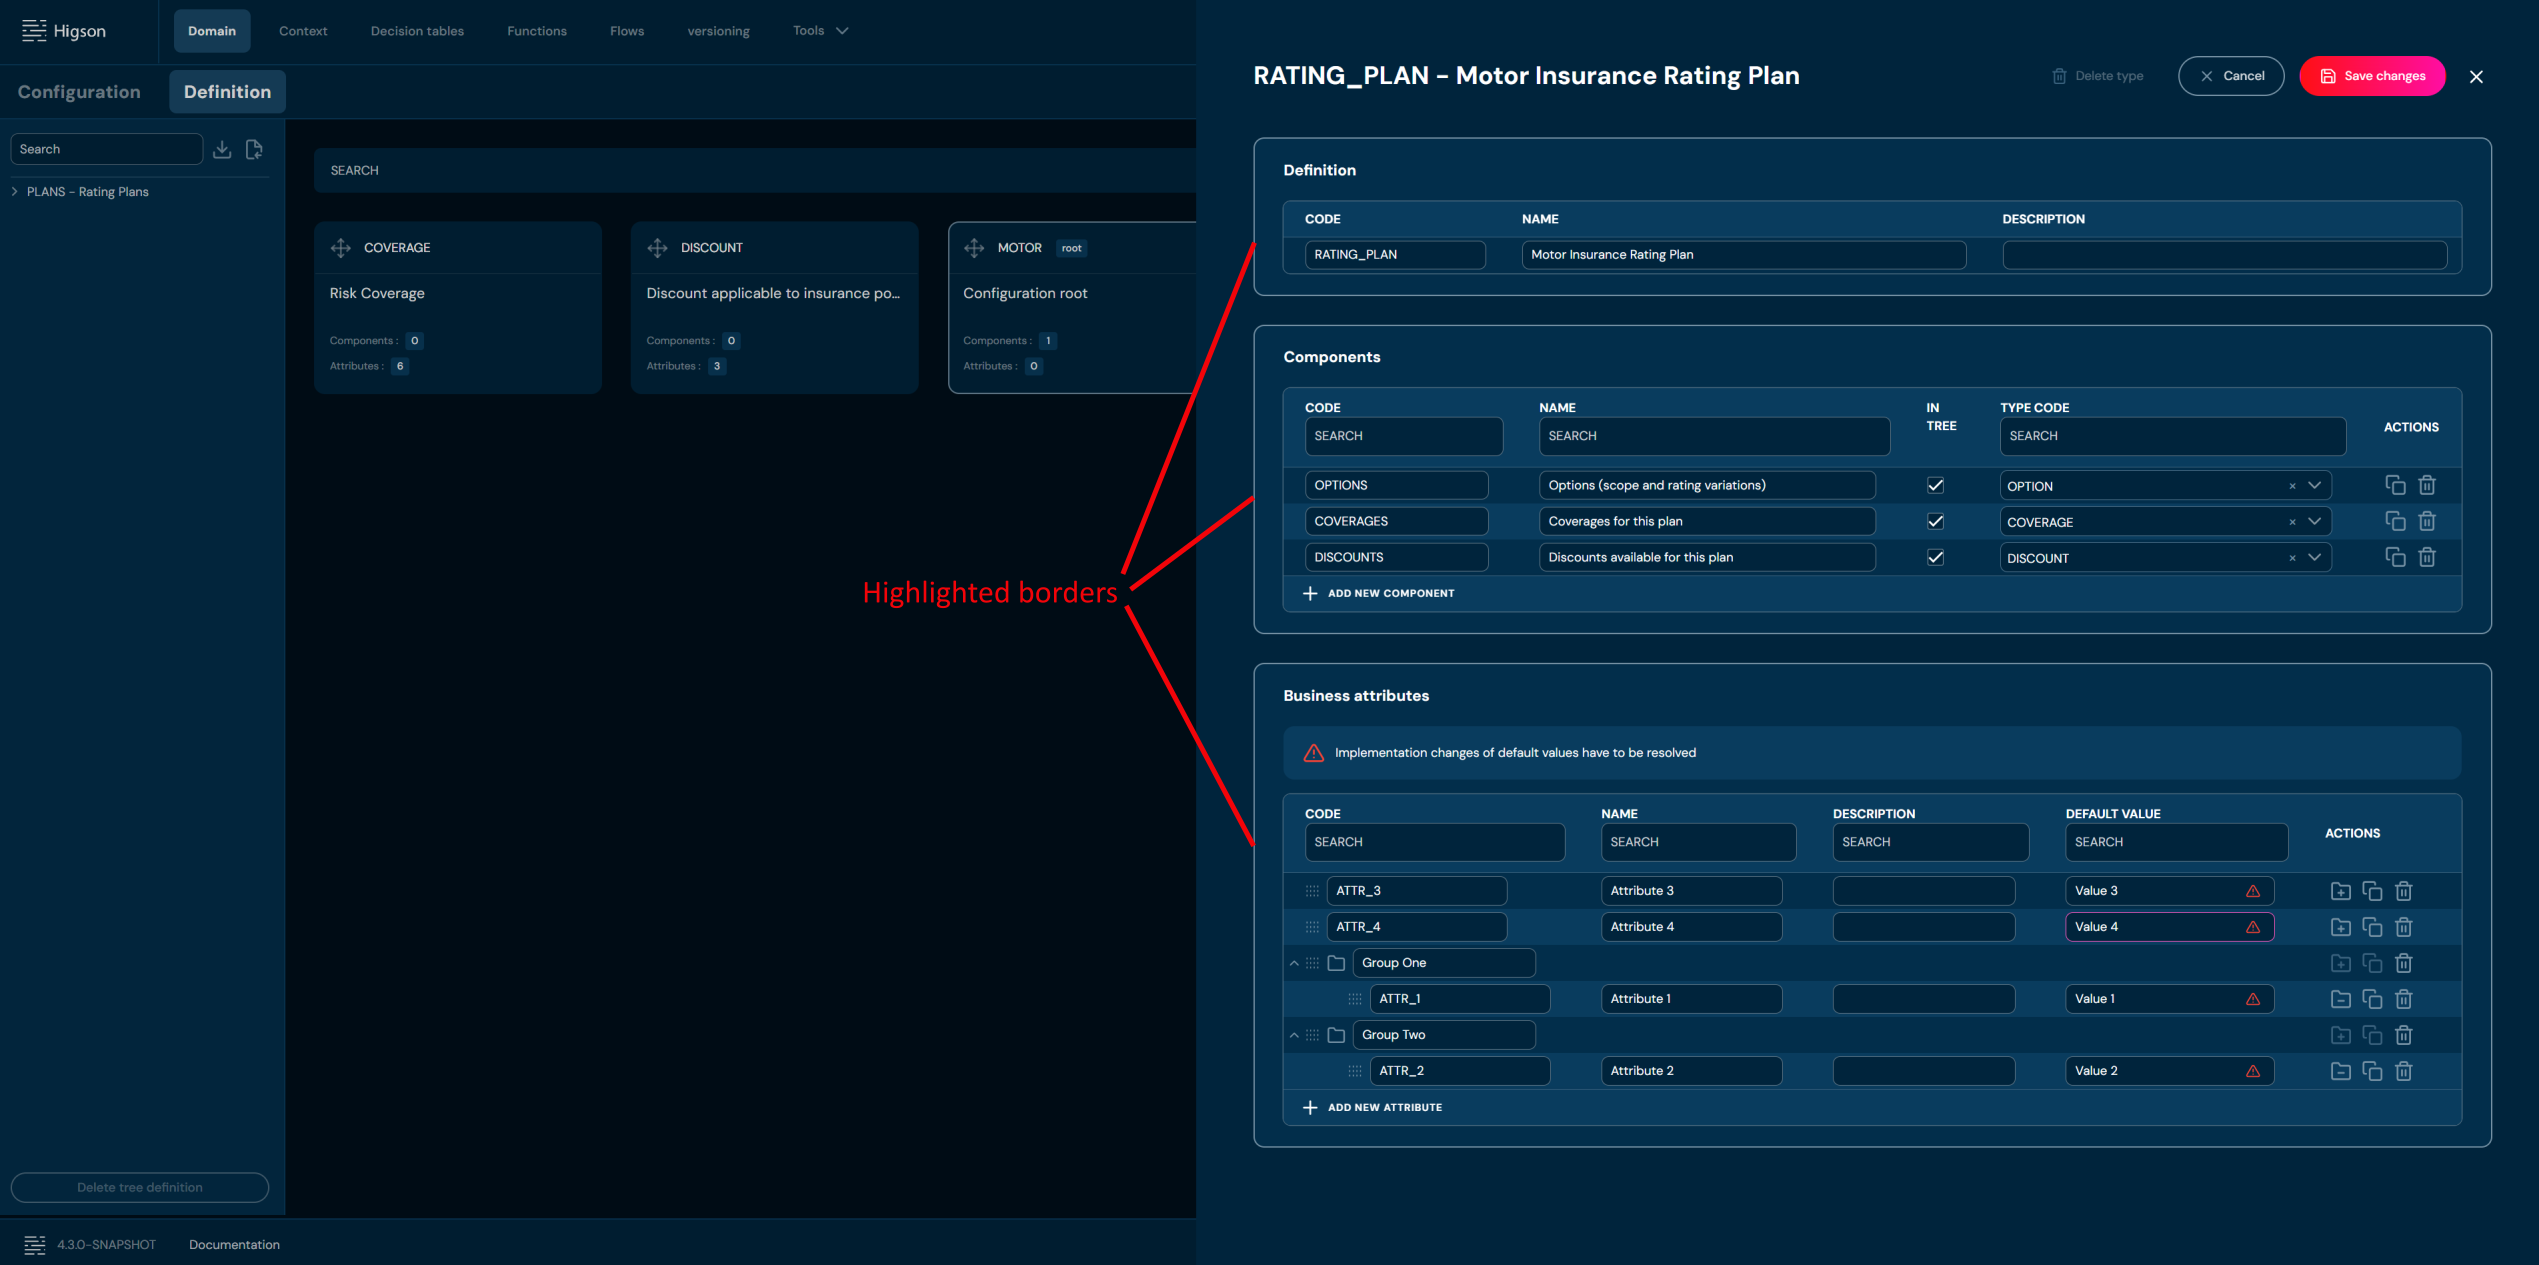
-
Choose Edit.
a. Highlighted borders indicate that edit mode is active.
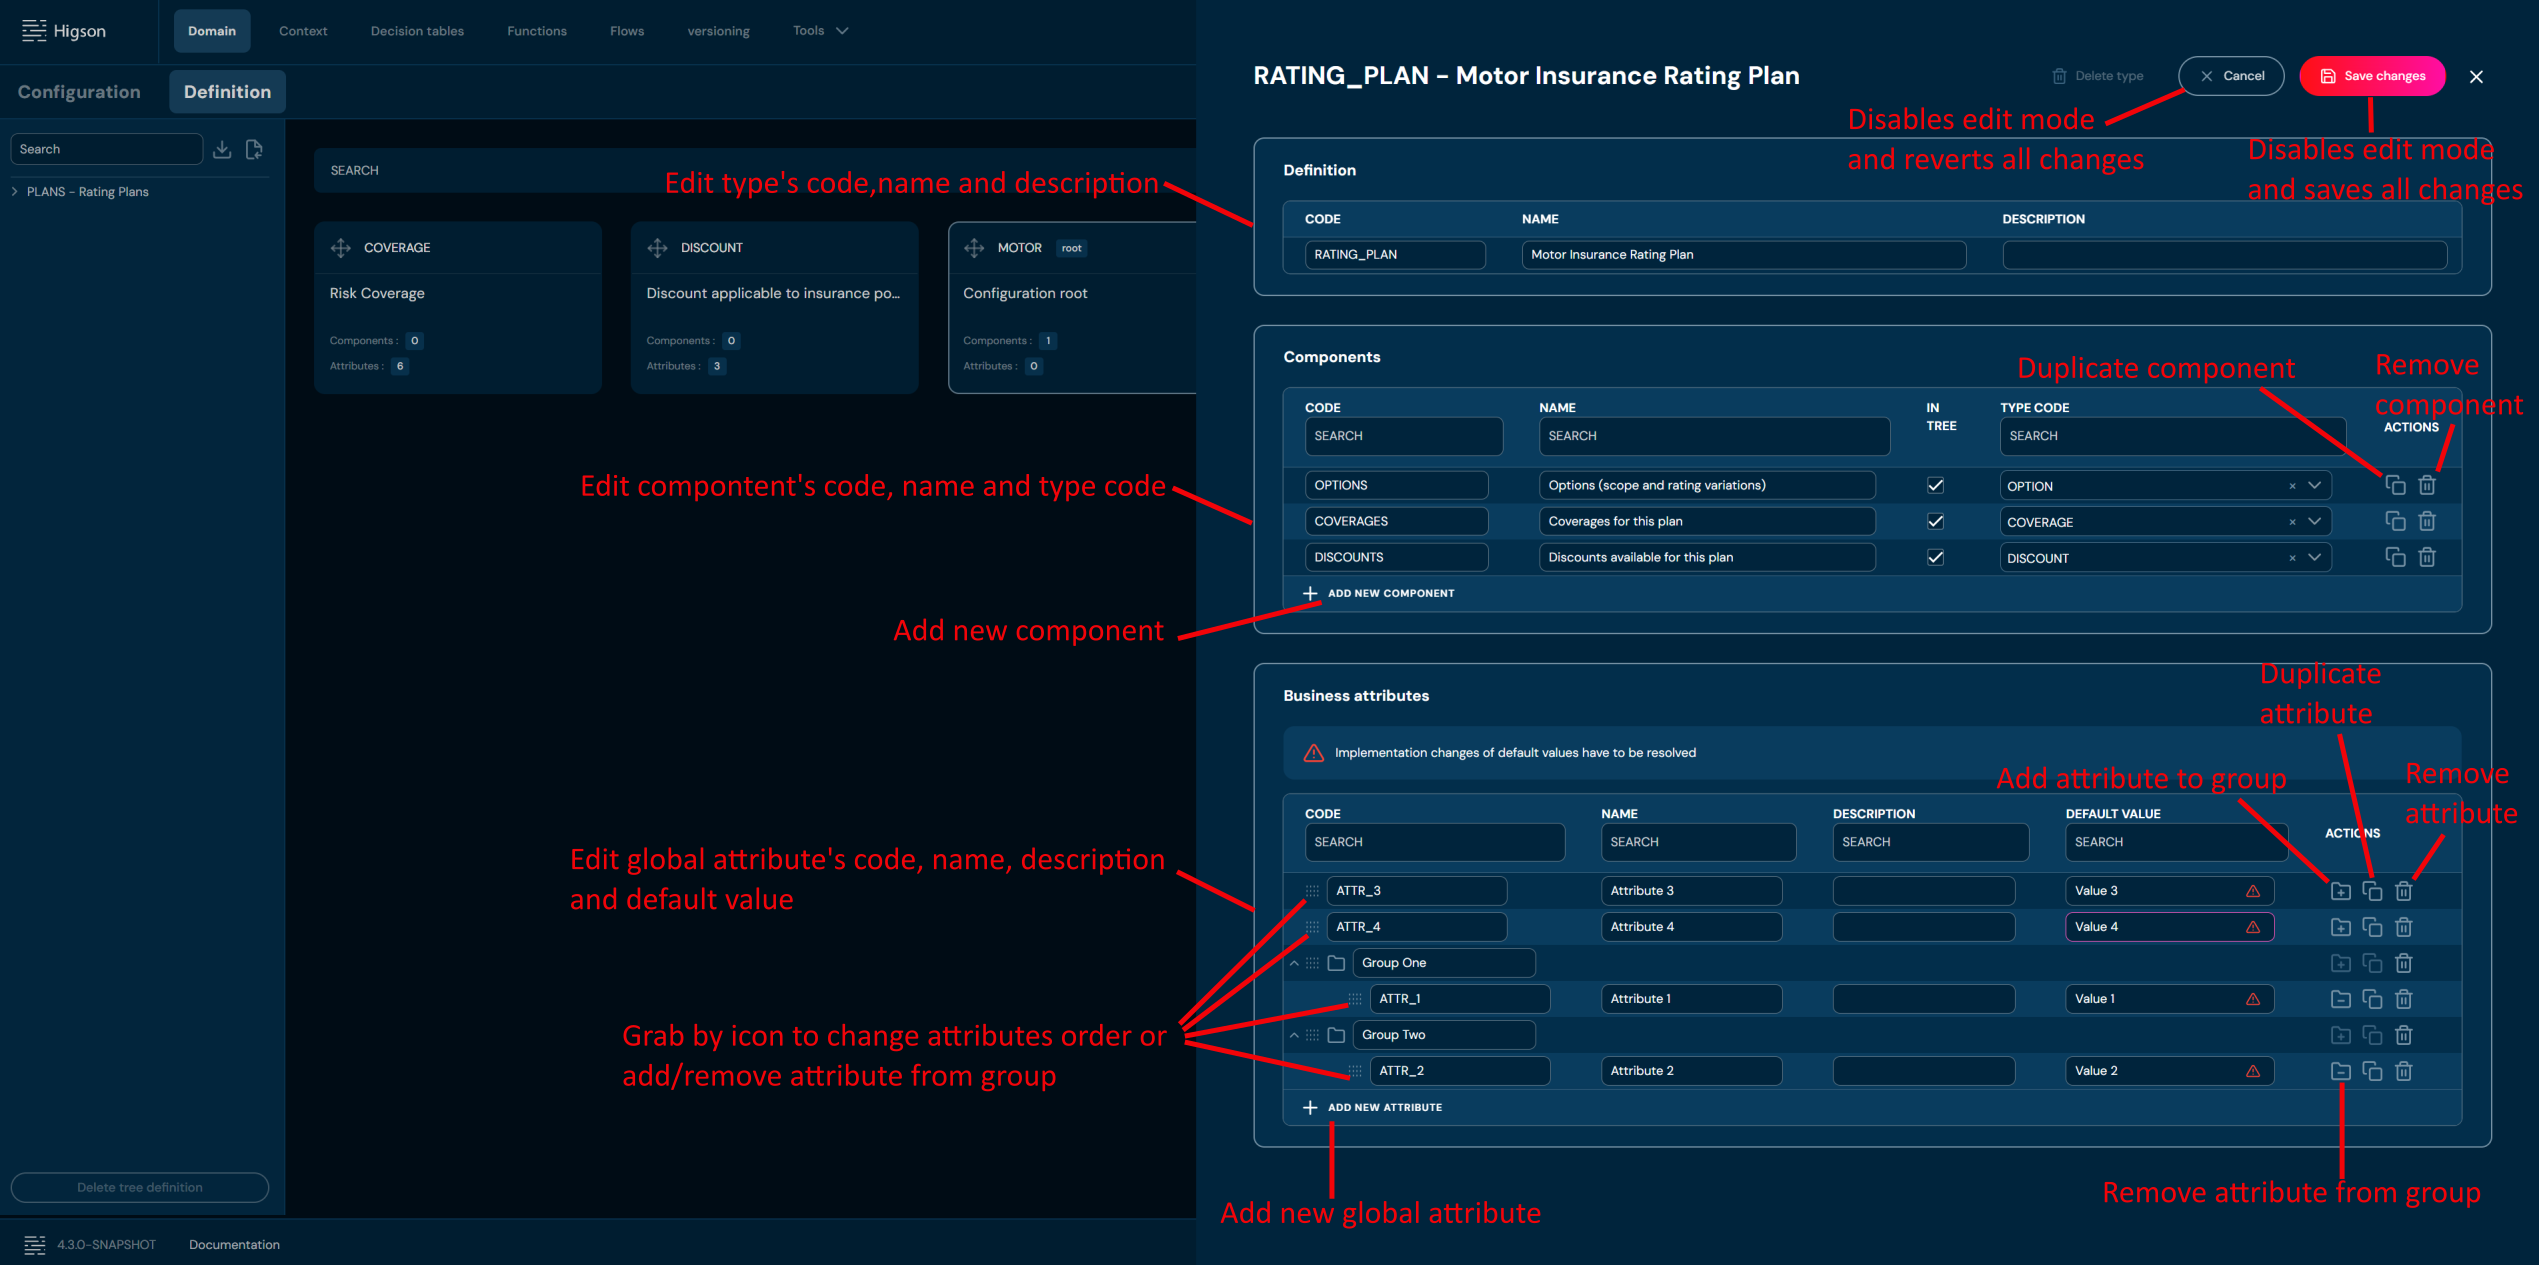
-
Edit any data you need.
-
Choose Save changes to save all changes made in definition type.
a. Cancel reverts all changes made in the definition type.
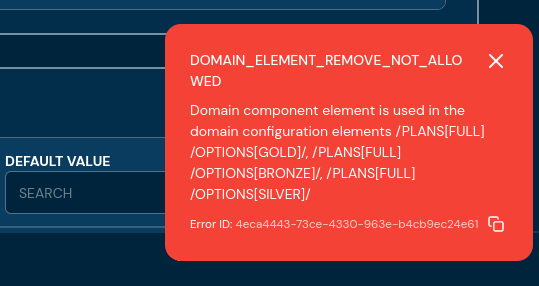
b. If components you edit are used in Domain Configuration, then validation error will appear.
In Domain configuration we can create instances of domain types and configure their attributes with use of Decision tables or Functions.
If you are new to Higson Domain, you may want to read the introductory section Introduction to Domain.
In order to see Domain Configuration, select Domain in Main Toolbar.
After you enter Configuration you will see screen of configuration from ROOT perspective:
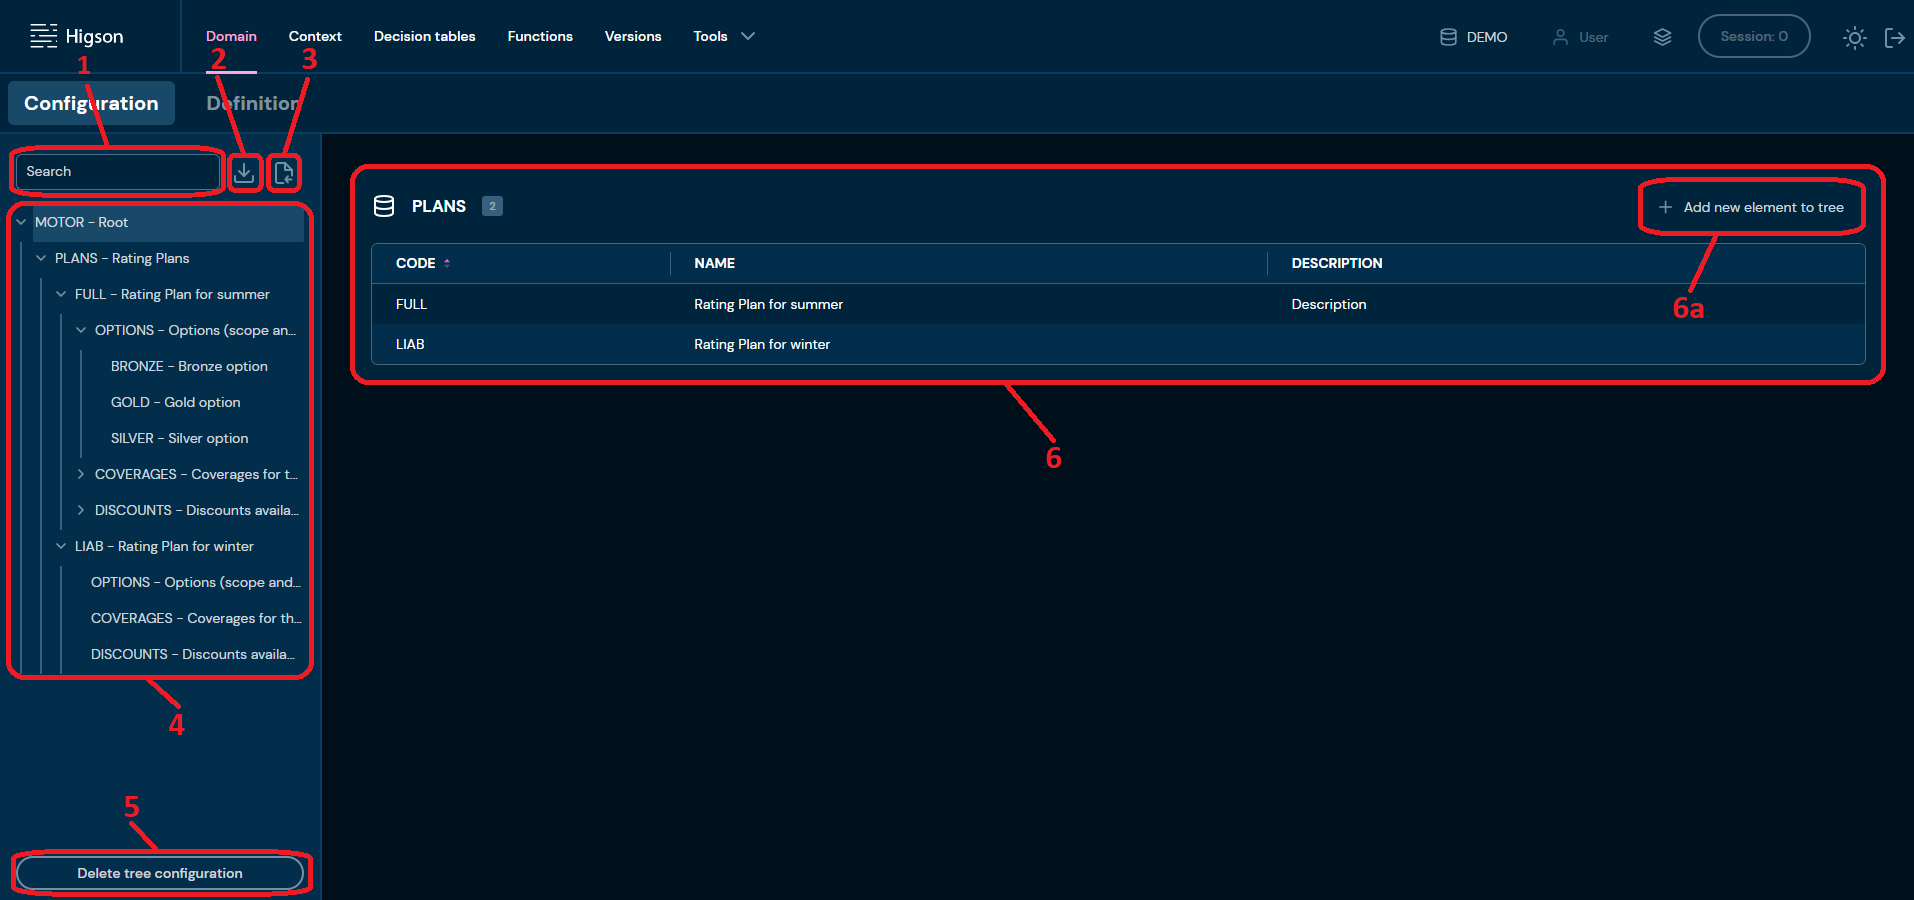
| No. | Name | Description |
|---|---|---|
| 1. | Tree search field | Filter by any string provided by user. Configuration tree navigates to all Elements matching the provided criteria. |
| 2. | Download Domain | Downloads a XML file that contains entire Domain Configuration. To learn more about downloading Configuration go here |
| 3. | Upload Domain | Allows to upload Domain Configuration from a XML file. To learn more about uploading Configuration go here |
| 4. | Configuration tree | Tree structure of your product. |
| 5. | Delete tree | Deletes all Configuration Elements. To learn more about delete all Configuration elements go here |
| 6. | Collection | Collections with all created elements. |
| 6a. | Add new element to tree | Allows to create new Configuration Elements. To learn more about adding Configuration Elements go here |
User can Expand/Collapse a tree by clicking on the arrows.
Configuration Collection:#
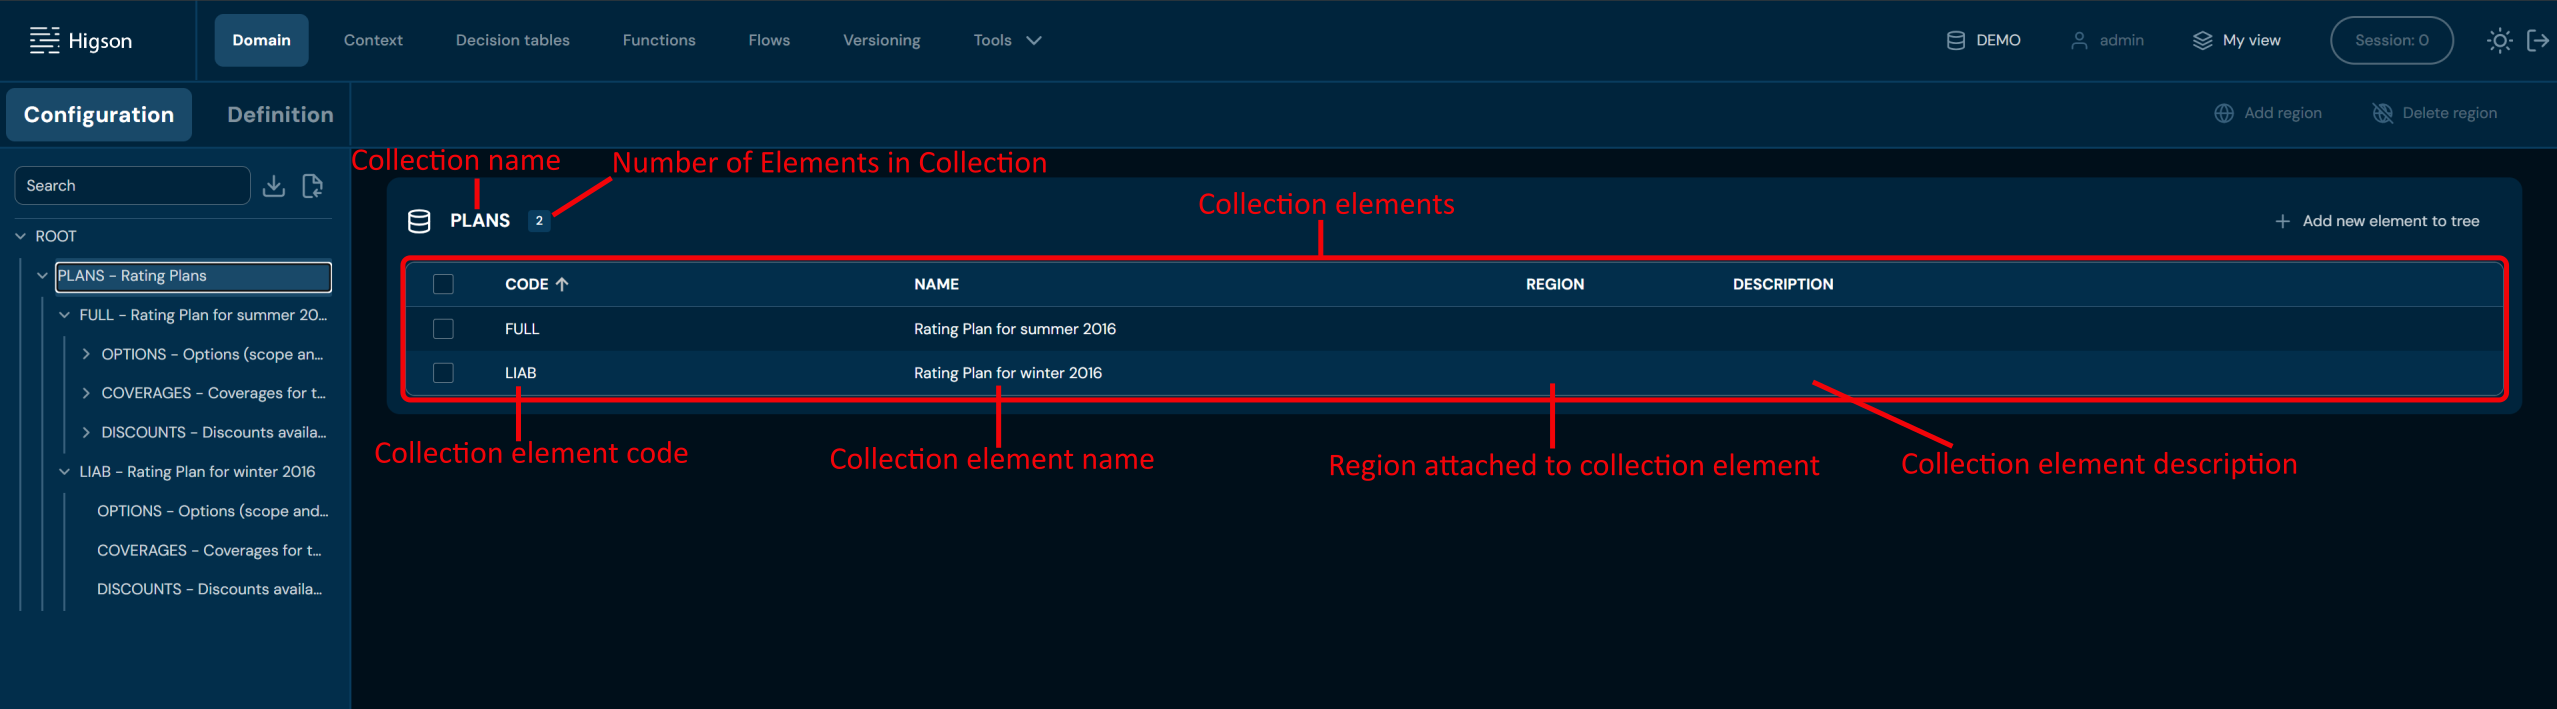
Add New Collection Elements#
If you want to add a new collection elements, follow these steps:
-
Choose Domain in Main toolbar.
-
Navigate to Collection you want to add new elements to.
-
Choose Add new elements to tree in desired Collection.
a. Choosing Add new elements to tree brings up Add to tree screen.
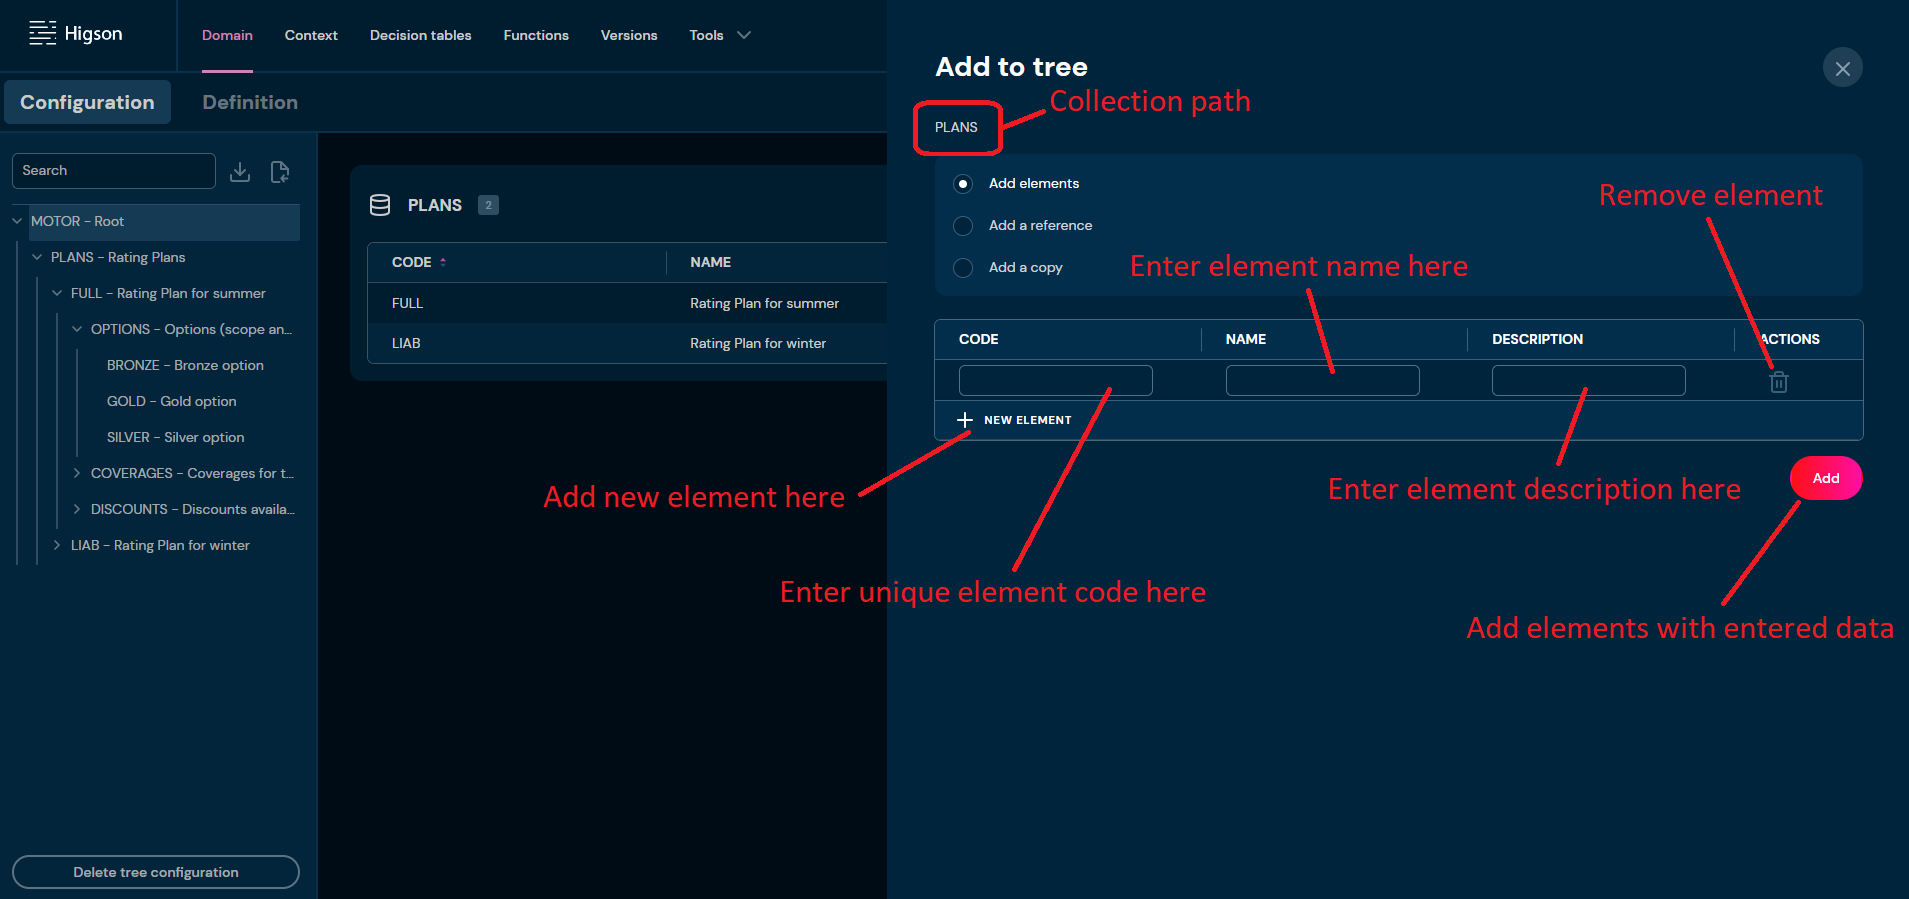
-
Choose Add elements radiobutton.
-
On this screen, you:
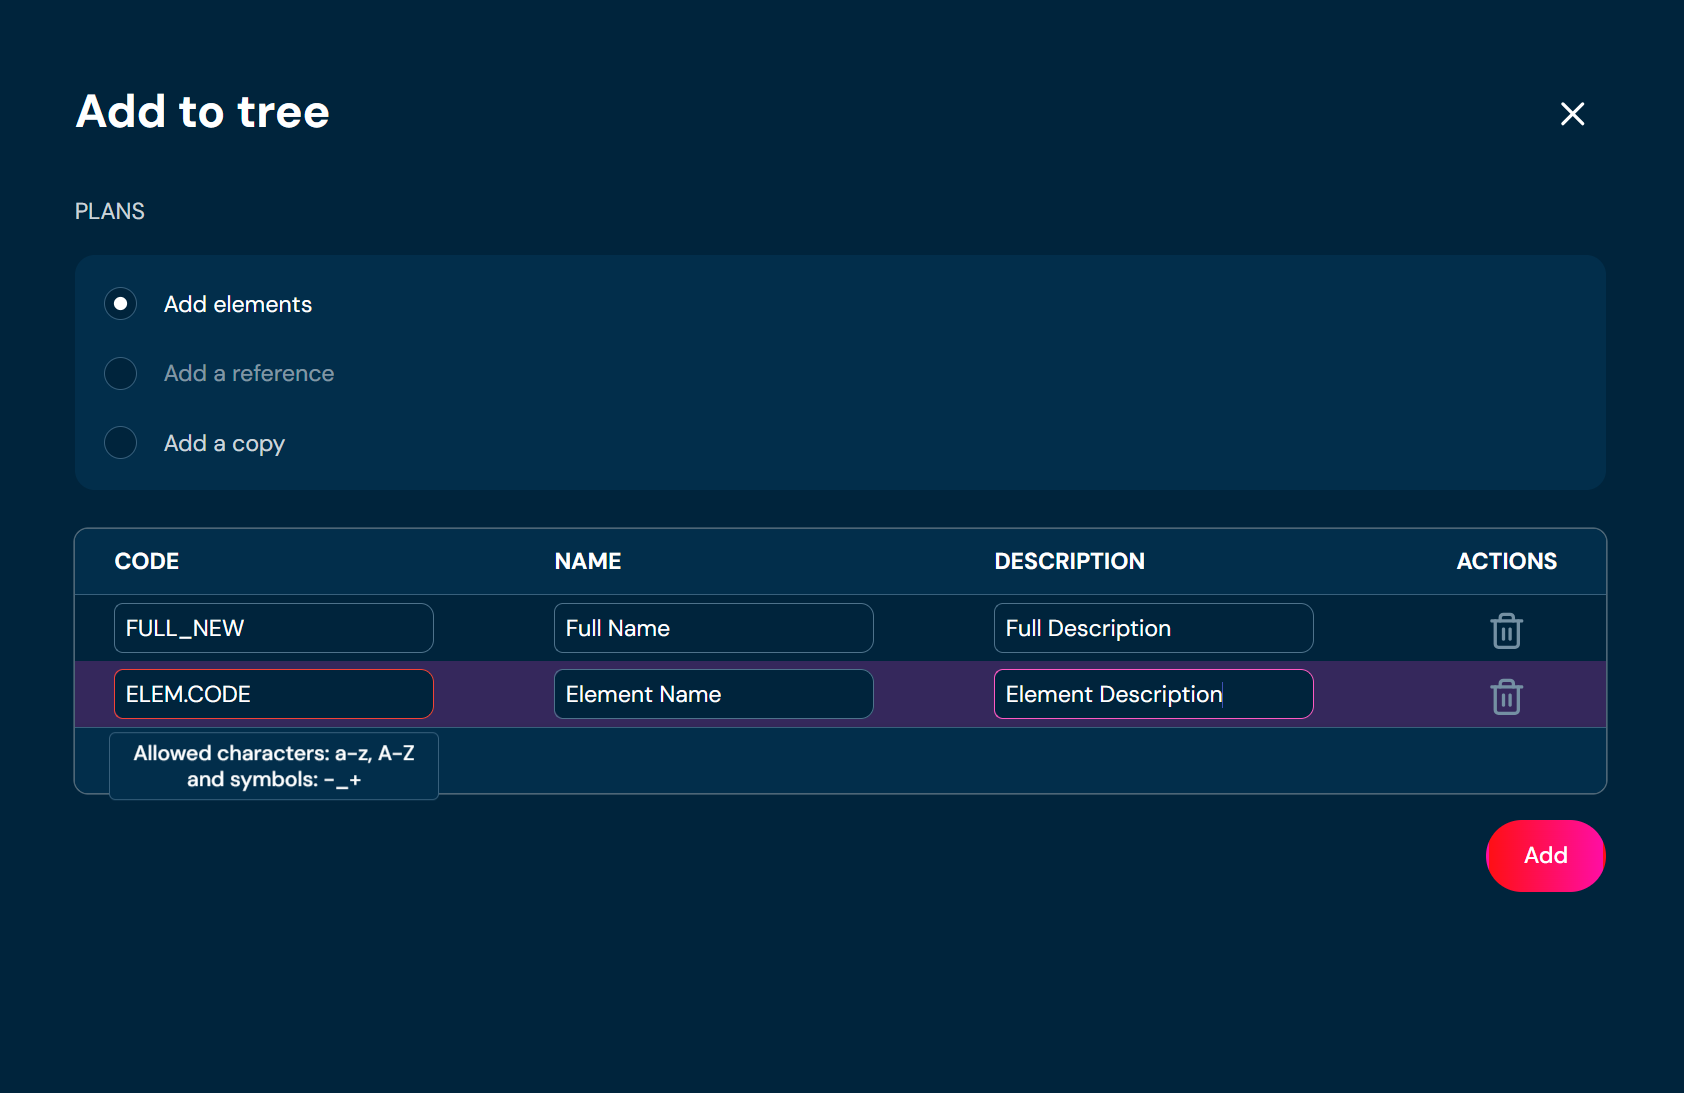
a. need to provide unique Element code. Code can contain only characters from collection a-z; 0-9; “-”; “_”; “+” and it can’t start with “-”.
i. If the code you provided is not unique, then borders will be highlighted with red color and warning message will appear.
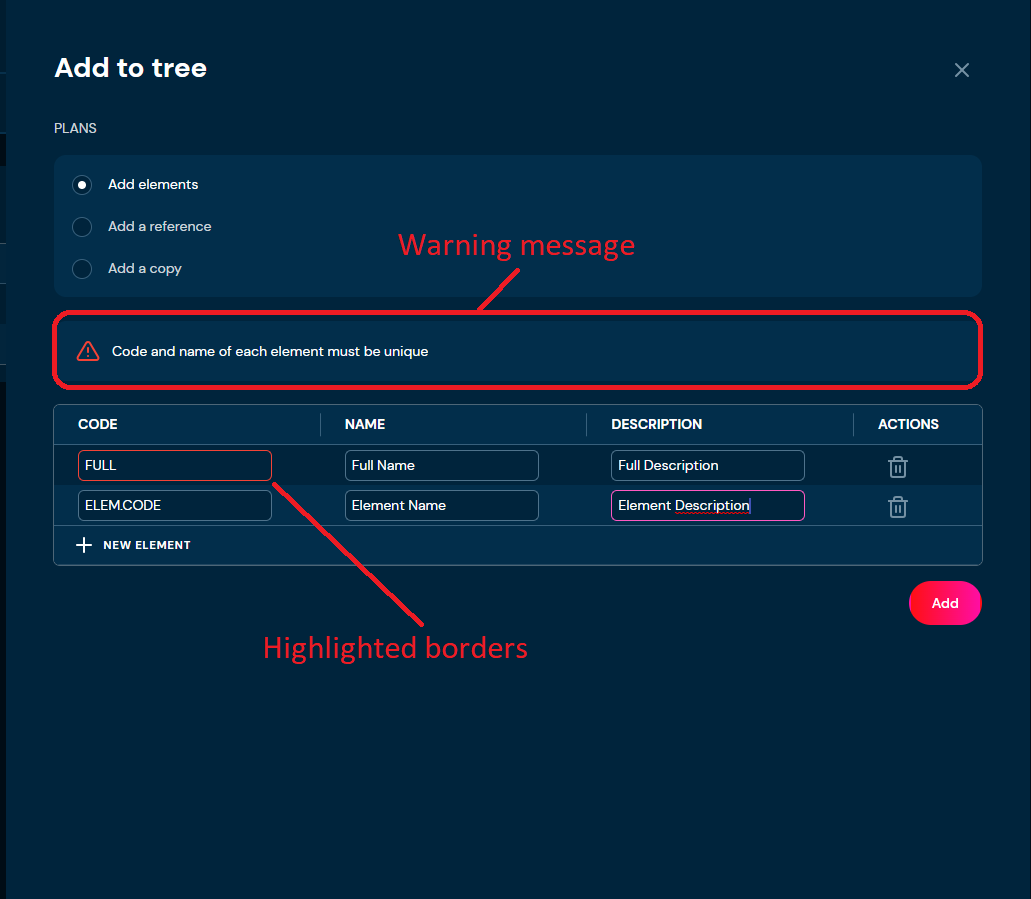
ii. If you enter illegal characters, then borders will be highlighted with red color. Hover on the field to see tooltip with more information.
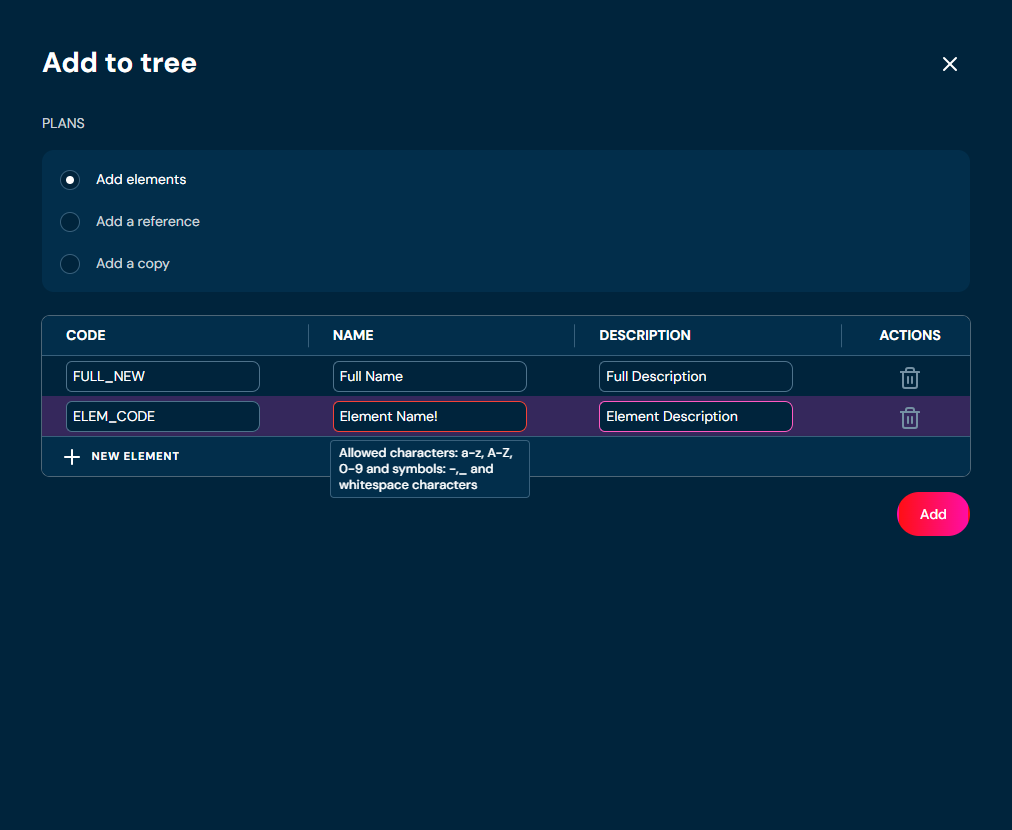
b. need to provide Element name. Name can contain only characters from collection a-z; A-Z; 0-9; “-”; “_” and white-space characters.
i. If you enter illegal characters, then borders will be highlighted with red color. Hover on field to see tooltip with more information.
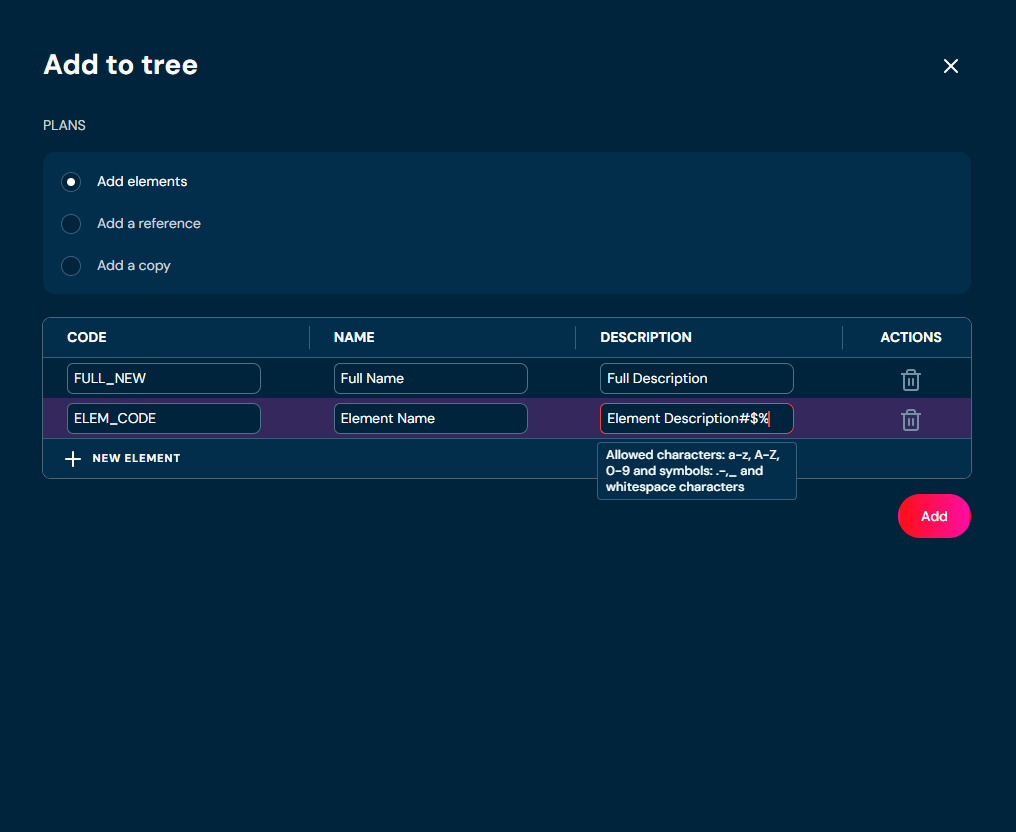
c. can provide Element description. Description can contain only characters from collection a-z; A-Z; 0-9; “:”; “.”; “,”; “-”; “_” and white-space characters.
i. If you enter illegal characters, then borders will be highlighted with red color. Hover on field to see tooltip with more information.
d. can add additional Elements by clicking + NEW ELEMENT.
-
Choose Add.
a. Elements with data you provided are created.
Add Reference#
If you want to add a reference, follow these steps:
-
Choose Domain in Main toolbar.
-
Navigate to the Collection for which you want to create reference.
-
Choose Add new elements to tree in desired Collection.
a. Choosing Add new elements to tree brings up Add to tree screen.
-
Choose Add a reference radiobutton.
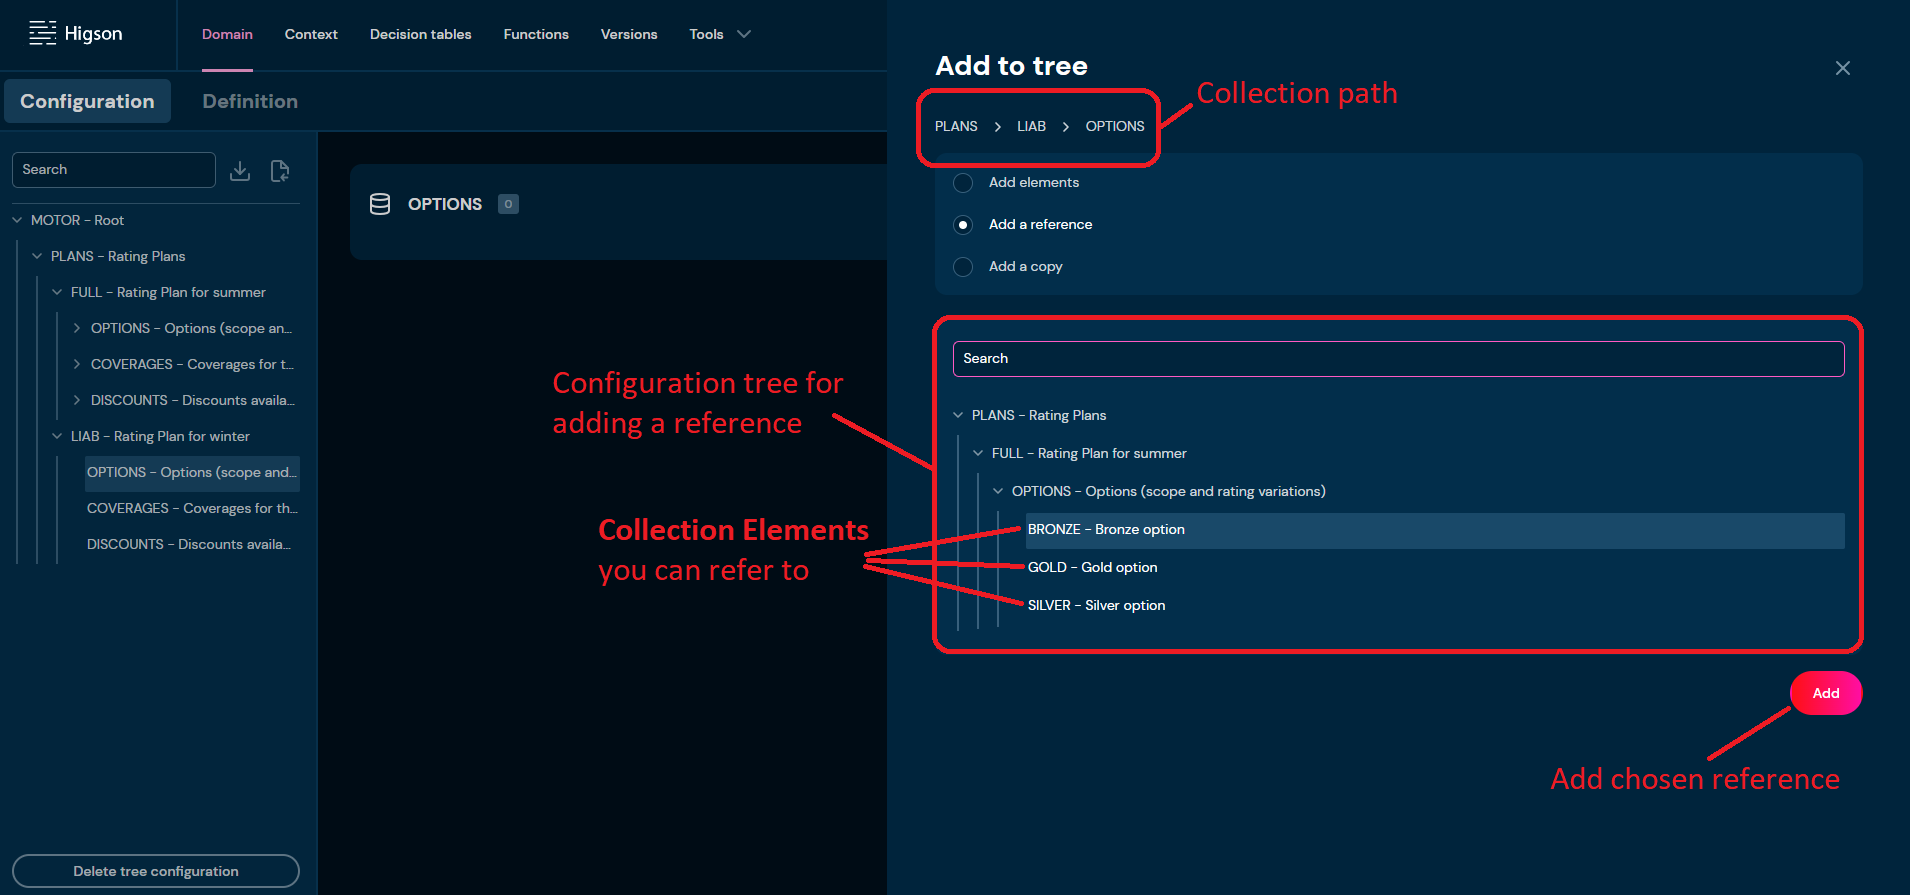
a. If the Add button is greyed out, it means that you have not chosen any Collection Element to refer to yet.
-
Choose Collection Element you want to create a reference to.
a. If there are no Elements to refer to, then an information message will be placed instead of the configuration tree.
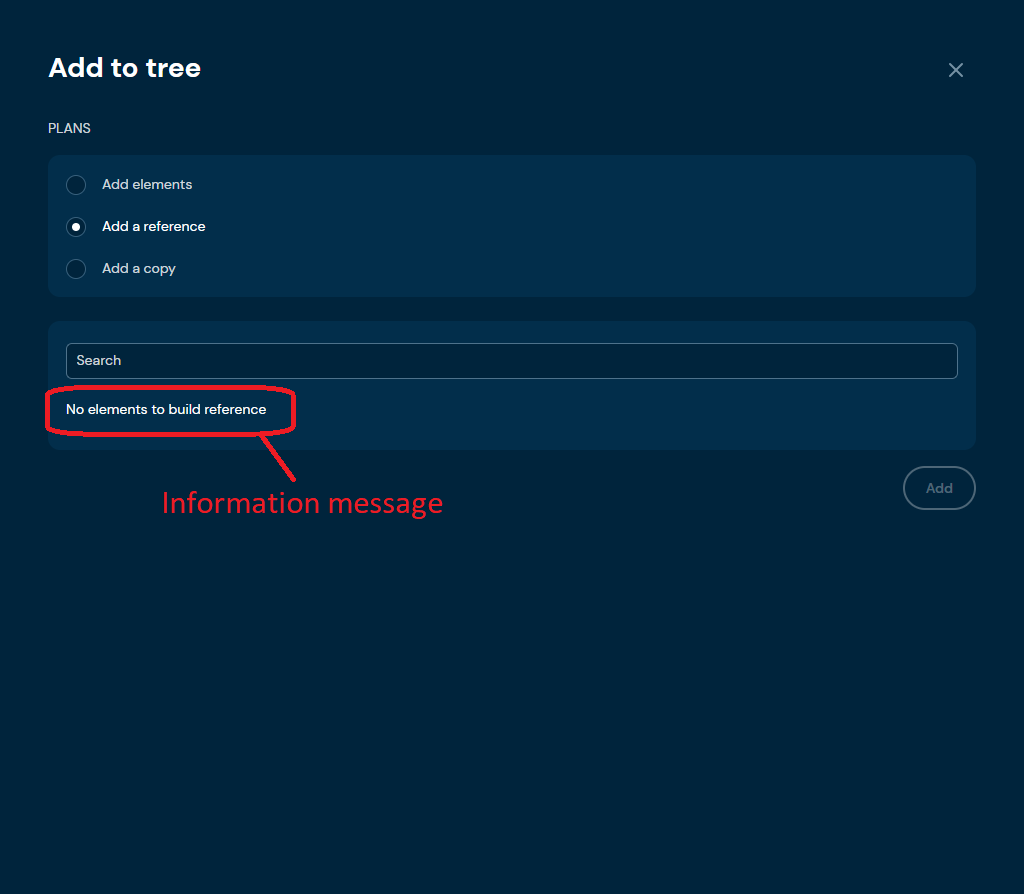
-
Choose Add.
a. Reference to chosen Element is created.
Add a Copy#
If you want to copy Collection or Collection Element, follow these steps:
-
Choose Domain in Main toolbar.
-
Navigate to the Collection for which you want to copy Elements.
-
Choose Add new elements to tree in desired Collection.
a. Choosing Add new elements to tree brings up Add to tree screen.
-
Choose Add a copy radiobutton.
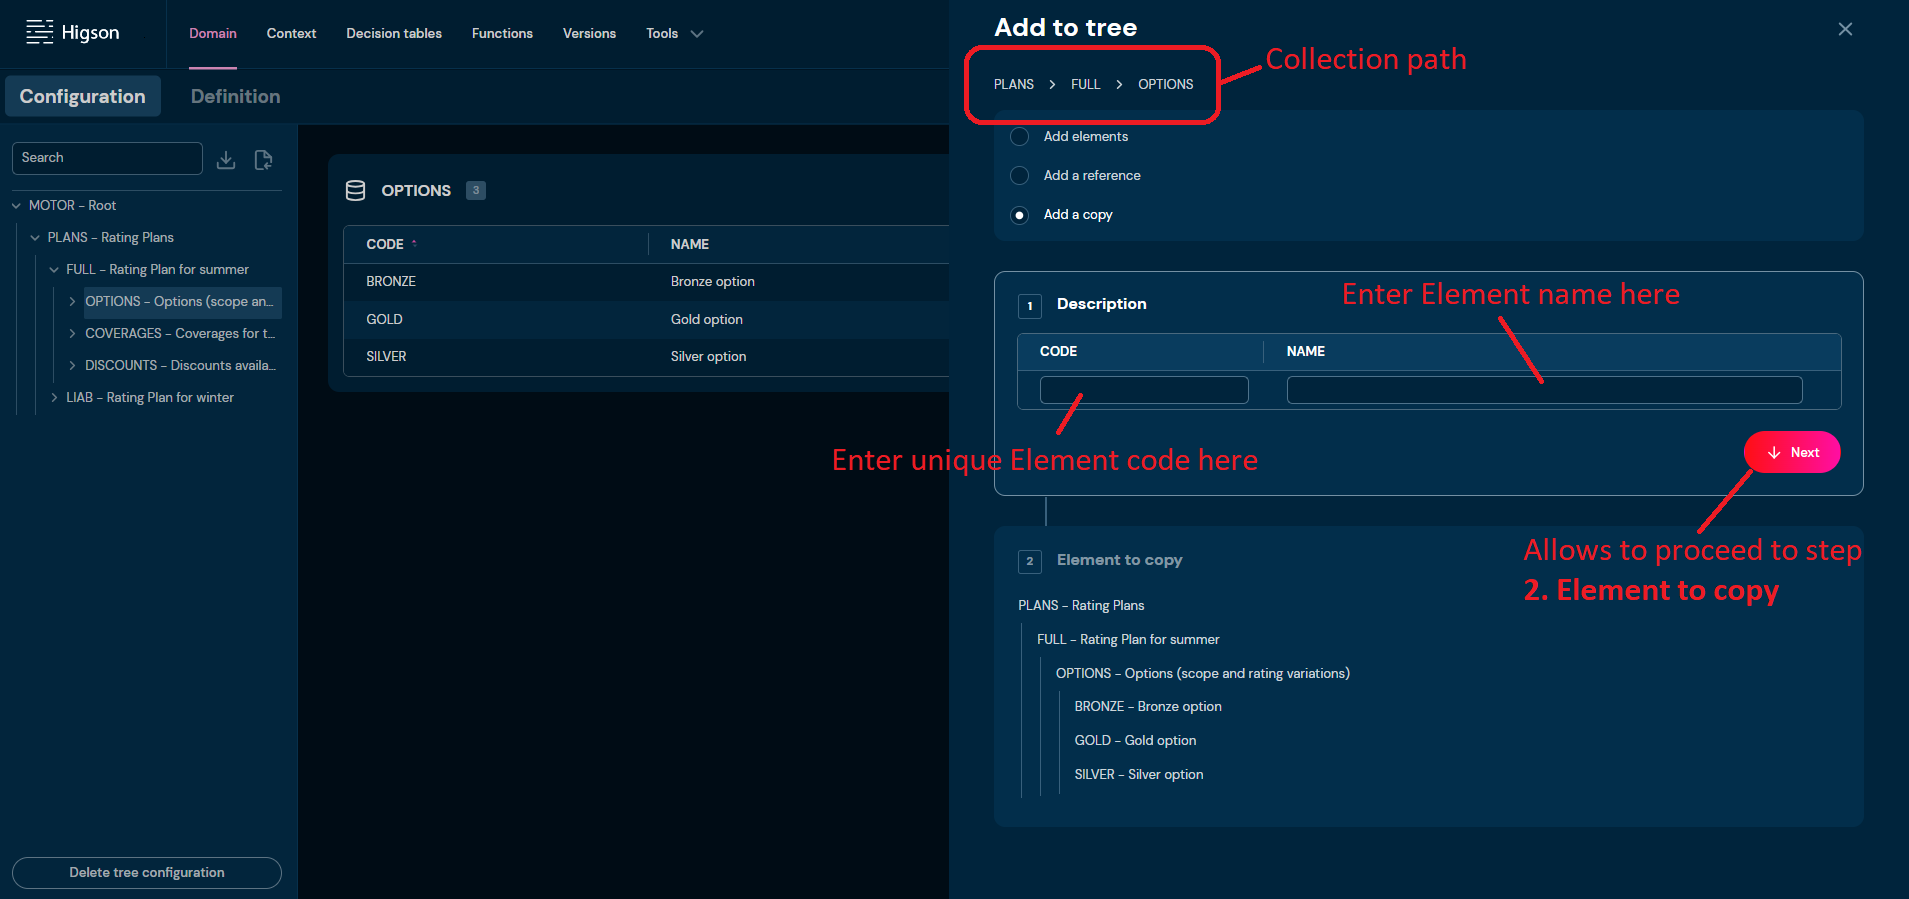
-
In step 1. Description, you:
a. need to provide unique Element code. Code can contain only characters from collection a-z; 0-9; “-”; “_”; “+” and it can’t start with “-”.
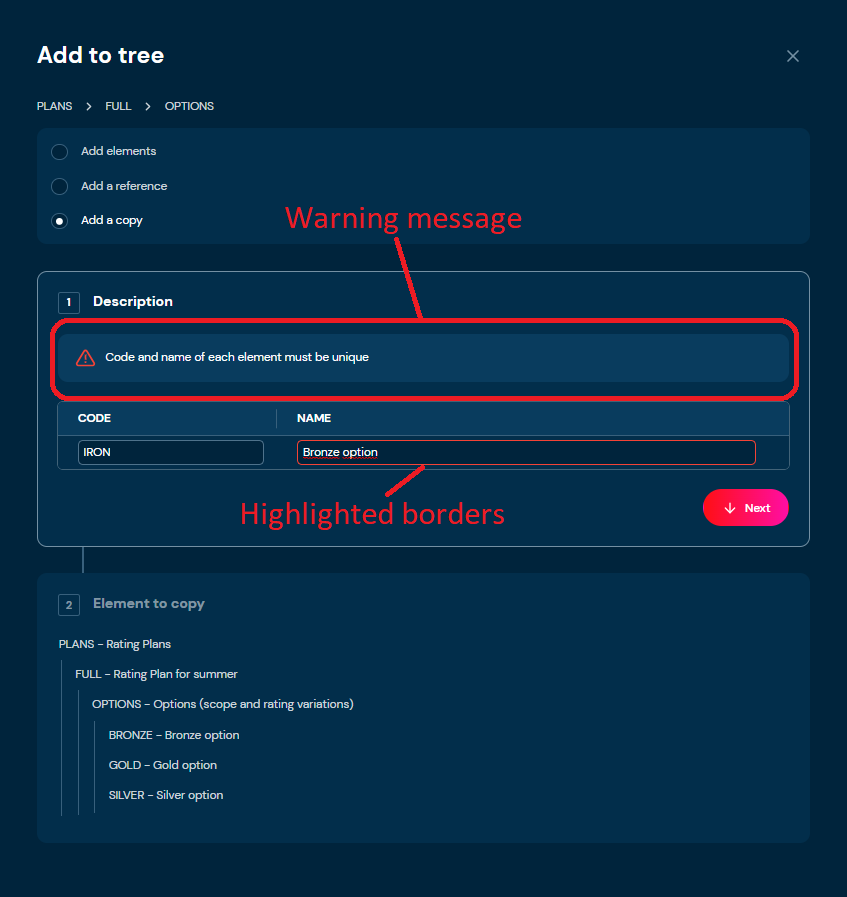
i. If the code you provided is not unique, then borders will be highlighted with red color and warning message will appear.
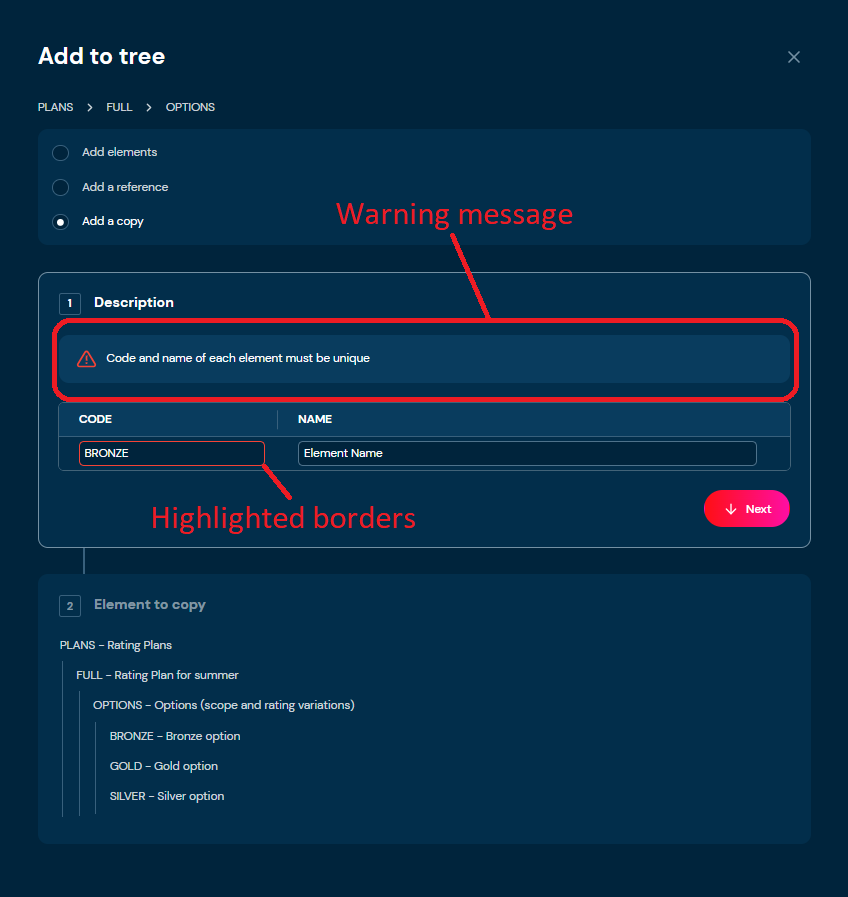
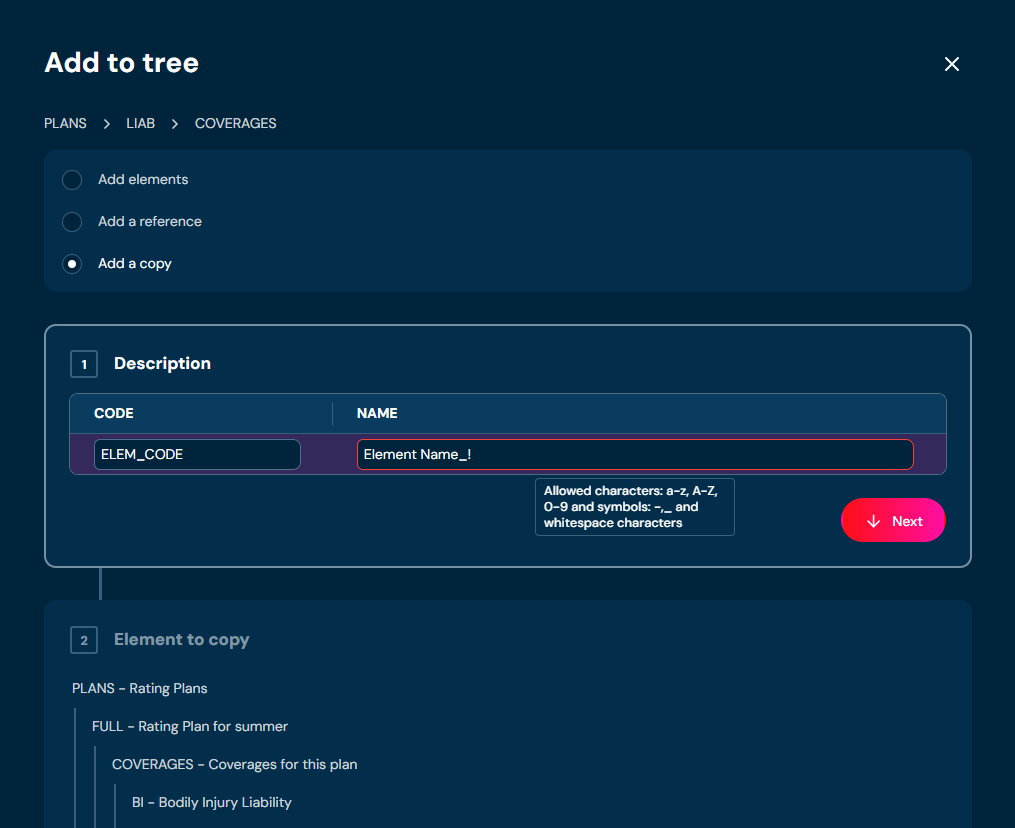
ii. If you enter illegal characters, then borders will be highlighted with red color. Hover on field to see tooltip with more information.
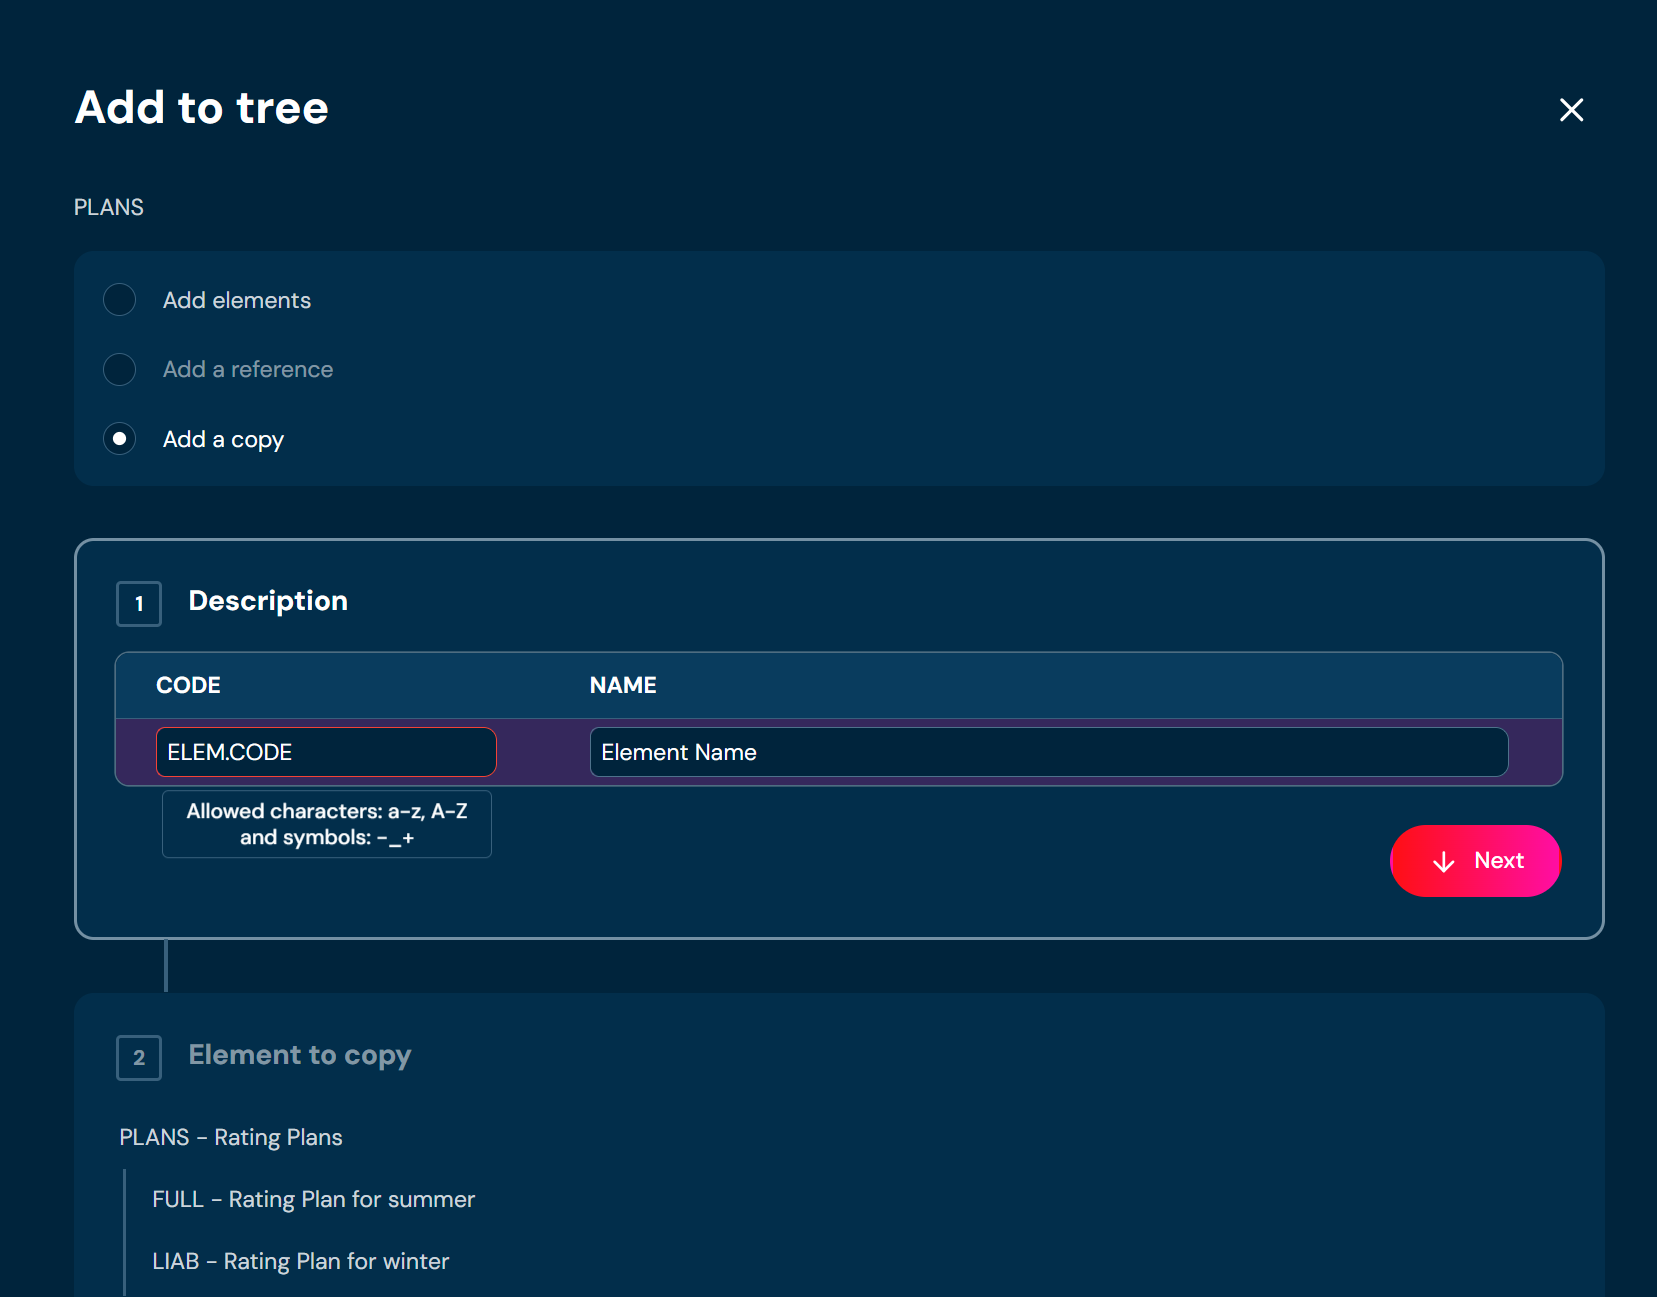
b. need to provide unique Element name. Name can contain only characters a-z; A-Z; 0-9; “-”; “_” and white-space characters.
i. If the name you provided is not unique, then borders will be highlighted with red color and warning message will appear.
ii. If you enter illegal characters, then borders will be highlighted with red color. Hover on field to see tooltip with more information.
-
Choose Next.
-
In step 2. Element to copy you need to choose which Collection Element you want to copy.
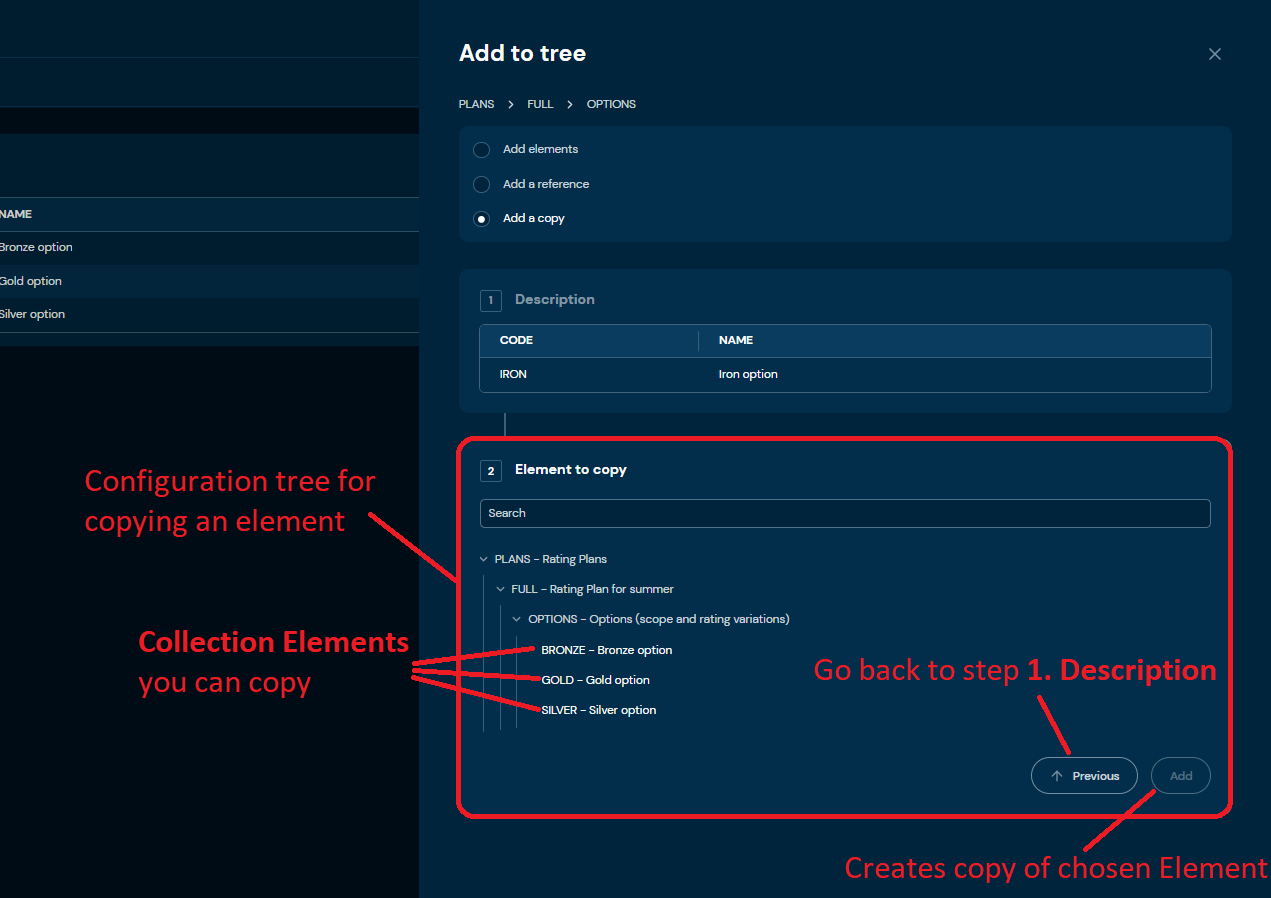
a. If the Add button is greyed out, it means that you have not chosen any Collection Element to copy.
-
Choose Add.
a. Copy of chosen Collection Element is created.
Download Domain Configuration#
If you want to download Domain Configuration, follow these steps:
-
Choose Domain in Main toolbar.
-
Choose Download Domain Configuration in Configuration tree.
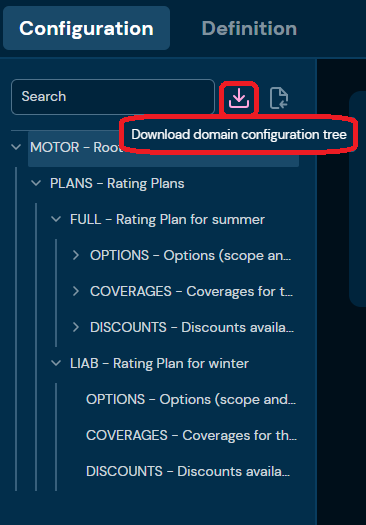
a. Choosing Download Domain Configuration downloads an XML file that contains all configuration Collections, Collection Elements, Definition Types and all dependencies between them.
Upload Domain Configuration#
If you want to upload Domain Configuration, follow these steps:
-
Choose Domain in Main toolbar.
-
Choose Upload Domain Configuration in Configuration tree.
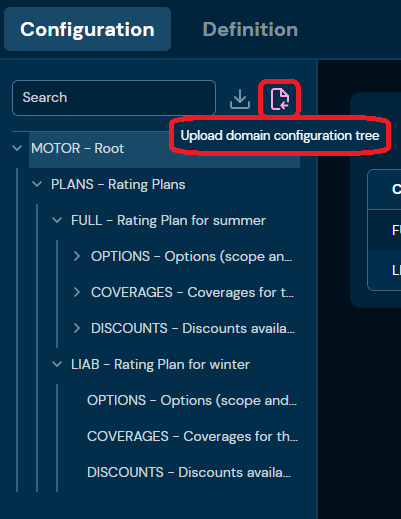
a. Choosing Upload Domain Configuration brings up Import from XML screen.
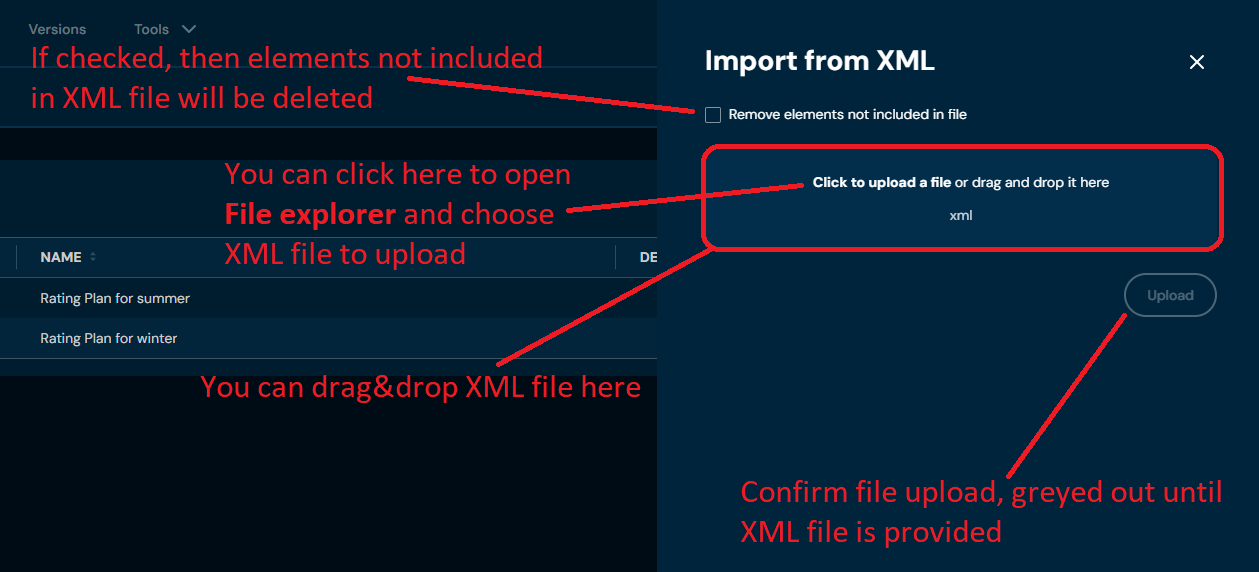
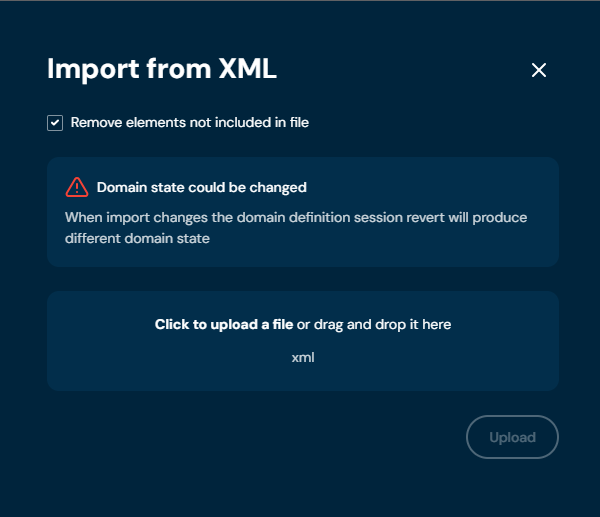
b. If you select checkbox Remove elements not included in file, then warning will appear.
-
Drag&drop desired file or Click to upload a file and choose file in File explorer.
a. If you choose a file with extension other than XML, then validation error will pop up
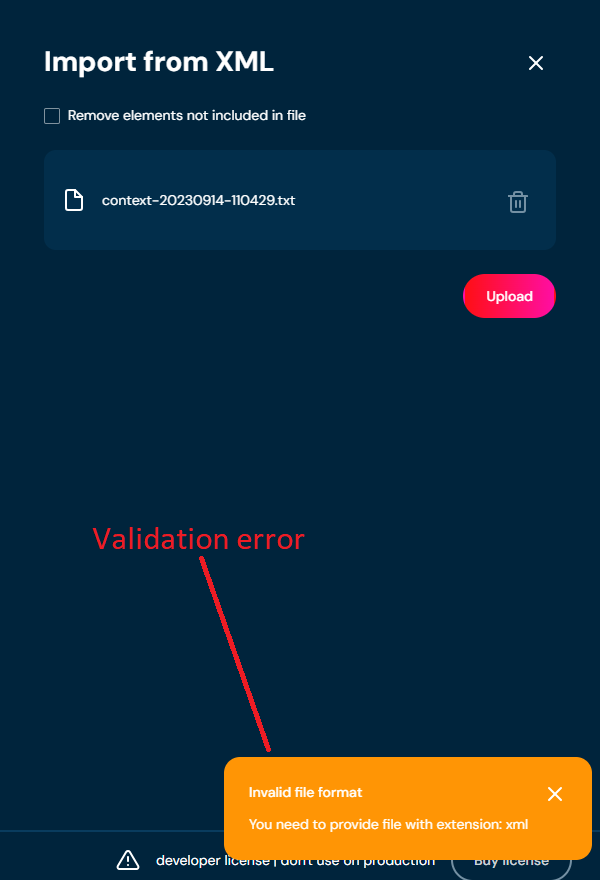
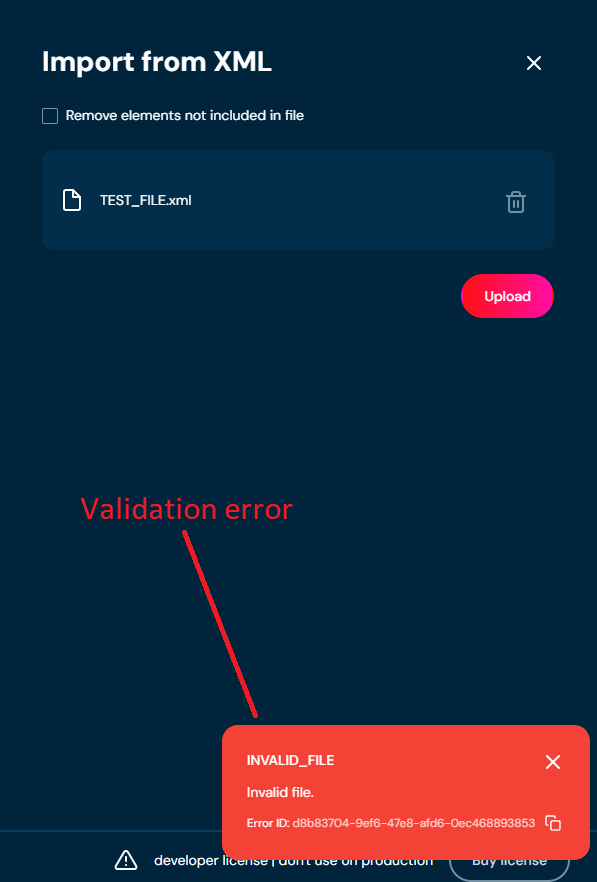
b. If there is something wrong with data in XML file, then validation error will appear.
-
Choose Upload
-
When the progress bar reaches 100%, it means that domain definition was uploaded correctly.
a. If a validation error occurs (see above), then an upload process is being aborted.
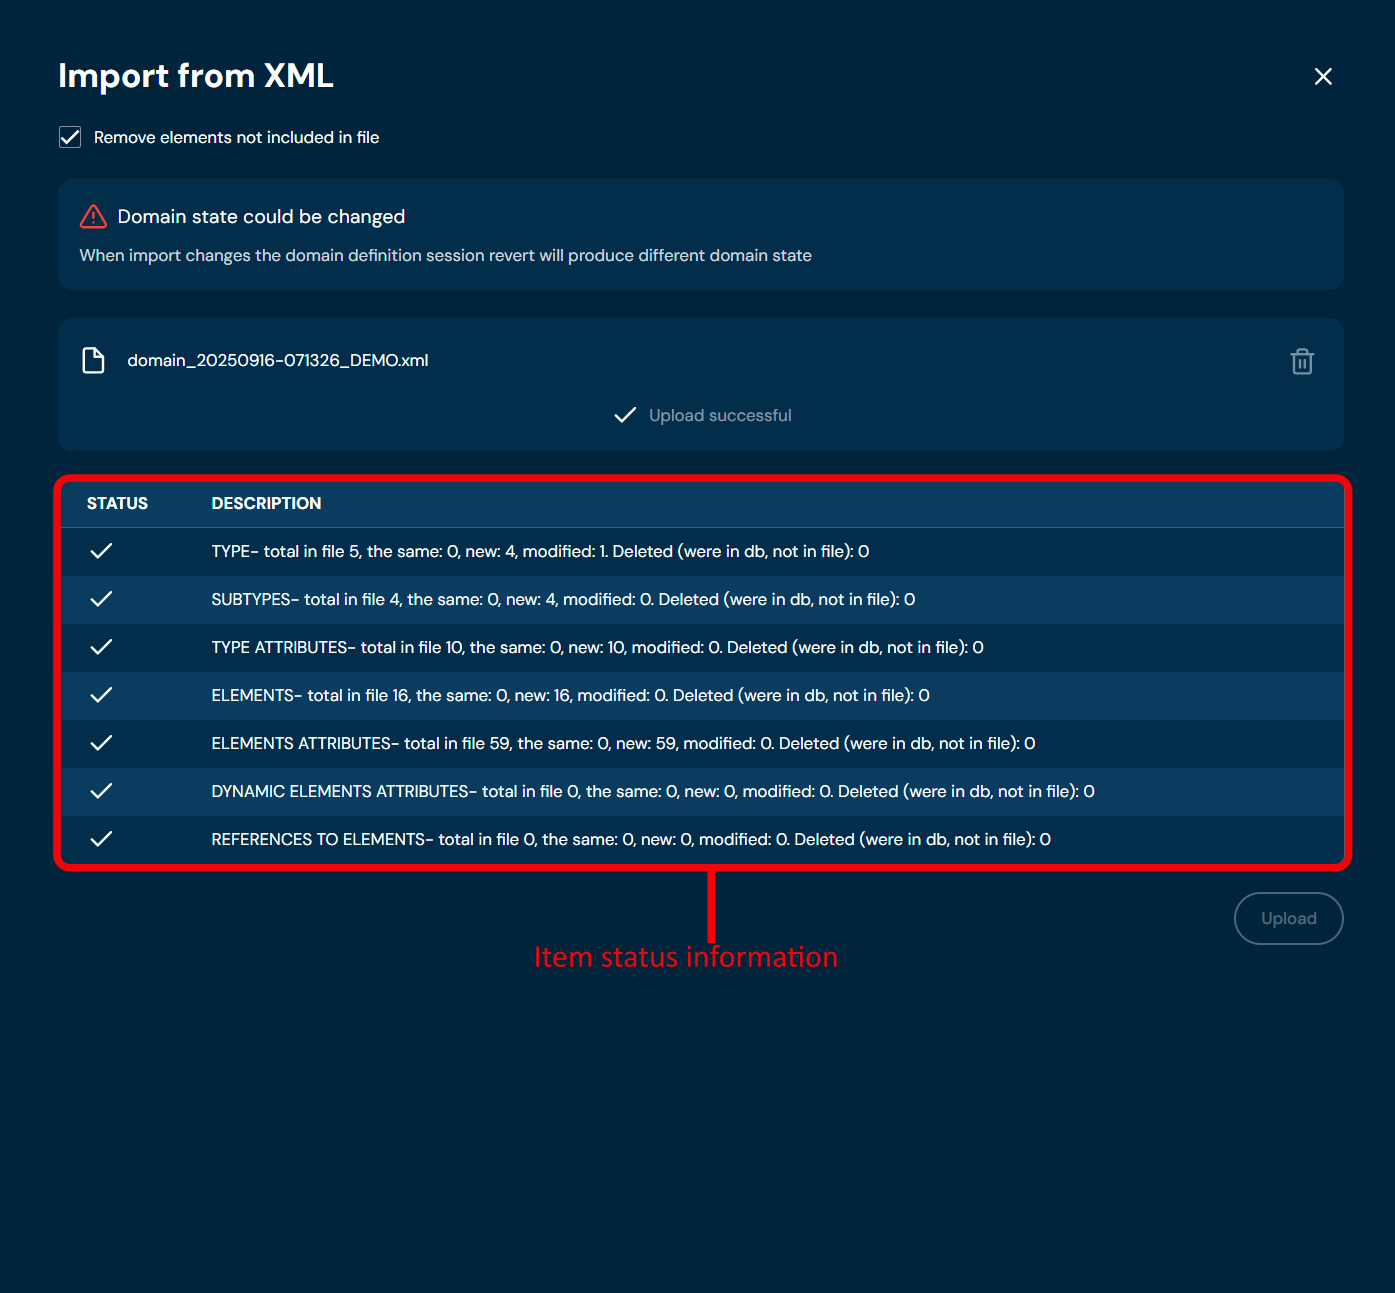
b. If you checked checkbox Remove elements not included in file in step 2, then adequate information about changes will appear after uploading a file.
Delete Configuration Tree#
If you want to delete the entire Domain Configuration, follow these steps:
-
Choose Domain in Main toolbar
-
Choose Delete configuration tree.
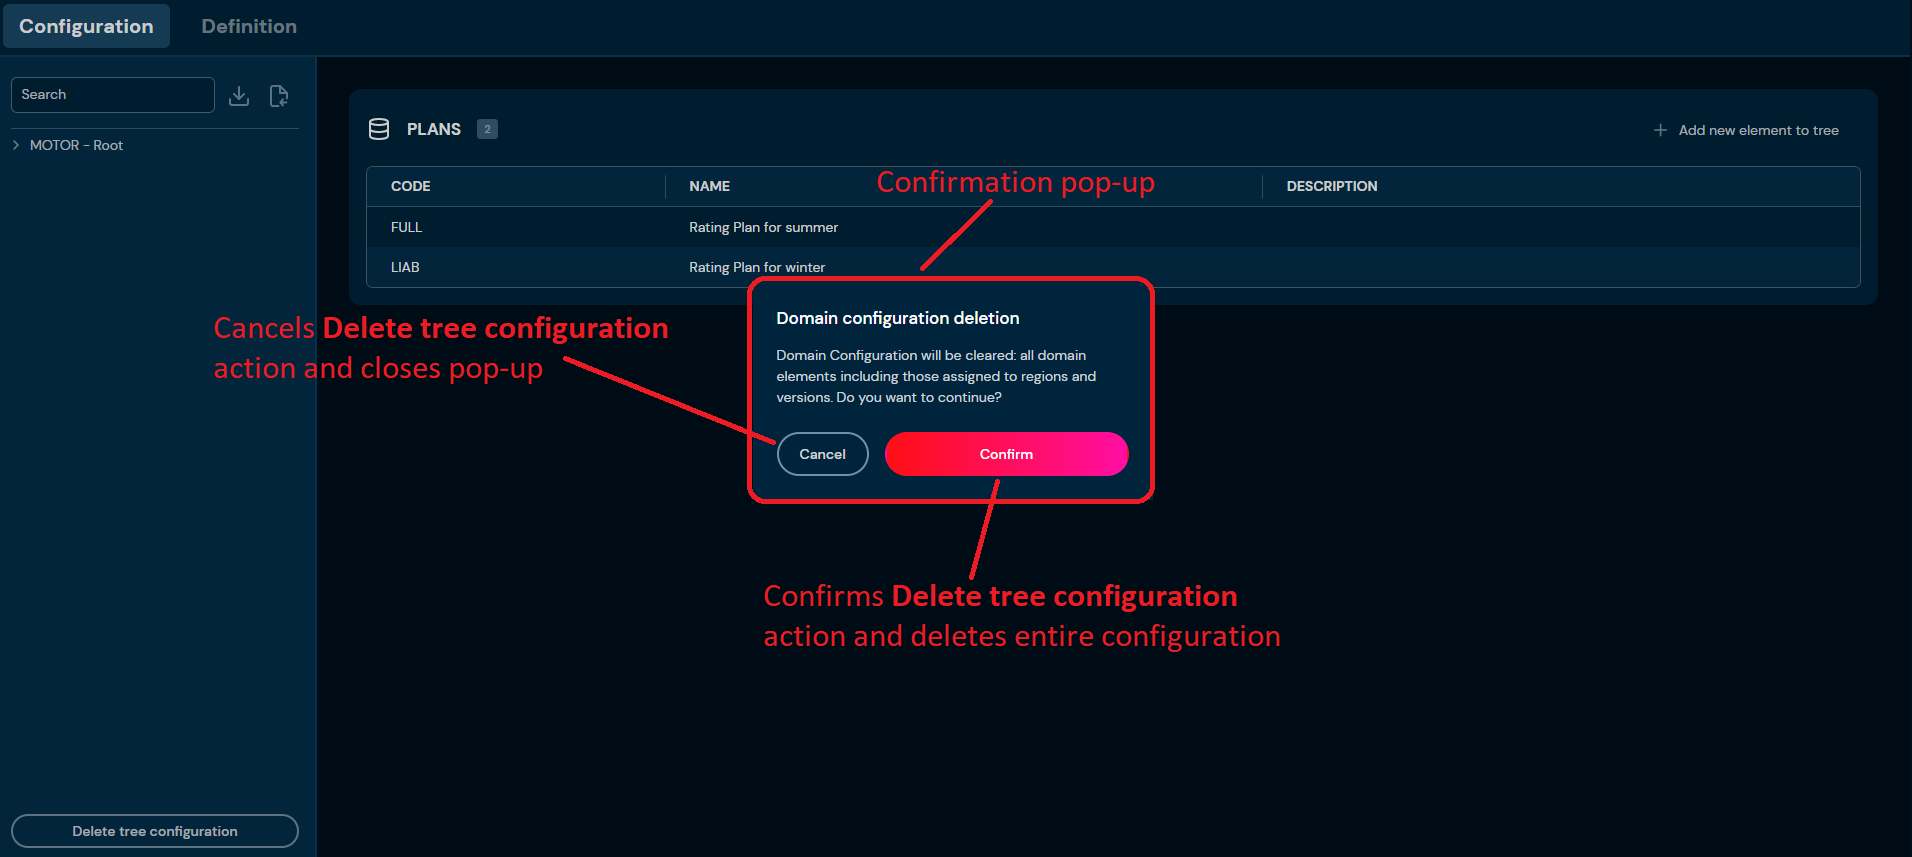
a. After choosing Delete configuration tree button, confirmation pop up will appear.
-
Choose Confirm.
a. The Entire Domain Configuration is deleted from the environment.
-
Choose Session.
a. After choosing Session button, Session preview screen will appear.
-
Choose Publish changes.
Collection Element Details Screen#
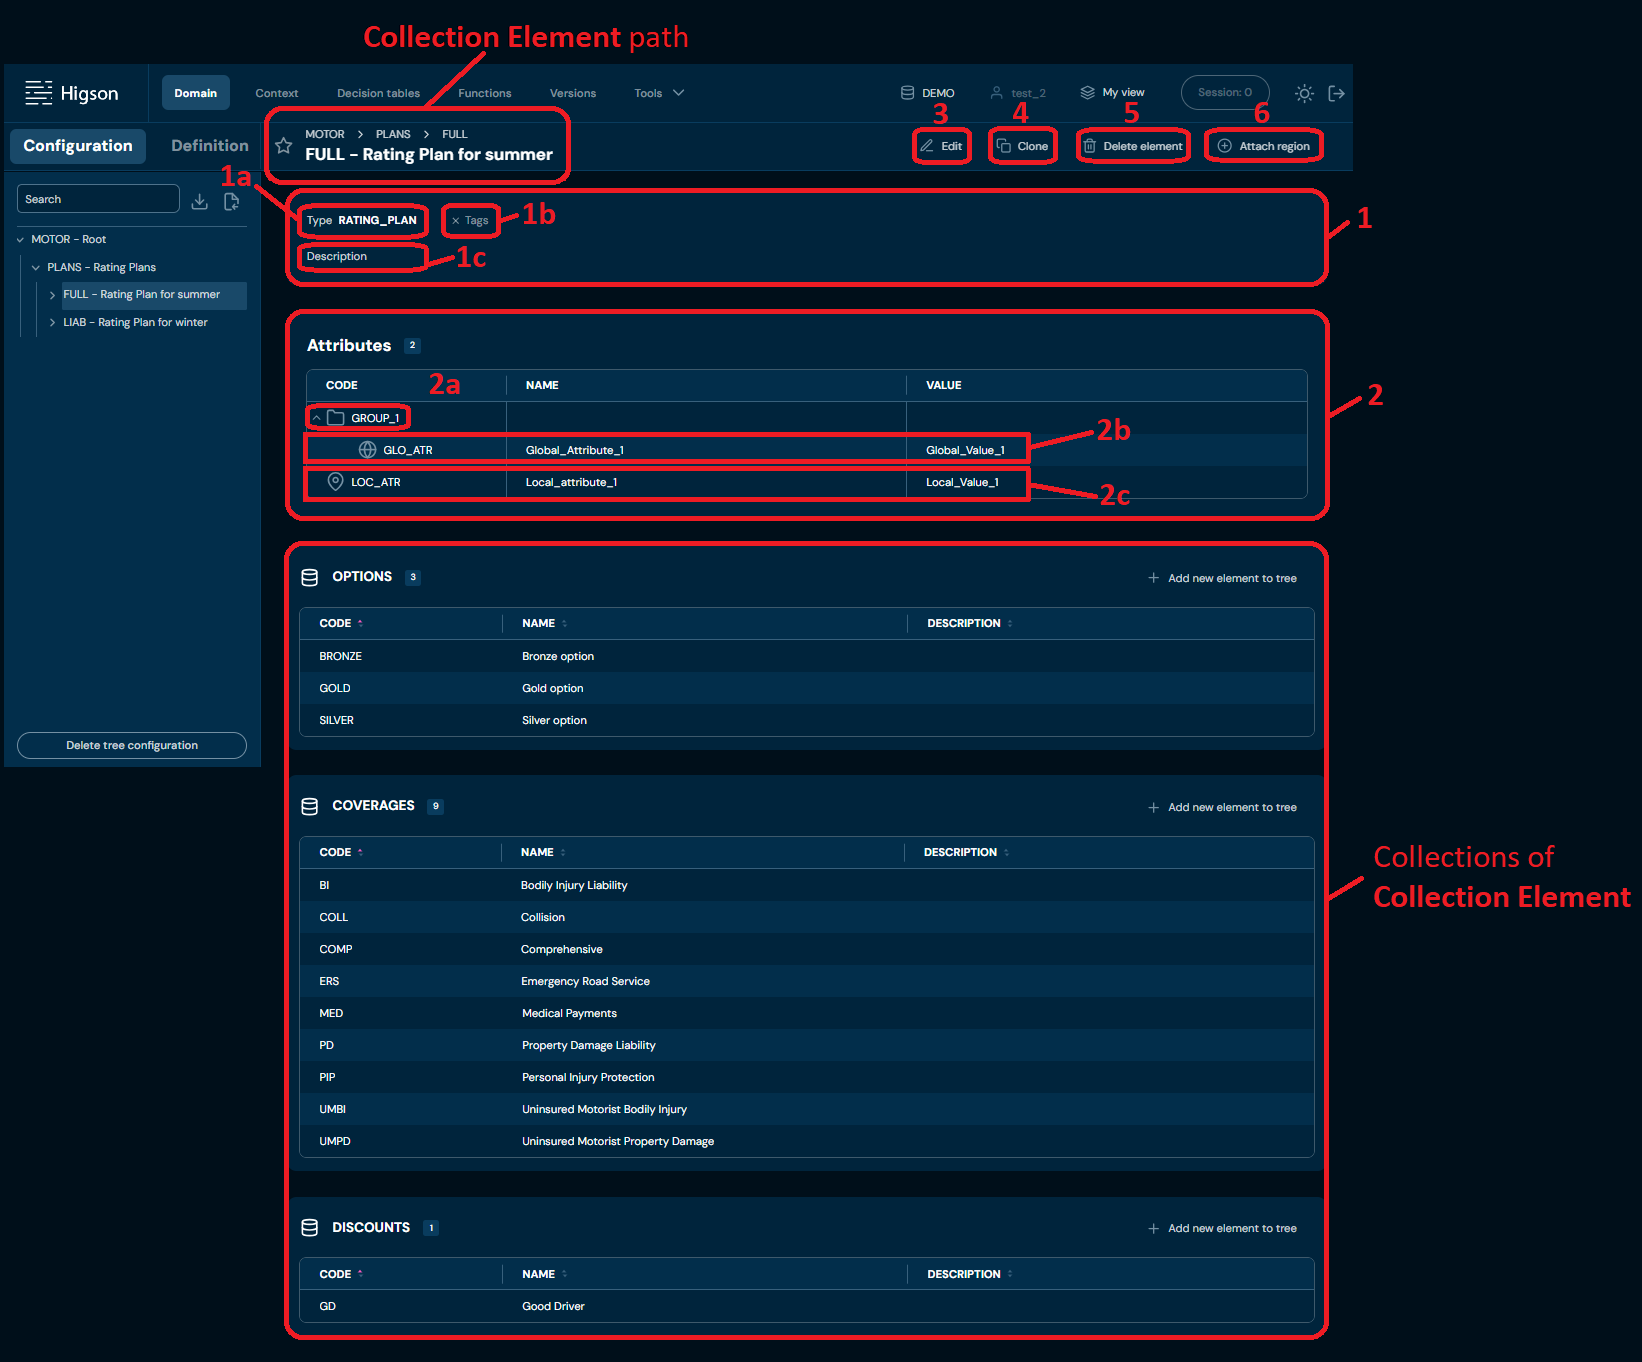
You can access Collection Element details by left-clicking on the specific Element in the Domain Configuration tree.
| No. | Name | Description |
|---|---|---|
| 1 | Collection Element details | Collection Element details include information about assigned Region, assigned Tags and description of Collection Element. |
| 1a | Definition Type code | Type code from Domain Definition. |
| 1b | Assigned Tags | List of all Tags assigned to the Element. |
| 1c | Collection Element | Description of Collection Element. |
| 2 | Collection Element attributes | List of all Global and Local Attributes created in Collection Element. |
| 2a | Attributes Group name | Name of Attributes Group. |
| 2b | Global Attributes | Global Attributes are defined by Types in Domain Definition. |
| 2c | Local Attributes | Local Attributes are created in Collection Element by User. |
| 3 | Edit | Enables Collection Element edit mode. To learn more about editing collection element go here |
| 4 | Clone | Allows to clone Collection Element. To learn more about cloning collection elements go here |
| 5 | Delete element | Deletes Collection Element. To learn more about deleting collection element go here |
| 6 | Attach/Detach region | Allows you to add/remove a region to/from the Collection Element. - Attach region is available if there are no regions added to Collection Element - Detach region is available if there is a region added to Collection Element If User has opened session, then button is greyed out. |
Edit Element#
If you want to edit data in specific Collection Element, follow these steps:
-
Choose Domain in Main toolbar.
-
In the Configuration tree, left-click on Collection Element you wish to edit.
-
Choose Edit.
a. Highlighted borders indicate that edit mode is active.
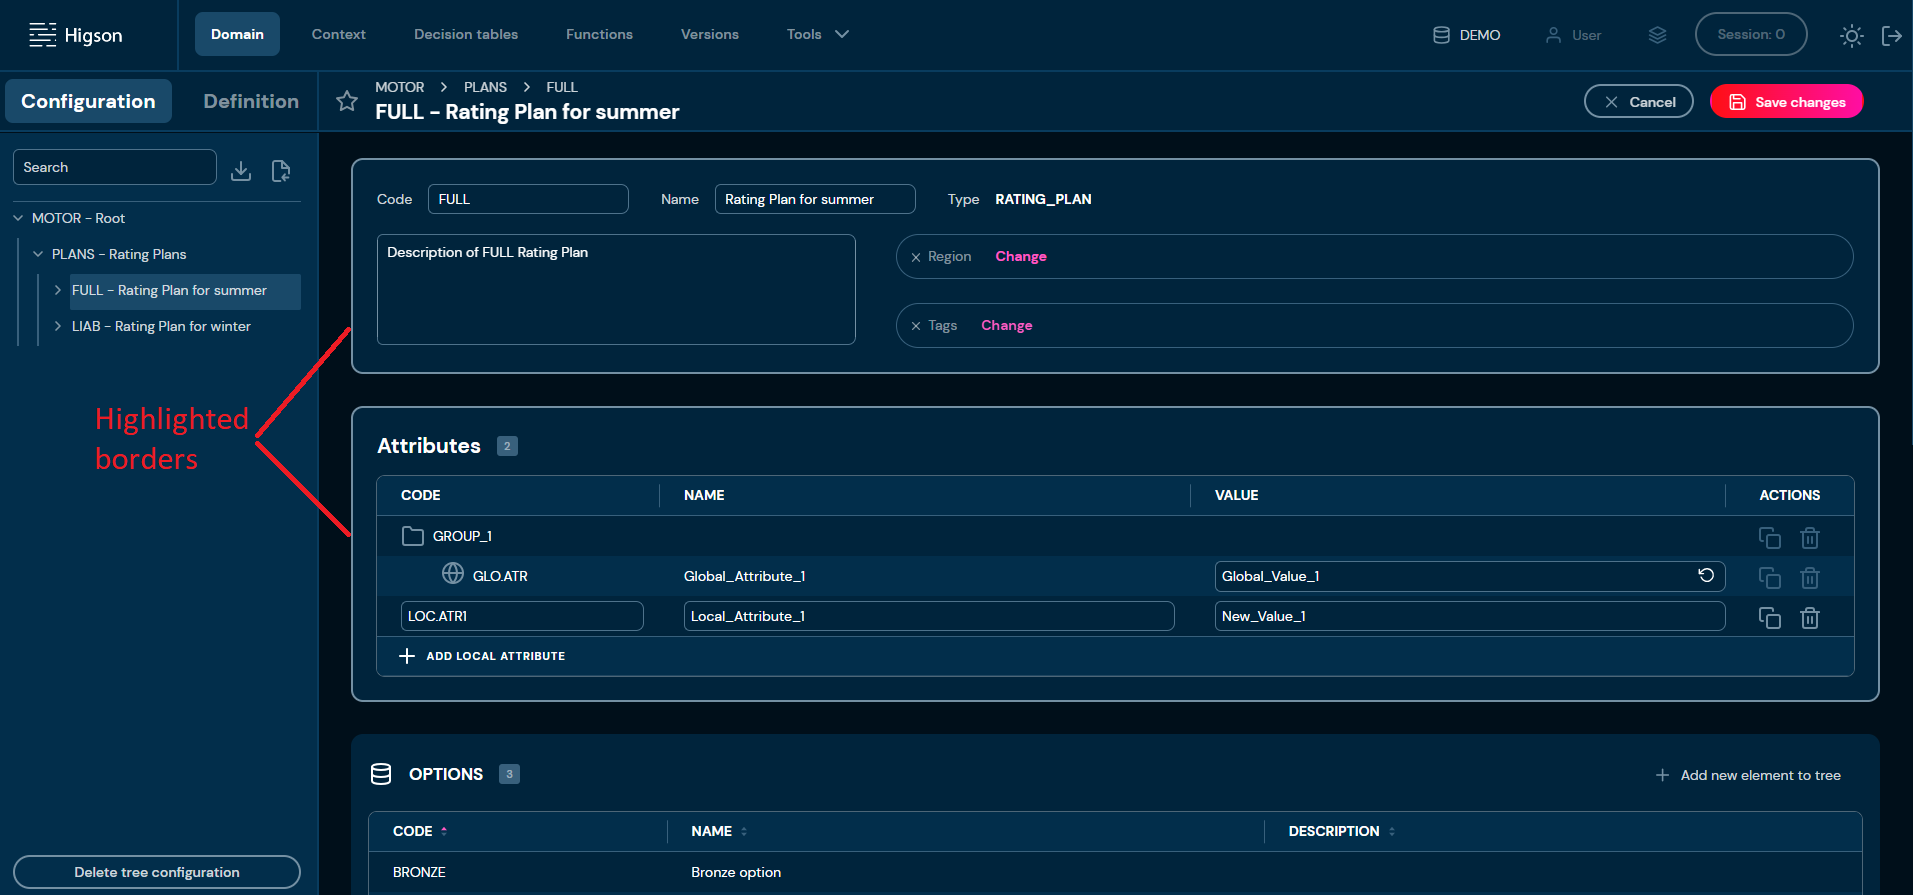
-
Edit any data you need.
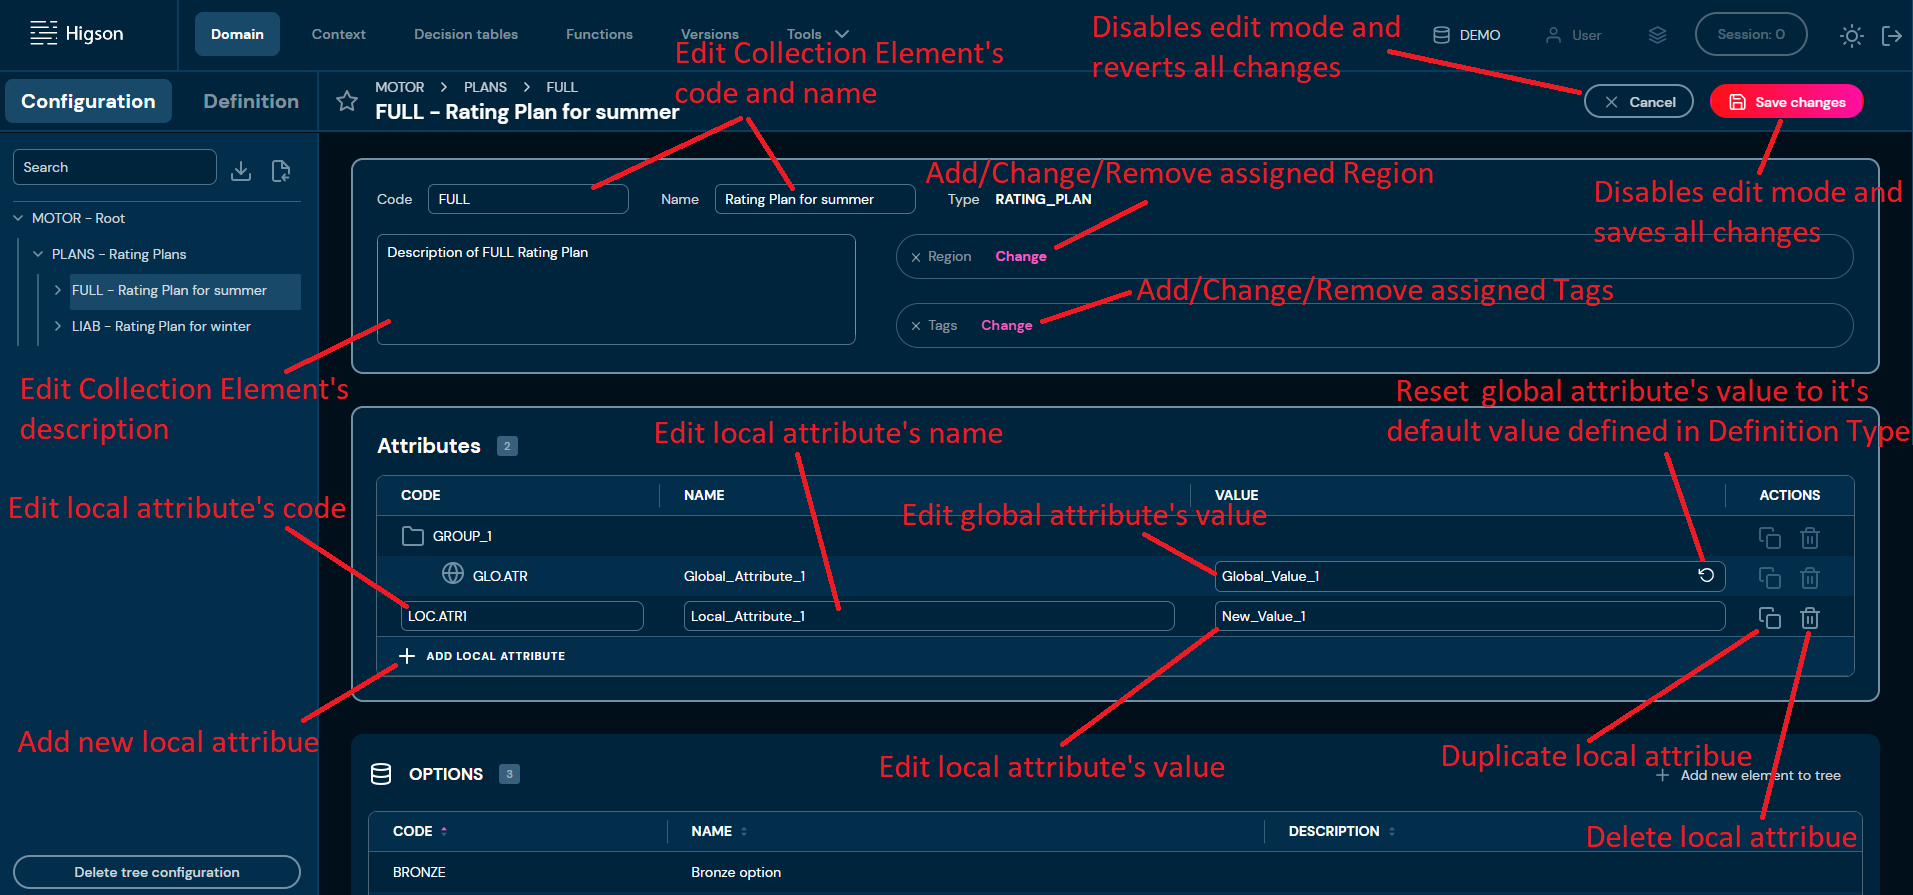
-
Choose Save changes to save all changes made in Collection Element.
a. Cancel reverts all changes made in the Collection Element.
Add Local Attribute#
-
Choose Domain in Main toolbar.
-
In the Configuration tree, left-click on Collection Element you wish to add local attribute.
-
Choose Edit.
-
Choose Add local attribute and you:
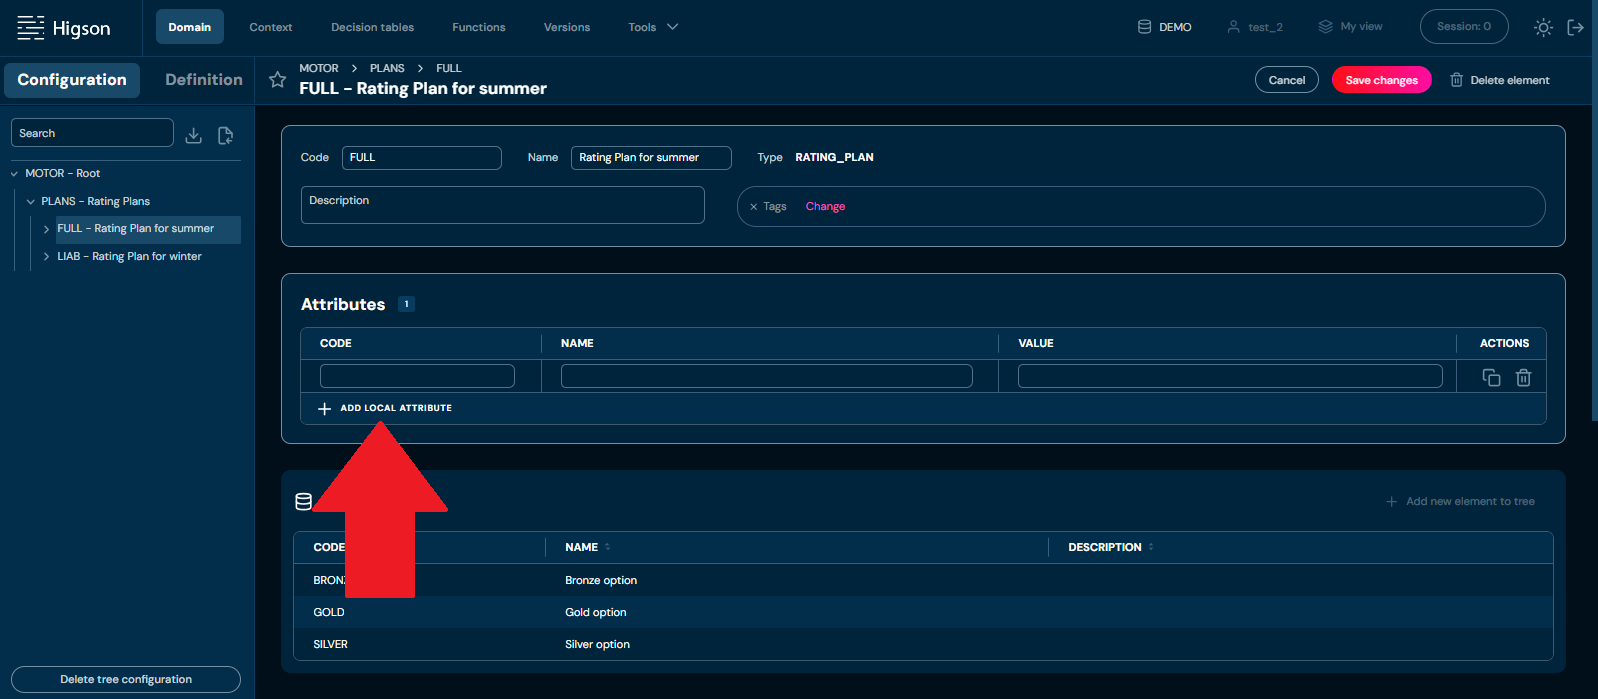
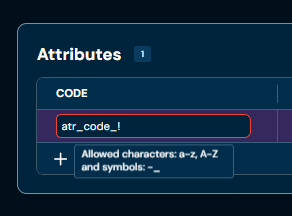
a. need to provide unique Attribute code. Code can contain only characters from collection “a-z”; “A-Z”; “-”; “_”.
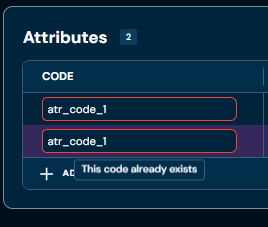
i. If you entered the same code in at least two attributes, then borders will be highlighted with red color, and you will not be able to save changes.
ii. If you enter illegal characters, then borders will be highlighted with red color. Hover on field to see tooltip with more information.
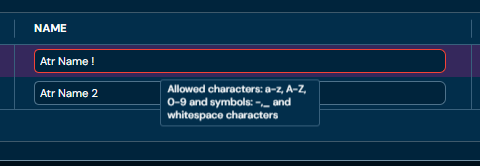
b. need to provide Attribute name. Name can contain only characters from collection “a-z”; “A-Z”; “0-9”; “-”; “_” and white-space characters.
i. If you enter illegal characters, then borders will be highlighted with red color. Hover on field to see tooltip with more information.
c. need to provide Attribute value. Value can contain any characters.
-
Choose Save changes.
Reset to Default Value#
-
Choose Domain in Main toolbar.
-
In the Configuration tree, left-click on Collection Element you wish to add local attribute.
-
Choose Edit.
-
Choose Reset to default value for specific Global Attribute.
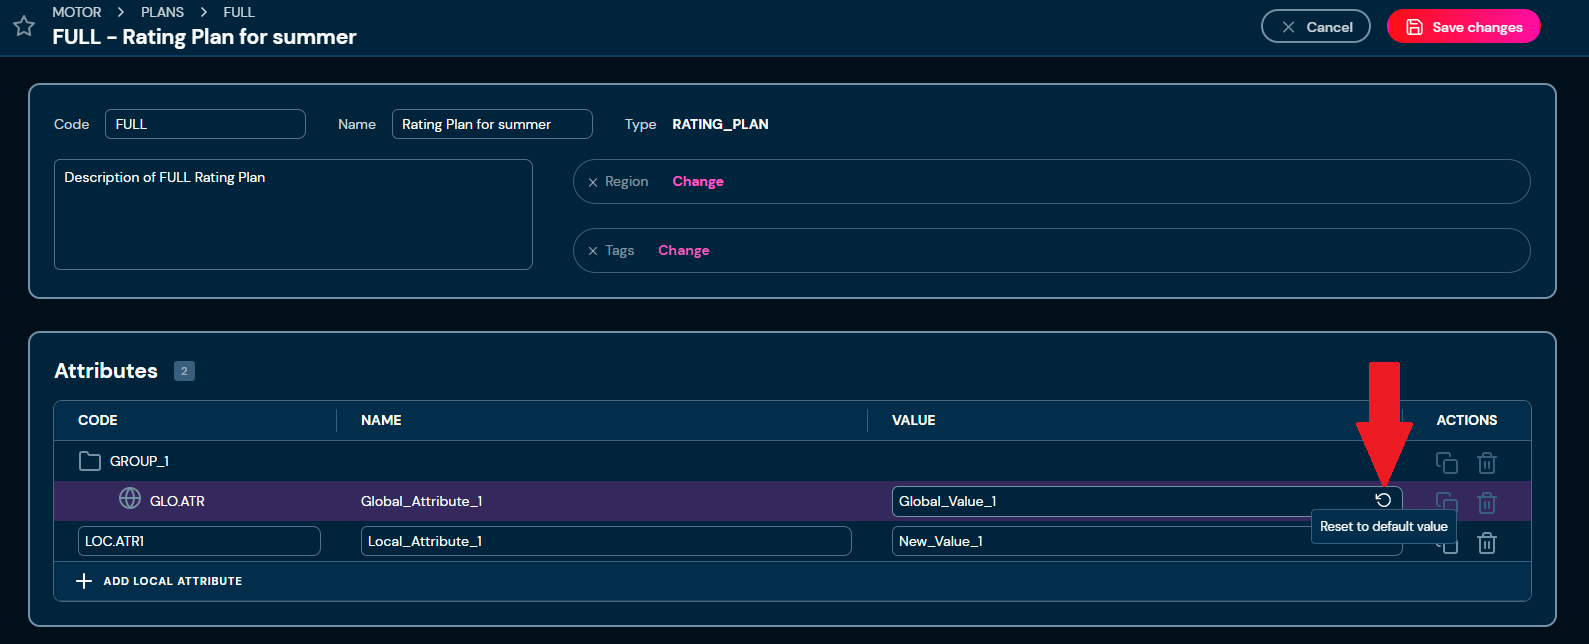
a. Attribute’s value is changed to the value defined in the appropriate Definition Type.
-
Choose Save changes.
Clone Element#
If you want to clone specific Collection Element, follow these steps:
-
Choose Domain in Main toolbar.
-
In the Configuration tree, left-click on Collection Element you wish to clone.
-
Choose Clone.
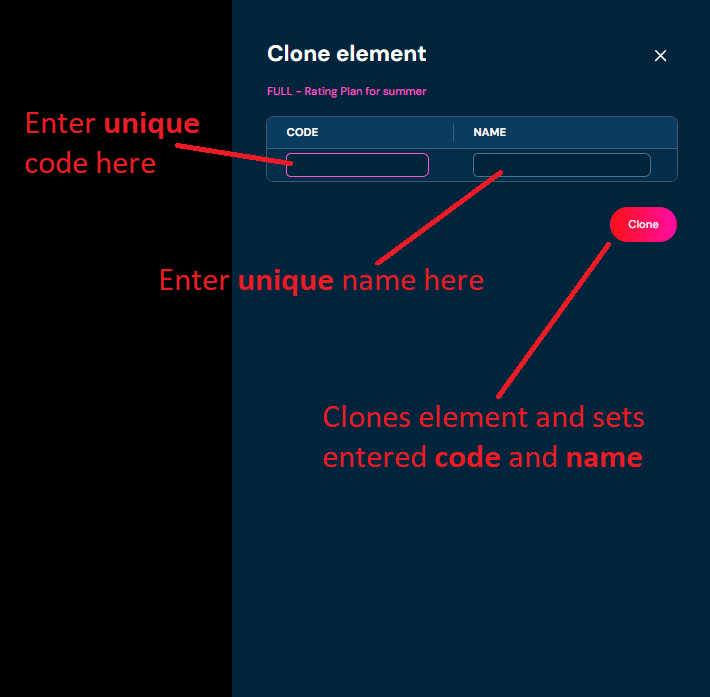
a. Choosing Clone brings up the Clone element screen.
-
You need to provide:
a. unique code. Code can contain only characters from collection “a-z”; “A-Z”; “-”; “_”.
i. If the code you entered is not unique, then borders will be highlighted with red color and warning message will appear.
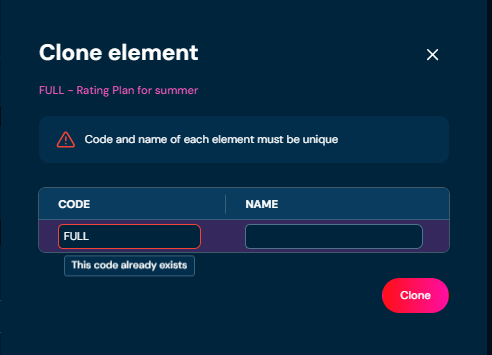
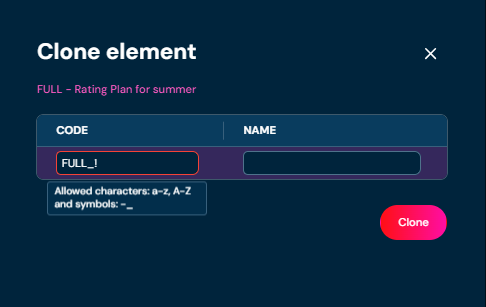
ii. If you enter illegal characters, then borders will be highlighted with red color. Hover on field to see tooltip with more information.
b. unique name. Name can contain only characters from collection"a-z"; “A-Z”; “0-9”; “-”; “_” and white-space characters.
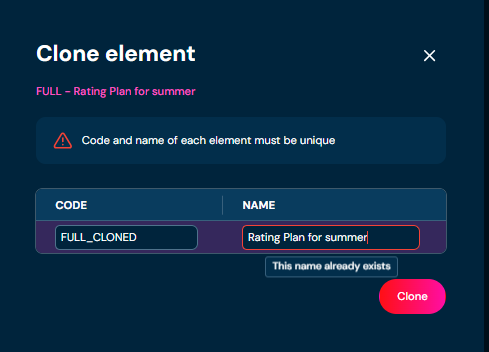
i. If the code you entered is not unique, then borders will be highlighted with red color and warning message will appear.
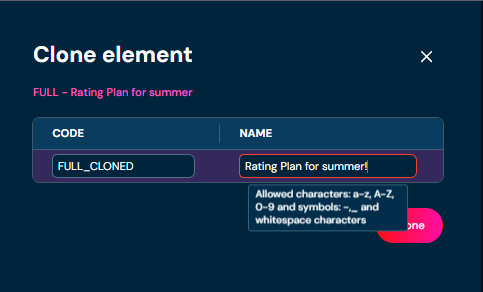
ii. If you enter illegal characters, then borders will be highlighted with red color. Hover on field to see tooltip with more information.
-
Choose Clone.
a. Collection Elements are being cloned.
Delete Element#
If you want to delete specific Collection Element, follow these steps:
-
Choose Domain in Main toolbar.
-
In the Configuration tree, left-click on Collection Element you wish to delete.
-
Choose Delete element.
a. After choosing Delete element action, confirmation pop up will appear.
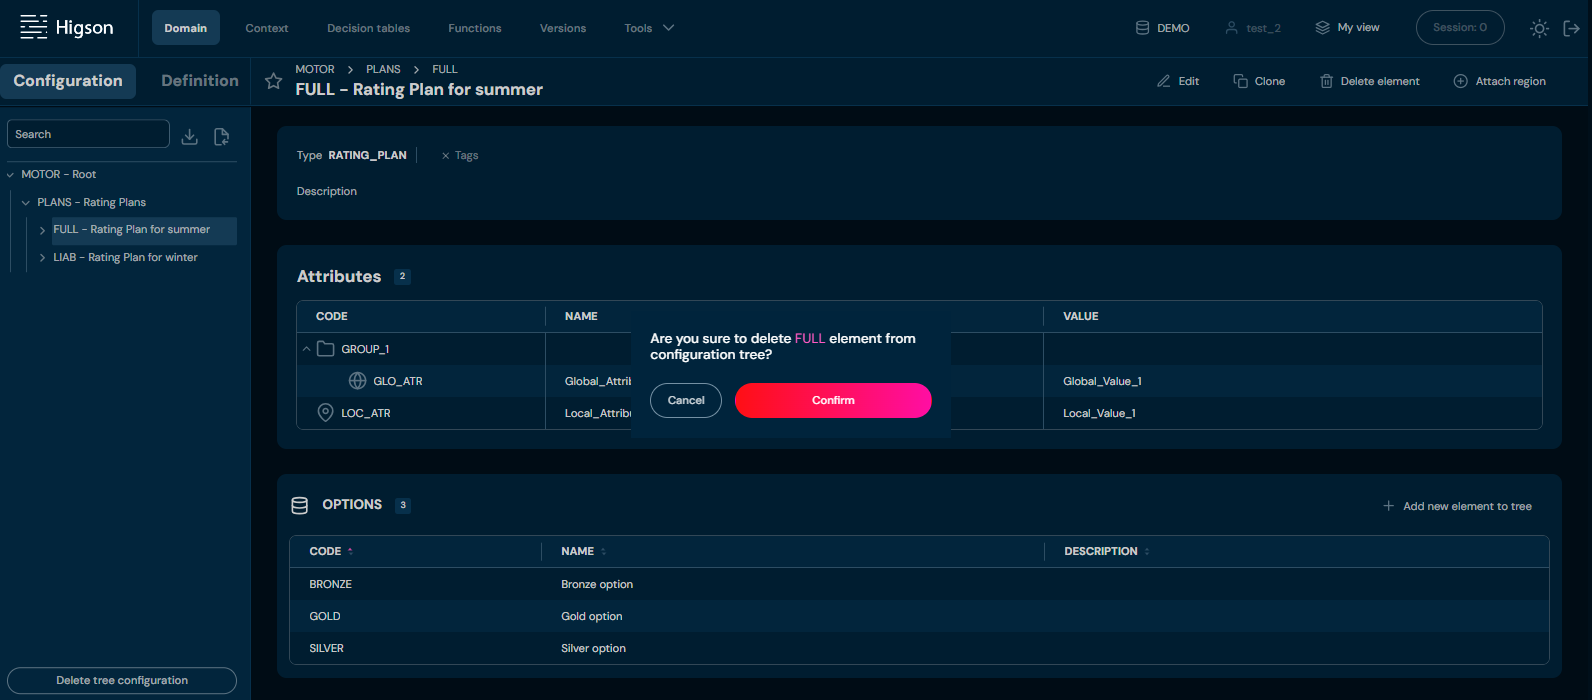
-
Choose Confirm.
a. Collection Element is deleted from the environment.
Attach Region#
If you want to attach a region to Collection Element, follow these steps:
-
Choose Domain in Main toolbar.
-
In the Configuration tree, left-click on Collection Element with no region assigned you want to attach a region.
-
Choose Attach region
a. If Attach region action is greyed out, it means that user has active open session.
b. If Detach region action is available, it means that Collection Element has assigned reason already. You need to Detach region before you will be able to attach a new region.
c. Choosing Attach region brings up Manage versioning screen.
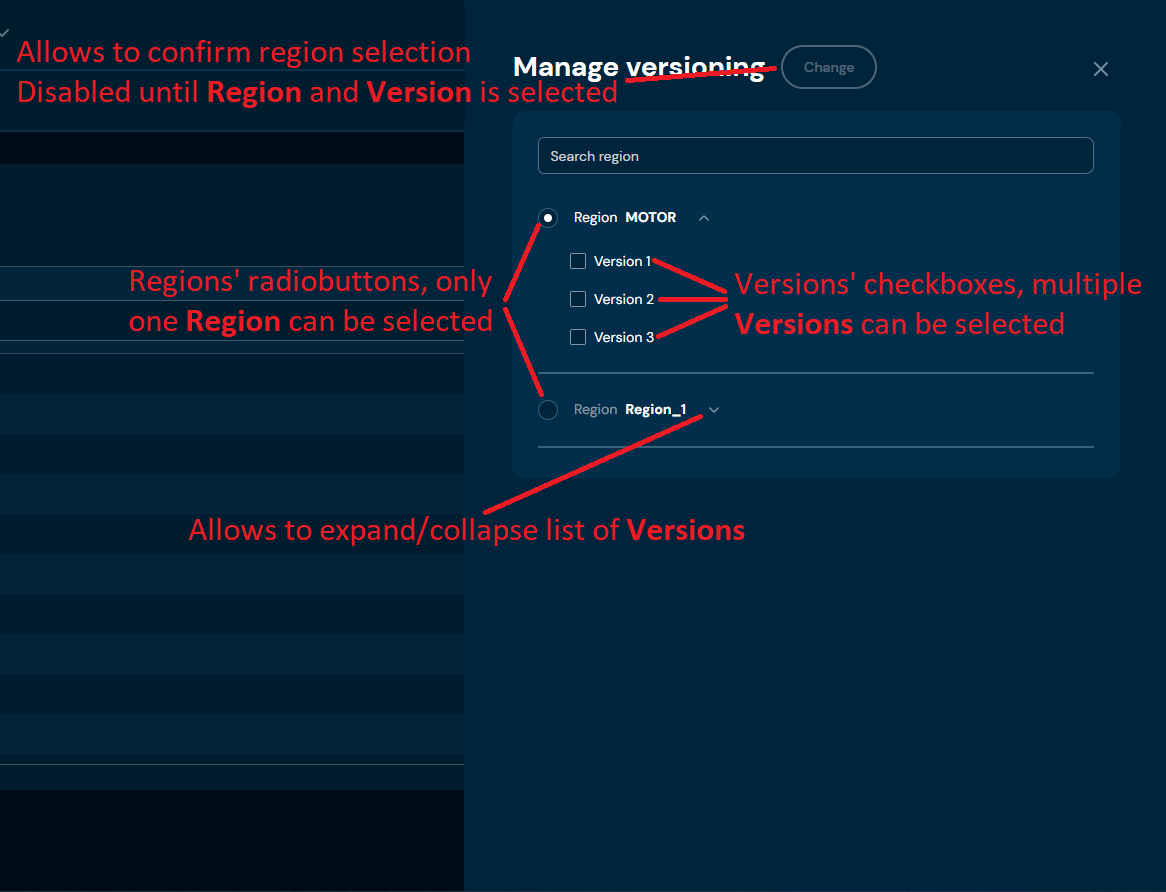
-
Select Region and one or more Version.
-
Choose Change.
a. Region is being assigned to the Collection Element.
Detach Region#
If you want to detach a region from Collection Element, follow these steps:
-
Choose Domain in Main toolbar.
-
In the Configuration tree, left-click on Collection Element with a region assigned you want to detach a region.
-
Choose Detach region.
a. If Detach region action is greyed out, it means that user has active open session.
b. If Attach region action is available, it means that Collection Element has no region assigned.
c. After choosing Detach region action, confirmation pop up will appear.
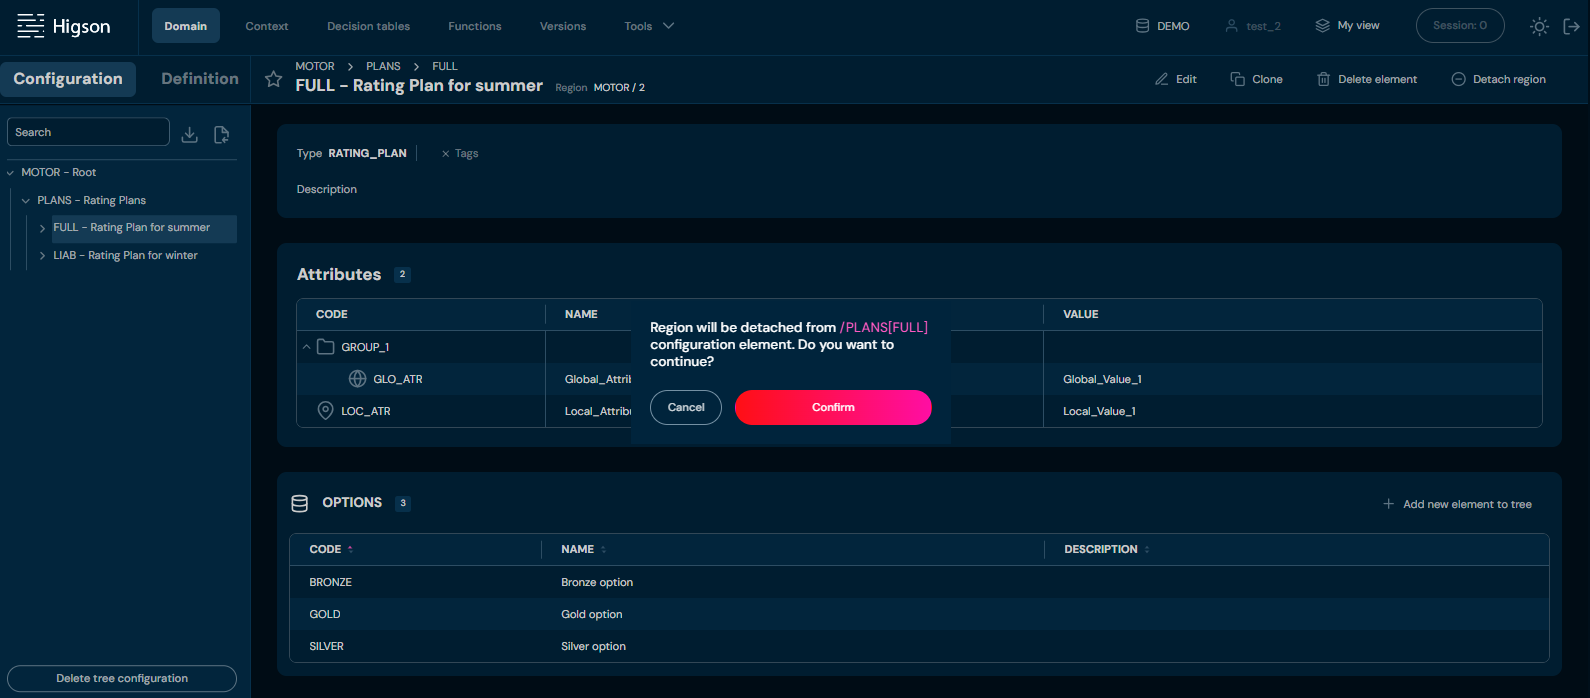
-
Choose Confirm.
a. The Region is being detached from Collection Element.
Decision Tables
A decision table presents values in rows and columns. Each row describes a situation when given inputs (columns) result in certain outputs (also columns). In other words, a decision matrix displays decisions based on certain criteria. You can create a decision table in Higson (so-called a parameter), where you define input and output columns and then populate data with values in rows.
If you are new to Higson decision tables, you may want to read the introductory section Introduction to Decision Tables.
Since version 4.3, Higson Studio also includes an AI Assistant that can help you conversationally design and refine decision tables. To learn how to enable it, see AI Assistant Configuration, and for usage instructions see AI Features in Decision Tables.
In order to see all Decision Tables select Decision Tables in the Main Toolbar.
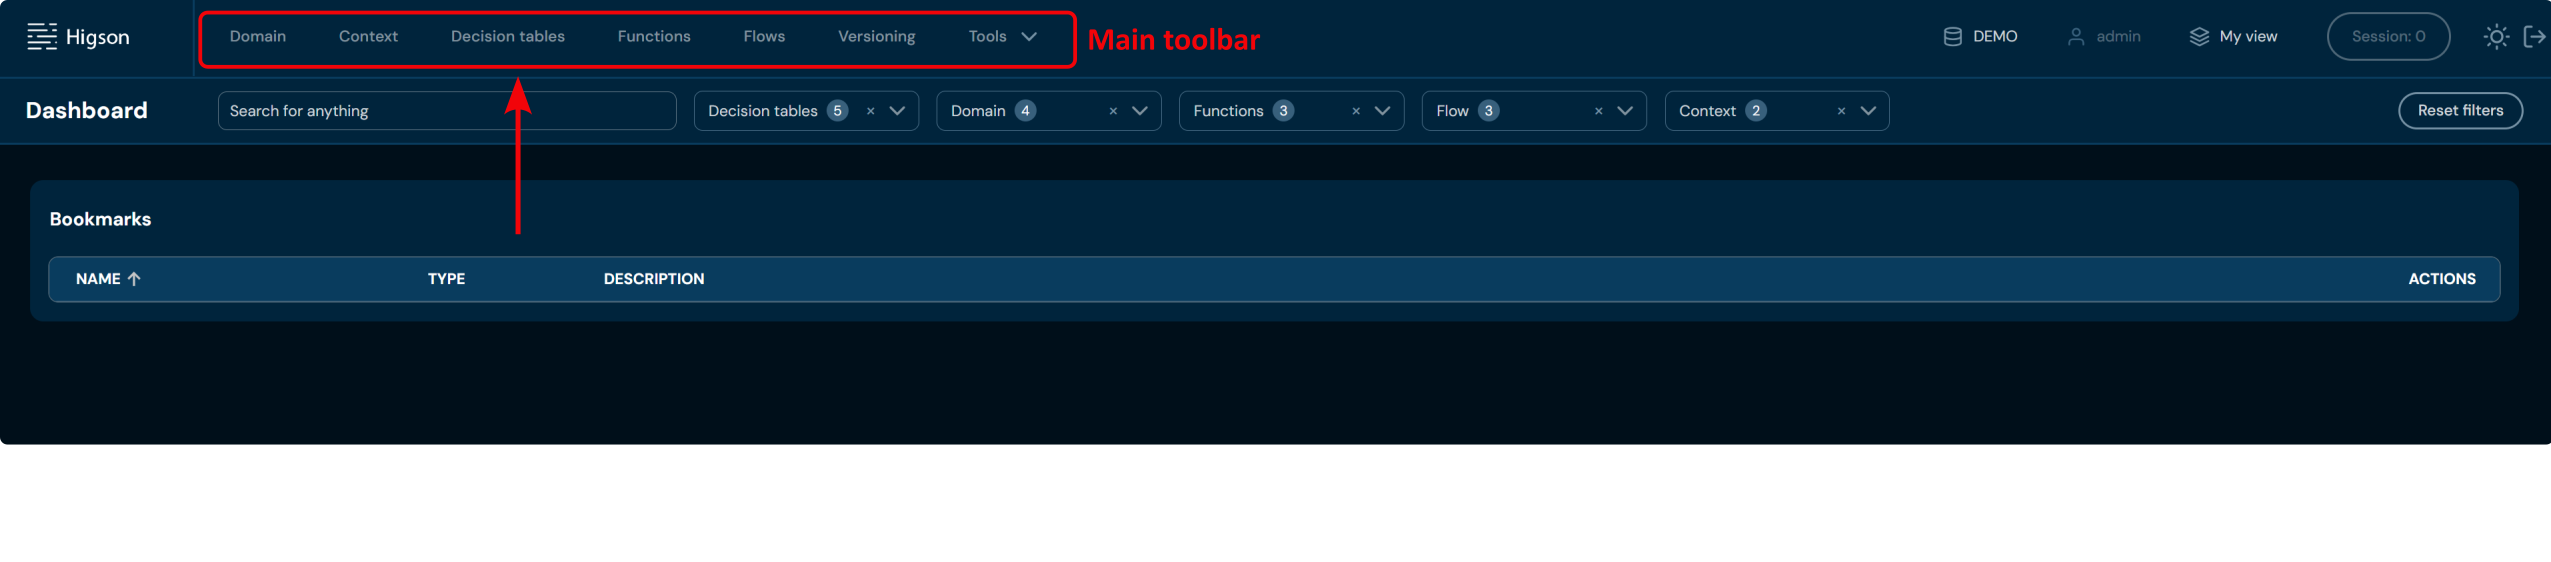
After that, when you enter Decision tables, you will see a screen of Decision Tables
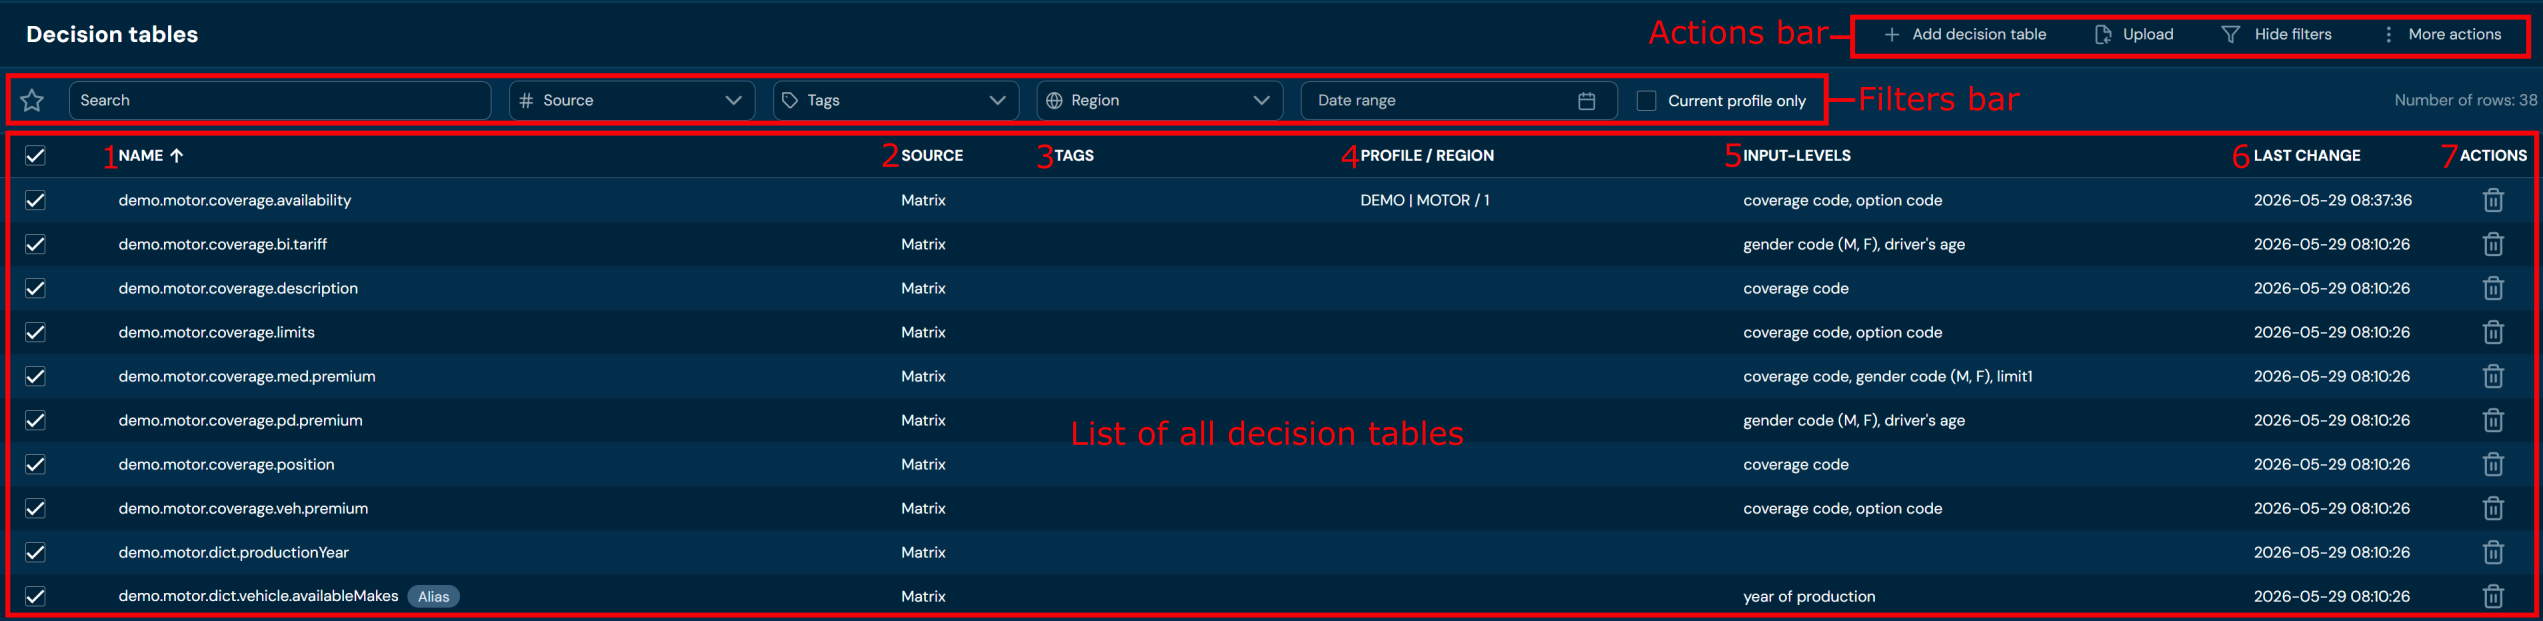
| No. | Column name | Description |
|---|---|---|
| 1. | Name | Full name of Decision table. |
| 2. | Source | Data source in the matrix. |
| 3. | Tags | List of all Tags assigned to the Decision table |
| 4. | Profile/Region | Profile and Region the decision table is assigned to. |
| 5. | Input levels | List of input levels for business data. |
| 6. | Last change | The last modification date of the decision table. |
| 7. | Actions | List of quick access actions. Remove action deletes decision table |
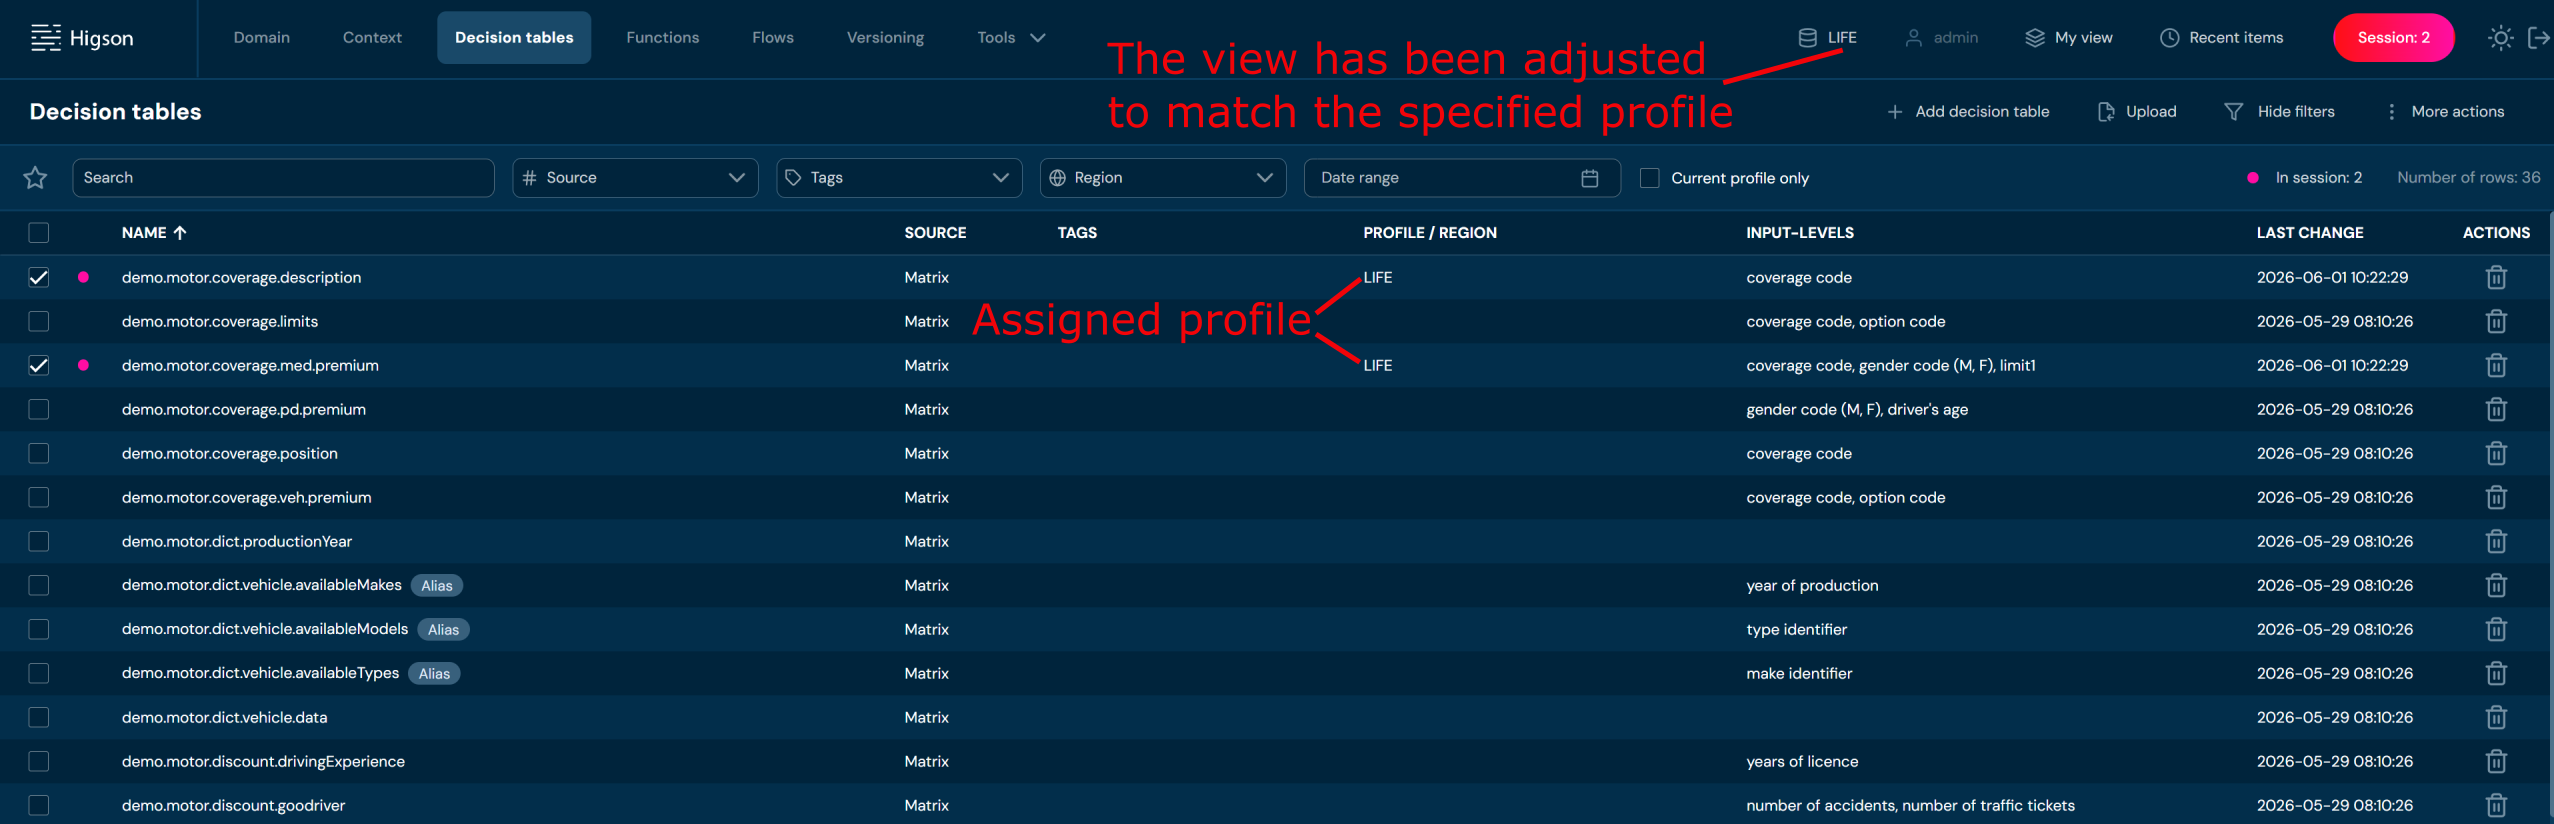
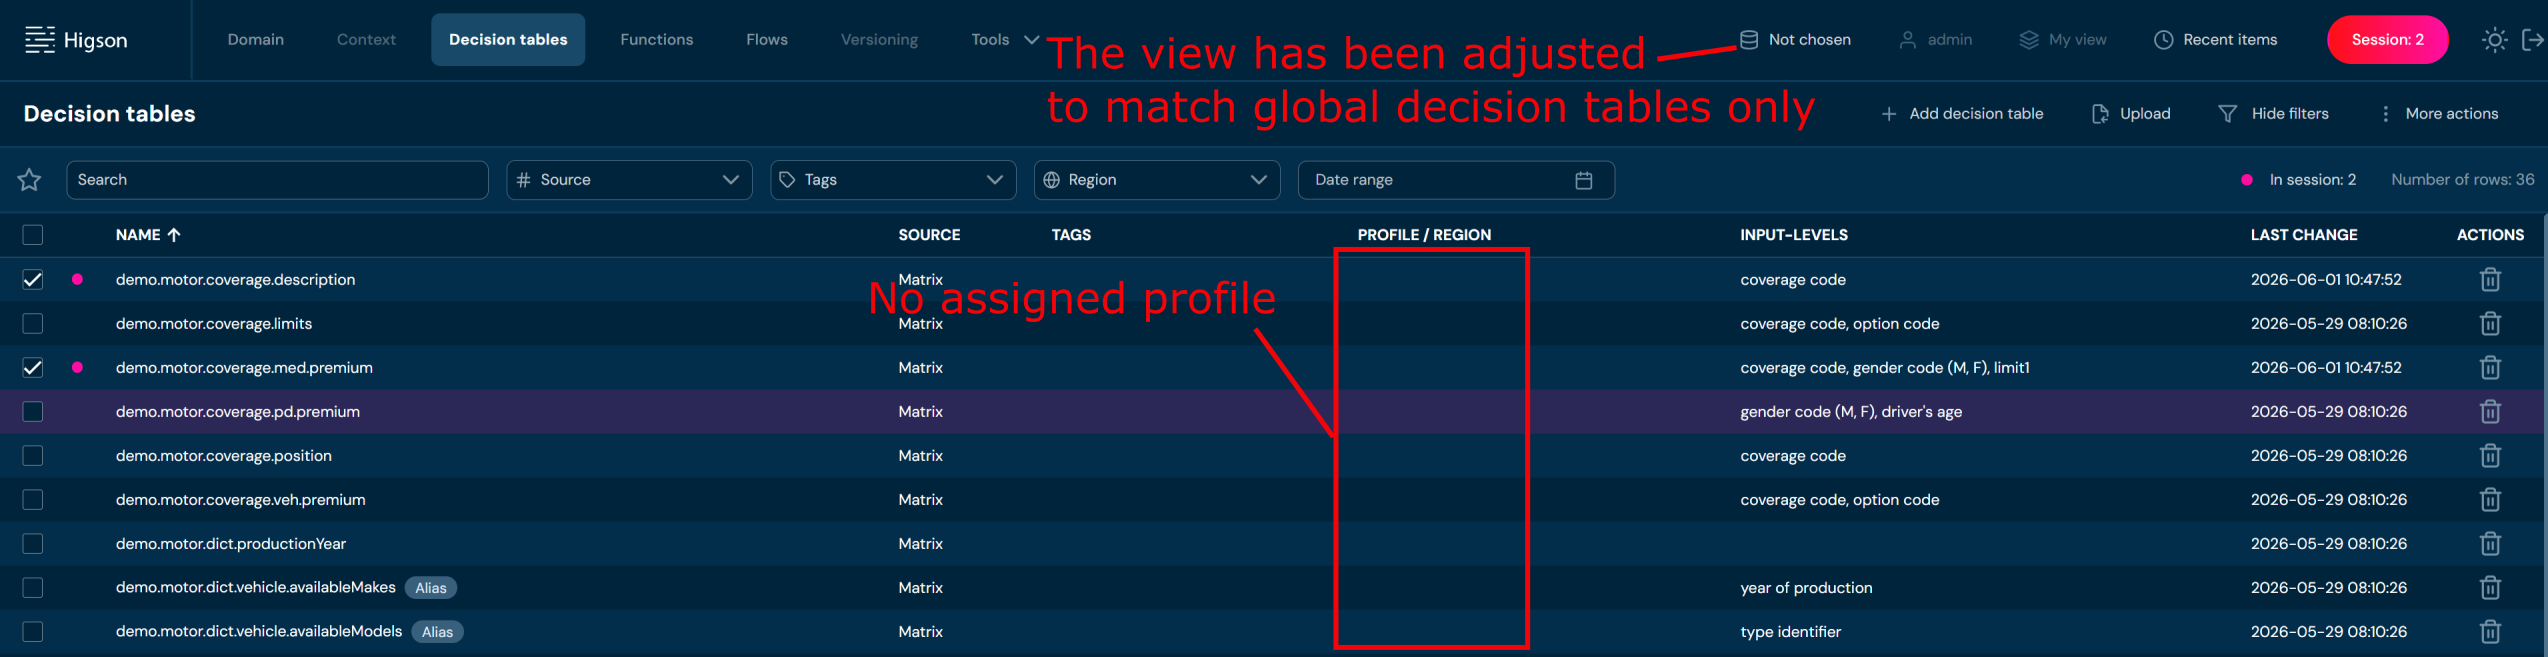
The decision tables list view depends on the selected profile.
If a profile is selected, both global items and items assigned to the selected profile are displayed.
If no profile is selected (not-chosen), only global items are visible.
Elements modified in current session are marked with pink dot:
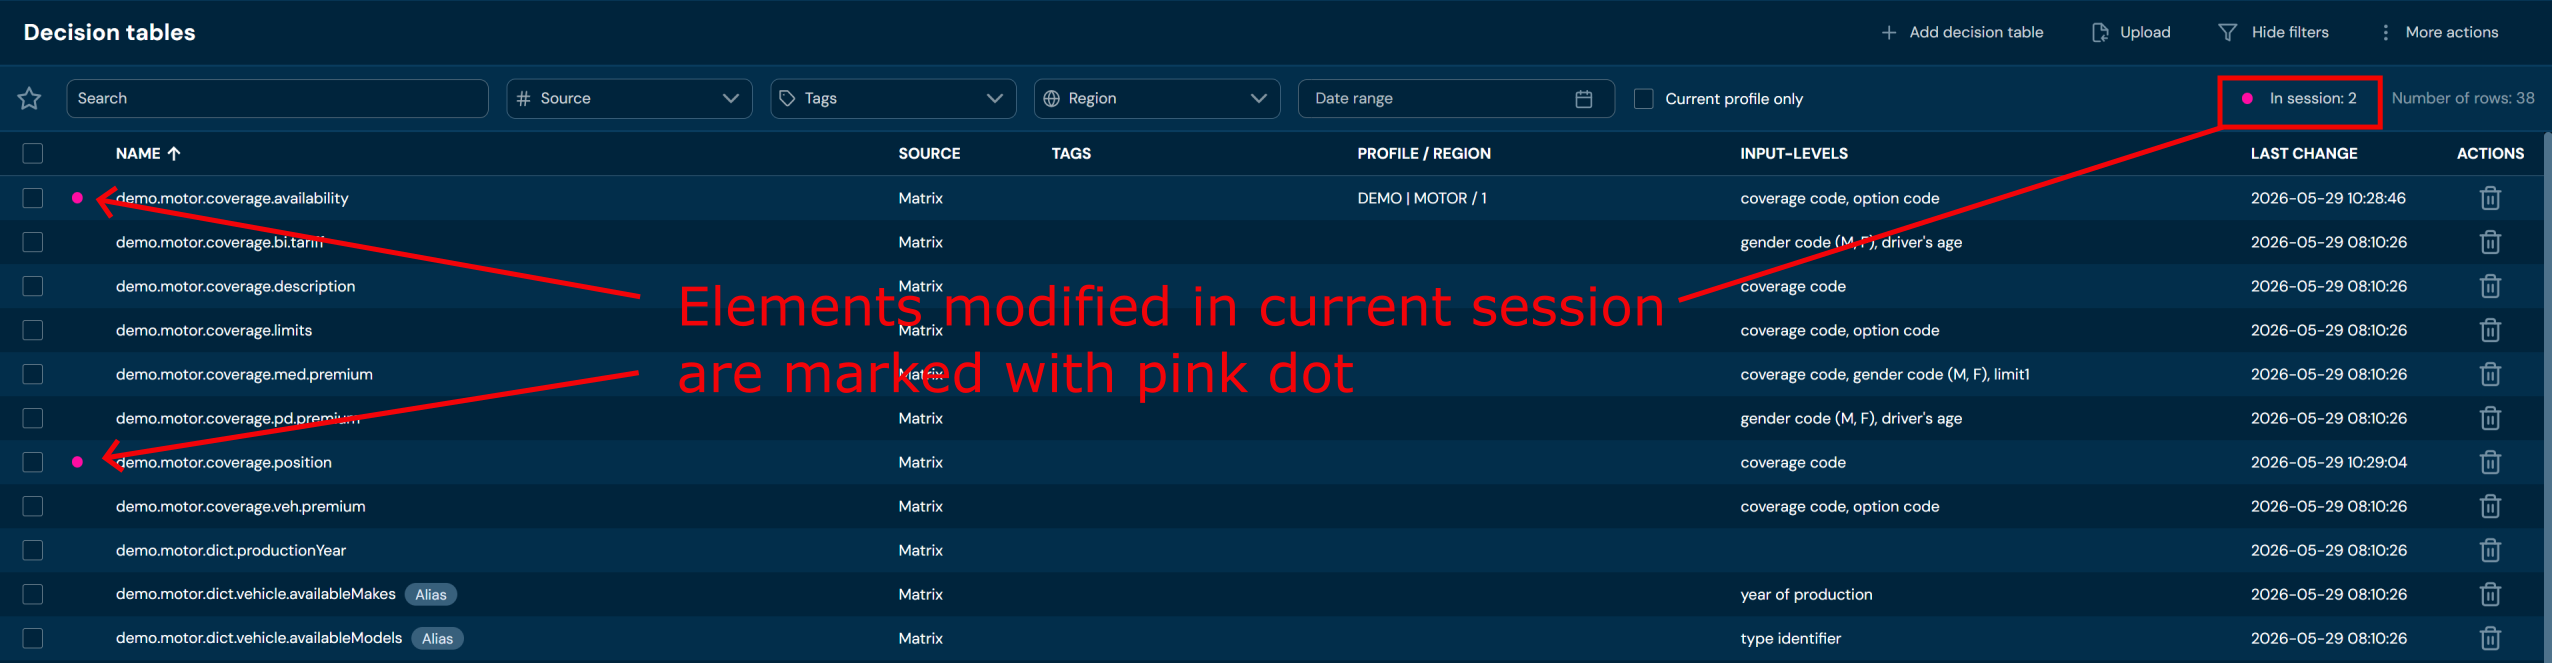
On this screen, you can apply Filters to search for specific decision table or to narrow down the number of displayed decision tables. You can also perform actions on one or multiple decision tables.
You can see All Actions available for the decision tables below:
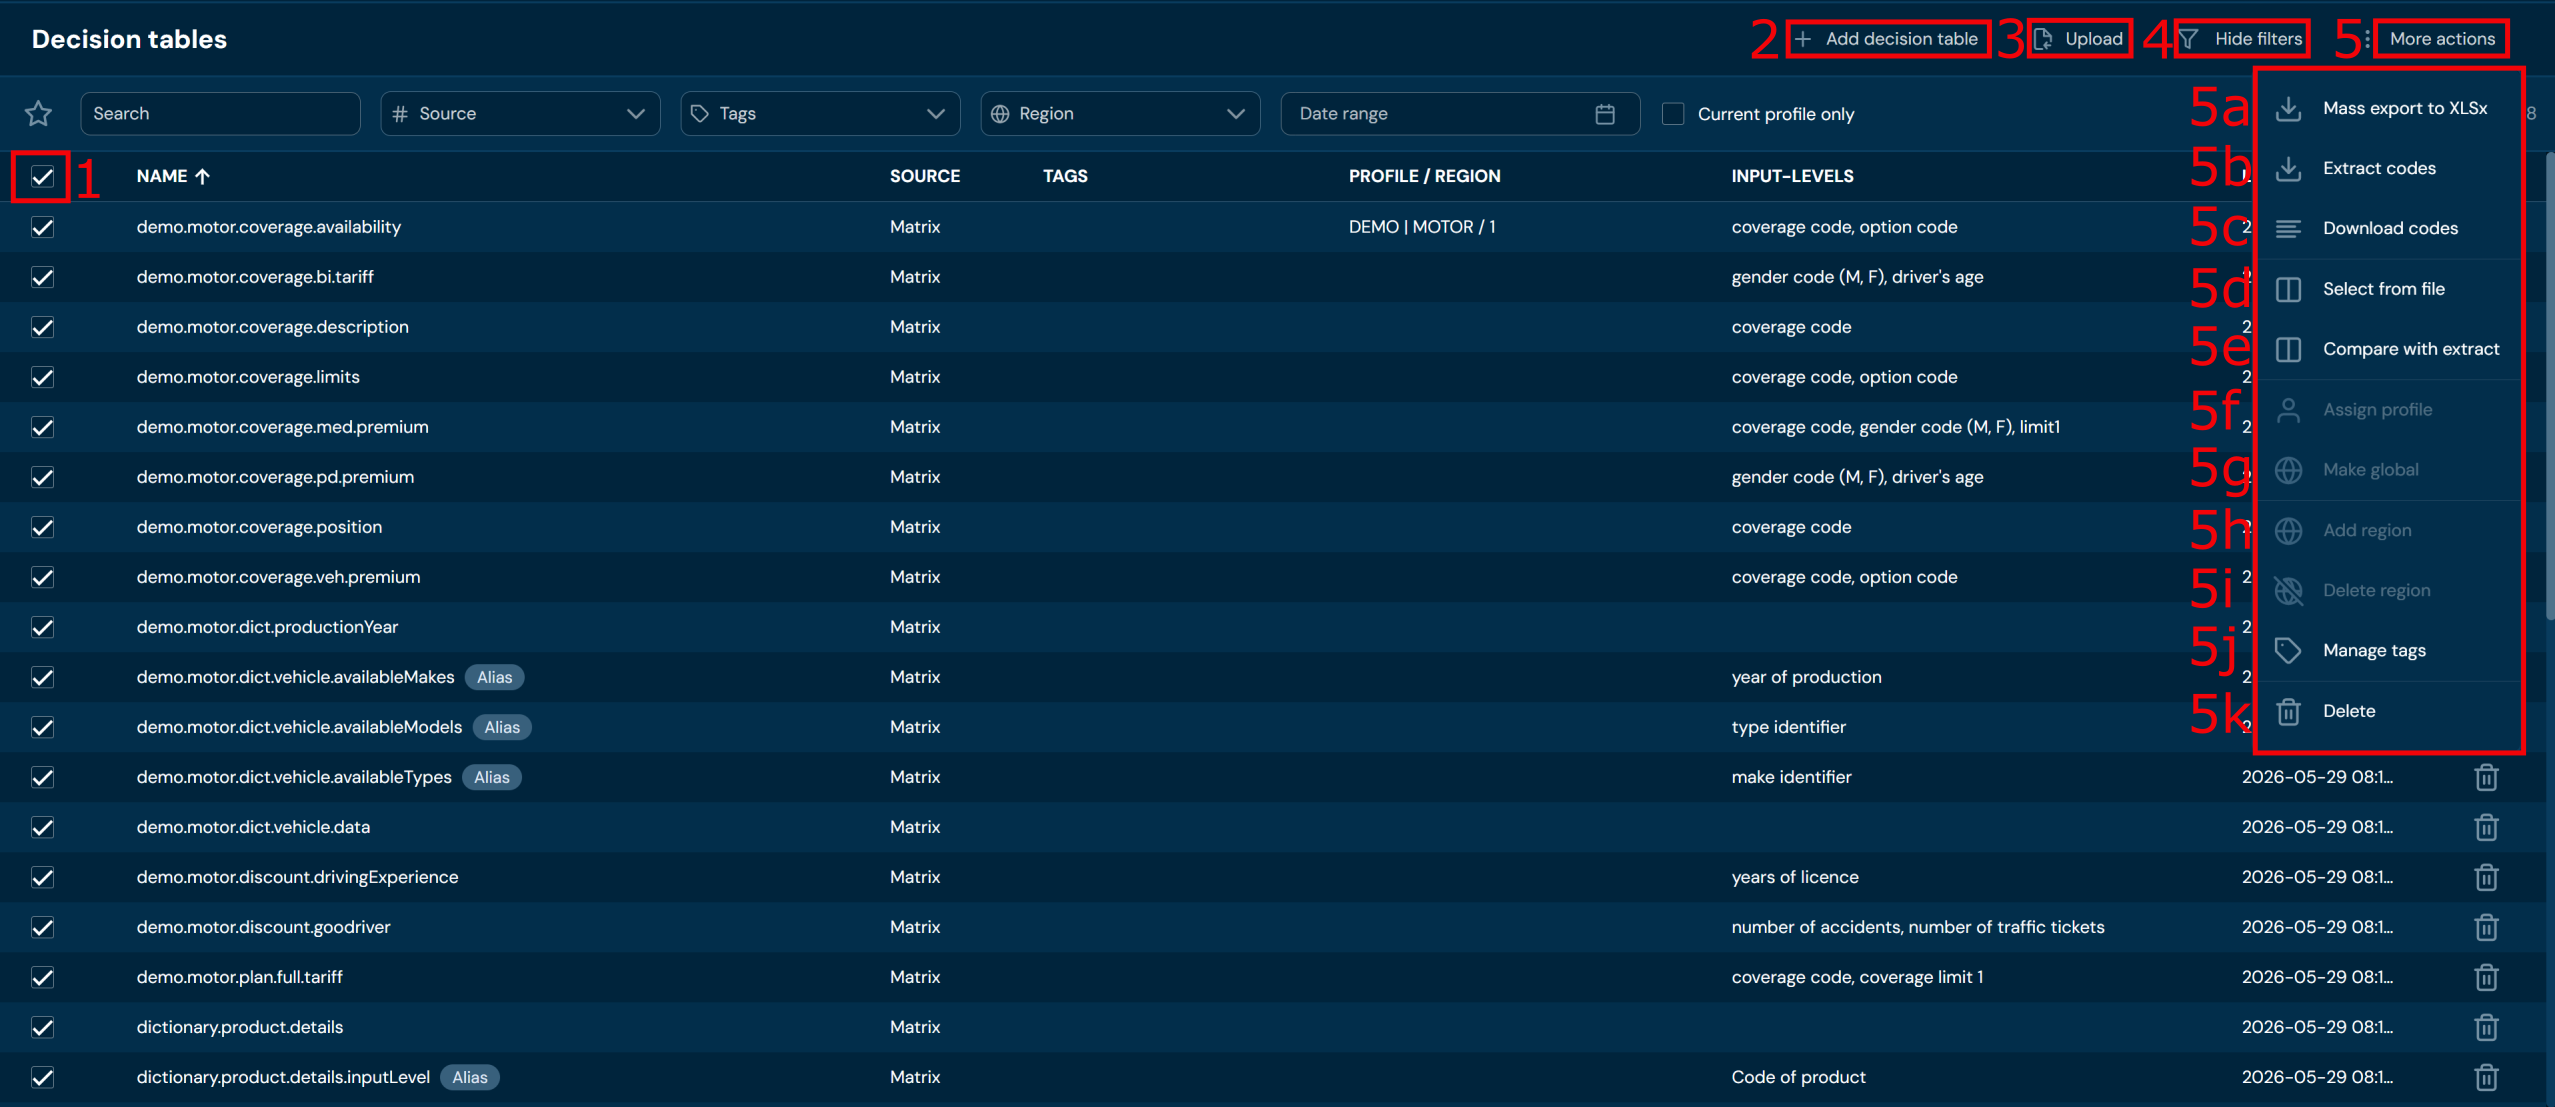
| No. | Action | Description |
|---|---|---|
| 1 | Checkboxes | Select the top checkbox to select all decision tables in the view or select individual checkboxes to group decision tables for actions 5a, 5b, 5c, 5f, 5g, 5h, 5i, 5j, 5k. |
| 2 | + Add decision tables | Opens a step-by-step decision tables wizard. Allows you to create new decision tables. |
| 3 | Upload | Allows importing decision tables from a ZIP or xlsx file. |
| 4 | Hide filters | Hides or reveals the Filters bar accordingly. If Filter bar is visible, then action Hide filters is available. If it’s hidden, then action Show filters is available. |
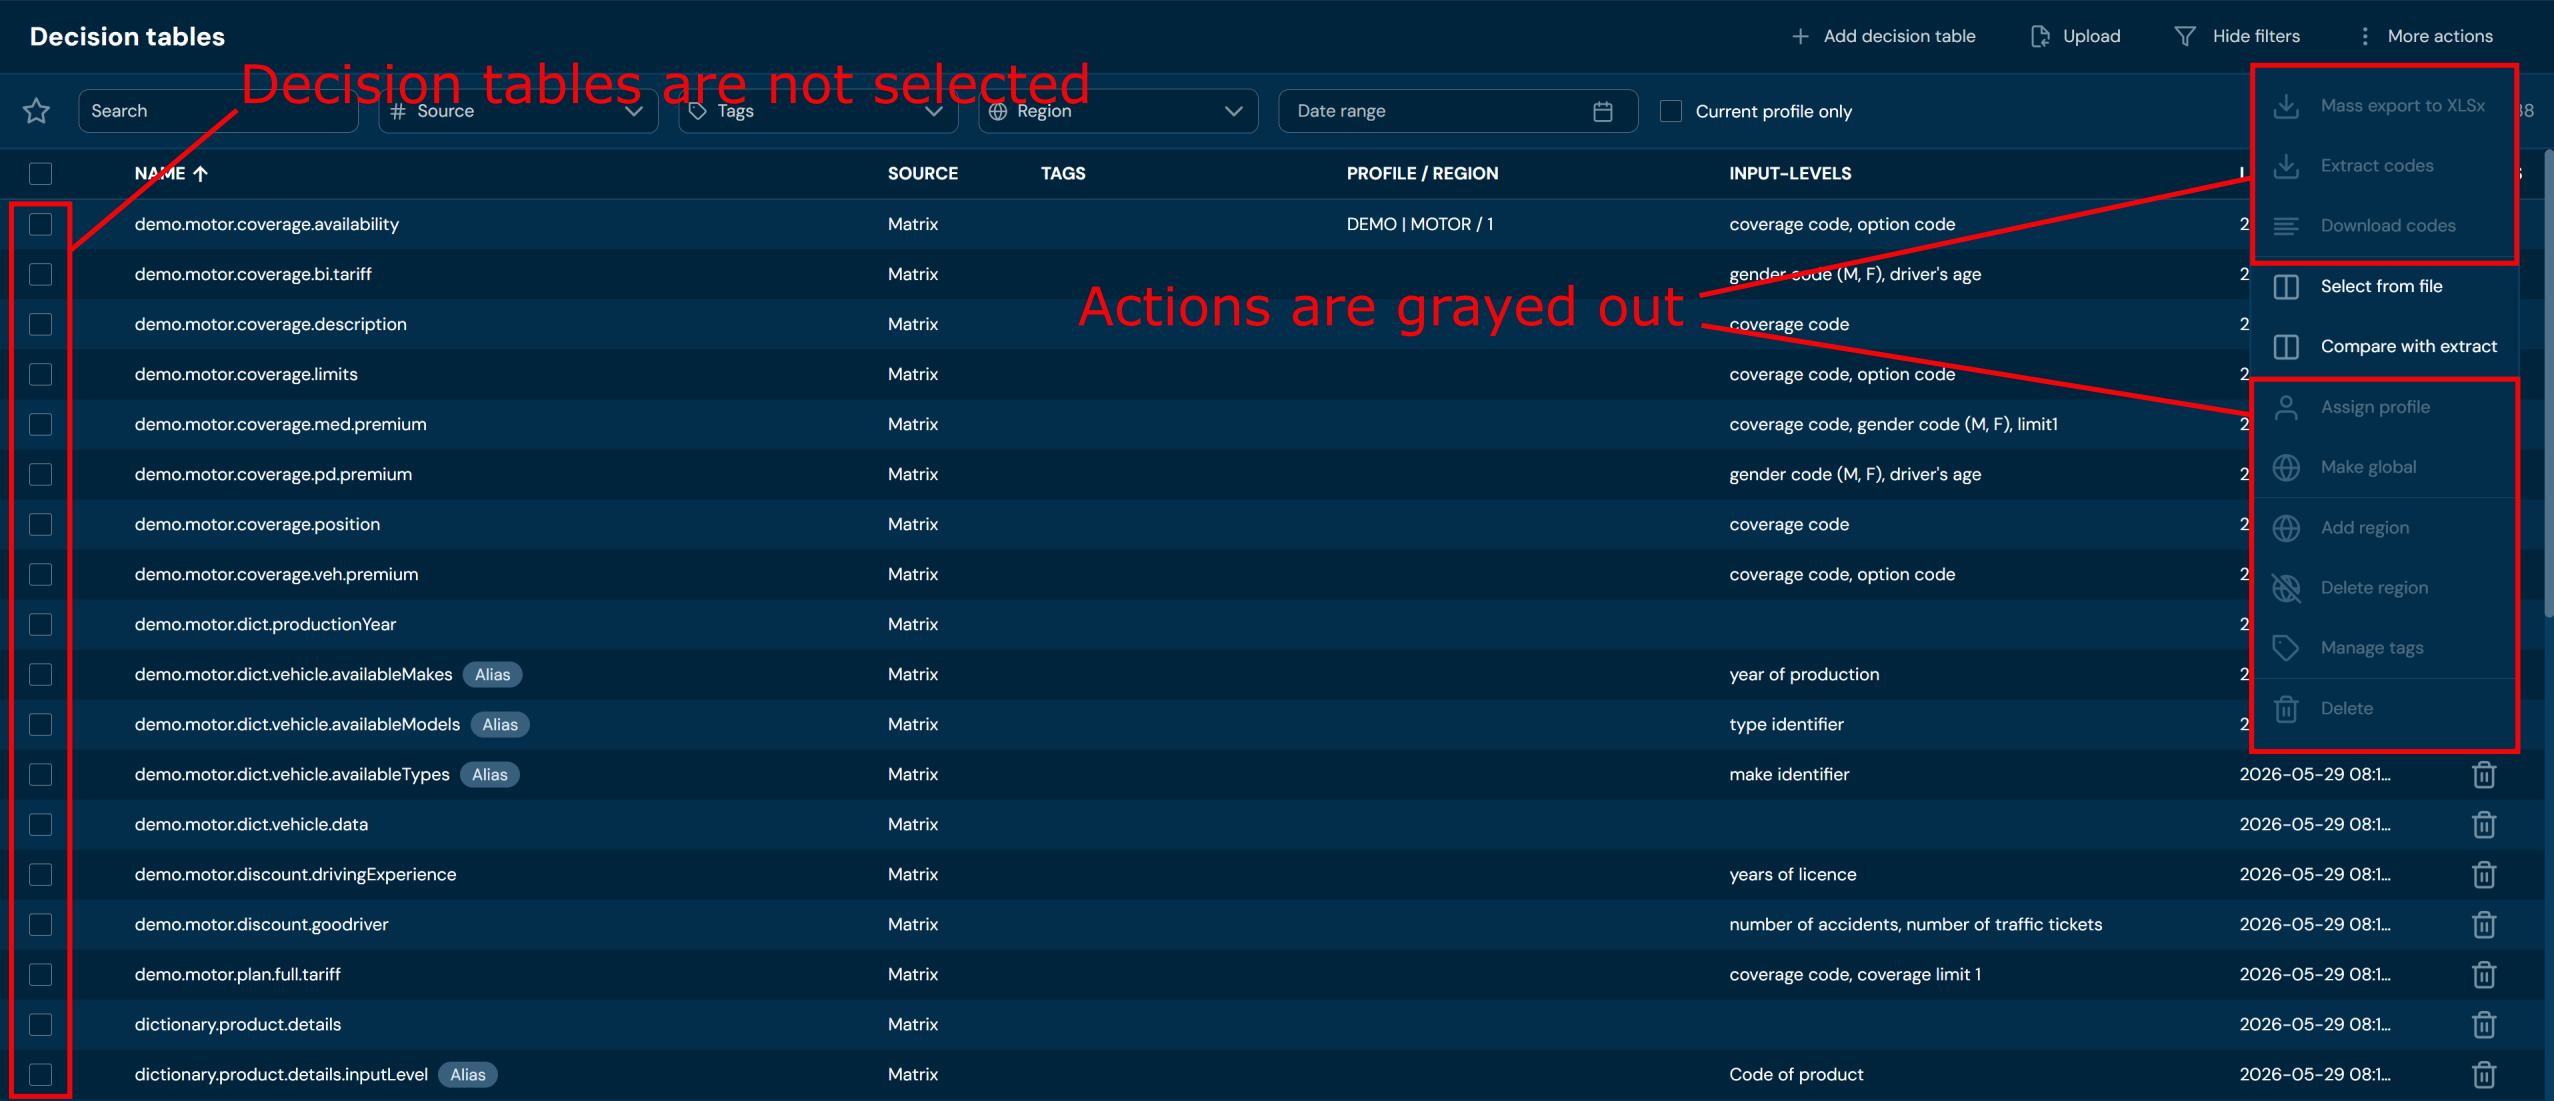
| 5 | More actions | The drop-down menu that contains actions 5a-5k. Bear in mind that actions 5a, 5b, 5c, 5f, 5g, 5h, 5i, 5j, 5k are available only if at least one decision table is selected (at least one checkbox is checked). Otherwise, the mentioned actions will be greyed out (see picture below the table). |
| 5a | Mass export to XLSx | Downloads a ZIP file that contains XLSX file and files with decision tables body. |
| 5b | Extract codes | Downloads an XLSX file that contains decision tables extract. |
| 5c | Download codes | Download a TXT file with decision tables names. |
| 5d | Select from file | Allows uploading a TXT file with decision tables. After uploading, all decision tables present in the file will be selected. |
| 5e | Compare with extract | Allows uploading an XLSX file with decision tables extract. Makes comparison between the provided file and the environment. |
| 5f | Assign profile | Assign profile to selected decision tables. |
| 5g | Make global | Make global selected decision tables. |
| 5h | Add region | Adds regions to all selected decision tables. |
| 5i | Remove region | Removes regions from all selected decision tables. |
| 5j | Manage tags | Allows adding/removing tags to/from selected decision tables. |
| 5k | Remove | Delete all selected decision tables. |
Some of the actions in the More actions drop-down menu are grayed out, when no decision tables are selected
You can see all Filters available for decision tables below:

| No. | Filter name | Description |
|---|---|---|
| 1 | Search text field | Filter by any string provided by the user. |
| 2 | Source | Filter by data source for the matrix. |
| 3 | Tags | Filter by assigned tags; only tags assigned to at least one decision table are visible for selection. |
| 4 | Region | Filter by assigned regions; only regions assigned to at least one decision table are visible for selection. |
| 5 | Date range | Filter by last change date in format YYYY/MM/DD - YYYY/MM/DD. |
| 6 | Current profile only | Check this box to limit the table view to those assigned to the currently selected profile. Otherwise, global tables will also be displayed. |
Add Decision Table#
If you want to add Decision tables follow these steps:
-
Choose Decision tables in Main toolbar.
-
Choose + Add Decision table in All actions bar.
a. Choosing + Add Decision table opens a step-by-step wizard.
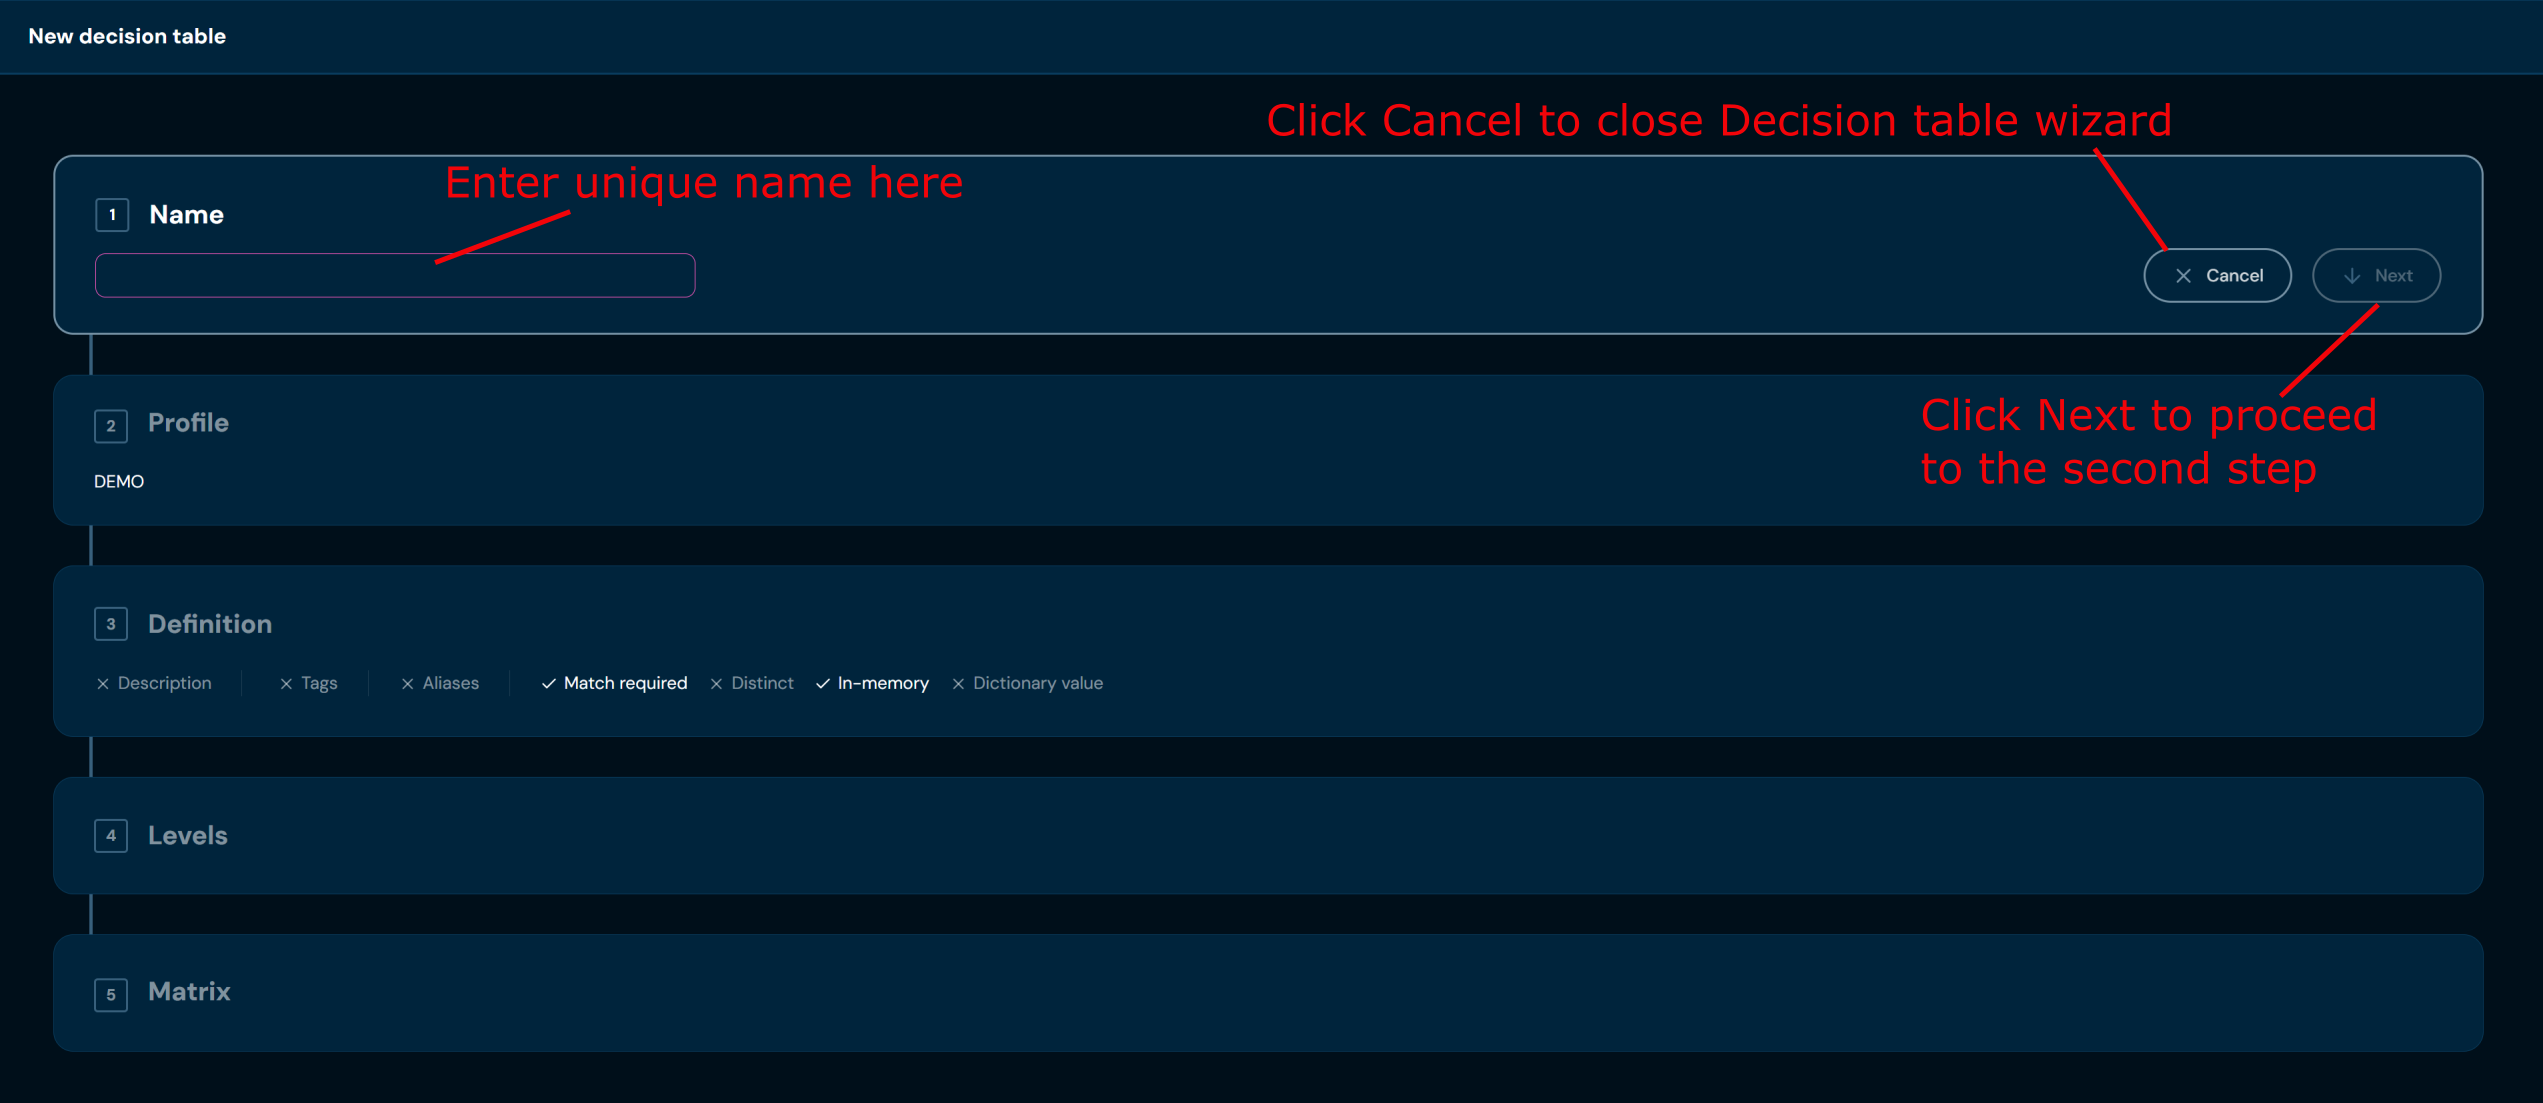
-
In step 1. Name, you need to provide a unique decision table code/name. Name can contain only characters from collection a-z; 0-9; “.”; “-”; “_” and it can’t start with “-”.
a. If you changed your mind and don’t want to create a new decision table, you can choose Cancel in step 1. Name.
-
Choose Next.
a. If you enter illegal characters, then the validation error will appear

b. If the name you provided is already used by another decision table, then a pop-up dialog will appear, either close the pop-up by clicking Cancel or View existing decision table, that will redirect you to the appropriate Decision table and close the Decision table wizard.
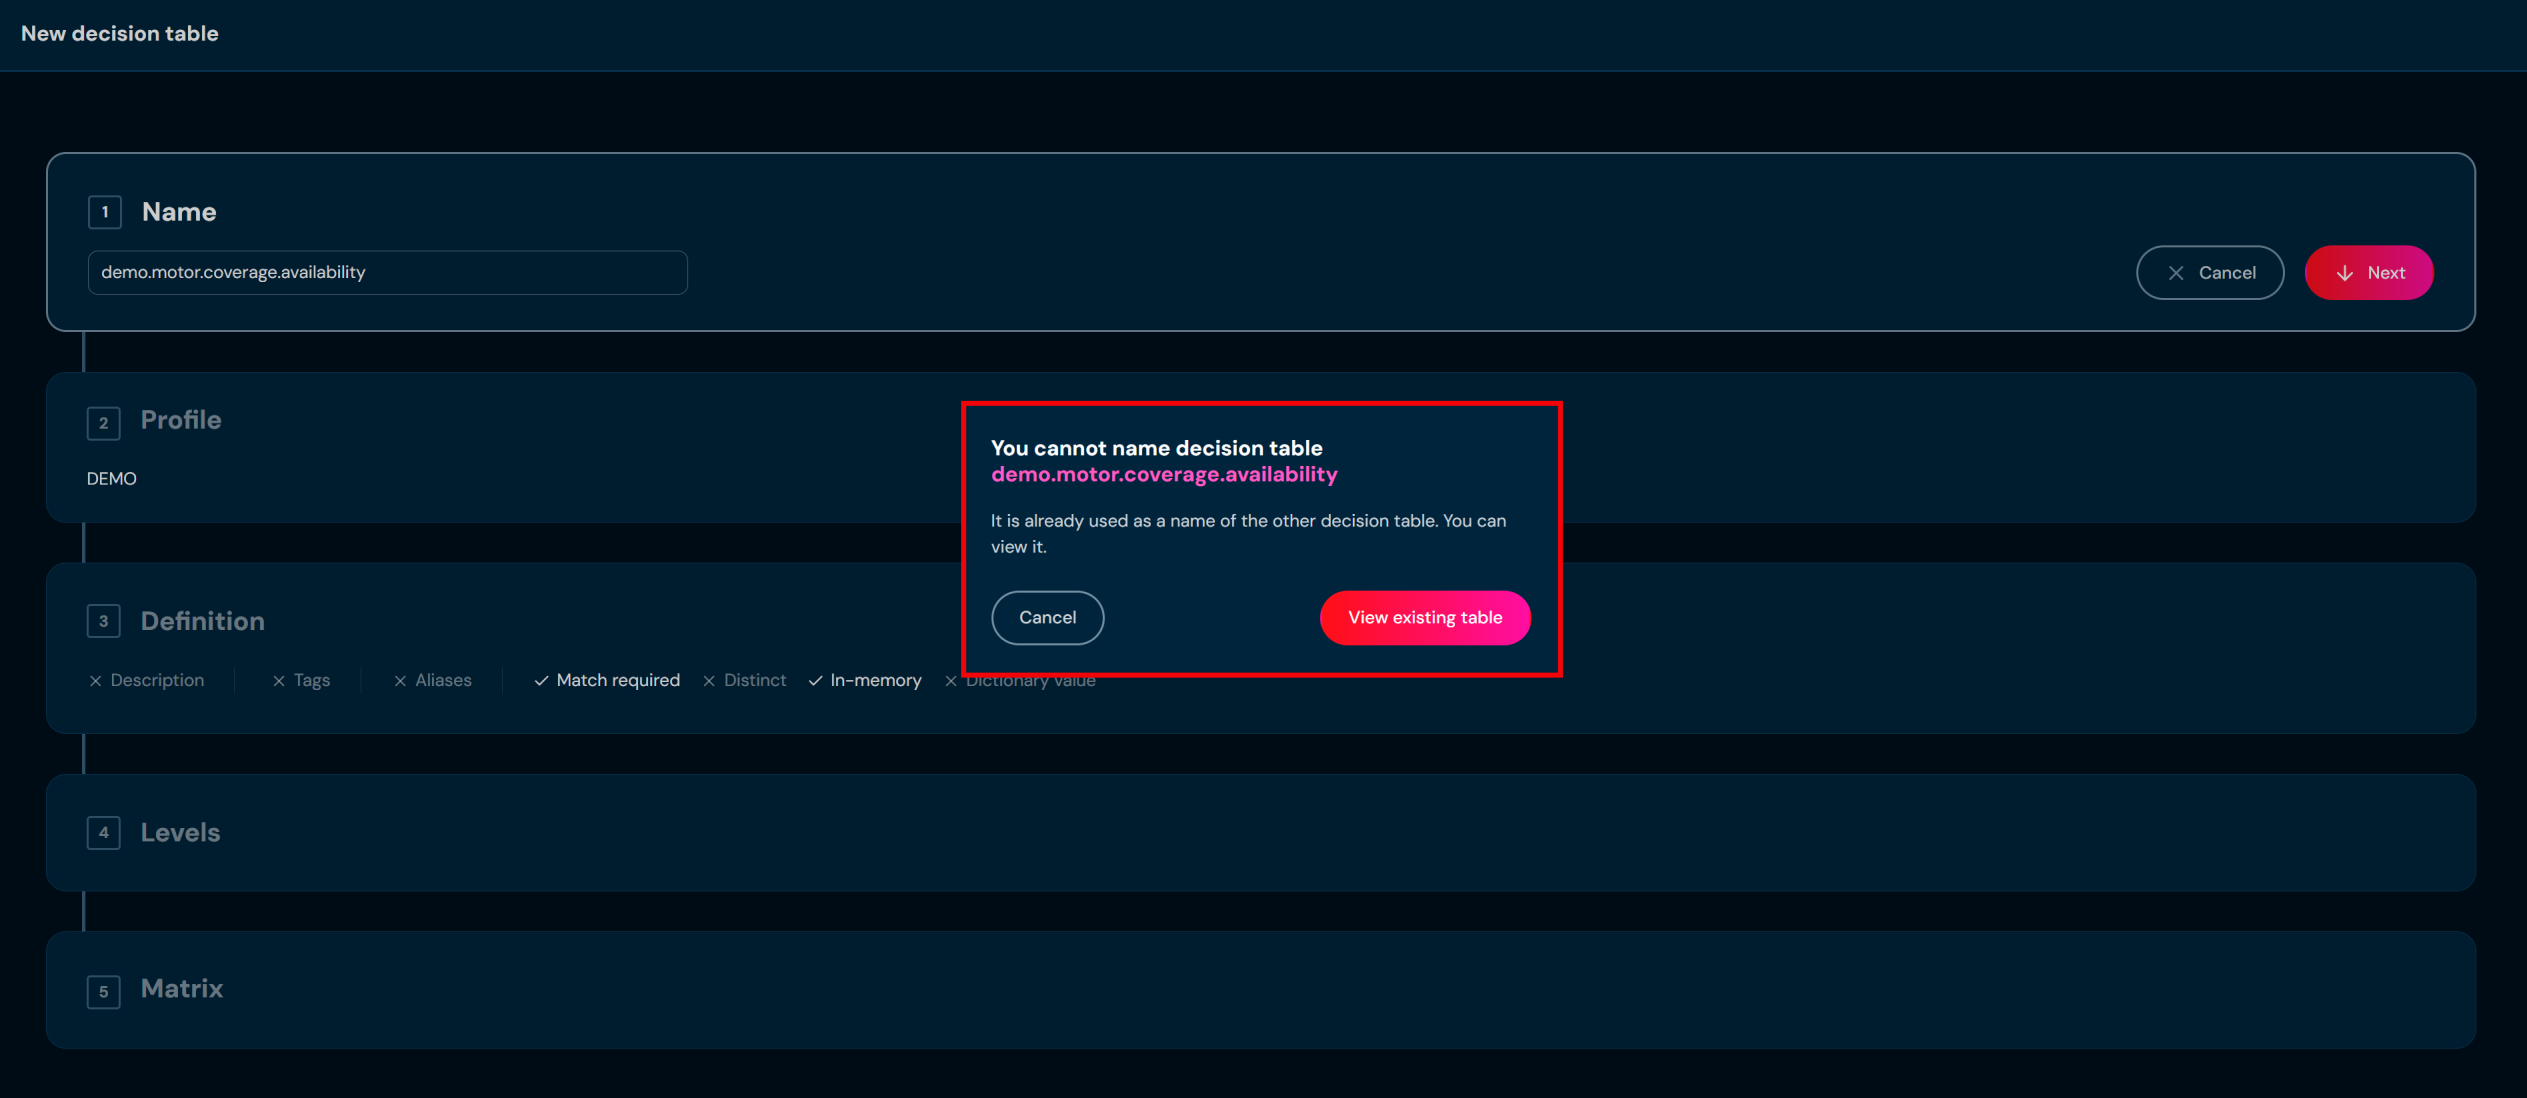
-
In step 2. Profile you may assign decision table to a profile by selecting a profile from drop down list or create a global table by checking No profile (global). Assigning this table to a profile will ensure that only users with permissions for that profile can access it. Global decision tables will be visible regardless of profile permissions.
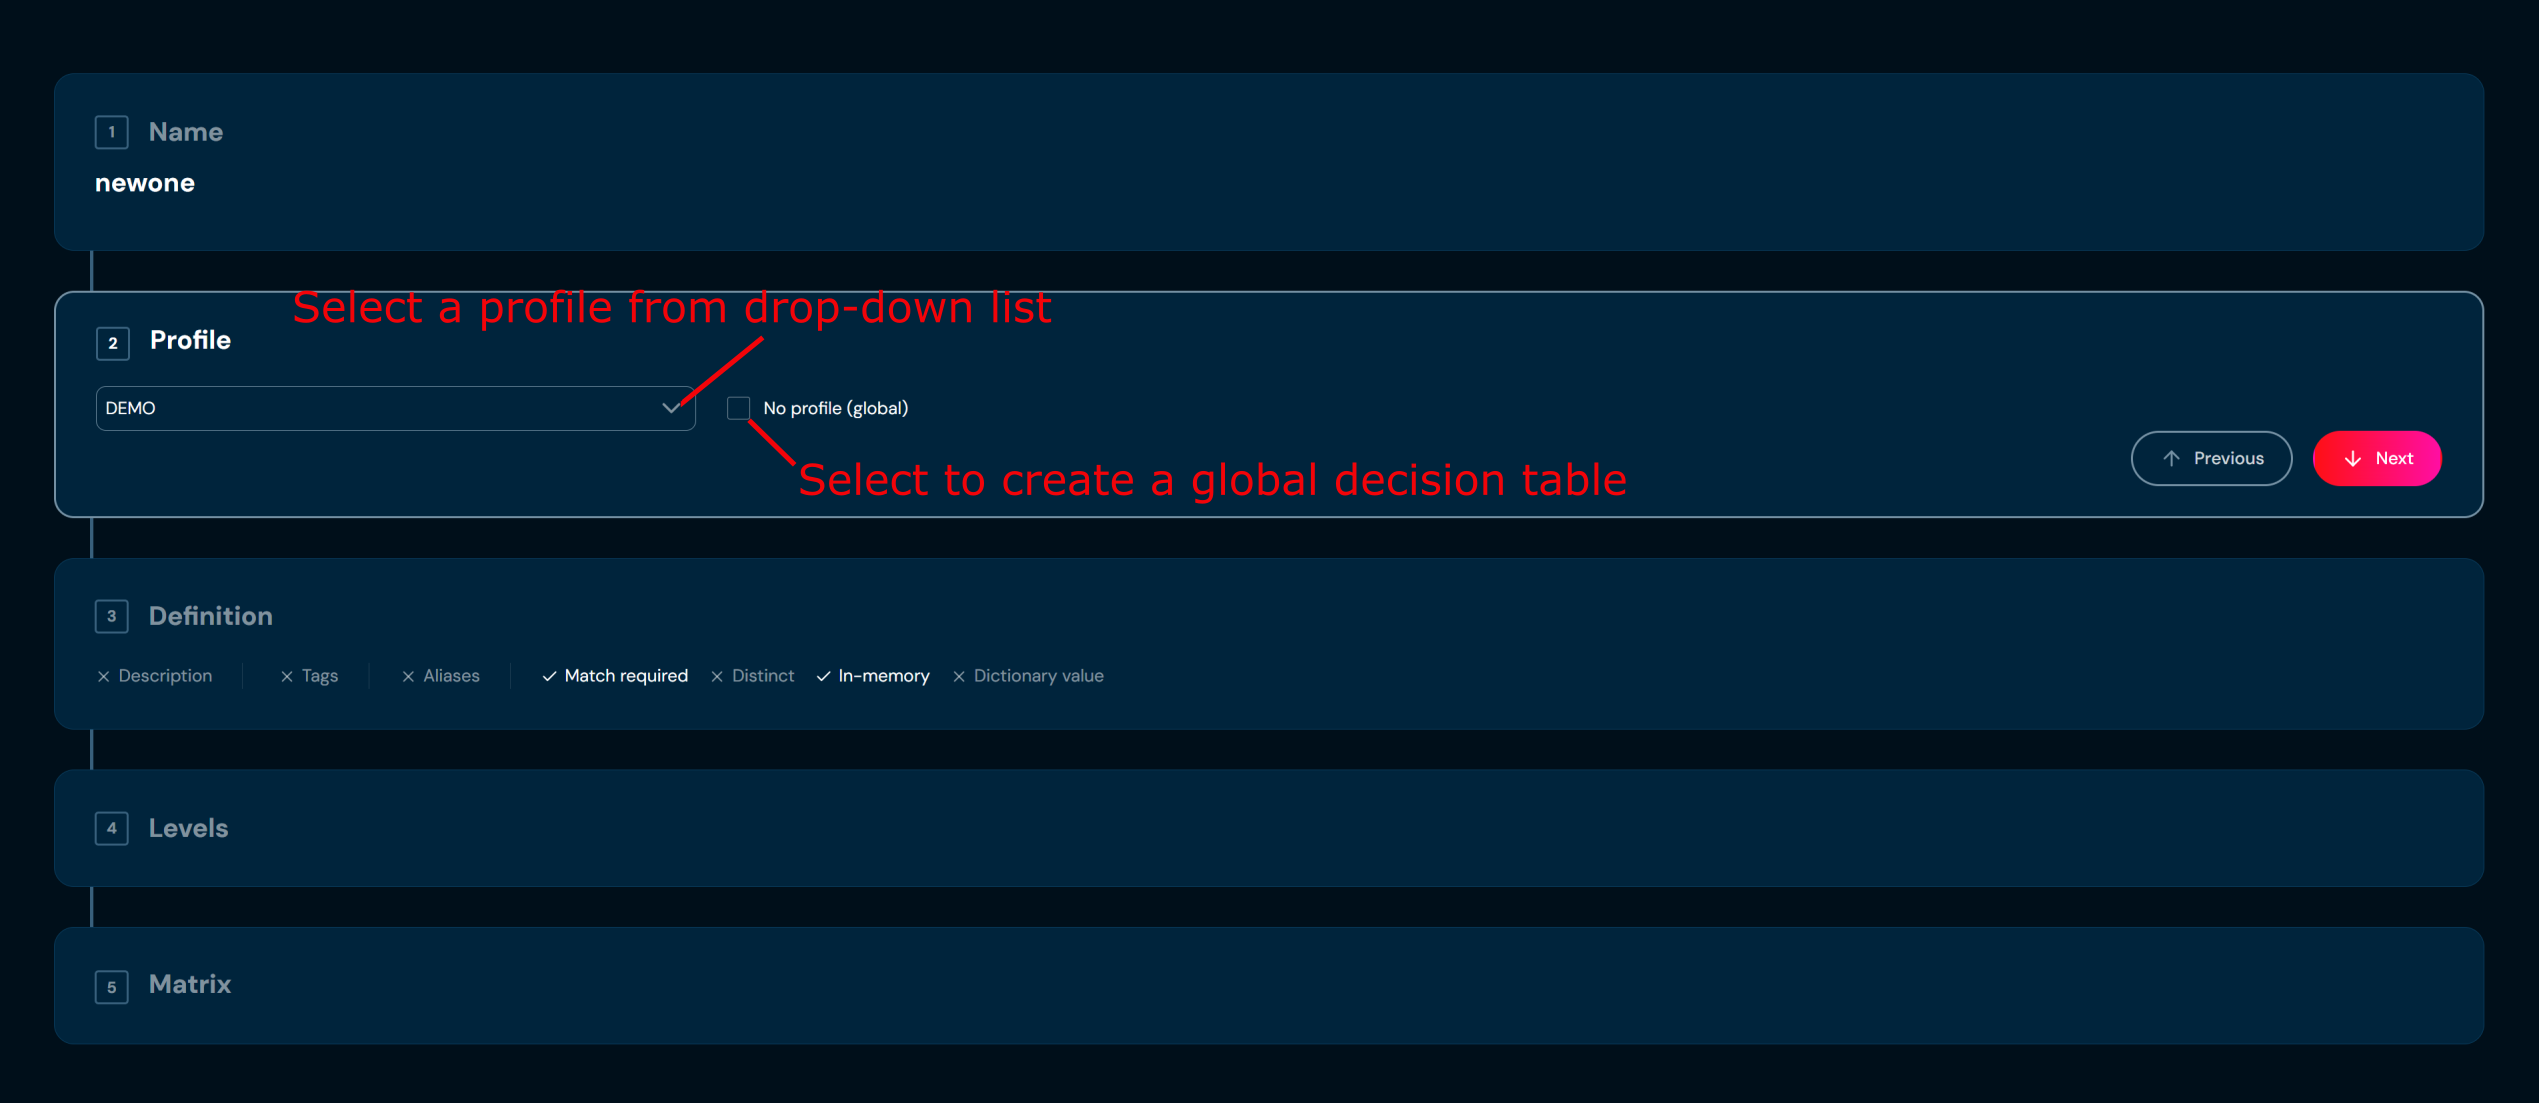
-
In step 3. Definition you may optionally add a description and assign tags. You must choose a data source for a matrix. External source and AI Model Source are described later in this document.
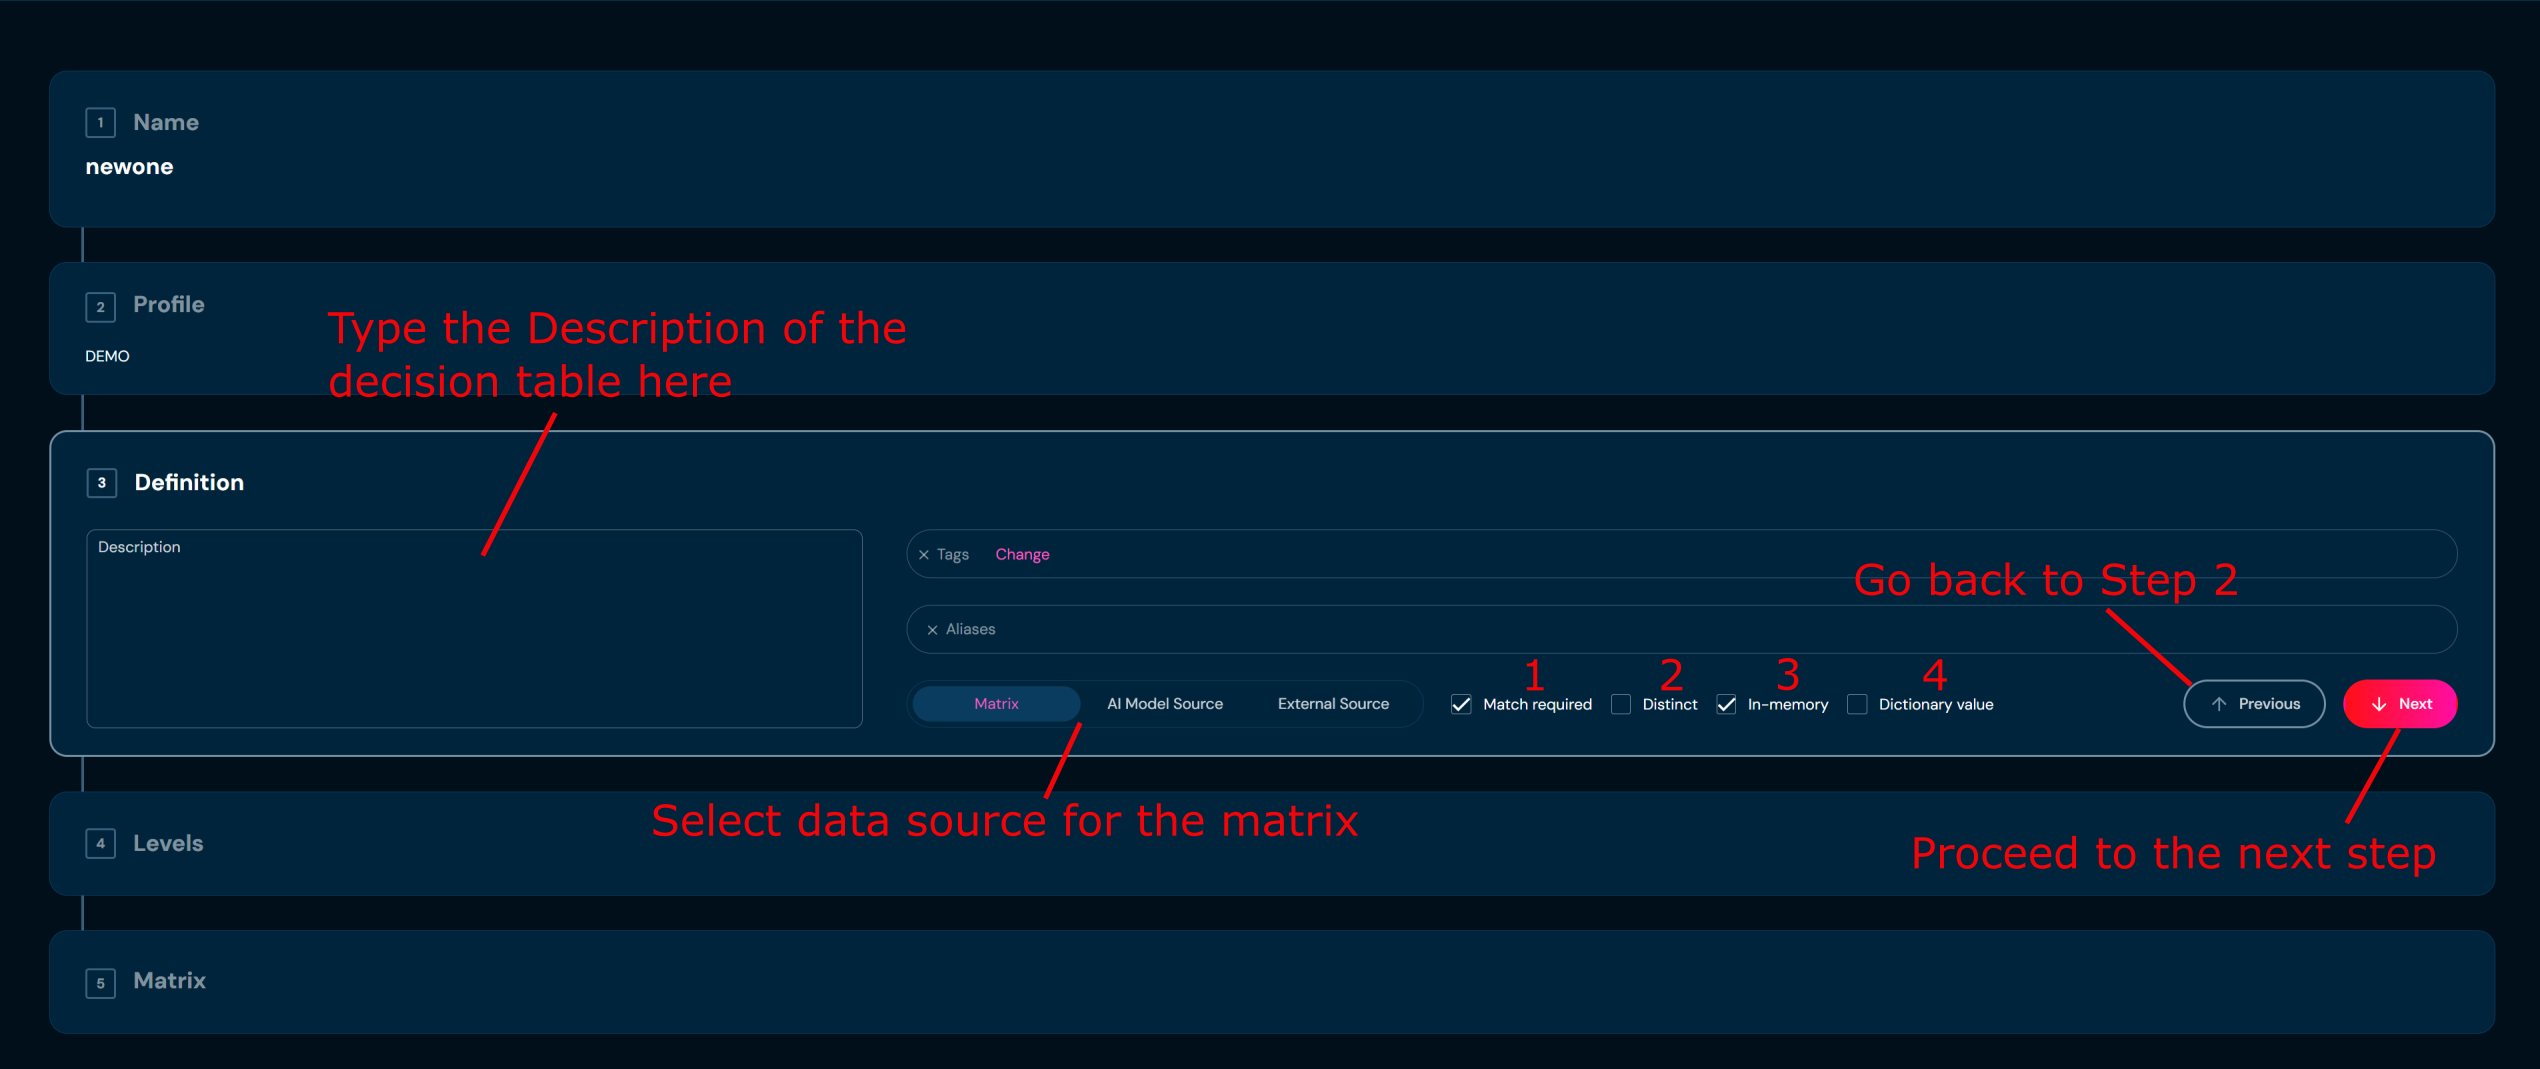
Additional options available to configure a decision table are described in the table below.
| No. | Name | Description |
|---|---|---|
| 1 | Match required | If checked: when in matrix value won’t be found, it will return an error; if checked and no match is found in the matrix, the decision table will return null. |
| 2 | Distinct filters | Removes duplicated records from the result list. |
| 3 | In memory index | If not checked, then with every call to that decision table, its definition and matrix must be reloaded from the database. This checkbox is flagged if the decision table should be stored in the application cache. |
| 4 | Dictionary value | To define the decision table as a dictionary, there is a checkbox “Dictionary” that needs to be marked. See Dictionary table for details. |
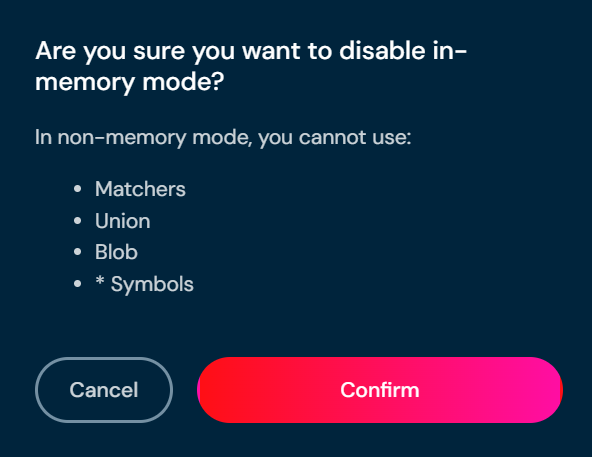
a. The match required and In-memory flags are checked by default. Unchecking the In-memory checkbox means that you will not be able to use the matchers, union, blob and asterisk. The confirmation pop-up will appear.
-
Choose Next.
-
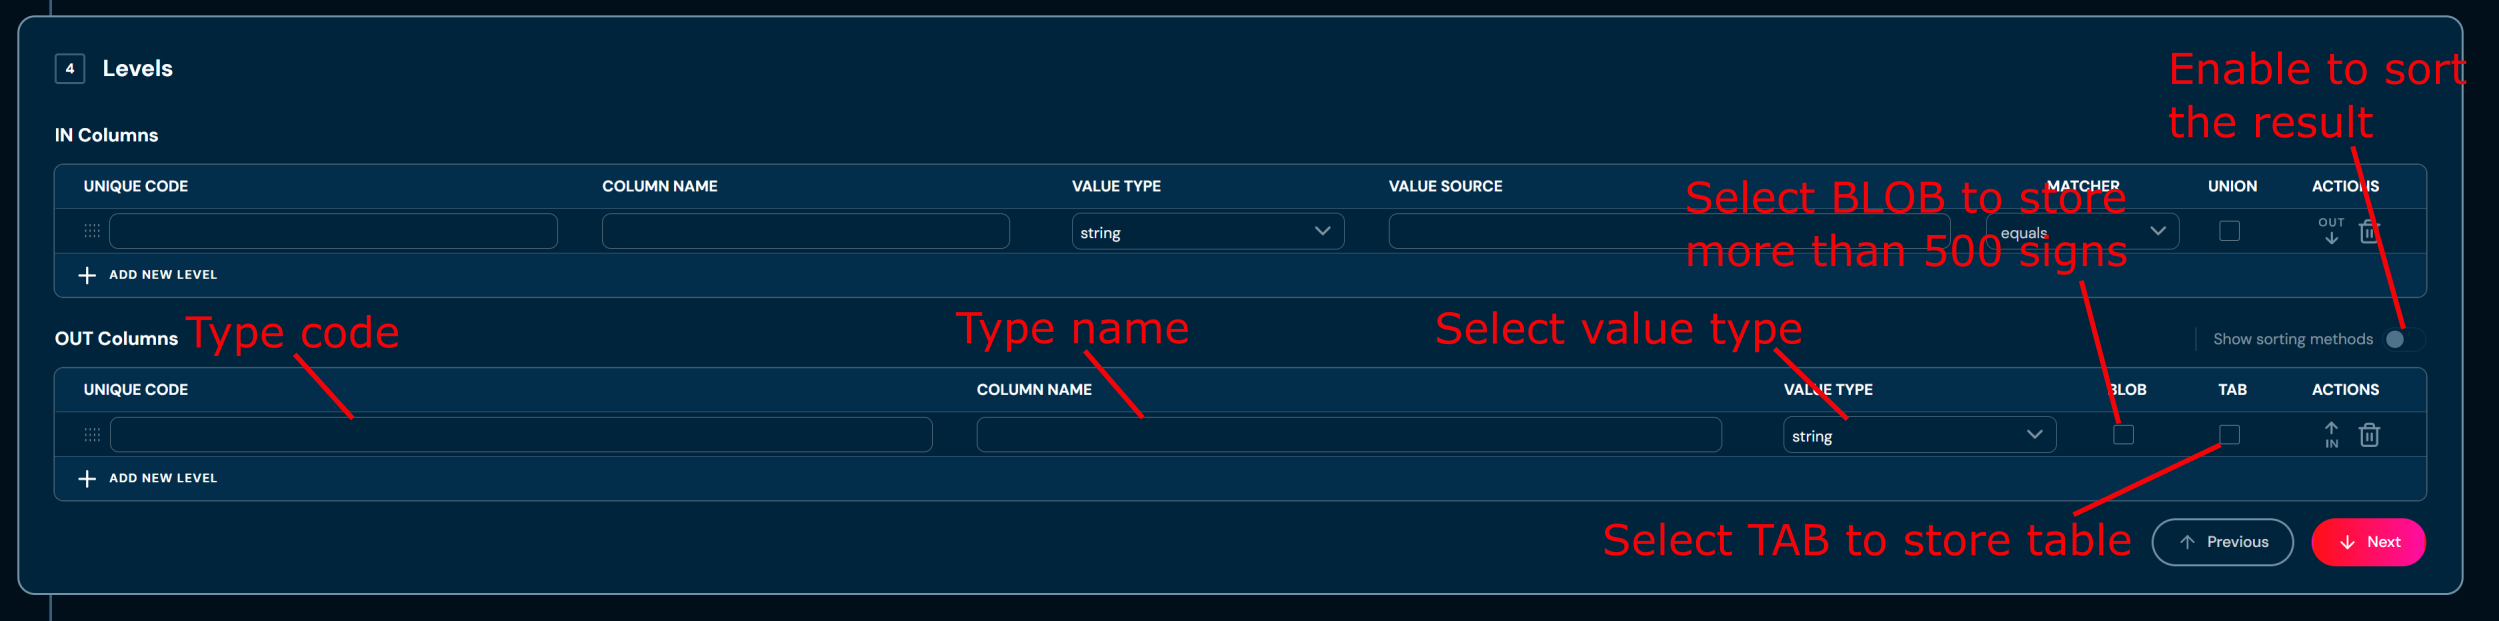
In step 4. Levels you may add IN and OUT columns, but this is not necessary to proceed to the next step.

When selecting the “date” value type, be sure to use the correct recording format: yyyy-MM-dd.
When selecting the “data time” value type, be sure to use the correct notation format: yyyy-MM-dd HH:mm:ss
-
Choose Next.
-
In step 5. Matrix you may add matrix cells, but this is not necessary to proceed to the next step.

-
Choose Save changes.
a. Decision table with data you provided is created. You will be redirected to Decision table’s details screen.
Upload Decision Table#
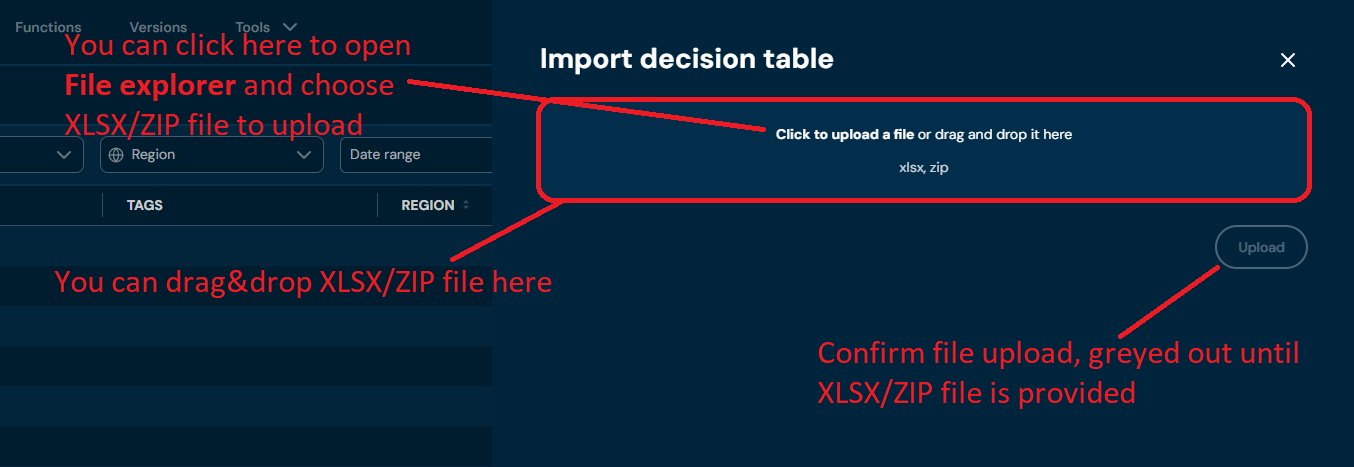
If you want to upload decision tables from a ZIP file, follow these steps:
-
Choose Decision Tables in the Main Toolbar.
-
Choose Upload in the “All Actions” bar.
a. Choosing Upload brings up the Import decision table screen.
-
Drag and drop the desired file or Click to upload a file and choose file in File Explorer.
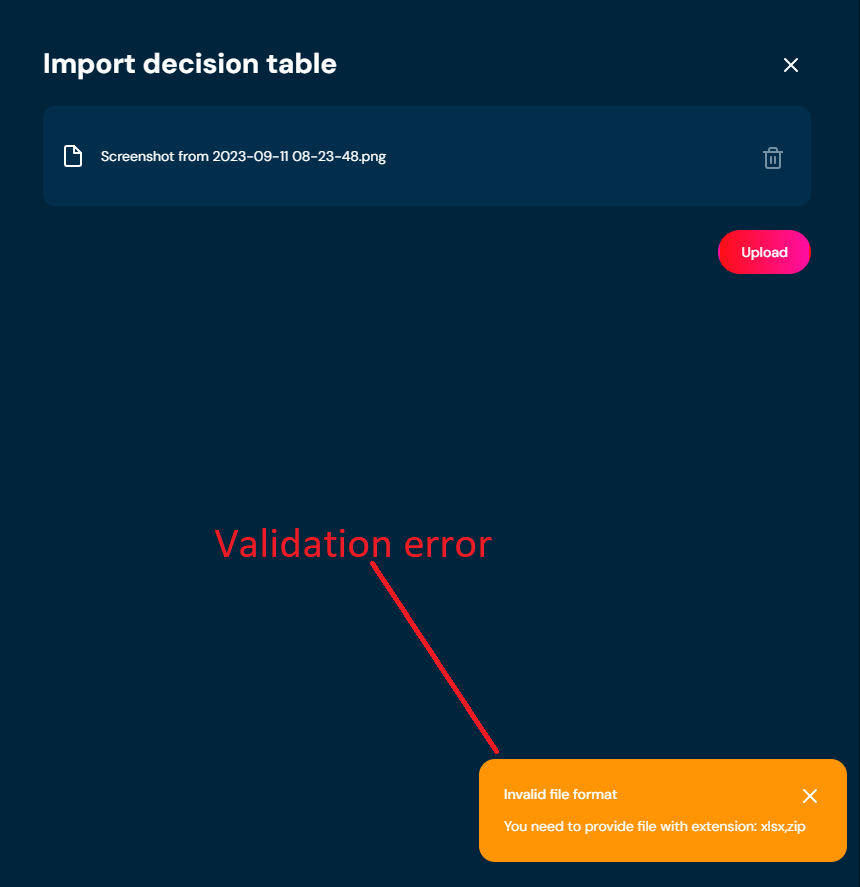
a. If you choose a file with an extension other than ZIP, then a validation error will pop up.
-
After uploading, the upload report appears.
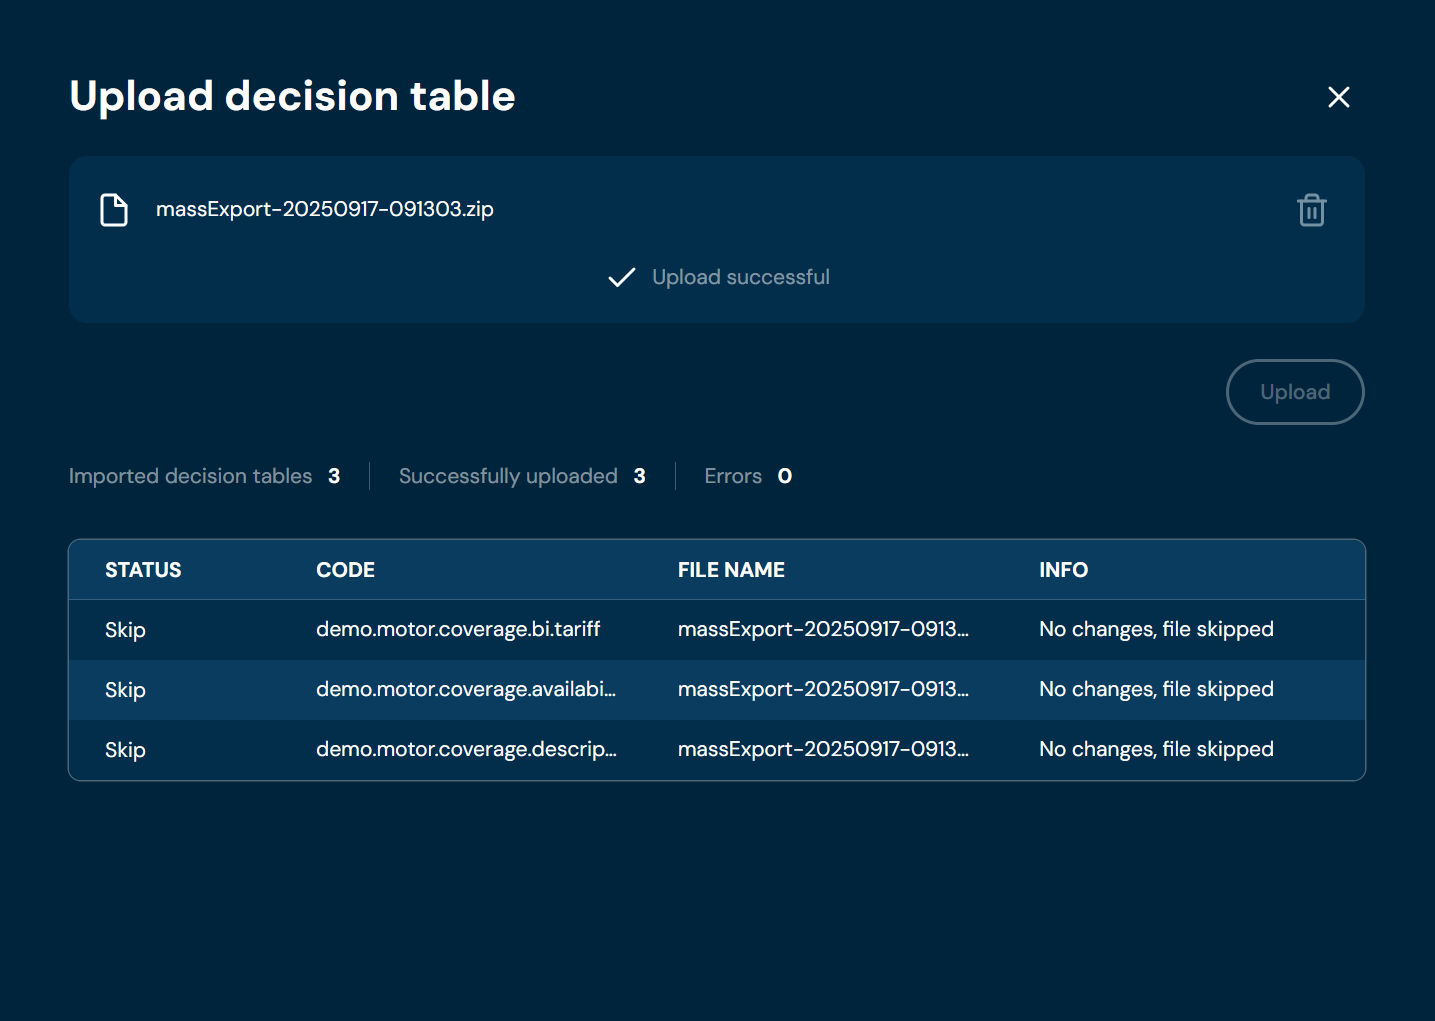
Mass Export to XLSX#
If you want to download one or more decision tables, follow these steps:
-
Choose Decision Tables in the Main Toolbar.
-
Select one or more.
a. Select the top checkbox to select all decision tables in the view, or select individual checkboxes to select one or multiple
-
From the drop-down menu More actions: choose Mass export to XLSx.
a. If action Mass export to XLSx is grayed out, it means that no decision tables have been selected.
b. Choosing Mass export to XLSx downloads a ZIP file that contains files with decision tables.

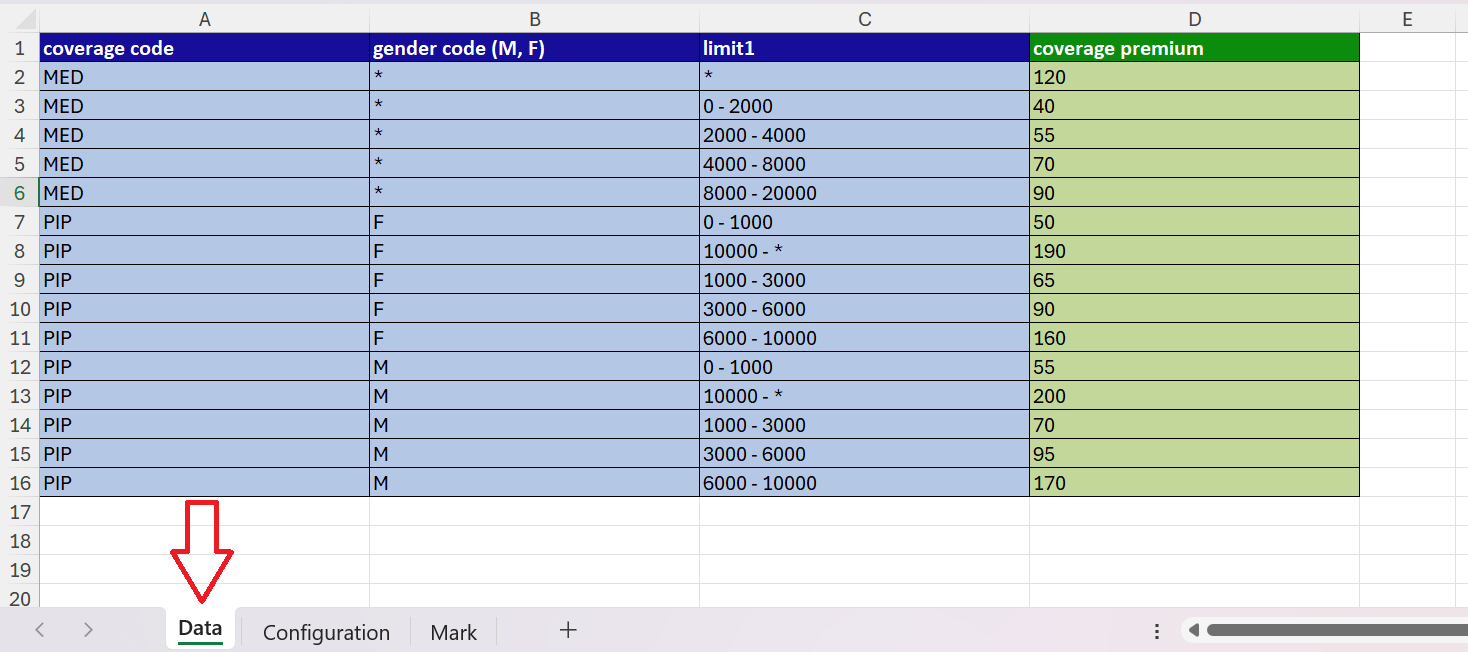
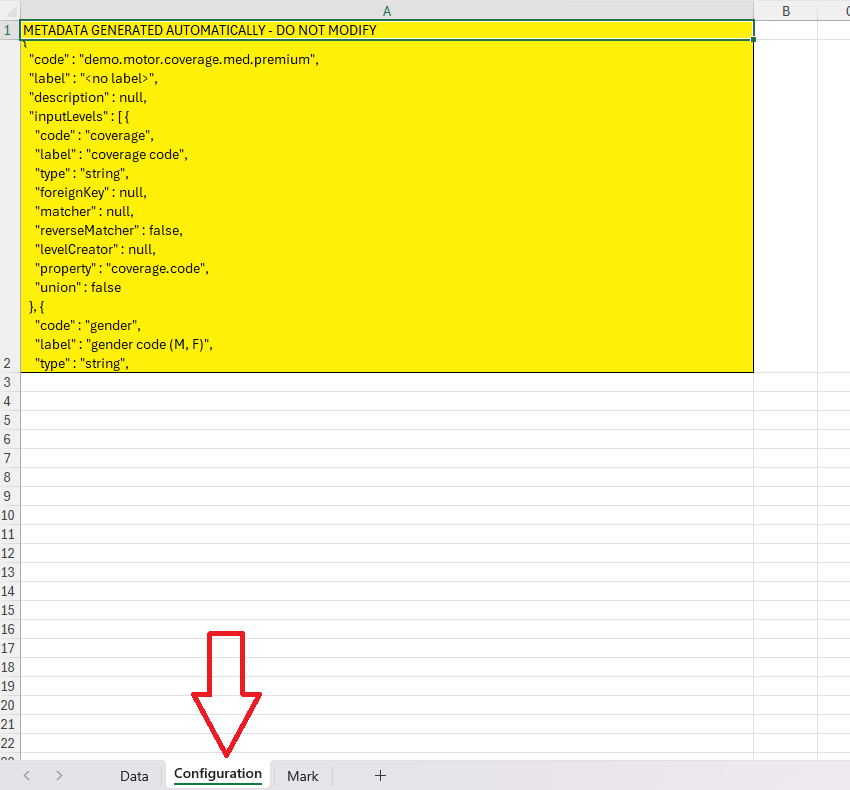
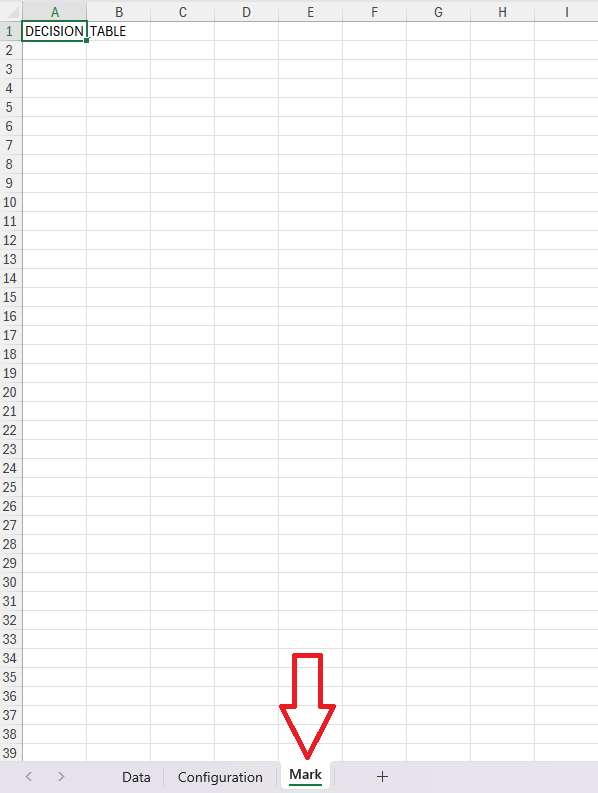
Details of zip
Sheet Data contains matrix.
Sheet Configuration contains details of levels and definition.
Sheet Mark contains information on object type, it is used for validation when uploading file into Higson Studio.
Extract Codes#
If you want to extract one or more decision tables, follow these steps:
-
Choose Decision tables in Main toolbar.
-
Select one or more decision tables
a. Select the top checkbox to select all decision tables in the view or select individual checkboxes to select one or multiple.
-
From drop-down menu More actions choose Extract codes
a. If action Extract codes is greyed out, it means that no decision tables have been selected.
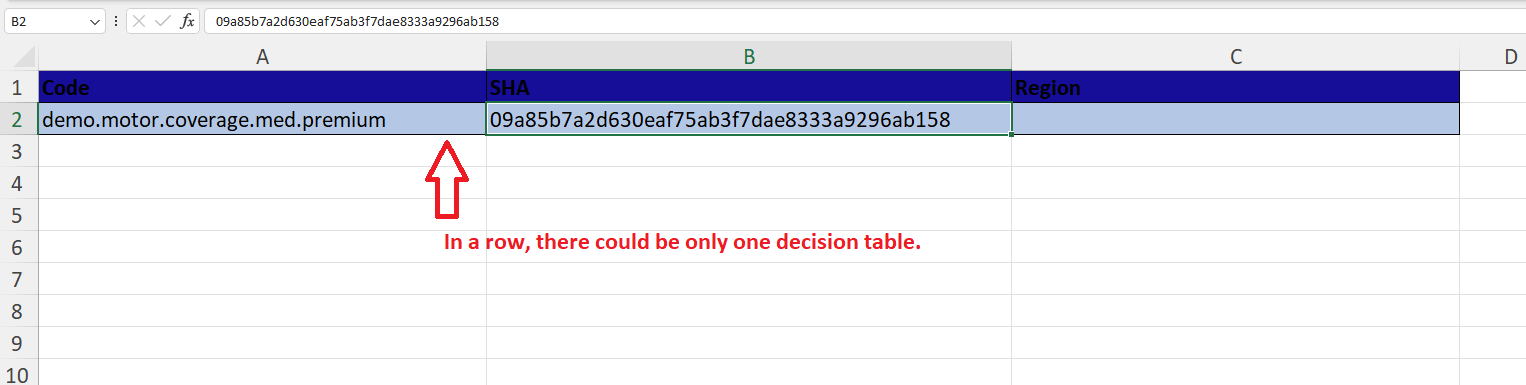
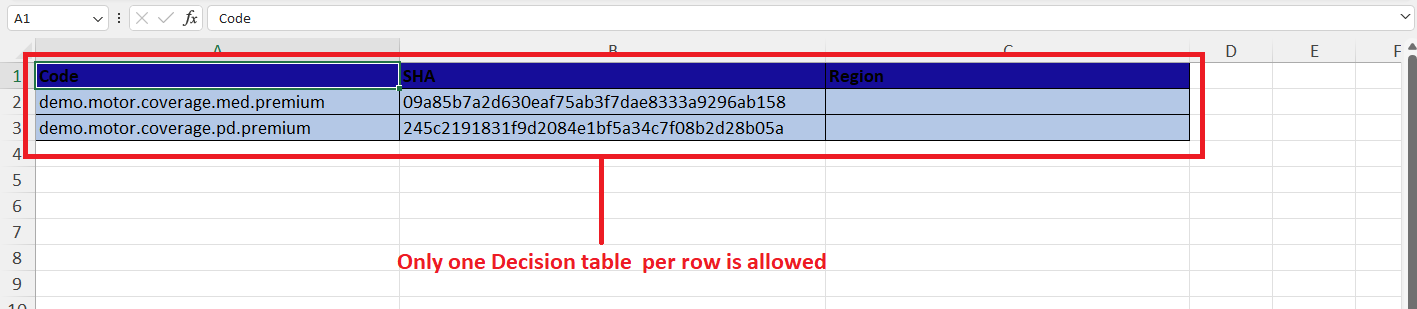
b. Selecting Extract codes downloads a XLSX file that contains Code, SHA and Region columns
Download Codes#
If you want to download one or more decision tables codes, follow these steps:
-
Choose decision table in Main toolbar.
-
Select one or more decision tables.
a. Select the top checkbox to select all decision tables in the view, or select individual checkboxes to select one or multiple
-
From drop-down menu More actions choose Download codes
a. If Download codes action is greyed out, it means that no decision tables have been selected.
b. Selecting Download codes downloads a TXT file that contains decision tables’ codes

Select from File#
If you want to select one or more Decision tables from the file, follow these steps:
-
Choose Decision tables in Main toolbar.
-
From drop-down menu More actions choose Select from file
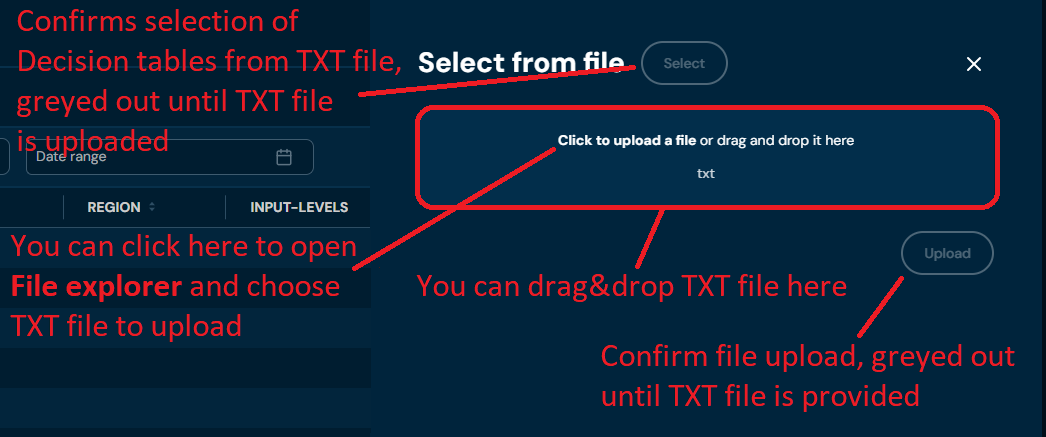
a. Choosing Select from file brings up the Select from file screen
-
Drag and drop the desired file or Click to upload a file and choose file in File explorer.
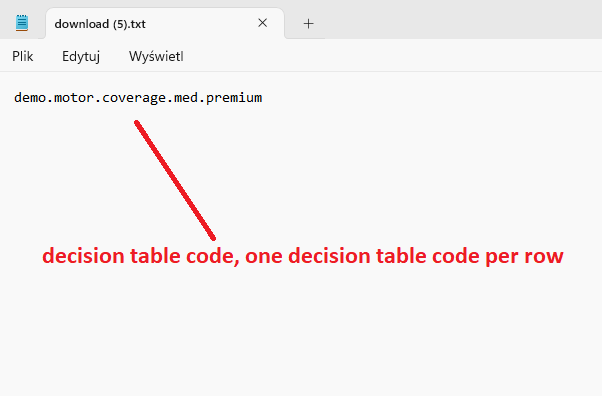
a. Correct TXT file should look like this:
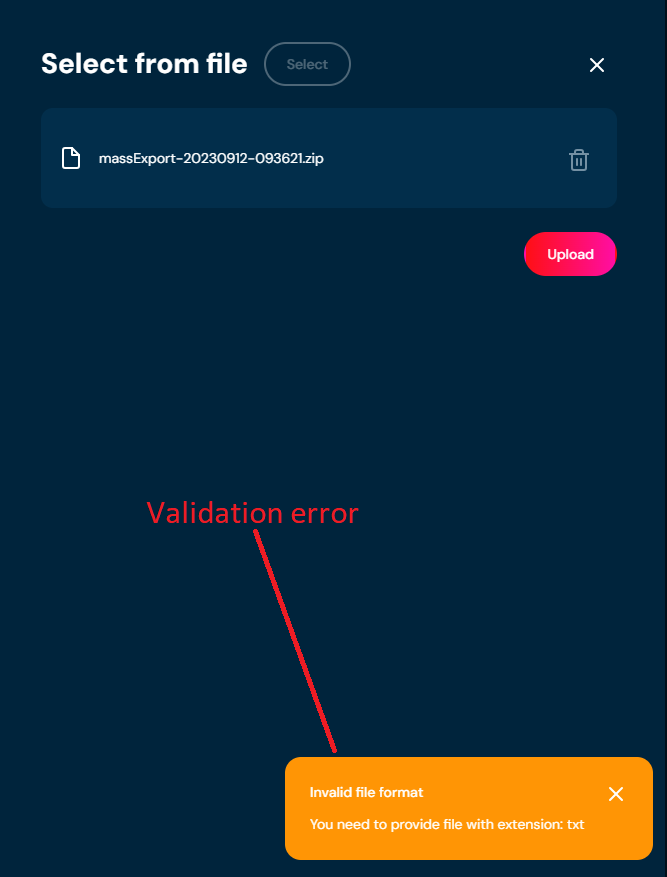
b. If you choose a file with an extension other than TXT, then a validation error will pop up.
-
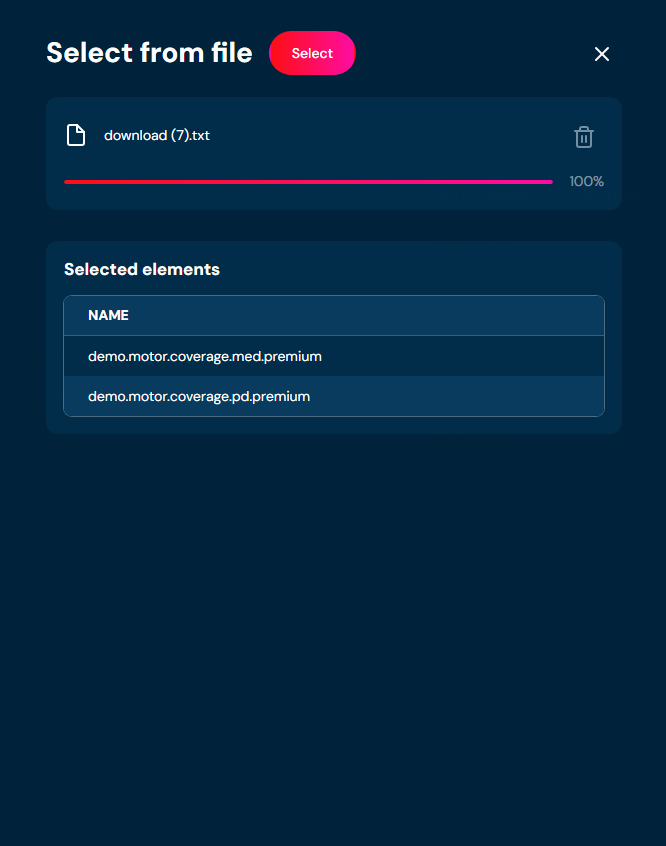
When the progress bar reaches 100%, you will be informed which decision tables will be selected.
-
Choose Select.
a. All decision tables that were present in the Selected Elements table get selected.
Compare with Extract#
Makes a comparison between the file and the environment, and gives information on which elements are the same, and which changes are only in the file or only in the environment.
-
Choose Decision tables in Main toolbar.
-
From drop-down menu More actions choose Compare with extract.
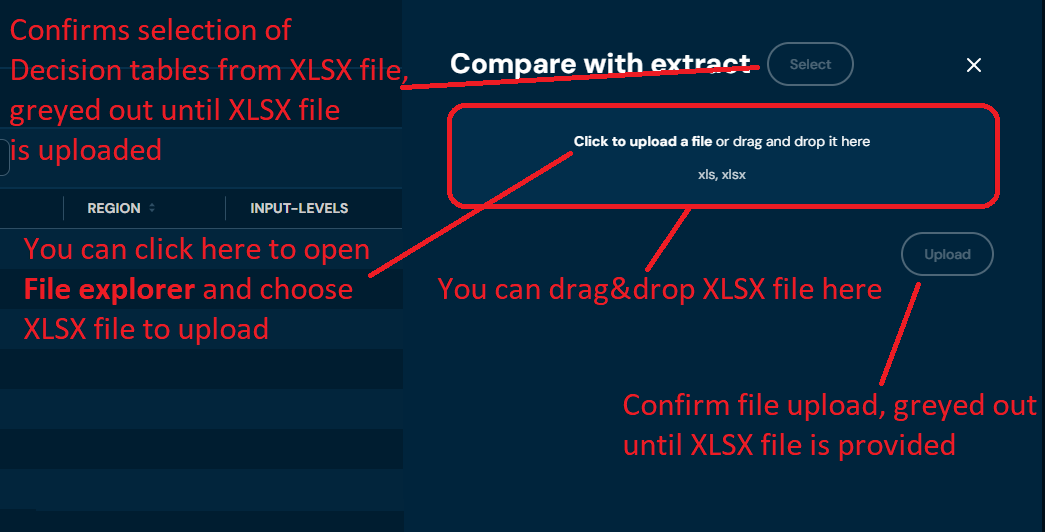
a. Choosing Compare with extract brings up the Compare with extract screen.
-
Drag and drop the desired file or Click to upload a file and choose file in the File explorer.
a. Correct XLS/XLSX file should look like this
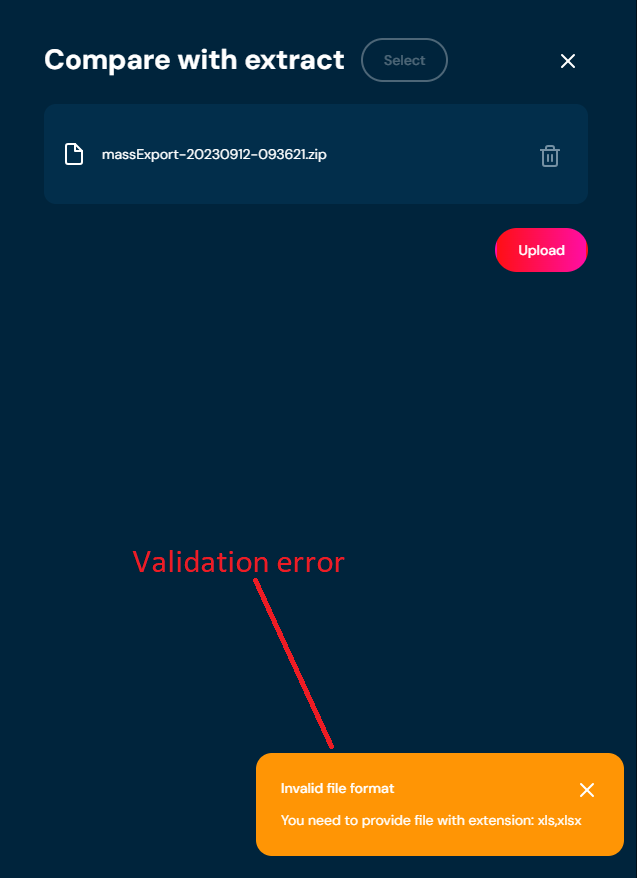
b. If you choose a file with extension other than XLS/XLSX, then validation error will pop up
-
When the import is successful you will be informed about it with the appropriate status Upload succesful. You will be informed about the status of all decision tables present in the environment and the extract file you provided.
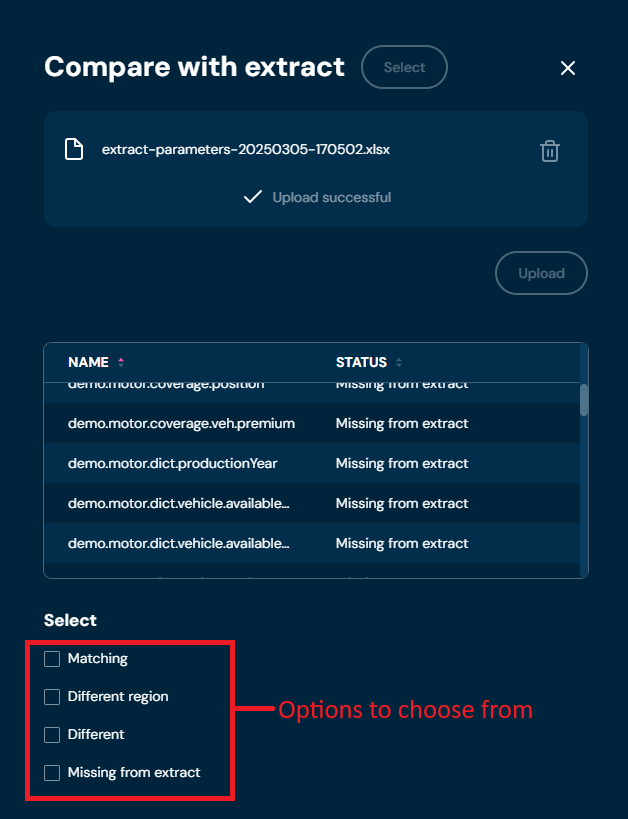
-
In the Select section (visible below the table with decision table status), choose which Decision tables will be selected.
a. You can select multiple options.
b. Matching: decision tables that are equal between the environment and the extract file will be selected.
c. Different regions: decision tables that are equal but with different regions between the environment and the extract file will be selected.
d. Different name: decision tables that are equal but with different names between the environment and the extract file will be selected.
e. Missing from extract: decision tables that are present in the environment but absent from the extract file will be selected.
-
Choose the Select Button.
a. If the Select button is grayed out, it means that no checkboxes were selected in step 5.
b. All Decision Tables that match the criteria provided in step 5 are selected.
Assign Profile#
If you want to assign a profile to one or more Decision Tables, follow these steps:
-
Select Decision Tables from the main toolbar.
-
Select the Decision Tables without an assigned profile by checking the boxes on the left side of the list.
-
From the More Actions drop-down menu, choose Assign Profile.
a. Selecting Assign Profile opens the Assign Profile screen.
-
Select the profile to which you want to assign the Decision Table and confirm by clicking Change.

On the Decision Tables list view, a profile entry will appear for the assigned Decision Tables. The view will also be updated to reflect the selected profile.
Make Global#
If you want to detach one or more Decision Tables from profile, follow these steps:
-
Select Decision Tables from the main toolbar.
-
Select the Decision Tables with an assigned profile by checking the boxes on the left side of the list.
-
From the More Actions drop-down menu, choose Make Global.
a. The pop up will appear.

- Click Confirm.
On the Decision Tables list view, a profile entry will disappear for the selected Decision Tables. The view will also be updated to global.
Add Region#
If you want to add a region to one or more decision tables, follow these steps:
-
Choose Decision Tables in the Main Toolbar.
-
Select one or more decision tables without a Region.
a. Select the top checkbox to select all decision tables in the view or select individual checkboxes to select one or multiple decision tables.
-
From the drop-down menu More actions, choose Add region.
a. If action Add region is grayed out, it means that no decision tables have been selected.
b. Choosing Add Region brings up the Manage Versioning screen.
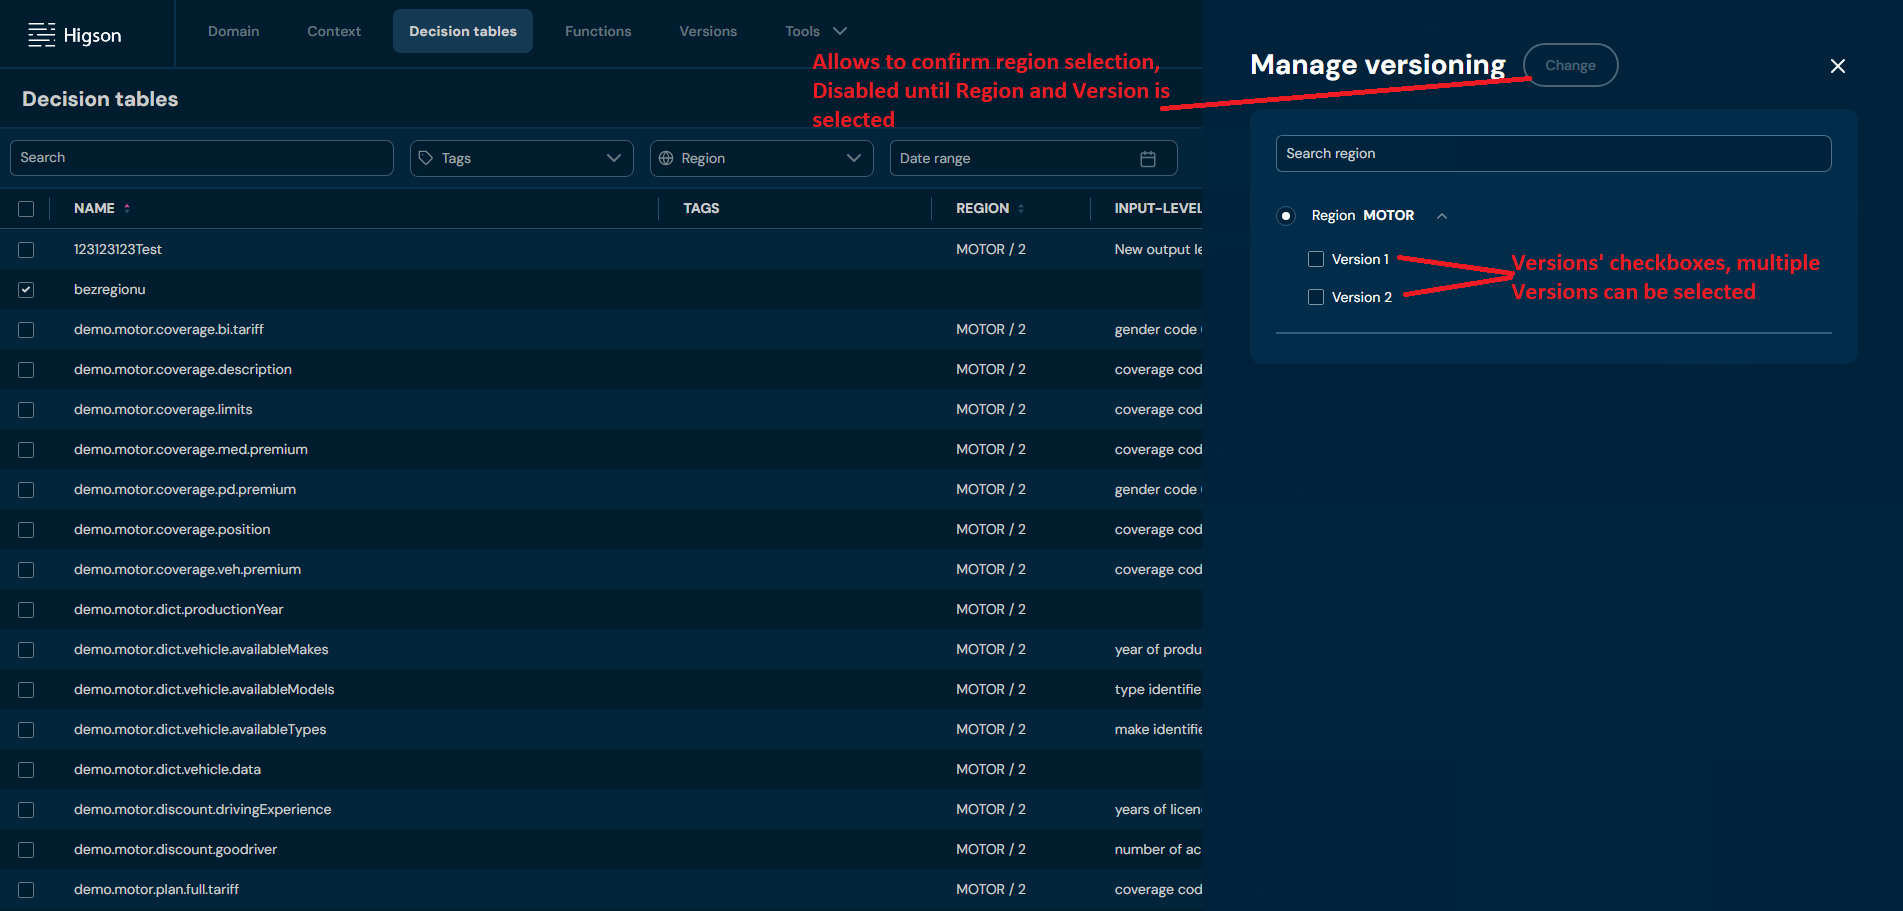
-
Select a Region and one or more versions.
-
Select Change.
-
The region has been assigned to the decision tables
Remove Region#
If you want to remove a region from one or more decision tables, follow these steps:
-
Choose Decision tables in Main toolbar.
-
Select one or more Decision tables with a Region.
a. Select the top checkbox to select all decision tables in the view or select individual checkboxes to select one or multiple.
-
From drop-down menu More actions choose Remove region.
a. If action Remove region is greyed out, it means that no function has been selected.
b. After choosing Remove region action, confirmation pop-up will appear.
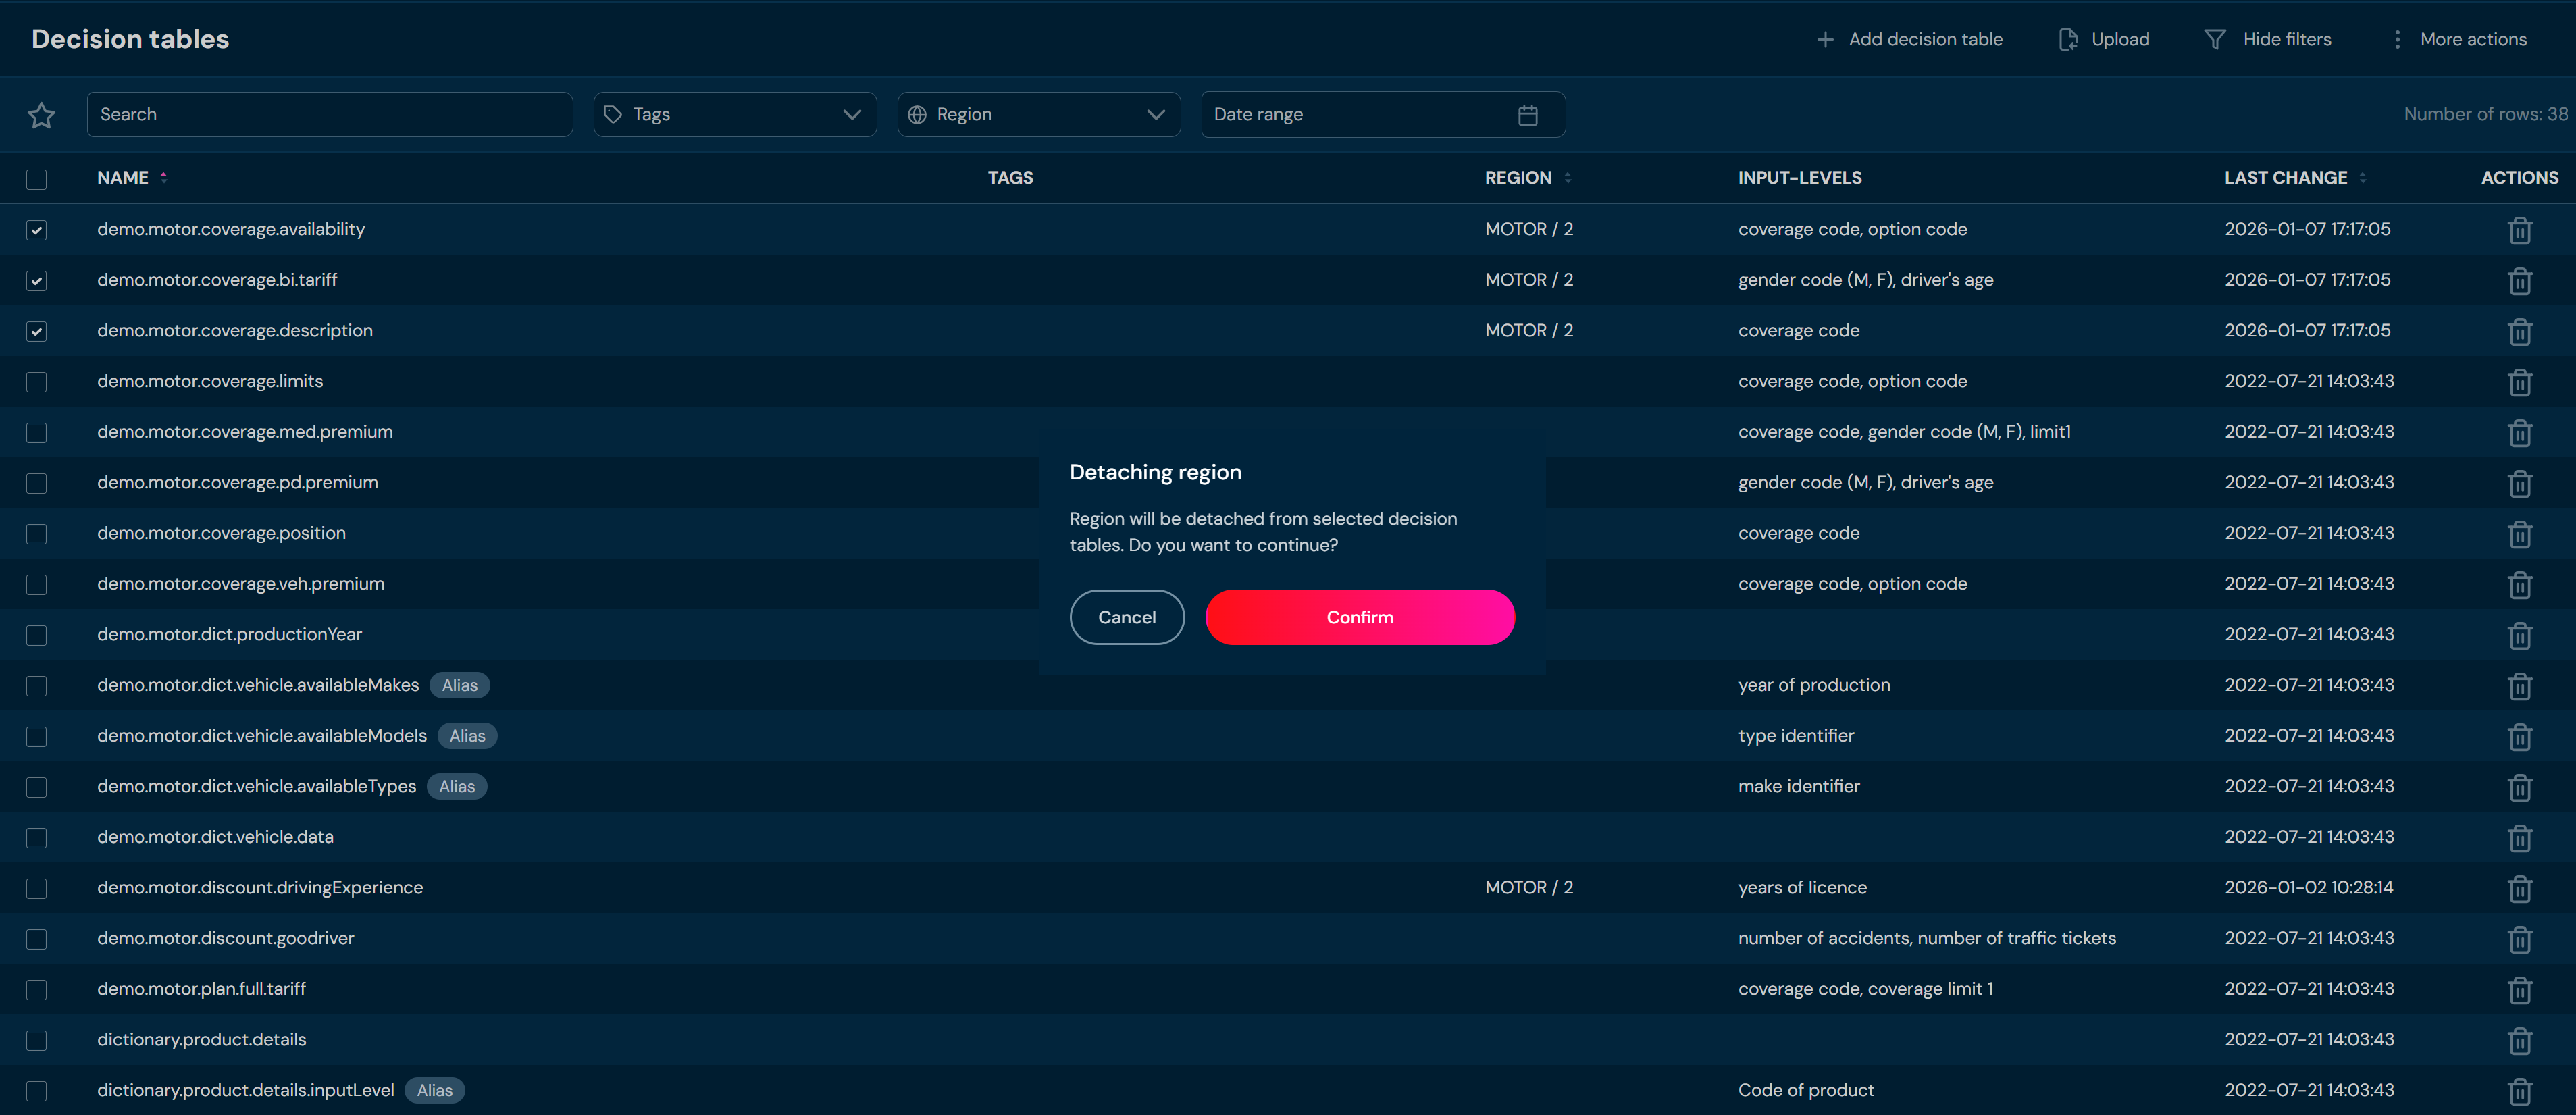
-
Choose Confirm.
a. Regions are being removed from all selected decision tables.
Manage Tags#
If you want to manage tags from one or more decision tables, follow these steps:
-
Select the decision tables on the main toolbar.
-
Select one or more untagged decision tables.
-
From the More Actions drop-down menu, select Manage Tags.
-
Select the tags you are interested in and click Save.
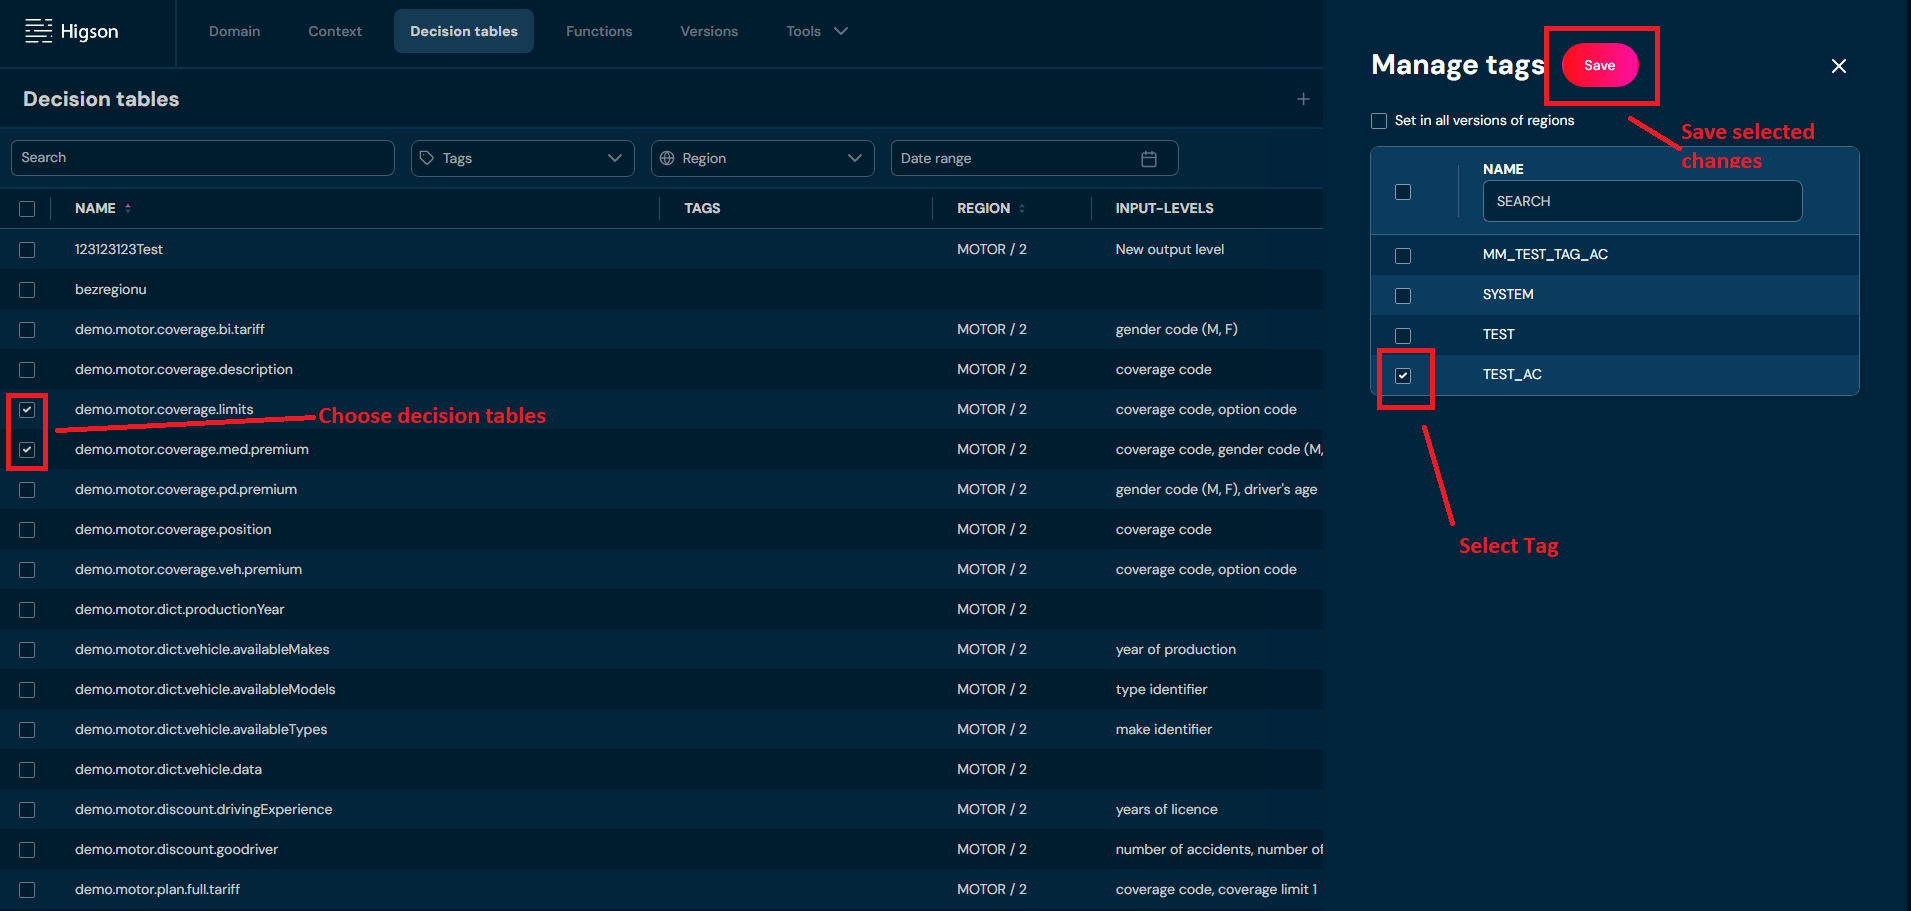
Remove Decision Table#
If you want to delete one or more decision tables, follow the steps below:
-
Choose the Decision tables in the Main toolbar.
-
Select one or more decision tables.
a. Select the top checkbox to select all decision tables in the view, or select individual checkboxes to select one or multiple
-
From the drop-down menu More actions, choose Remove.
a. If action Remove is grayed out, it means that no decision tables have been selected.
b. After choosing Remove action, a confirmation pop-up will appear.
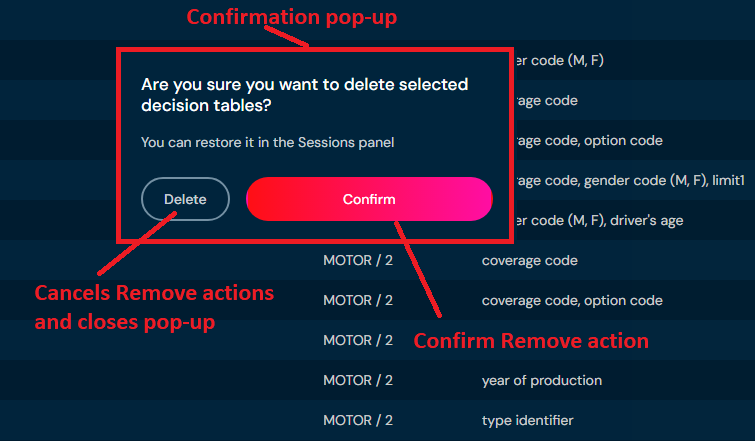
-
Choose Confirm.
-
All selected decision tables are deleted from the environment
Details View#
You can access decision table details by left-clicking on the specific decision table in the List of all decision tables. The decision tables details screen contains all information about the decision tables, including their description, assigned regions, tags, and others.
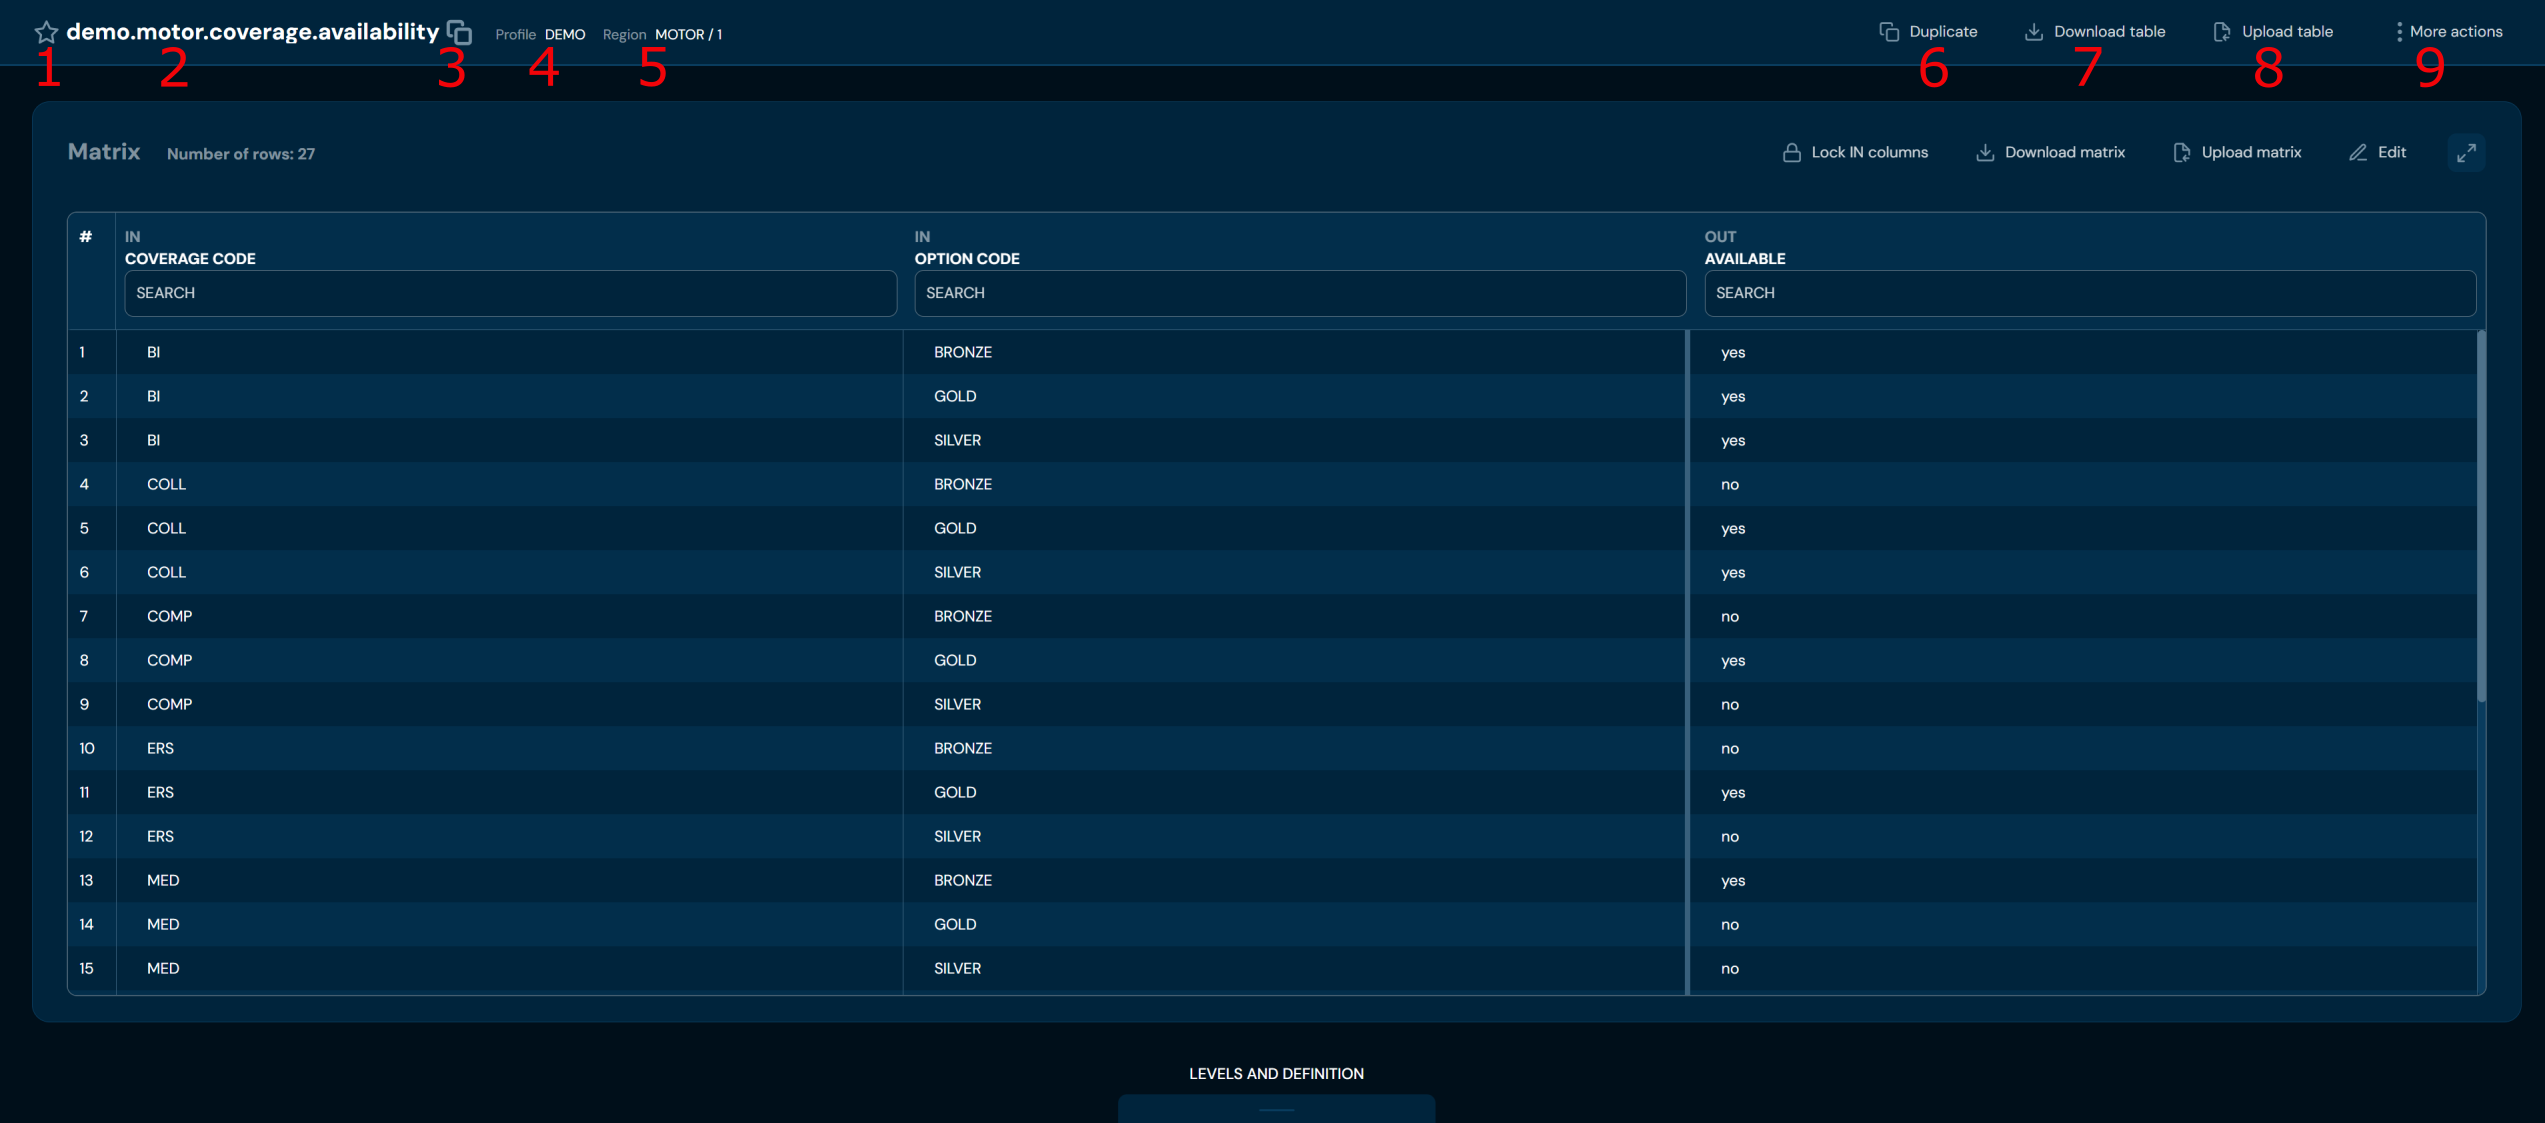
And you can see the available actions below:
| No. | Name | Description |
|---|---|---|
| 1 | Bookmarks | Adds decision table to bookmarks. |
| 2 | Name | Name of decision table |
| 3 | Copy | Copy to clipboard |
| 4 | Profile | Assigned profile. |
| 5 | Region/Version | Assigned region and version |
| 6 | Duplicate | Allows to duplicate decision table. |
| 7 | Download table | Downloads XLSX file with decision table. |
| 8 | Upload table | Allows to upload decision table from xlsx file. |
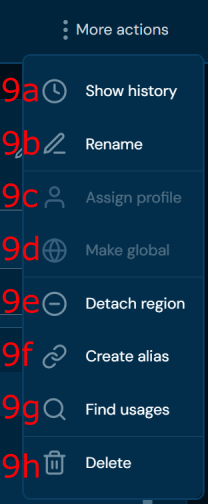
| 9 | More actions | Drop-down list that contains actions 9a-9h. |
| 9a | Shows history | Opens a new screen with a table of all modifications made on the decision table. |
| 9b | Rename | Allows you to change the name. |
| 9c | Assign profile | Assigns the decision table to a profile. Assigning the decision table to a profile will ensure that only users with permissions for that profile can access it. |
| 9d | Make global | Makes the decision table global. Global decision tables are visible regardless of profile permissions. |
| 9e | Attach/Detach | Allows you to add/remove a region to/from the Decision table. Attach region is available if there are no regions added to the Decision table. Detach region is available if there is a region added to the Decision table. |
| 9f | Create Alias | Creates a copy of the decision table with its own code. |
| 9g | Find usages | Redirects you to Find usages search where you may find every reference to that decision table. |
| 9h | Delete | Action removes the decision table. |
Left-click on LEVELS AND DEFINITION to see more details about the Decision table.
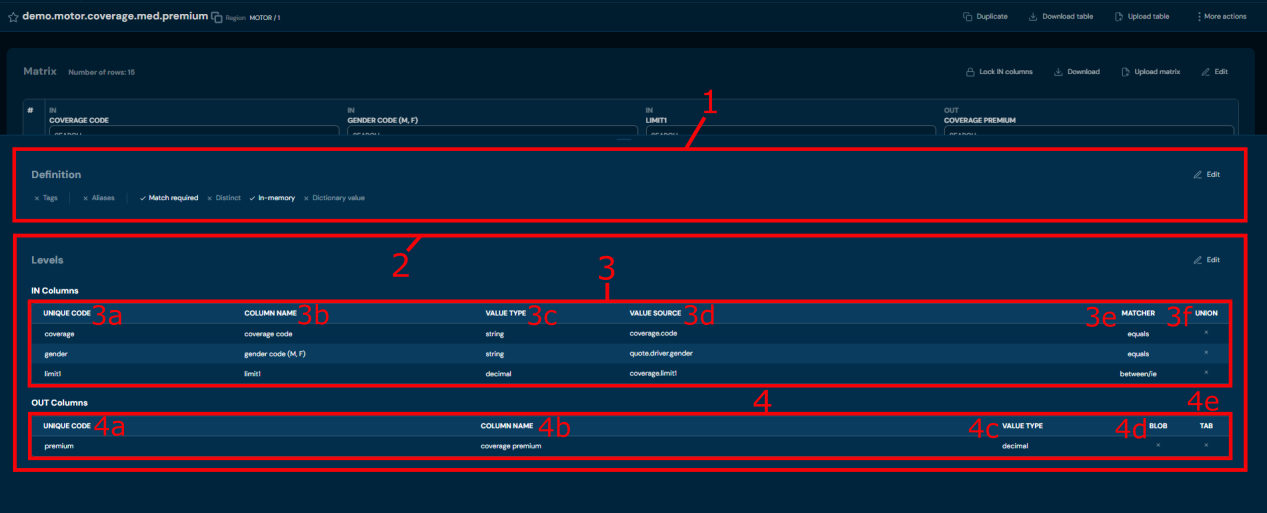
| No. | Name | Description |
|---|---|---|
| 1 | Definition section | Definition of Decision table. Contains information such as: - Description of Decision table - Assigned Tags - Created Aliases |
| 2 | Levels section | Levels of Decision table. Contains information about created IN Columns and OUT Columns. |
| 3 | IN Columns section | IN Columns table contains all IN Columns created in Decision table. |
| 3a | Unique Code | Unique Code of IN Column. |
| 3b | Column Name | Name of IN Column. |
| 3c | Value Type | Informs about Value Type of IN Column. |
| 3d | Value Source | Value Source of IN Column. |
| 3e | Matcher | Informs about the selected matcher for IN Column. To learn more about matchers go here. |
| 3f | Union | Informs if Union checkbox was selected for IN Column. |
| 4 | OUT Columns section | OUT Columns table contains all OUT Columns created in Decision table. |
| 4a | Unique Code | Unique Code of OUT Column. |
| 4b | Column Name | Name of OUT Column. |
| 4c | Value Type | Informs about Value Type of OUT Column. |
| 4d | Blob | Informs if Blob checkbox was selected for OUT Column. |
| 4e | Tab | Informs if Tab checkbox was selected for OUT Column. |
Value Source#
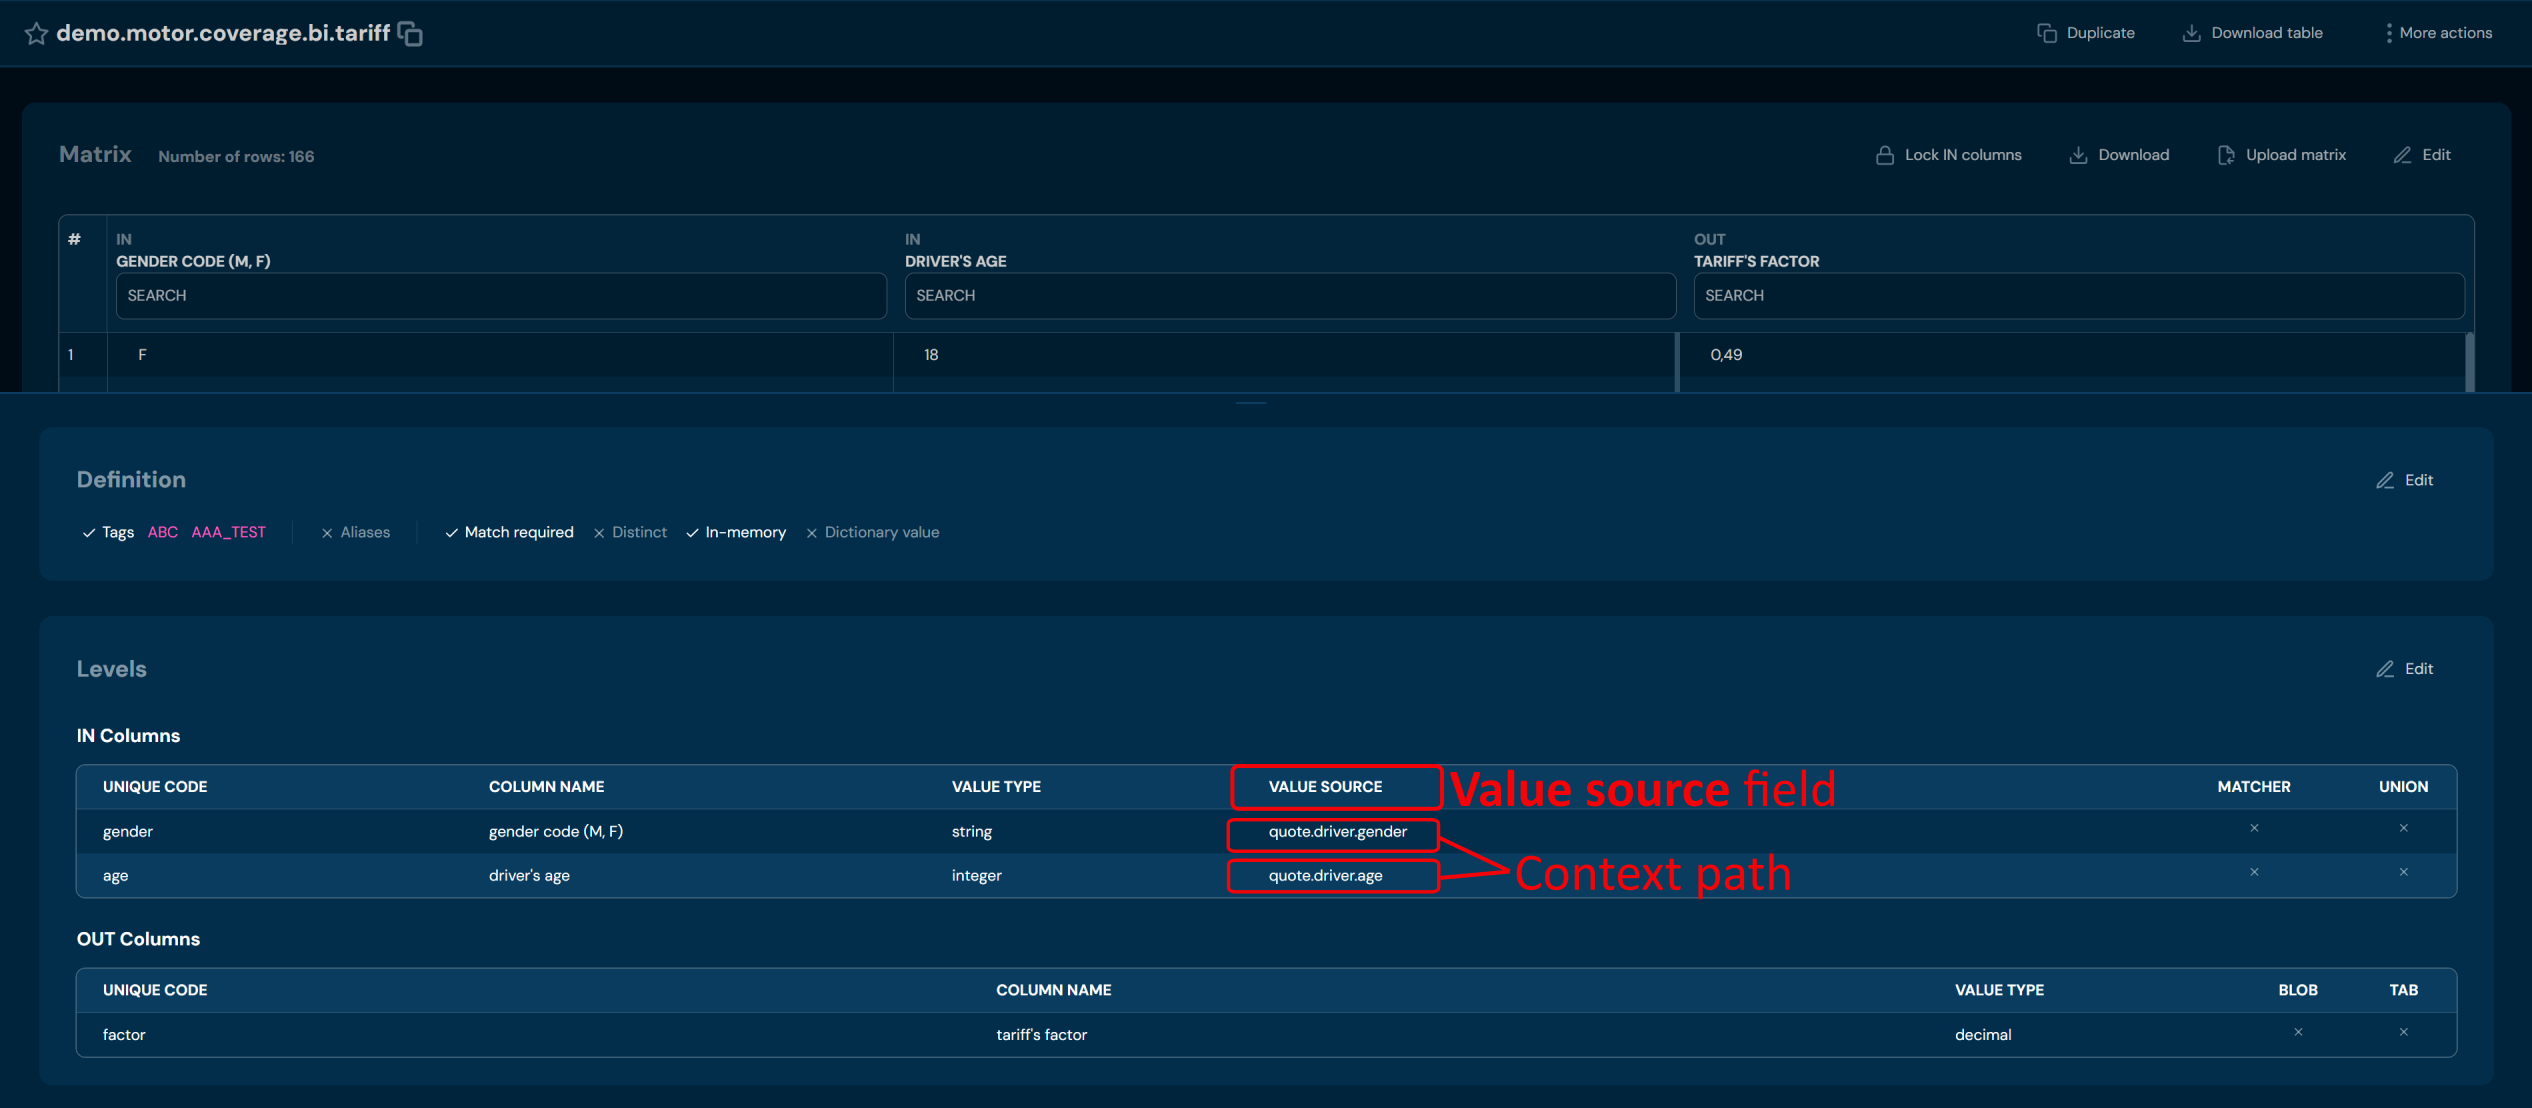
The Value Source field is used to define the source of a value for an IN level in a decision table. It can accept two types of references:
- context paths,
- functions.
Context Paths in the Value Source Field
If the value in the IN level should be read from the context, an appropriate context path must be provided, for example: quote.driver.age.
In this example, the value of the age attribute is read from the Driver type, which is a subtype of the Quote type.
EXAMPLE
For the following data taken from the context:
quote.driver.gender = F
quote.driver.age = 20
the resulting Tariff’s factor is 0.507.
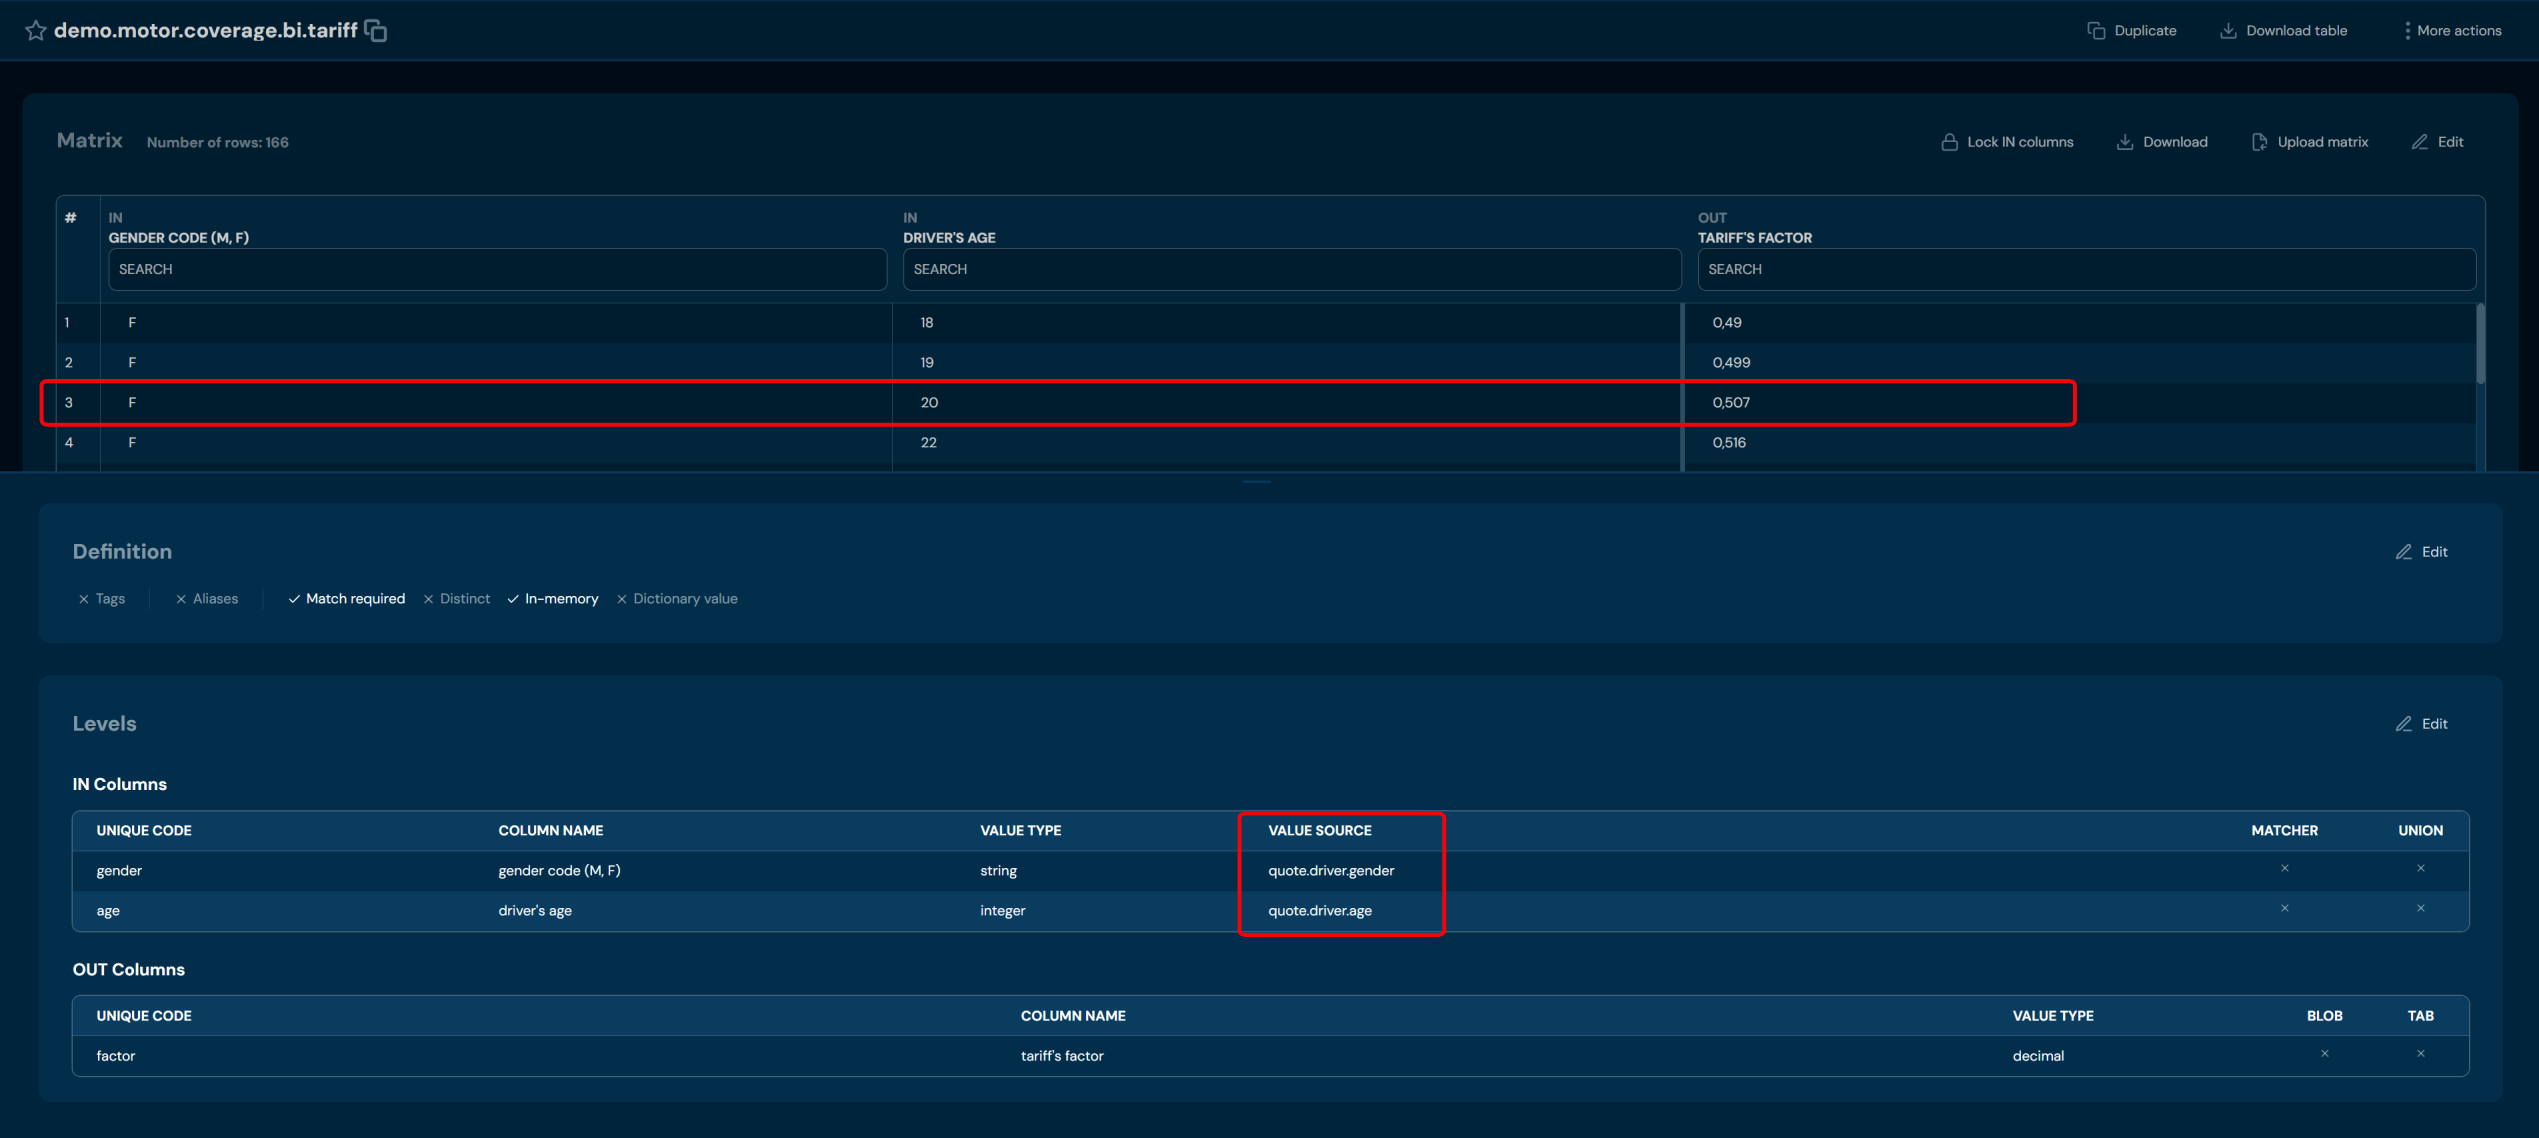
Functions in the Value Source Field
The Value Source field also supports references to functions using the $f notation. In this case, the value evaluated in the decision matrix is the result of a function execution.
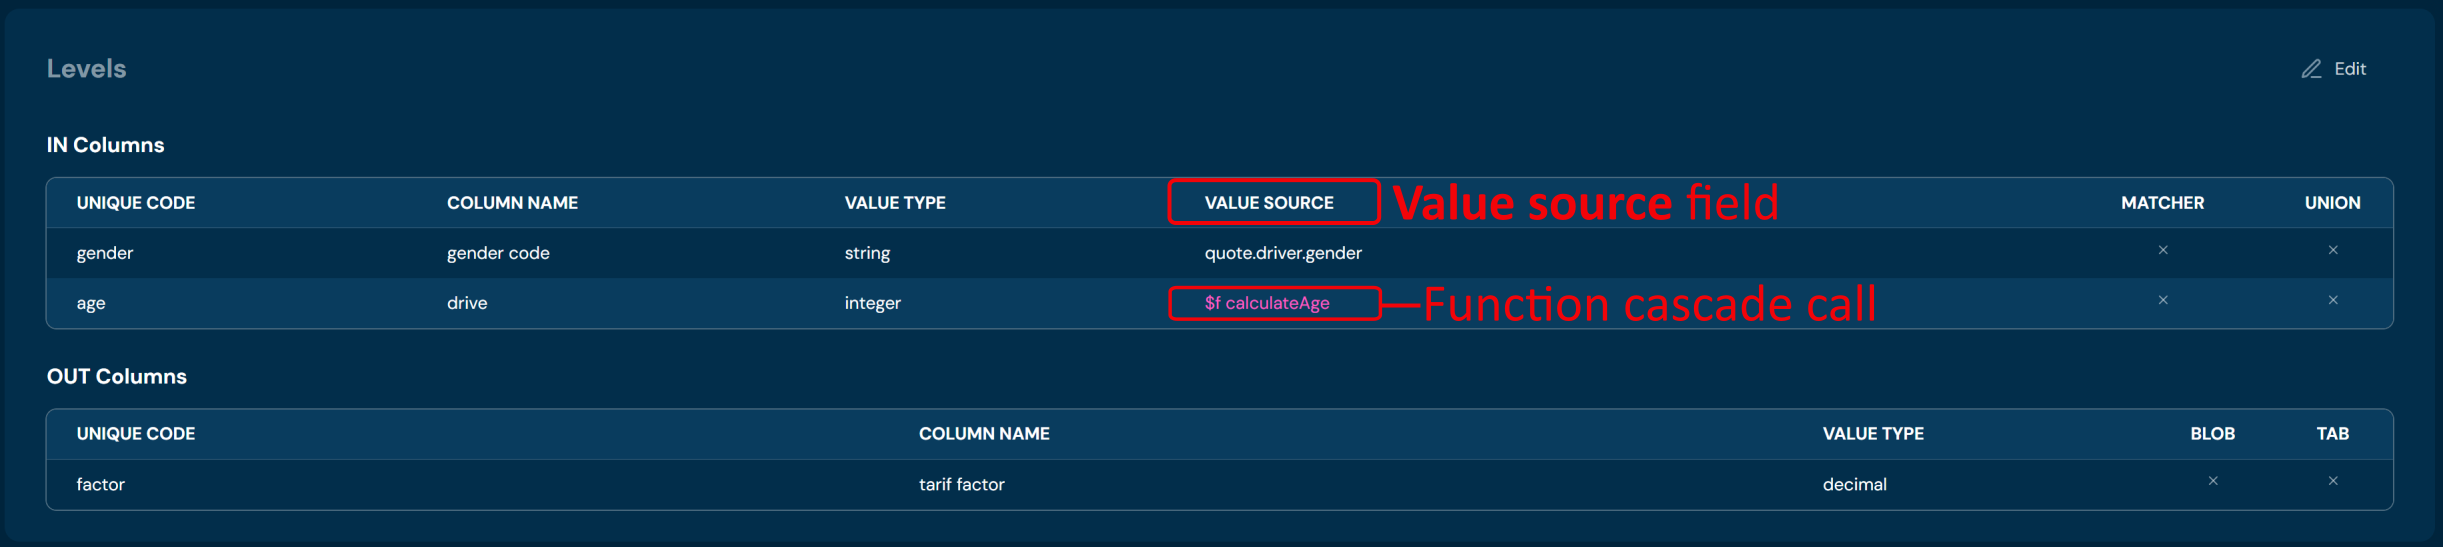
Duplicate Decision Table#
If you want to duplicate specific Decision table, follow these steps:
-
Choose Decision tables in Main toolbar.
-
Left-click on the Decision table you wish to duplicate.
a. Left-clicking on Decision table opens Decision table details screen.
-
Choose Duplicate in Available actions.
a. Choosing Duplicate brings up the Duplicate table screen.
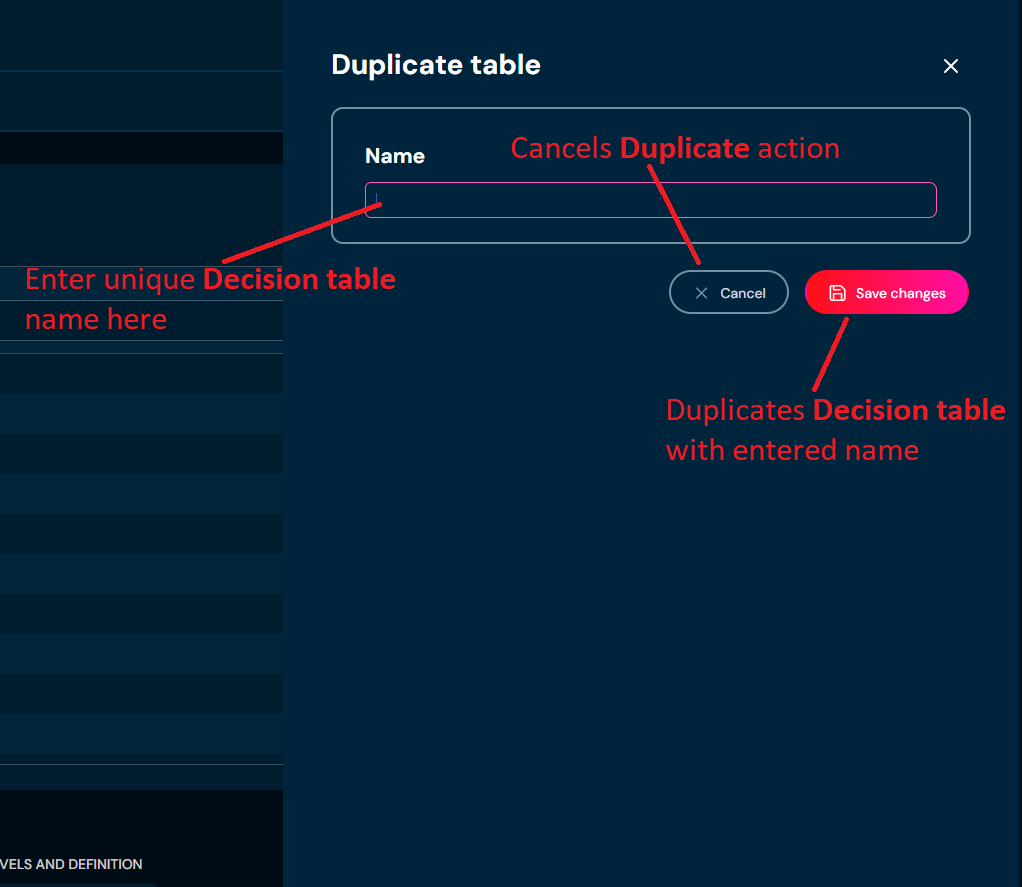
-
Enter unique Decision table name. Name can contain only characters from collection a-z; 0-9; “.”; “-”; “_” and it can’t start with “-”.
-
Choose Save changes.
a. If you entered illegal characters, then name filed will highlight with red color.
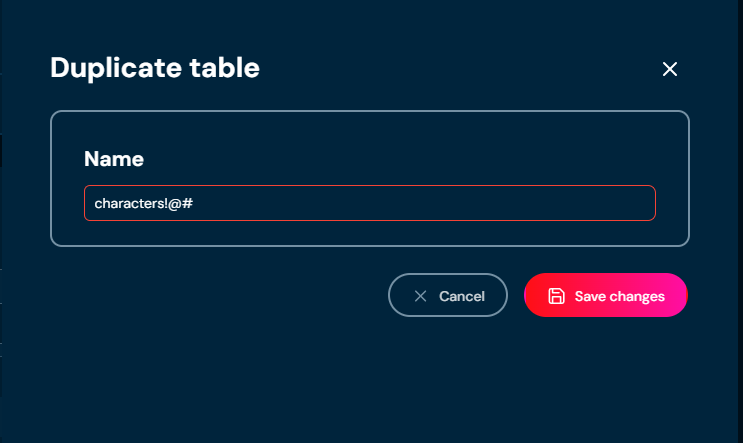
b. If the name you provided is already used by another Decision table, then pop-up dialog will appear. You can either close the pop-up by clicking Cancel or you can click View existing Decision table, that will redirect you to the appropriate Decision table.
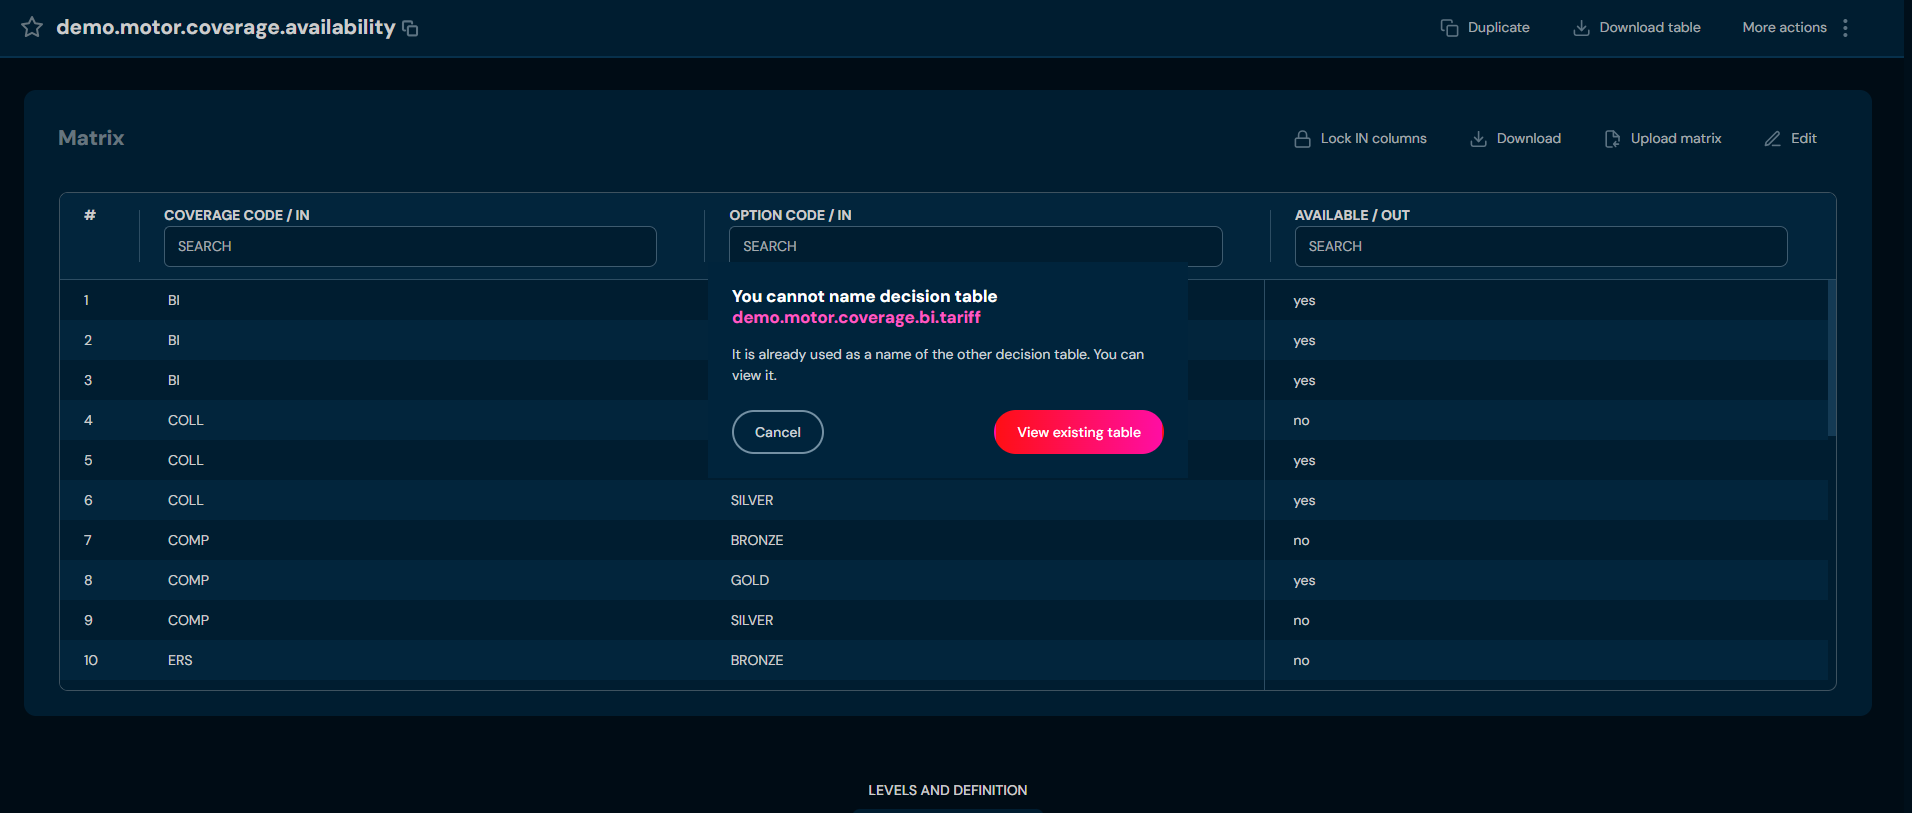
Download Decision Table#
If you want to download a specific Decision table, follow these steps:
-
Choose Decision tables in Main toolbar.
-
Left-click on the Decision table you wish to download.
a. Left-clicking on Decision table opens Decision table details screen.
-
Choose Download in Available actions.
a. Choosing Download downloads an XLSX file that contains data of Decision table.
Show History#
If you want to check all modifications made on Decision table, follow these steps:
-
Choose Decision tables in Main toolbar.
-
Left-click on the Decision table you want to check.
a. Left-clicking on Decision table opens Decision table details screen.
-
From drop-down menu More actions choose Show history.
a. Choosing Show history brings up the Decision table history screen.
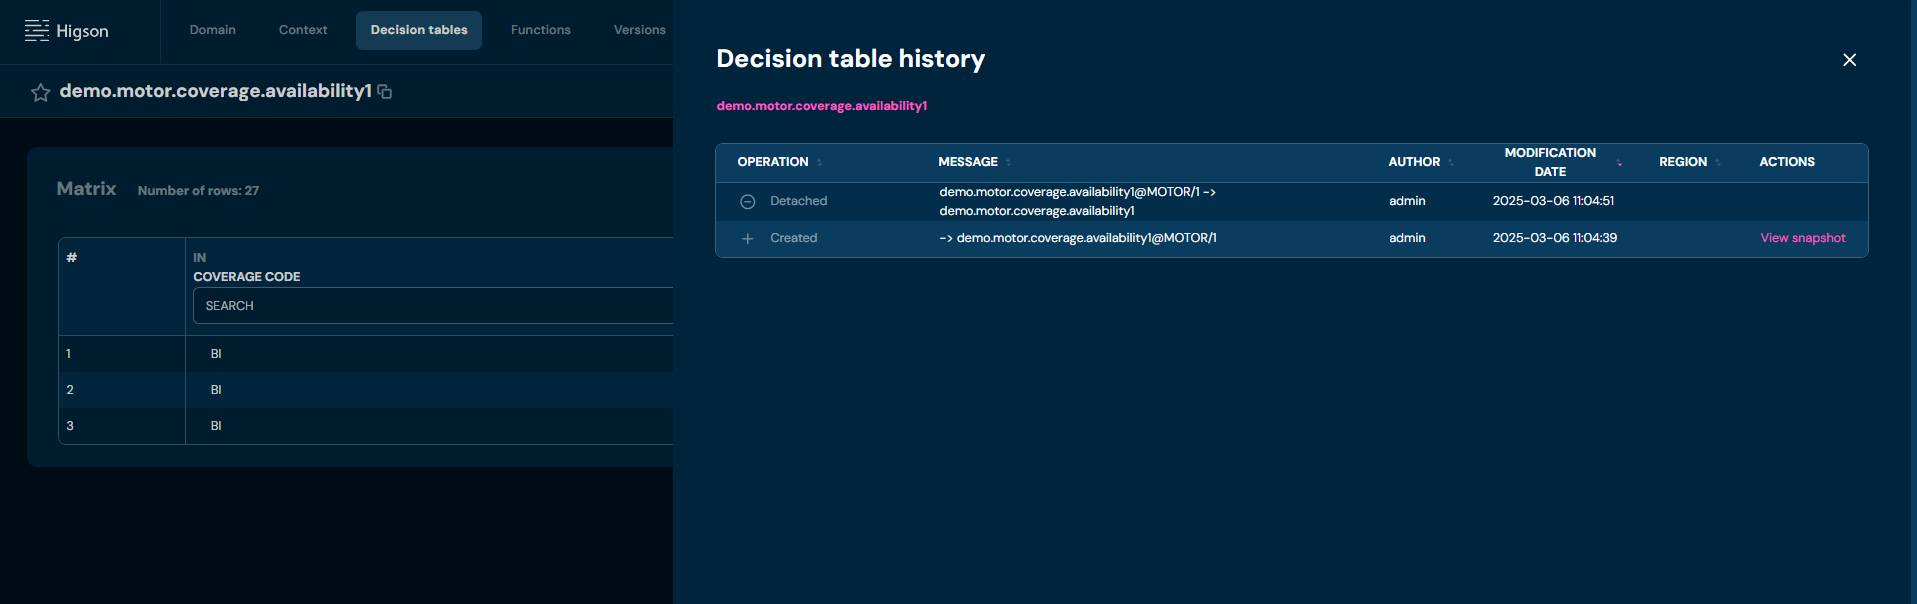
No. Column name Description 1 Operation Type Type of operation made on the Decision table. 2 Message Deatailed information on operation. 3 Author User’s login that made an operation. 4 Modification Date Date of the published session that made an operation. 5 Region Region and version assigned to the Decision table at the time of modification. 6 Digest Decision table’s hash. 7 Actions View redirects to an archived version of the Decision table. In this screen, you can choose Restore to restore that version of the Decision table.
Rename#
If you want to rename a Decision table, follow these steps:
-
Choose Decision tables in Main toolbar.
-
Left-click on the Decision table you wish to rename.
a. Left-clicking on Decision table opens Decision table details screen.
-
From drop-down menu More actions choose Rename.
a. The Highlighted border around the Decision table name indicates that the name is editable.
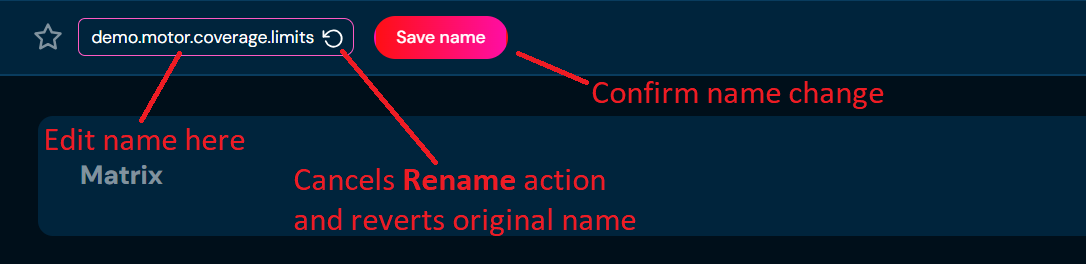
-
Enter unique Decision table name. Name can contain only characters from collection a-z; 0-9; “.”; “-”; “_” and it can’t start with “-”.
-
Choose Save name.
a. If you enter illegal characters, then the rename field will highlight with red color.
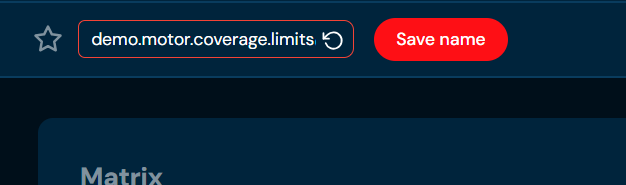
b. If the name you provided is already used by another Decision table, then pop-up dialog will appear. You can either close the pop-up by clicking Cancel or you can click View existing decision table, that will redirect you to the appropriate Decision table.
Attach Region#
To attach a decision table to a region, decision table must first be assigned to a profile. A region belongs to a profile.
If you want to attach a region to a specific Decision table from Decision table details level, follow these steps:
-
Choose Decision tables in Main toolbar.
-
Left-click on Decision table with no region assigned you want to attach a region.
a. Left-clicking on Decision table opens Decision table details screen.
-
From drop-down menu More actions choose Attach region
a. If Detach region action is available, it means that the Decision table has assigned the region already. You need to Detach region (hyperlink) before you will be able to attach a new region.
b. Choosing Attach region brings up Manage versioning screen.
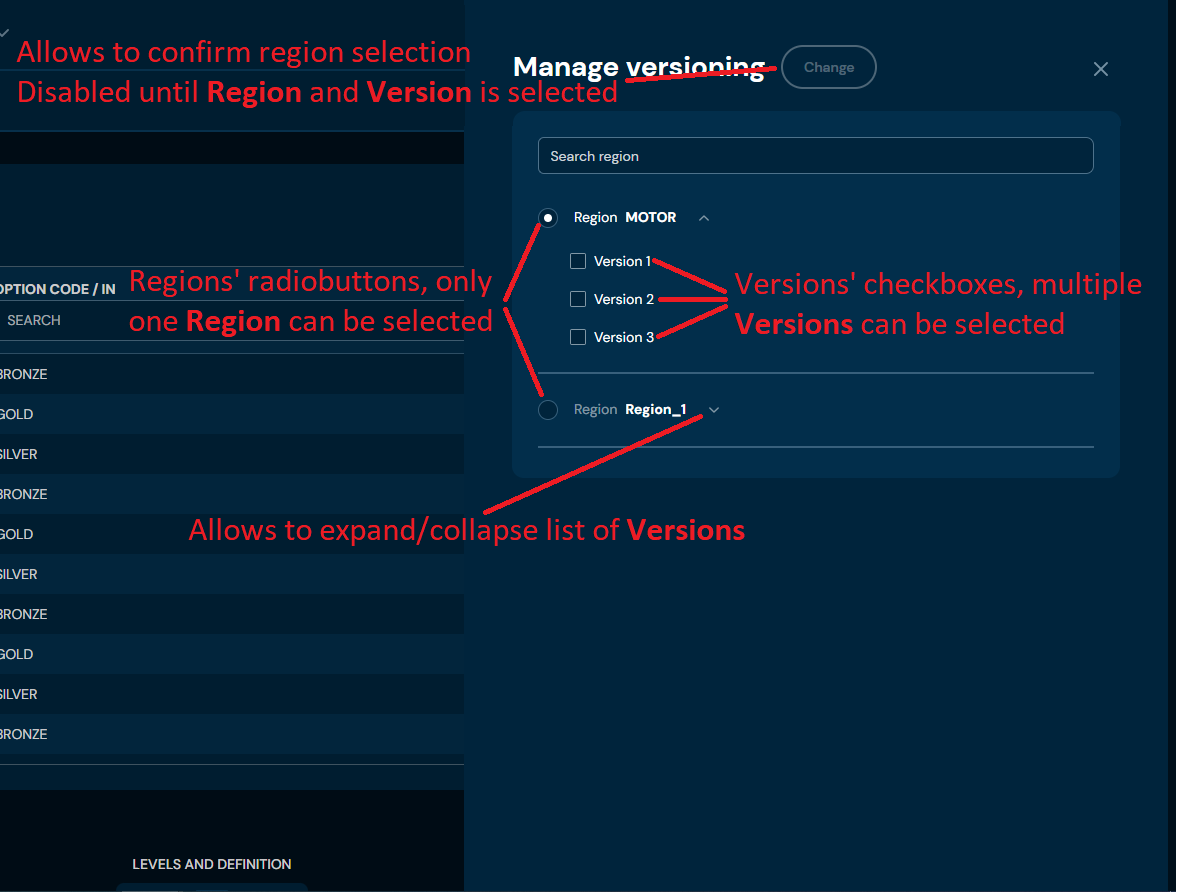
-
Select Region and one or more Version.
-
Choose Change
a. The Region is being assigned to the Decision table.
Detach Region#
If you want to detach a region from a specific Decision table from Decision table details level, follow these steps:
-
Choose Decision tables in Main toolbar.
-
Left-click on the Decision table with a region assigned you want to detach region.
a. Left-clicking on Decision table opens Decision table details screen.
-
From drop-down menu More actions choose Detach region.
a. If Attach region action is available, it means that the Decision table has no region assigned.
b. After choosing Detach region action, confirmation pop-up will appear.
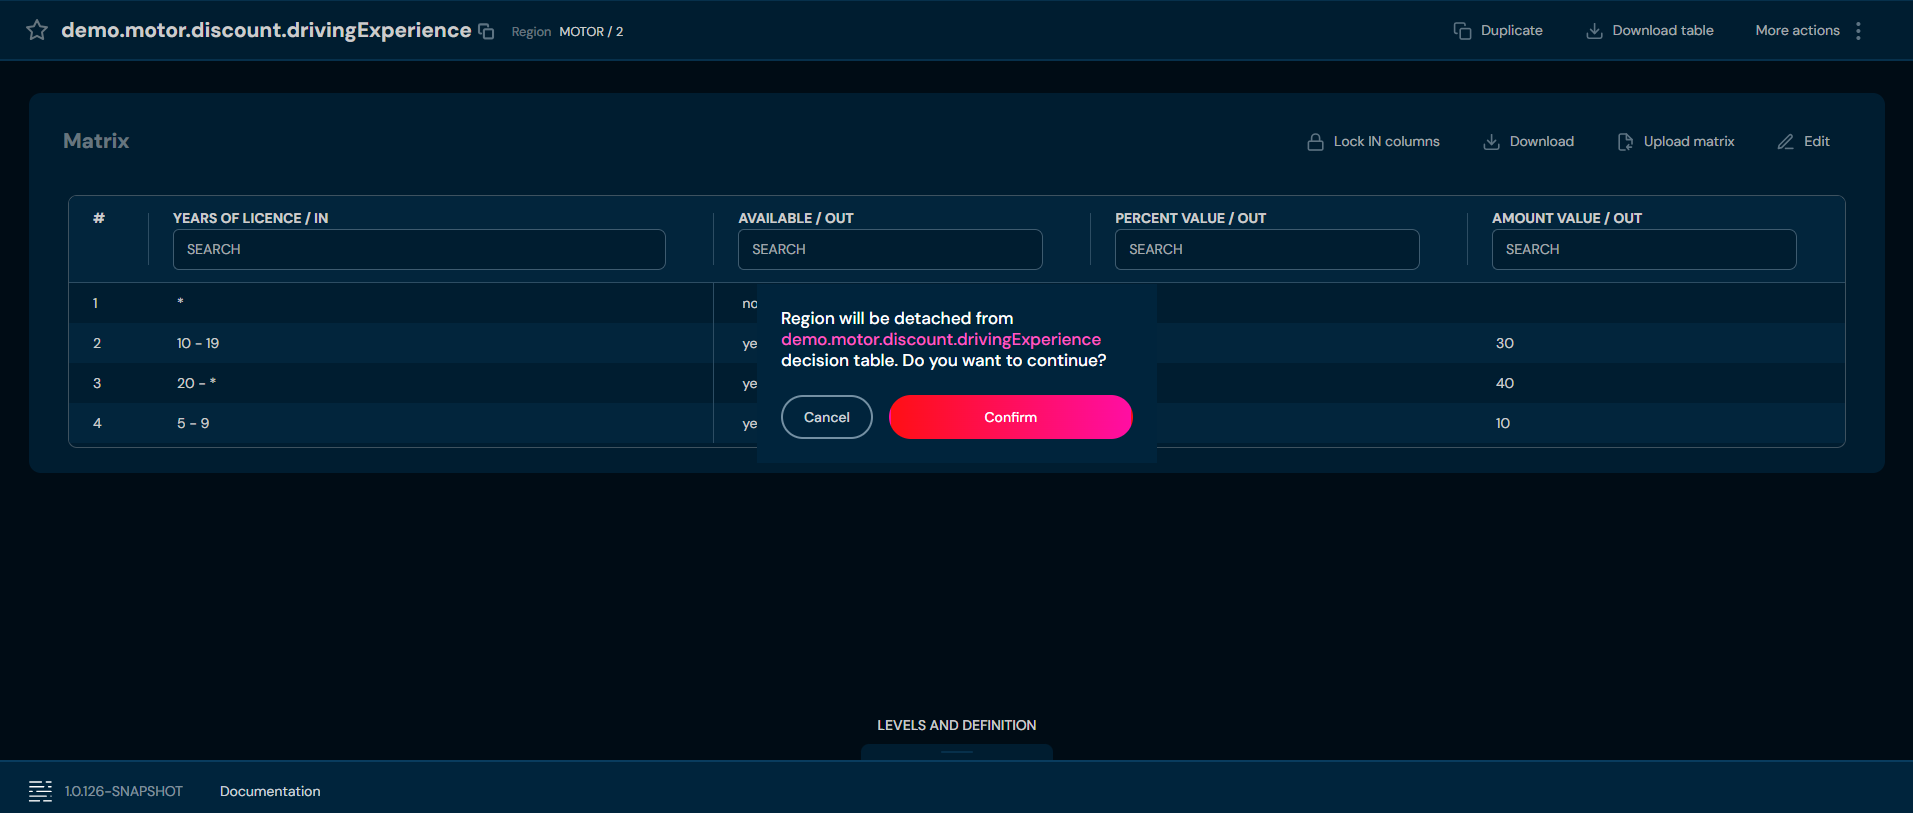
-
Choose Confirm.
a. The Region is being detached from the Decision table.
Create Alias#
If you want to create an alias to specific Decision table, follow these steps:
-
Choose Decision tables in Main toolbar.
-
Left-click on Decision table you want to create alias.
a. Left-clicking on Decision table opens Decision table details screen.
-
From drop-down menu More actions choose Create alias.
a. Choosing Create alias brings up the Create alias screen.
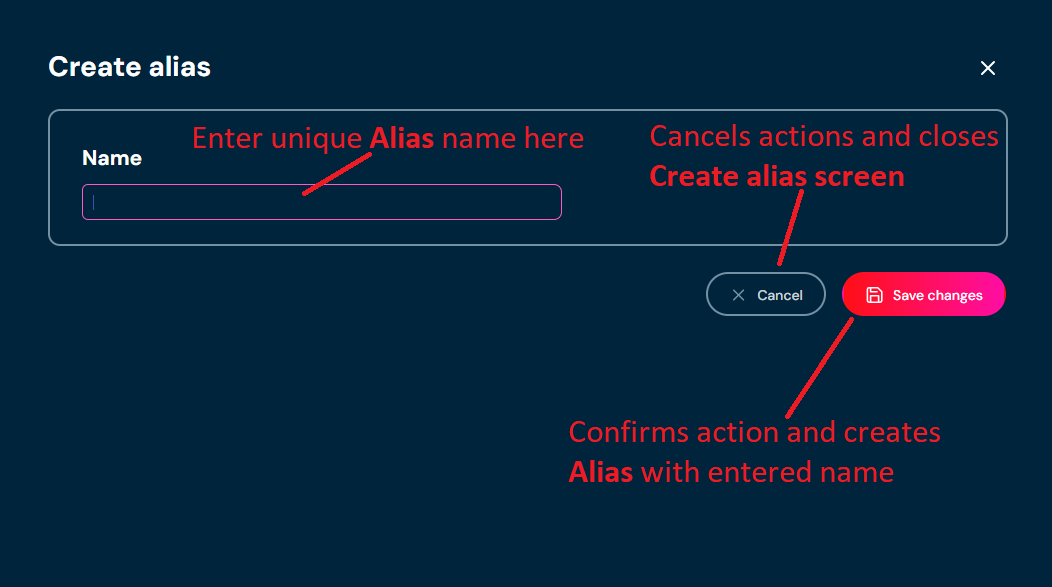
-
Enter unique alias name. Name can contain only characters from collection a-z; 0-9; “.”; “-”; “_” and it can’t start with “-”.
-
Choose Save change.
a. If you enter illegal characters, then the rename field will highlight with red color.
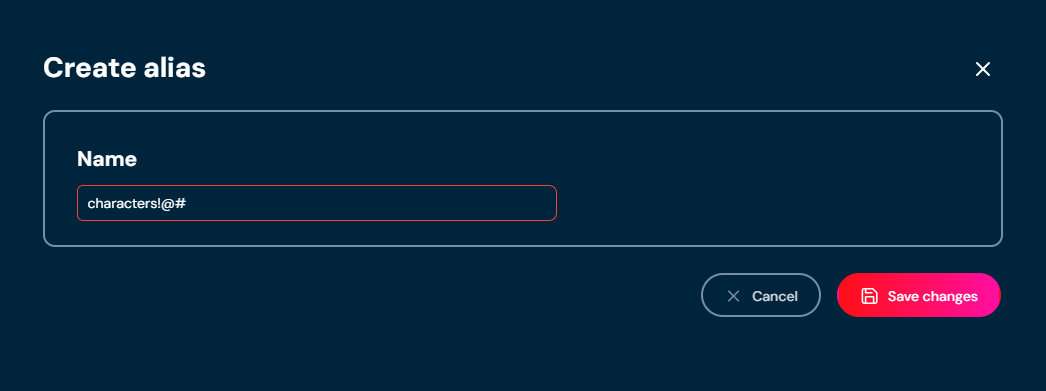
b. If the name you provided is already used by another Decision table, then a pop-up message will appear.
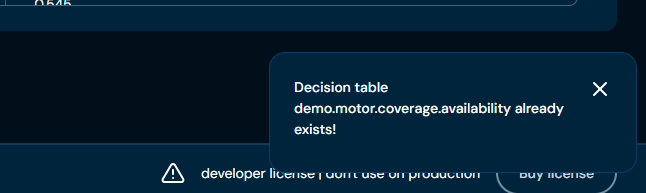
Find Usages#
If you want to check where Decision table is used, follow these steps:
-
Choose Decision tables in Main toolbar.
-
Left-click on the Decision table you want to check.
a. Left-clicking on Decision table opens Decision table details screen.
From drop-down menu More actions choose Find usages.
a. Choosing Find usages brings up the Find usages screen.
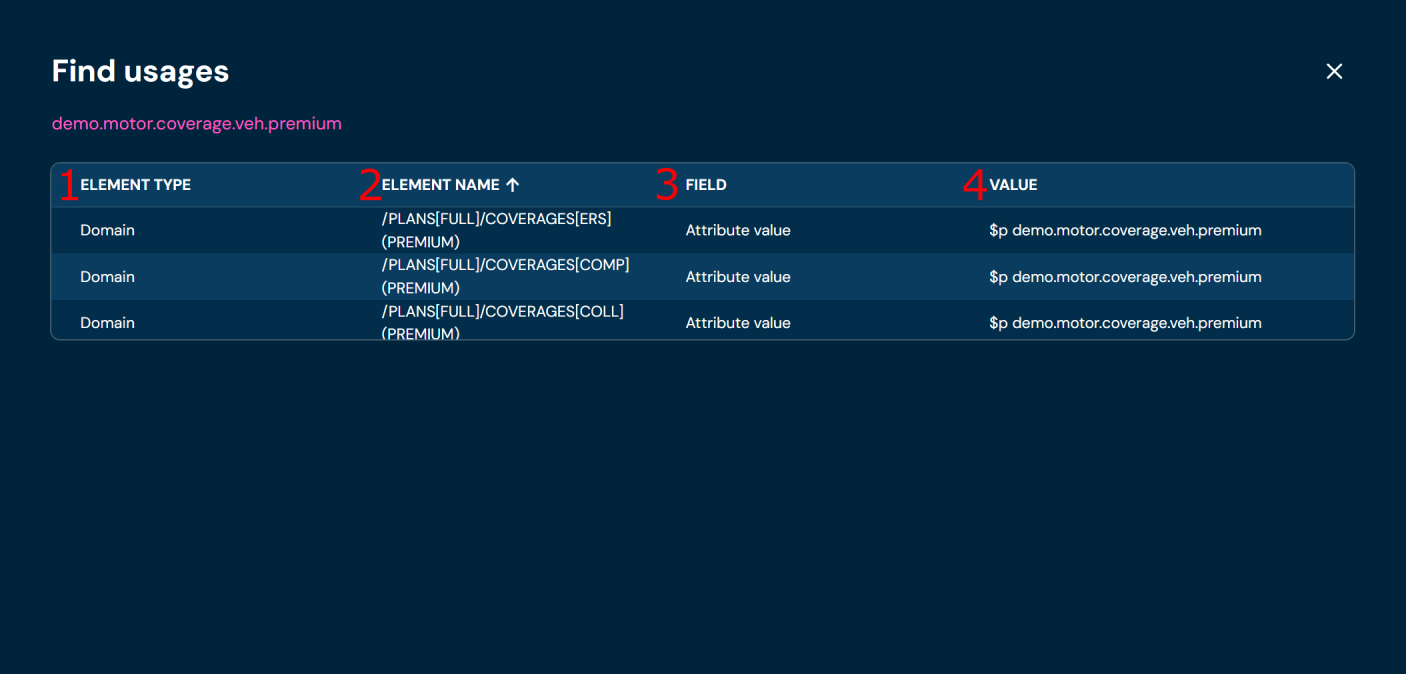
| No. | Column name | Description |
|---|---|---|
| 1 | Element Type | Type of element that uses this Decision table. |
| 2 | Element Name | Name of the element that uses this Decision table. |
| 3 | Field | Informs about the type of field where the Decision table is used. |
| 4 | Value | Value of the element that uses this Decision table. This column is filled only for Attribute value element; for other elements, this column is empty. |
Remove (Details View)#
If you want to delete specific Decision table from Decision table details level, follow these steps:
-
Choose Decision tables in Main toolbar.
-
Left-click on the Decision table you wish to remove.
a. Left-clicking on Decision table opens Decision table details screen.
-
From drop-down menu More actions choose Remove.
a. After choosing Remove action, confirmation pop-up will appear.
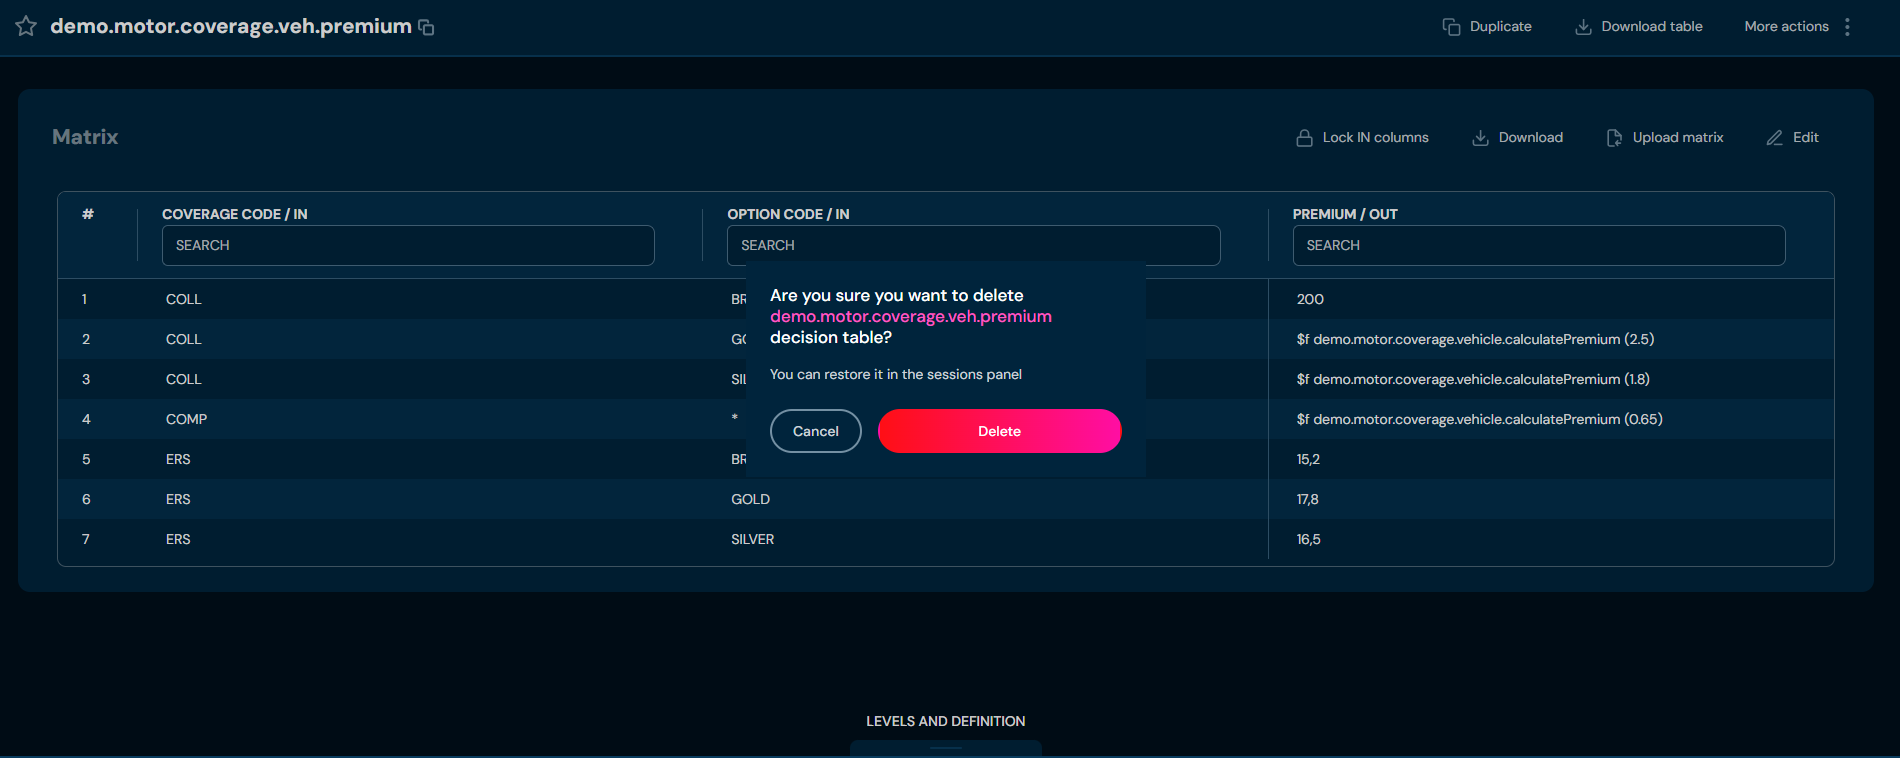
-
Choose Confirm.
a. The Decision table is deleted from the environment.
Matrix#
The Matrix section displays the decision table data in rows and columns. The section header shows the current number of rows.
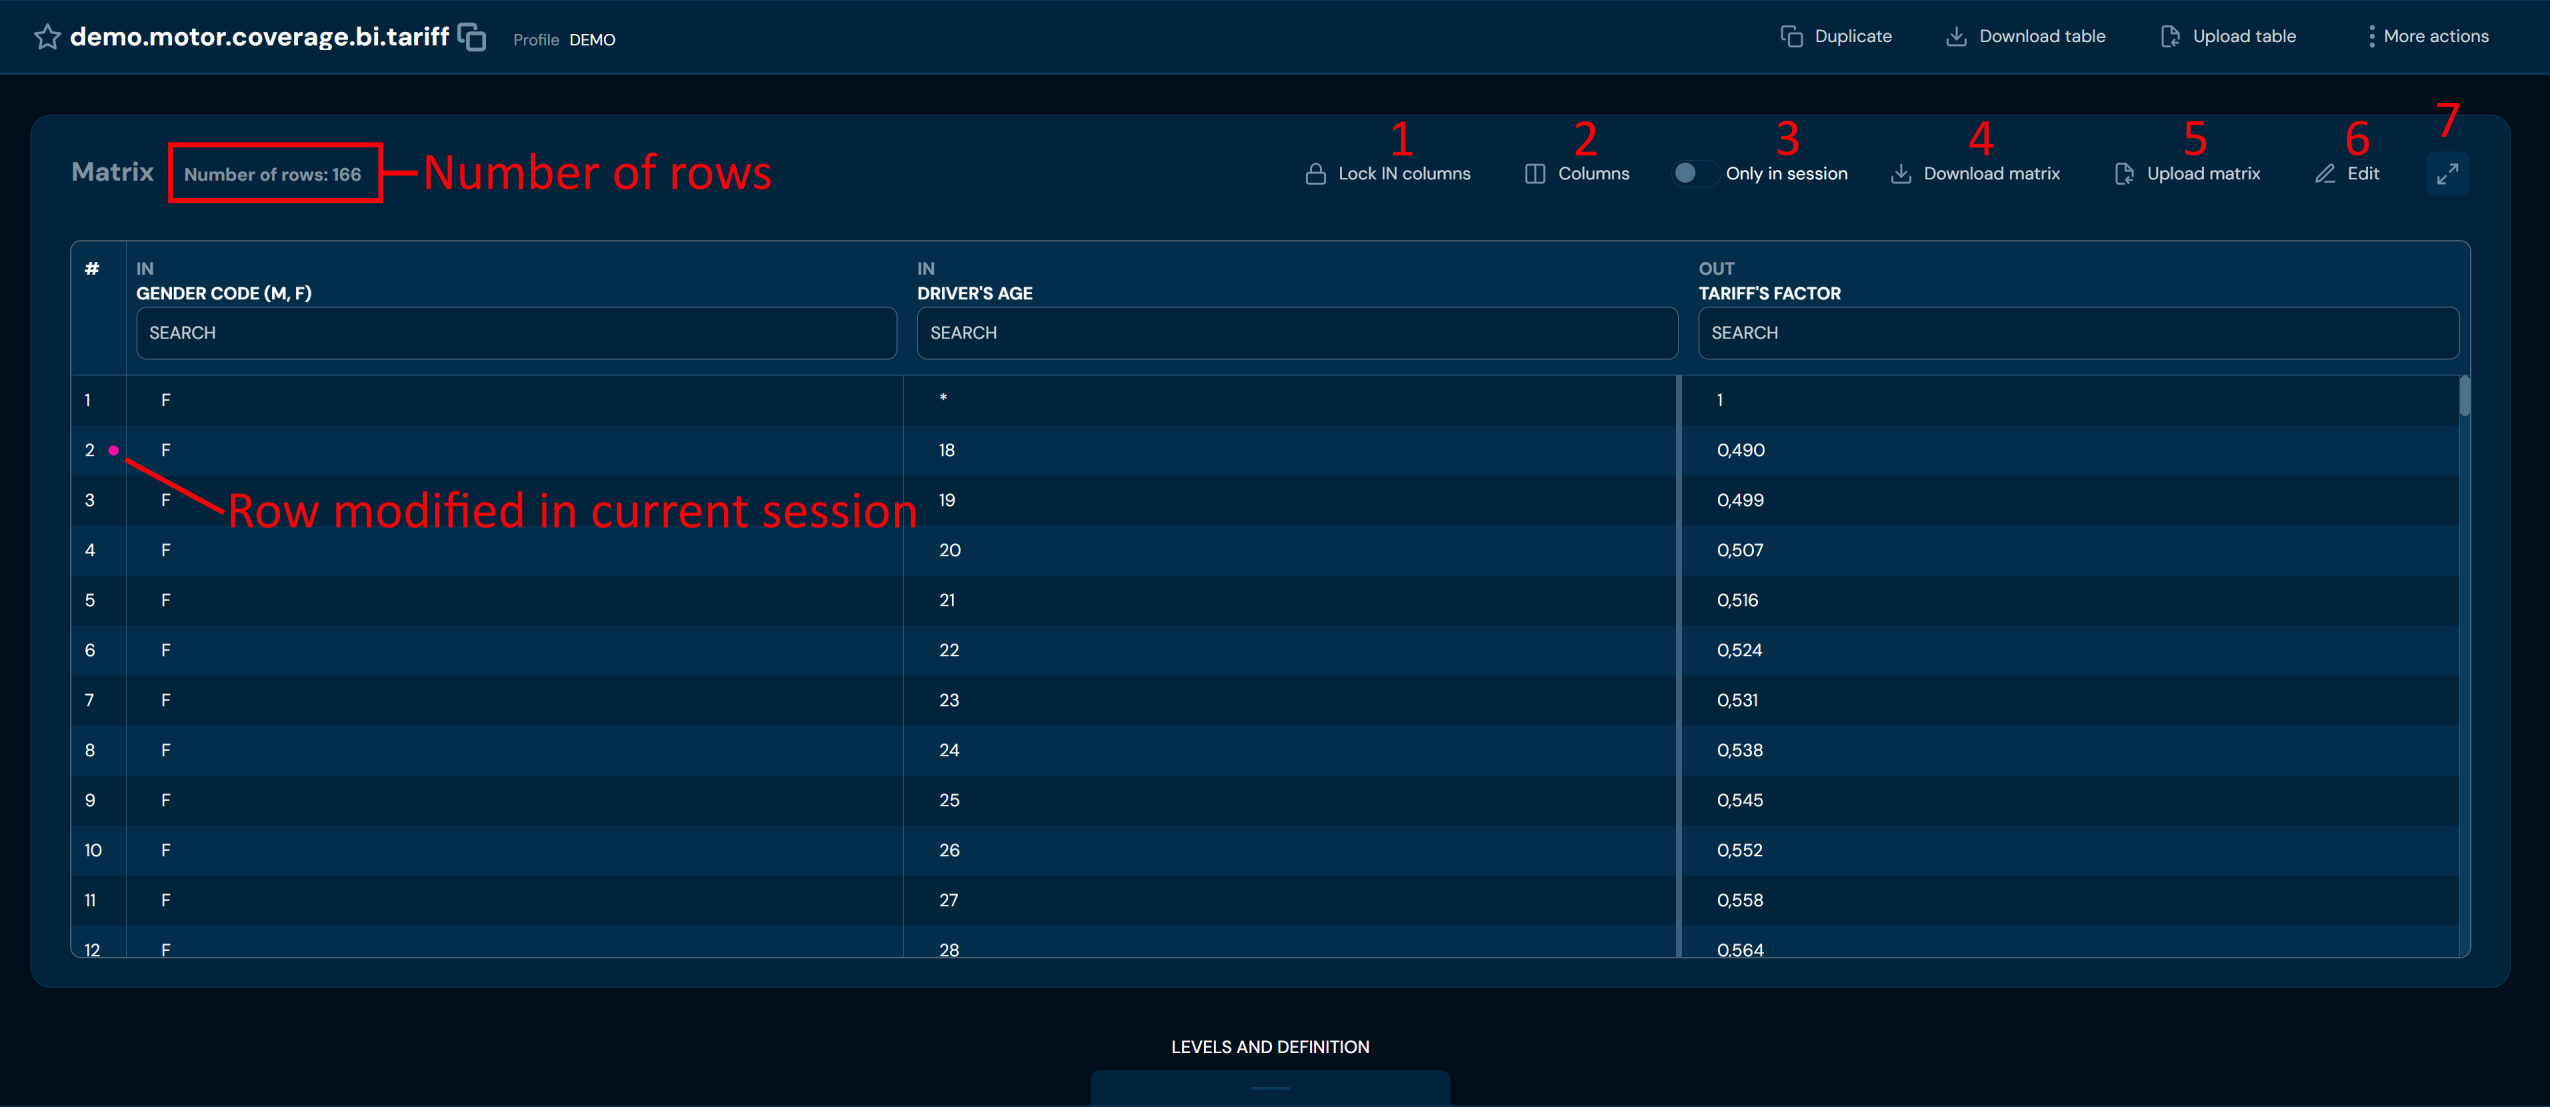
The following actions are available in the Matrix section toolbar:
| No. | Action | Description |
|---|---|---|
| 1 | Lock IN columns | Locks the IN columns in place so they remain visible while scrolling horizontally through the matrix. |
| 2 | Columns | Opens a panel for showing or hiding individual columns in the matrix view. |
| 3 | Only in session | Toggle switch. When enabled, any changes made to the matrix are applied only for the duration of the current session and are not persisted. |
| 4 | Download matrix | Downloads the matrix data as an XLSX file. |
| 5 | Upload matrix | Uploads matrix data from an XLSX file, replacing the current matrix content. |
| 6 | Edit | Activates edit mode for the matrix. Highlighted borders indicate that edit mode is active. |
| 7 | Expand | Expands the matrix to full screen for a larger working area. |
Each row in the matrix that has been modified in the current session is preceded by a colored dot indicator. Each column has a Search field that allows you to filter rows by the values in that column.
Edit Matrix#
If you want to edit matrix in a specific decision table, follow these steps:
-
Choose Decision tables in Main toolbar.
-
Left-click on the Decision table you wish to edit.
a. Left-clicking on the Decision table opens the details screen.
-
Choose Edit in Matrix section.
a. Highlighted borders indicate that the edit mode is active.
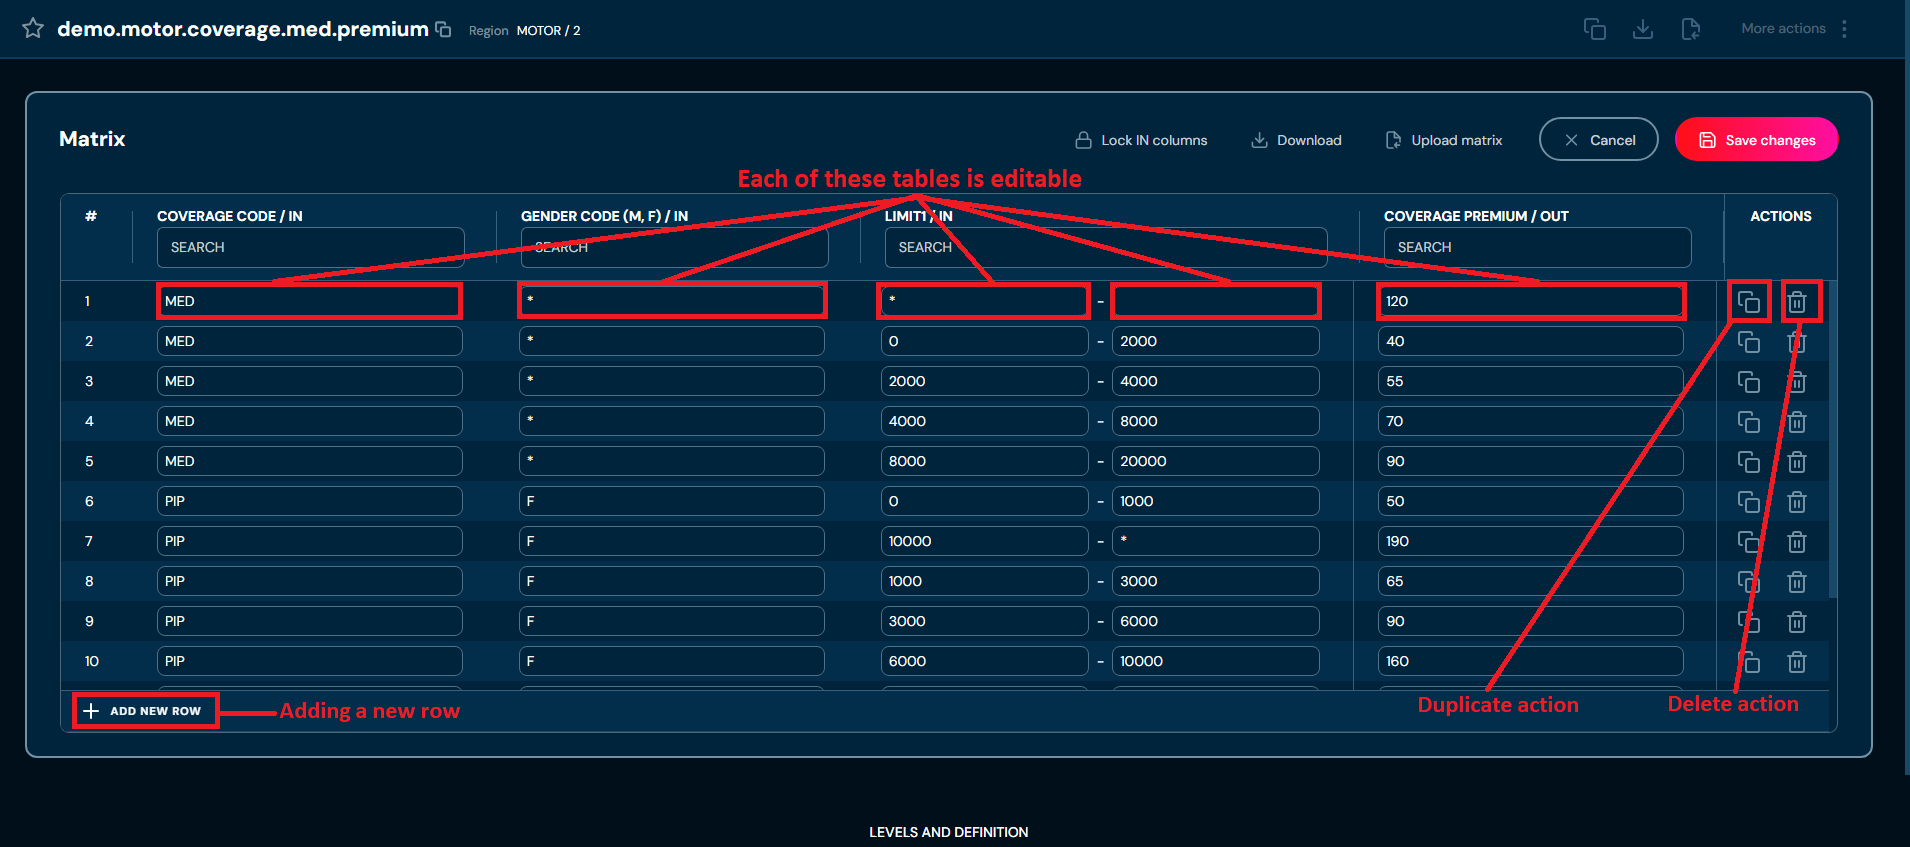
-
Edit any data you need.
-
Choose Save changes to save all changes made in the Decision table.
a. Cancel reverts all changes.
Edit Levels and Definition#
If you want to edit levels or definition in a specific decision table, follow these steps:
-
Choose Decision tables in Main toolbar.
-
Left-click on the Decision table you wish to edit.
a. Left-clicking on Decision table opens Decision table details screen.
-
Expand LEVELS AND DEFINITION
-
Choose Edit in Definition section or in Levels section. Only one section can be edited at given time.
a. Edit mode for Definition section.
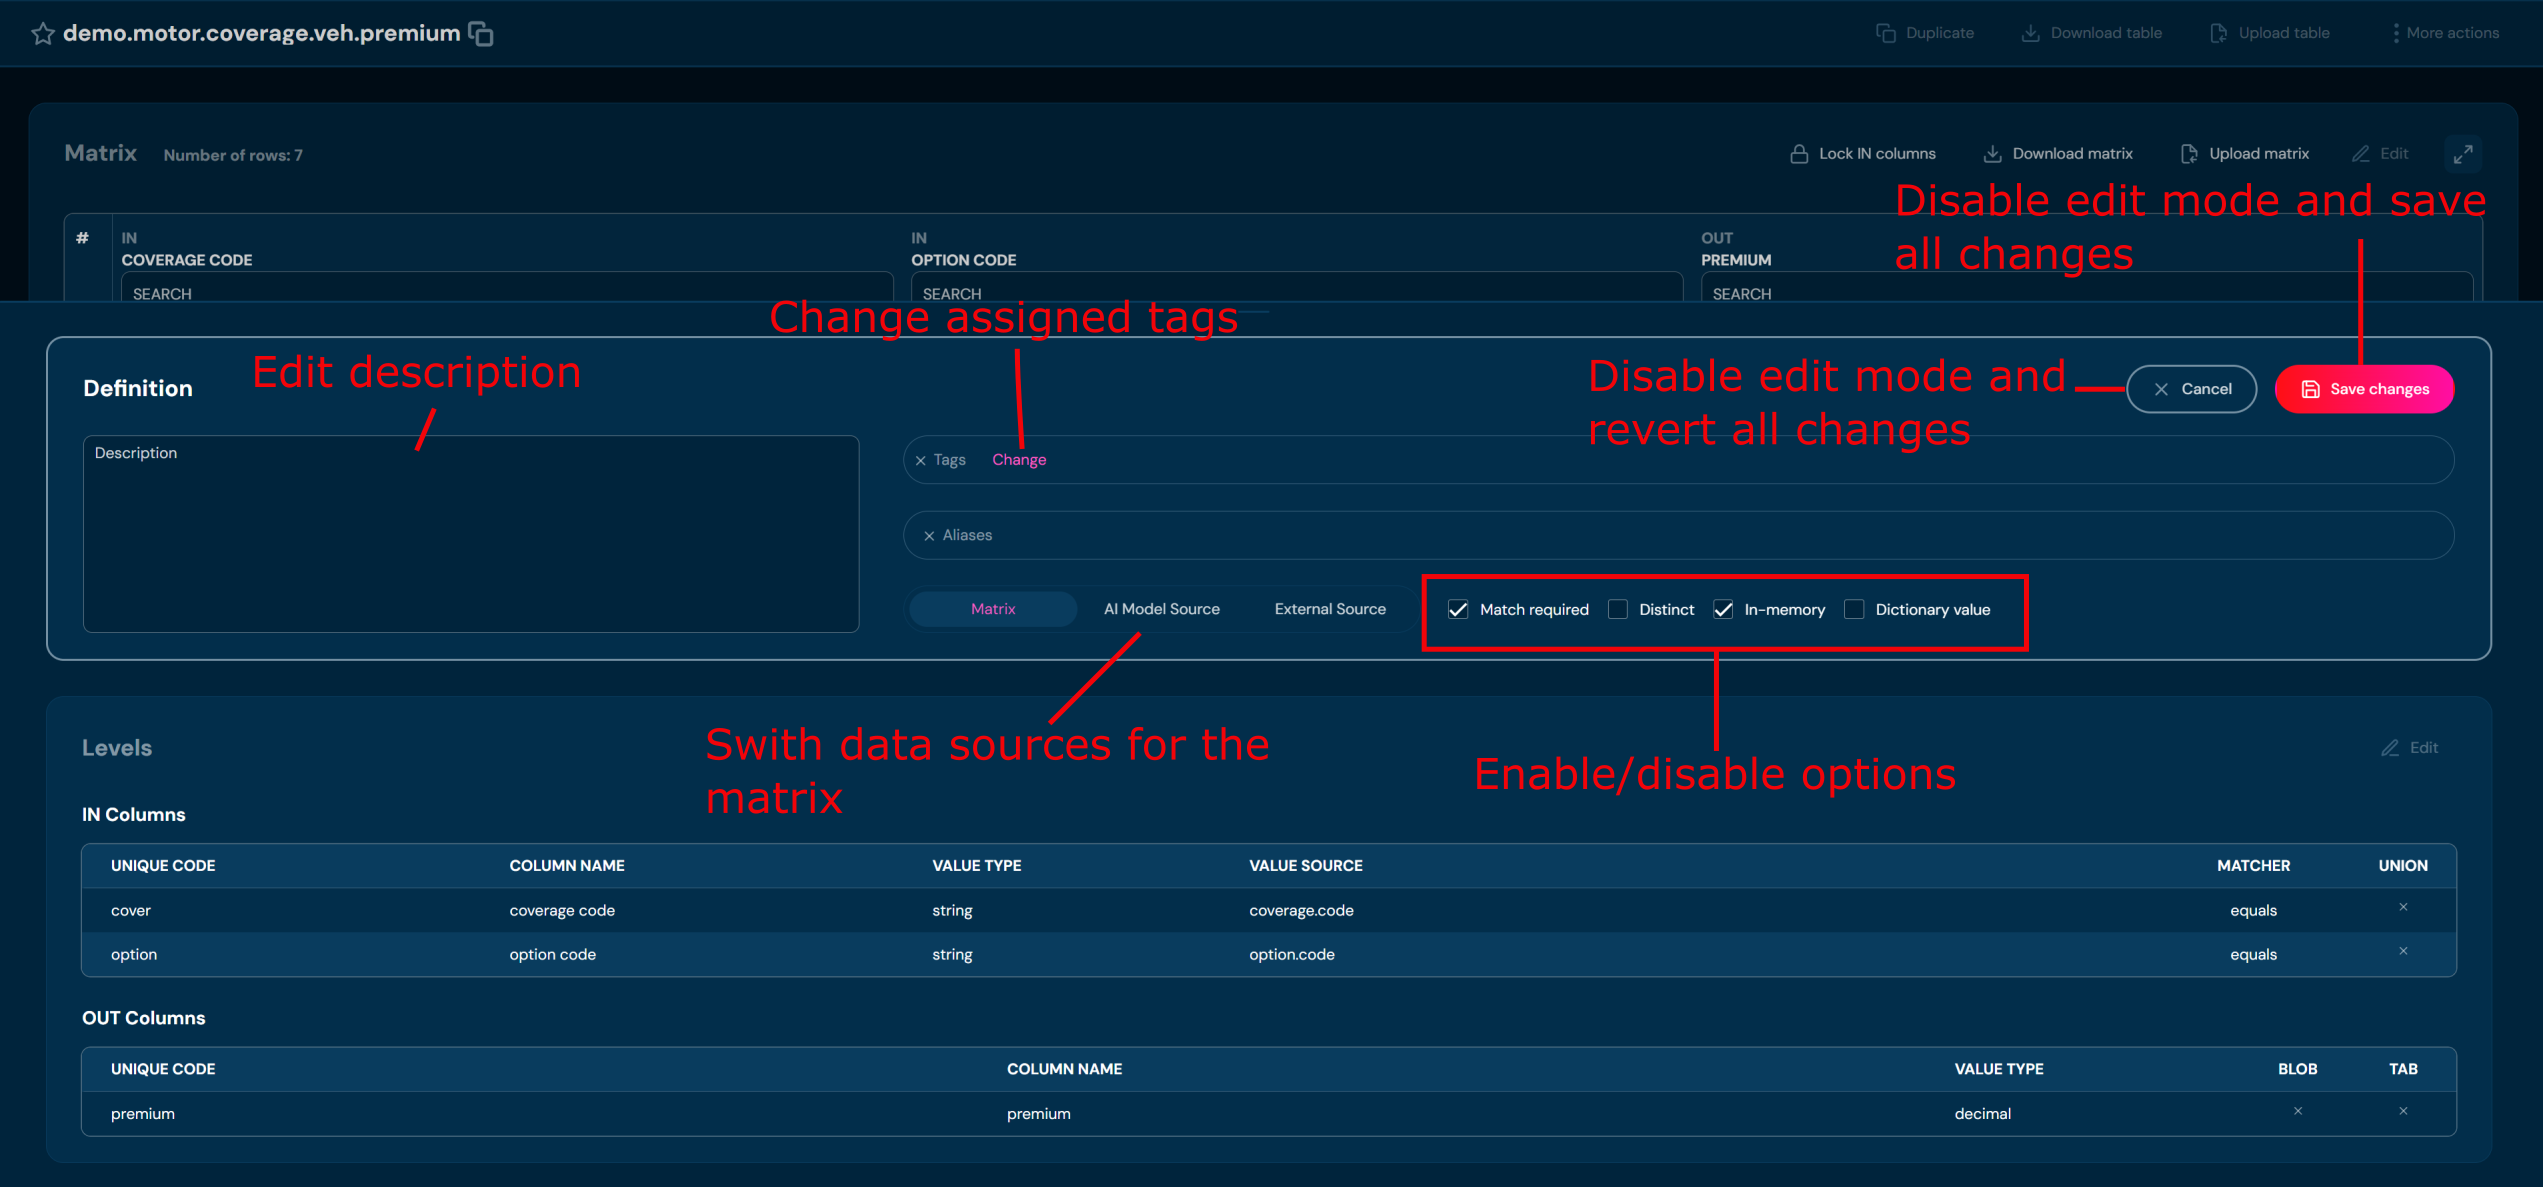
b. Edit mode for Levels section.
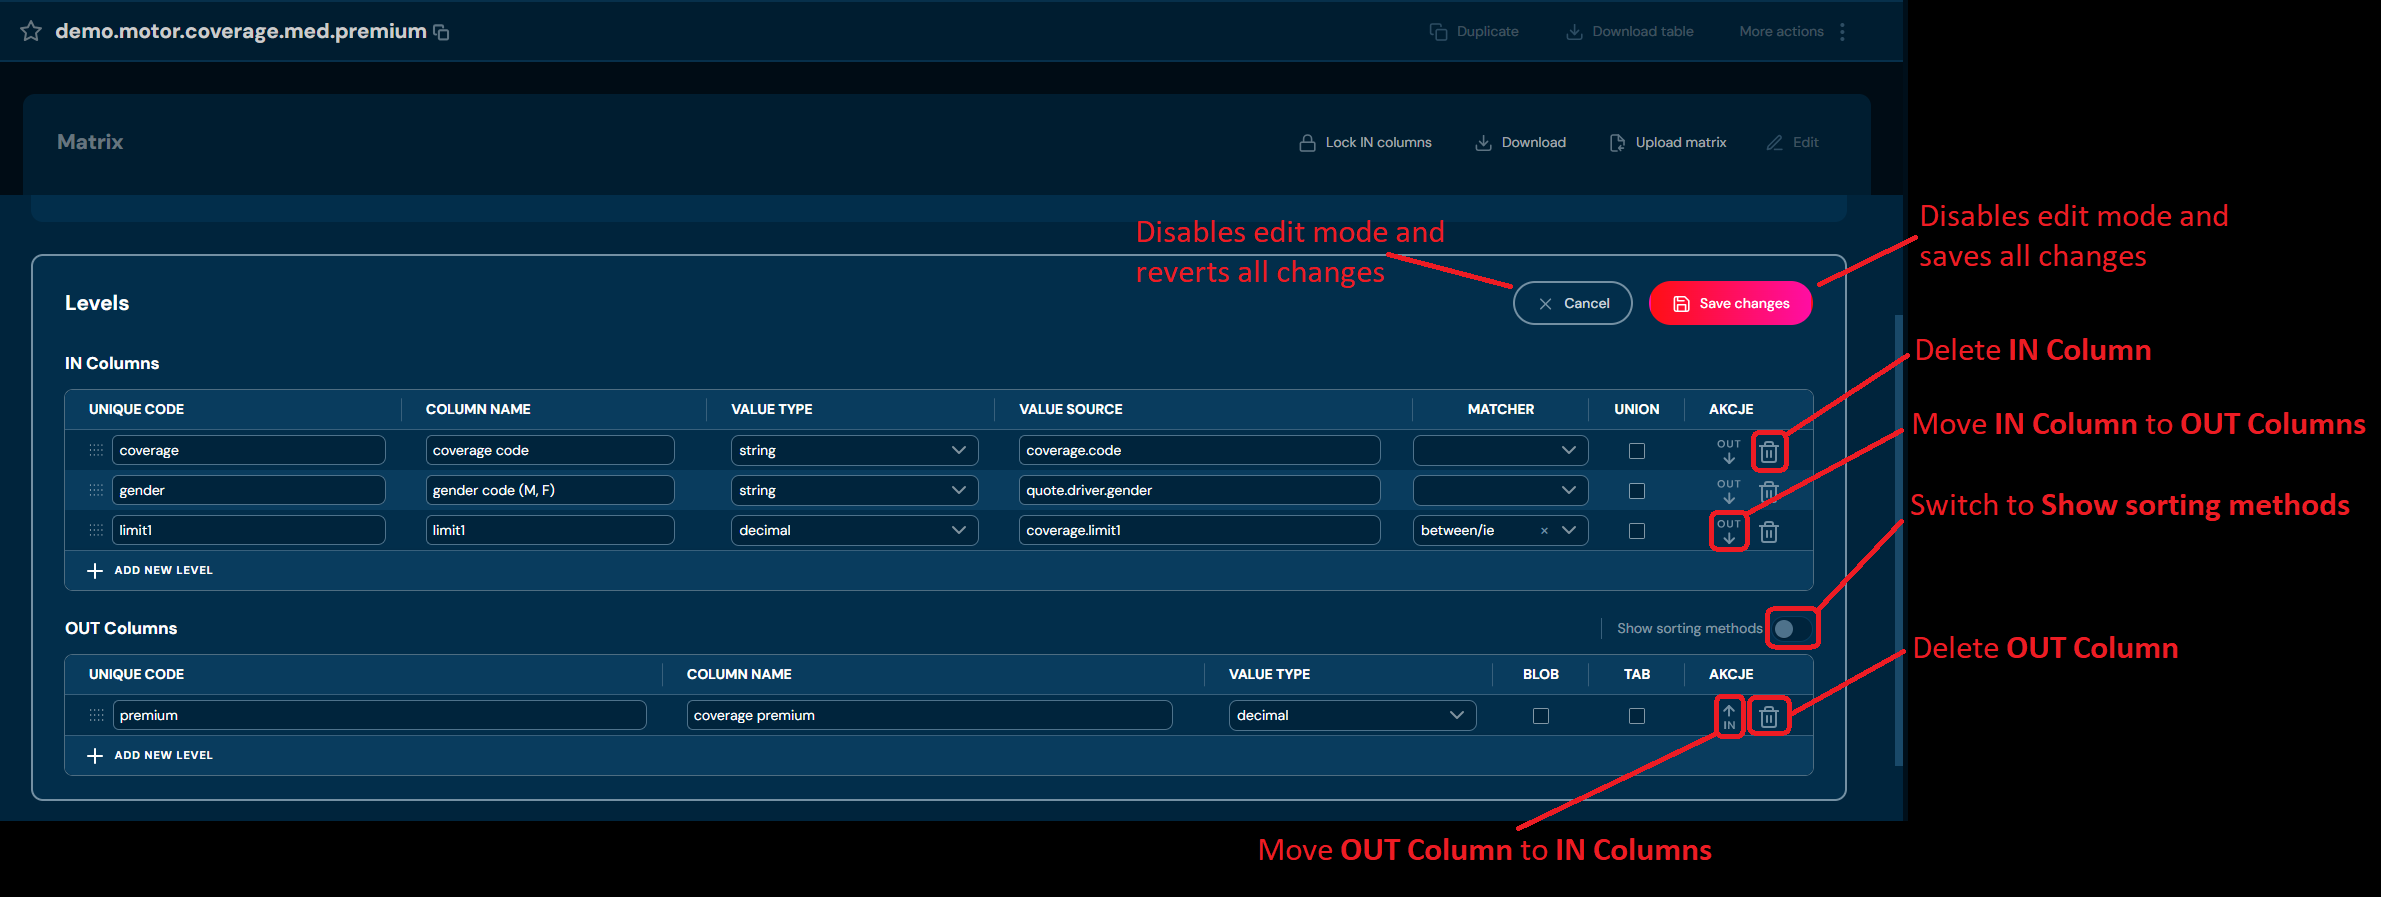
-
Edit any data you need.
-
Choose Save changes to save all changes made in the Decision table.
a. Cancel reverts all changes.
Decision tables - Cascade call#
In each OUT cell of the decision table, the value can be specified in three ways:
- as a literal
- as a value retrieved from another decision table (cascade get)
- as a value retrieved from a function (cascade call)
Cascade call - how to call#
In the cell, enter an expression that means returning the result from the specified function.
| Cascade expression | Description |
|---|---|
$f fun |
execution of a function named “fun”. |
$f fun (1, 5, active) |
Passing arguments to the function always as strings, meaning the function will receive the arguments: "1", "5", "active". |
$f fun (1; 5; active) |
The argument separator can also be a semicolon. If a semicolon appears in the expression, Higson will treat it as the argument separator; otherwise, the separator will be a comma. |
$f fun (ctx:insured.age, 5) |
Passing arguments coming from the context. The function will receive one argument retrieved using: ctx.get("insured.age"). |
$f fun [idx] |
If the function returns a composite object of type ParamValue, MultiValue, Java array, Collection, or Iterable, only the element at index idx will be retrieved. |
$f fun [code] |
If the function returns a composite object of type ParamValue, MultiValue, or Map, only the value associated with the key code will be retrieved. |
$f fun (1, ctx:risk.code) [factor] |
Example: one argument passed as a literal, the second coming from context, and additionally retrieving the result under the key “factor”. |
Cascade call – implicit type conversion#
If we use a cascade call expression to function F returning an object of any type T2 in decision table P at level T1, then:
- cascade call will internally return an object of type T2
- then T2 will be converted to HolderT1
- the conversion will take place according to the logic of the methods from the family: _dec(), _num(), _int(), _str() , _date(), _bool()
- the conversion may be lossy
Cascade call – example#
Function calc.factors:
age = _num(age)
var factor1 = 1.0 + age / 100
var factor2 = 3.0 + age / 10

// function returns a map
return util.map(
    'f1', factor1,
    'f2', factor2
)
Decision table client.factors:
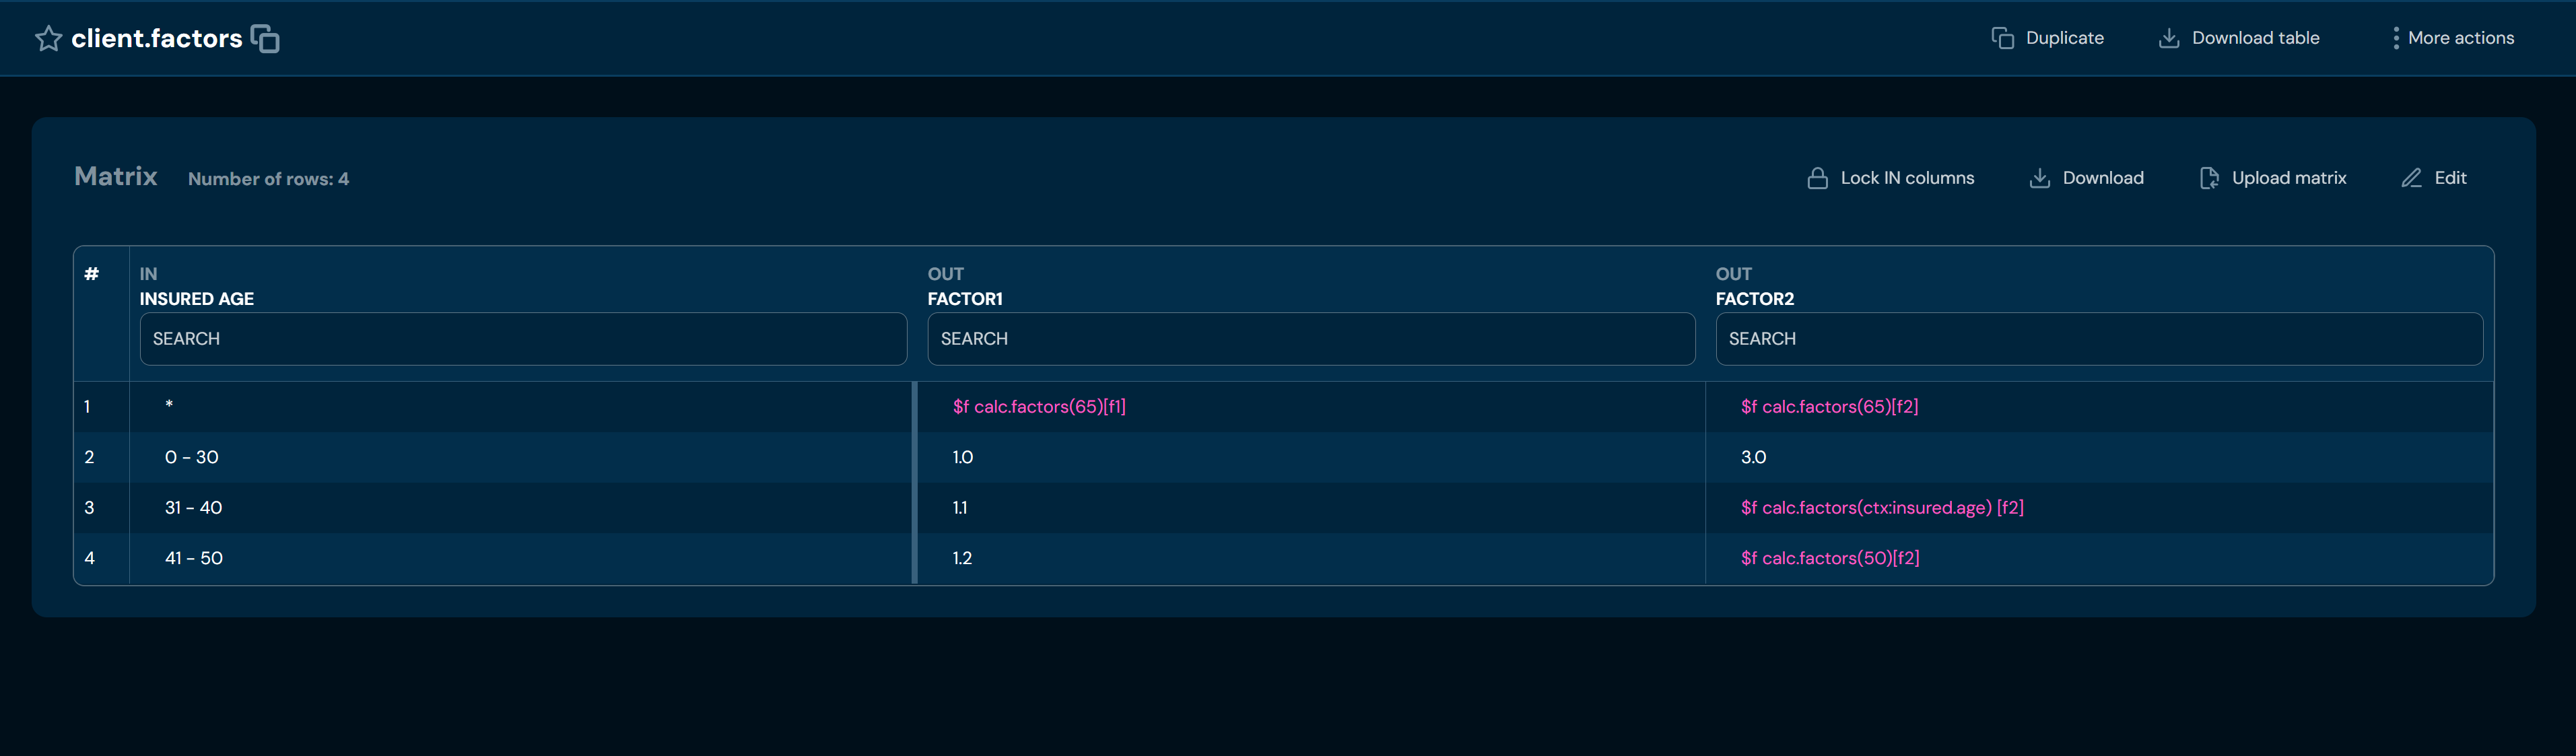
Result of get( “client.factors”, ctx ):
| insured.age | factor1 | factor2 |
|---|---|---|
| 22 | 1.0 | 3.0 |
| 37 | 1.1 | 6.7 |
| 44 | 1.2 | 8 |
| 61 | 1.65 | 9.5 |
Cascade get – invocation method#
In a cell, we enter an expression that represents returning a value from another decision table.
| Cascade expression | Description |
|---|---|
$p decisionTable.name |
Returns the value of a decision table from the first cell; equivalent to calling:higson.get("decisionTable.name", ctx).getHolder() |
$p decisionTable.name [idx] |
Returns the value of a decision table from the output level at index idx; equivalent to calling:higson.get("decisionTable.name", ctx).getHolder(idx) |
$p decisionTable.name [code] |
Returns the value of a decision table from the output level with the code code; equivalent to calling:higson.get("decisionTable.name", ctx).getHolder(code) |
Cascade get - implicit type conversion#
If, in decision table P1 at level T1, we use the cascade get expression to decision table P2 at level T2, then:
- cascade get will internally return a Holder of type T2
- then HolderT2 will be converted to HolderT1
- the conversion will take place according to the logic of one of the functions: _dec(), _num(), _int(), _str(), _date(), _bool()
- the conversion may be lossy
Cascade get - example#
Decision table decisionTable.p1:
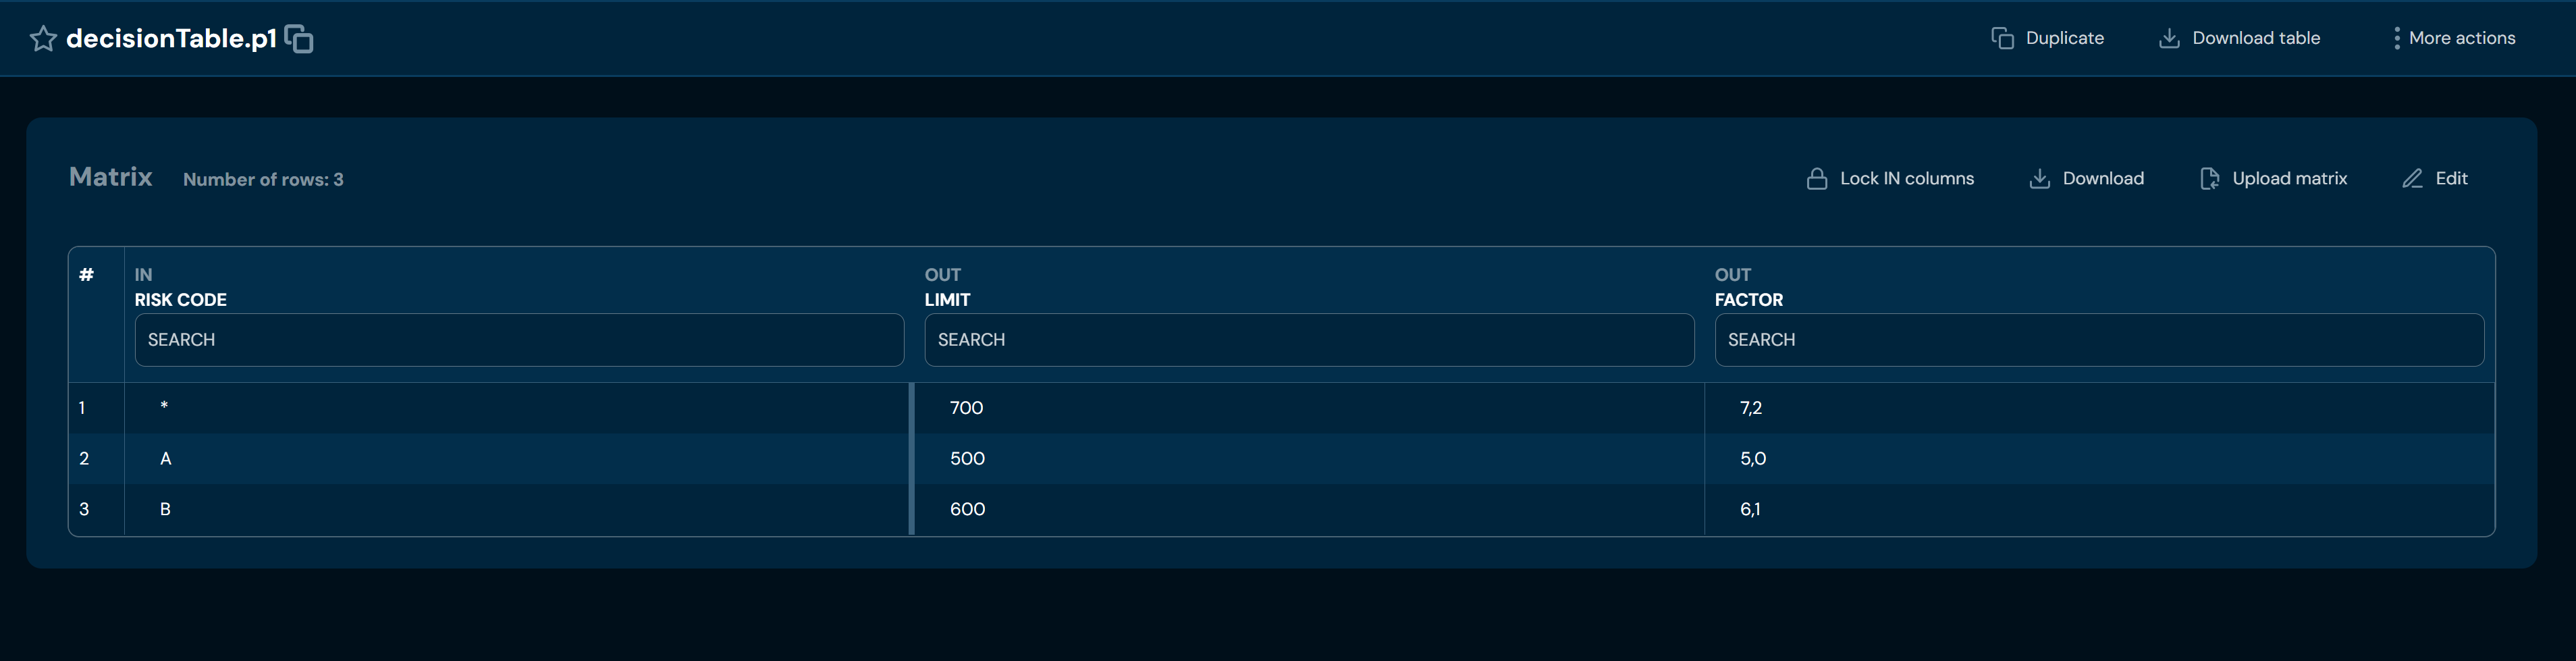
Decision table decisionTable.p2:
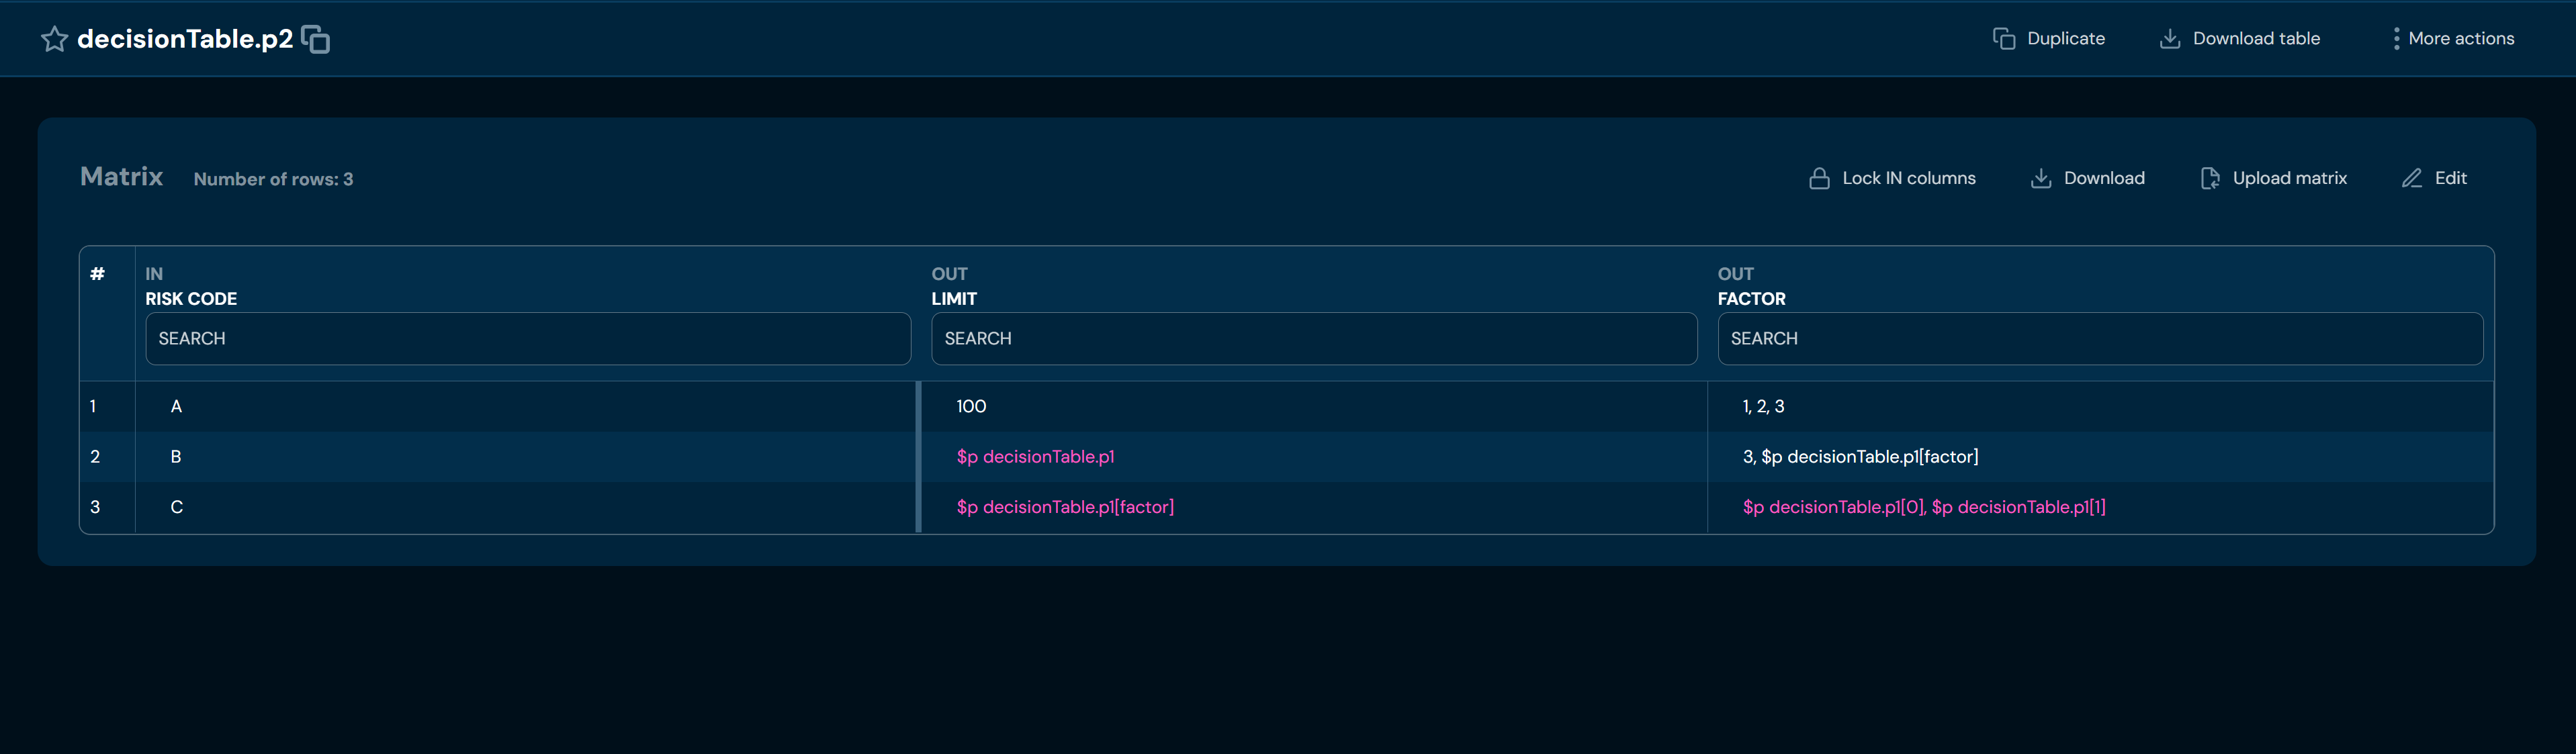
Result of get(decisionTabl.p2):
| ctx: risk.code | decisionTable.p2 | OUT1 | OUT2 |
|---|---|---|---|
| A | 100 | 1 | 2 |
| B | 600 | 1 | 6.1 |
| C | 7 | 700 | 7.2 |
When retrieving values for decisionTable.p2, the same context is used as for the initial decisionTable.p1.
A cascade calls cycle is not permitted: P1 -> P2 -> …. -> P1
Decision Table Search Mechanism#
There are two mechanisms for searching the matrix of a decision table: best match and union match.
Best match#
Best match is the default search mode. It searches the In levels sequentially, looking for an exact match. The asterisk (*) is considered only if no exact match is found at a given level. In this mode, subsequent levels have progressively lower priority. Therefore, the order of the columns affects the search result.
Let’s examine this using the following decision table:
| in1 | in2 | out1 |
|---|---|---|
| * | 1 | 100 |
| b | * | 200 |
| c | 1 | 300 |
EXAMPLE
context values: In1 = b, In2 = 1
An exact match for value In1 = b is found at the In1 level, so for that row we search the In2 level for the value 1. No exact match is found, but there is an asterisk, so the result in best match mode is 200.
Union match#
In union match mode, asterisk(*) is treated the same as an exact match. To enable uniion mode select union checkbox in the in-levels section.
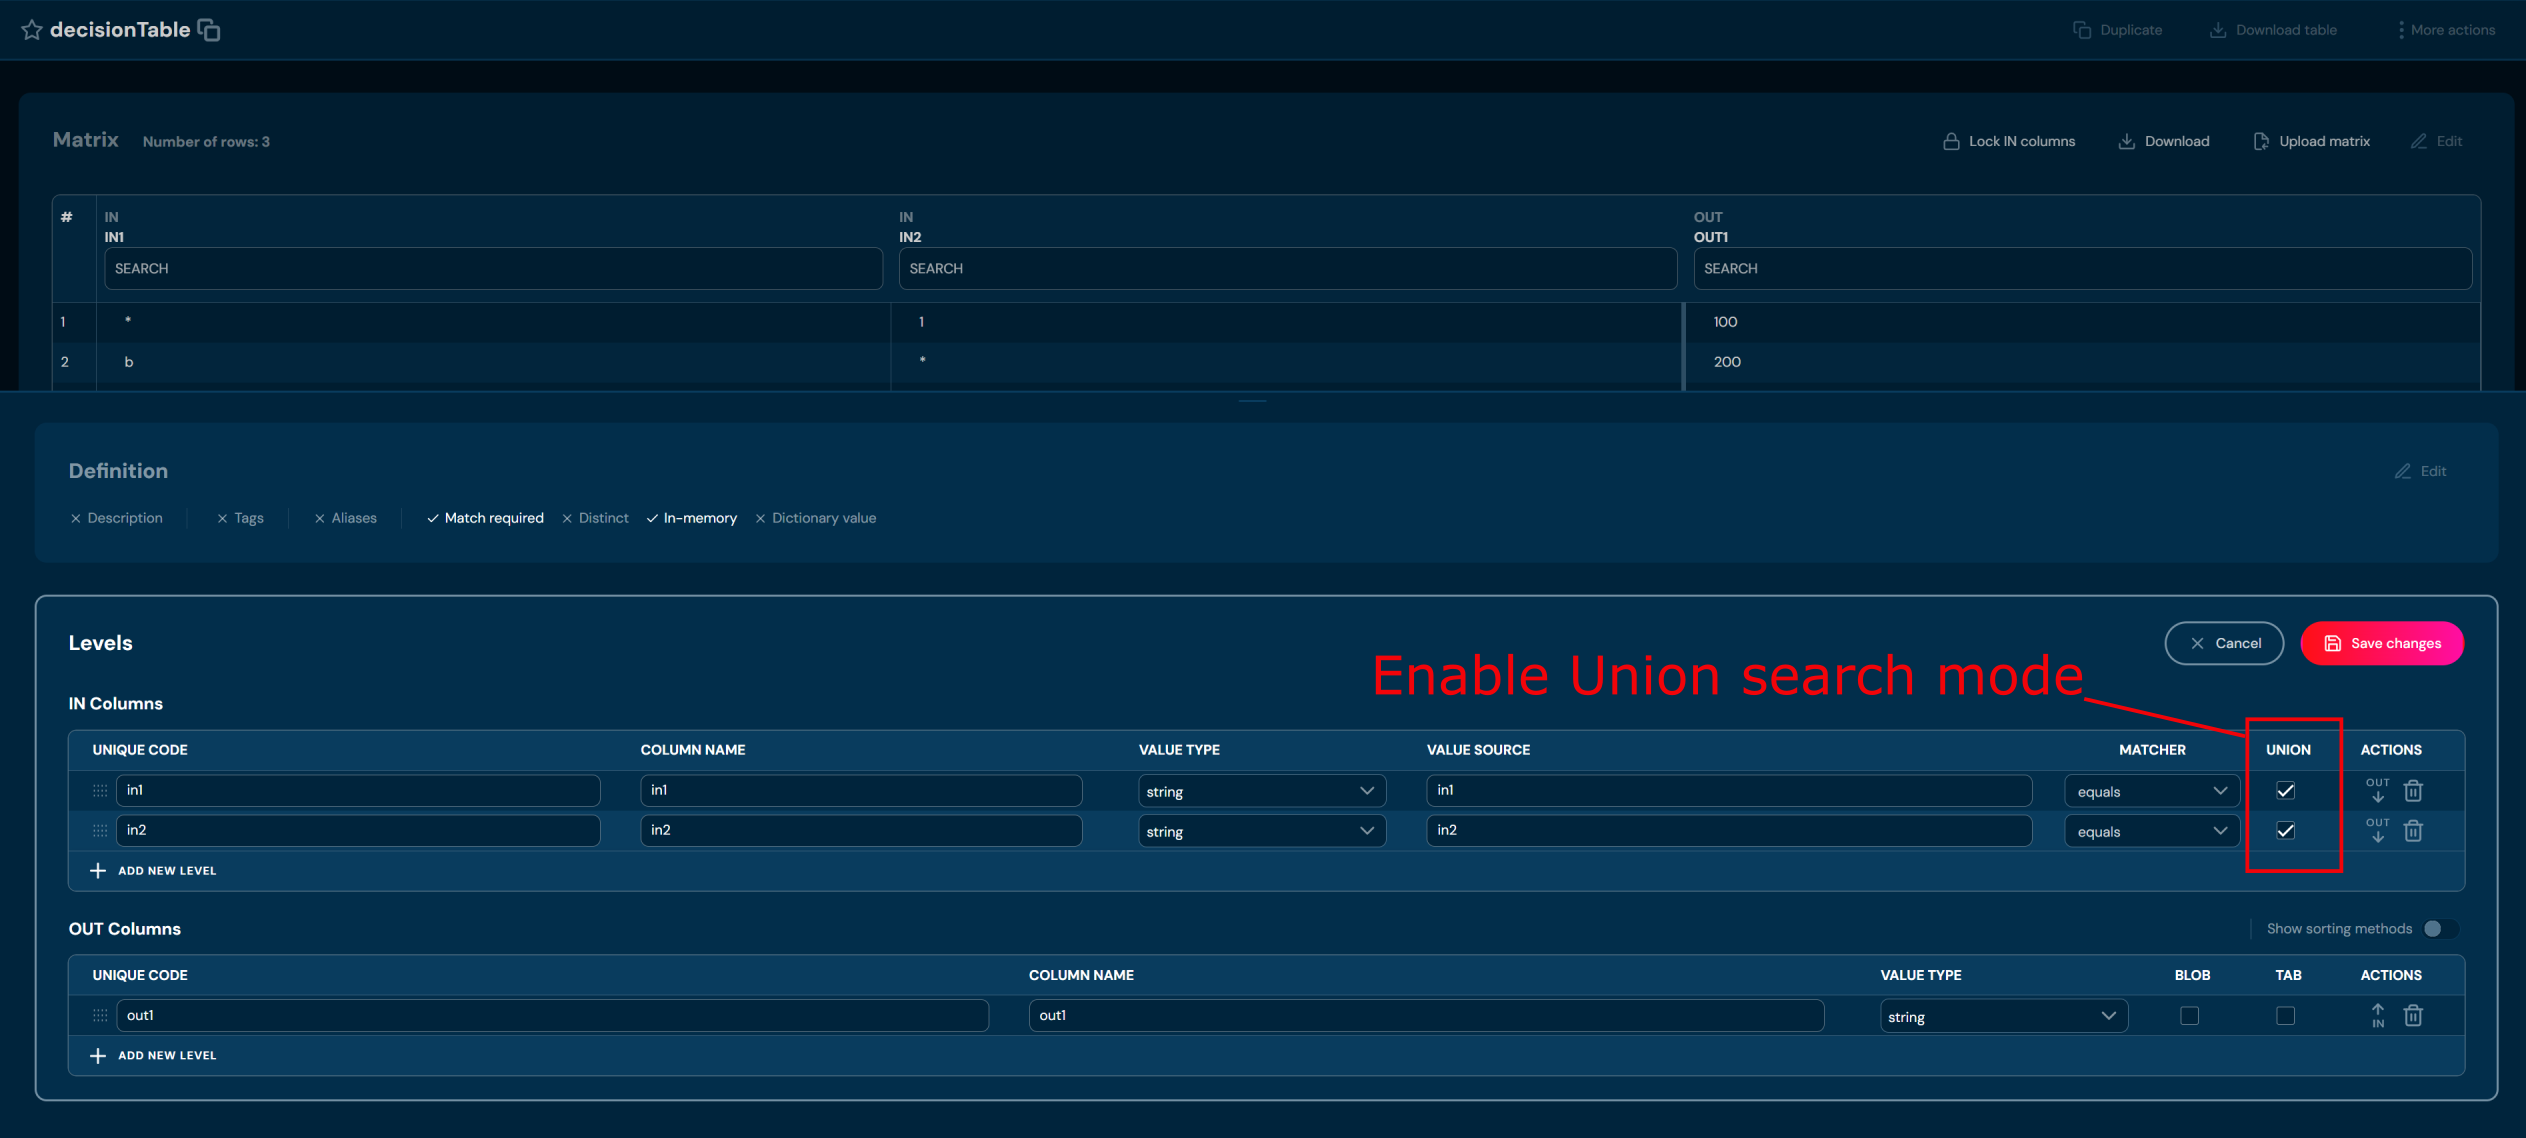
EXAMPLE
context values: In1 = b, In2 = 1
An exact match for value In1 = b is found at the In1 level, but there is also an asterisk so both rows are taken into account. We then search the In2 level for the value 1. Both asterisk(*) and an exact match are found, so the result in union mode is 100 and 200. In this case, both rows are returned.
Creating AI Model-Based Decision Tables in Higson Studio#
Higson Studio allows the creation of decision tables utilizing artificial intelligence (AI) models. In this approach, the AI model serves as the matrix of the decision table. The definition and levels are configured similarly to standard decision tables; however, the matrix is represented by the ONNX file. Higson Studio does not perform model training – it is assumed that the model has been previously prepared in an external environment and converted to the ONNX format.
Use Case#
Use a trained AI model (in ONNX format) to predict a client’s monthly insurance premium based on their demographic and lifestyle data. Below is a description of the process for configuring and deploying such a table using an AI model in the ONNX format.
To get started, create a new decision table in Higson Studio. Navigate to the Decision tables tab and select the Add decision table action.
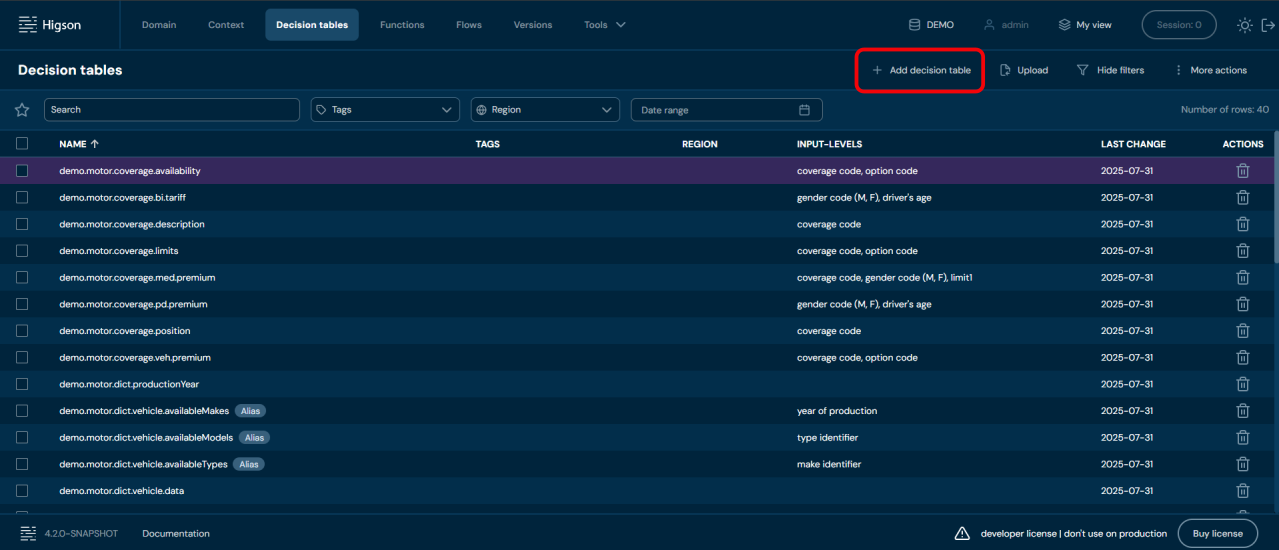
-
Assign a name to your decision table and click Next to proceed to the next step.
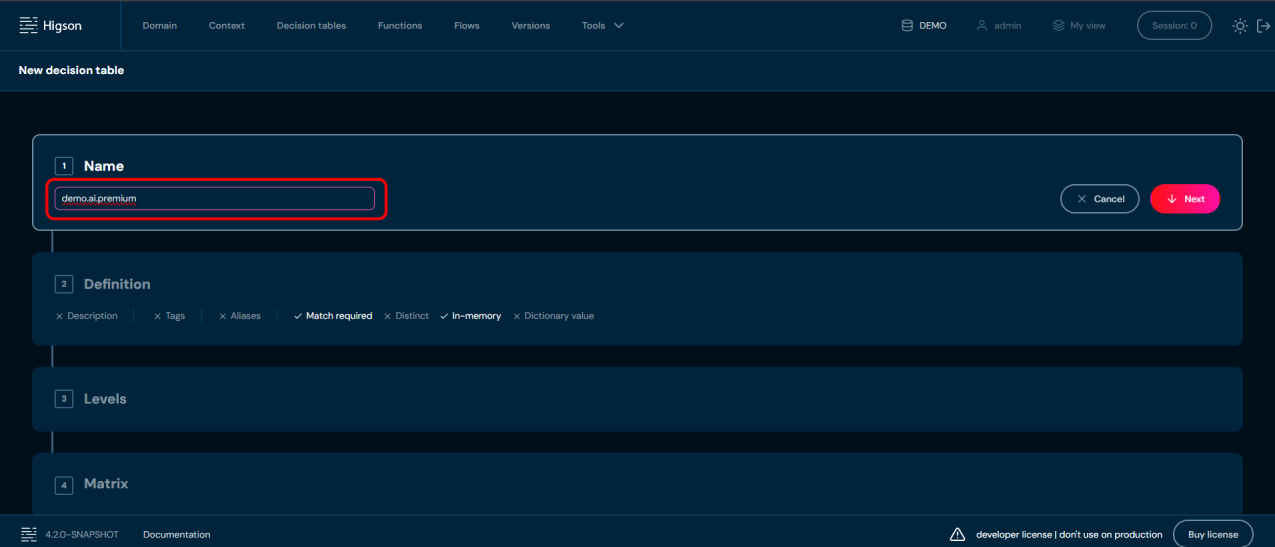
-
In the second step, under the Definition section, set AI Model Source as the data source for decision-making. Then, click Next to continue.
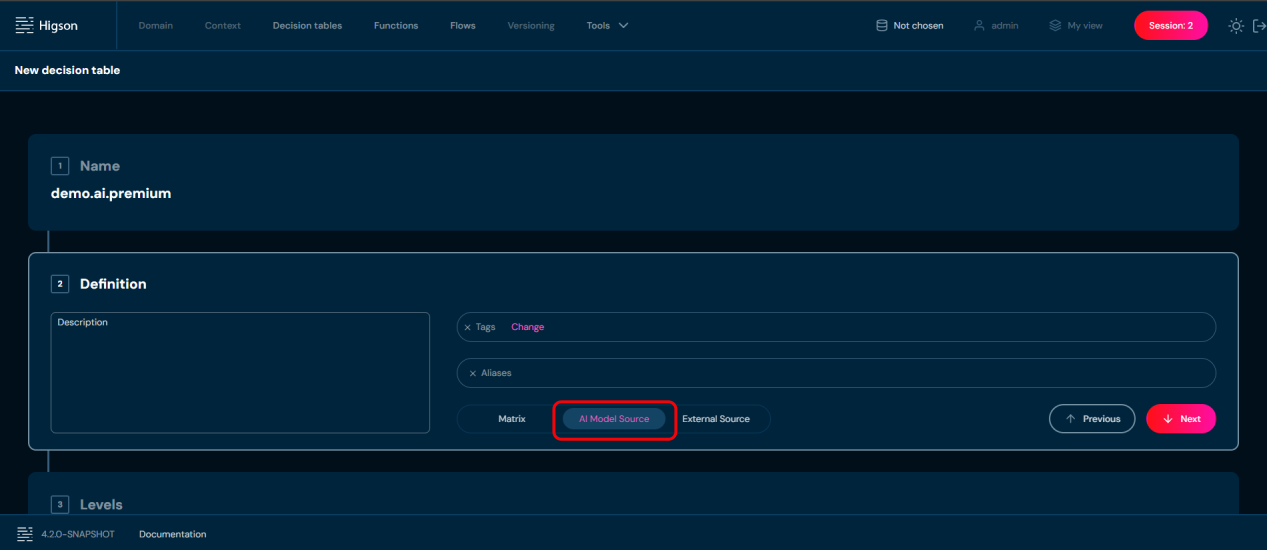
-
In step 3, similar to standard decision tables, you need to define:
- Input levels (in) – the input data passed to the AI model.
- Output levels (out) – the expected responses generated by the AI model.
Please note, that for decision tables with an AI model data source, only decimal data type is available.
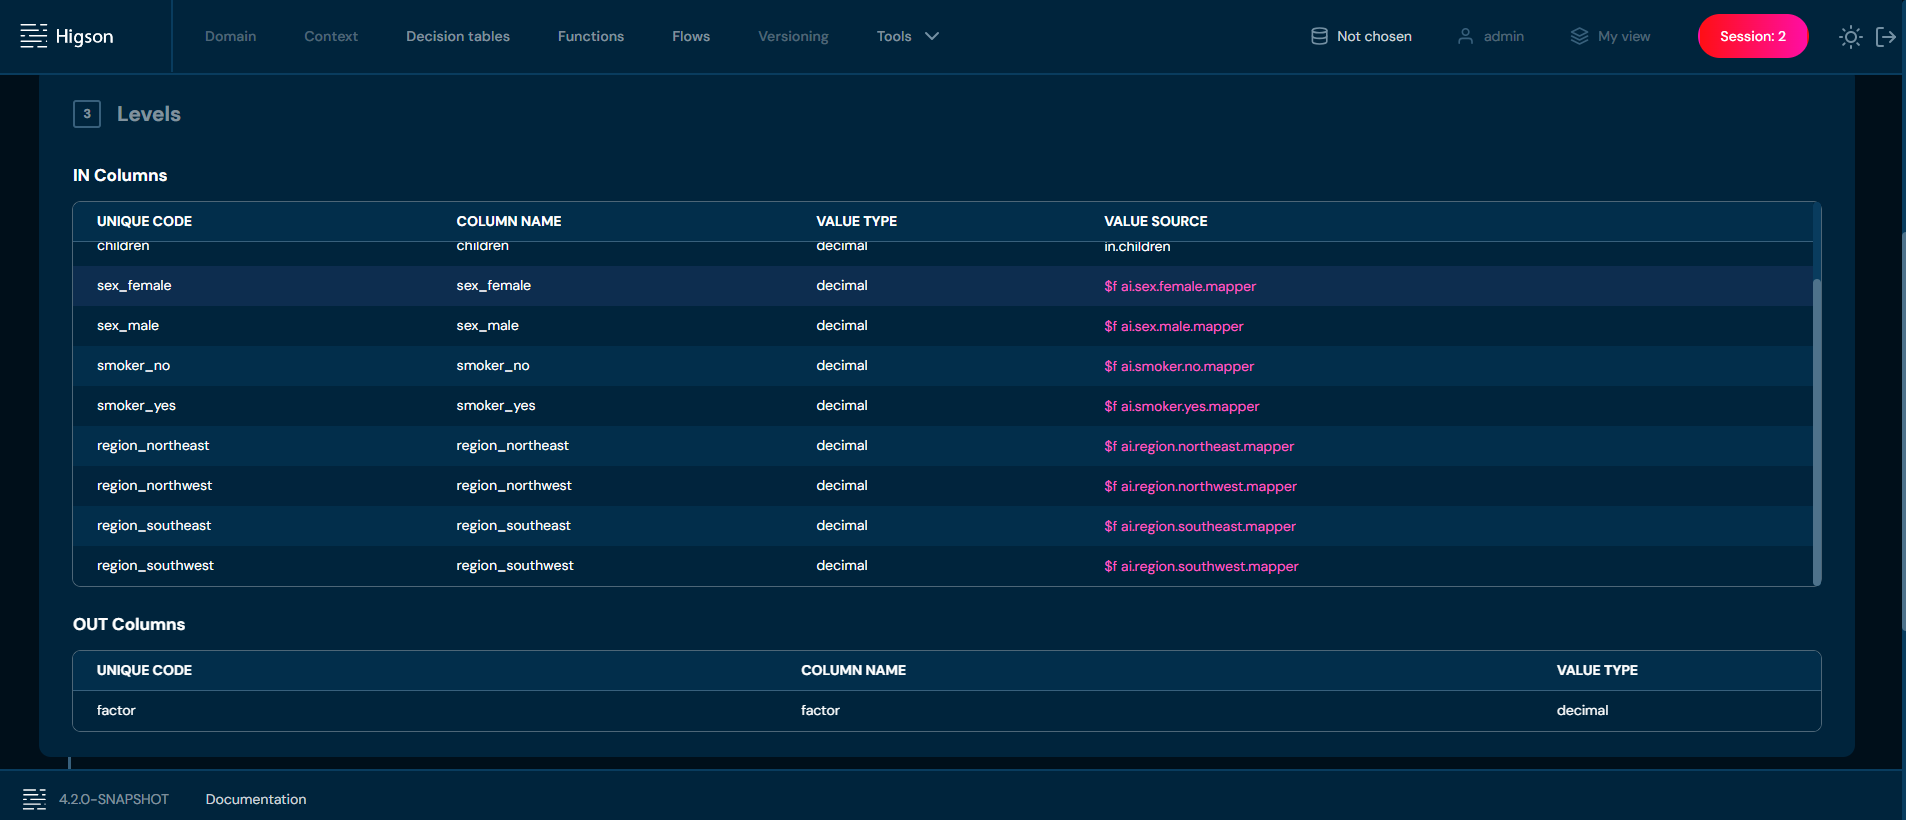
- In step 4 of the configuration wizard:
- You need to upload a onnx file containing the trained AI model.
- During upload, the file is automatically validated for correct format and model structure.
The onnx file added in this way serves as the matrix of our decision table.
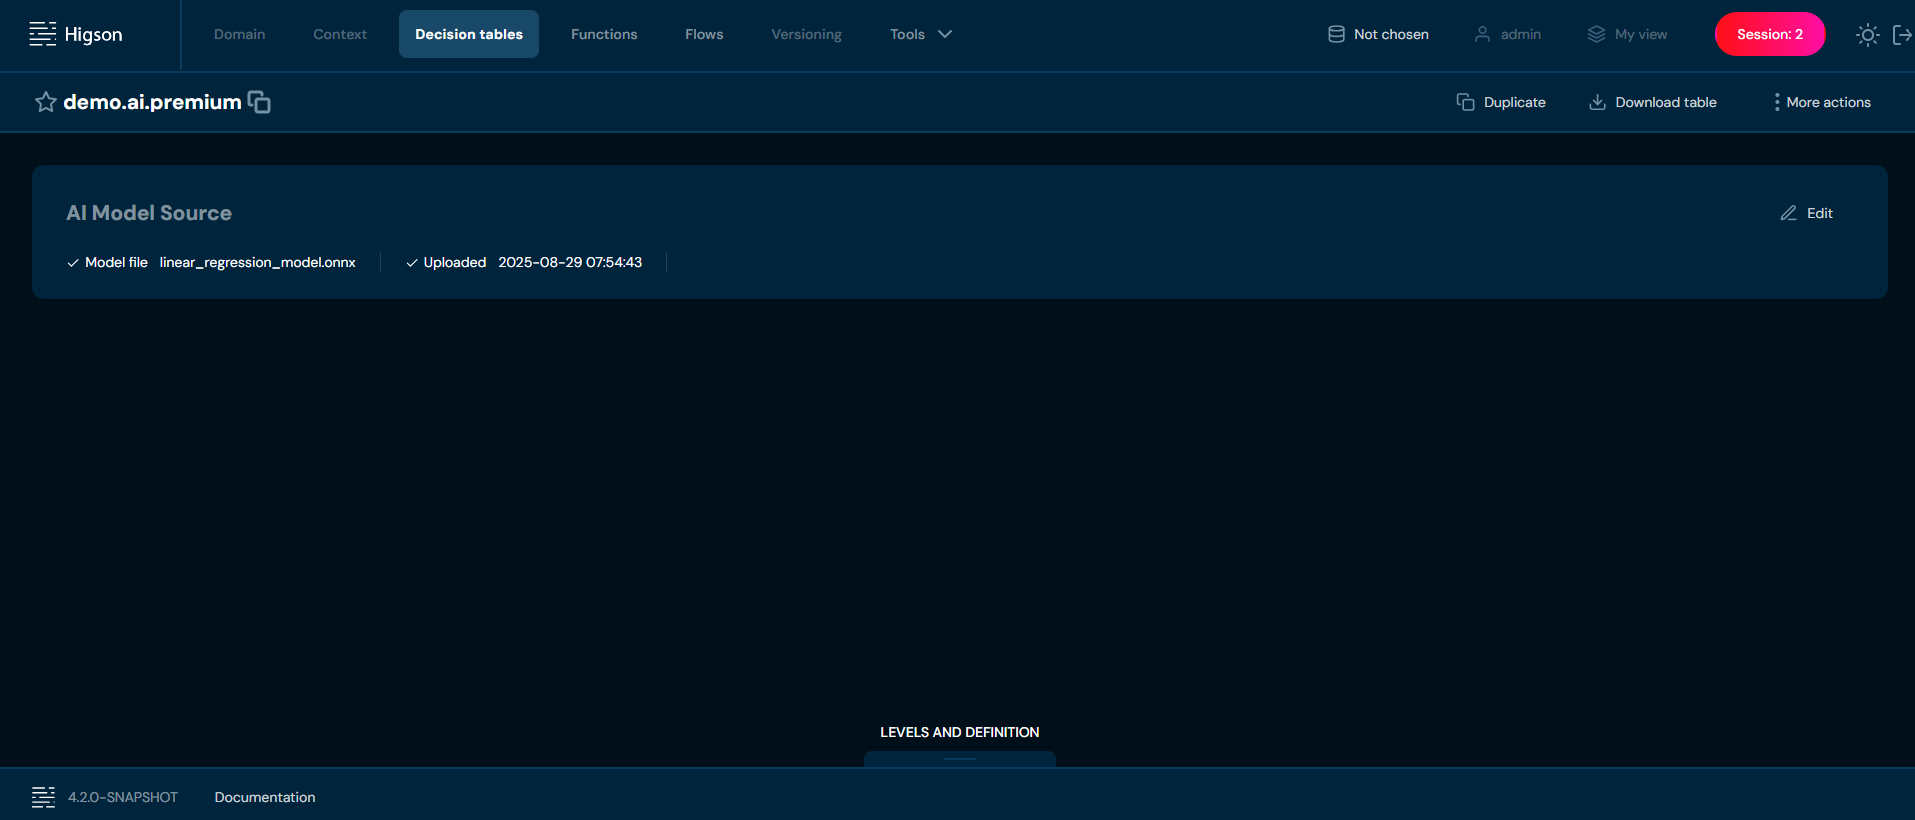
Once the decision table is correctly configured and saved, it can be invoked through Higson Runtime REST. At this stage, the ONNX file logic is validated.
A matcher is a functionality available for IN levels in a decision table. It is easy to use but has a significant impact on how values in matrix columns are interpreted.
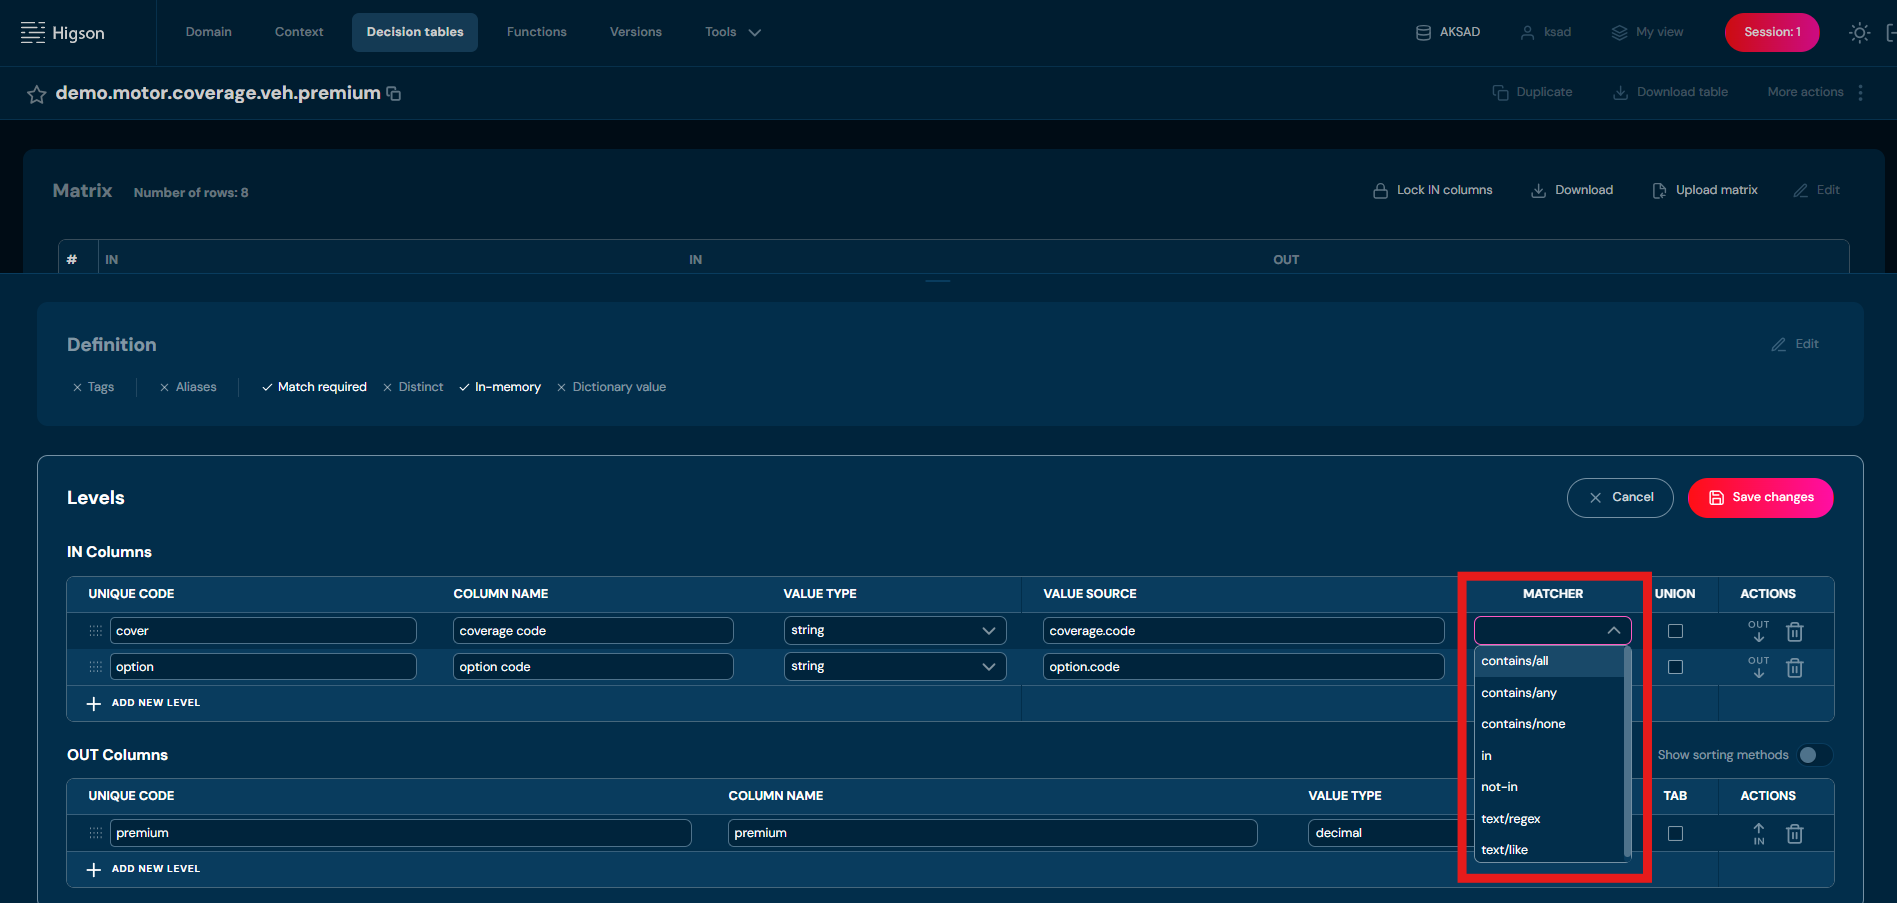
Matchers are divided into three main groups:
- Between
- Contains
- Like
Between Group – Defining Numerical Ranges#
These matchers allow the definition of a numerical range in a matrix column:
- between/ii – closed interval on both sides.
- between/ie – left-inclusive, right-exclusive interval.
- between/ei – left-exclusive, right-inclusive interval.
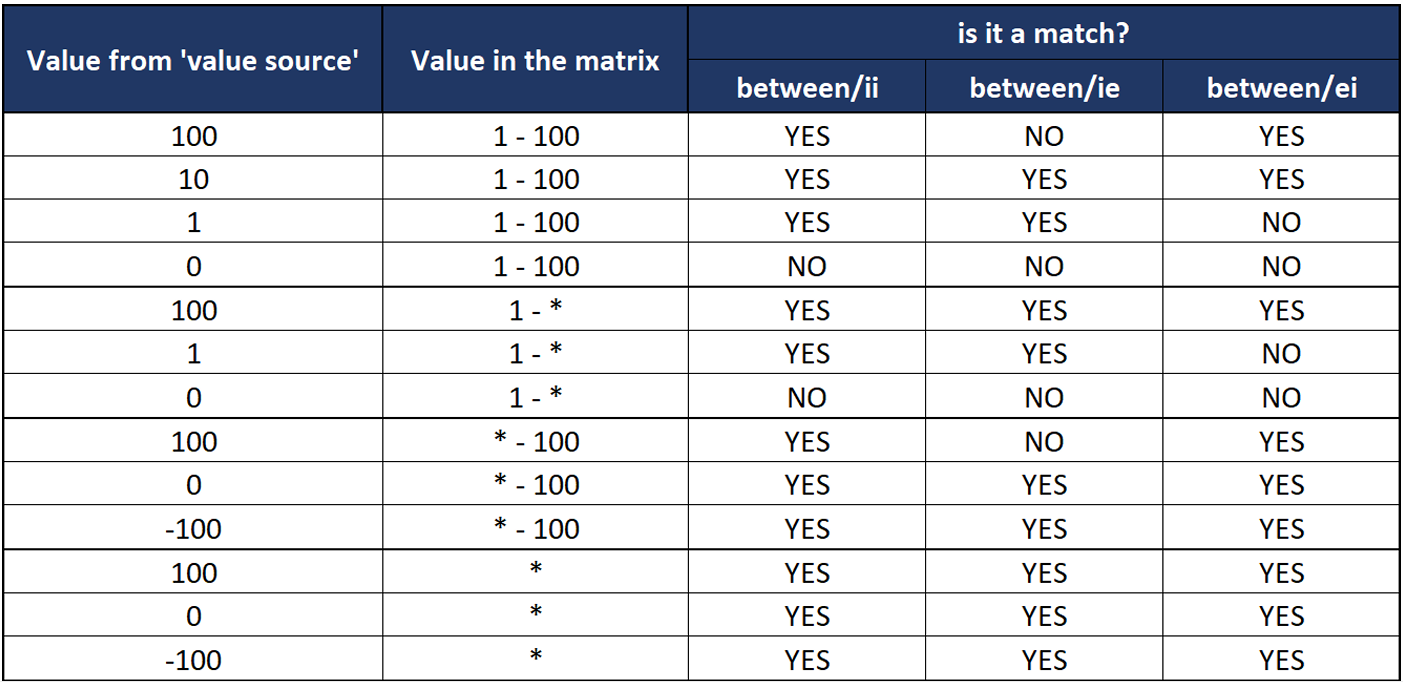
Wildcards and ranges in matrix cells for “Between” matcher columns#
- * — wildcard; matches any value.
In Best Match mode it’s only considered if no exact match exists in other rows.
Use one of two notations for unbounded ranges:
- * — * unbounded range (−∞ … +∞); matches any non-null value.
- * + checkbox — also an unbounded range, but null-safe; it matches any value including null.
Tip: Use * + checkbox for a default/fallback row that should also handle missing input; use *-* when null is handled elsewhere.
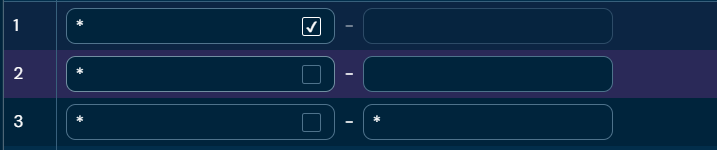
Contains Group – Matching Based on Value Sets#
This group enables the introduction of value lists into matrix columns and allows values to be compared as sets:
- contains/all – checks whether all values in the matrix exist in the dataset from the data source (comparison direction matters!).
- contains/any – checks whether the two sets have at least one common element.
- contains/none – checks whether the sets are disjoint; if they are, the matcher returns a match.
- in / not in
- in – checks whether the value from the data source is present in the list of values in the matrix cell.
- not in – checks whether the sets are disjoint. Contains matchers assume that:
- The value source is a set of values (e.g., A, B, C, D).
- The value in the matrix cell also represents a set.
- The matcher verifies whether the value source set has a common part with the matrix set.
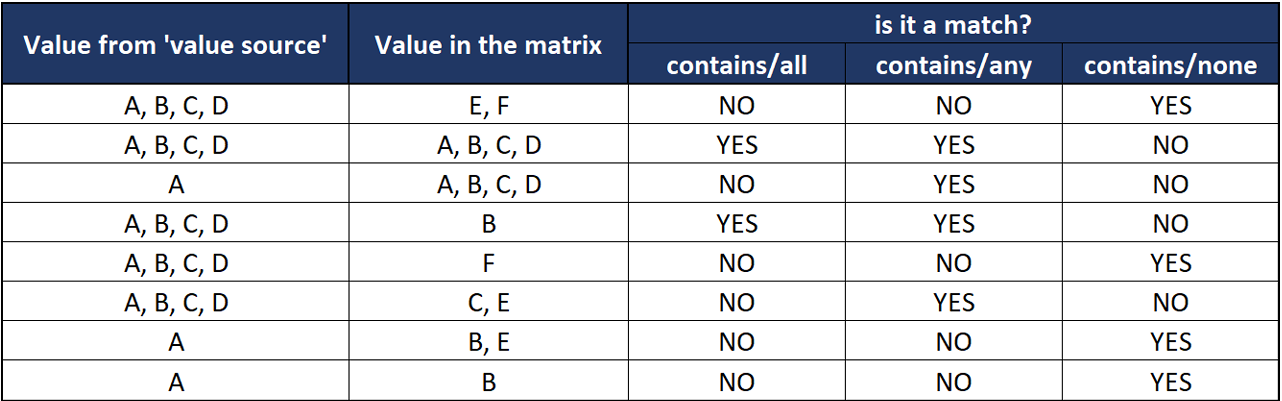
In / Not In matchers assume that:
- The value source is a single value (scalar).
- The value in the matrix cell represents a set.
- The matcher checks whether the value source belongs to that set. Performance Considerations: The contains and in/not in matchers produce the same result. Contains matchers are more general, so if performance is a priority, use in/not in whenever possible.
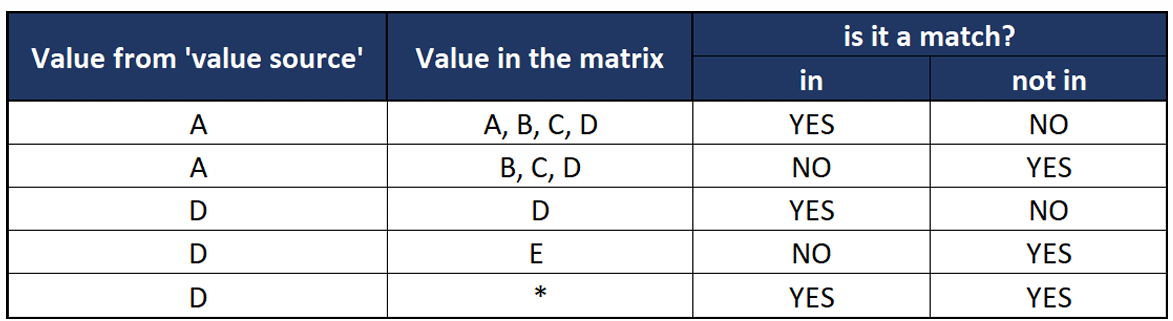
Like Group – Pattern Matching#
This group allows for pattern-based text matching:
- text/like – compares a string value from the data source with the string value in the matrix. The values in the matrix can use asterisk as a wildcard character.
- text/regex– checks whether the value from the data source matches the regex pattern stored in the matrix cell.
When to Use Matchers?#
Matchers are useful when you need to precisely define how values in a column should be interpreted, such as:
- Value Ranges (Range)
- Lists of Values (List)
- Pattern Matching (RegEx, Like) Each matcher can be defined separately for every IN level in a decision table, providing flexibility in business logic modeling.
Each column of any decision table has a specific type. This type is defined when creating a decision table.
There are many built-in types available:
stringdecimalintegerdatedatetimeboolean
However, sometimes we need to limit the values that can be entered by the user. In this case we need to be able to define an enumeration of allowed values or in other words a dictionary.
Higson has the answer to this need - a Dictionary mode.
Creating a Dictionary Table#
To create an enumeration of allowed values,
we just need to create a decision table and select the Dictionary value checkbox:
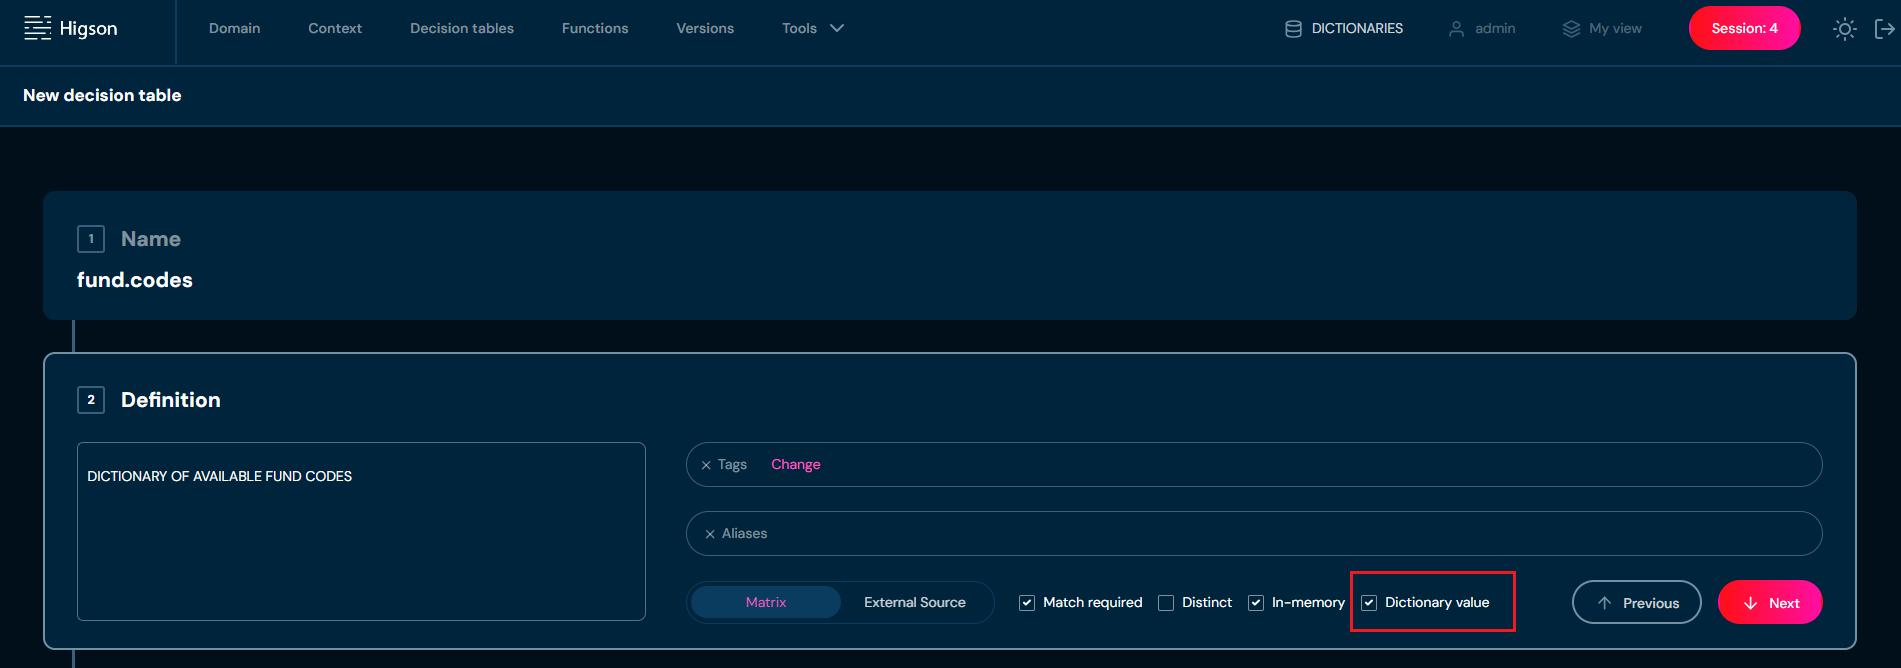
Then we define a single OUT column and enter (or import from the Excel file) all dictionary values.
Let’s say we need a dictionary of available fund codes.
So we can create a decision table called fund.codes (for example)
and enter all valid fund codes into a single OUT column, like in the image below:
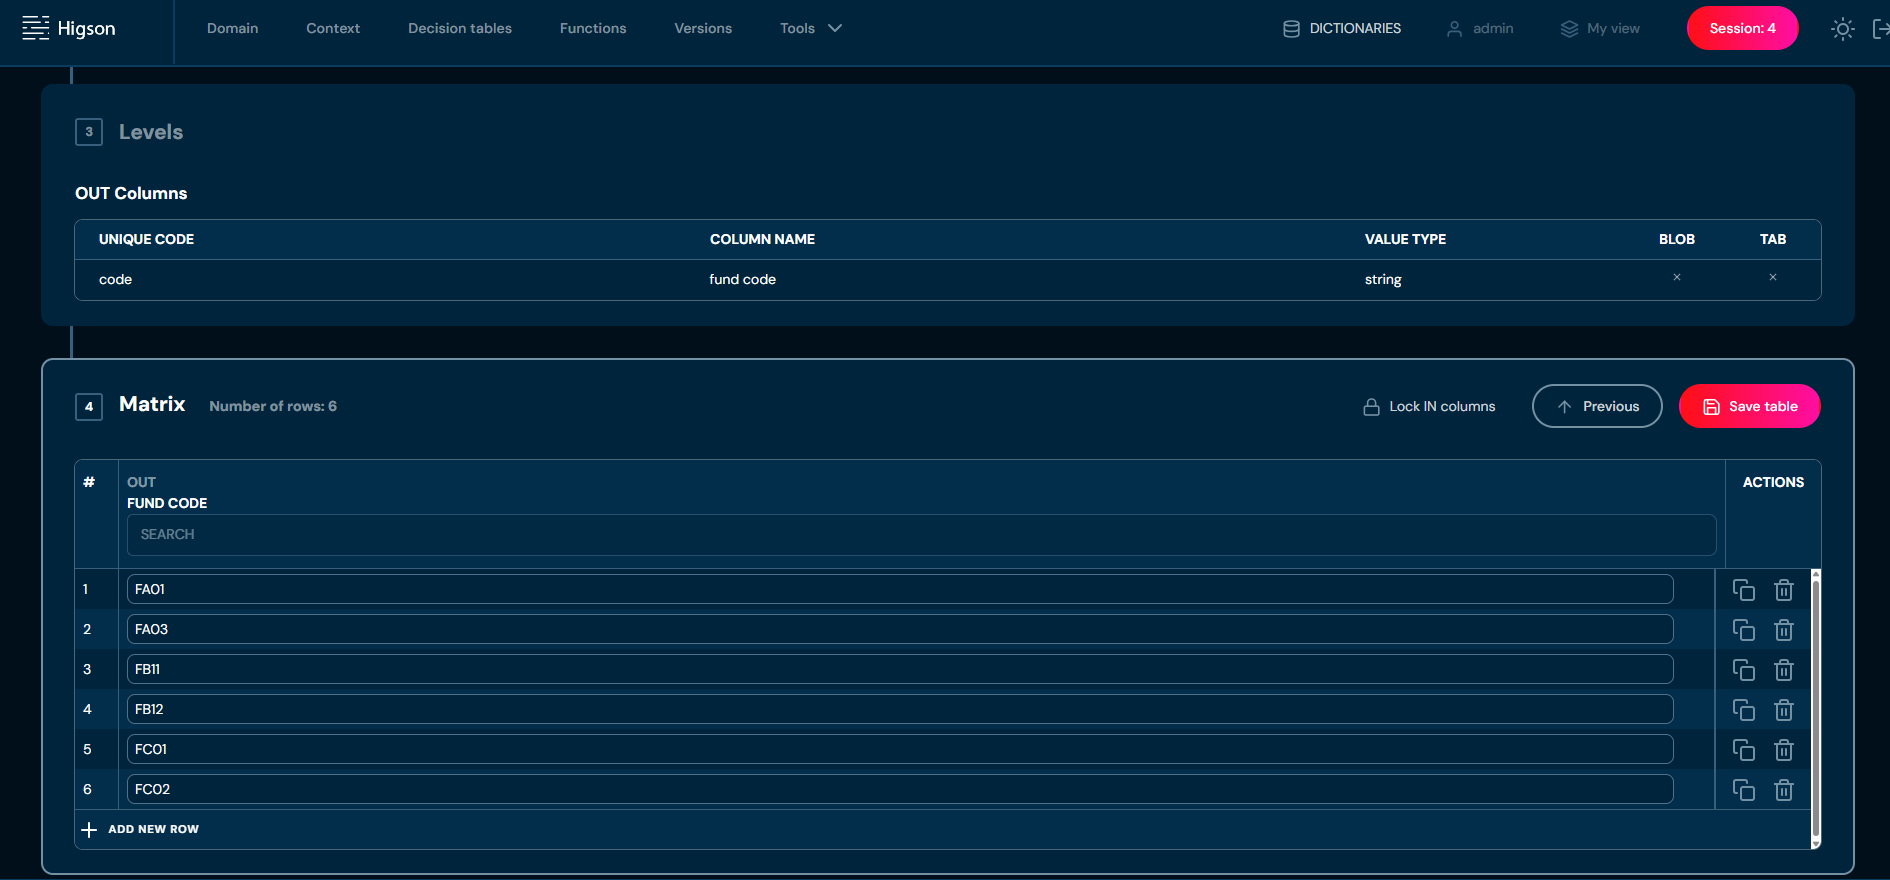
By creating this dictionary decision table we just defined new type available for other decision tables.
Now, we can create an ordinary decision table and define a column type to be fund.codes.
Using a Dictionary Table#
Once we have created a dictionary we can use it in another table.
The following image shows an example decision table called fund.transfer.fee
that uses IN column with dictionary type fund.codes:
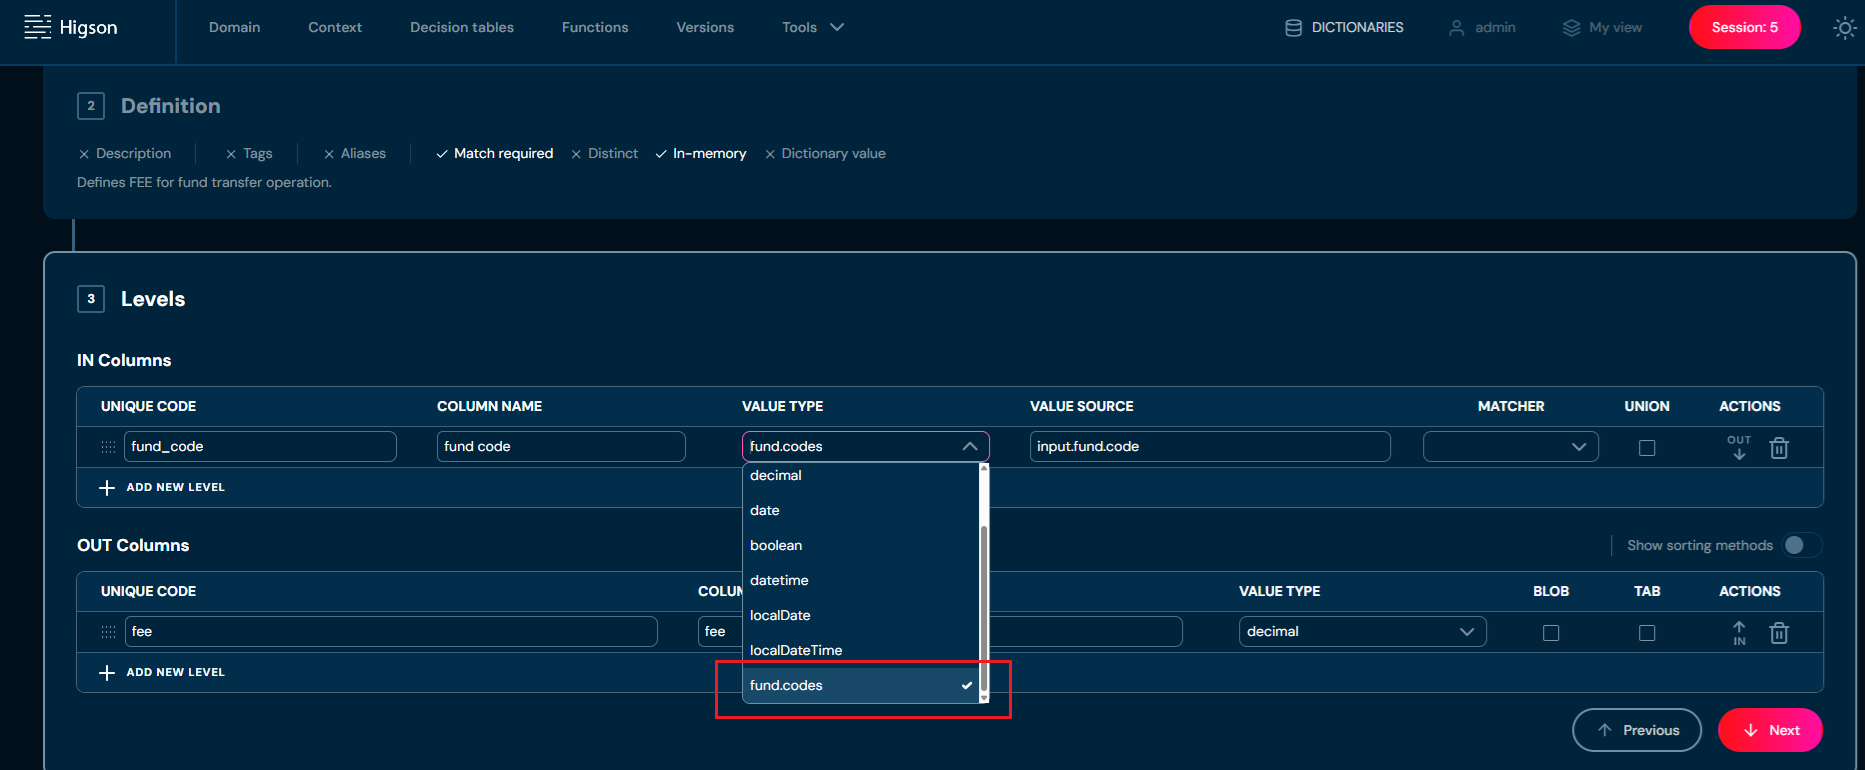
From now on, only codes defined in the fund.codes dictionary can be entered into this column:
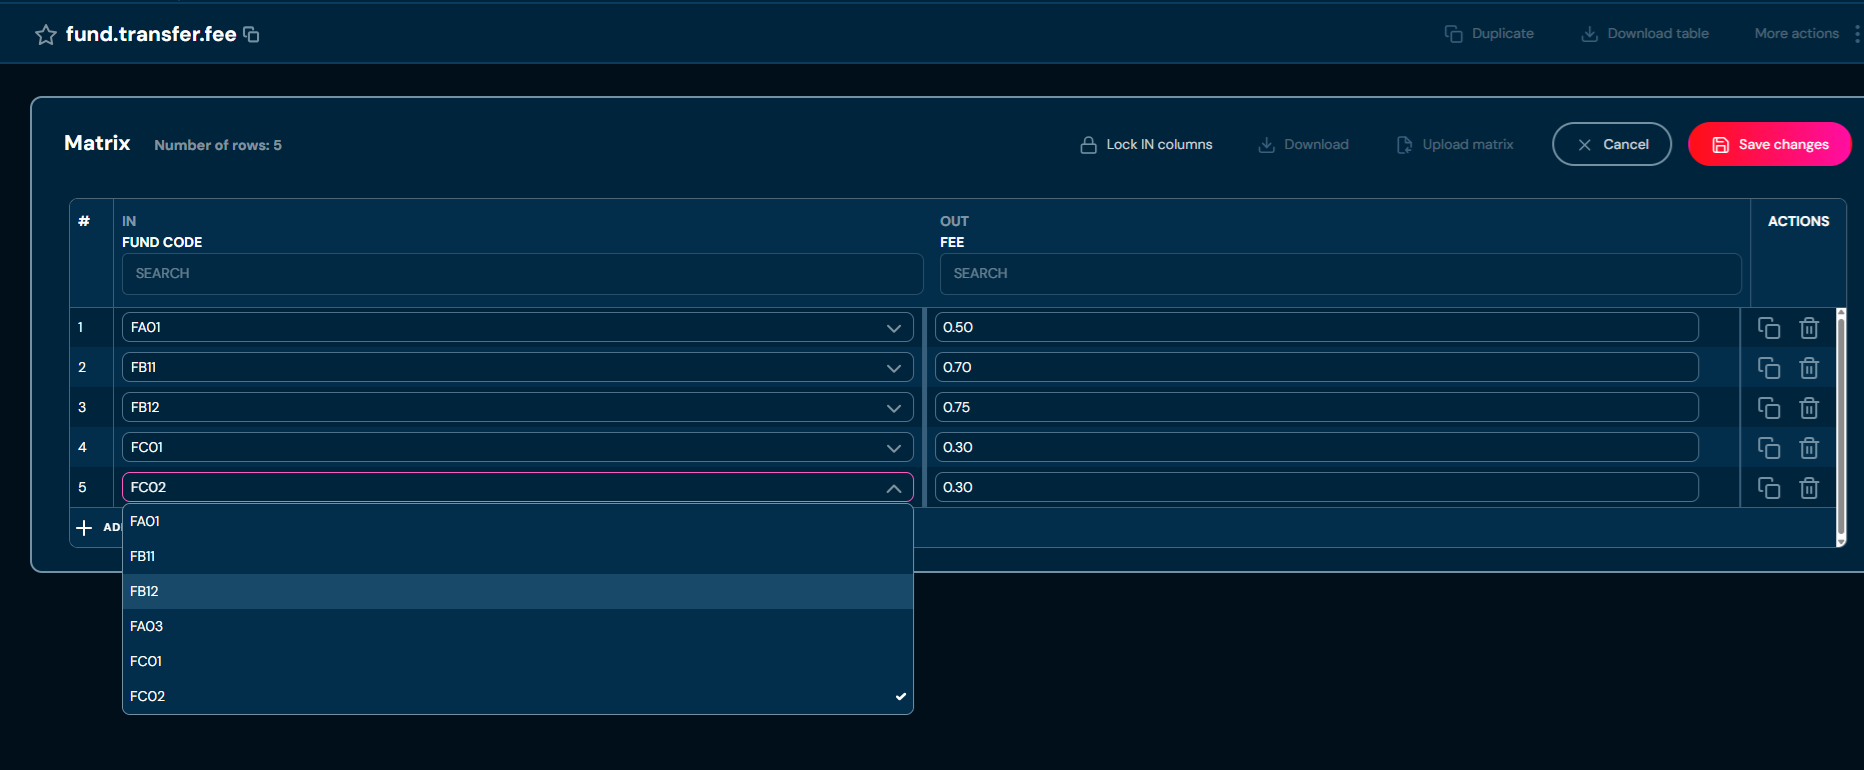
Below is a list of restrictions related to the use of dictionary decision tables:
- dictionary table must have exactly one output column
- dictionary table cannot be deleted if it is used by another decision table
- dictionary table cannot be defined as an external source
- dictionary table cannot be attached to any region
- dictionary table cannot be unmarked as a dictionary if it is used
External Source is a feature that allows you to retrieve data from an external database (using an SQL query) and treat this data as if it were defined in a decision table matrix.
With this option you can create decision tables that are fully dependent on data coming from an external source, managed by an external application, etc. For example, you could create a database table with daily updated prices of investment fund units and then have Higson treat these prices as a decision table matrix.
Let’s see how External Source feature fits into the bigger picture.
Ordinary Decision Table#
Every ordinary decision table consists of two main parts:
- input/output columns configuration (types, matchers, matching mode etc.)
- matrix with data
The ordinary decision table is the owner of the matrix data. The matrix data is managed by Higson and is stored in the Higson DB. It can be exported or imported from excel or snapshot files.
Ordinary decision tables can work in 2 modes:
- in-memory mode (default)
- non-memory mode
In-memory mode means that during the first use the matrix is converted into fast index kept in memory for fast decision table lookups.
Non-memory mode means that every time, the decision table is used, Higson executes an SQL query to fetch the result from the Higson DB.
Now we are ready to see what change the external-source brings.
External-Source Decision Table#
The matrix data is stored in an external database and can be fetched when needed. Once the data is downloaded, the decision table behaves like an ordinary decision table.
So, in case of external-source decision table, instead of creating a matrix, we need to create an SQL query.
Higson provides 2 modes that need to be described in more detail.
In-Memory External-Source Decision Table#
To configure decision table to use in-memory external source, we need to:
- check the
External Sourcetoggle button - check the
In-memorycheckbox.
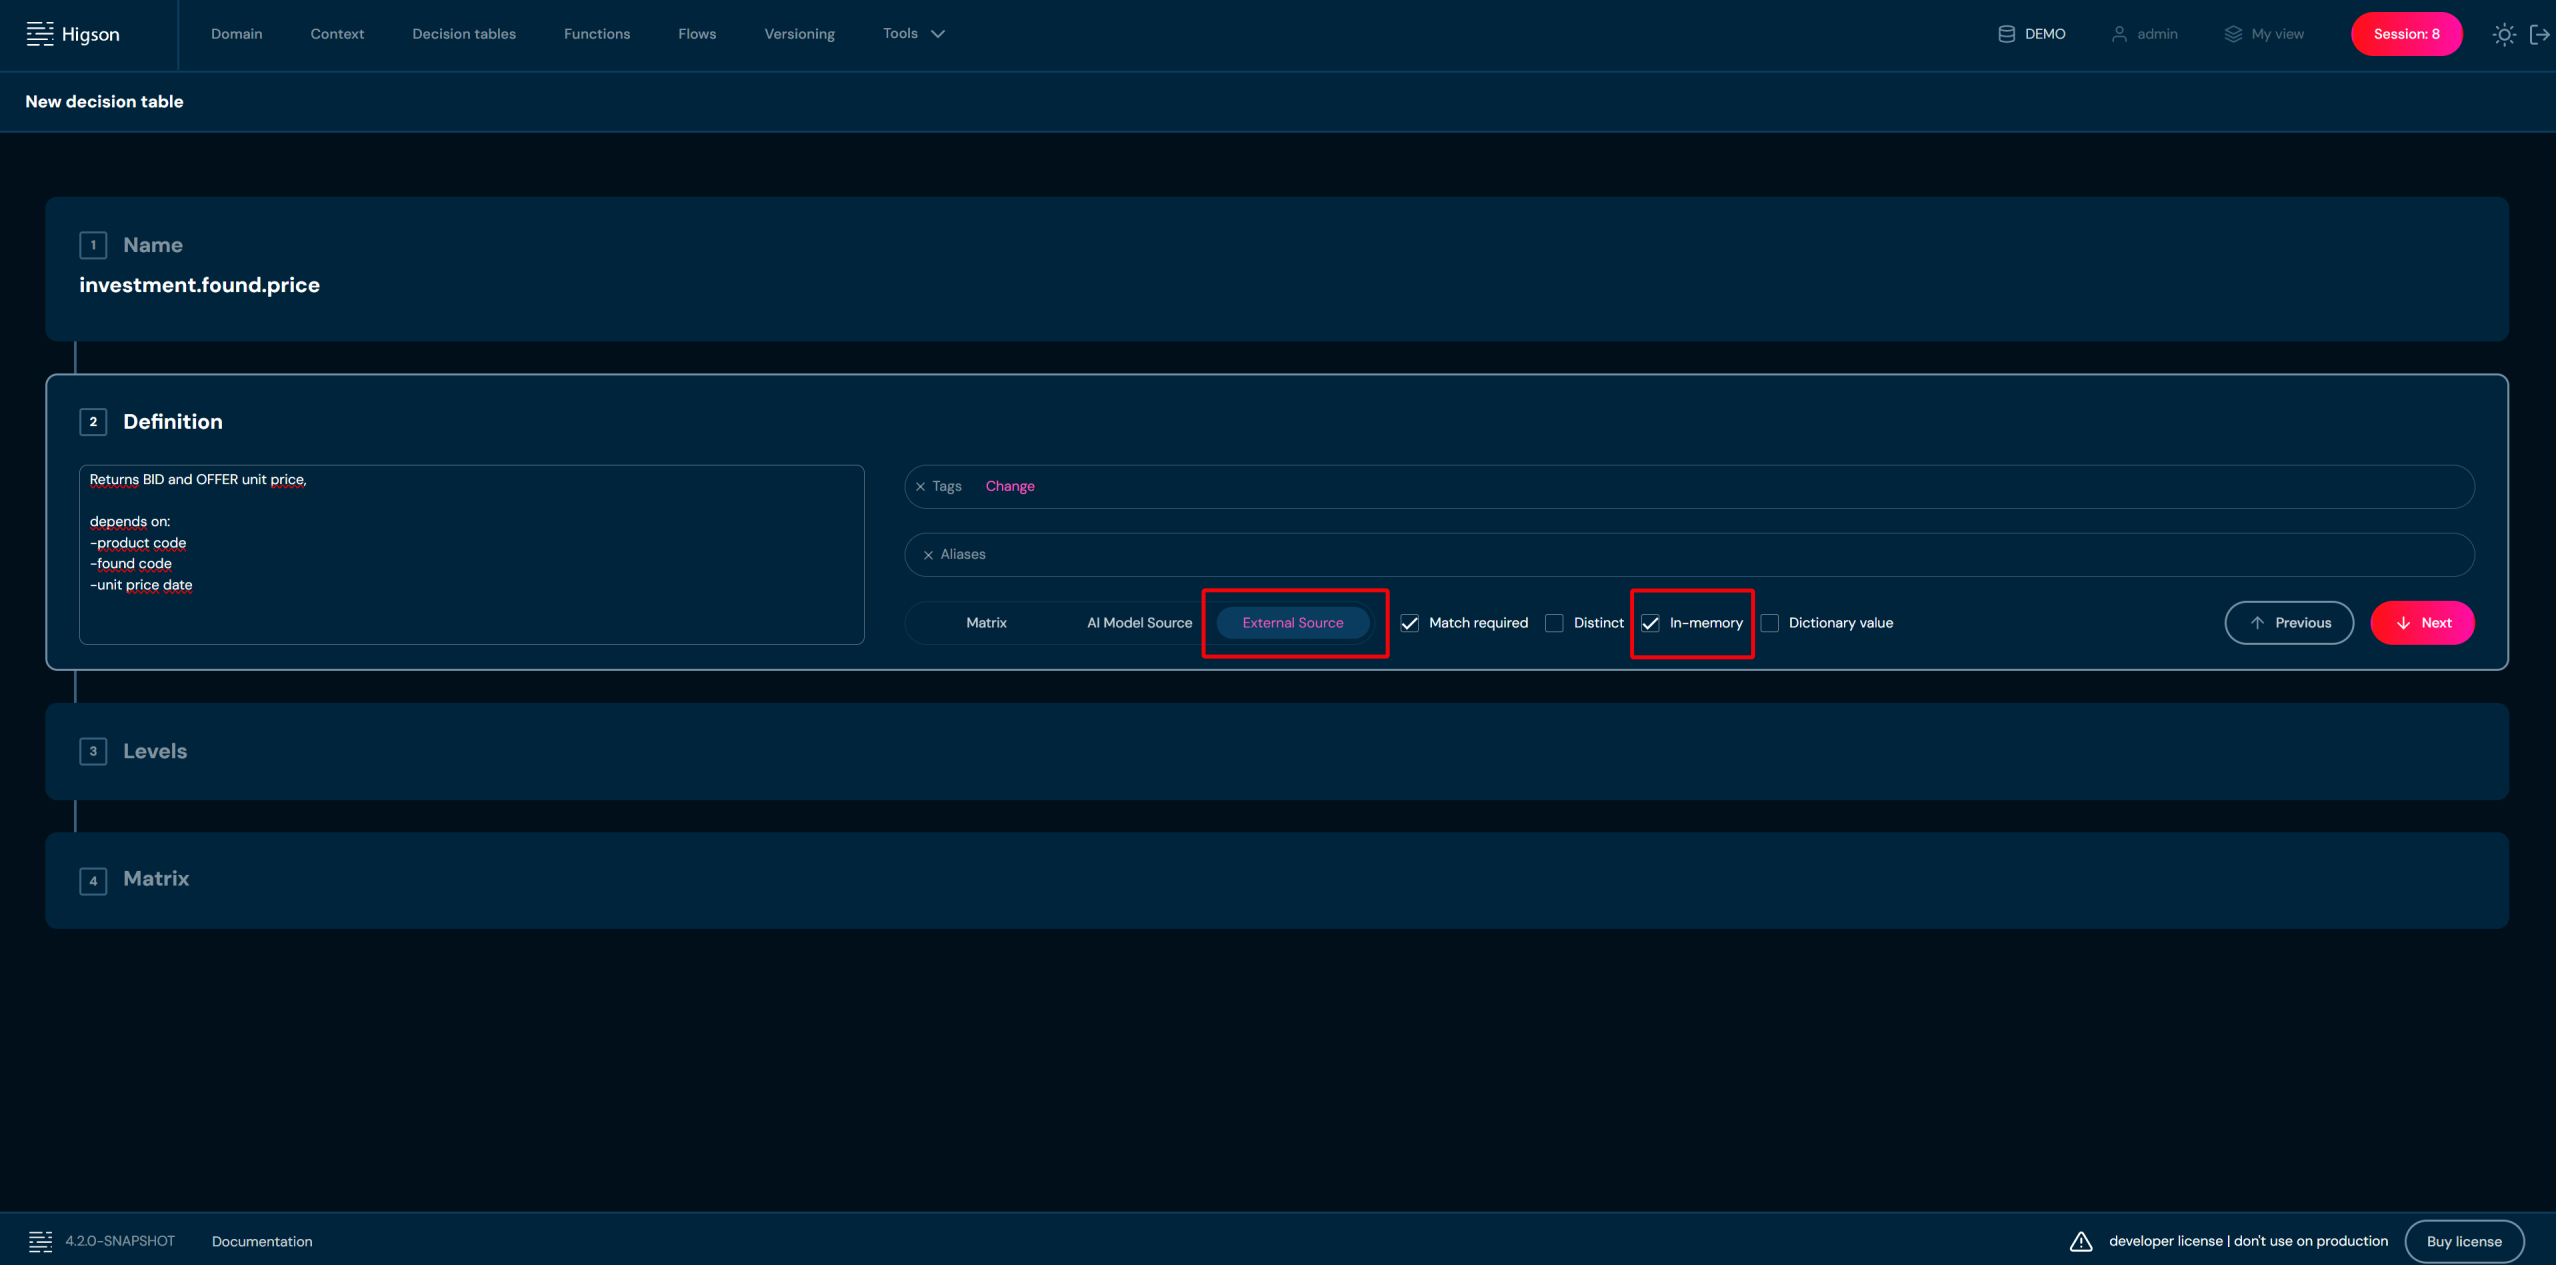
Then we need to define input/output columns like in an ordinary decision table.
Finally, we can configure External Source panel by:
- selecting datasource from
External data sourcedropdown, - writing SQL query in
In-memory SQL Templatetext area, - setting
auto refreshandrefresh periodif needed.
Writing SQL Query for In-Memory Mode#
As mentioned earlier, in-memory decision table takes the entire matrix (input and output columns) and converts it into fast search index. So, the SQL query must also return the entire matrix, both input and output columns.
Consider a decision table with 3 input columns and 2 output columns:
- input column:
product_code - input column:
fund_code - input column:
unit_price_date - output column:
unit_bid_price - output column:
unit_offer_price
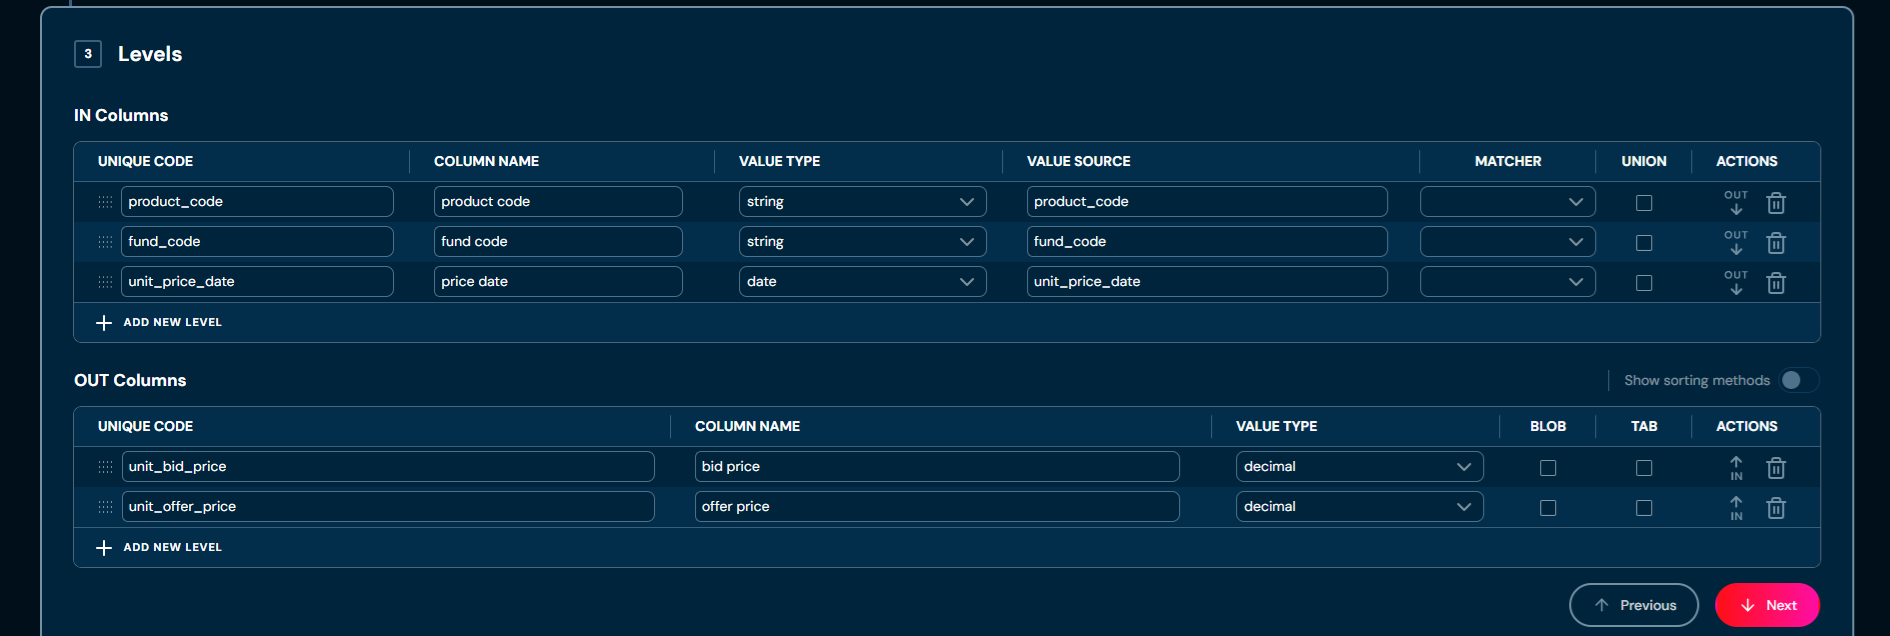
So, the SQL query must return dataset with 5 columns that will match 5 columns from decision table definition.
For example:
SELECT p.code, f.code, fp.price_date, fp.bid_price, fp.offer_price
FROM fund_price fp
  INNER JOIN fund f ON fp.fund_id = f.id
  INNER JOIN product p ON f.product_id = p.id
WHERE p.active = 1
  AND fp.price_date > now() - INTERVAL '1' YEAR
When this decision table is used for the first time, Higson executes this SQL query to obtain full data set (matrix). This matrix will be converted to in-memory index like in ordinary decision table.
Auto Refresh#
The SQL query is executed only once, when decision table is used for the first time. All subsequent lookups will be extremely fast, because they will be handled by in-memory index. What if the underlying database table changes in the meantime?
We can force Higson to periodically refresh the index in memory.
Just check the Auto refresh checkbox and provide Refresh period expression.
Refresh period consist of a number followed by a duration unit, for example:
| Refresh period | Meaning |
|---|---|
90s |
90 seconds |
15m |
15 minutes |
3h |
3 hours |
An empty Refresh period means 1h by default.
The image below shows the sample configuration:
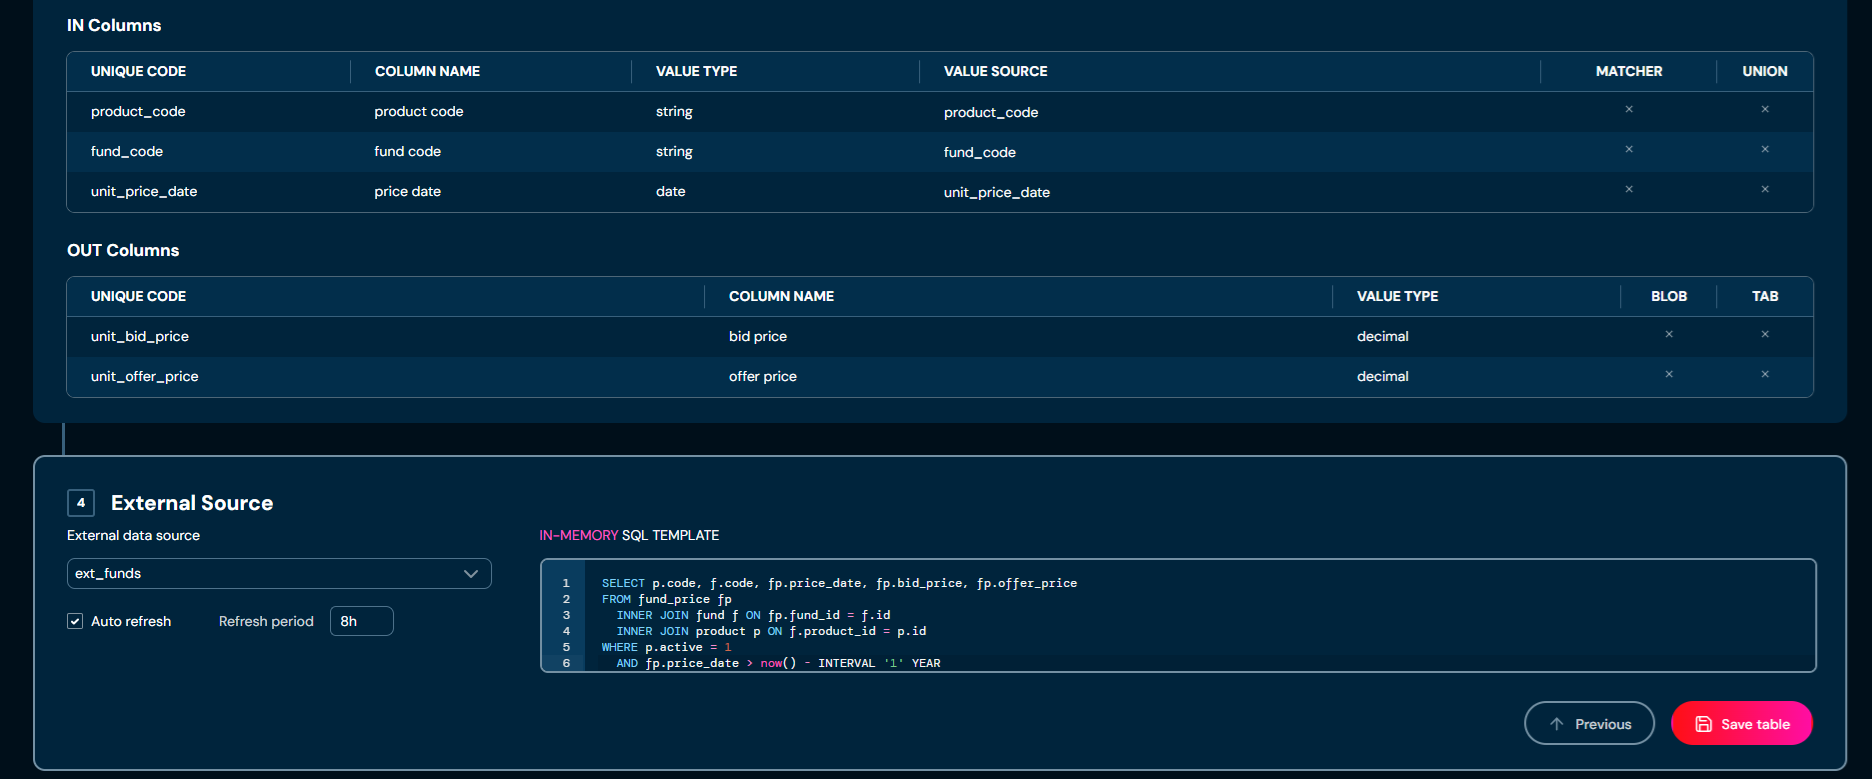
Non-Memory External-Source Decision Table#
To configure decision table to use non-memory external source, we need to:
- check the
External Sourcetoggle button - uncheck the
In-memorycheckbox.
Then we need to define input/output columns like in an every decision table.
Finally, we can configure External Source panel by:
- selecting datasource from
External data sourcedropdown, - writing SQL query in
Non-memory SQL Templatetext area.
Writing SQL Query for Non-Memory Mode#
As mentioned earlier, non-memory decision table does not cache anything. It executes SQL query for every evaluation request.
So, the SQL query:
- must return only output column
- may use input values to make conditions in SQL (
whereclause)
Consider a decision table with 3 input columns and 2 output columns:
- input column:
product_code - input column:
fund_code - input column:
unit_price_date - output column:
unit_bid_price - output column:
unit_offer_price
So, the SQL query must return dataset with only 2 columns,
for unit_bid_price and unit_offer_price.
It may use 3 inputs (product_code, fund_code, unit_price_date) to narrow the result.
For example:
SELECT fp.bid_price, fp.offer_price
FROM fund_price fp
  INNER JOIN fund f ON fp.fund_id = f.id
  INNER JOIN product p ON f.product_id = p.id
WHERE p.active = 1
  AND p.code = :product_code
  AND f.code = :fund_code
  AND fp.price_date = :unit_price_date
The above query will use input values in where clause.
If we evaluate decision table with such context:
ctx = new HigsonContext('product_code', 'AUL1', 'fund_code', 'FCB', 'unit_price_date', '2025-01-01');
result = engine.get(decisionTable, ctx);
Higson executes SQL query (PreparedStatement) with where clause:
select fp.bid_price, fp.offer_price
...
where p.active = 1
and p.code = 'AUL1'
and f.code = 'FCB'
and fp.price_date = '2025-01-01'
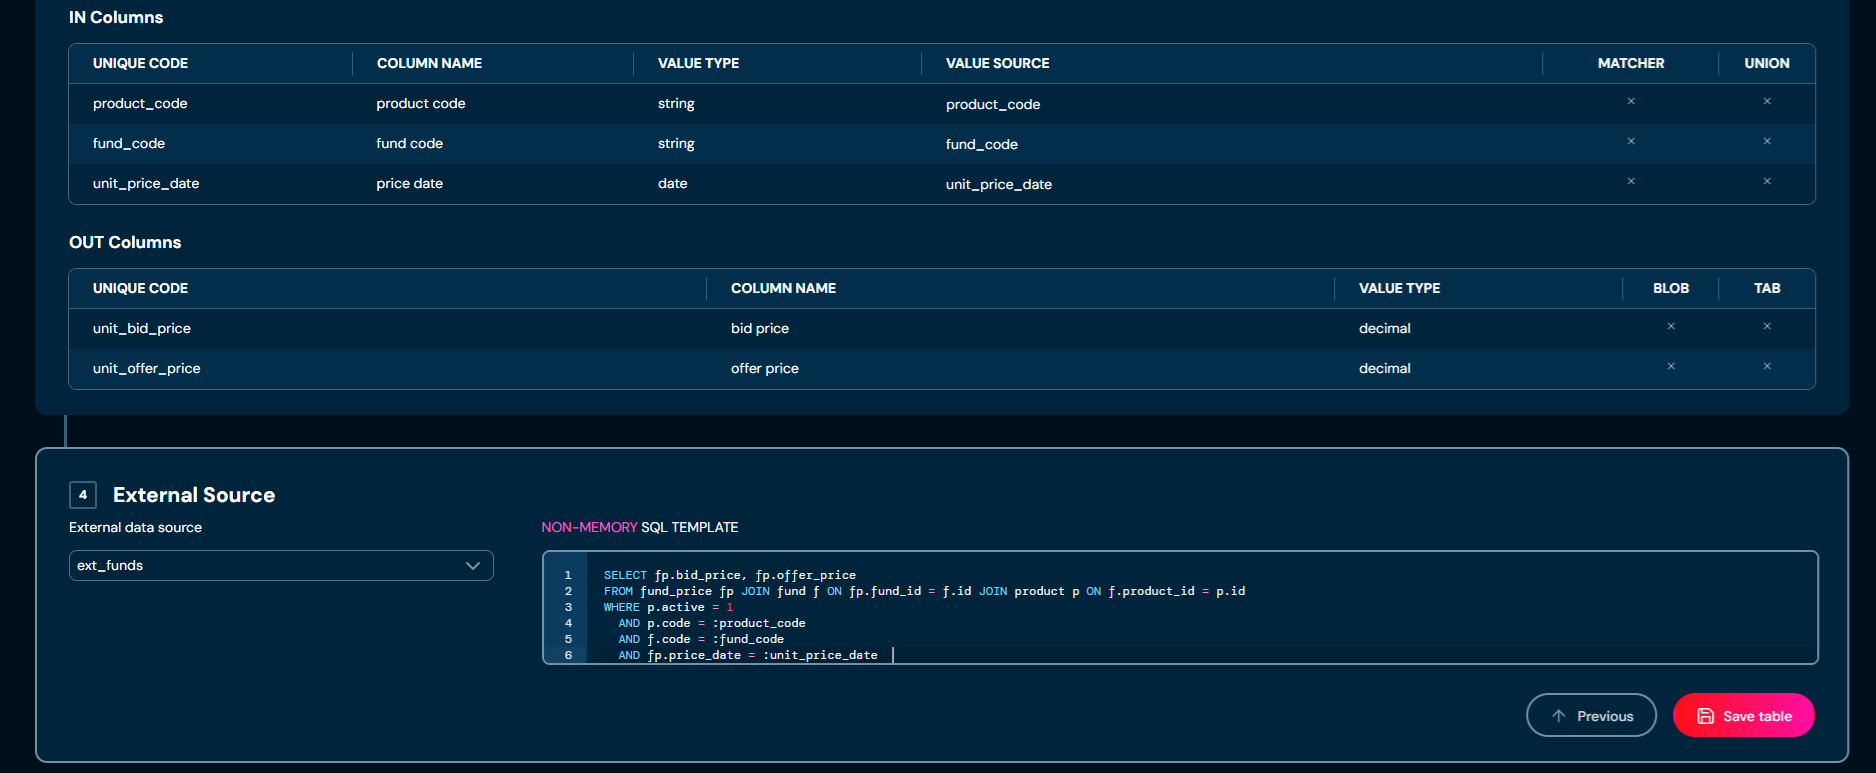
Configuring Datasources in Higson Studio#
For an datasource to be available on the External data source dropdown
it must be configured in Higson Studio configuration file.
The following is the part of the conf/application.properties file
with sample external source configuration:
higson.runtime.external-datasource.sql.names=ext_data, ext_funds, analytics

higson.runtime.external-datasource.sql.ext_data.url=jdbc:postgresql://...:5432/db1
higson.runtime.external-datasource.sql.ext_data.username=...
higson.runtime.external-datasource.sql.ext_data.password=...

higson.runtime.external-datasource.sql.ext_funds.url=jdbc:postgresql://...:5432/funds_history
higson.runtime.external-datasource.sql.ext_funds.username=...
higson.runtime.external-datasource.sql.ext_funds.password=...

higson.runtime.external-datasource.sql.analytics.url=jdbc:postgresql://...:5432/analytics
higson.runtime.external-datasource.sql.analytics.username=...
higson.runtime.external-datasource.sql.analytics.password=...
The above file configures 3 datasources that can be used by External Source decision tables:
ext_dataext_fundsanalytics
Higson Studio creates simple javax.sql.DataSource for every defined external datasource.
The configuration uses following properties:
| property | meaning |
|---|---|
higson.runtime.external-datasource.sql.names |
comma separated names of external datasources (logical names) |
higson.runtime.external-datasource.sql.[name].url |
JDBC url for external datasource using this [name] |
higson.runtime.external-datasource.sql.[name].username |
user name to establish jdbc connection |
higson.runtime.external-datasource.sql.[name].password |
password to establish jdbc connection |
Configuring Datasources in Higson Runtime#
If the application uses the Higson Runtime (embedded engine), it is necessary to provide external data sources and add them to the engine runtime:
HyperonEngineFactory factory = new HyperonEngineFactory(higsonDataSource);
...
DataSource dataDs = createDataSource(...)
DataSource fundsDs = createDataSource(...)
DataSource analyticsDs = createDataSource(...)
...
factory.addExternalDataSource( "ext_data",      dataDs );
factory.addExternalDataSource( "ext_funds",     fundsDs );
factory.addExternalDataSource( "ext_analytics", analyticsDs );
...
HigsonEngine engine = factory.create();
The deduplication process for decision tables is an automatic, cyclic background process running on the Higson Studio server. Its purpose is to optimize the storage of decision table matrices by detecting and deduplicating (reusing) identical matrices.
Problem It Solves#
Decision tables in Higson Studio may contain identical matrices. In such cases, the same data is stored multiple times — separately for each decision table. The deduplication process detects such situations and eliminates redundancy:
- one decision table is designated as the owner of the matrix,
- while the others become hard links pointing to that owner.
The physical data exists only once, regardless of how many decision tables share it.
Benefits#
- Lower memory (heap) – the DT lookup index is reused whenever possible
- Database storage – the matrix is stored only once in the database
- Smaller snapshot size – DTs that are hard links do not contain matrix files (
*.mat) - Faster DT loading time by the engine (no need to rebuild the lookup index if another DT uses the same matrix)
- Faster snapshot export time
- Faster export time for the list of decision tables
Functionality#
In addition to the deduplication process, hard links may also be created in other scenarios. For example, attaching a global decision table (DT) to multiple versions no longer requires creating deep copies of the DT. Only one DT will contain the matrix, while the others will become hard links.
Configuration#
Configuration is available via four properties:
| Property | Description | Default value |
|---|---|---|
| higson.studio.deduplication.enabled | Enables or disables the hard link feature | false |
| higson.studio.deduplication.job-enabled | Enables or disables the background deduplication process | false |
| higson.studio.deduplication.job-interval | Interval between consecutive runs of the deduplication process (if enabled). Format: number followed by a unit (s, m, h, d) |
30m |
| higson.studio.deduplication.matrix.min-size | The minimum number of matrix rows required for a matrix to qualify for deduplication by the background process |
Functions
Functions enable you to write code snippets in regular programming language, which let you implement any logic you want. You can write functions where Decision Table matrix is not enough.
If you are new to Higson functions, you may want to read the introductory section Introduction to Functions.
Since version 4.3, Higson Studio also includes an AI Assistant that can help you generate and refine functions from a natural-language description. To learn how to enable it, see AI Assistant Configuration, and for usage instructions see AI Features in Functions.
In order to see all functions, select Functions in Main Toolbar.
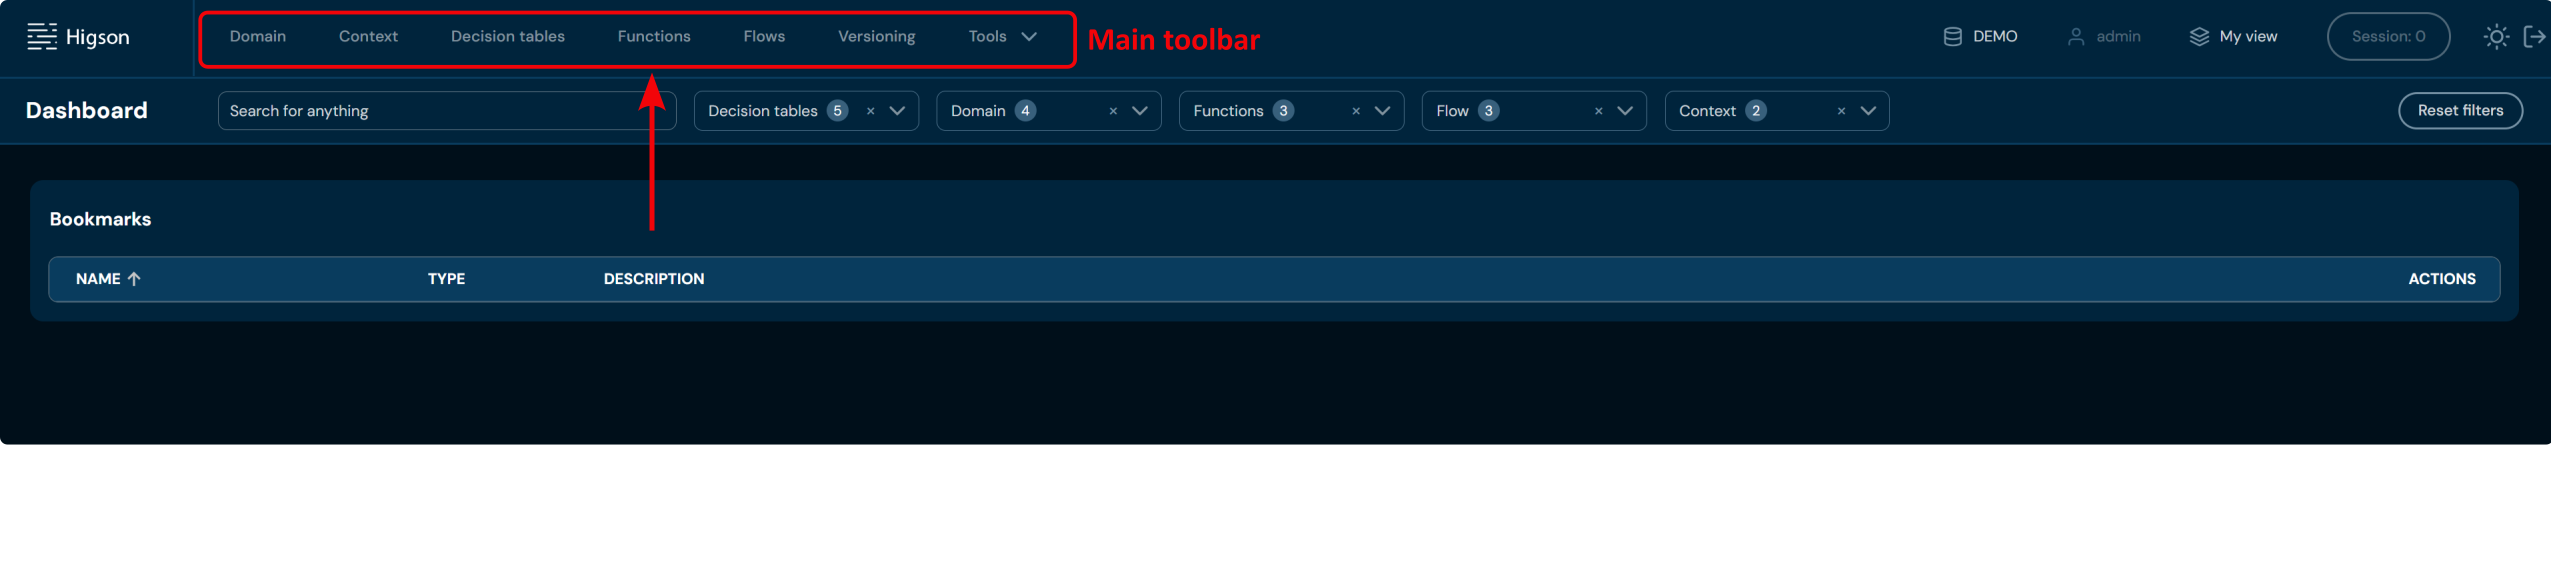
After you enter Functions you will see screen of all functions:
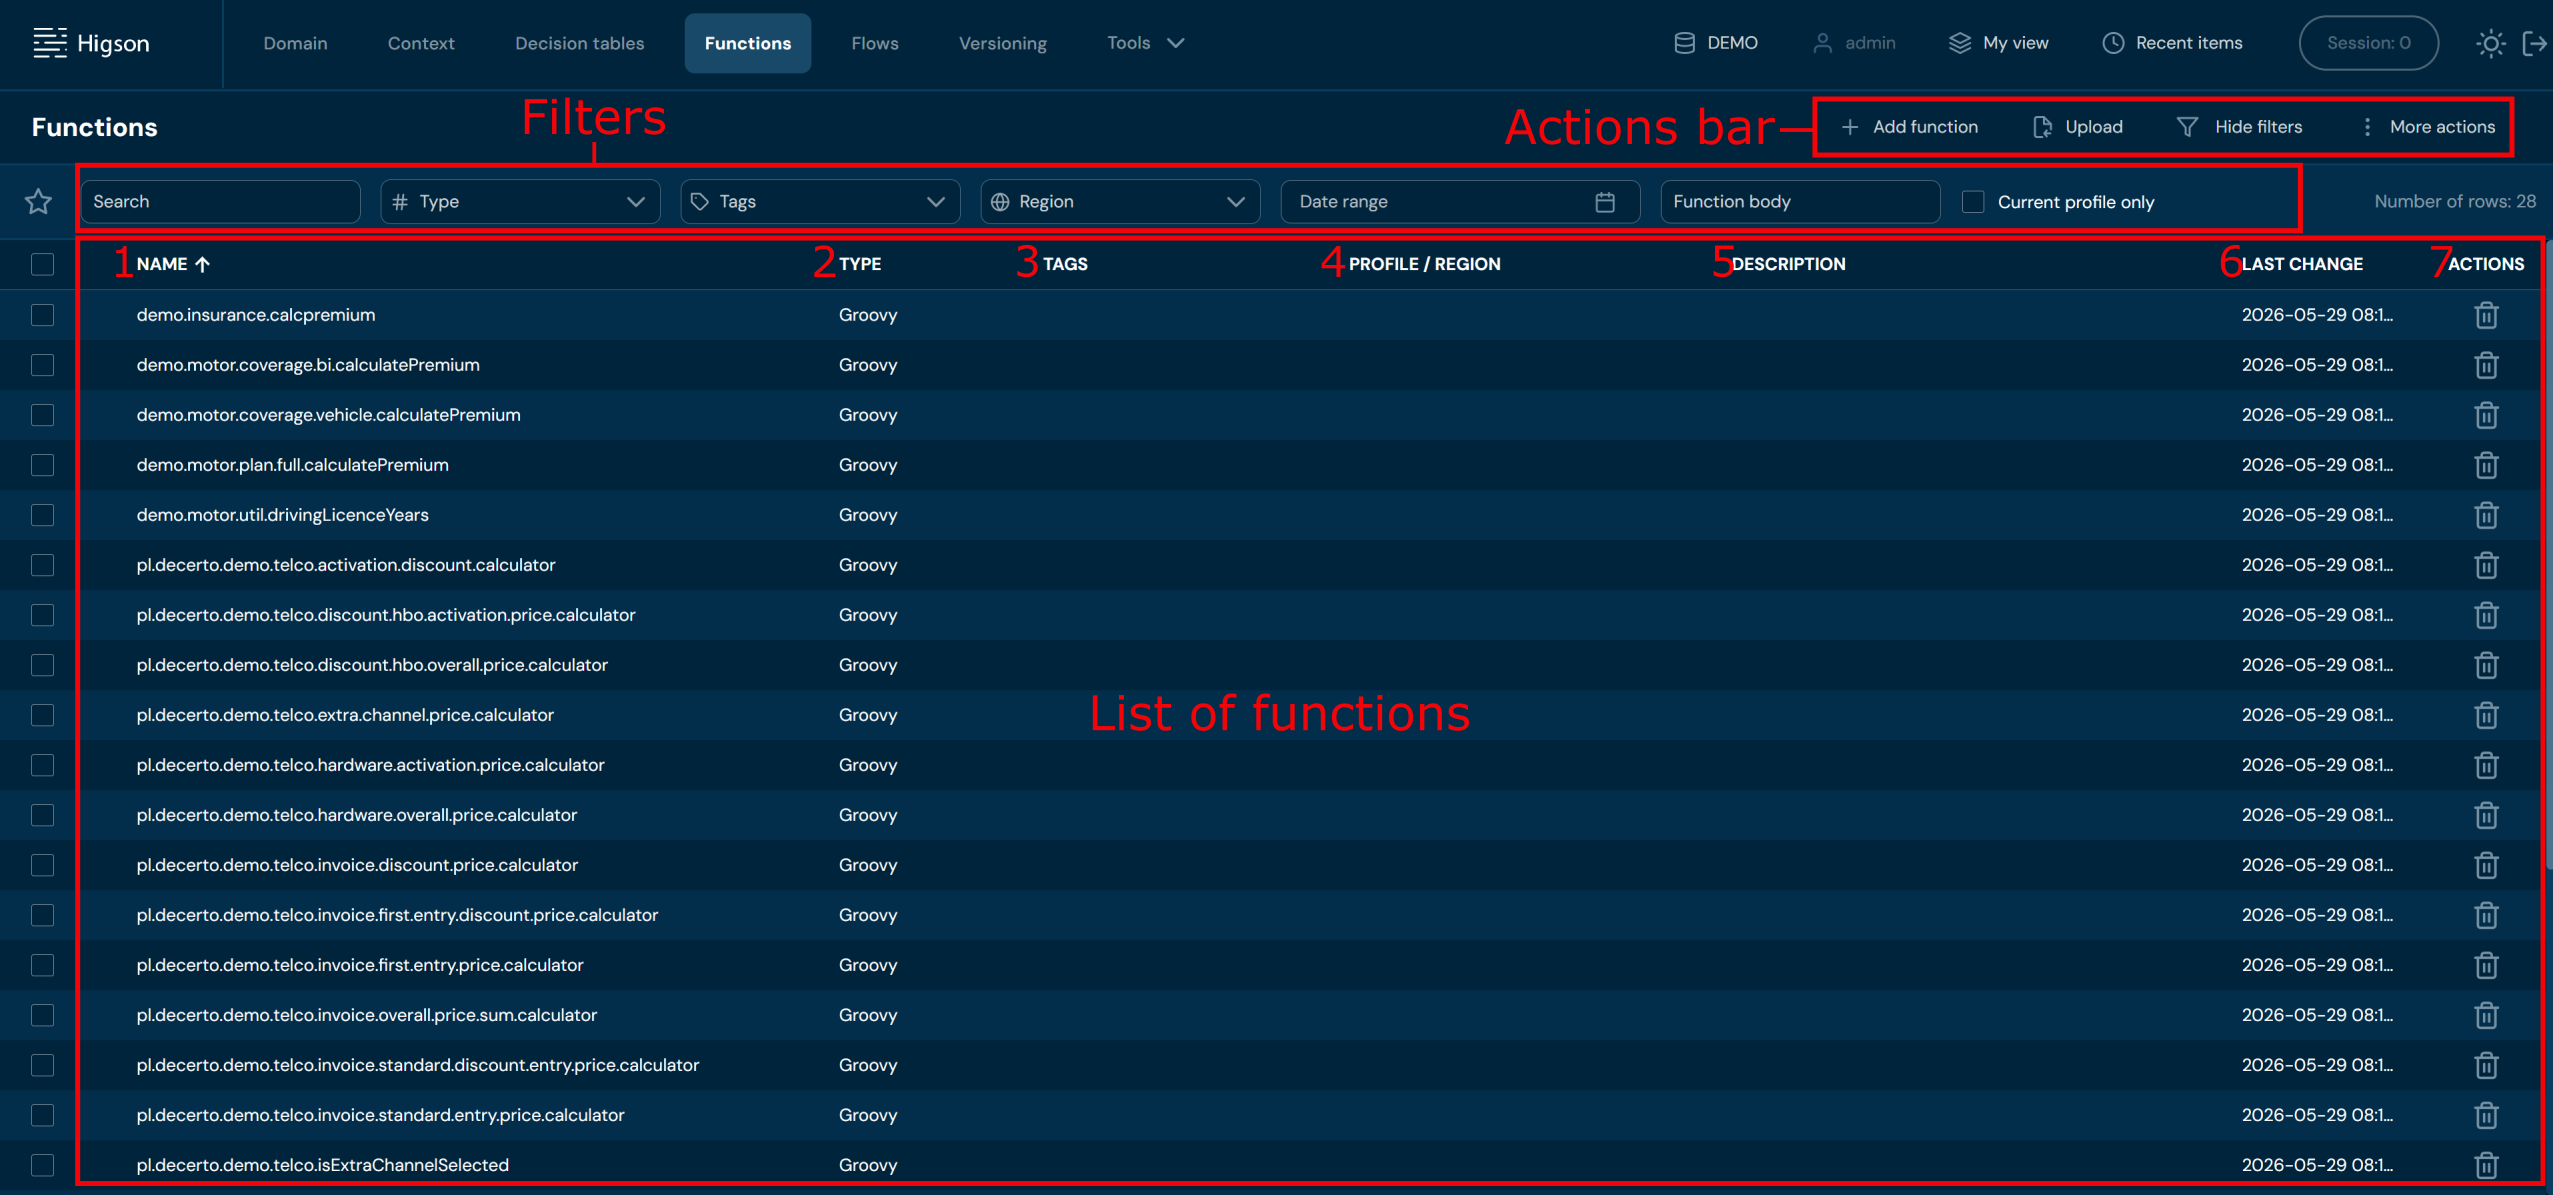
Each function is described by seven attributes:
| No. | Column name | Description |
|---|---|---|
| 1. | Name | Full function name/code. The function name and function code are interchangeable. |
| 2. | Type | Type of programming language used in the Groovy function. |
| 3. | Tags | List of all Tags assigned to the function. To learn more about assigning Tags go here. |
| 4. | Profile/Region | Profile and Region the function is assigned to. |
| 5. | Description | Contains the Description of the function if such was added. |
| 6. | Last change | The last modification date of the function. |
| 7. | Actions | List of quick access actions. Currently only Remove action (bin icon) is available here. Remove action deletes desired function. |
The functions list view depends on the selected profile.
If a profile is selected, both global items and items assigned to the selected profile are displayed.
If no profile is selected (not-chosen), only global items are visible.
Elements modified in current session are marked with a dot:
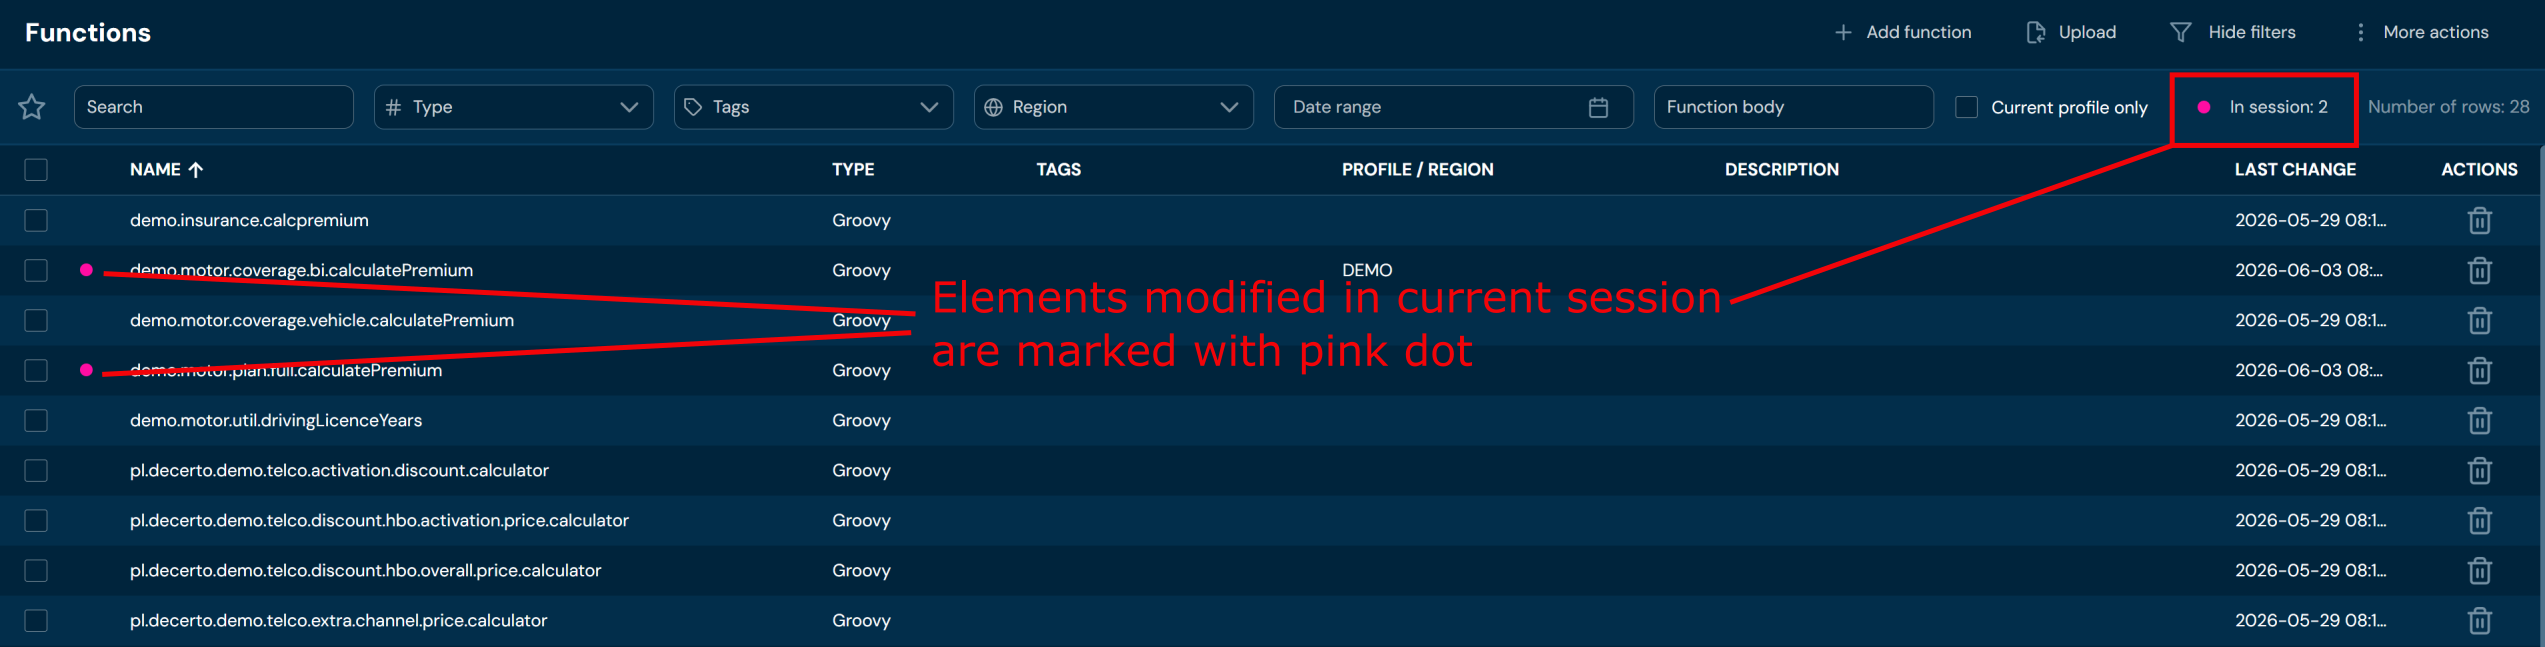
On this screen, you can apply Filters to search for specific function or to narrow down the number of displayed functions. You can also perform actions on one or multiple functions.
You can see All Actions available for the functions below:
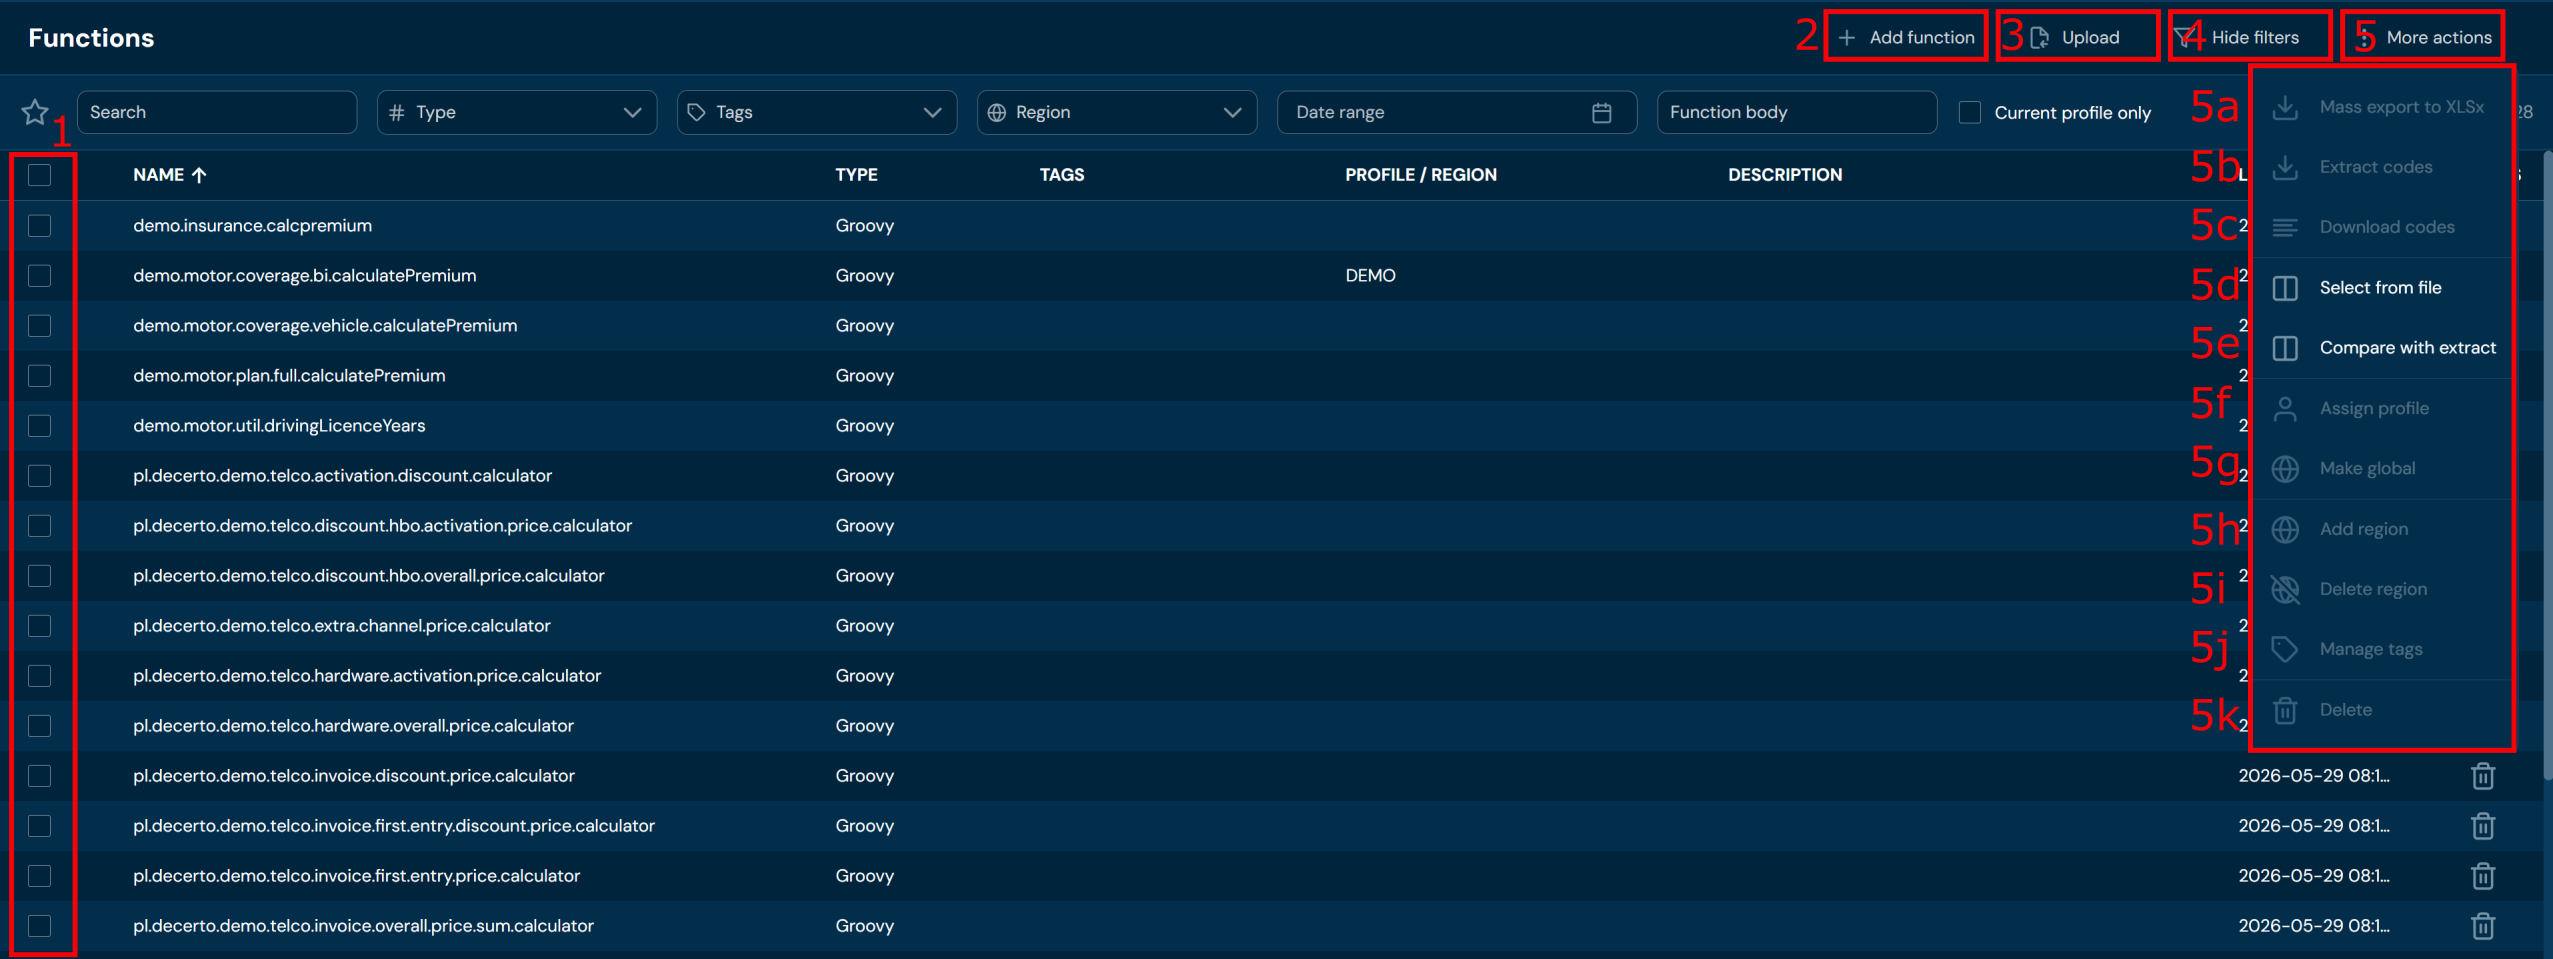
| No. | Action | Description |
|---|---|---|
| 1. | Checkboxes | Select the top checkbox to select all functions in the view, or select individual checkboxes to group functions for actions 5a, 5b, 5c, 5f, 5g, 5h, 5i, 5j, 5k. |
| 2. | + Add function | Opens a step-by-step function wizard. Allows to create new functions. To learn more about adding functions go here. |
| 3. | Upload | Allows to import functions from a ZIP file. To learn more about uploading functions go here. |
| 4. | Hide/Show filters | Hides or reveals Filters bar accordingly. If Filter bar is visible, then action Hide filters is available. If Filter bar is hidden, then action Show filters is available. - is visible, then action Hide filters is available. - is hidden, then action Show filters is available. |
| 5. | More actions | Drop-down list that contains actions 5a-5k. Bear in mind that actions 5a, 5b, 5c, 5f, 5g, 5h, 5i, 5j, 5k are available only if at least one function is selected (at least one checkbox is checked). Otherwise, the mentioned actions will be greyed out (see picture below the table). |
| 5a. | Mass export to XLSx | Downloads a ZIP file that contains XLSX file and files with functions’ body. To learn more about mass export go here |
| 5b. | Extract codes | Downloads a XLSX file that contains functions’ extract. To learn more about extracting codes go here. |
| 5c. | Download codes | Download a TXT file with functions’ names/codes To learn more about extracting codes go here. |
| 5d. | Select from file | Allows to upload a TXT file with function codes, after uploading, all functions present in file will be selected. To learn more about selecting from file go here |
| 5e. | Compare with extract | Allows to upload an XLSX file with functions’ extract. Makes comparison between the provided file and the environment. To learn more about comparing with extract go here |
| 5f. | Assign profile | Assigns a profile to all selected functions. To learn more about assigning profiles go here |
| 5g. | Make global | Makes all selected functions global. To learn more about making functions global go here |
| 5h. | Add region | Adds regions to all selected functions. To learn more about adding regions go here |
| 5i. | Remove region | Removes regions from all selected functions. To learn more about removing regions go here |
| 5j. | Manage tags | Allows to add/remove tags to/from selected functions. To learn more about adding/removing tags go here |
| 5k. | Remove | Deletes all selected functions. To learn more about removing functions go here |
More actions drop-down menu, when no function is selected:
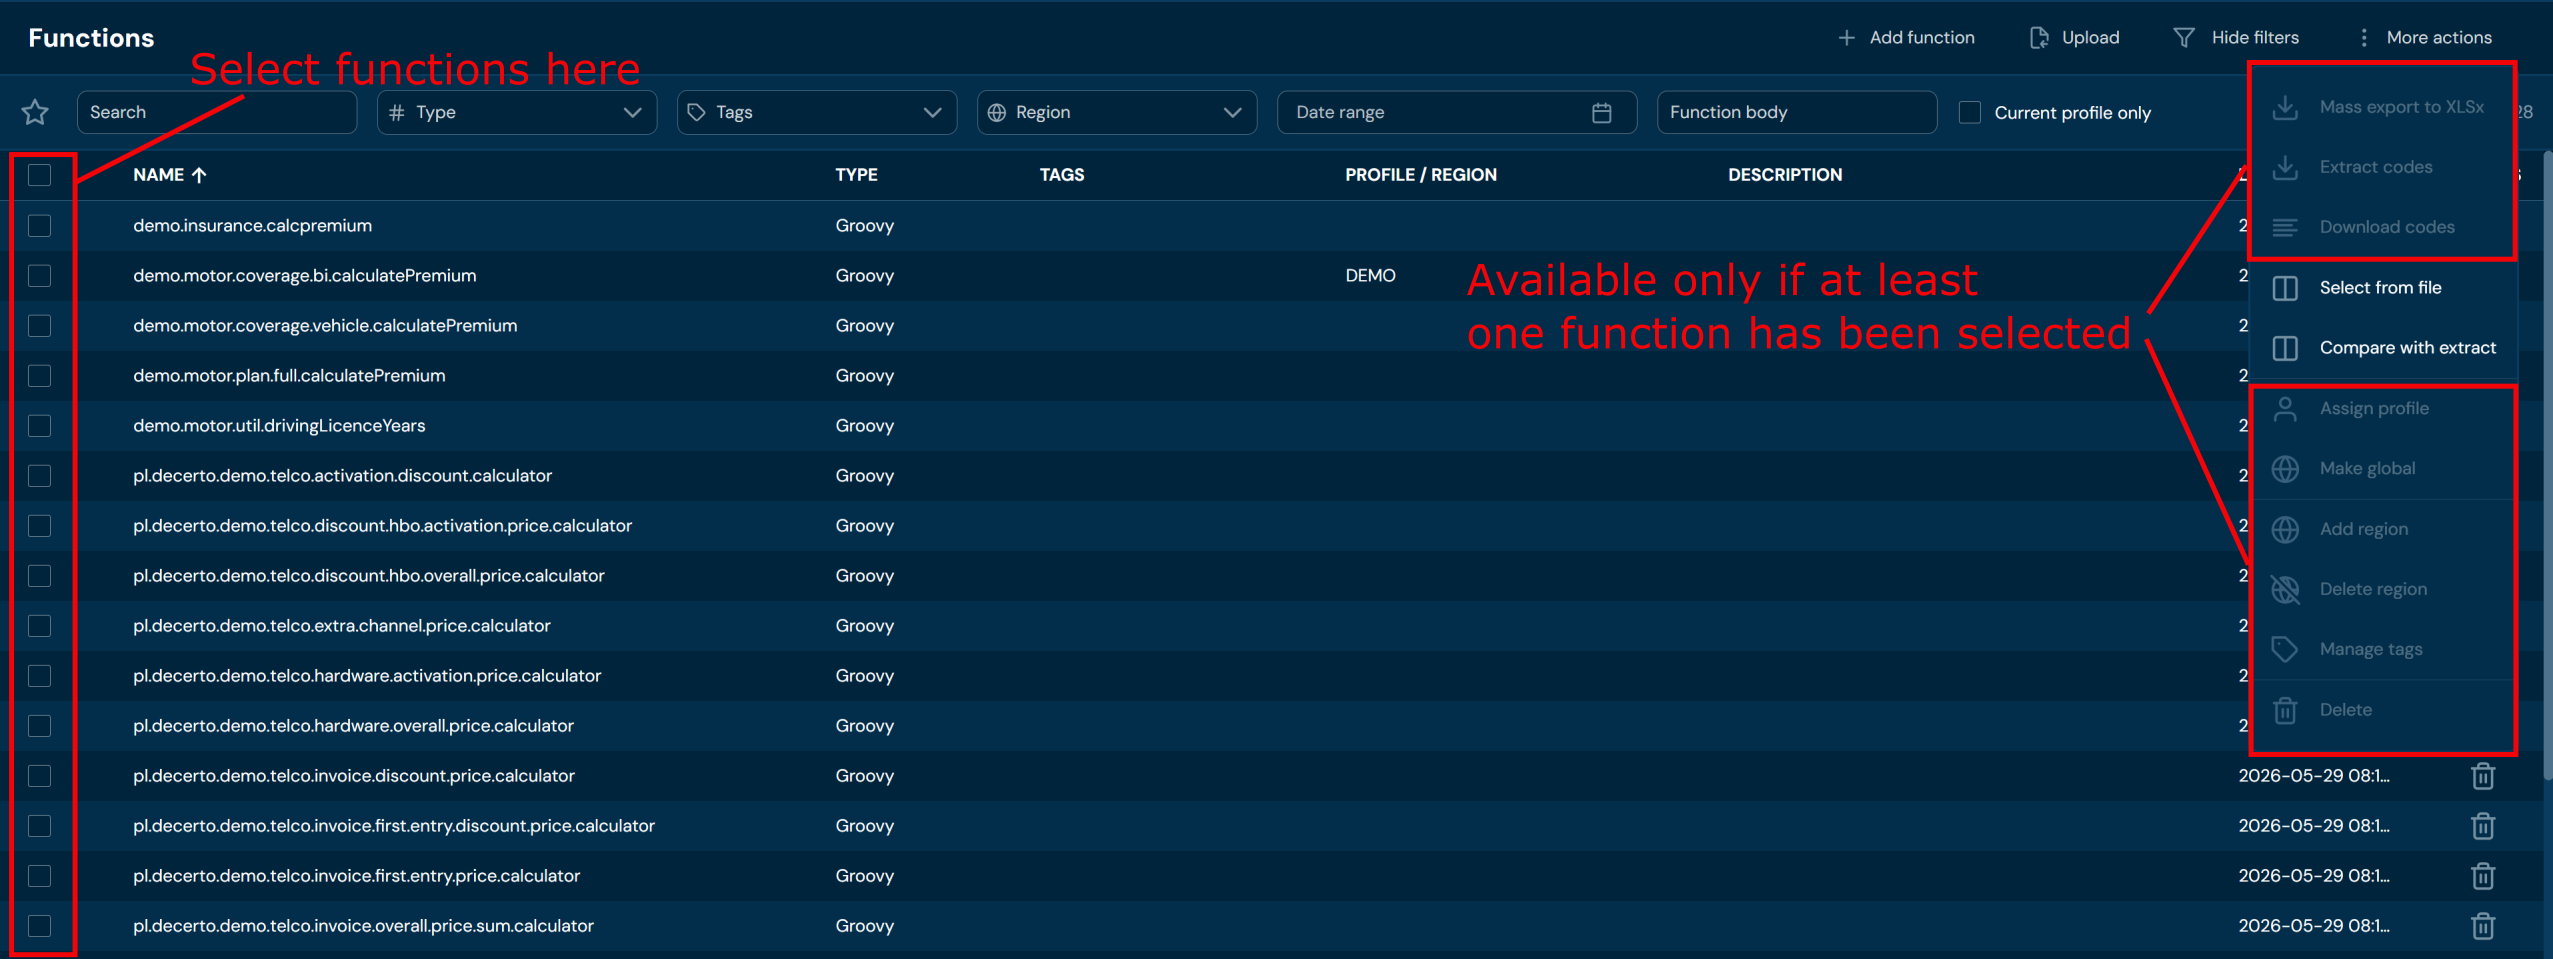
You can see all Filters available for the functions below:

| No. | Filter name | Description |
|---|---|---|
| 1. | Search text field | Filter by any string provided by the user. Searches in the Name field. |
| 2. | Type | Filter by used programming language: Groovy |
| 3. | Tags | Filter by assigned tags. Only tags assigned to at least one function are visible for selection. |
| 4. | Region | Filter by assigned regions. Only regions assigned to at least one function are visible for selection. |
| 5. | Date range | Filter by last change date in the format DD/MM/YYYY-DD/MM/YYYY. |
| 6. | Function body | Filter by any string provided by the user. Searches in a body of a function. |
| 7. | Current profile only | Check this box to limit the view to functions assigned to the currently selected profile. Otherwise, global functions will also be displayed. |
Add Function#
If you want to add a new function, follow these steps:
-
Choose Functions in Main toolbar.
-
Choose + Add function in All actions bar.
a. Choosing + Add function opens a step-by-step Function wizard.
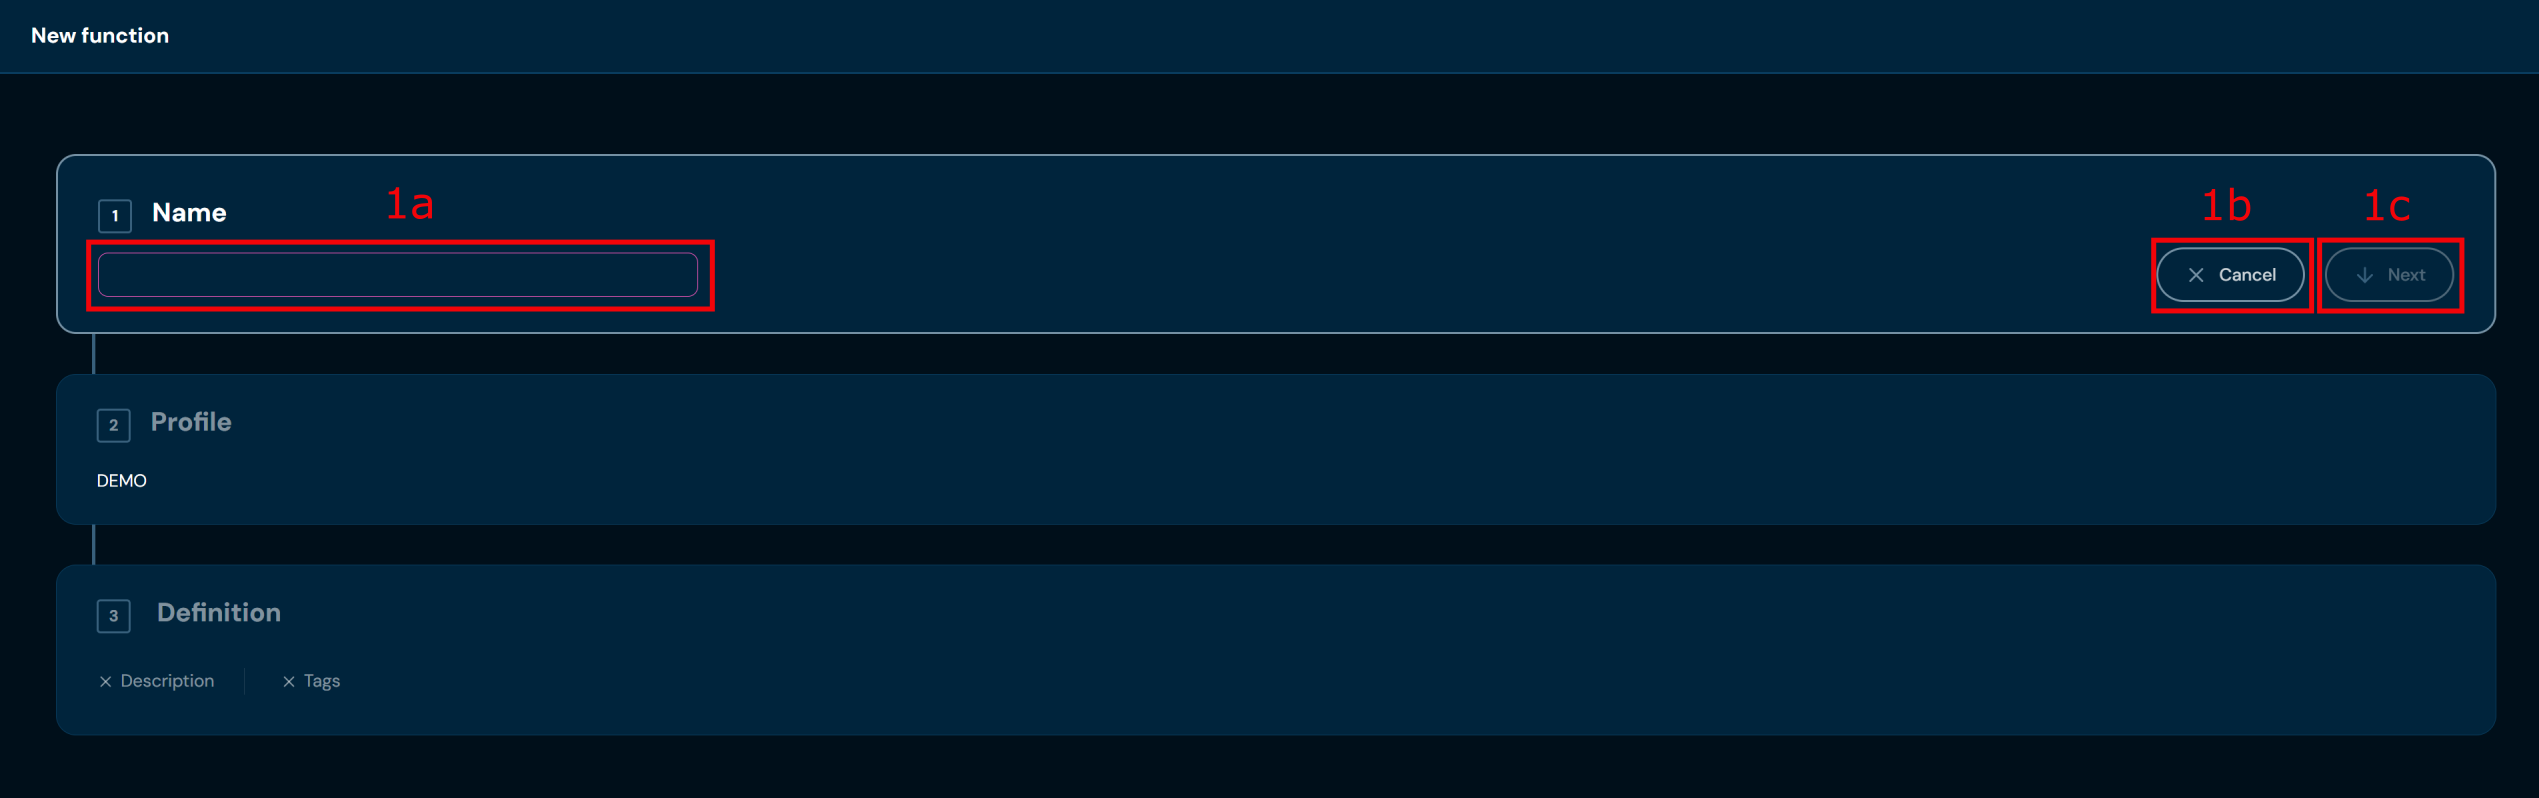
No. Field/Button code Description 1a Name Allows to add function name. 1b Cancel Interrupts the process of creating a new function. Returns the user to the functions list view. 1c Next Proceeds to the next step of the function wizard. -
In step 1. Name, you need to provide unique Function code/name. Name can contain only characters from collection a-z; 0-9; “.”; “-”; “_” and it can’t start with “-”, “+”, “=” or “@”.
a. If you change your mind and don’t want to create a new function, you can choose Cancel in step 1. Name.
-
Click Next.
a. If you enter illegal characters, then validation error will make field frame red.
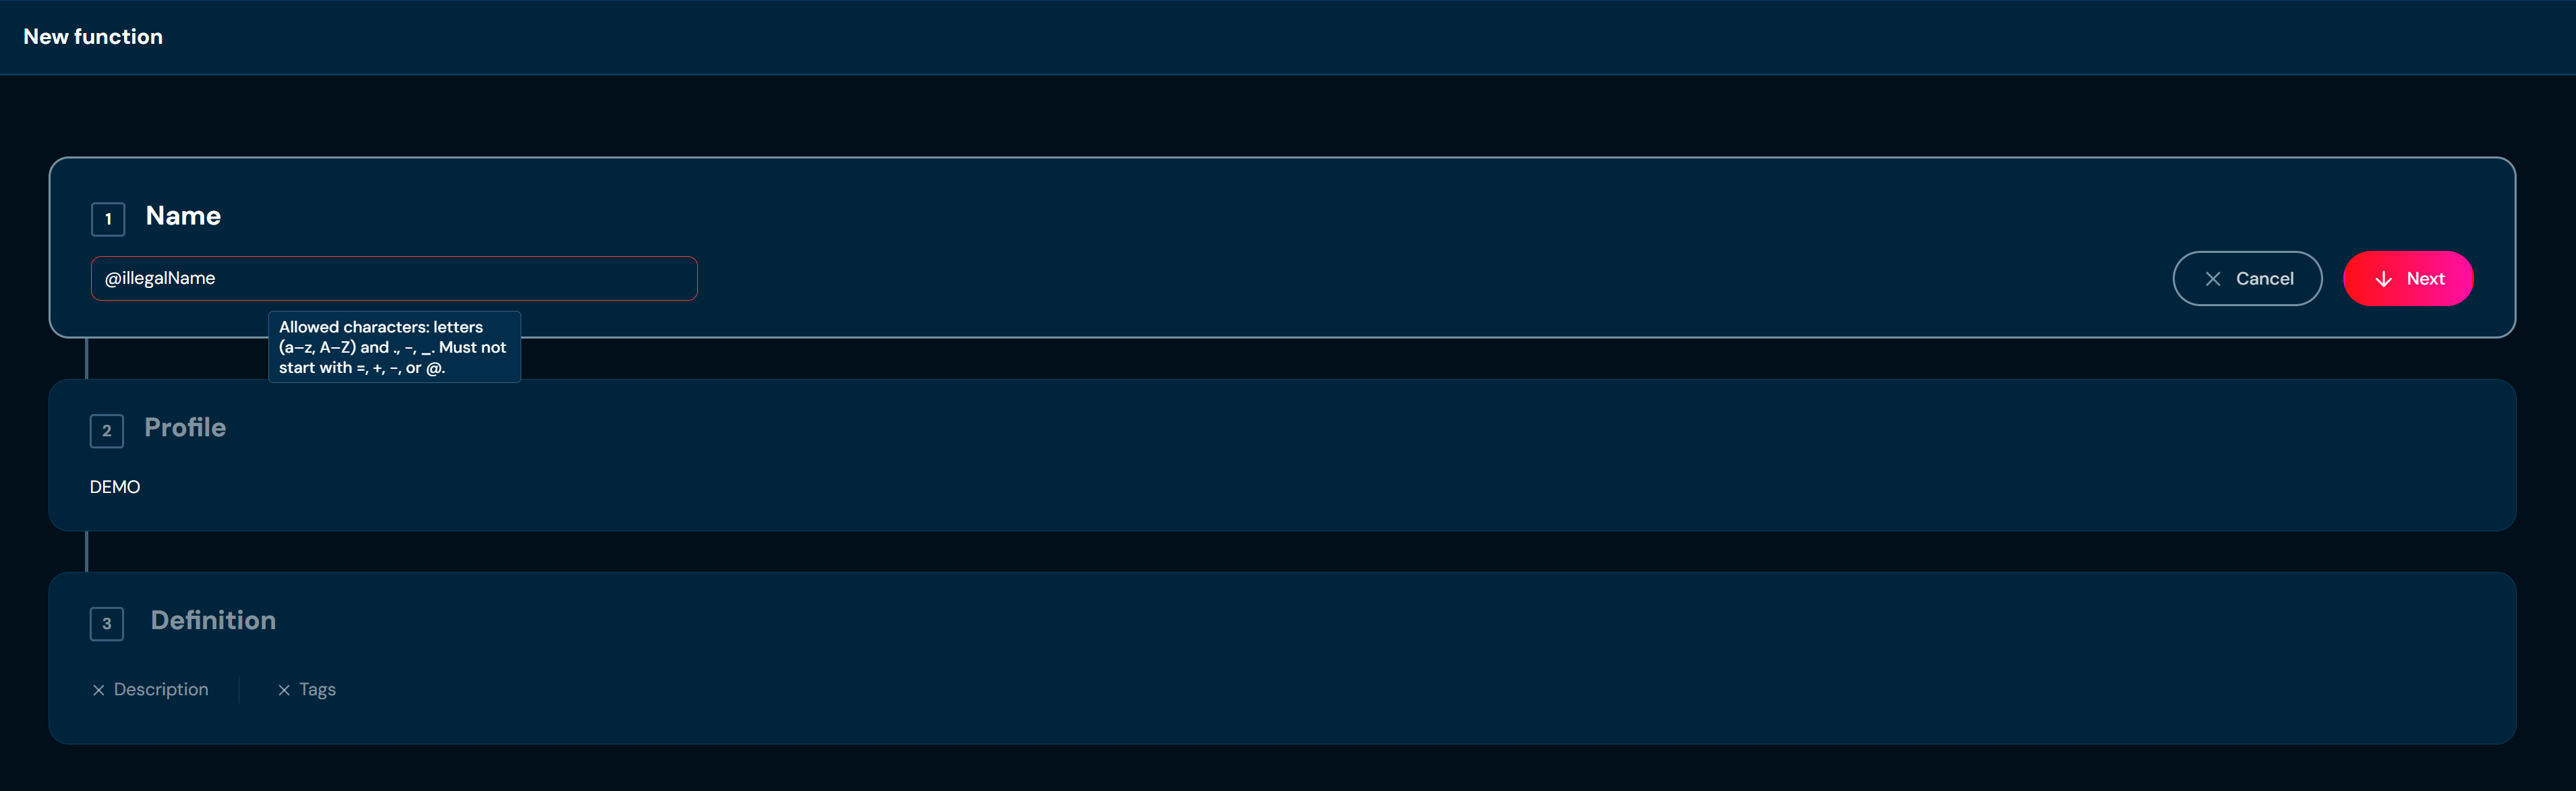
b. If another function already uses the name you provided, then pop-up dialog will appear. You can either close the pop-up by clicking Cancel or you can click View existing function, that will redirect you to the appropriate function and close the Function wizard.

-
In step 2. Profile you may assign the function to a profile by selecting a profile from the drop-down list, or create a global function by checking No profile (global). Assigning the function to a profile will ensure that only users with permissions for that profile can access it. Global functions are visible regardless of profile permissions.
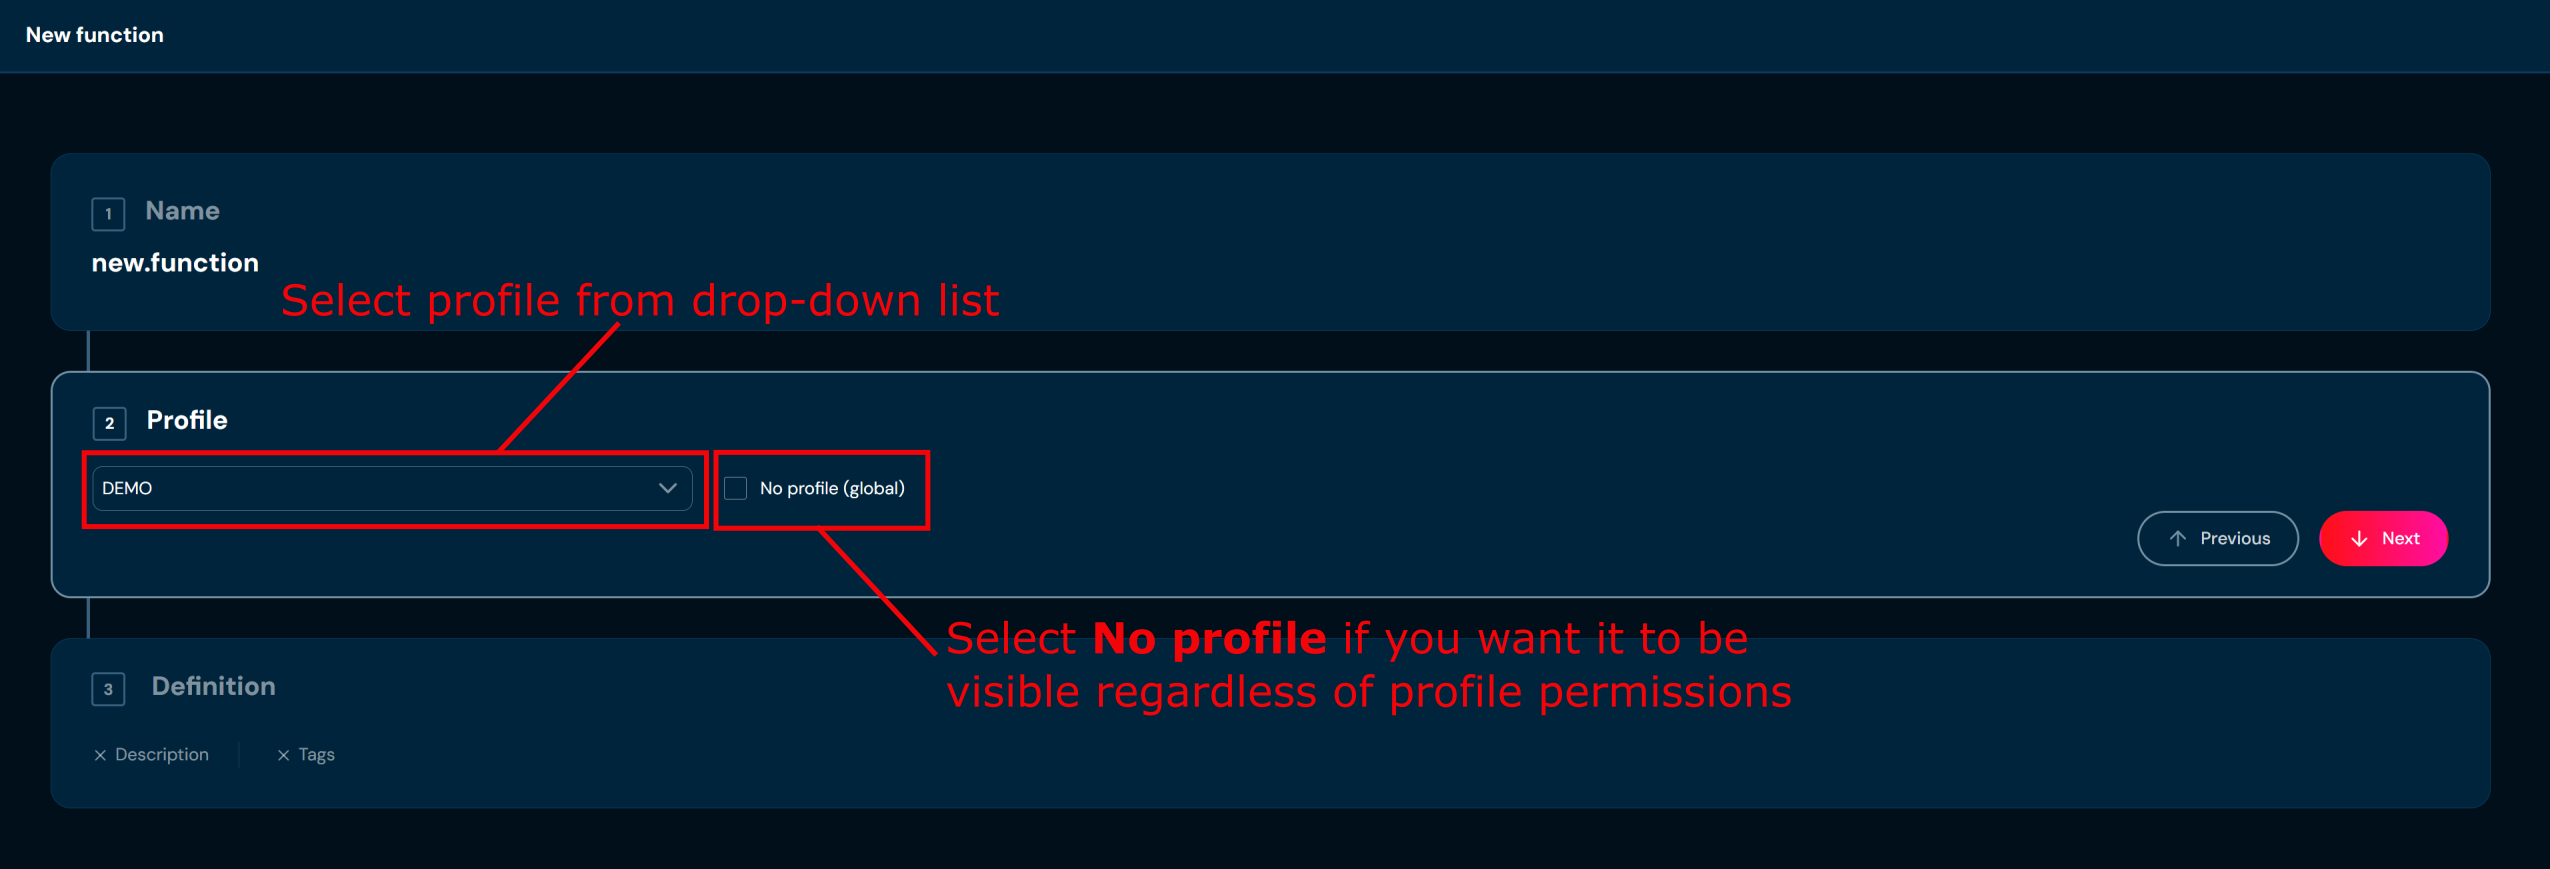
-
In step 3. Definition you may add description, assign tags and select a type.
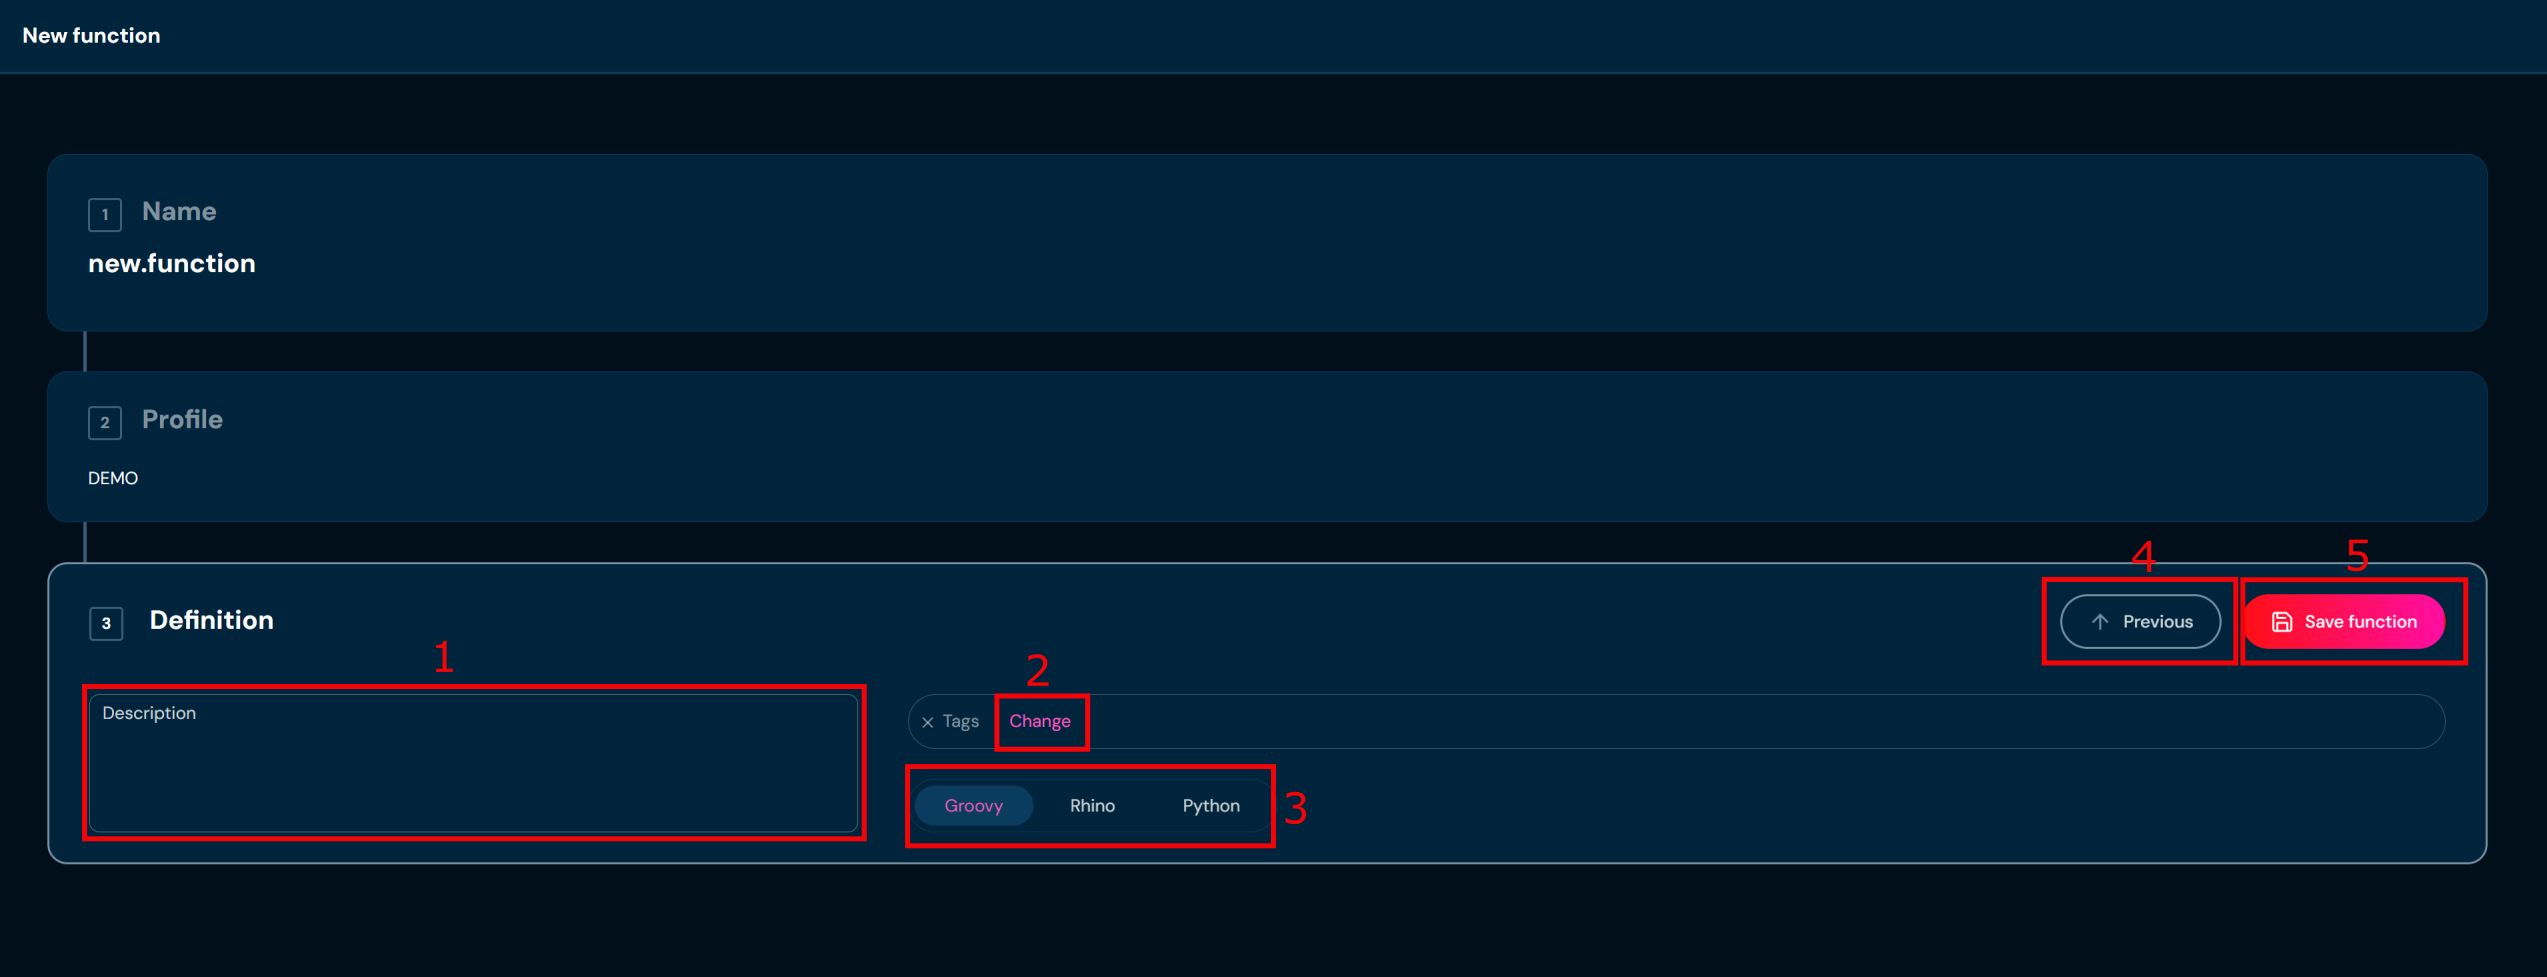
No. Field/Button code Description 1. Description Add or modify element description. Here you can add any additional detailed information about the new function. 2. Change Modify tags attached to the function. 3. Type Function’s type. 4. Previous Go back to the previous step of the function wizard. 5. Save function Completes the process of creating the new function. a. If you choose Previous you will go back to step 2. Profile
-
Choose Save function.
a. Function with data you provided is created. You will be redirected to Function’s details screen.
Upload Function#
If you want to upload functions from ZIP file, follow these steps:
-
Choose Functions in Main toolbar.
-
Choose Upload in All actions bar.
a. Choosing Upload brings up the Upload screen.
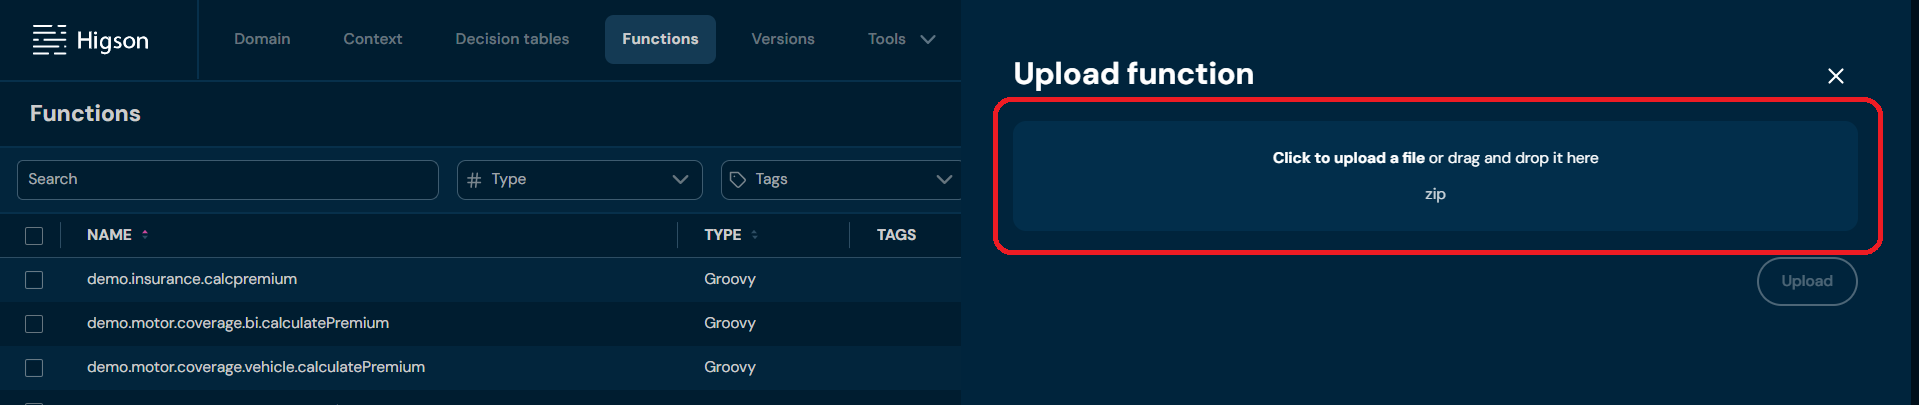
-
Drag&drop desired file or Click to upload a file and choose file in File explorer.
a. If you choose a file with extension other than ZIP, then validation error will pop up to learn how the correct file looks like go here.
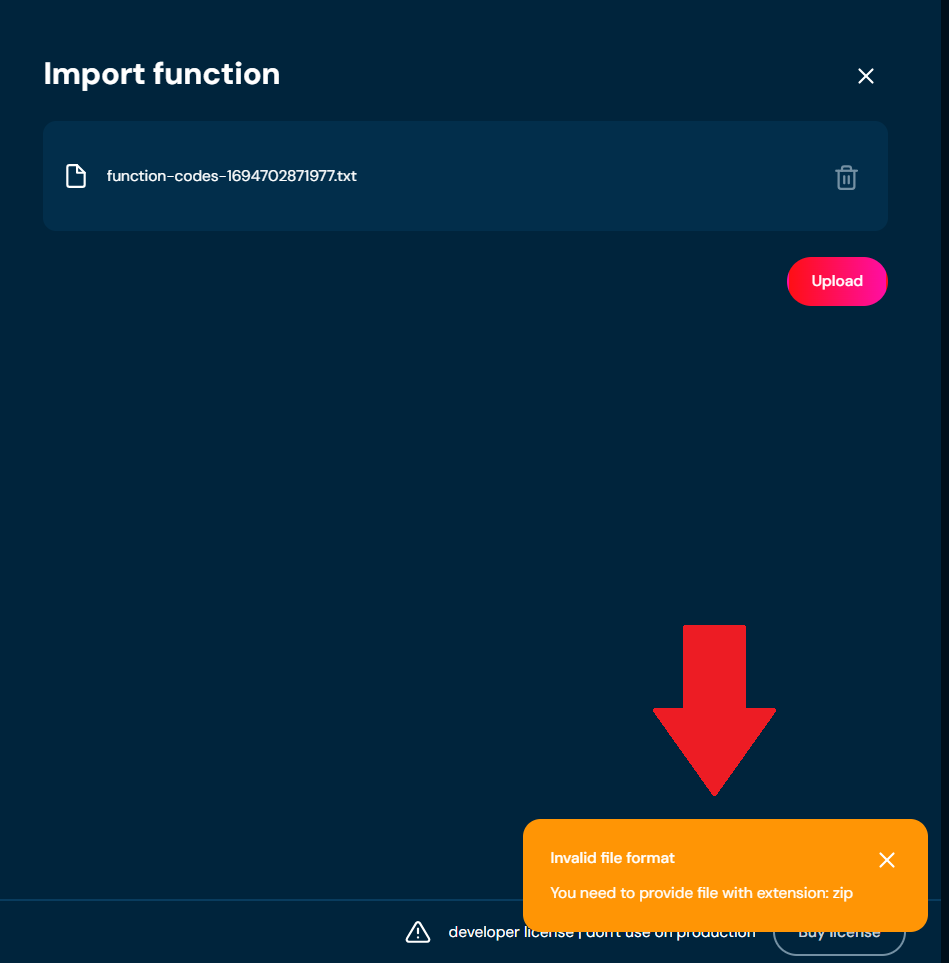
b. If there is some problem with the data in the ZIP file you provided, then validation error will pop up.
-
If the file loads correctly, it may be uploaded to the environment. File will load correctly if there is no file format problem.
a. If validation error occurs (see above), then no function will be uploaded.
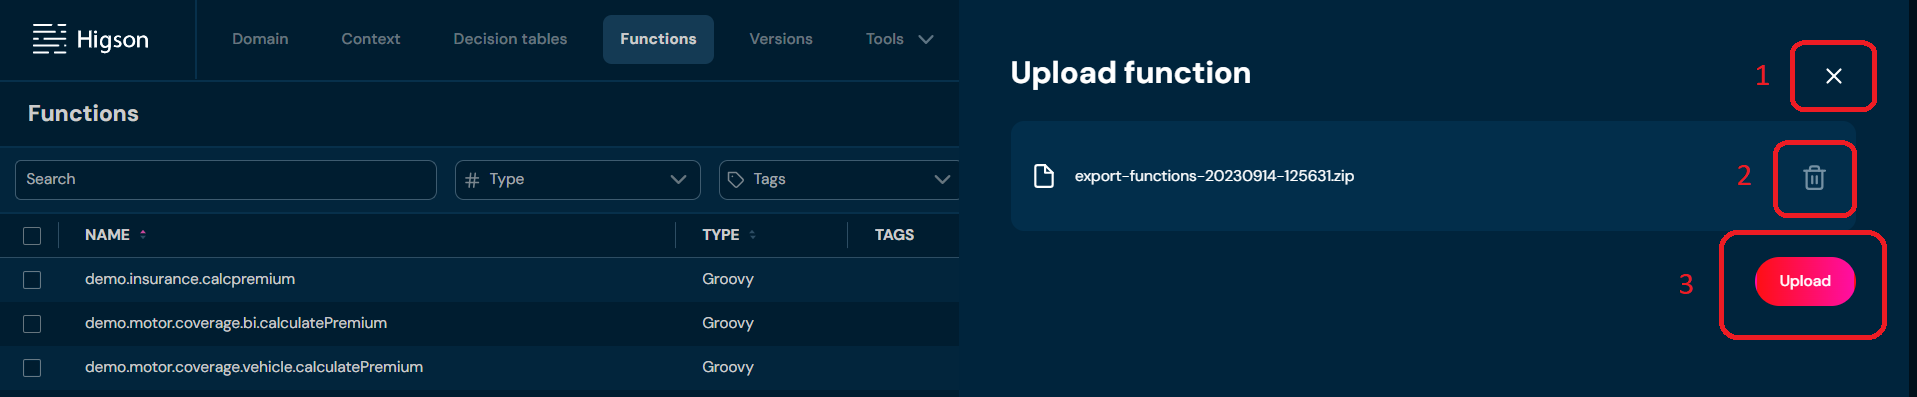
No. Field/Button code Description 1 Close Aborts the upload process. 2 Delete Removes the loaded file. When clicked, you will need to provide the file to load for the upload process to be completed. 3 Upload Uploads the loaded file to the system. The report of the upload will show. -
Click Upload
-
When Upload is completed, the progress bar at 100% shows and the report is visible below.
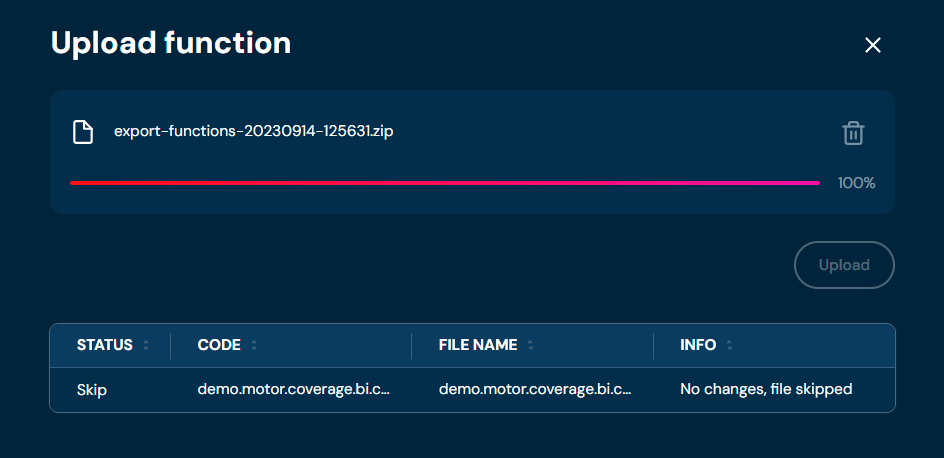
It allows you to check all the imported elements and if any problems during upload occurred.
Mass Export to XLSx#
If you want to download one or more functions, follow these steps:
-
Choose Functions in Main toolbar.
-
Select one or more function.
a. Select the top checkbox to select all functions in the view, or select individual checkboxes to select one or multiple functions
-
From drop-down menu More actions choose Mass export to XLSx
a. If action Mass export to XLSx is greyed out, it means that no function has been selected.
b. Choosing Mass export to XLSx downloads a ZIP file that contains files with functions’ body (one file per function) and XLSX file with functions’ details.
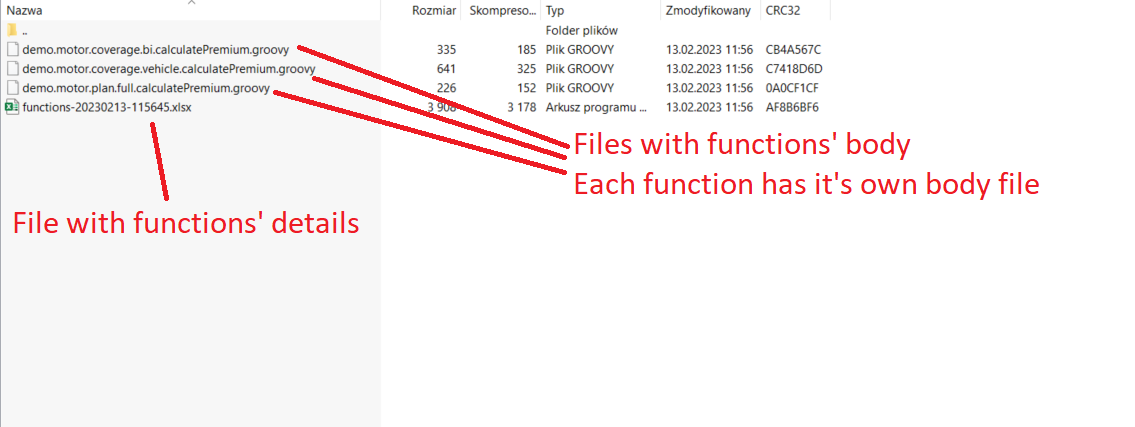

Extract Codes#
If you want to extract one or more functions, follow these steps:
-
Choose Functions in Main toolbar.
-
Select one or more function.
a. Select the top checkbox to select all functions in the view, or select individual checkboxes to select one or multiple functions
-
From drop-down menu More actions choose Extract codes
a. If action Extract codes is greyed out, it means that no function has been selected.
b. Selecting Extract codes downloads a XLSX file that contains Code, SHA and Region columns
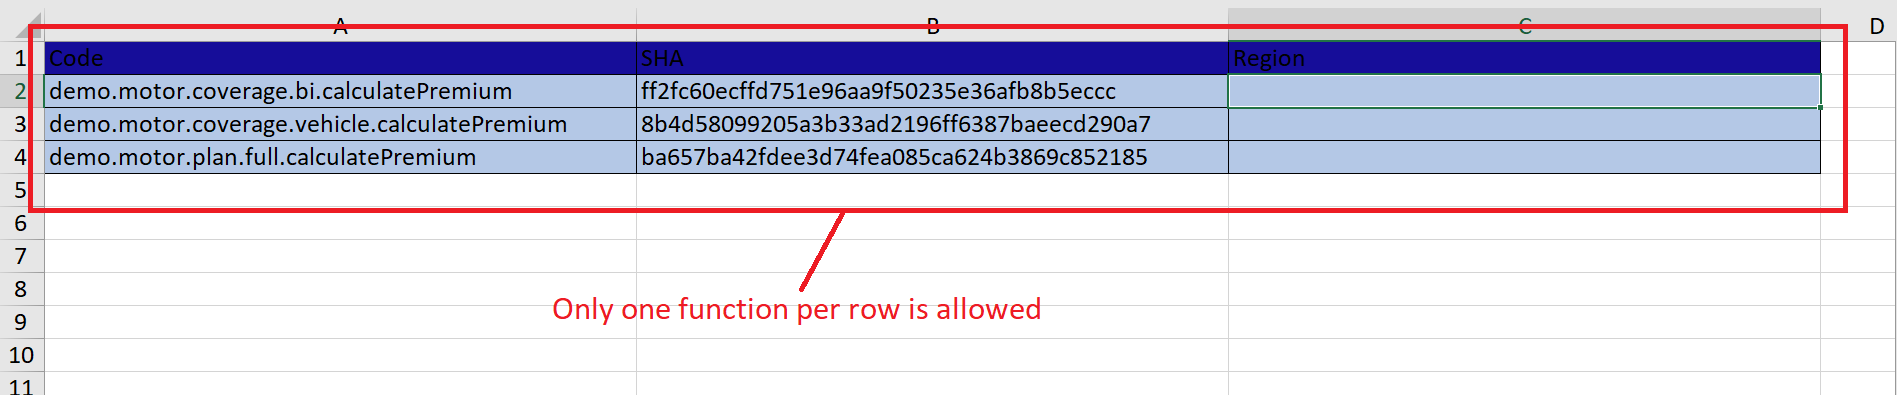
Download Codes#
If you want to download one or more function codes, follow these steps:
-
Choose Functions in Main toolbar.
-
Select one or more function.
a. Select the top checkbox to select all functions in the view, or select individual checkboxes to select one or multiple functions
-
From drop-down menu More actions choose Download codes
a. If action Download codes is greyed out, it means that no function has been selected.
b. Selecting Download codes downloads a TXT file that contains functions’ codes (as in you can see below, one function code per one row)
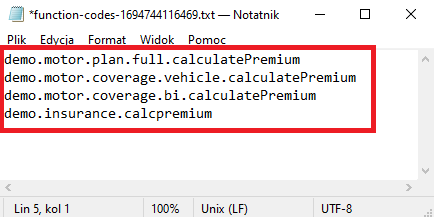
Select from File#
If you want to select one or more functions from the file, follow these steps:
-
Choose Functions in Main toolbar.
-
From drop-down menu More actions choose Select from file
a. Choosing Select from file brings up the Select from file screen

No. Field / Button code Description 1 Upload a file Drag & drop a txt file from your computer or select a txt file through File Explorer. 2 Upload Uploads the loaded file. When clicked, the file gets uploaded and all elements provided in it are compared with elements on the environment. 3 Select Selects (checks checkboxes) for elements on the list from the provided file. -
Drag&drop desired file or Click to upload a file and choose file in File explorer.
a. Correct TXT file should look like this:
b. If you choose a file with extension other than TXT, then validation error will pop up
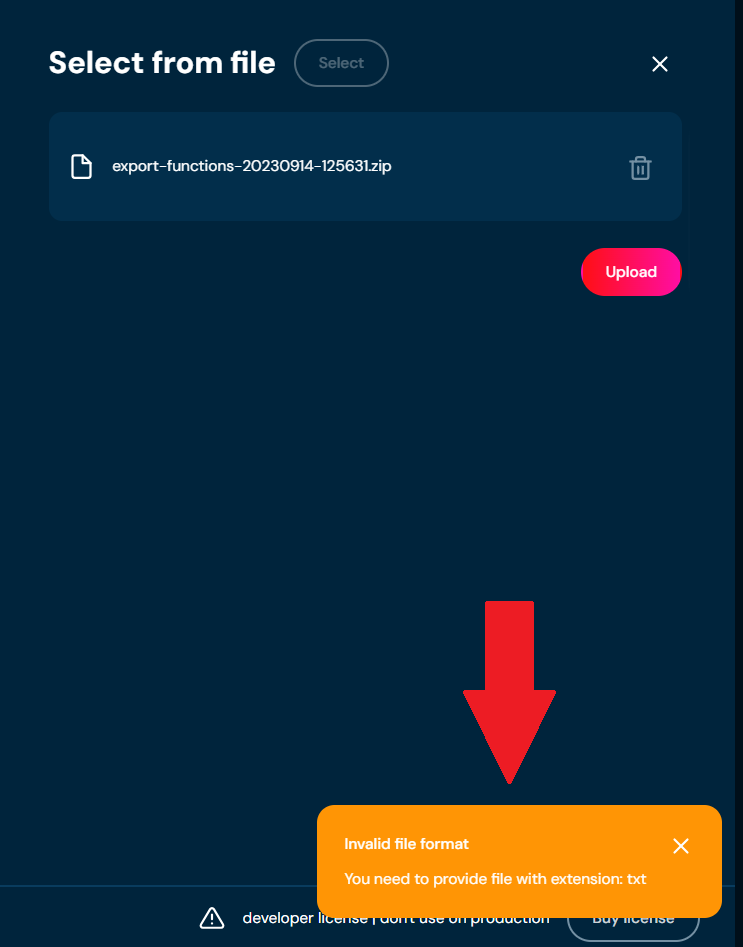
-
When the progress bar reaches 100%, you will be informed which functions will be selected.
a. Functions present in Selected elements table will be selected in step 5. These functions exist both in the TXT file and on the environment.
b. Functions present in Missing from table will not be selected in step 5. These functions exist only in TXT file therefore, they cannot be selected on the environment.
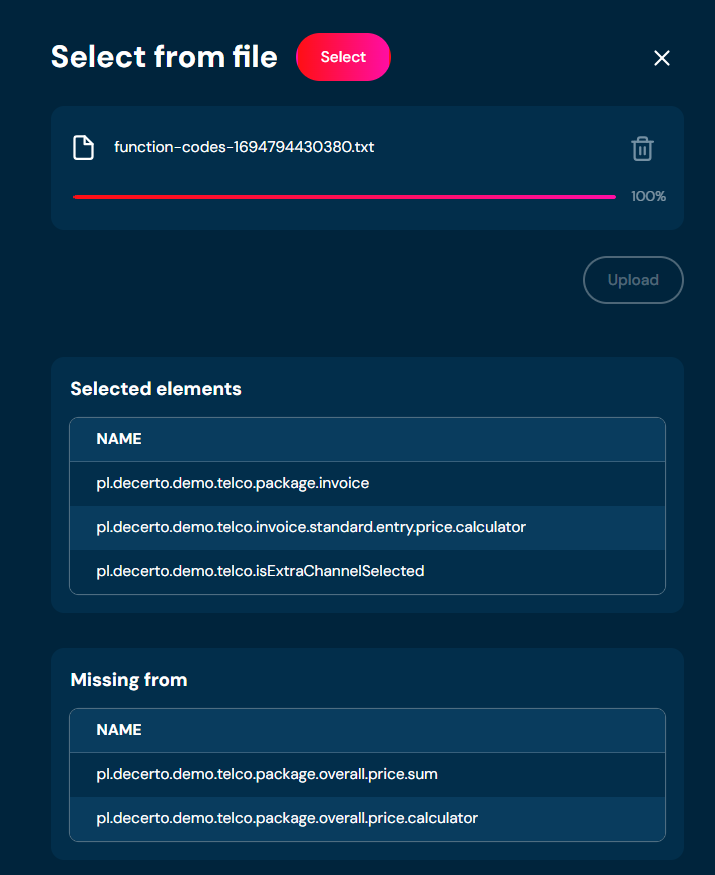
-
Choose Select.
a. All functions that were present in Selected elements table get selected (checkboxes associated with these functions are checked).
Compare with Extract#
Makes a comparison between file and the environment, gives information which element are the same, which changed and which are only in file or only in the environment.
-
Choose Functions in Main toolbar.
-
From drop-down menu More actions choose Compare with extract.
a. Choosing Compare with extract brings up the Compare with extract screen.

-
Drag&drop desired file or Click to upload a file and choose file in File explorer.
a. Correct XLS/XLSX file should look like this:
b. If you choose a file with extension other than XLS/XLSX, then validation error will pop up
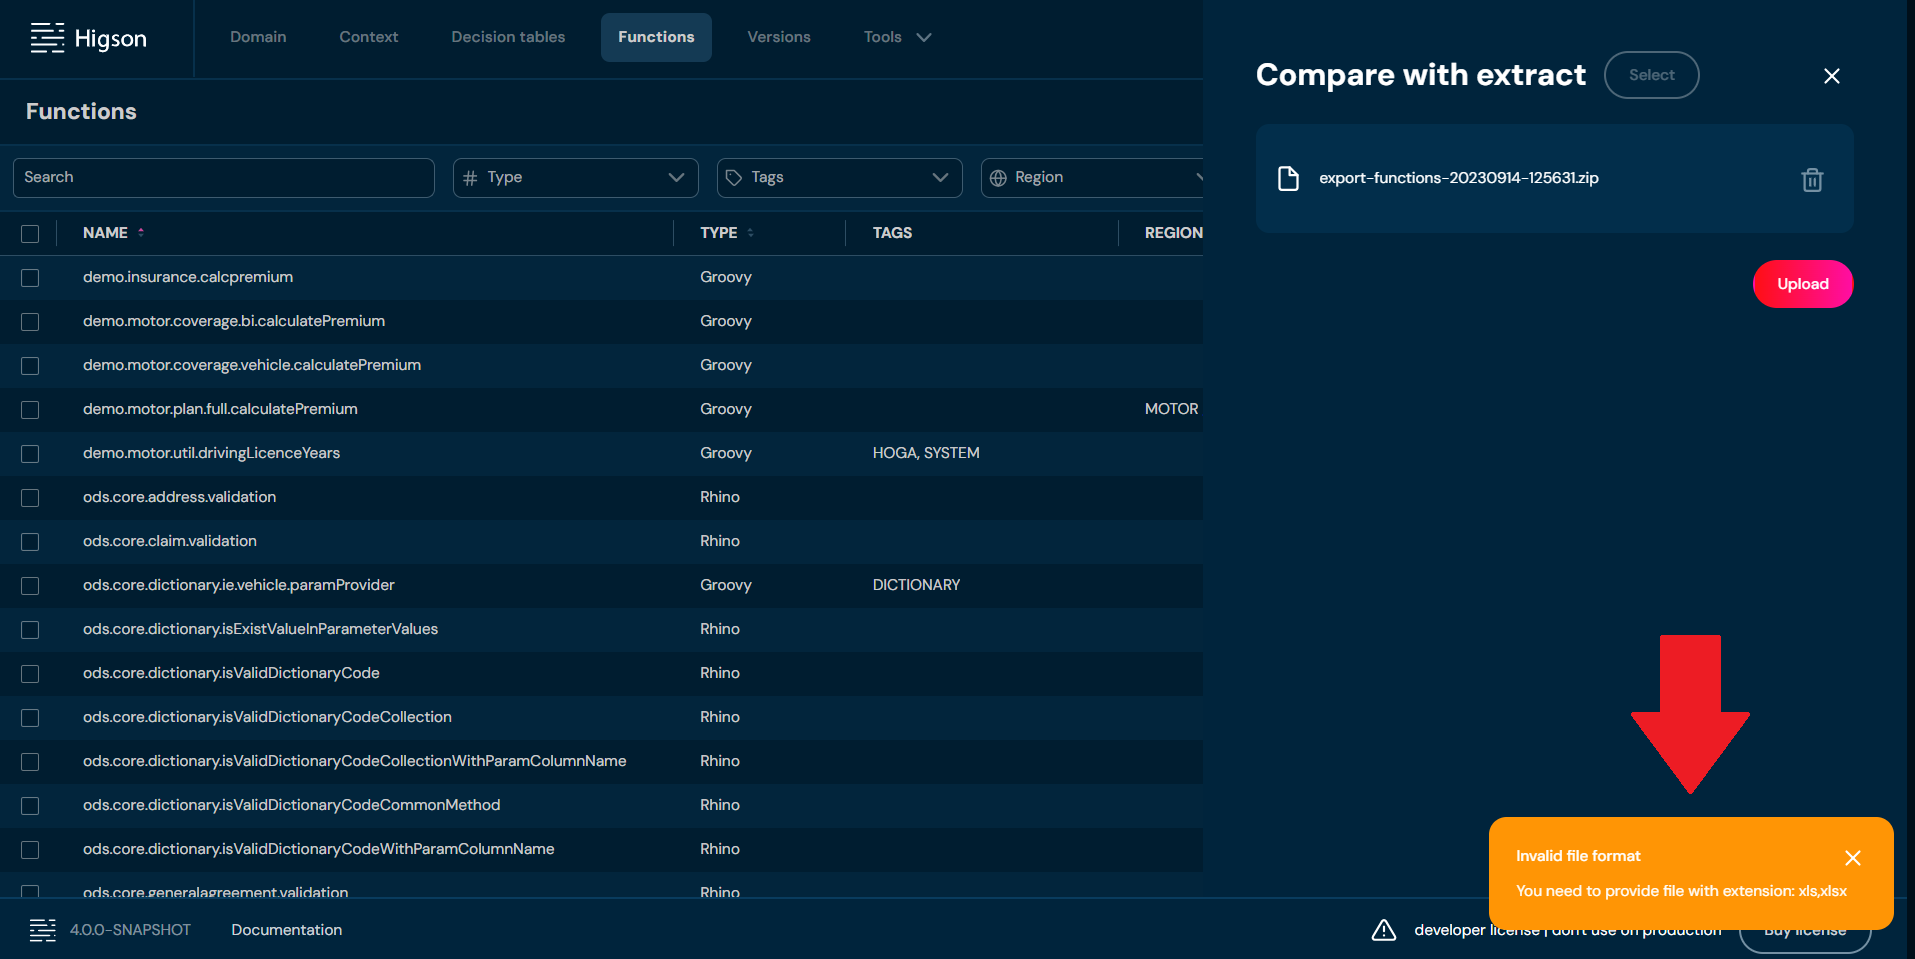
-
When the progress bar reaches 100%, you will be informed about the status of all functions present in the environment and the extract file you provided.
-
In Select section (visible below table with functions’ status) choose which functions will be selected
a. You can select multiple options
b. Matching - functions that are equal between the environment and the extract file will be selected.
c. Different region - functions that are equal but with different regions between the environment and the extract file will be selected.
d. Different name - functions that are equal but with different name between the environment and the extract file will be selected.
e. Missing from extract - functions that are present in the environment but absent from extract file will be selected.
-
Choose Select button.
a. If Select button is greyed out, it means that no checkboxes were selected in step 5.
b. All functions that match the criteria provided in step 5 are selected.
Assign Profile#
If you want to assign a profile to one or more functions, follow these steps:
-
Select Functions from the Main toolbar.
-
Select the functions without an assigned profile by checking the boxes on the left side of the list.
-
From the More Actions drop-down menu, choose Assign Profile.
a. Selecting Assign Profile opens the Assign Profile screen.
-
Select the profile to which you want to assign the function and confirm by clicking Change.
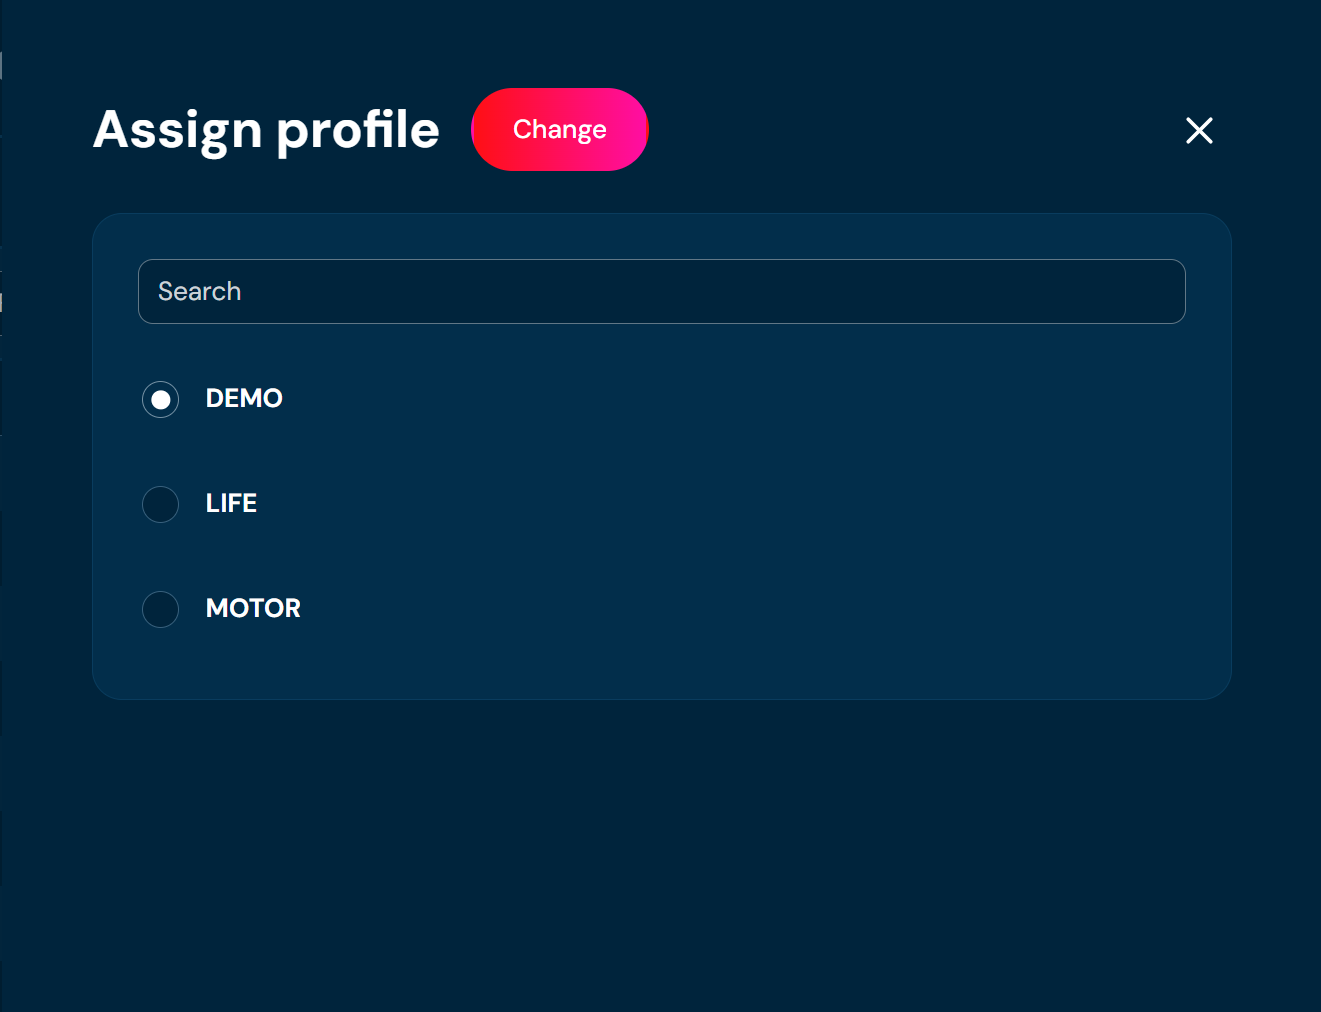
On the functions list view, a profile entry will appear for the assigned functions. The view will also be updated to reflect the selected profile.
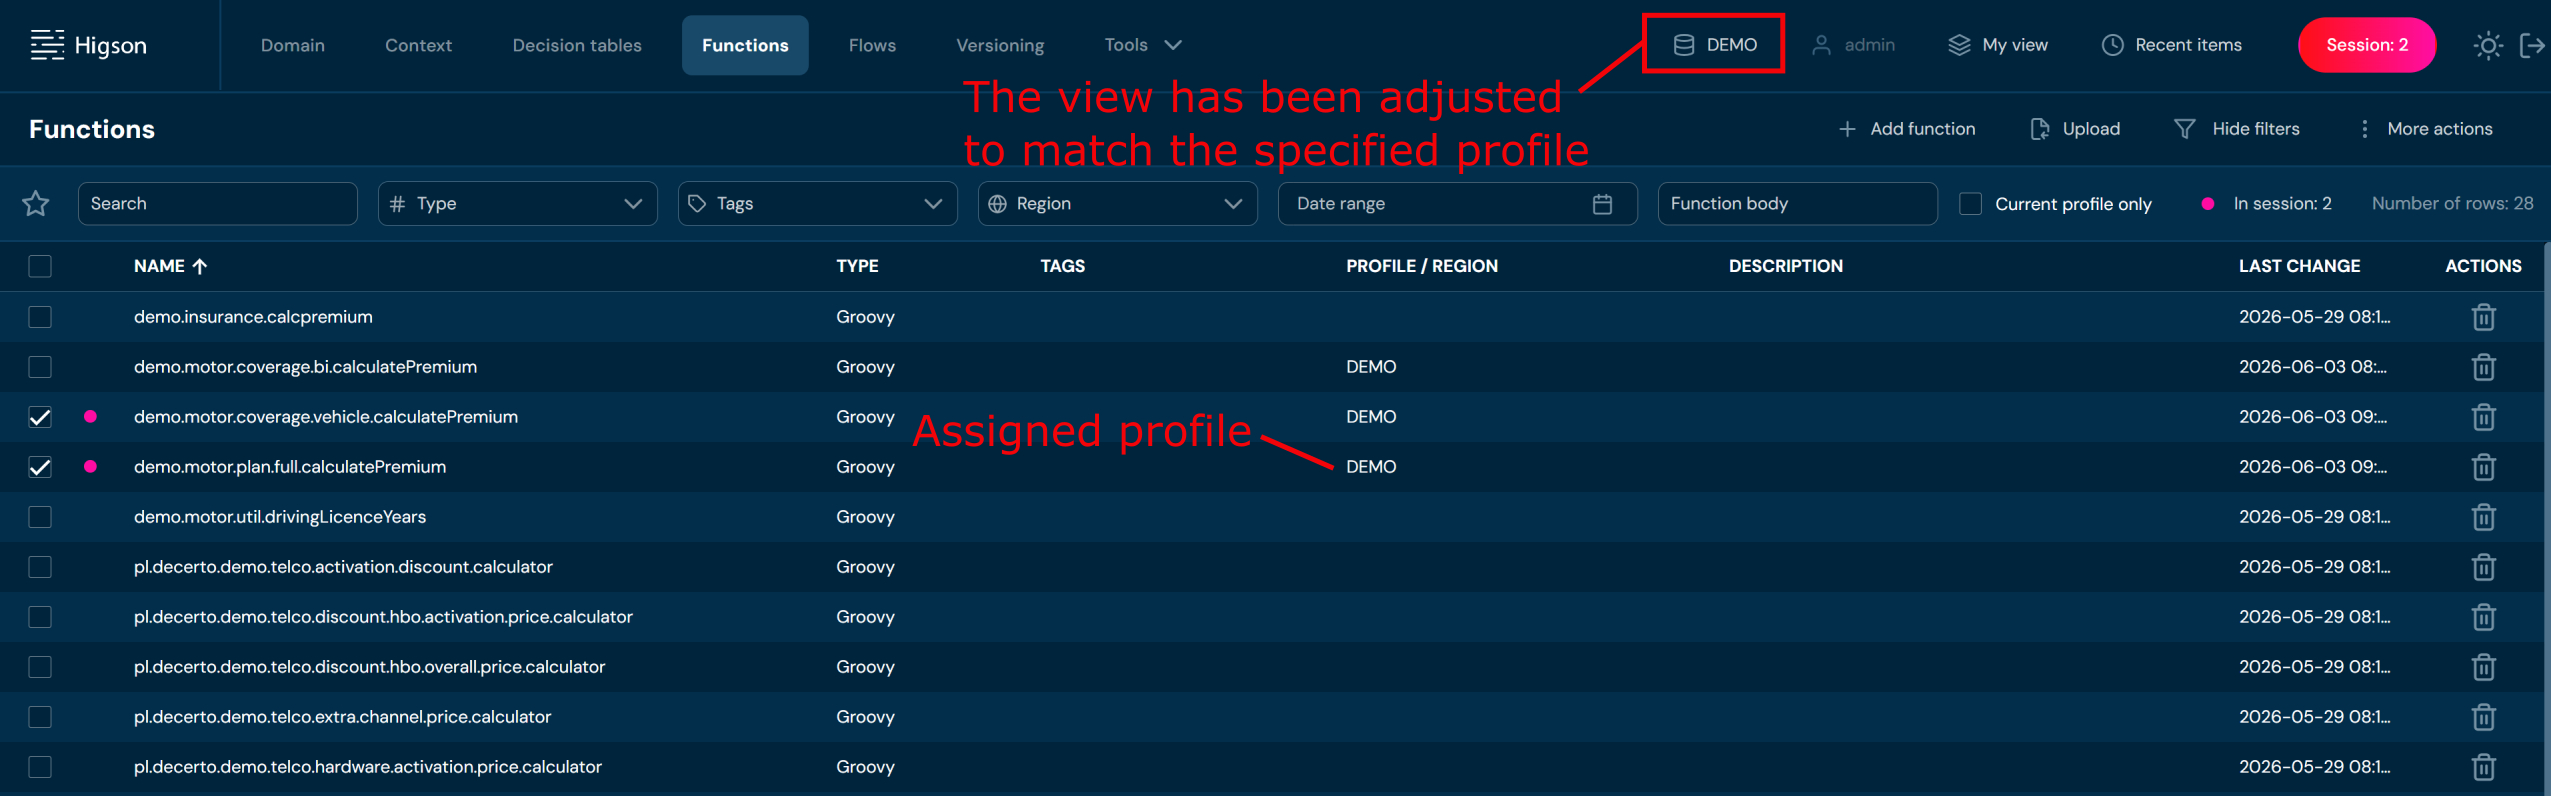
Make Global#
If you want to detach one or more functions from a profile, follow these steps:
-
Select Functions from the Main toolbar.
-
Select the functions with an assigned profile by checking the boxes on the left side of the list.
-
From the More Actions drop-down menu, choose Make Global.
a. A confirmation pop-up will appear.
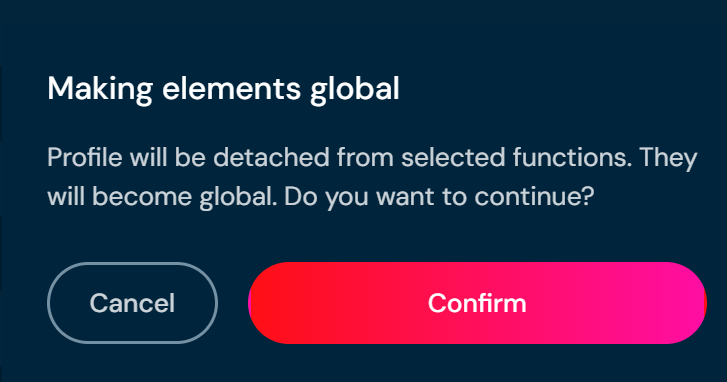
- Click Confirm.
On the functions list view, the profile entry will disappear for the selected functions. The view will also be updated to global.
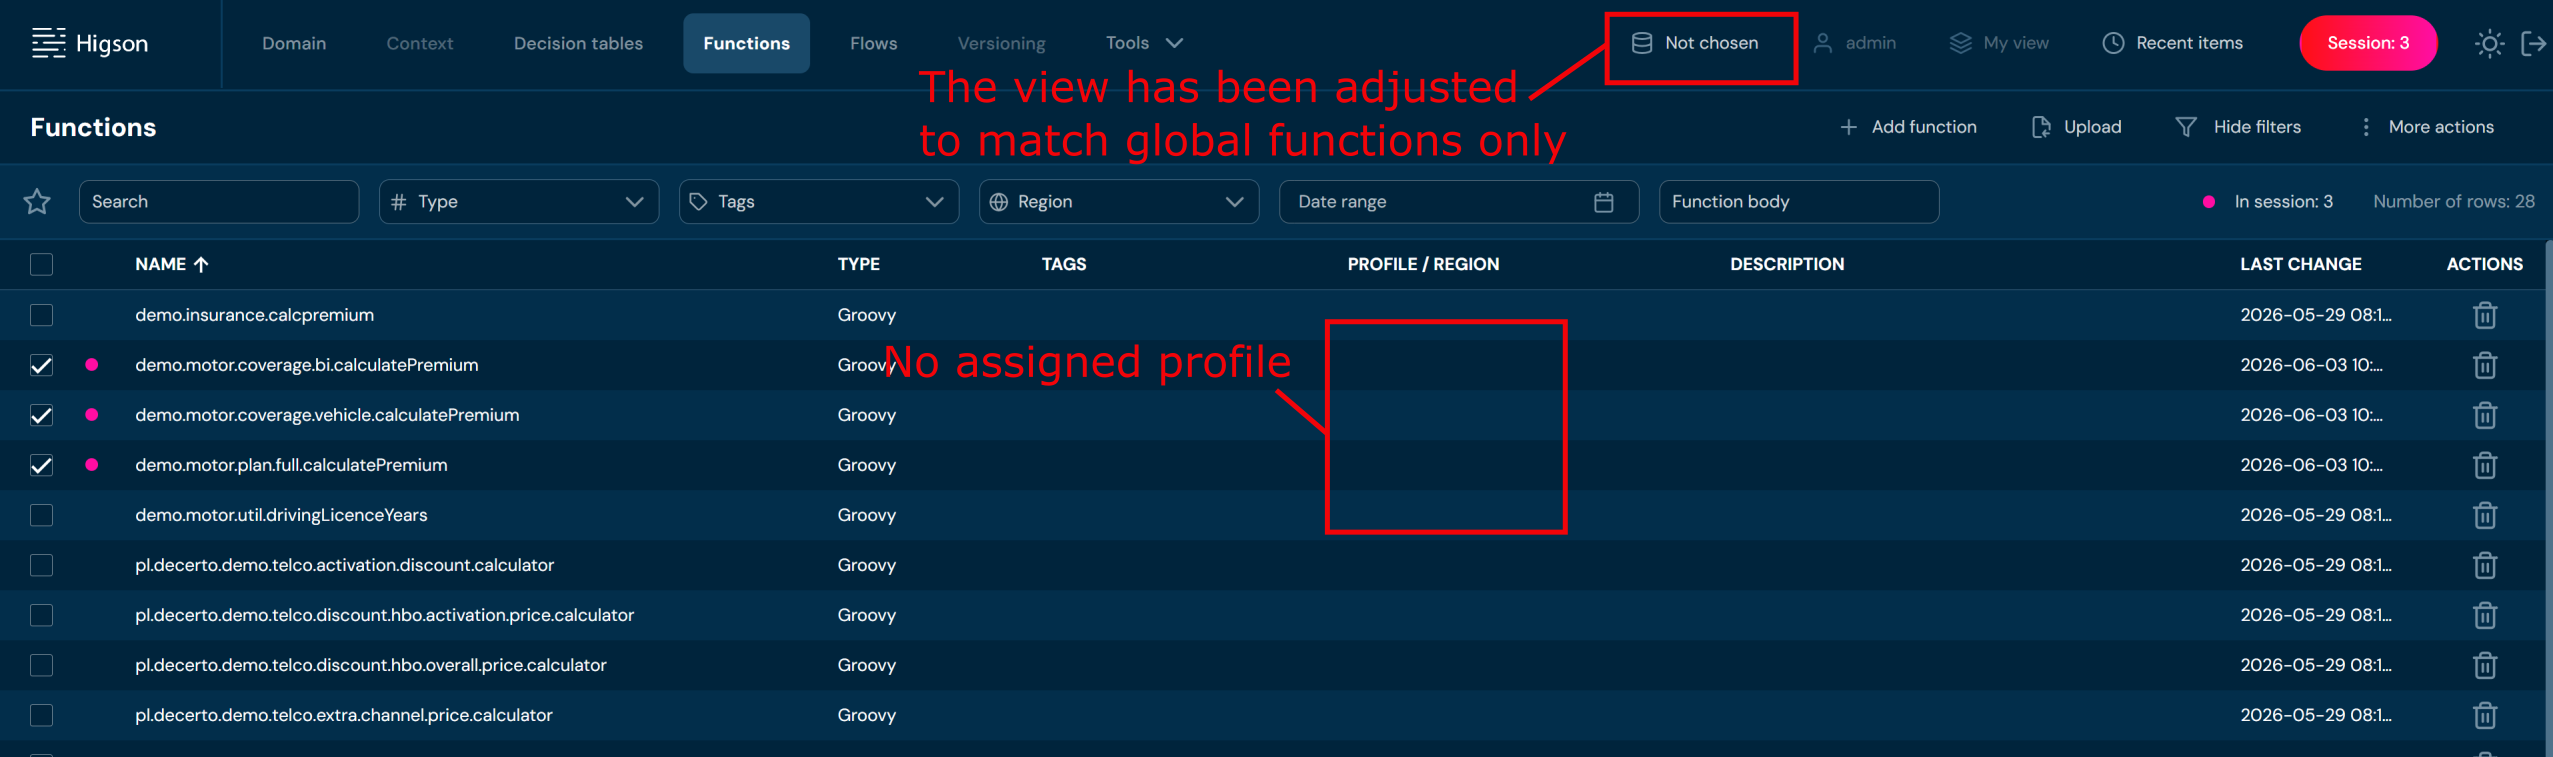
Add Region#
To attach a function to a region, function must first be assigned to a profile. A region belongs to a profile.
If you want to add a region to one or more functions, follow these steps:
-
Choose Functions in Main toolbar.
-
Select one or more functions without a Region.
a. Select the top checkbox to select all functions in the view, or select individual checkboxes to select one or multiple functions.
-
From drop-down menu More actions choose Add region.
a. If action Add region is greyed out, it means that no function has been selected.
b. Choosing Add region brings up the Manage versioning screen.
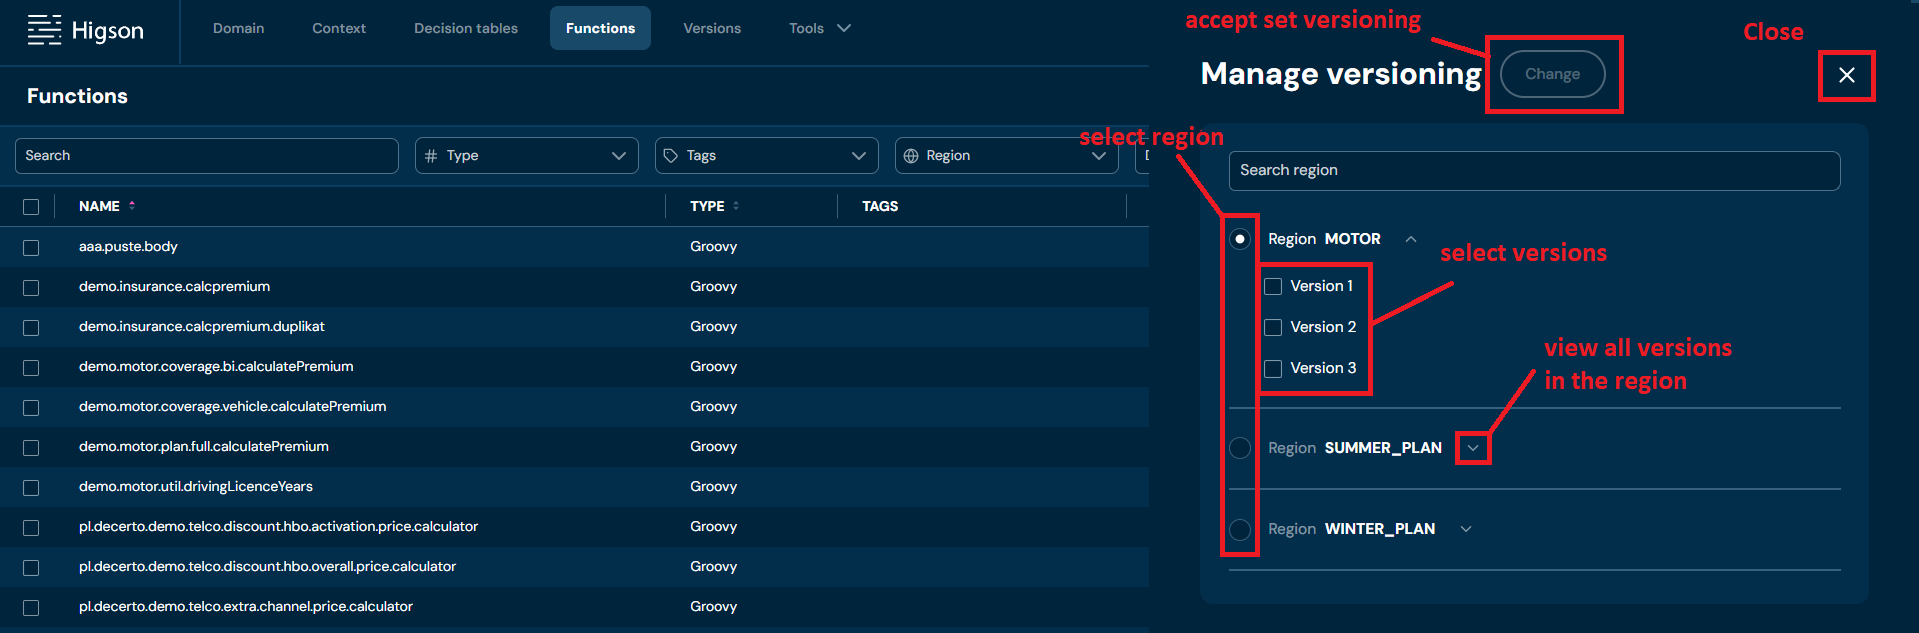
-
Select Region and one or more Version.
-
Choose Change.
a. Region is being assigned to all functions selected in Step 2.
b. If at least one function you selected in Step 2 had assigned Region, then validation error appears and assigning Region process will be aborted.
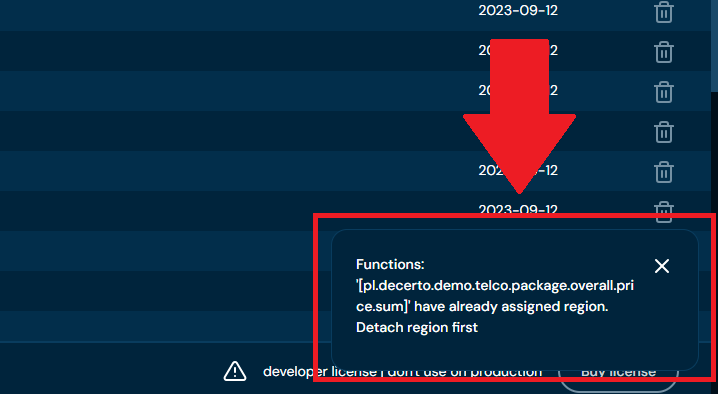
Remove Region#
If you want to remove region from one or more functions, follow these steps:
-
Choose Functions in Main toolbar.
-
Select one or more functions with a Region.
a. Select the top checkbox to select all functions in the view, or select individual checkboxes to select one or multiple functions.
-
From drop-down menu More actions choose Remove region.
a. If action Remove region is greyed out, it means that no function has been selected.
b. After choosing Remove region action, confirmation pop-up will appear.
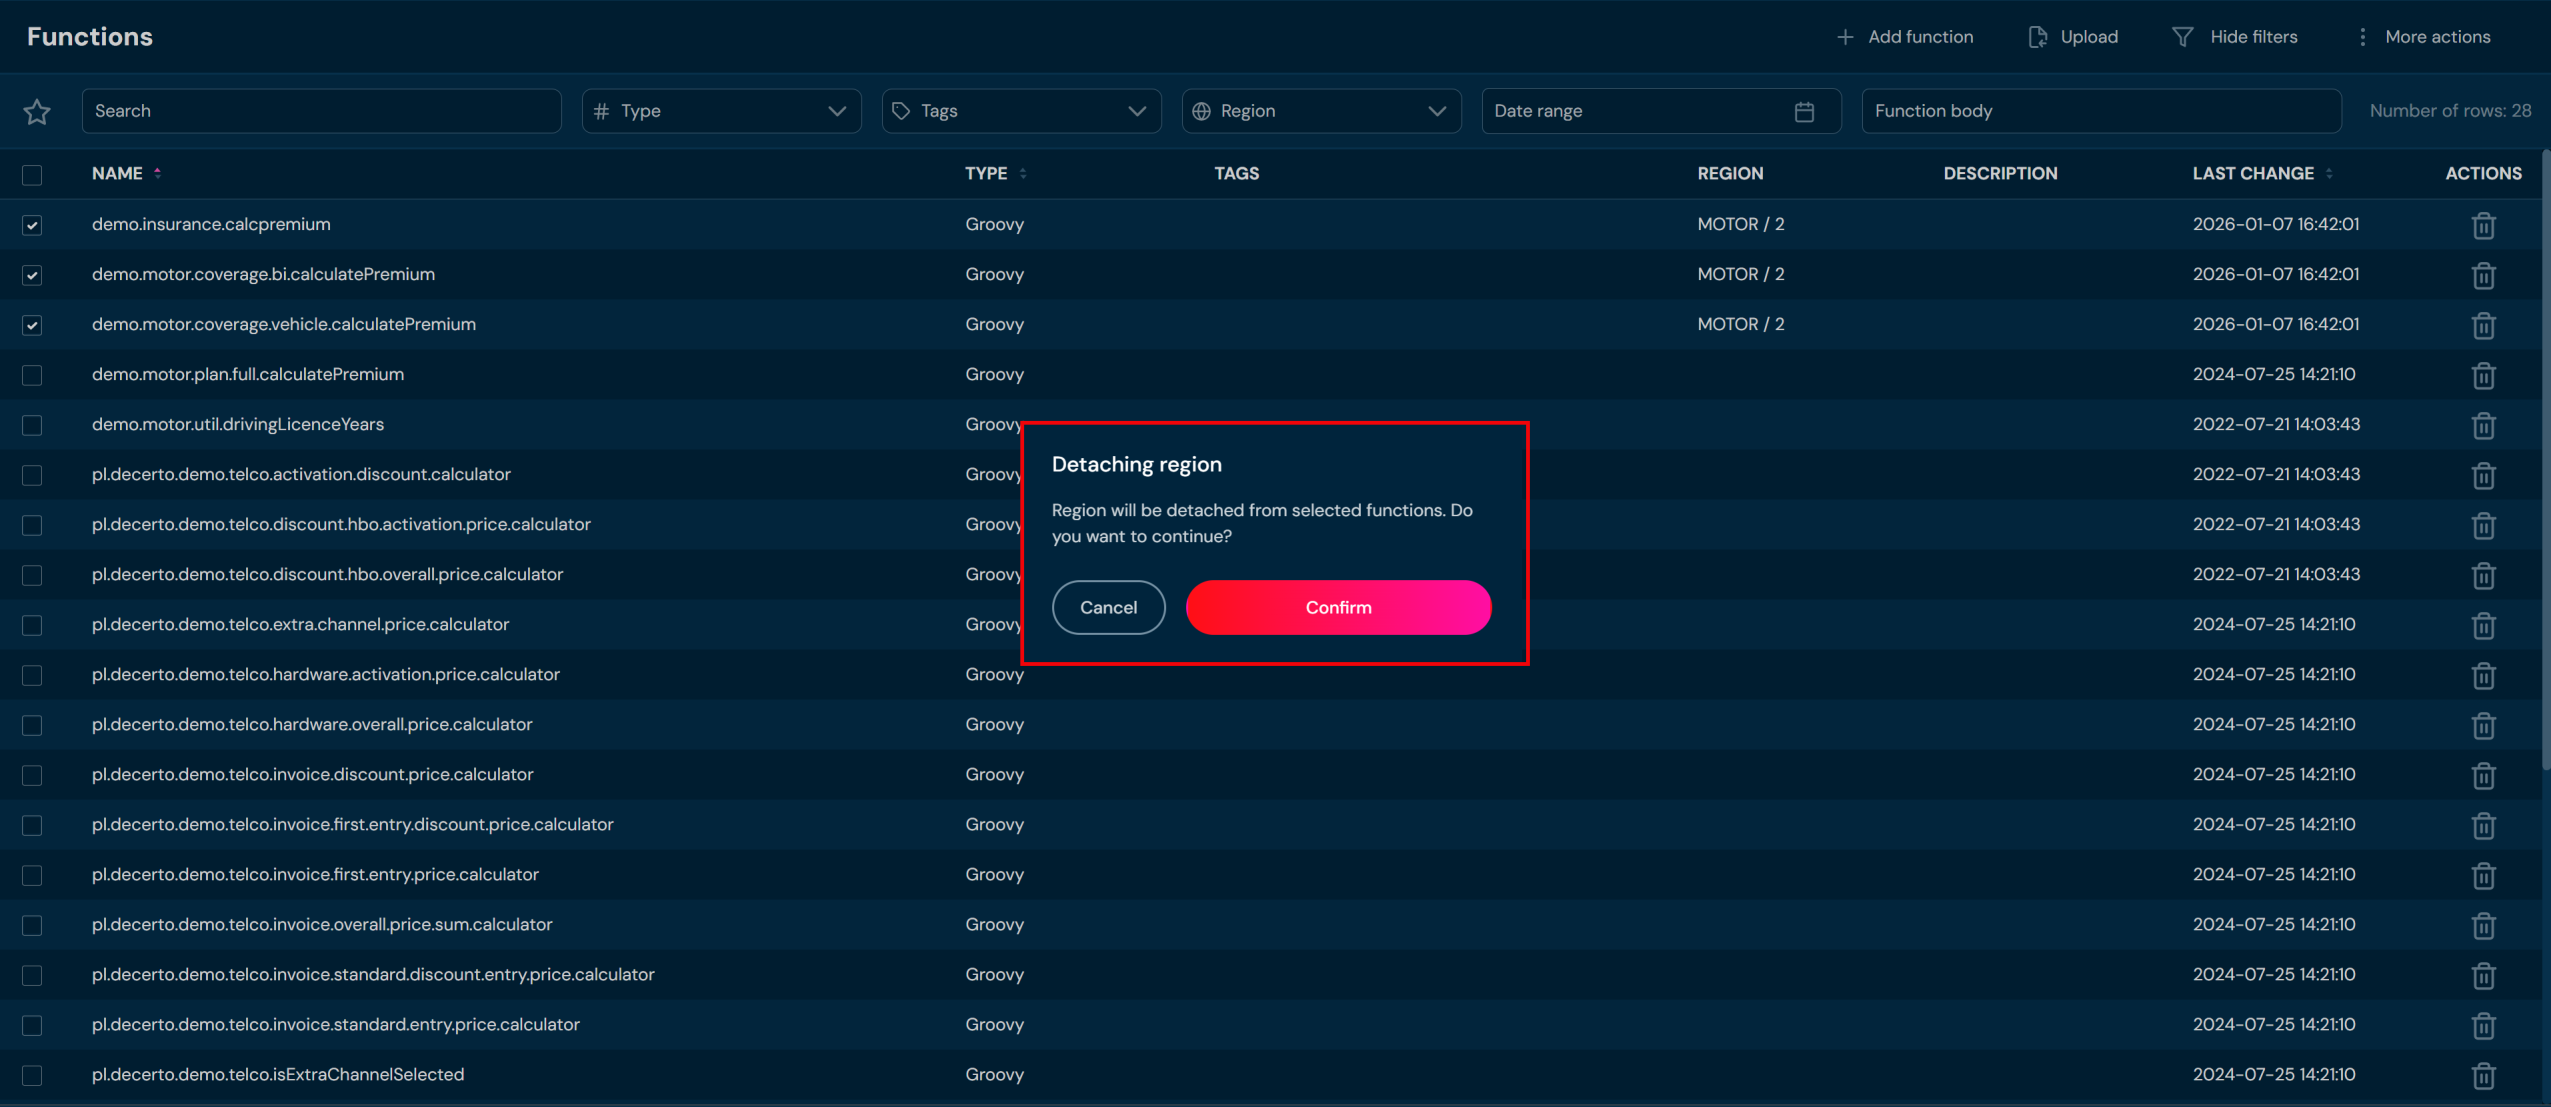
-
Choose Confirm.
d. Regions are being removed from all selected functions.
Manage Tags#
If you want to manage tags for one or more functions, follow these steps:
-
Select the Functions on the Main toolbar.
-
Select one or more functions.
-
From the More Actions drop-down menu, select Manage Tags.
-
Select the tags you are interested in and click Save.
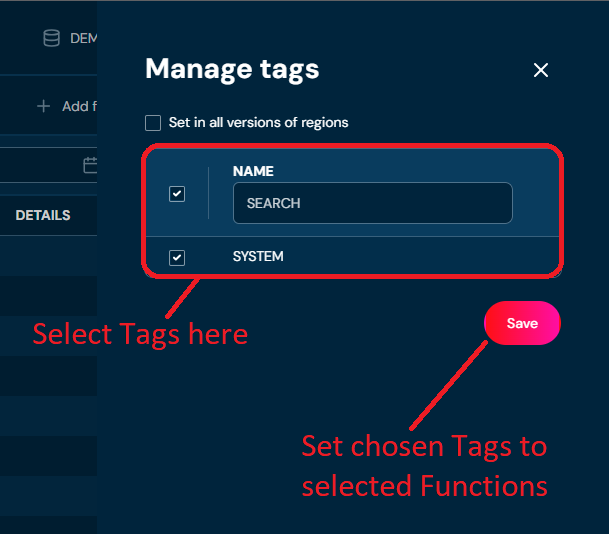
Remove Function#
If you want to delete one or more functions, follow the steps below:
-
Choose Functions in Main toolbar.
-
Select one or more functions.
a. Select the top checkbox to select all functions in the view, or select individual checkboxes to select one or multiple functions.
-
From the drop-down menu More actions choose Remove
a. If action Remove is greyed out, it means that no function has been selected.
b. After choosing Remove action, confirmation pop-up will appear.

-
Choose Confirm.
a. All functions are deleted from the environment.
Function Details Screen#
You can access Function details by left-clicking on the specific function in the List of all functions. Function details screen contains all information about the function, its Description, assigned Region/Tags, function body and function arguments.
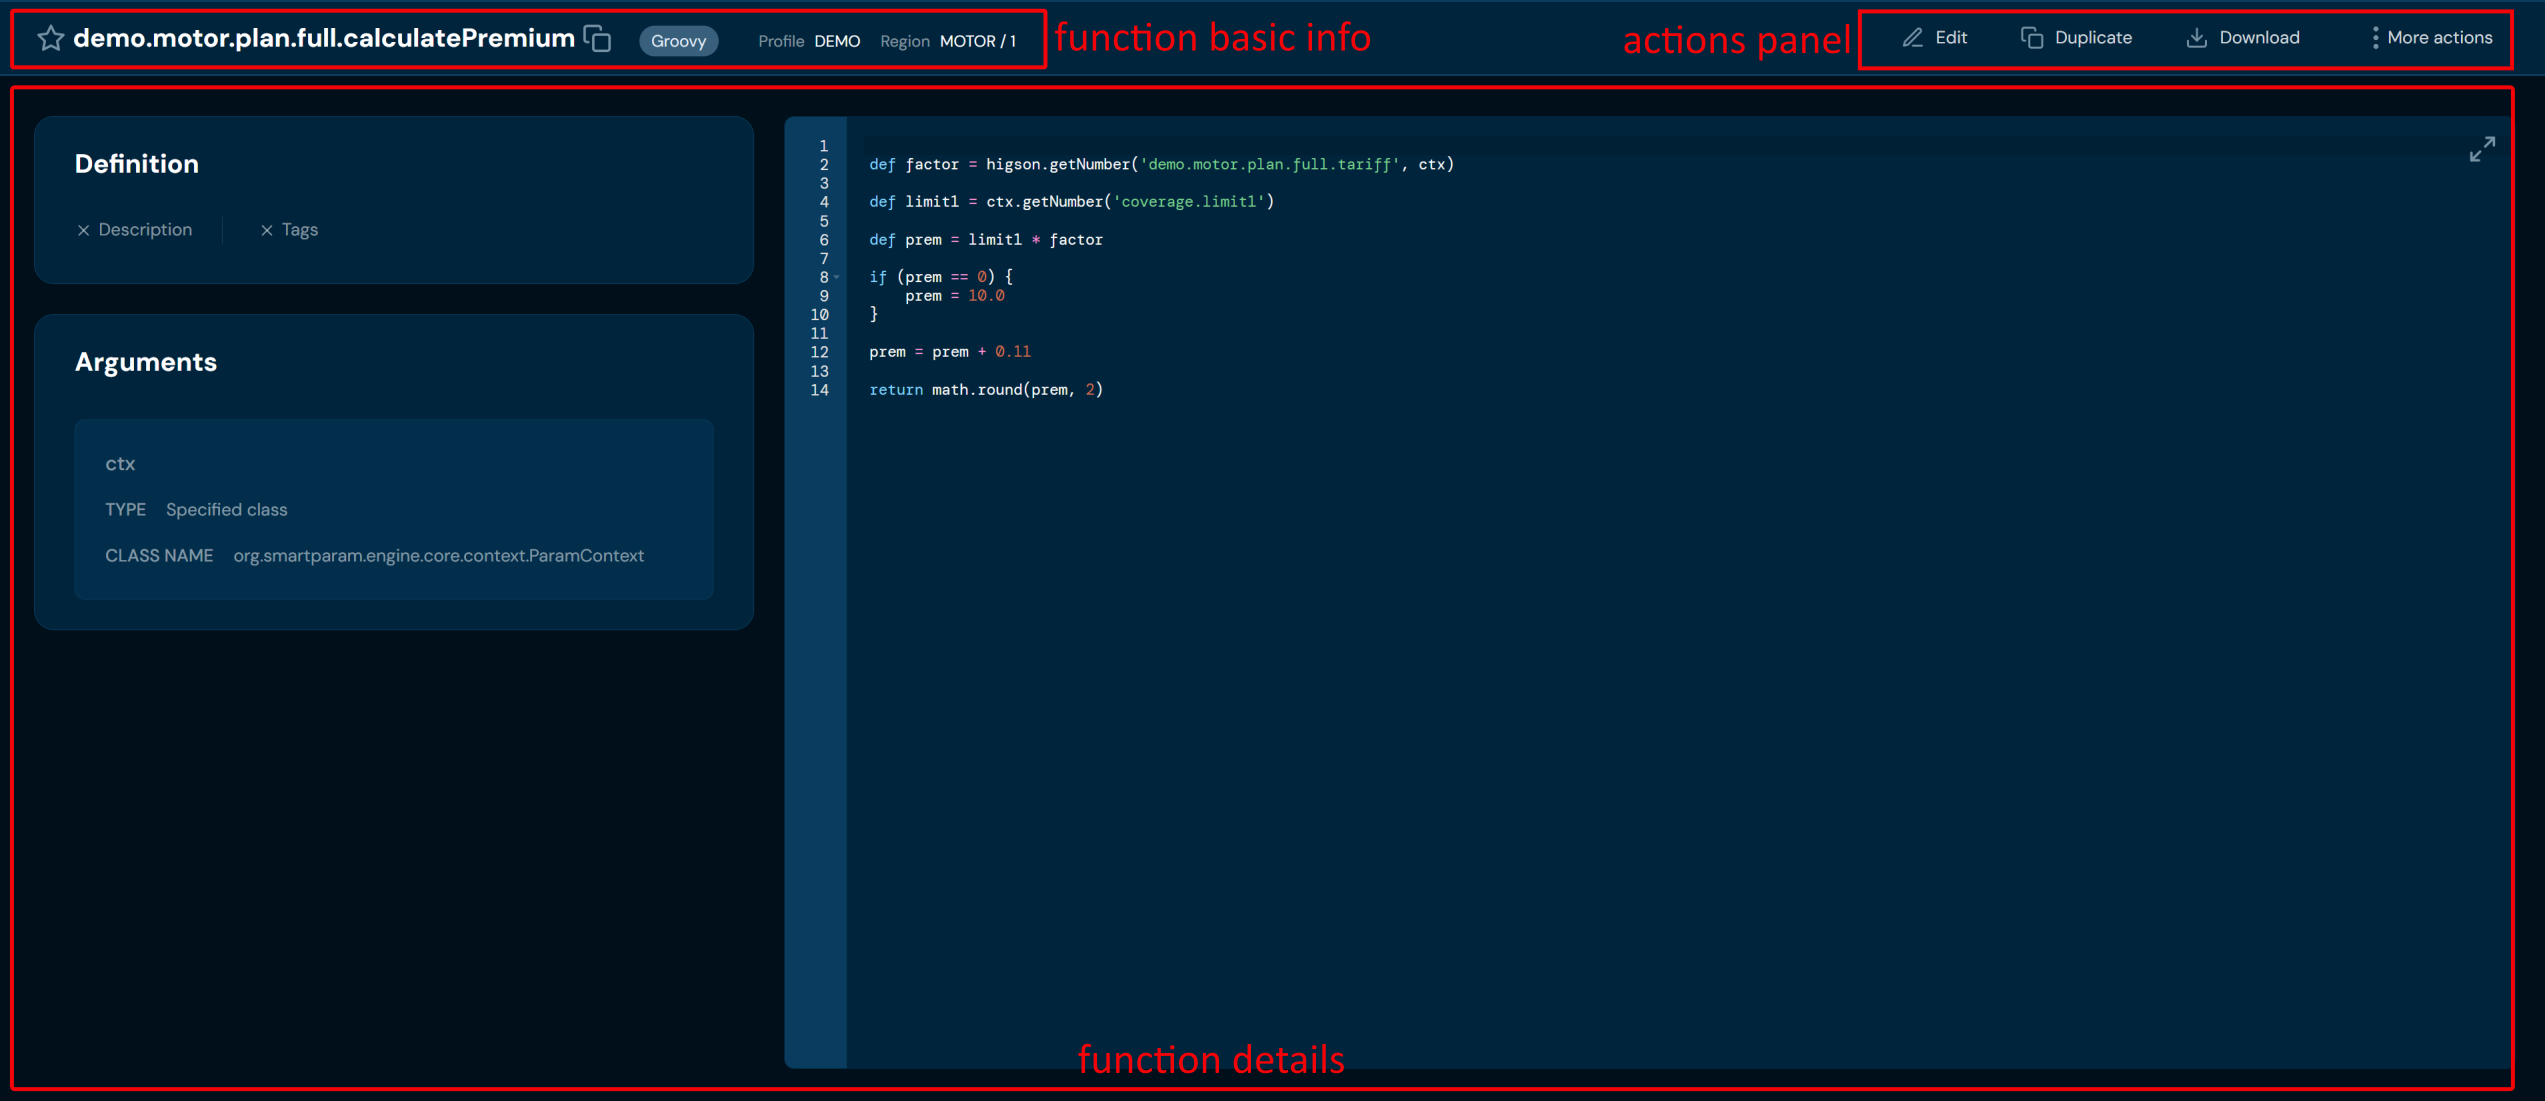
Firstly, function basic info:

| No. | Field/Button code | Description |
|---|---|---|
| 1. | Add to favorites | Adds the element to favorites. |
| 2. | Function code/name | Current function name/code. |
| 3. | Copy name | Copies the function name to clipboard. |
| 4. | Language | Groovy. Defines the programming language in which the function is validated and performed. |
| 5. | Profile | Profile the function is assigned to. |
| 6. | Region | Carries information about region and version attached to the function. |
You can see Available actions for the function below:
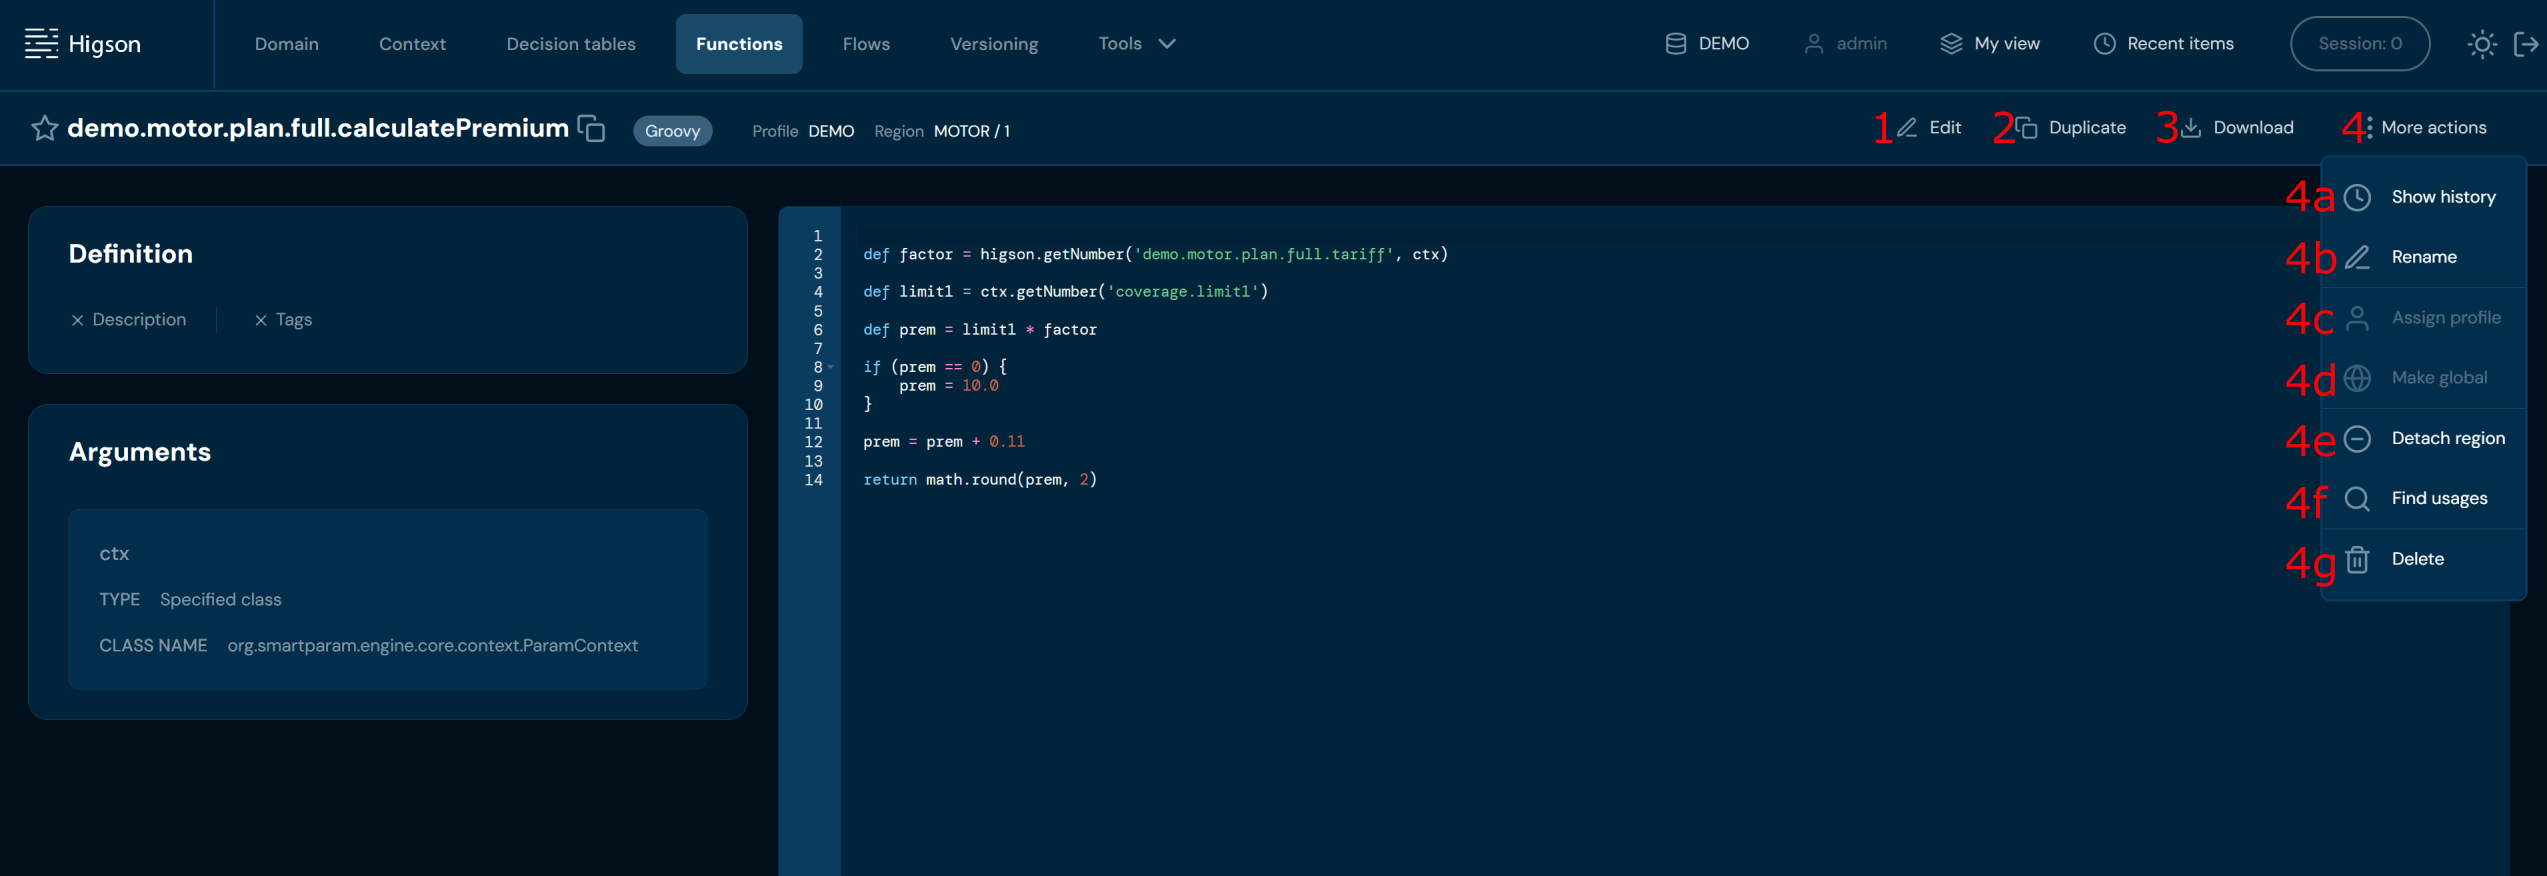
| No. | Action | Description |
|---|---|---|
| 1. | Edit | Enables function edit mode. To learn more about editing function go here. |
| 2. | Duplicate | Allows to duplicate function. Duplicated function has all data the same as the original function. |
| 3. | Download function | Downloads a ZIP file that contains XLSX file and file with function body. |
| 4. | More actions | Drop-down list that contains actions 4a-4g. |
| 4a. | Show history | Opens a new screen with a table of all modifications made on the function. To learn more about function history go here. |
| 4b. | Rename | Allows changing function code/name. To learn more about renaming function go here. |
| 4c. | Assign profile | Assigns the function to a profile. Assigning the function to a profile will ensure that only users with permissions for that profile can access it. |
| 4d. | Make global | Makes the function global. Global functions are visible regardless of profile permissions. |
| 4e. | Detach/Attach | Allows managing region and versions attached to the function. |
| 4f. | Find usages | Redirects you to Find usages search where you may find every reference to that function. |
| 4g. | Remove | Deletes function. To learn more about removing function go here. |
The main part of the function view includes the most important information about the function that makes it work:
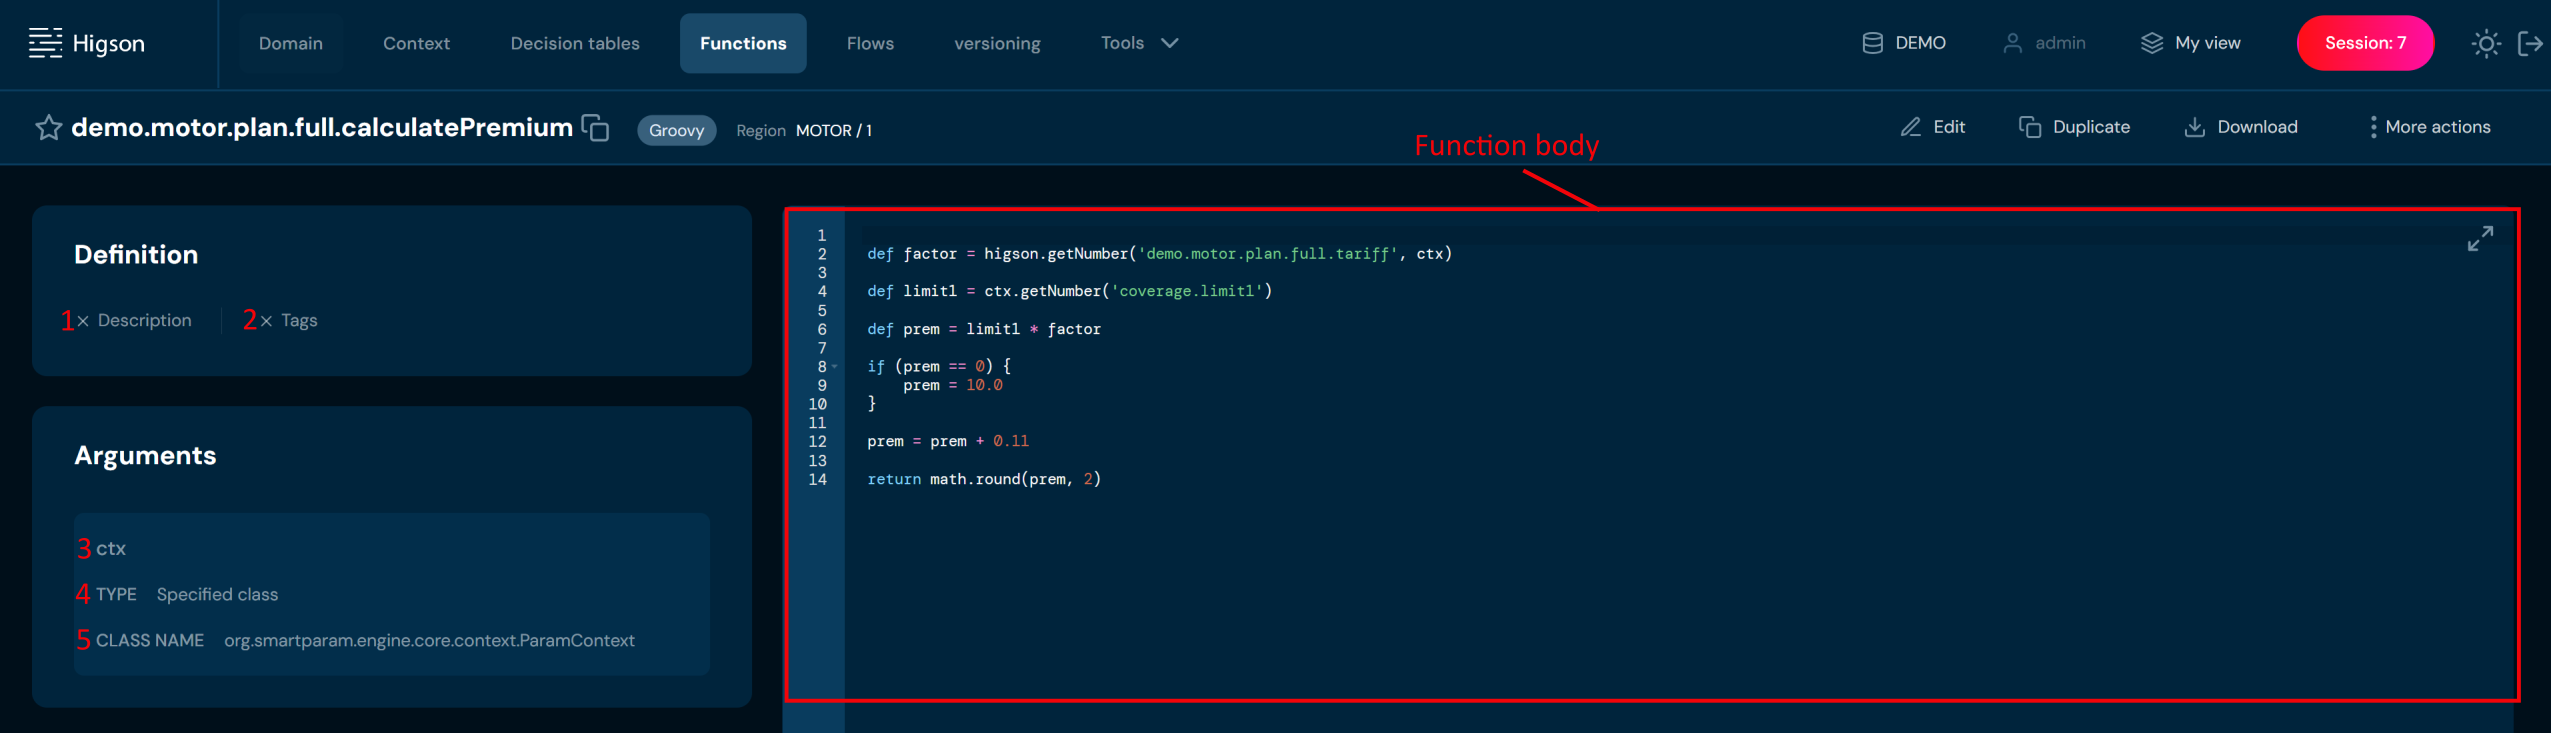
| No. | Action | Description |
|---|---|---|
| 1. | Description | Contains the Description of the function if such was added. |
| 2. | Tags | Contains the tags attached to function. |
| 3. | Argument name | Argument name defined separately for each argument. Must be unique within the function. |
| 4. | Argument type | Argument type selected from the available types list, defined separately for each argument. |
| 5. | Argument class | Argument class name defined separately for each argument. |
Edit Function#
If you want to edit data in a specific function, follow these steps:
-
Choose Functions in Main toolbar.
-
Left-click on the function you wish to edit.
a. Left-clicking on function opens Function details screen.
-
Choose Edit in Available actions.
a. Highlighted borders indicate that edit mode is active.
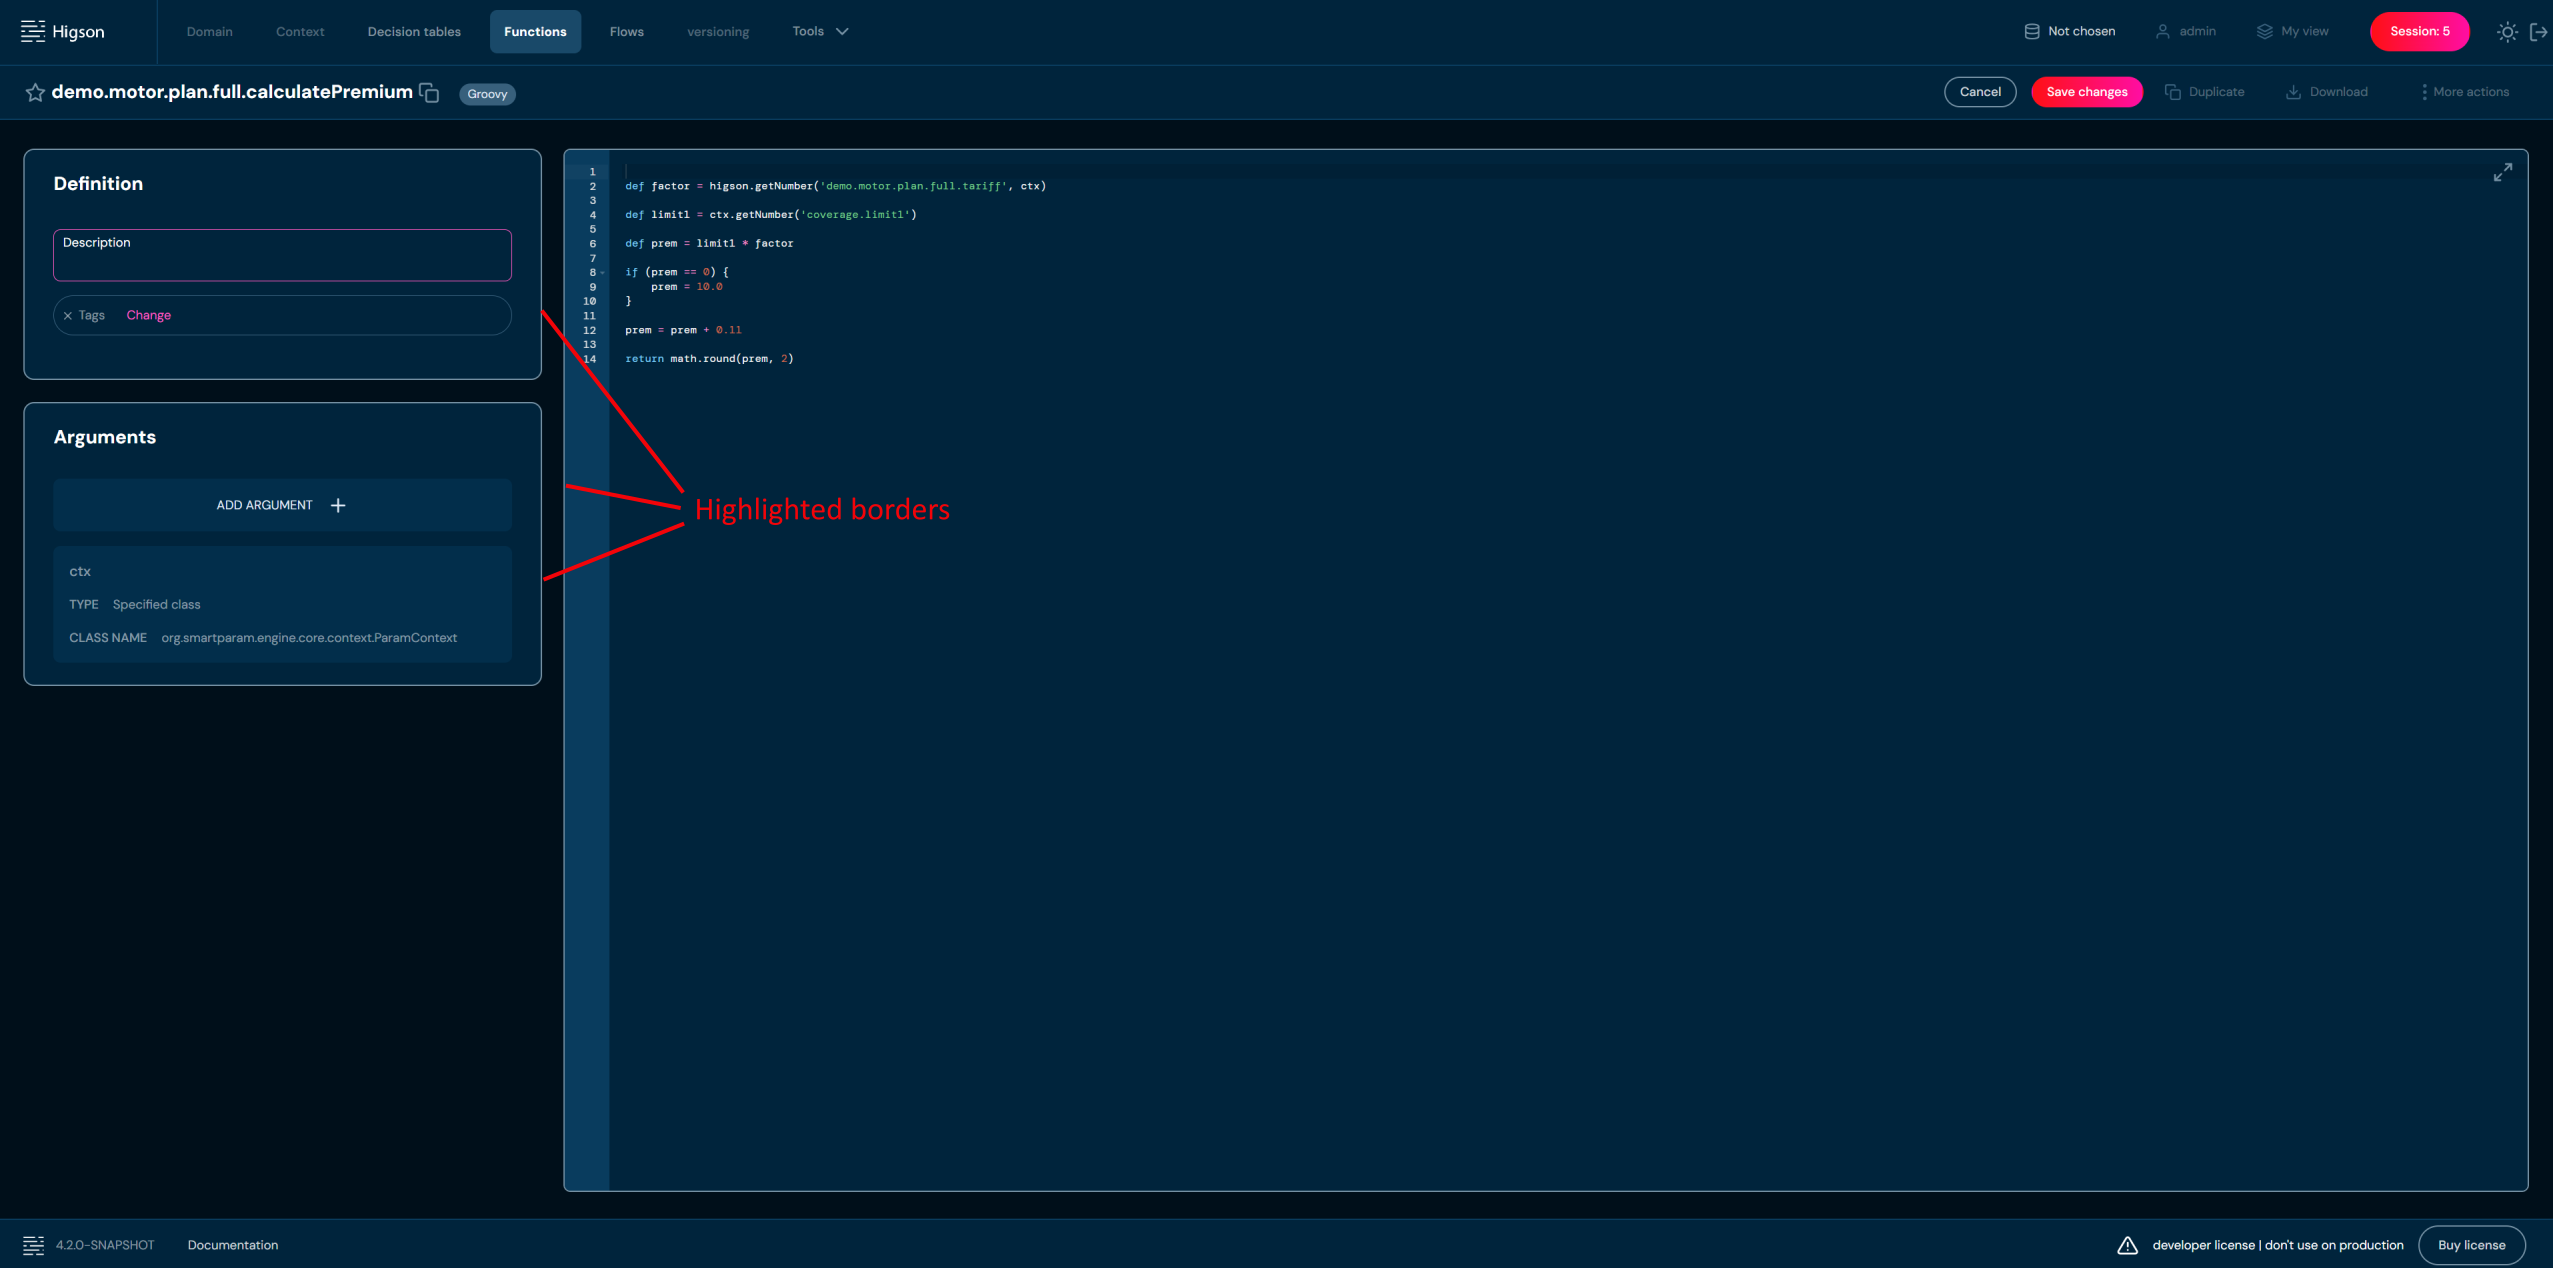
-
Edit any data you need.
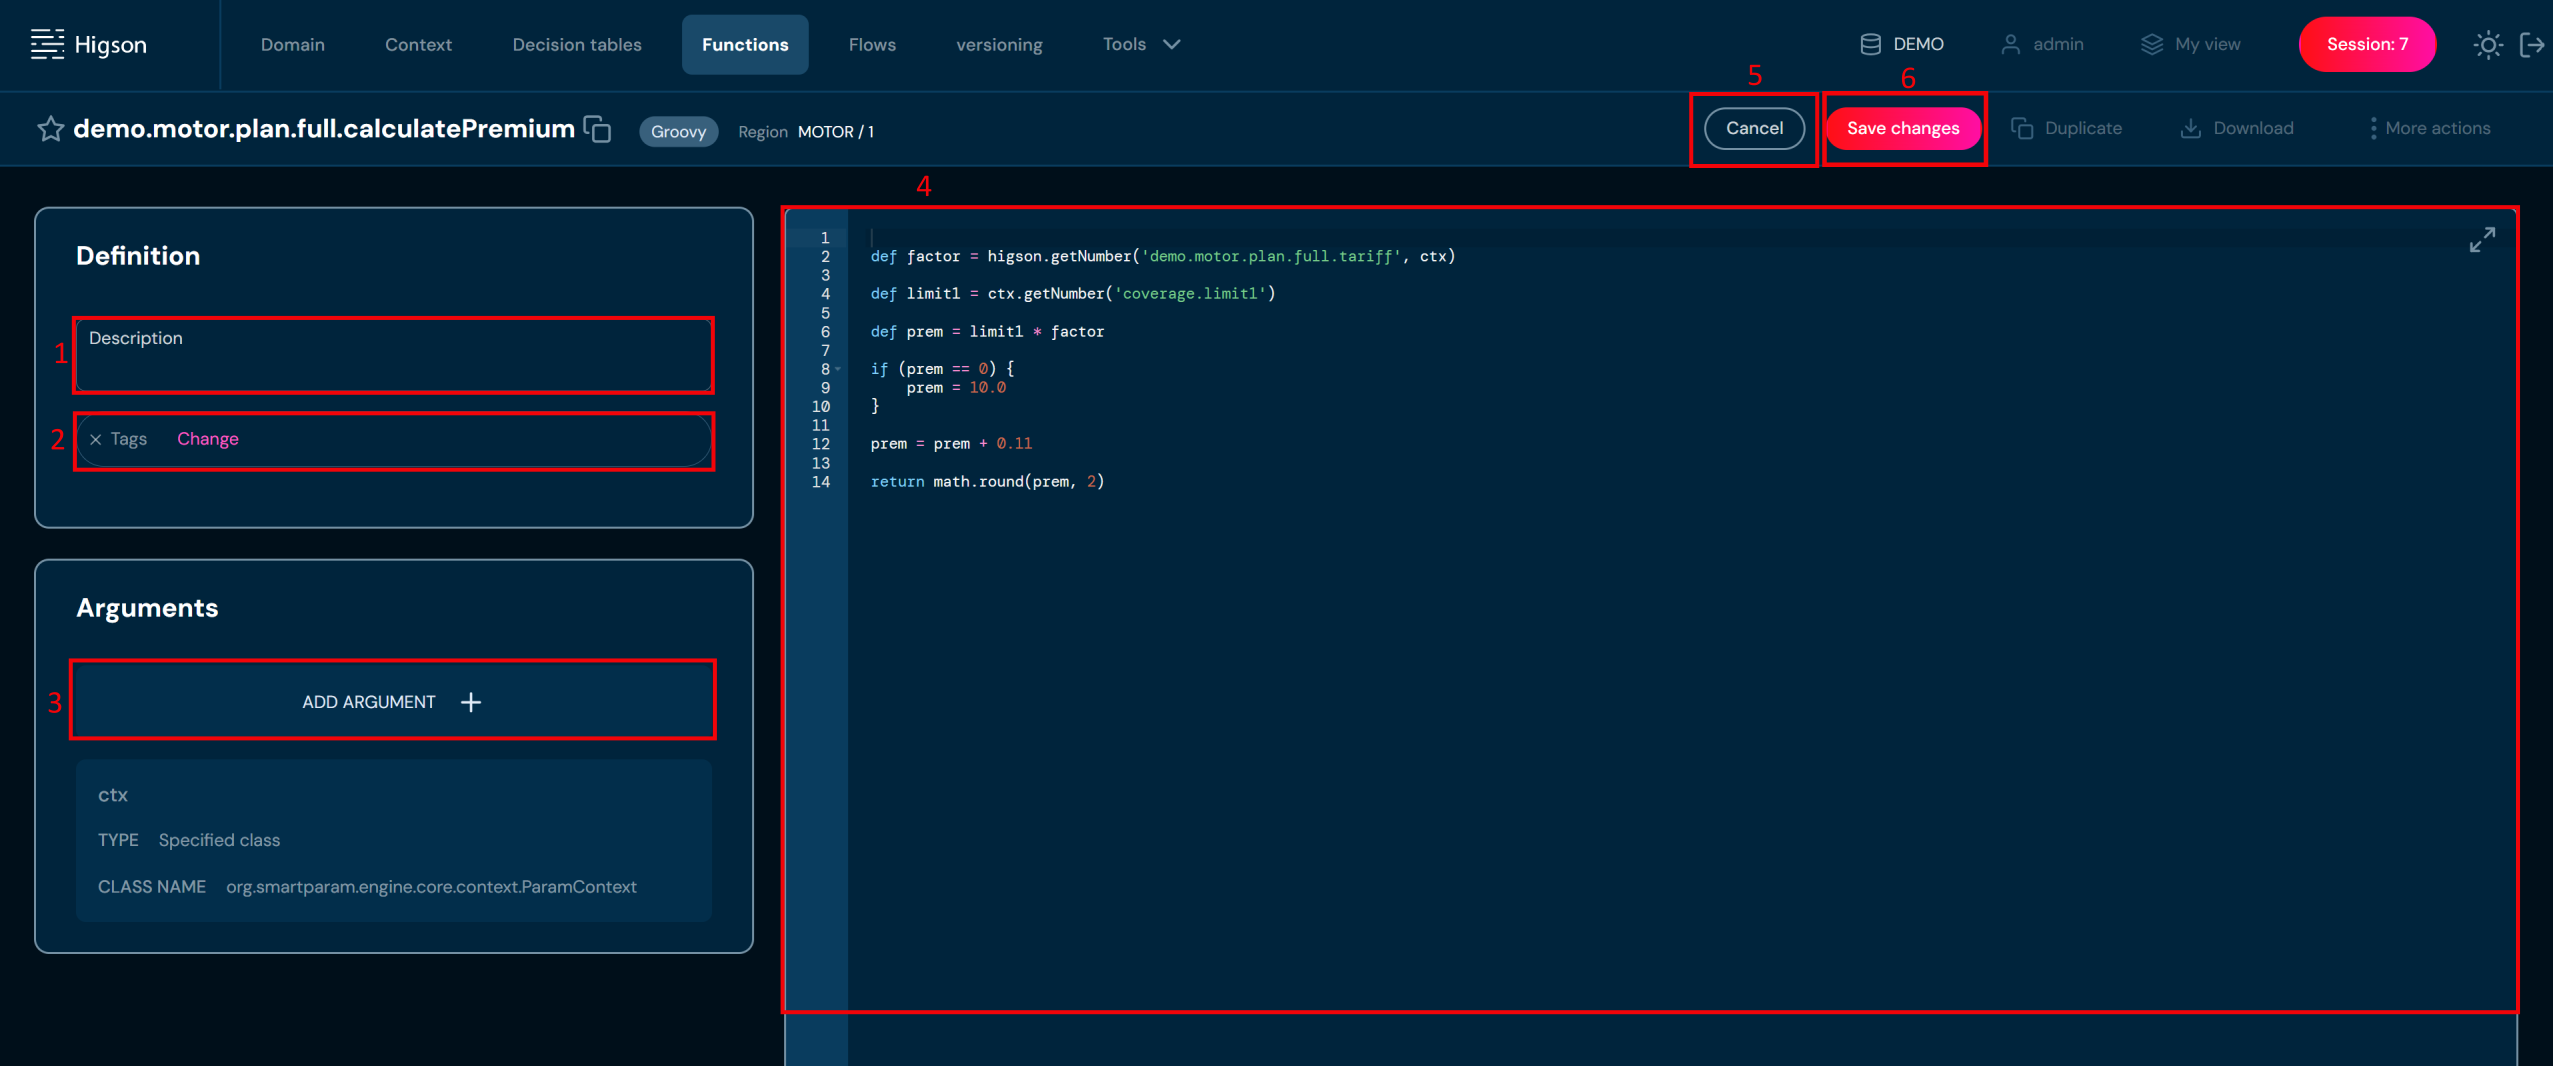
No. Action Description 1 Description Contains the Description of the function if such was added. 2 Change Allows to manage tags. 3 Add argument Adds a new argument for which name, type, and class name will have to be provided. 4 Function body Here you can write a code to create your algorithm. You can define variables and use arguments defined in the Argument section. 5 Cancel Rejects all changes made in the edit mode. 6 Save changes Saves all changes made in the edit mode. a. Bear in mind that function’s name can only be changed with Rename action.
-
Choose Save changes to save all changes made in the function.
a. Cancel reverts all changes made in the function.
Duplicate Function#
If you want to duplicate specific function, follow these steps:
-
Choose Functions in Main toolbar.
-
Left-click on the function you wish to duplicate.
a. Left-clicking on function opens Function details screen.
-
Choose Duplicate in Available actions.
a. Choosing Duplicate brings up the Duplicate function screen.
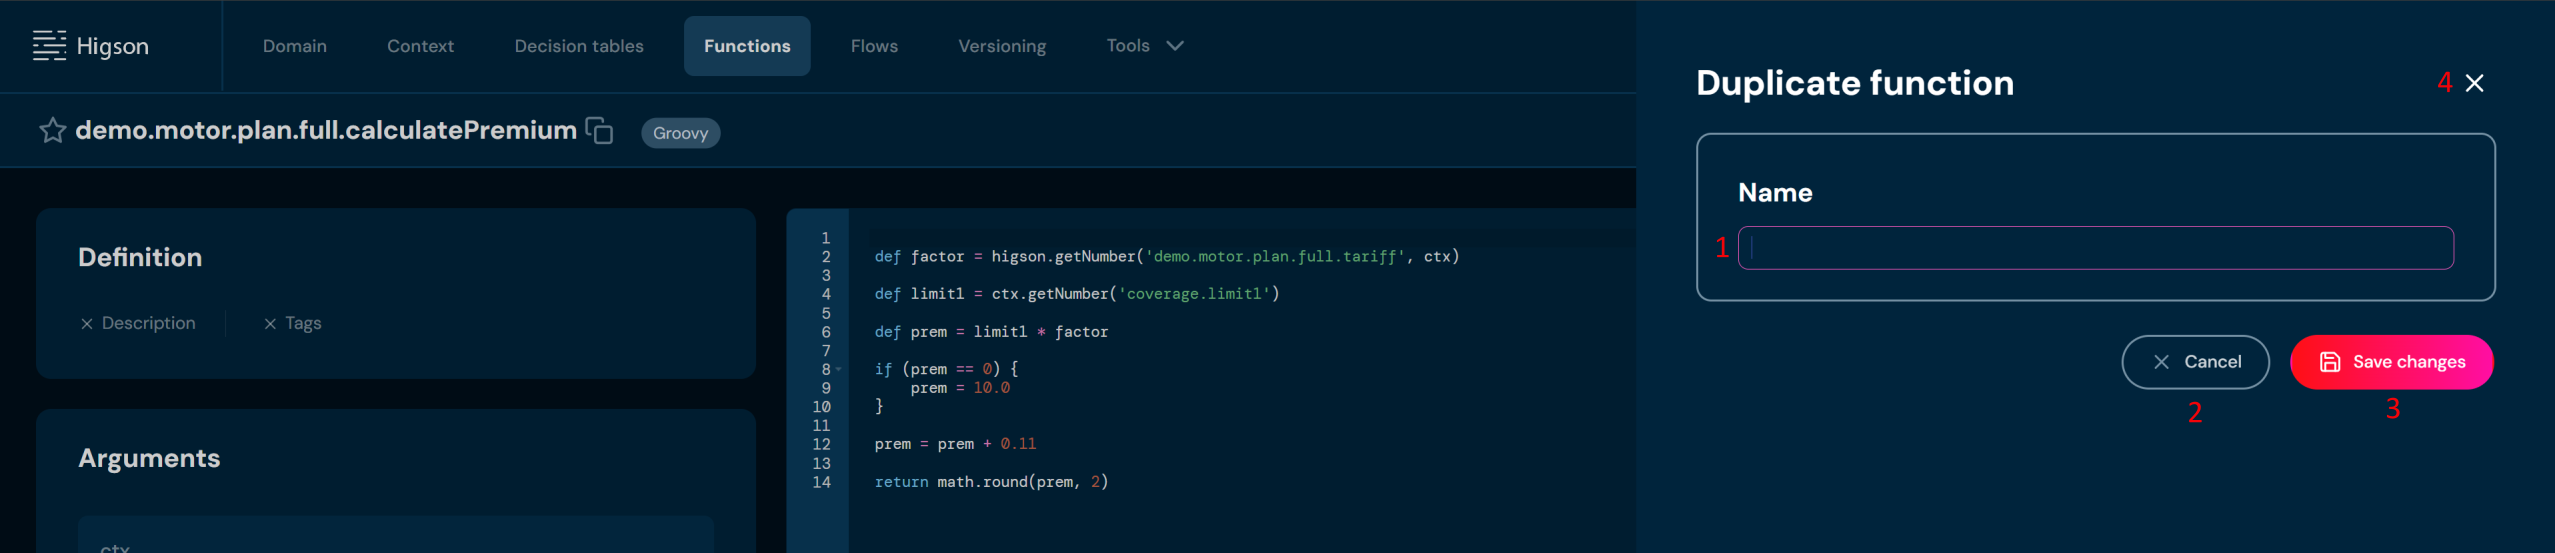
No. Action Description 1 Name Provide the name for the duplicated function. 2 Cancel Abort the process of duplicating the function. 3 Save changes Save the new, duplicated, element. 4 Close Abort the process of duplicating the function. -
Enter unique function name. Name can contain only characters from collection a-z; 0-9; “.”; “-”; “_” and it can’t start with “-”.
-
Choose Save changes.
a. If you enter illegal characters, then validation error will make the field frame red.
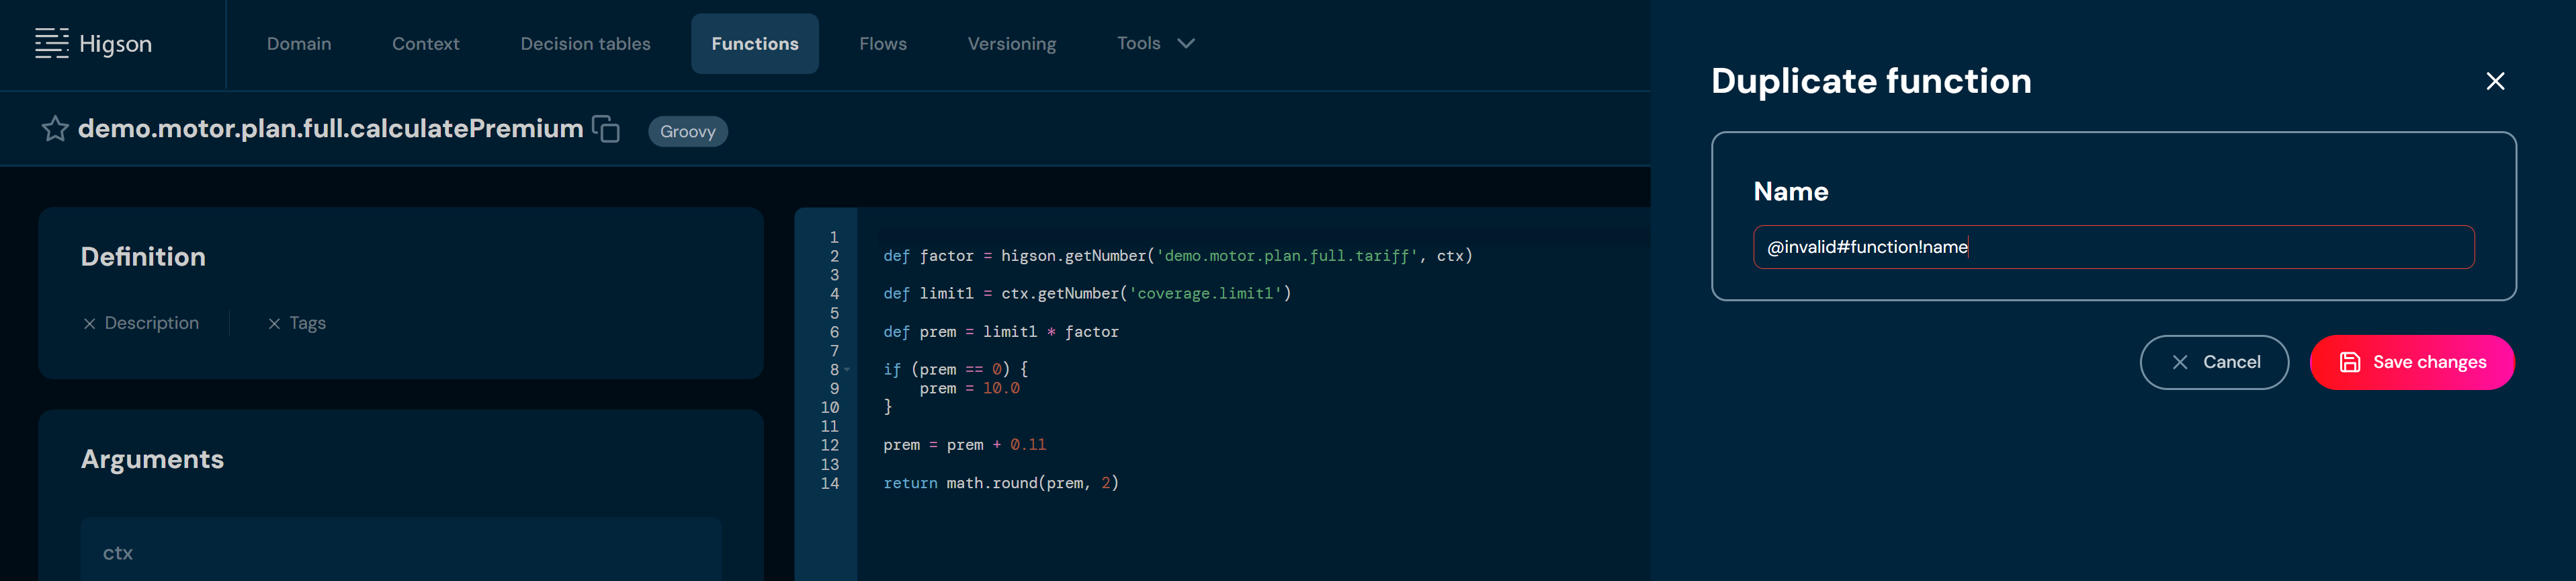
b. If another function already uses the name you provided, then pop-up dialog will appear. You can either close the pop-up by clicking Cancel or you can click View existing function, that will redirect you to the appropriate function.
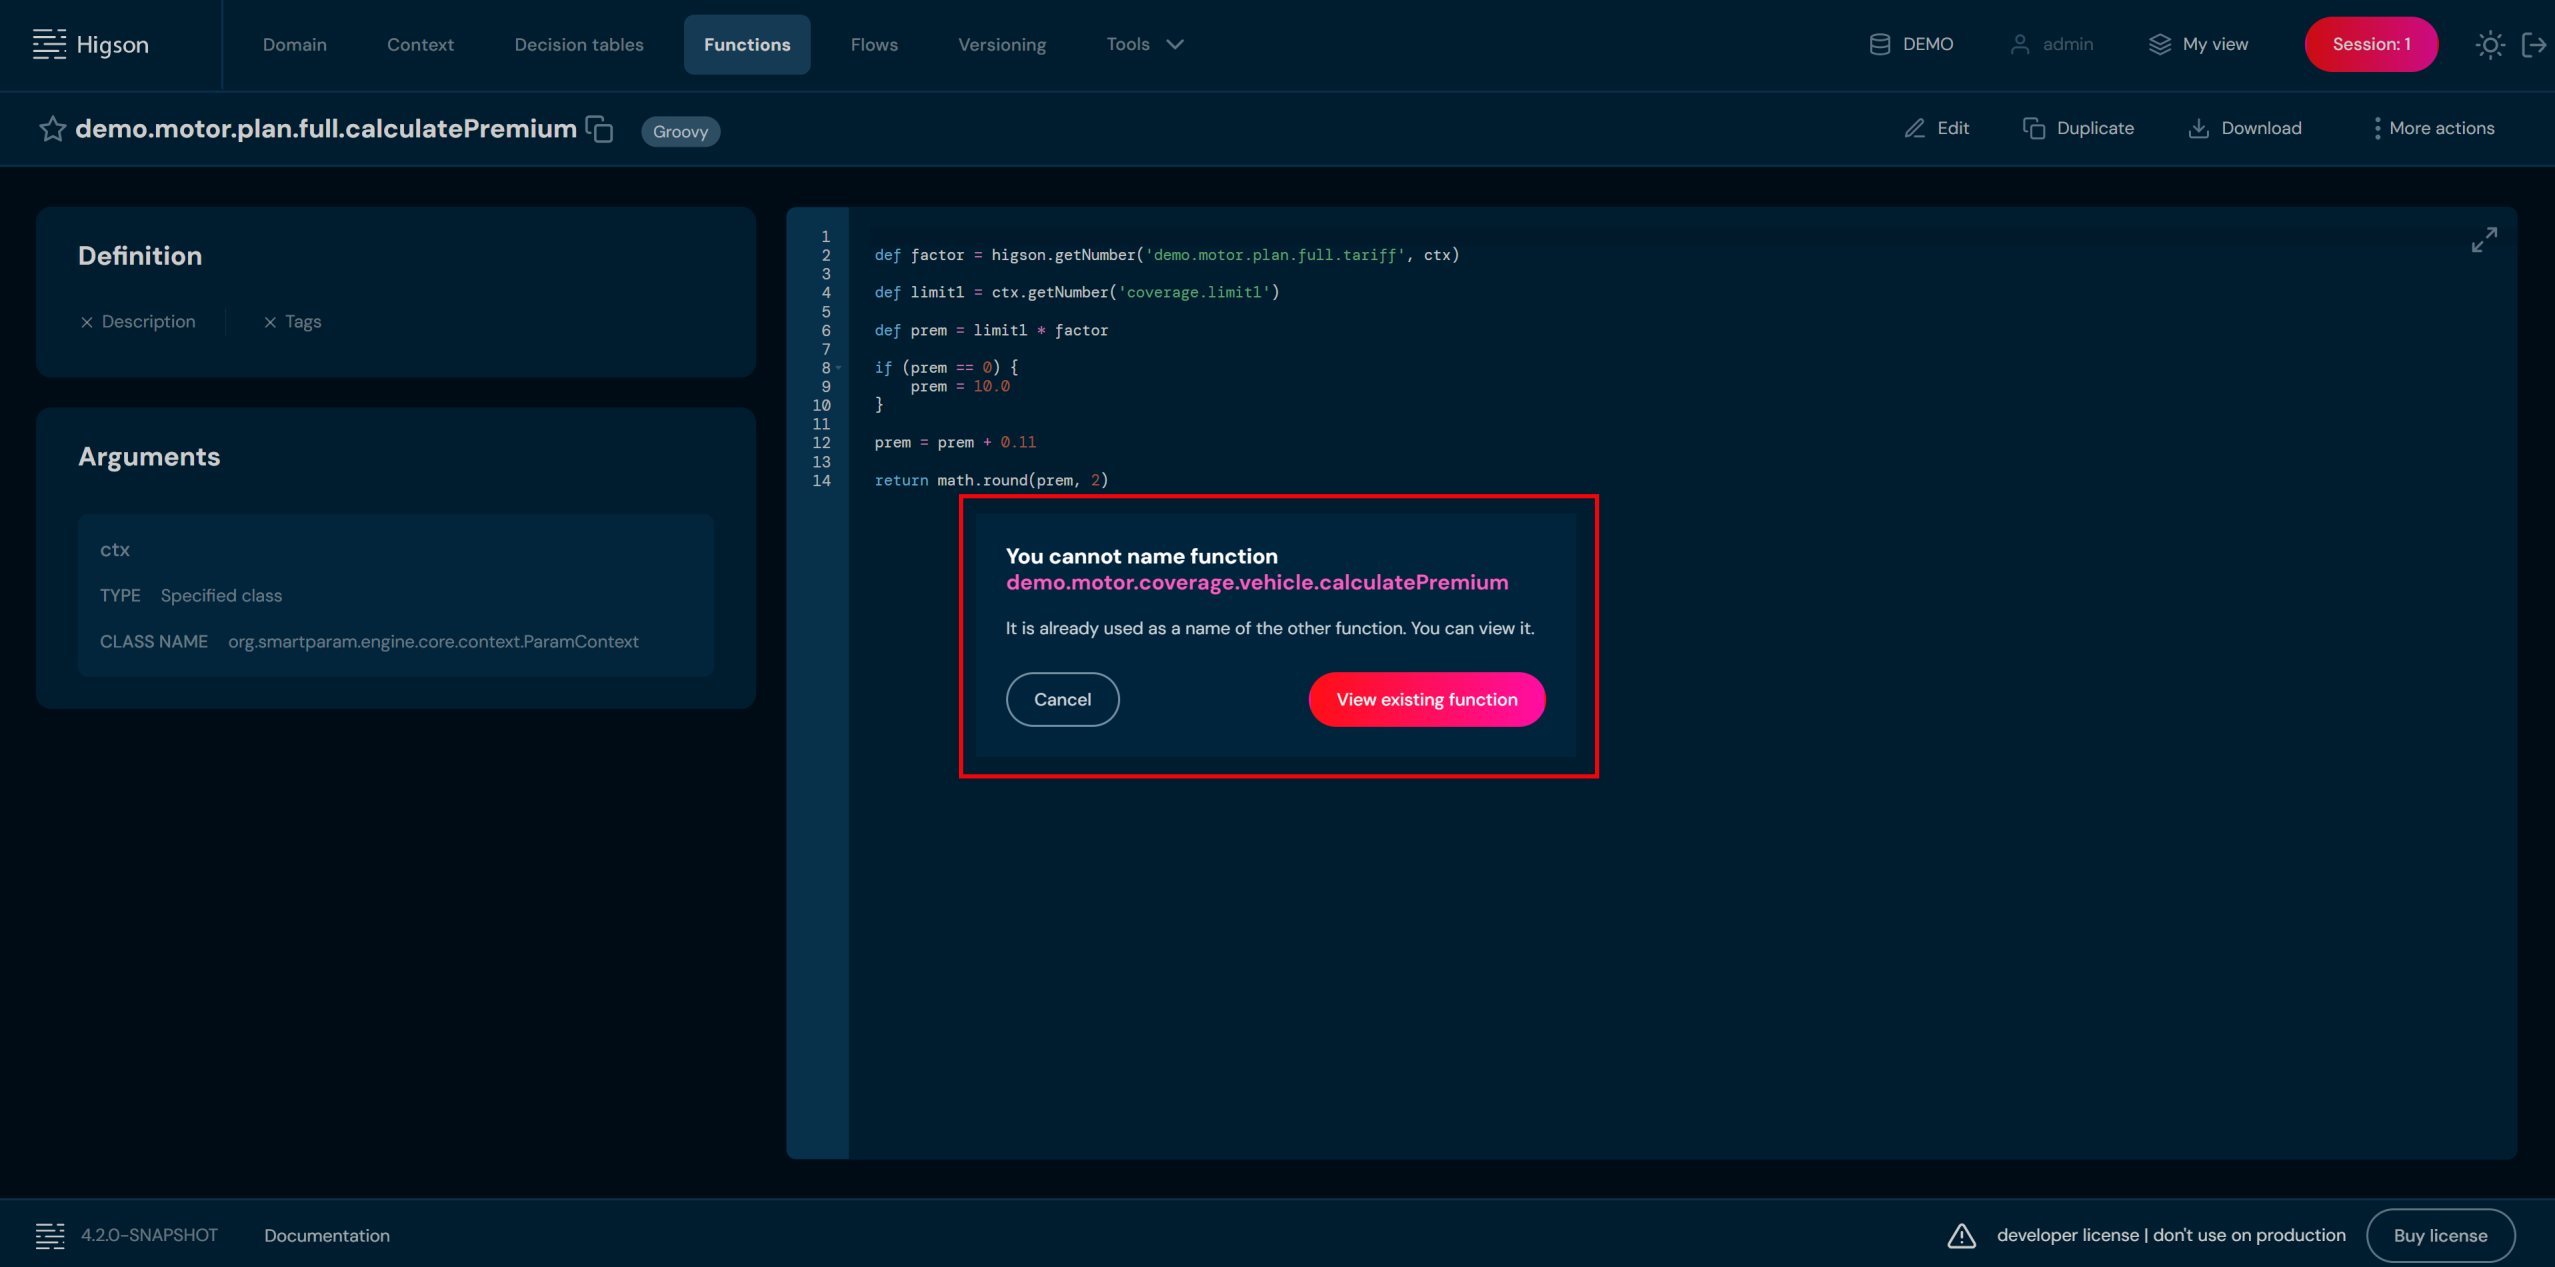
-
Choose Save changes.
a. The Function will be duplicated with the name provided in step 4. You will be redirected to duplicated Function’s details screen.
Show History#
If you want to check all modifications made on function, follow these steps:
-
Choose Functions in Main toolbar.
-
Left-click on the function you want to check.
a. Left-clicking on function opens Function details screen.
-
From drop-down menu More actions choose Show history.
a. Choosing Show history brings up the Function history screen.

No. Column name Description 1. Operation Type of operation made on function. 2. Message Brief information about the details of the operation. 3. Author User’s login that made an operation. 4. Modification Date Date of the published session that made an operation. 5. Region Region and version assigned to function at the time of modification. 6. Actions View redirects to archived version of Function. In this screen you can choose Restore to restore that version of Function.
Rename#
If you want to rename a function, follow these steps:
-
Choose Functions in Main toolbar.
-
Left-click on the function you wish to duplicate.
a. Left-clicking on function opens Function details screen.
-
From drop-down menu More actions choose Rename.
a. The Highlighted border around the function name indicates that it is editable.

-
Enter unique function name. Name can contain only characters from collection a-z; 0-9; “.”; “-”; “_” and it can’t start with “-”.
-
Choose Save name.
a. If you enter illegal characters, then validation error will appear.

Find Usages#
If you want to check where the function is used, follow these steps:
-
Choose Functions in Main toolbar.
-
Left-click on the function you want to check.
a. Left-clicking on function opens Function details screen.
-
From drop-down menu More actions choose Find usages.
a. Choosing Find usages brings up the Find usages screen. The screen displays a list of objects in which the function has been used
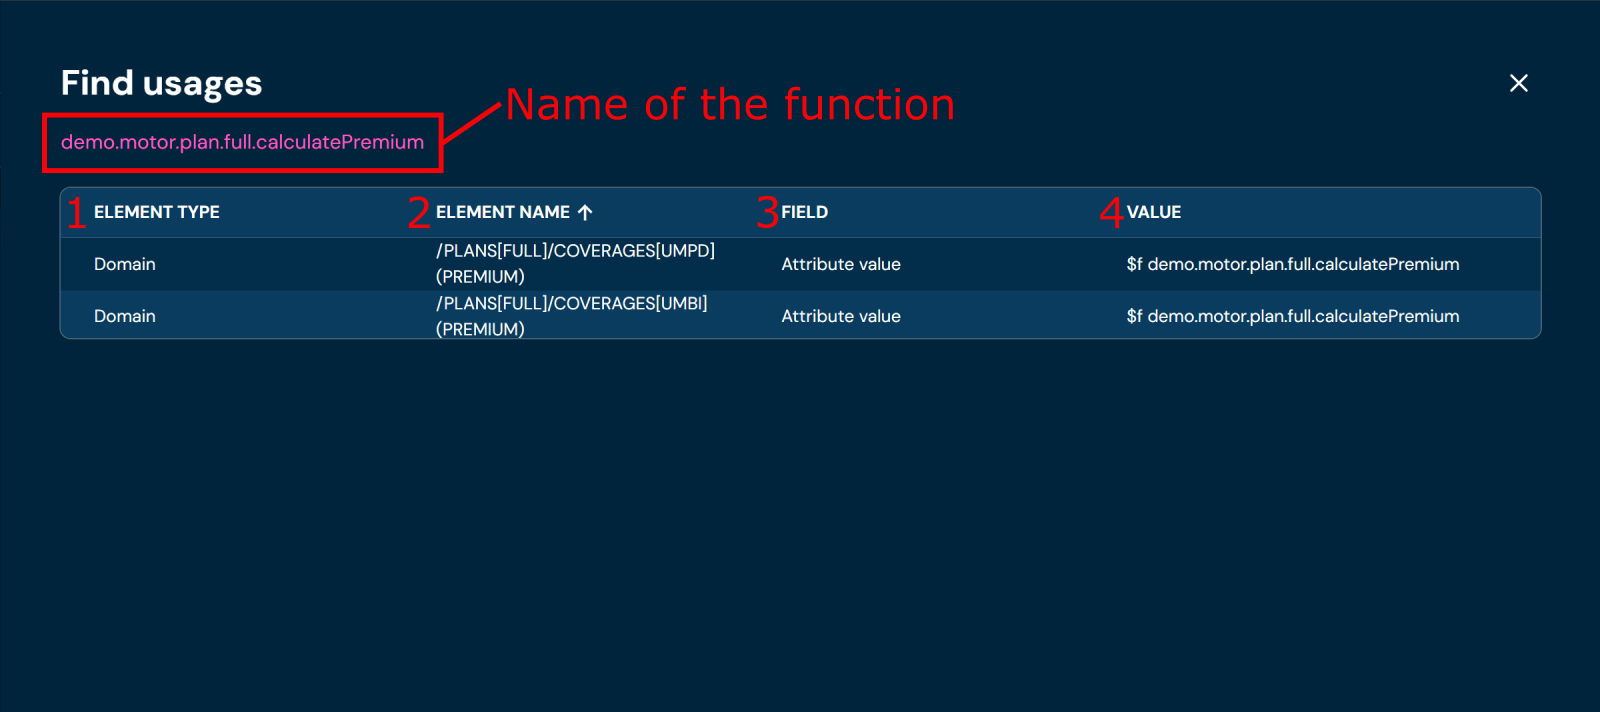
No. Column name Description 1. Element type Type of element that uses this function. 2. Element name Name of the element that uses this function. 3. Field Value of the element that uses this function. This column is filled only for Attribute value element, for other elements this column is empty. 4. Value Informs the user in what value the searched element was used.
Remove (Details View)#
If you want to delete specific function from Function details level, follow these steps:
-
Choose Functions in Main toolbar.
-
Left-click on the function you wish to remove.
a. Left-clicking on function opens Function details screen.
-
From drop-down menu More actions choose Remove.
a. After choosing Remove action, confirmation pop-up will appear.
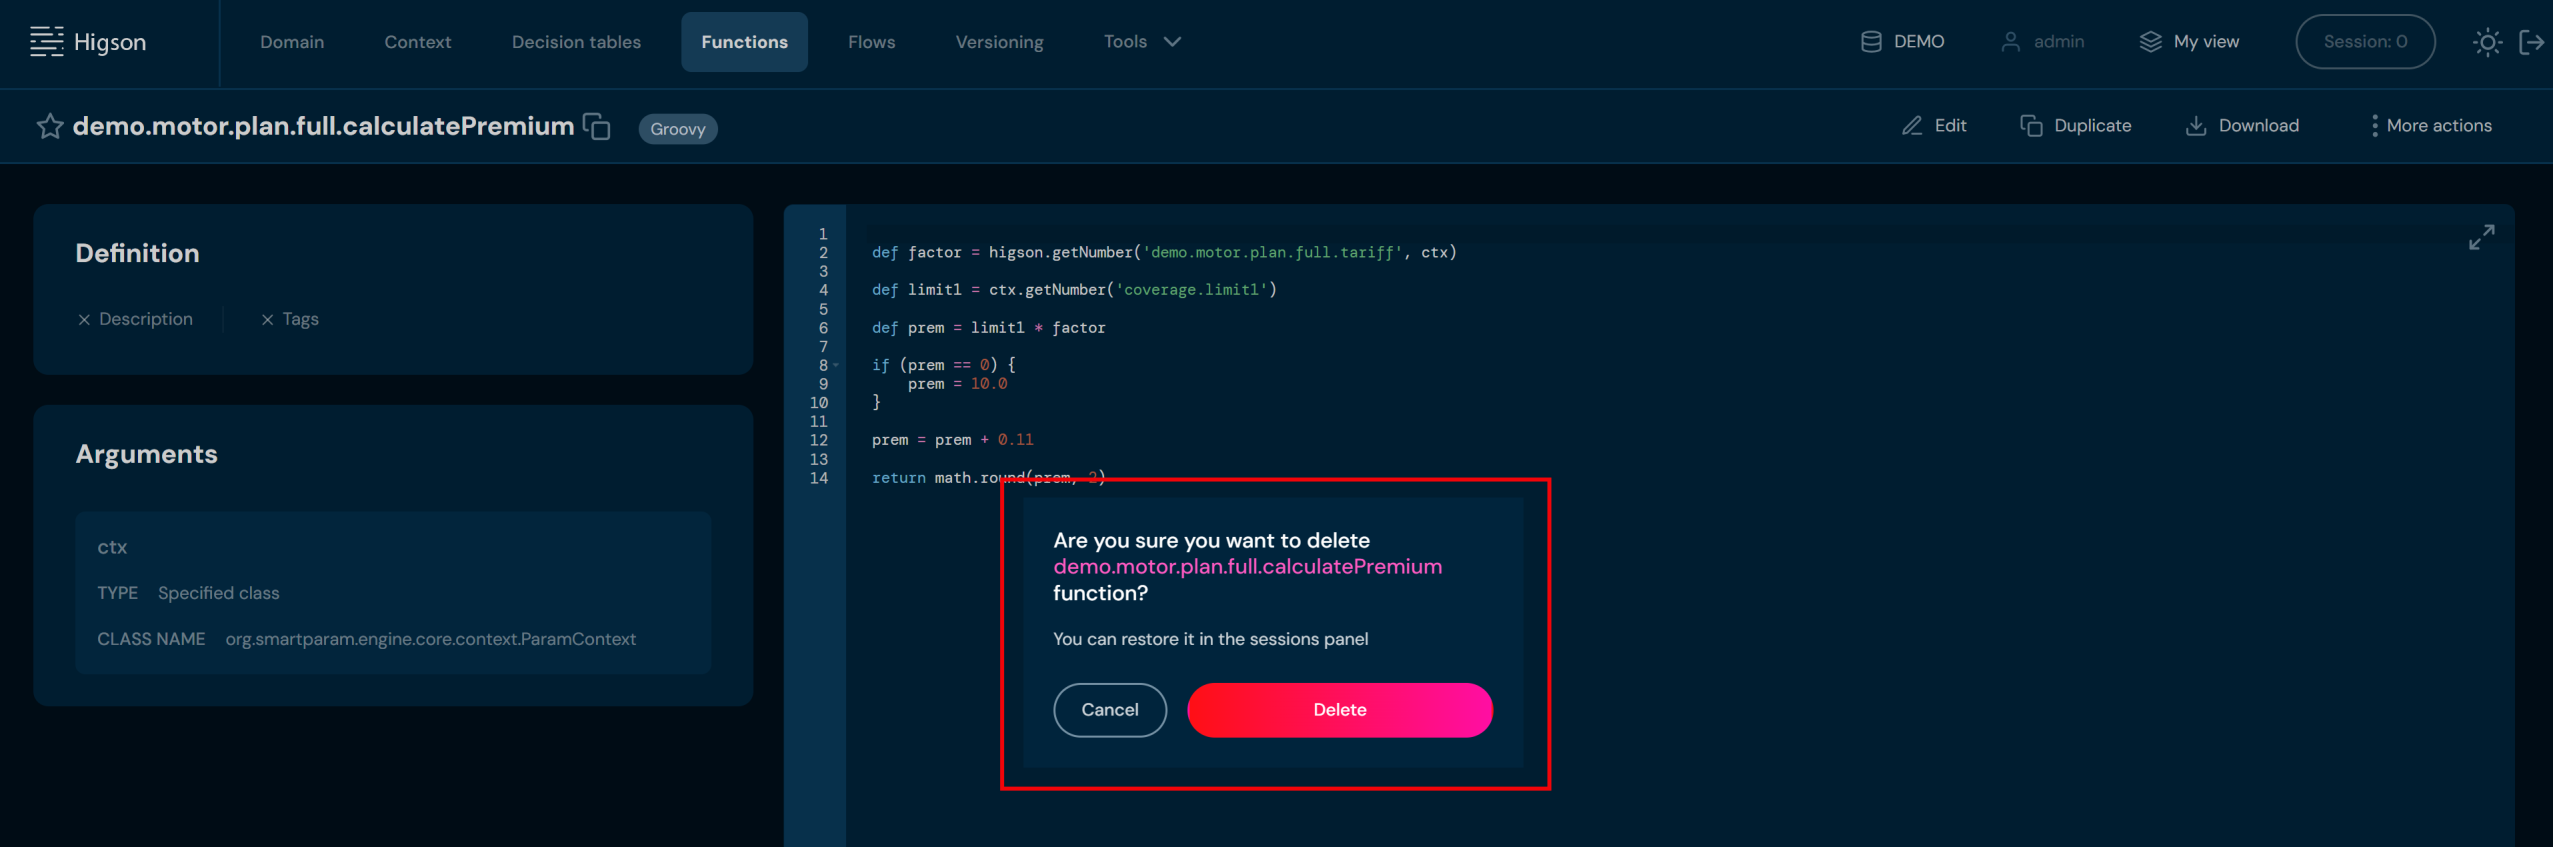
-
Choose Confirm.
a. The Function is deleted from the environment.
Util functions are small, general-purpose functions designed to perform simple, often repetitive tasks. They are generic and can be used in various places in Higson configuration, which helps organize, maintain, and increase the readability of configuration.
Features of Util Functions:
- Clearly defined purpose: Util functions perform a single, specific operation, such as date formatting, string manipulation, data type conversions, validations, etc.
- Independent of specific business logic: They are neutral and can be reused across different projects.
- Reusable: They are created to be used multiple times in different parts of the configuration.
In summary, util functions are tools that make it easier to handle common and repetitive tasks in Higson, improving the structure and organization of configuration.
You can use util functions in Domain Configuration and Decision Tables. To call a util function in Higson configuration, use the notation $u utilFunctionName().
The following util functions are available in Higson:
- Equals
- Add
- Diff
- Exist
- Format
- From
- GreaterThanEquals
- GreaterThan
- IsBlank
- LessThanEquals
- LessThan
- NotBlank
- Size
- To
- Trim
- NotEmpty
- Get
- IsEmpty
Examples#
Equals#
This method checks if a value from the Higson context is equal to another value.
Function arguments (mandatory 2 arguments):
ctx: The HigsonContext object.args: The arguments passed to the method.
Example 1: $u equals(context.path, 100)
- The first argument should be the path to the target object in the context.
- The second argument should be the value to compare with the target object (it can be a number or date).
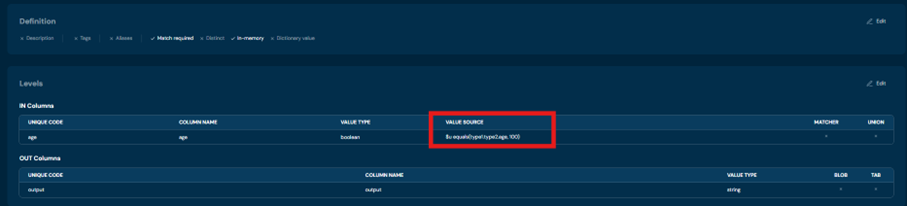
Function arguments (optionally 4 arguments):
- First argument: path to the target object.
- Second argument: value to compare with the target object.
- Third argument:
ignoreCasefor case-insensitive comparison. - Fourth argument:
trimto ignore leading and trailing whitespace.
Example 2: $u equals(context.path, 100, ignoreCase, trim)
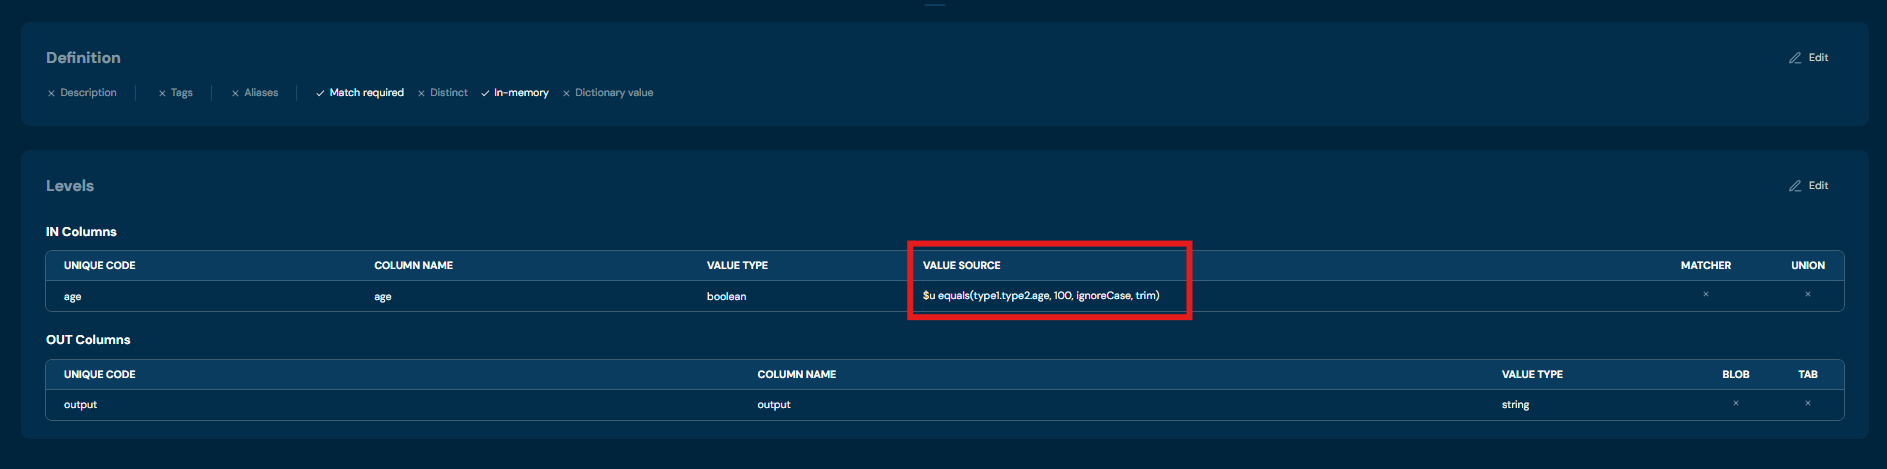
Return: True or false based on the comparison.
Add#
This method performs an addition operation based on the given arguments. Note: Numbers given as text in the context are interpreted by Higson as numbers
Function arguments:
ctx: The HigsonContext object.args: The arguments passed to the method.
Example 1: $u add(ctx, arg)
For numeric attributes, only two arguments are needed: context path and value to add.
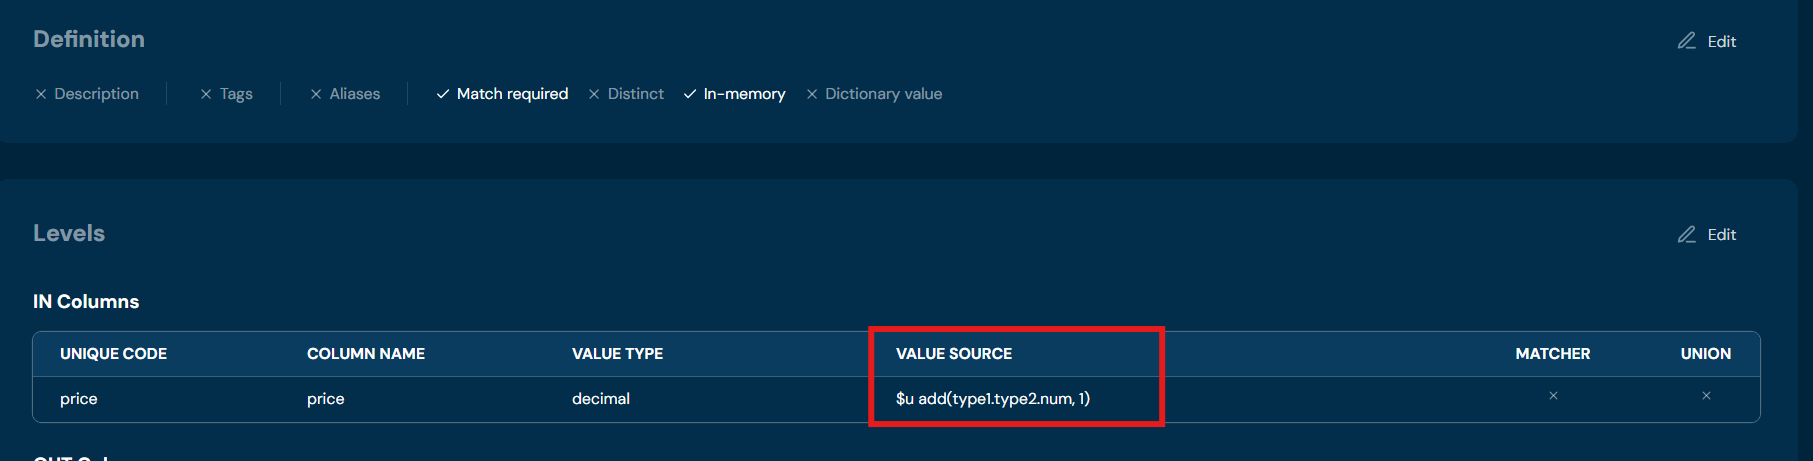
Example 2: $u add(ctx, 10, d)
For date type attributes, three arguments are needed: context path, value to add, and string representation of the time token (e.g., “d” for days).
The following table shows the supported time tokens.
| Argument | Description | Applies to data type |
|---|---|---|
| s | SECOND | Local datetime, Date |
| m | MINUTE | Local datetime, Date |
| h | HOUR | Local datetime, Date |
| d | DAY | Local datetime, Local date, Date |
| M | MONTH | Local datetime, Local date, Date |
| Y | YEAR | Local datetime, Local date, Date |
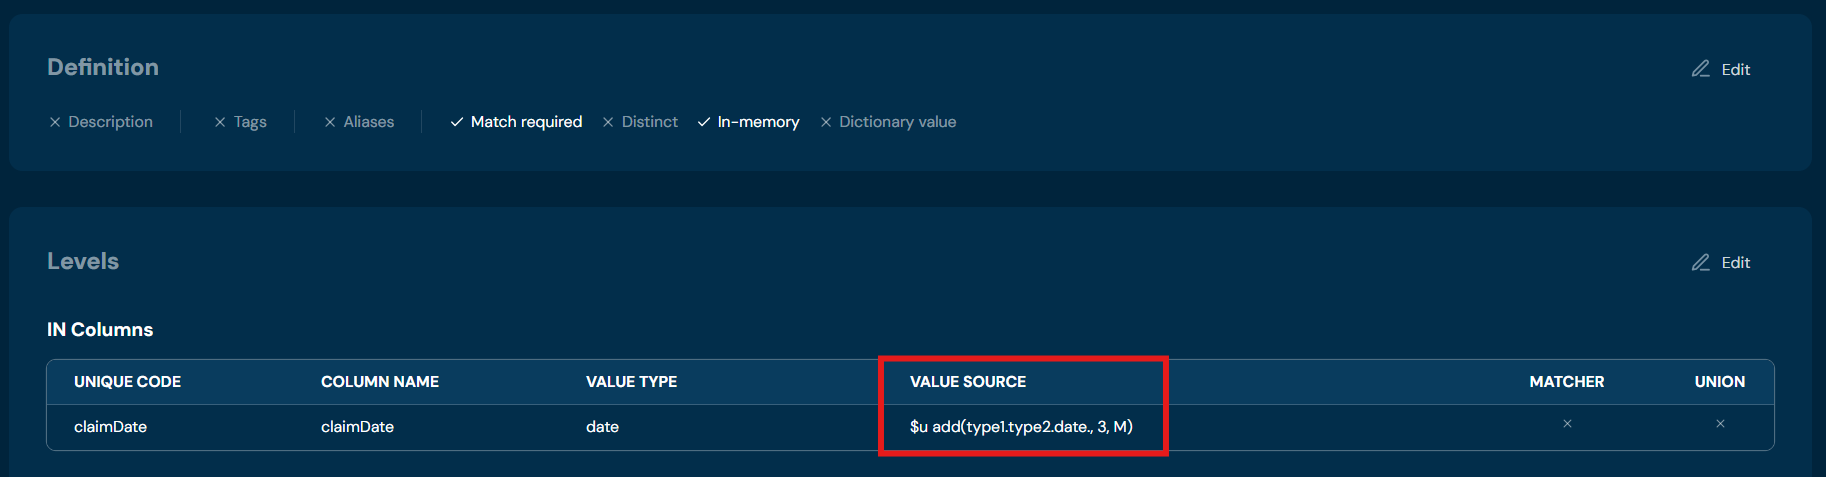
Return: The result of the addition operation, or null if the value is blank.
Example 3: $u add(ctx.path1, ctx.path2) - adds two elements provided by the HigsonContext
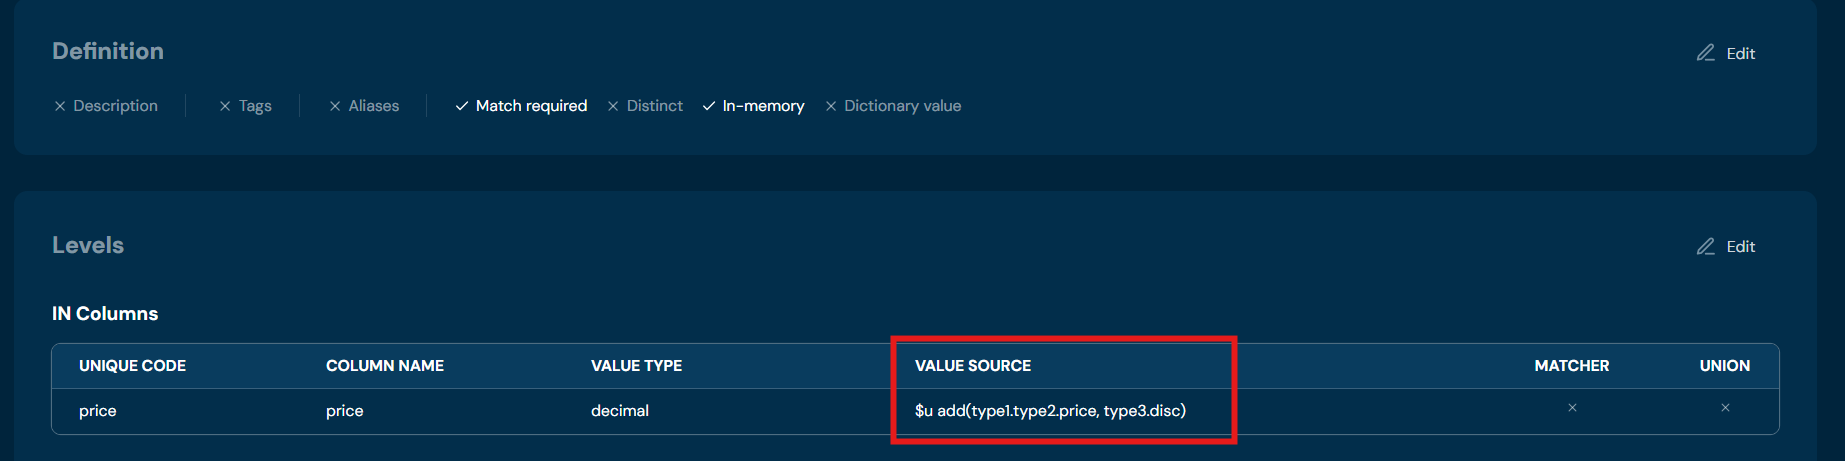
Return: The result of the addition operation, or null if the value is blank.
Diff#
Calculates the difference based on the given arguments and the target object.
Function arguments:
ctx: The HigsonContext object.args: The arguments passed to the method.
Example: $u diff(ctx, arg)
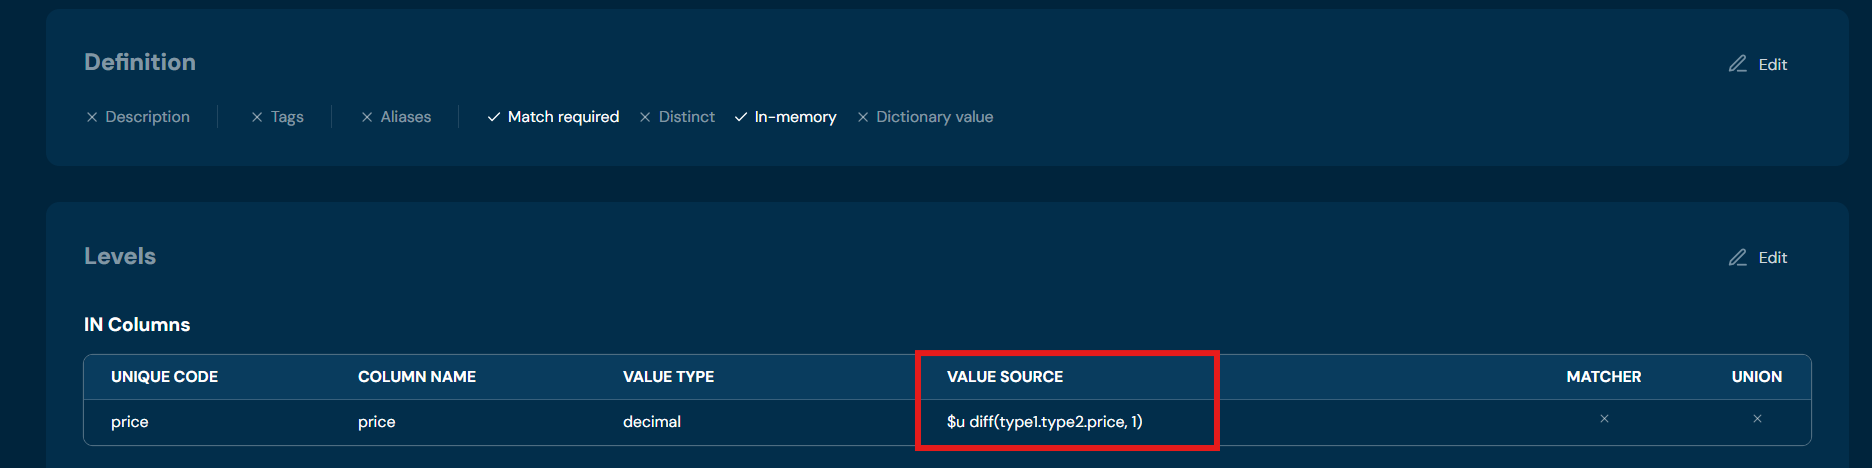
- The first argument is the path to the target object.
- The second argument is the value to subtract from the target object.
- The third argument (optional) is the string representation of the time token (for date formats).
Return: The result of the difference calculation, or:
- If the target object and the diff value are both numbers, the method returns the subtraction of the two values.
- If the target object is a Date or LocalDateTime, and the diff value is a number, the method returns the difference in time based on the provided time token.
- If the target object is a String, the method returns the modified string after applying the difference operation.
- If none of the above conditions match, the method returns the target object as is.
Throws: HigsonRuntimeException if the target object is a number and the diff value is not a number, an exception is thrown.
Exist#
Checks if a value exists in the given context.
Function arguments:
ctx: The HigsonContext object.
Example: $u exist(ctx.path)
Return: True if the context value exists. False if the ctx.path is an empty string.
Format#
Formats data according to a given pattern. Applies to the following data types:
- Number/Integer
- String
- Date
Function arguments:
ctx: The HigsonContext object.args: The arguments passed to the method.
| Argument | Description | Applies to data type |
|---|---|---|
| 2 | Rounding to two decimal places | number/integer |
| lower | Format string to lowercase | string |
| upper | Format string to uppercase | string |
| capitalize | Format string to capitalize | string |
| reverse | Reverse string | string |
| yyyy.MM.dd G ‘at’ HH:mm:ss | Format date according to pattern: 2001.07.04 AD at 12:08:56 | date |
| EEE, MMM d, ‘‘yy | Format date according to pattern: Wed, Jul 4, ‘01 | date |
| h:mm a | Format date according to pattern: 12:08 PM | date |
| hh ‘o’‘clock’ a | Format date according to pattern: 12 o’clock PM | date |
| K:mm a | Format date according to pattern: 0:08 PM | date |
| yyyyy.MMMMM.dd GGG hh:mm aaa | Format date according to pattern: 02001.July.04 AD 12:08 PM | date |
| EEE, d MMM yyyy HH:mm:ss | Format date according to pattern: Wed, 4 Jul 2001 12:08:56 | date |
| yyMMddHHmmss | Format date according to pattern: 010704120856 | date |
| yyyy-MM-dd’T’HH:mm:ss.SSS | Format date according to pattern: 2001-07-04T12:08:56.235 | date |
| yyyy-MM-dd’T’HH:mm:ss.SSSXXX | Format date according to pattern: 2001-07-04T12:08:56.235-07:00 | date |
| YYYY-‘W’ww-u" 2001-W27-3 | Format date according to pattern: 2001-W27-3 | date |
Example: $u format(ctx, arg)
$u format(1.2345, 2) → 1.23
Return: The formatted output based on the type of the object retrieved from the context.
Throws: HigsonRuntimeException if the format utility function is missing the format argument or if the type is unsupported.
From#
This function is used to extract a substring from a string or extract some elements from a list.
- if object is String then function will return part of string after indexed passed in the second argument
- if object is List then function will return part of list after indexed passed in the second argument
- in other cases function will throw exception with unsupported type
Function arguments:
ctx: The HigsonContext object.args: The arguments passed to the ‘from’ util function.
Example: $u from(ctx, arg)
$u from(abcdef, 5) → f

Return: The result of the ‘from’ util function or null if the target is null or of an unsupported type.
Throws: HigsonRuntimeException if a required argument is missing, or if the target is of an unsupported type.
Greater Than Equals#
Checks if a value from the Higson context is greater than or equal to another value.
Function arguments:
ctx: The HigsonContext object.args: The arguments passed to the method.
Example: $u gte(ctx, arg)
The method supports comparing various types, including:
- Strings: Compares lexicographically.
- Numbers: Compares numerically.
- Dates (java.util.Date, LocalDate, LocalDateTime): Compares chronologically.
Return: True if the target object is greater than or equal to the given value, otherwise false.
Throws: HigsonRuntimeException if fewer than two arguments are provided.
Greater Than#
Checks if a value from the Higson context is greater than another value.
Function arguments:
ctx: The HigsonContext object.args: The arguments passed to the method.
Example: $u gt(ctx, arg)
- The first argument should be the path to the target object in the context.
- The second argument should be the value to compare with the target object.
The method supports comparing various types, including:
- Strings: Compares lexicographically.
- Numbers: Compares numerically.
- Dates (java.util.Date, LocalDate, LocalDateTime): Compares chronologically.
Return: True if the target object is greater than the given value, otherwise false.
Is Blank#
Checks if a value from the Higson context is blank.
This method considers an object blank if it meets one of the following conditions:
- It is null
- It is the string “undefined”
- It is an instance of ParamValue and its isBlank method returns true
- It is an instance of MultiValue and its isBlank method returns true
- It is an instance of ValueHolder and its isBlank method returns true
- It is an instance of Collection and it is empty or all its elements are blank
- It is an array and all its elements are blank
- It is an instance of Map and all its values are blank
- It is a CharSequence (like String, StringBuffer, etc.) and is blank, that is when text has no characters or there is no other character than whitespace.
- It is an instance of Iterable and it is empty or all its elements are blank
Function arguments:
ctx: The HigsonContext object.
Example: $u isBlank(ctx.path)
Return: True if the object is blank, false otherwise.
Is Empty#
Checks if a value from the Higson context is empty.
Function arguments:
ctx: The HigsonContext object.
Example: $u isEmpty(ctx)
Return: It retrieves the value from the context using the given path and returns:
- false: if value is not string, collection, map, array, ParamValue
- false: if value is not empty string
- false: if value is collection or map, array but it is not empty
- true: if value is empty string or is null
- true: if value is collection, map or array but it is empty
- true: if value is null
- true: if value is ParamValue but it is empty, meaning does not contains any value inside of it
Less Than Equals#
Checks if a value from the Higson context is less than or equal to another value.
Function arguments:
ctx: The HigsonContext object.args: The arguments passed to the method.
Example: $u lte(ctx, arg)
- The first argument should be the path to the target object in the context.
- The second argument should be the value to compare with the target object.
The method supports comparing various types, including:
- Strings: Compares lexicographically.
- Numbers: Compares numerically.
- Dates (java.util.Date, LocalDate, LocalDateTime): Compares chronologically.
Return: True if the target object is less than or equal to the given value, otherwise false.
Throws: HigsonRuntimeException if fewer than two arguments are provided.
Less Than#
Checks if a value from the Higson context is less than another value.
Function arguments:
ctx: The HigsonContext object.args: The arguments passed to the method.
Example: $u lt(ctx, arg)
- The first argument should be the path to the target object in the context.
- The second argument should be the value to compare with the target object.
The method supports comparing various types, including:
- Strings: Compares lexicographically.
- Numbers: Compares numerically.
- Dates (java.util.Date, LocalDate, LocalDateTime): Compares chronologically.
Return: True if the target object is less than the given value, otherwise false.
Throws: HigsonRuntimeException if fewer than two arguments are provided.
Not Blank#
Checks if a value from the Higson context is not blank.
Function arguments:
ctx: The HigsonContext object.
Example: $u notBlank(ctx)
Return: It retrieves the value from the context using the given path and returns:
- false: if value is null
- false: if value is not string, collection or map , array, ParamValue
- false: if value is string, collection or map , array, ParamValue but it is blank
- true: if value is blank string
- true: if value is collection or map but it is empty
Size#
Retrieves the length of a string attribute from context.
Function arguments:
ctx: The HigsonContext object.
Example: $u size(ctx)
Return: The length of the string or collection, or null if the object is null or of an unsupported type.
Throws: HigsonRuntimeException If the object is of unsupported type.
To#
Calls the ’to’ util function with the given context and arguments.
- if object is String then function will return part of string to indexed passed in the second argument
- if object is collection then function will return part of list to indexed passed in the second argument
- in other cases function will throw exception with unsupported type
- if object is a null then returned value is a null
Function arguments:
ctx: The HigsonContext object.args: The arguments passed to the method.
Example: $u to(ctx, arg)
$u to(abcdef, 5) → abcde
Return: Part of the string or collection up to the indexed position passed in the second argument or null if the target is null or of an unsupported type.
Throws: HigsonRuntimeException if a required argument is missing, or if the target is of an unsupported type.
Trim#
Trims values in a given context, removing leading and trailing whitespaces.
Function arguments:
ctx: The HigsonContext object.
Example: $u trim(ctx)
- If the value is null, returns null.
- If the value is a Number, returns its decimal representation.
- If the value is a Boolean, returns its boolean representation If the value is a Number, returns its decimal representation.
- If the value is a Date, returns its Date representation.
- If the value is a LocalDate, returns its LocalDate representation.
- If the value is a LocalDateTime, returns its LocalDateTime representation.
- If the value is a collection, filters out null values and returns the filtered array.
- If the value is a CharSequence, trims it and returns the trimmed String.
Return: The trimmed value, or the original value if no trimming is possible.
Not Empty#
Checks if a given object is not empty.
Function arguments:
ctx: The HigsonContext object.
Example: $u notEmpty(ctx)
Return: True if the context object is not empty, false if it is empty.
Get#
Retrieves a value from the Higson context.
Function arguments:
ctx: The HigsonContext object.
Example: $u get(ctx, arg)
Return: The value from the context using the provided path.
The Higson function is a Groovy code snippet stored in the Higson application database. Its primary purpose is to perform business logic computations. Higson functions can be executed in multiple ways: programmatically via the Higson engine object, through the Higson Runtime REST API, or within the Tester module. In addition to being directly invoked via the engine or REST, functions can also be used as part of other functions, within a decision table, or as an output values for Domain attributes.
Higson functions consists of the following components:
- Name: The function’s unique identifier.
- Body: The core Groovy code snippet that implements the function’s logic.
- Definition: This section contains the function’s description and any assigned tags.
- Arguments: A list of arguments defined by the user. Each argument consists of a name and type. Supported argument types include:
- Boolean (similar to Java’s
boolean) - Integer (similar to Java’s
int) - Decimal (similar to Java’s
BigDecimal) - Date (similar to Java’s
Date) - Local Date (similar to Java’s
LocalDate) - Local DateTime (similar to Java’s
LocalDateTime) - String (similar to Java’s
String) - Object (similar to Java’s
Object)
- Boolean (similar to Java’s
By default, each Higson function has a special argument called ctx, which references the context object. This context object is accessible within the function body. For further details on this topic, refer to the documentation below.
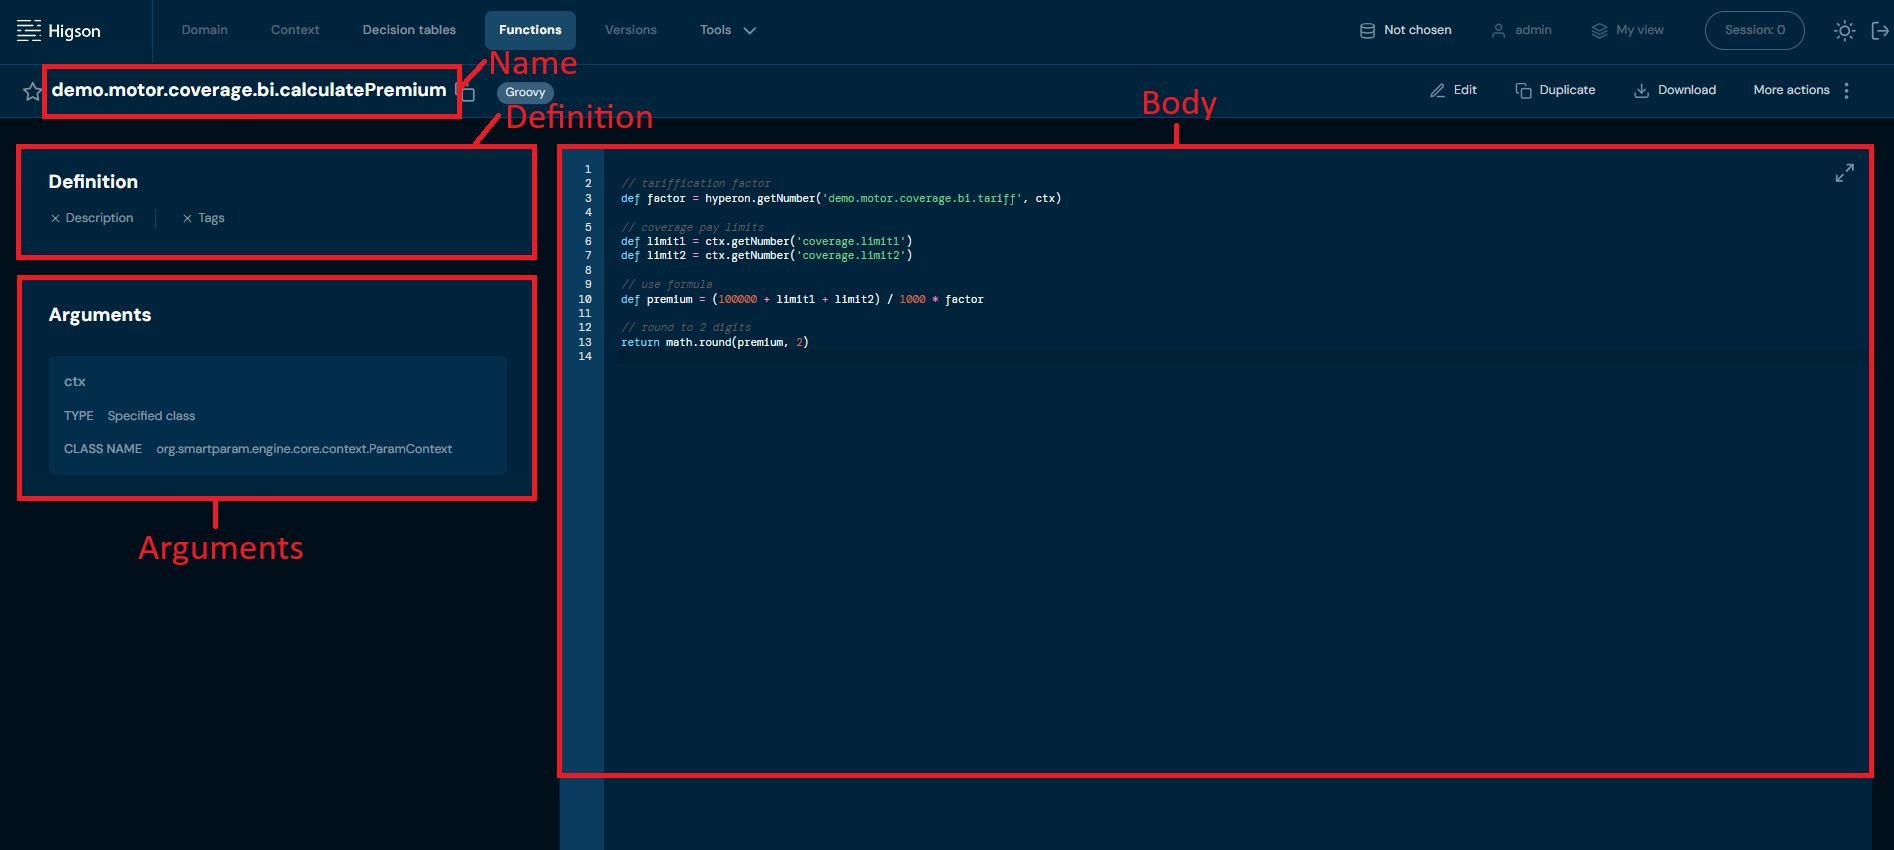
Available Objects in the Function Body#
Several objects are accessible within the function body, including:
- ctx: The context object, representing the default argument of the function.
- higson: An object providing access to decision tables and function calls.
- log: A reference to the logger utility class.
- date: A utility class for working with dates supported by Higson.
- math: A utility class that provides mathematical functions for use within Higson functions.
- str: A utility class for working with strings.
- util: A reference to a common utility class.
- type: A reference to a utility class for programming types.
- domain: A reference to a utility class for domain types.
Built-in Type Converters#
Higson also includes a set of built-in type converters, which help convert values between different data types. These converters are:
| Type Converter | Type | Example |
|---|---|---|
| _dec(x) | BigDecimal | def value = _dec(x) |
| _dec(x, n) | BigDecimal rounded to n places | def value = _dec(x, n) |
| _num(x) | double | def value = _num(x) |
| _num(x, n) | double rounded | def value = _num(x, n) |
| _int(x) | Integer | def value = _int(x) |
| _str(x) | String | def value = _str(x) |
| _bool(x) | boolean | def value = _bool(x) |
| _date(x) | java.util.Date | def value = _date(x) |
Retrieving Values from a Decision Table#
The following table outlines the structure of decision table calls, detailing the type of data returned and the default values in case of missing data:
| Method | Type Returned | In Case of Missing Data |
|---|---|---|
higson.getValue('decisionTableName', ctx) |
entire matrix | empty matrix if not found |
higson.getString('decisionTableName', ctx) |
String | null |
higson.getDecimal('decisionTableName', ctx) |
BigDecimal | null |
higson.getInteger('decisionTableName', ctx) |
Long | null |
higson.getNumber('decisionTableName', ctx) |
double | 0 if not found |
higson.getBoolean('decisionTableName', ctx) |
boolean | false if not found |
higson.getDate('decisionTableName', ctx) |
java.util.Date | null |
higson.getLocalDate('decisionTableName', ctx) |
java.time.LocalDate | null |
EXAMPLE: Retrieving Value from a Decision Table
In this example, we will demonstrate how to retrieve a value from the decision table demo.motor.coverage.bi.tariff. This decision table has two IN levels defined by gender and age, with the values for these levels being sourced from the context data (see picture below). The result of the decision table lookup will be the tariff’s factor from the output level.
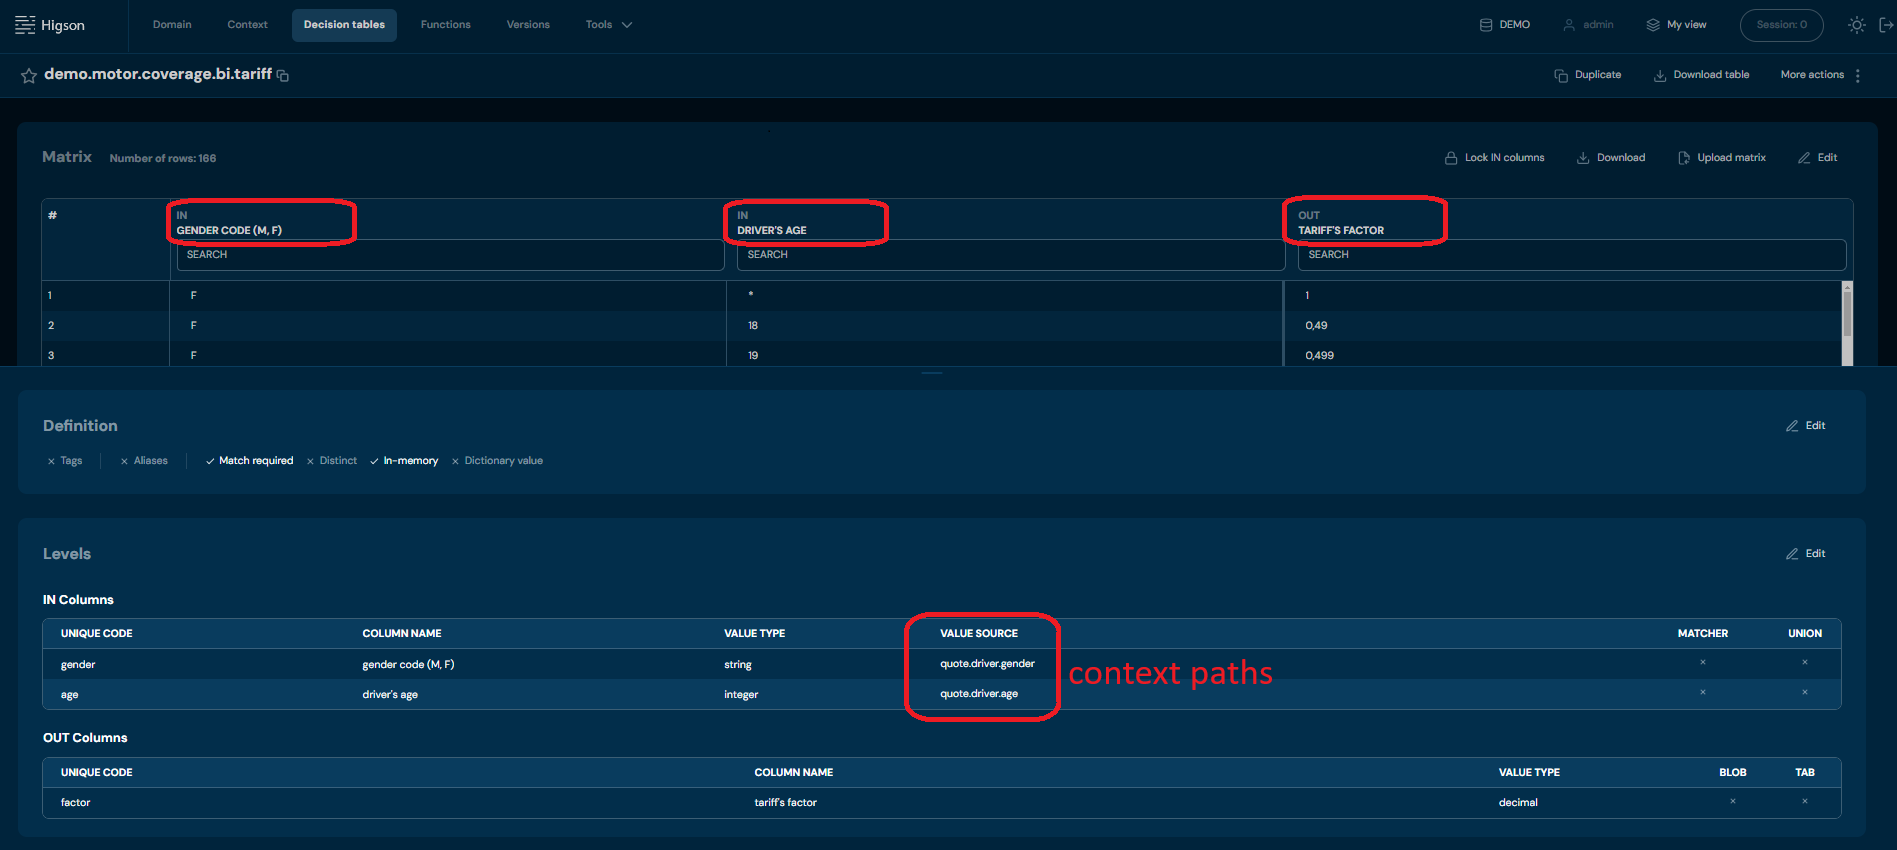
To retrieve the output from the decision table demo.motor.coverage.bi.tariff use the following code:
def factor = higson.getNumber('demo.motor.coverage.bi.tariff', ctx)
Code breakdown:
higson.getNumberis used to query the decision tabledemo.motor.coverage.bi.tariff.- The argument,
ctx, allows reaching into the object context. - The decision table reads the levels (gender and age) from the context and identifies the corresponding row.
- Based on this input, the appropriate output row is returned, containing the tariff’s factor.
Working with a Matrix#
When a value from a decision table is assigned to a variable, we often want to use that value later in the function code. Below are some tips on how to work with variables containing a matrix.
To assign the result of a decision table call (based on data from the context) to a variable:
def matrix = higson.getValue('decisionTableName', ctx)
Once the matrix is assigned, you can call various methods on the matrix variable:
matrix.size()
matrix.isEmpty()
matrix.rows()
You can also iterate over the matrix to access its individual rows:
for (def row in matrix) {
    def value = row.getNumber( ‘columnName’ )
    def value = row.getDecimal( ‘columnName’)
    ...
}
Calling Other Functions#
To call another function from within the body of your function, use the following syntax:
higson.call(‘functionName’, ctx)
If the function you are calling requires arguments, you can pass them as follows:
higson.call(‘functionName’, ctx, arg1, arg2, ..)
where arg1, arg2, etc., are optional arguments for the function.
When calling another function, make sure to consider the data type it returns. The table below outlines various function calls and the types of data they return:
| Method | Returned Type |
|---|---|
higson.call('functionName', ctx, ...) |
returns any object from function |
higson.callString('functionName', ctx, ...) |
String |
higson.callDecimal('functionName', ctx, ...) |
BigDecimal |
higson.callInteger('functionName', ctx, ...) |
Integer |
higson.callNumber('functionName', ctx, ...) |
double |
higson.callBoolean('functionName', ctx, ...) |
boolean |
higson.callDate('functionName', ctx, ...) |
java.util.Date |
higson.callLocalDate('functionName', ctx, ...) |
java.time.LocalDate |
EXAMPLE:
def result = higson.callDecimal(‘pl.decerto.demo.telco.hardware.activation.price.calculator’, ctx, packageCode)
Keep in mind that the order of the arguments must match the order in which they were defined in the function. The ctx argument is always the first one, as it is automatically included when the function is created
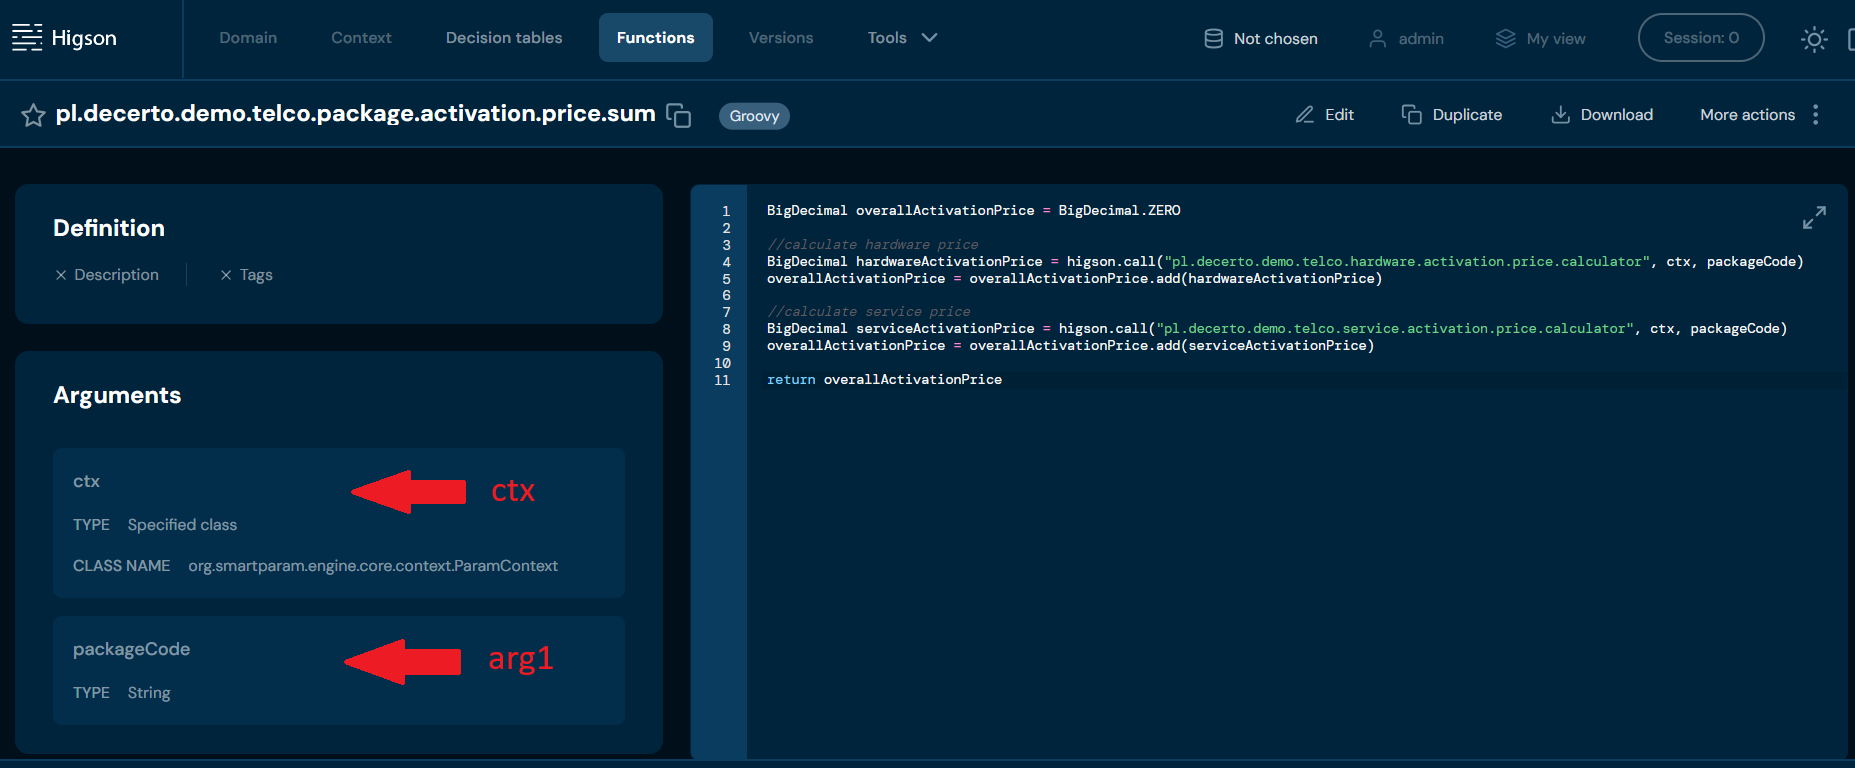
Accessing Domain Elements#
The table below lists methods for accessing domain elements, along with the results returned by each method.
| Method | Result |
|---|---|
domain.get('profile', 'path') |
Returns DomainElement for specified path. |
domain.get('profile') |
Returns DomainElement for root. |
domainObj.get('path') |
Returns DomainElement for path relative to domainObj. Throws an exception if the path is unknown. |
domainObj.getSafe('path') |
Returns DomainElement for path relative to domainObj. Does not throw an exception if the path is unknown. |
domainObj.get('path', 'elementCode') |
Returns a DomainElement with the specified elementCode for the collection path. |
domainObj.getSafe('path', 'elementCode') |
Returns a DomainElement with the specified elementCode for the collection path. Does not throw an exception if the path is unknown. |
domainObj.getAll('path') |
Returns all elements for the collection at the specified path. |
Domain paths should be written according to this pattern:
/Collection1[Collection1_Element]/Collection[Collection2_Element]
EXAMPLE 1:
def domainObj = domain.get(‘DEMO’, ‘/PLANS[FULL]’)
In this example, we access the FULL element in the PLANS - Rating Plan collection in the Domain Configuration of profile DEMO, as shown in the screen below.
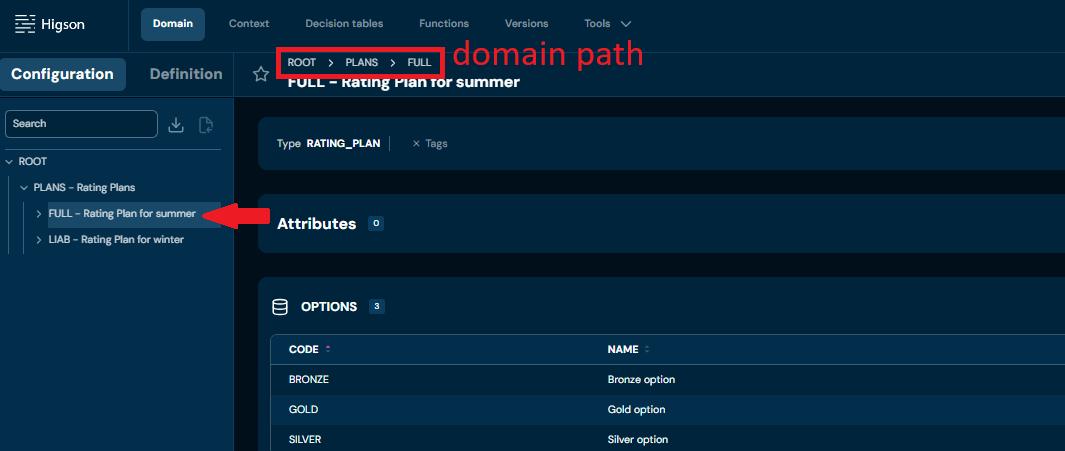
EXAMPLE 2:
def rootObj = domain.get(‘DEMO’)
In this example, we access directly to the ROOT of the profile DEMO.
Reading Domain Attributes#
The table below outlines methods for accessing domain attributes and the corresponding data types returned by each method.
| Method | Returned type |
|---|---|
domainObj.getAttrString(attributeName, ctx) |
String |
domainObj.getAttrDecimal(attributeName, ctx) |
BigDecimal |
domainObj.getAttrInteger(attributeName, ctx) |
Integer |
domainObj.getAttrNumber(attributeName, ctx) |
double |
domainObj.getAttrBoolean(attributeName, ctx) |
boolean |
domainObj.getAttrDate(attributeName, ctx) |
java.util.Date |
domainObj.getAttrValue(attributeName, ctx) |
ParamValue |
EXAMPLE:
In this example, we’ll demonstrate how to retrieve the Position attribute from a domain configuration, similar to the one shown in the screenshot below.
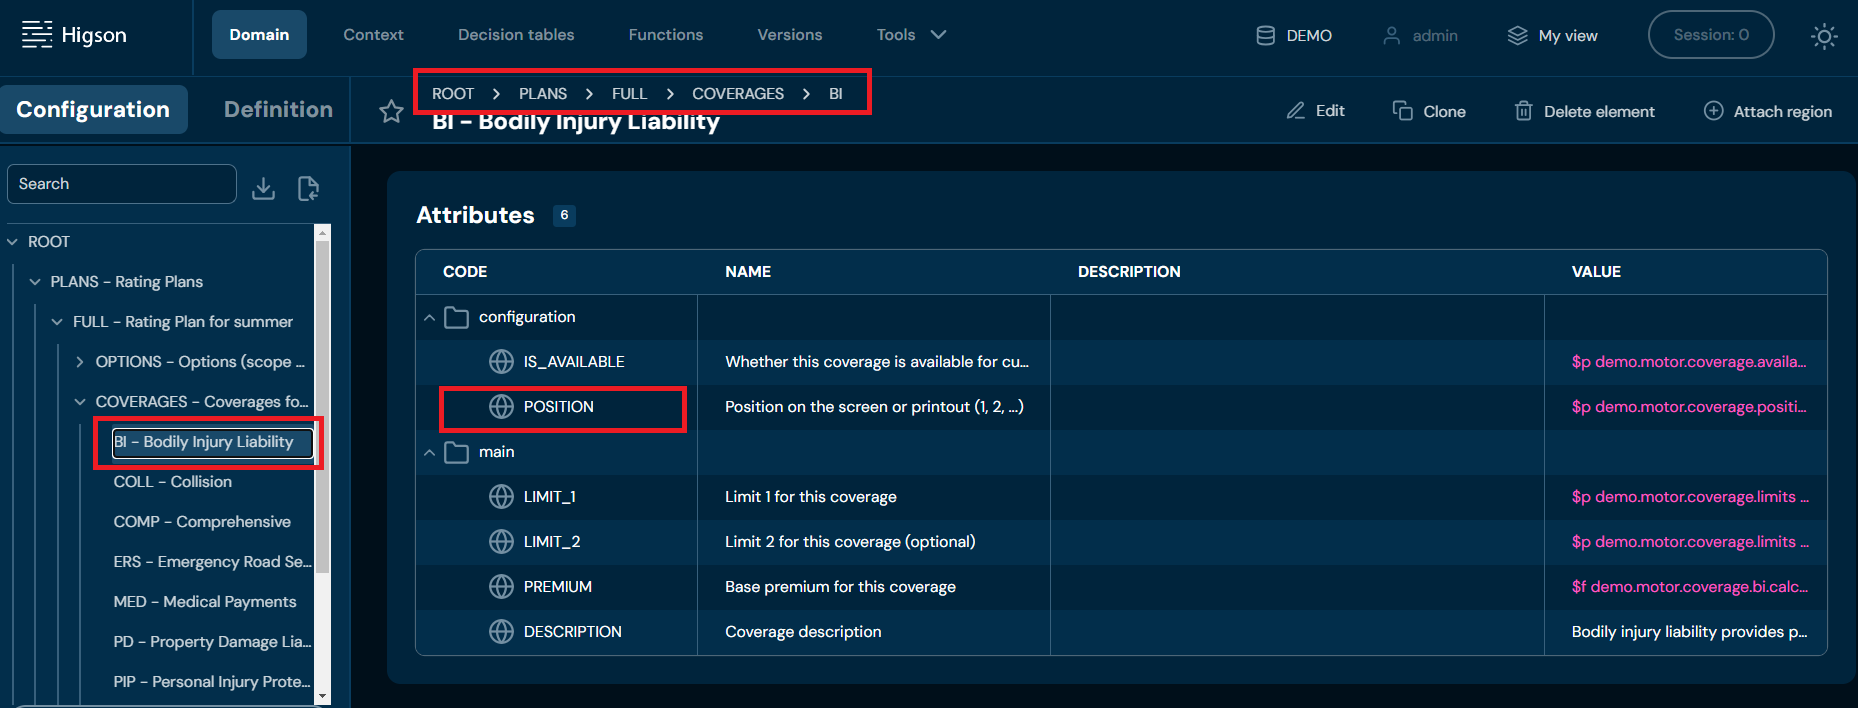
Steps to Retrieve the Position Attribute
- Access the Domain Configuration: First, we access the relevant domain configuration element.
- Retrieve the Position Attribute: Once we have the element, we retrieve the Position attribute using the getAttrInteger method.
Code:
def coverage = domain.get('DEMO', '/PLANS[FULL]/COVERAGES[BI]')
def position = coverage.getAttrInteger('POSITION', ctx)
return position
Reading Code and Name#
Dedicated functions are available to retrieve the code and name of a domain element. Below are examples demonstrating how to call these functions.
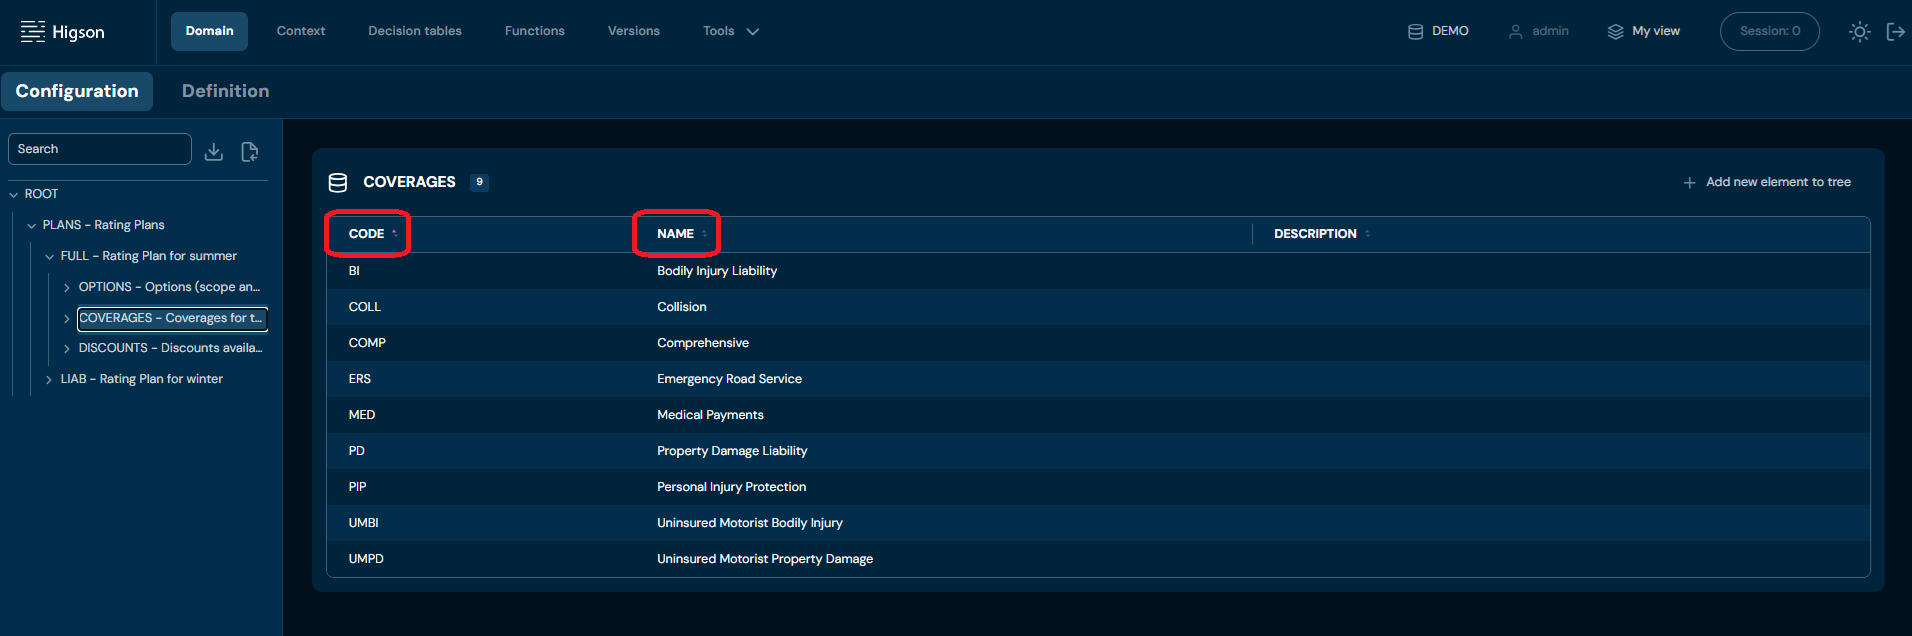
EXAMPLE: Reading the BI element code
def coverage = domain.get('DEMO', '/PLANS[FULL]/COVERAGES[BI]')
def coverageCode = coverage.code
EXAMPLE: Reading the BI element name
def coverage = domain.get('DEMO', '/PLANS[FULL]/COVERAGES[BI]')
def coverageName = coverage.name
Reading Values from Context#
The table below lists methods for accessing context elements, along with the data types they return.
| Method | Returned type |
|---|---|
ctx.getString('path') |
String |
ctx.getDecimal('path') |
BigDecimal |
ctx.getInteger('path') |
Integer |
ctx.getNumber('path') |
double |
ctx.getBoolean('path') |
boolean |
ctx.getDate('path') |
java.util.Date |
ctx.getLocalDate('path') |
LocalDate |
Context Path Format#
Context paths should follow this pattern:
Type1.Type2.Type2_Attribute
EXAMPLE:
def value = ctx.getInteger(‘quote.driver.age’)
In this simple example, age is an attribute of the Driver type, which is a subtype of the Quote type. Note that the ROOT is omitted in context paths.
Getting Collection#
To retrieve a collection, use the following method:
def collection = ctx.get(collectionPath)
You can iterate over the collection elements as shown below:
for (elementCtx in collection) {

    def x = elementCtx.getNumber(relativePath)
}
Getting Sub-Context or Intermediate Node#
To retrieve a sub-context or an intermediate node, use the following methods:
def node = ctx.get(nodePath)
def value = node.getString(relativePath)
EXAMPLE:
def risks = ctx.get('policy.risks')
for (def risk in risks) {
    def premium = risk.getDecimal('premium')
    def sumInsured = risk.getDecimal('sumInsured')
}
In example above, we navigate to the risks context node, then retrieve the values of the premium and sumInsured attributes (both of type number) into the corresponding variables.
Using Functions in Cascade Expressions#
In complex business configurations, operations on objects or data often need to be performed sequentially, where one operation triggers another. In Higson, cascade expressions allow this kind of functionality and can be used in the following configuration elements:
- Value source field of decision tables
- Cells in the matrix of the output levels of decision tables
- Domain attributes
| Expression | Description |
|---|---|
$f fun |
Executes the function fun. |
$f fun (1, 5, active) |
Executes the function fun with the arguments: 1, 5, and active. |
$f fun (1; 5; active) |
Executes the function fun with the arguments: 1, 5, and active. If a semicolon is used, it acts as the argument separator. |
$f fun (ctx:path, 5) |
Executes the function fun where the first argument is the value from the context path and the second is 5. |
$f fun [idx] |
If the function fun returns a complex object (e.g., ParamValue, MultiValue, array, Collection, or Iterable), it retrieves the element at the specified index idx. |
$f fun [code] |
If the function fun returns a complex object (e.g., ParamValue, MultiValue, or Map), it retrieves the value associated with the specified code. |
EXAMPLE:
$f fun (1, ctx:risk.code) [factor]
In this example, the function fun is executed with the value of ctx:risk.code as an argument, and the result is filtered by the factor element if the return type is a complex object.
Higson Function Example#
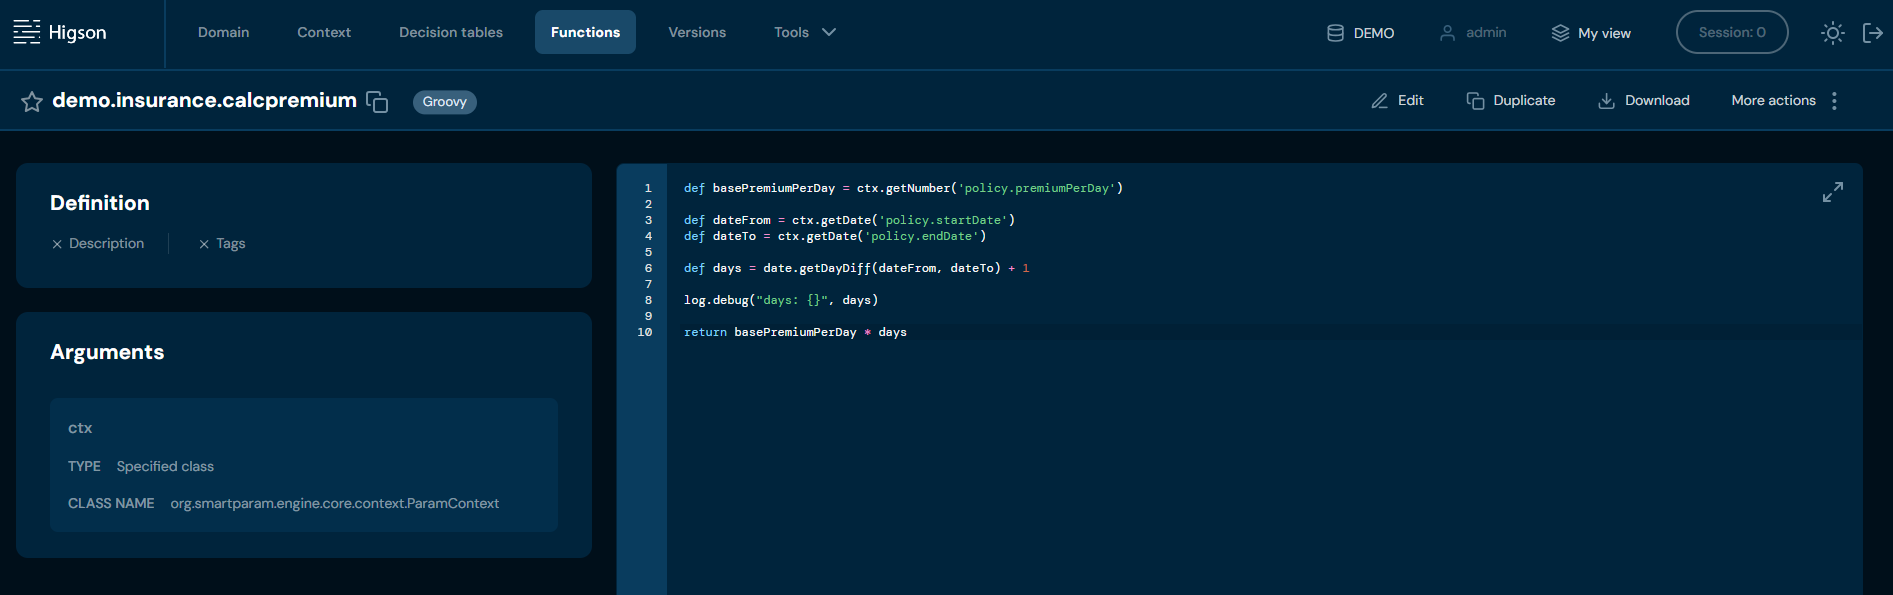
Above function calculates the total premium for a policy based on the premium per day and the number of days the policy is active.
Using Flows in Cascade Expressions#
To call a flow use $w notation.
EXAMPLE:
$w flow (1,active)
Flows are another powerful tool for parametrization. Flows enable users to design business logic visually—without any programming skills. This means that even those with no coding experience can independently create complex algorithms and processes. Within a flow, logic is represented as a diagram composed of blocks, decision gates, and arrows that define how the process unfolds. The intuitive, user-friendly interface makes it easy to understand the operation of even complex schemes.
To start working with flows, go to the Flows tab on the Main Toolbar.
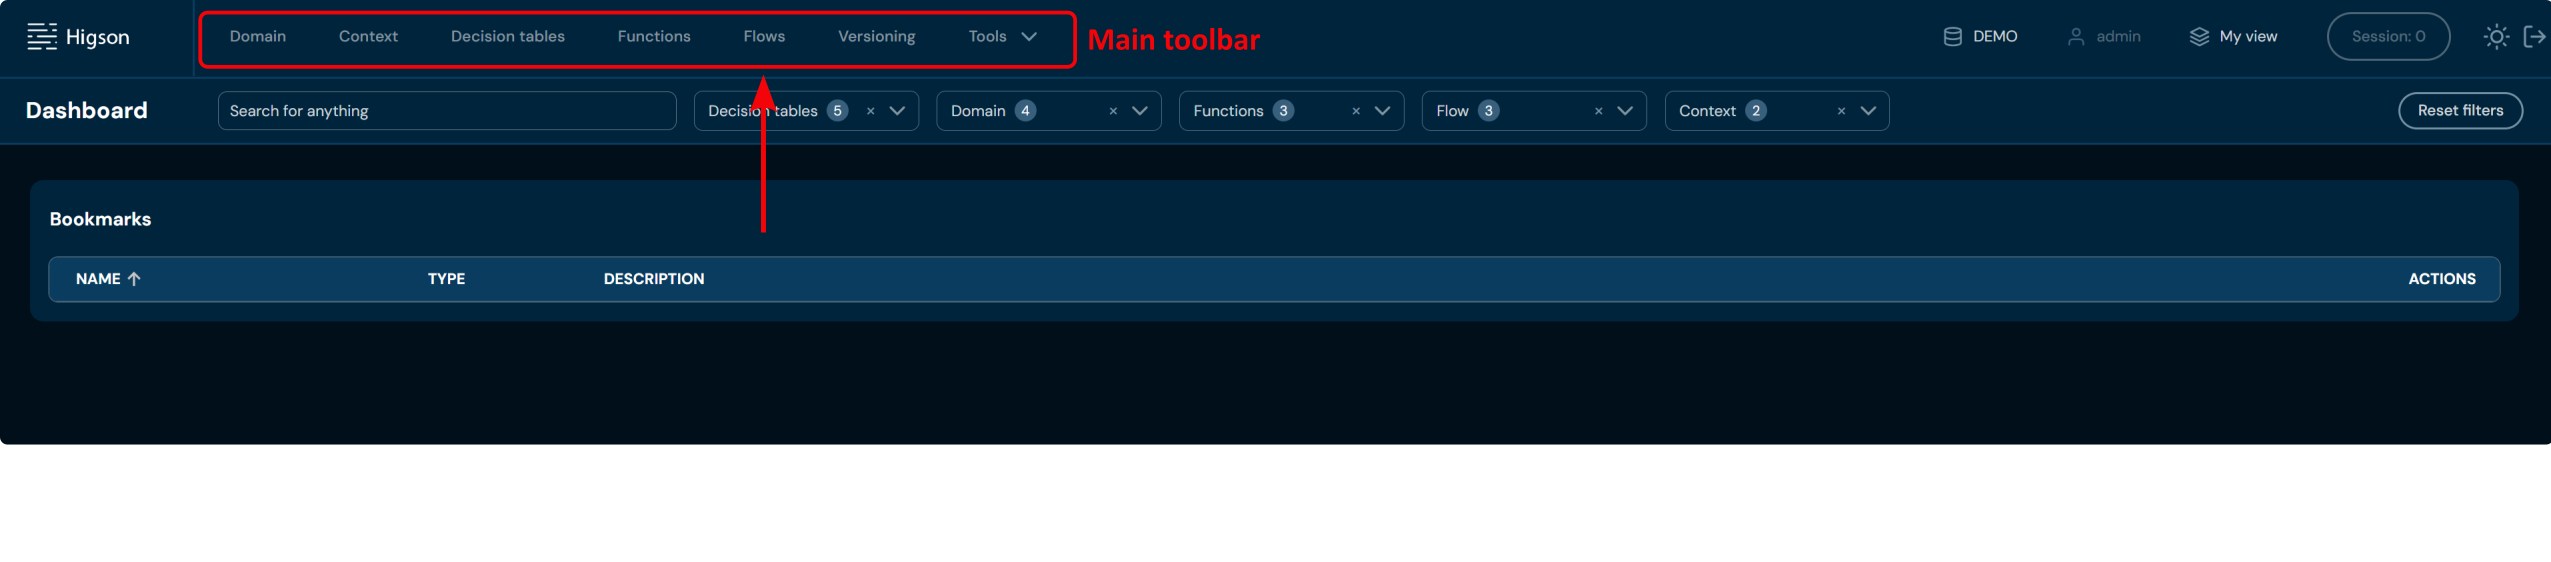
After selecting Flows, you are redirected to a view listing all flows created in the given environment.
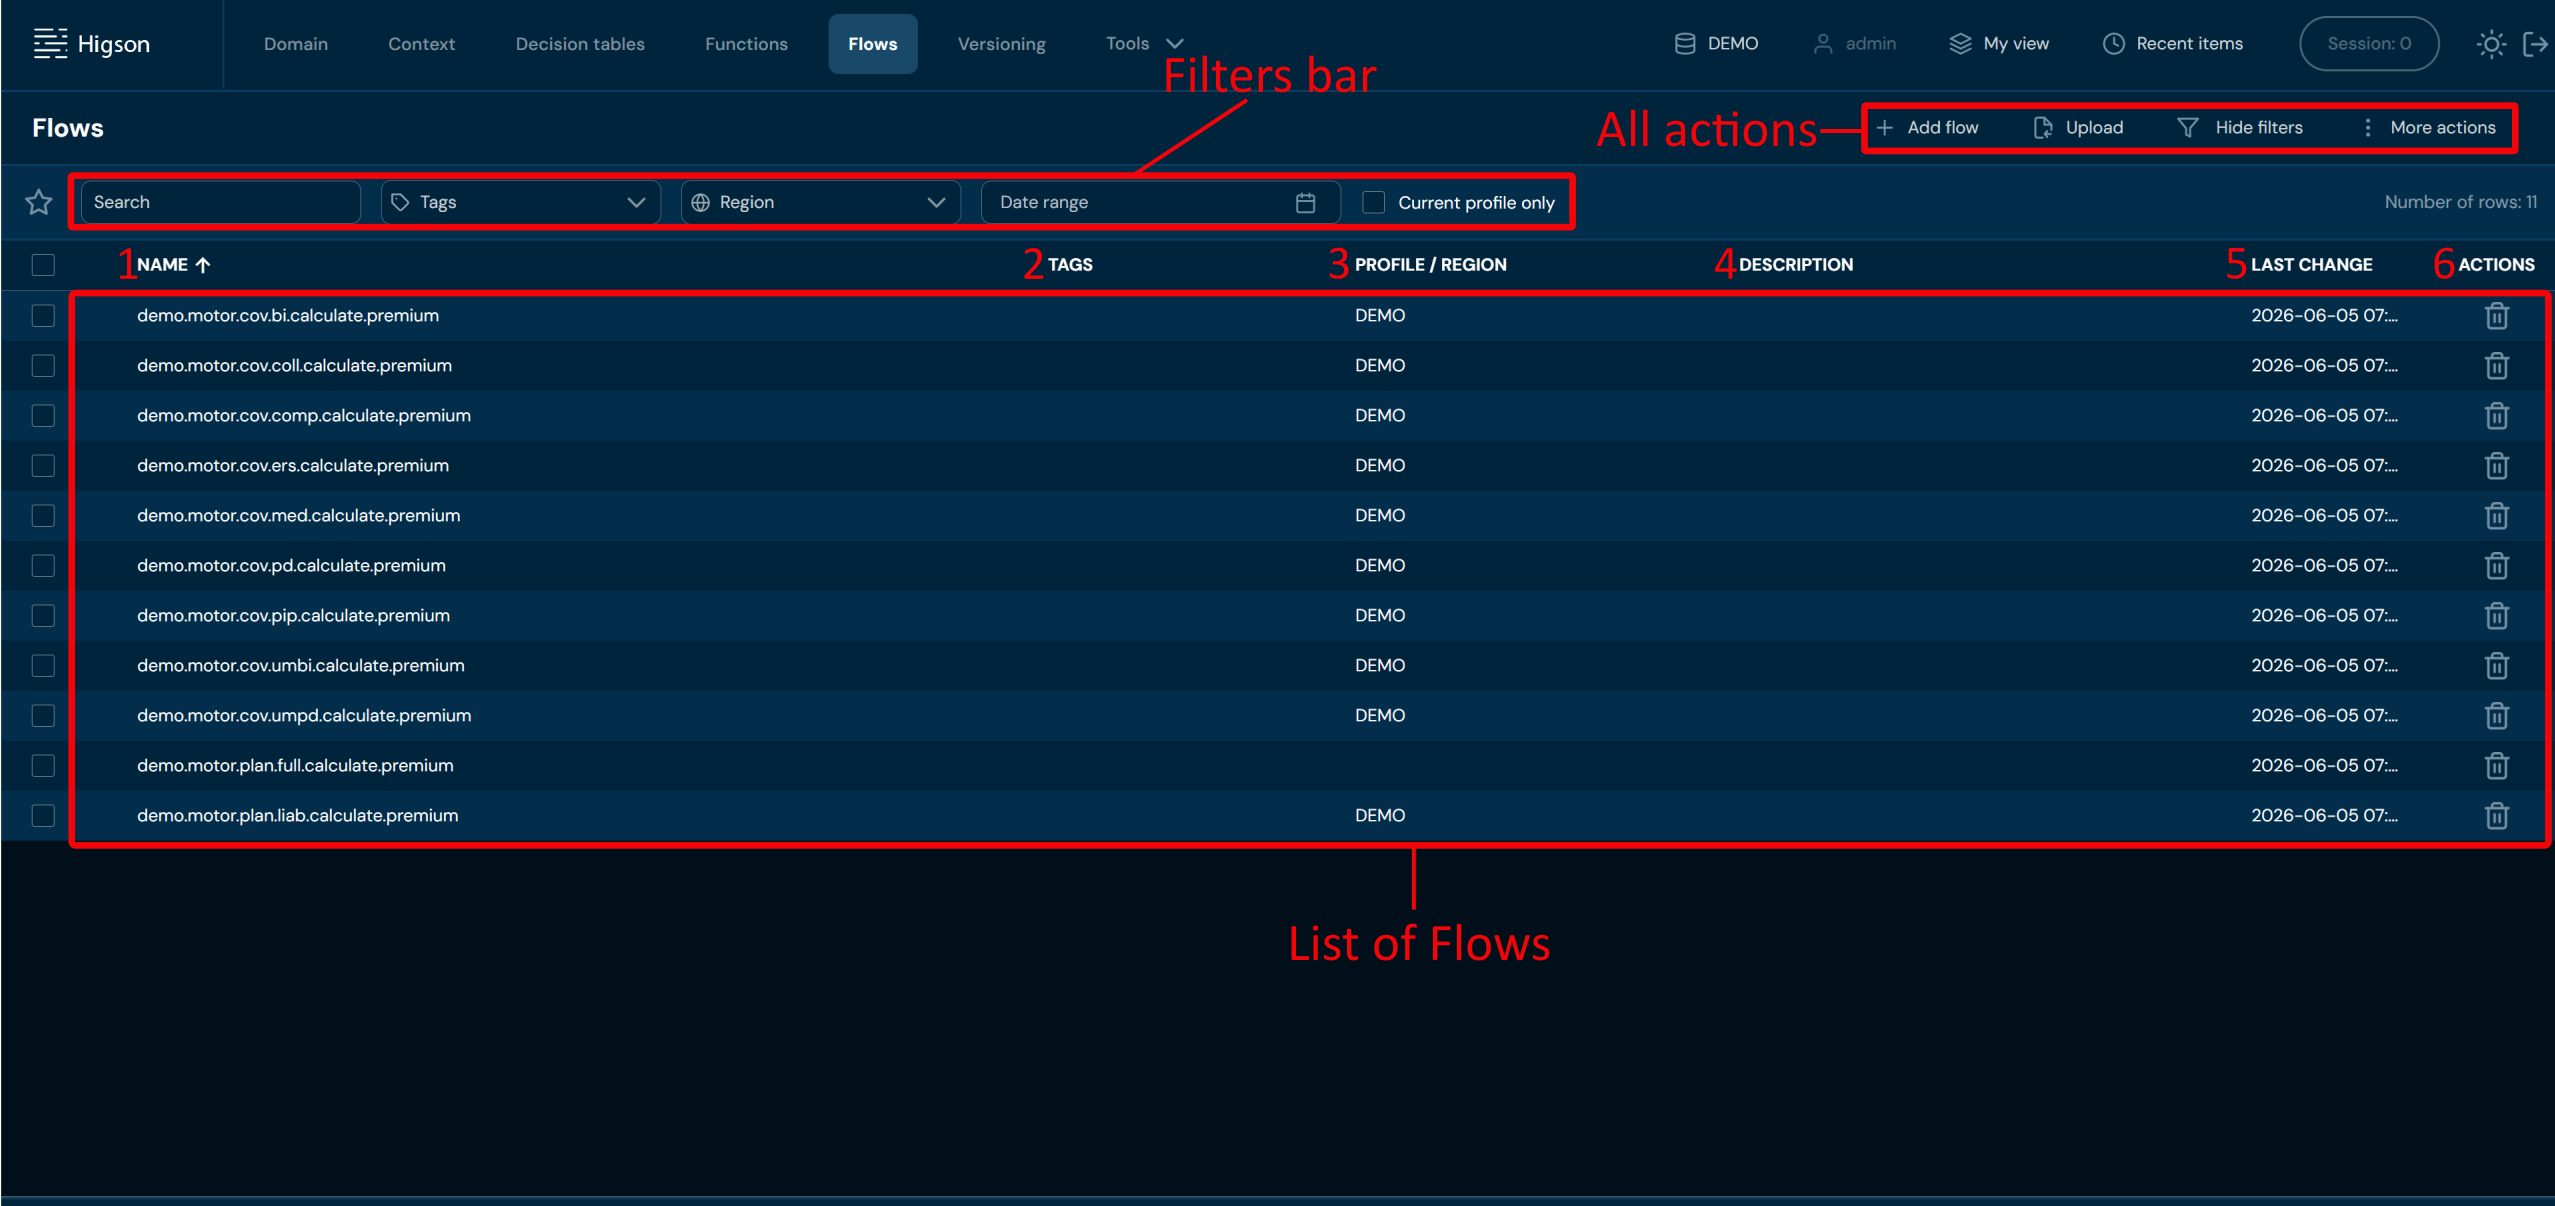
| No. | Column name | Description |
|---|---|---|
| 1 | Name | Full name of the flow. |
| 2 | Tags | List of all tags assigned to the flow. |
| 3 | Profile/Region | Profile and Region the flow is assigned to. |
| 4 | Description | Description of the flow. |
| 5 | Last Change | The last modification date of the flow. |
| 6 | Actions | List of quick access actions. The remove action deletes the flow. |
The flows list view depends on the selected profile.
If a profile is selected, both global items and items assigned to the selected profile are displayed.
If no profile is selected (not-chosen), only global items are visible.
Elements modified in current session are marked with pink dot:
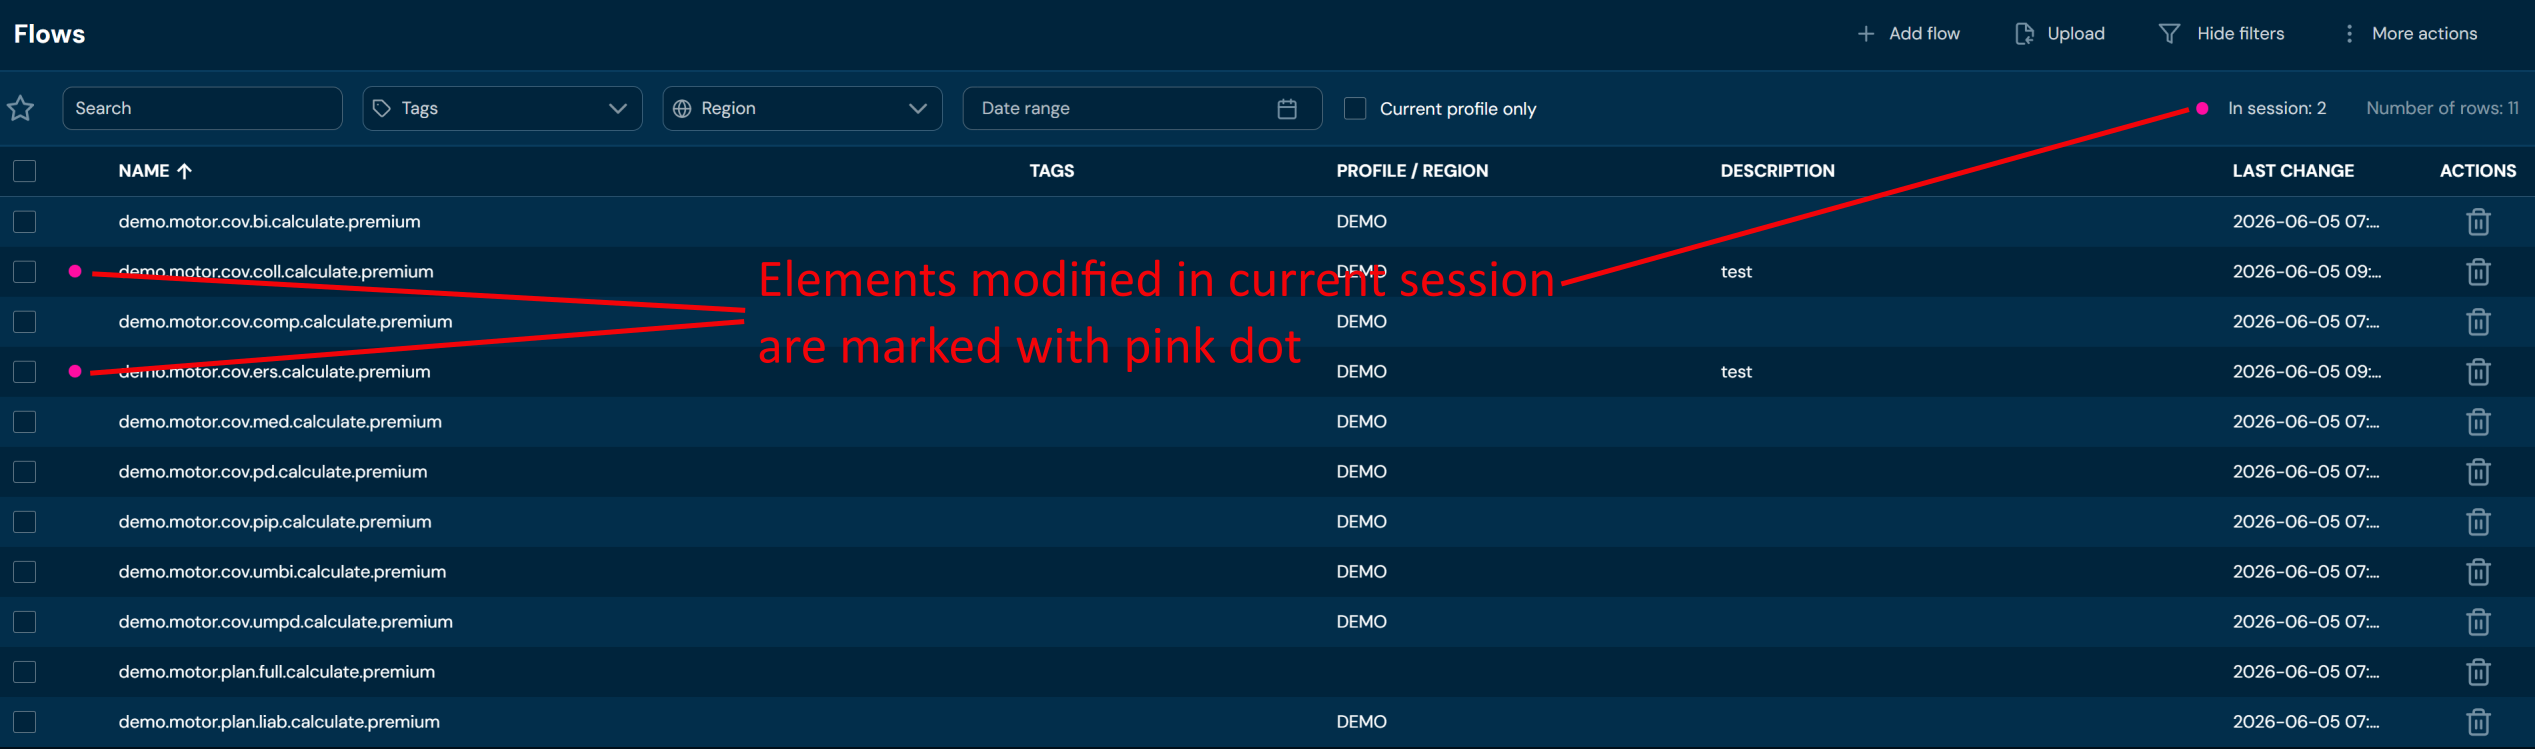
On this screen, you can apply Filters to search for specific flow or to narrow down the number of displayed flows. You can also perform actions on one or multiple flows. You can see All Actions available for the flows below:
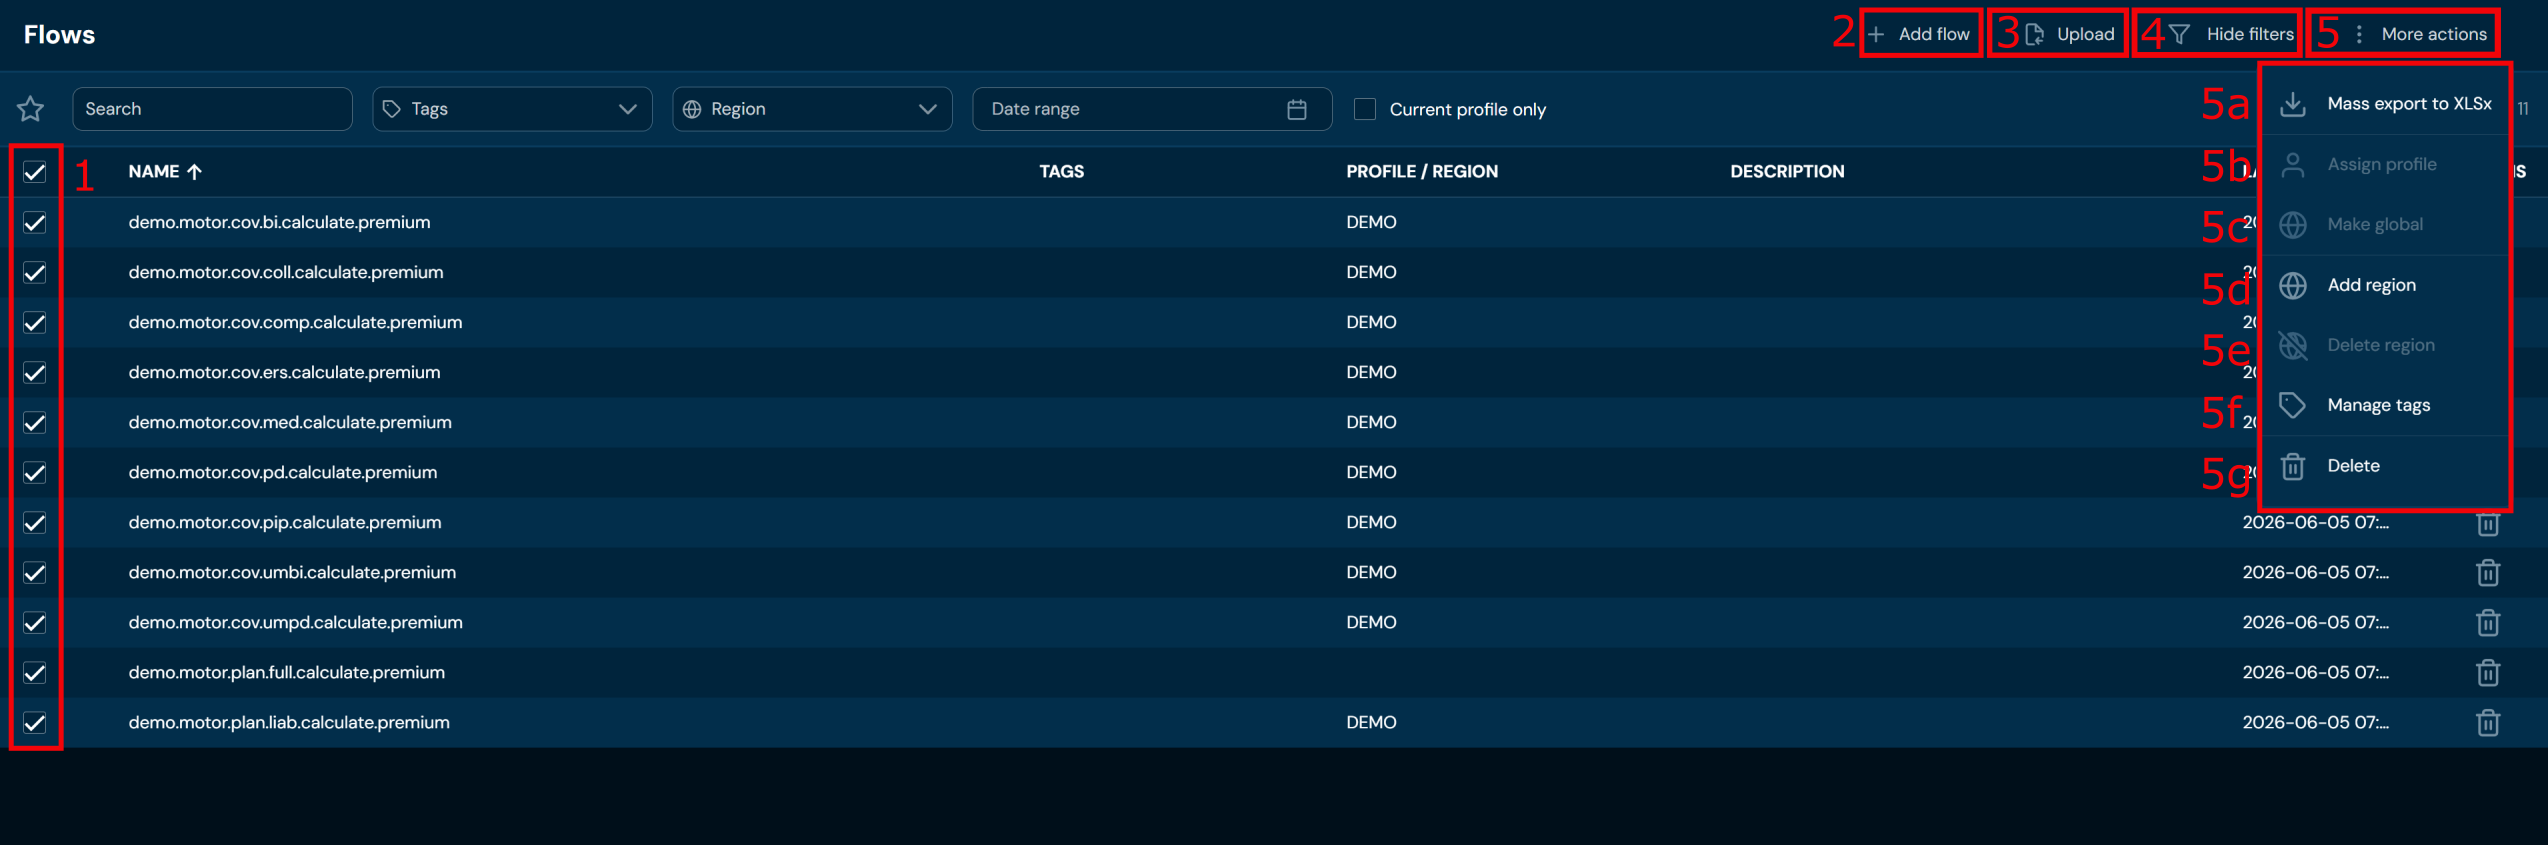
| No. | Action | Description |
|---|---|---|
| 1 | Checkboxes | Select the top checkbox to select all flows in the view or select individual checkboxes to group flows for actions 5a, 5b, 5c, 5d, 5e, 5f, 5g. |
| 2 | Add flow | Opens a step-by-step flow wizard. Allows you to create a new flow. |
| 3 | Upload | Allows importing flows from a ZIP or XLSX file. |
| 4 | Hide filters | Hides or reveals the Filters bar accordingly. If the Filter bar is visible, then the Hide filters action is available. If it’s hidden, then the Show filters action is available. |
| 5 | More actions | The drop-down menu that contains actions 5a–5g. Bear in mind that actions 5a, 5b, 5c, 5d, 5e, 5f, 5g are available only if at least one flow is selected (at least one checkbox is checked). Otherwise, the mentioned actions will be greyed out. |
| 5a | Mass export to XLSX | Downloads a ZIP file that contains flows (XLSX + JSON). |
| 5b | Assign profile | Assigns a profile to all selected flows. To learn more about assigning profiles go here. |
| 5c | Make global | Makes all selected flows global. To learn more about making flows global go here. |
| 5d | Add region | Adds regions to all selected flows. |
| 5e | Delete region | Removes regions from all selected flows. |
| 5f | Manage tags | Allows adding or removing tags to/from selected flows. |
| 5g | Delete | Deletes all selected flows. |
You can see all Filters available for flows below:
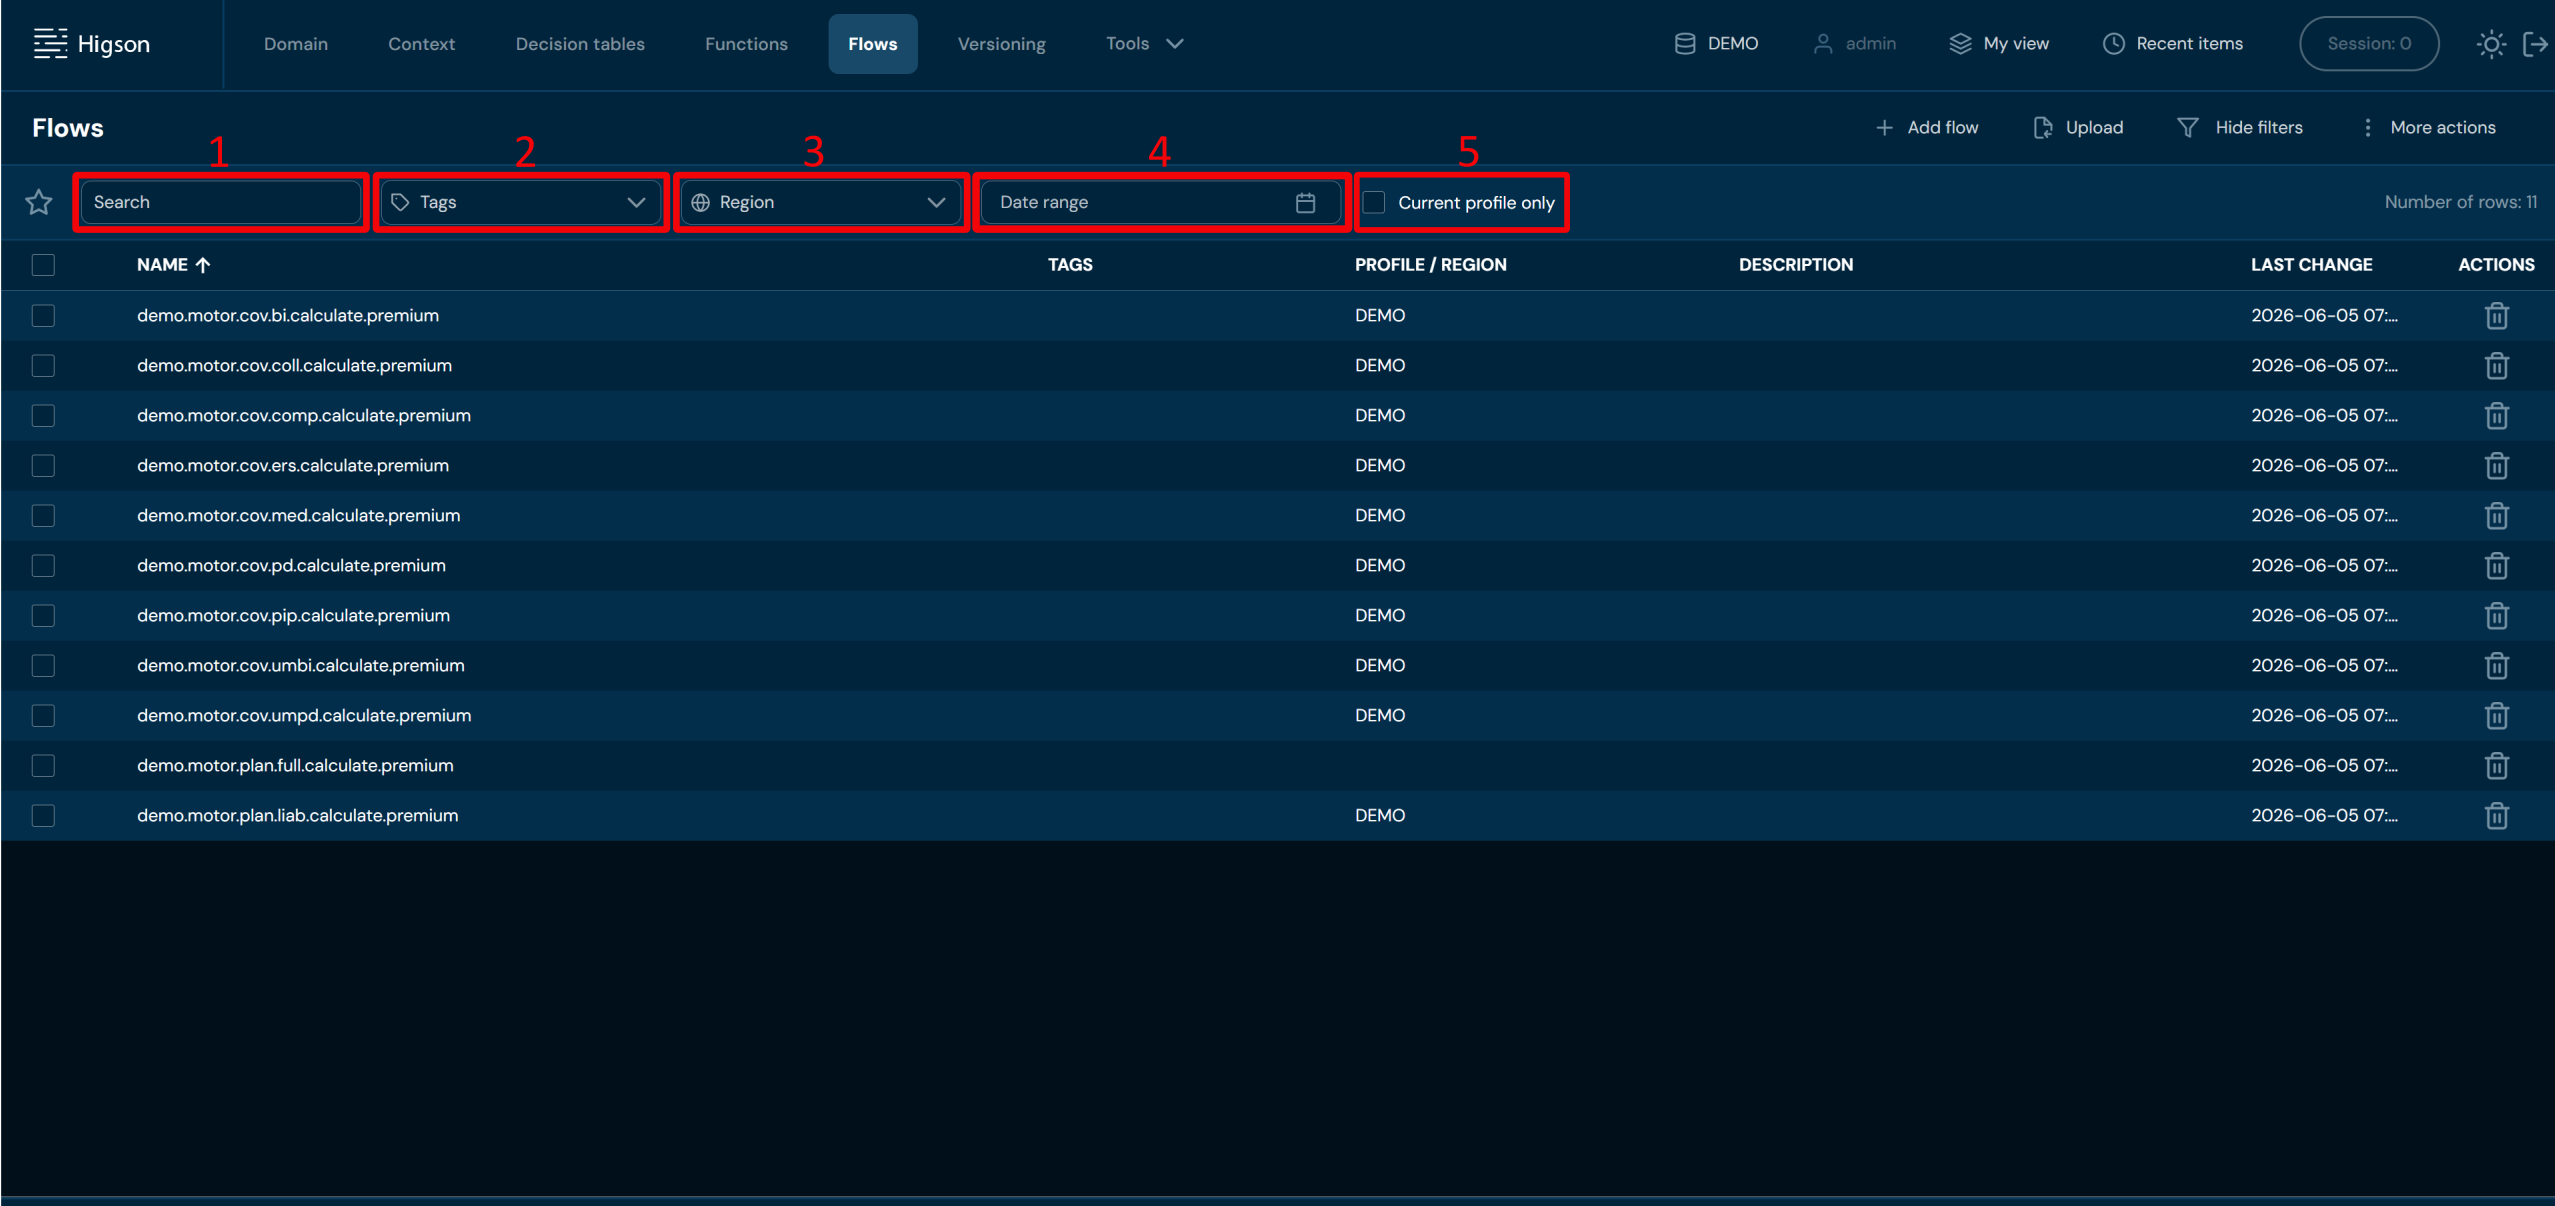
| No. | Filter name | Description |
|---|---|---|
| 1 | Search text field | Filter by any string provided by the user. |
| 2 | Tags | Filter by assigned tags; only tags assigned to at least one flow are visible for selection. |
| 3 | Region | Filter by assigned regions; only regions assigned to at least one flow are visible for selection. |
| 4 | Date range | Filter by last change date in format YYYY/MM/DD - YYYY/MM/DD. |
| 5 | Current profile only | Check this box to limit the view to flows assigned to the currently selected profile. Otherwise, global flows will also be displayed. |
Upload Flow#
If you want to upload flow from ZIP file, follow these steps:
-
Choose Flows on the Main toolbar.
-
Choose Upload in All actions bar.
a. Choosing Upload brings up the Upload screen.
-
Drag & drop desired file or click to upload a file and choose file in File explorer.
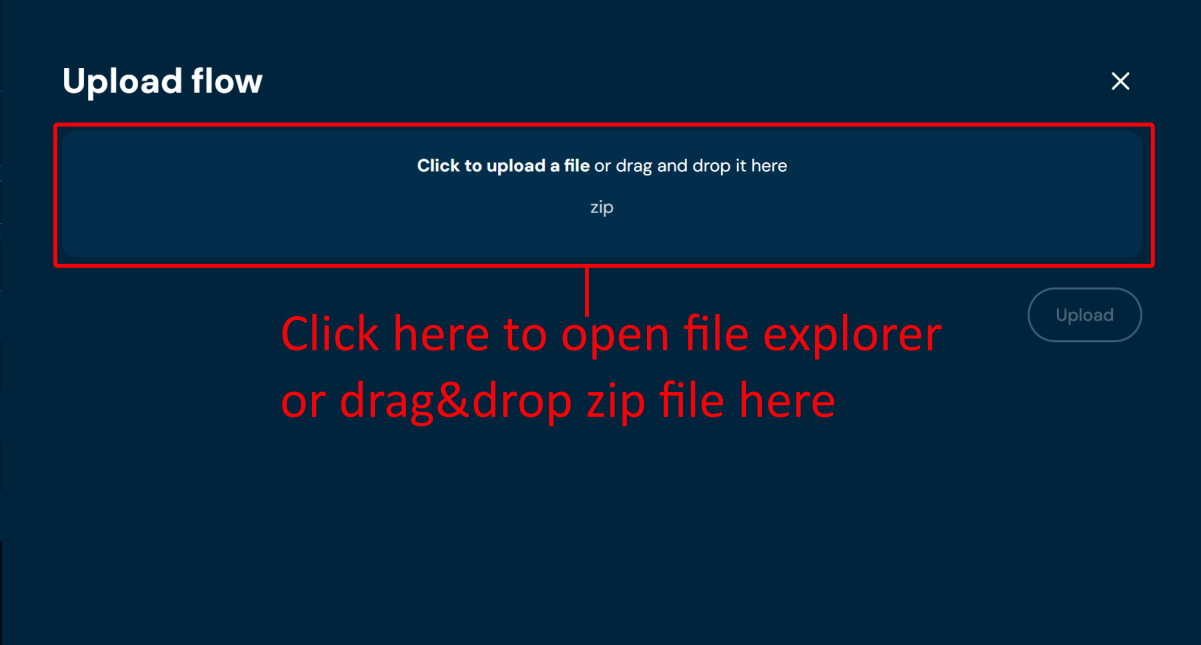
- If the file loads correctly, it may be uploaded to the environment. File will load correctly if there is no file format problem.
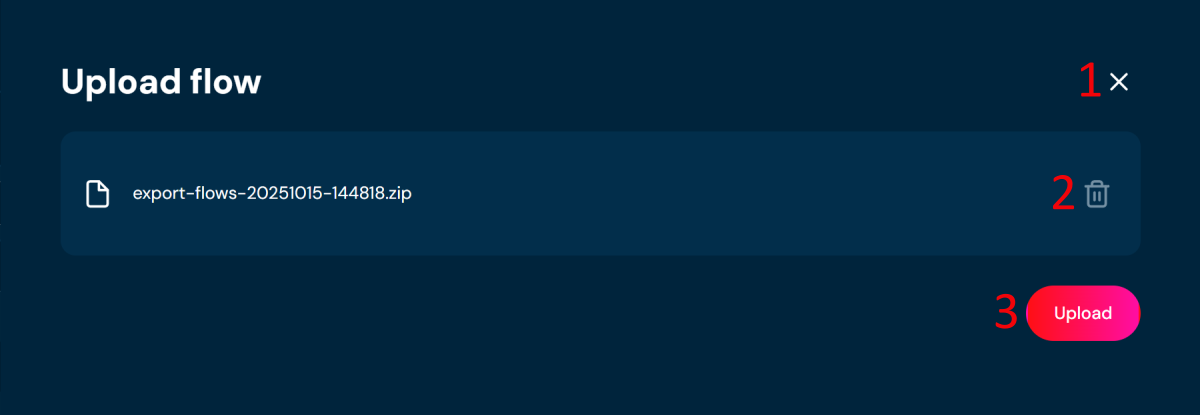
| No. | Button | Description |
|---|---|---|
| 1 | Close | Aborts the upload process. |
| 2 | Delete | Removes the loaded file. When clicked, you will need to provide the file to load for the upload process to be completed. |
| 3 | Upload | Uploads the loaded file to the system. The report of the upload will show. |
-
Click Upload.
-
When Upload is completed, you will see message Upload successful and the upload report. It allows you to check if any problems during upload occurred.
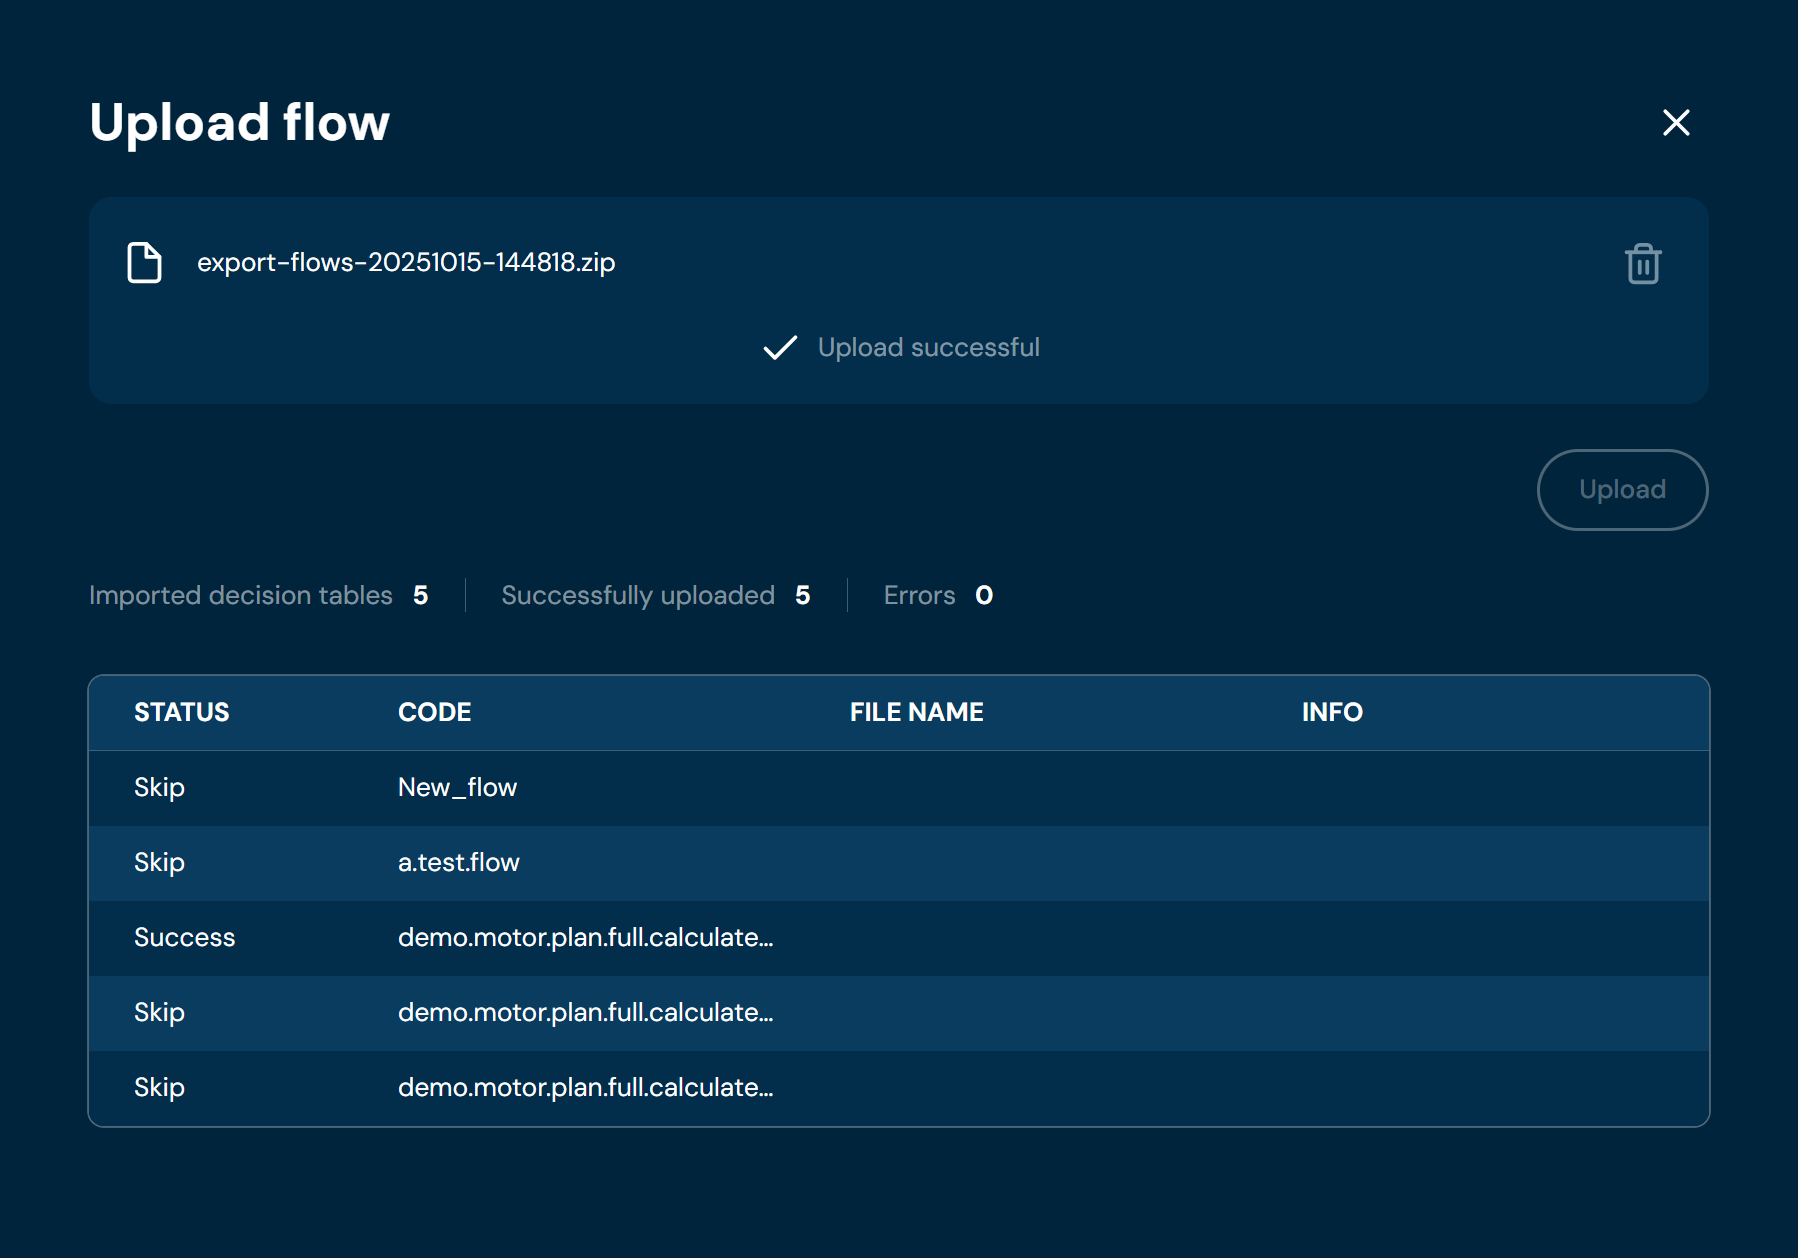
Mass Export to XLSx#
If you want to download one or more flow, follow these steps:
-
Choose Flows on the Main toolbar.
-
Select one or more flow.
a. Select the top checkbox to select all flows in the view, or select individual checkboxes to select one or multiple flows.
-
From drop-down menu More actions choose Mass export to XLSx.
a. If action Mass export to XLSx is greyed out, it means that no flow has been selected.
b. Choosing Mass export to XLSx downloads a ZIP file that contains json files with flows body (one file per flow) and XLSX file with flows details.

Assign Profile#
If you want to assign a profile to one or more flows, follow these steps:
-
Select Flows from the Main toolbar.
-
Select the flows without an assigned profile by checking the boxes on the left side of the list.
-
From the More Actions drop-down menu, choose Assign Profile.
a. Selecting Assign Profile opens the Assign Profile screen.
-
Select the profile to which you want to assign the flow and confirm by clicking Change.
On the flows list view, a profile entry will appear for the assigned flows. The view will also be updated to reflect the selected profile.
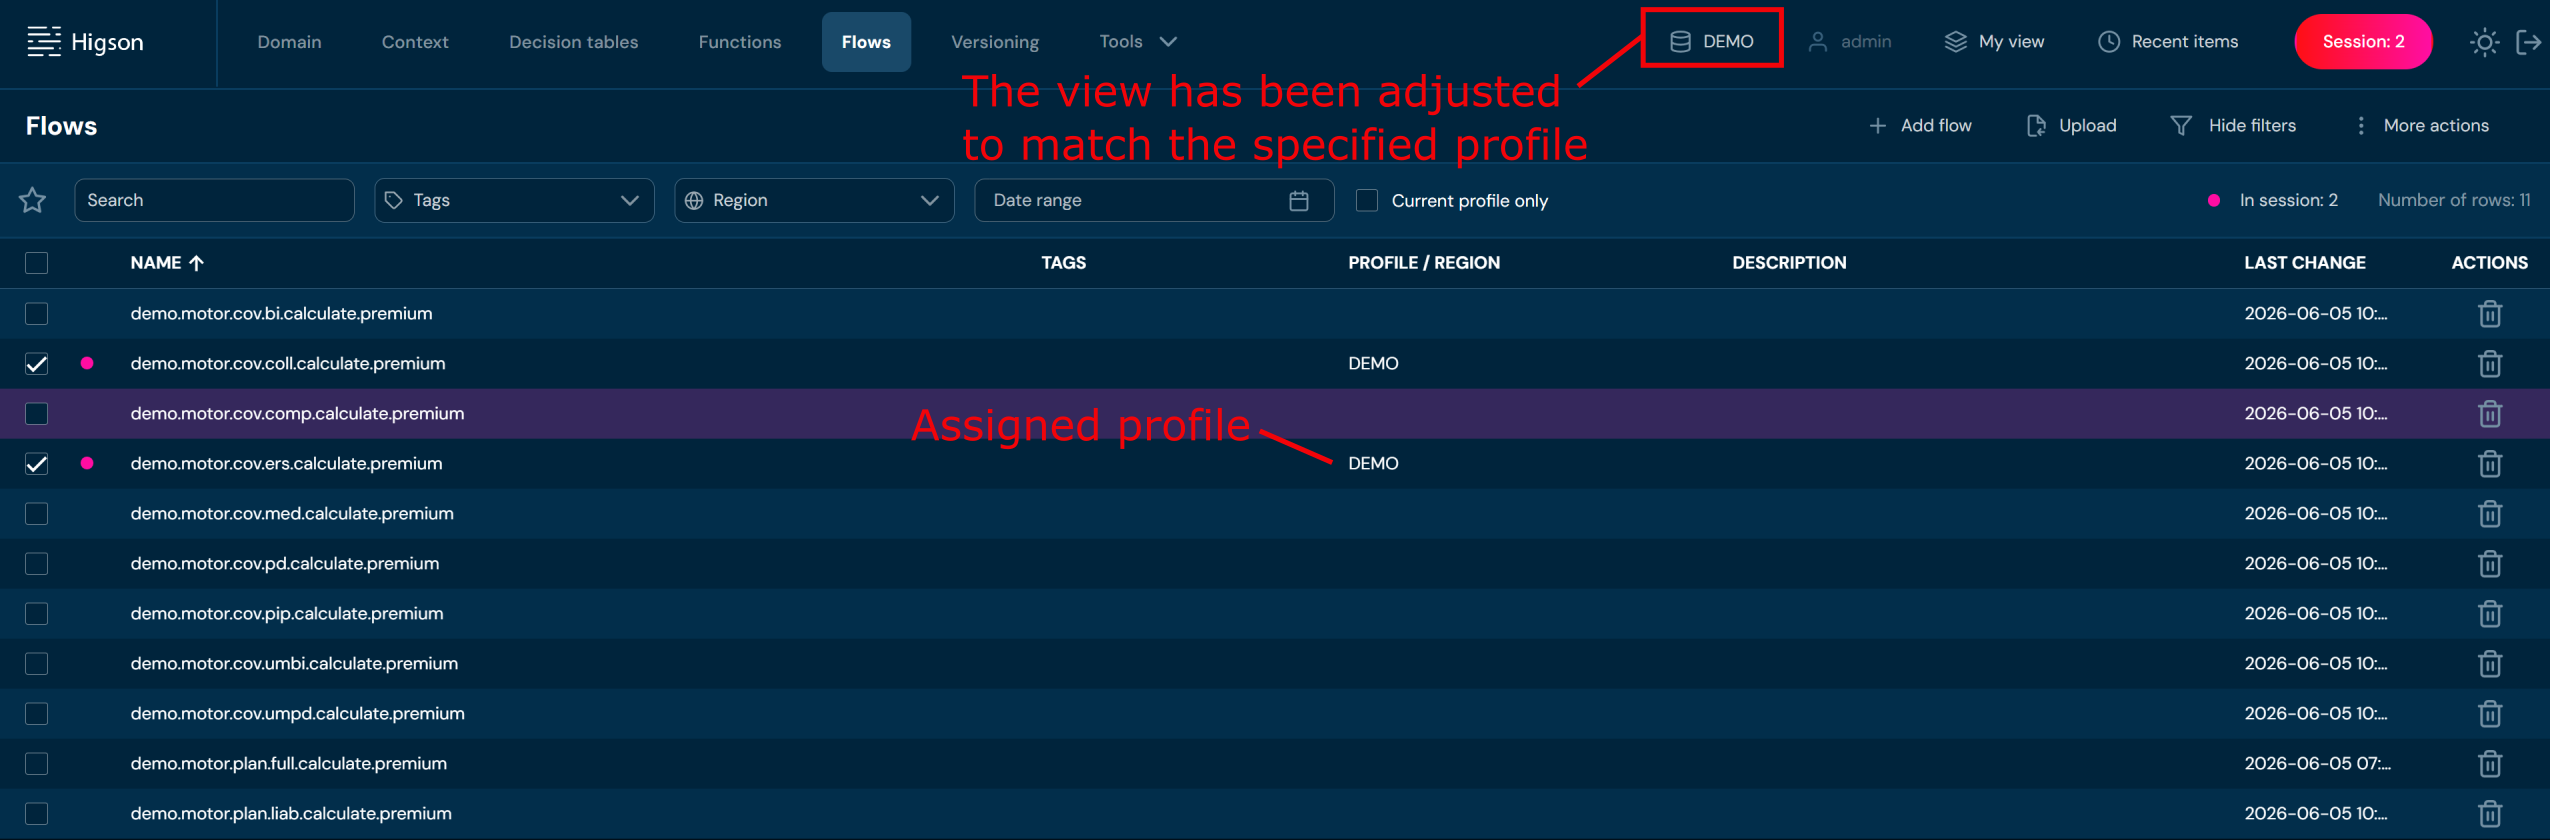
Make Global#
If you want to detach one or more flows from a profile, follow these steps:
-
Select Flows from the Main toolbar.
-
Select the flows with an assigned profile by checking the boxes on the left side of the list.
-
From the More Actions drop-down menu, choose Make Global.
a. A confirmation pop-up will appear.
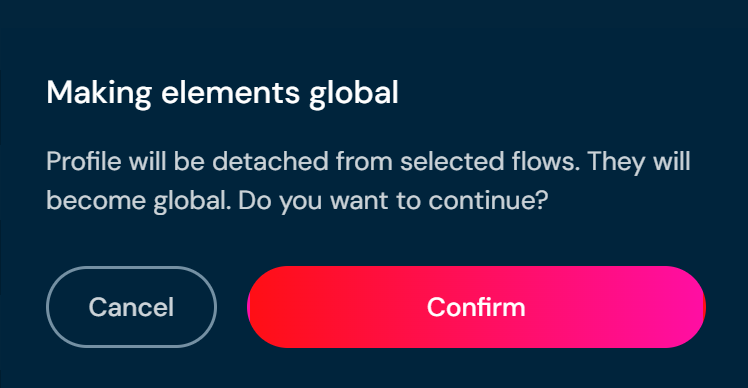
- Click Confirm.
On the flows list view, the profile entry will disappear for the selected flows. The view will also be updated to global.
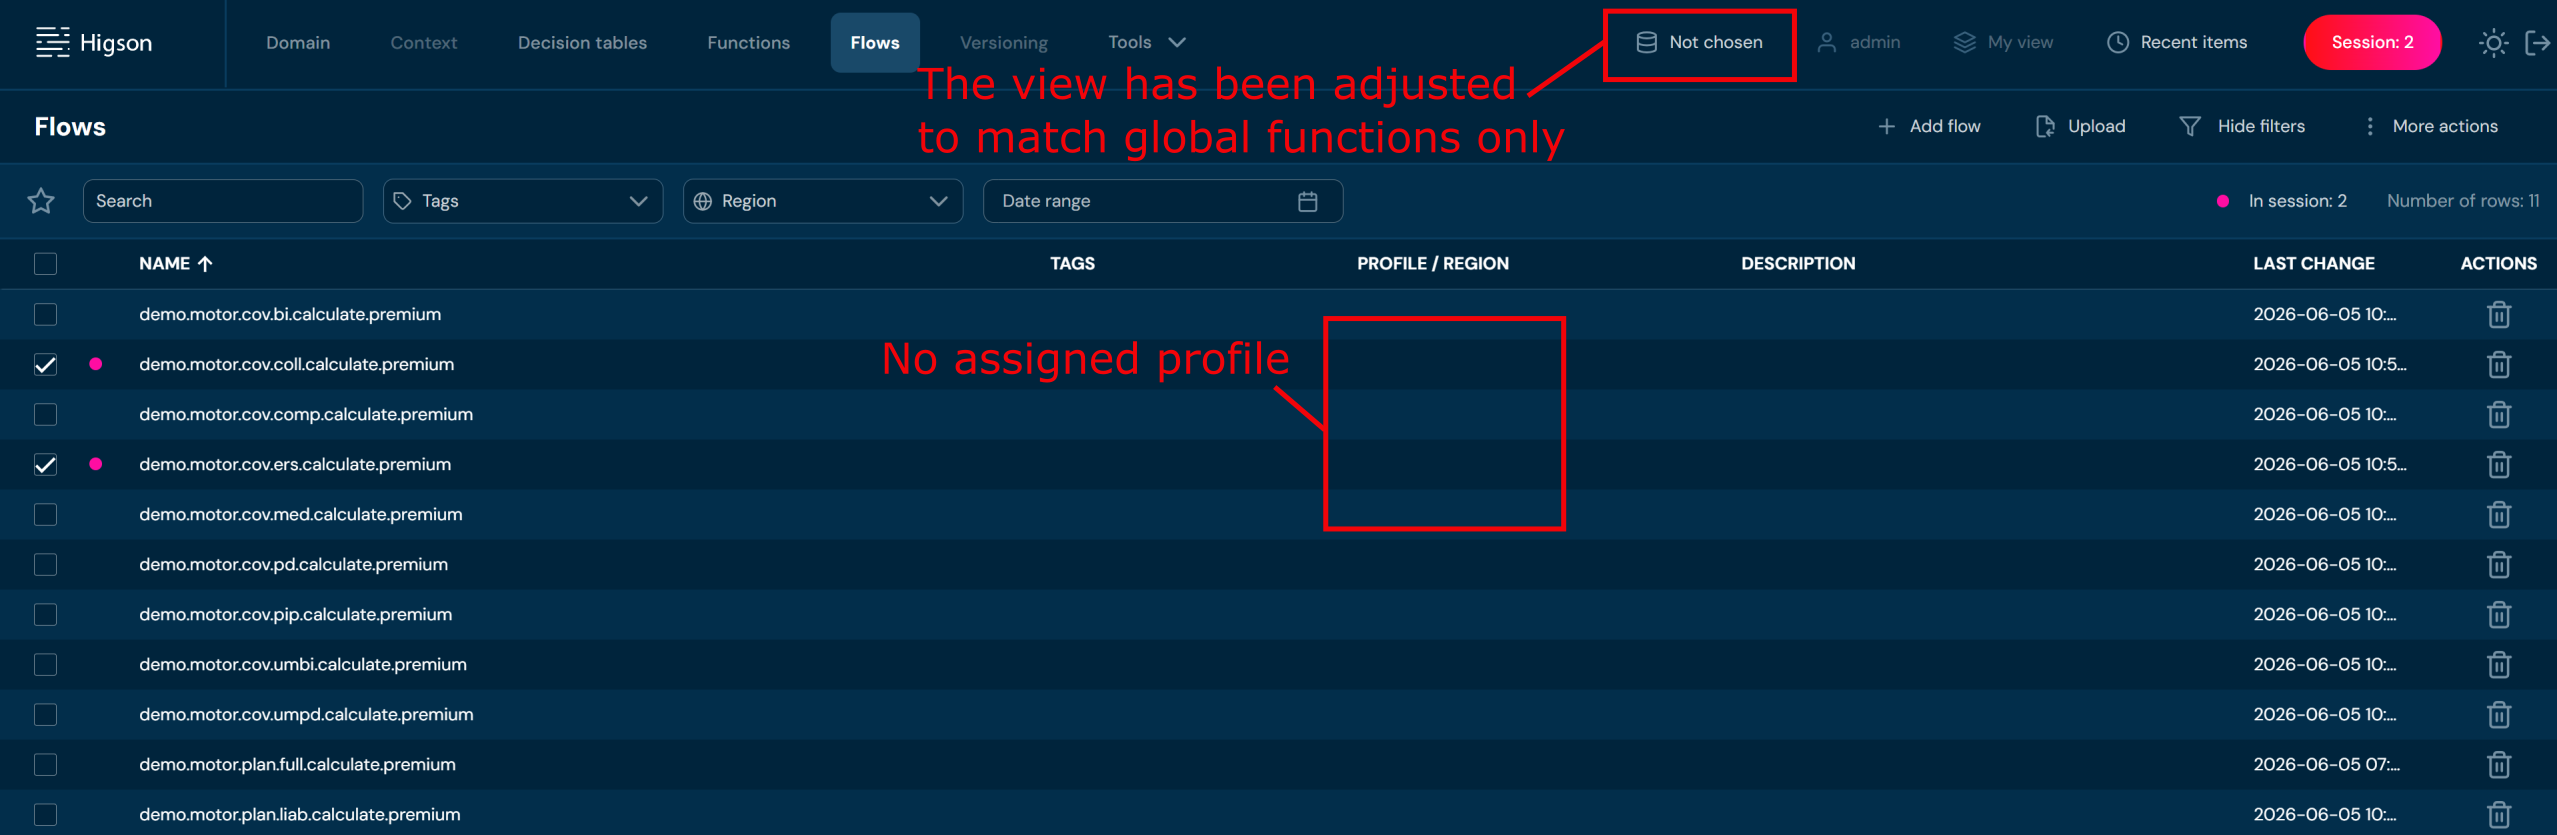
Add Region#
To attach a flow to a region, flow must first be assigned to a profile. A region belongs to a profile.
If you want to add a region to one or more flows, follow these steps:
-
Choose Flows on the Main toolbar.
-
Select one or more flow without a Region.
a. Select the top checkbox to select all flows in the view, or select individual checkboxes to select one or multiple flows.
-
From drop-down menu More actions choose Add region.
a. If action Add region is greyed out, it means that no flow has been selected or selected flows already have region attached.
b. Choosing Add region brings up the Manage versioning screen.
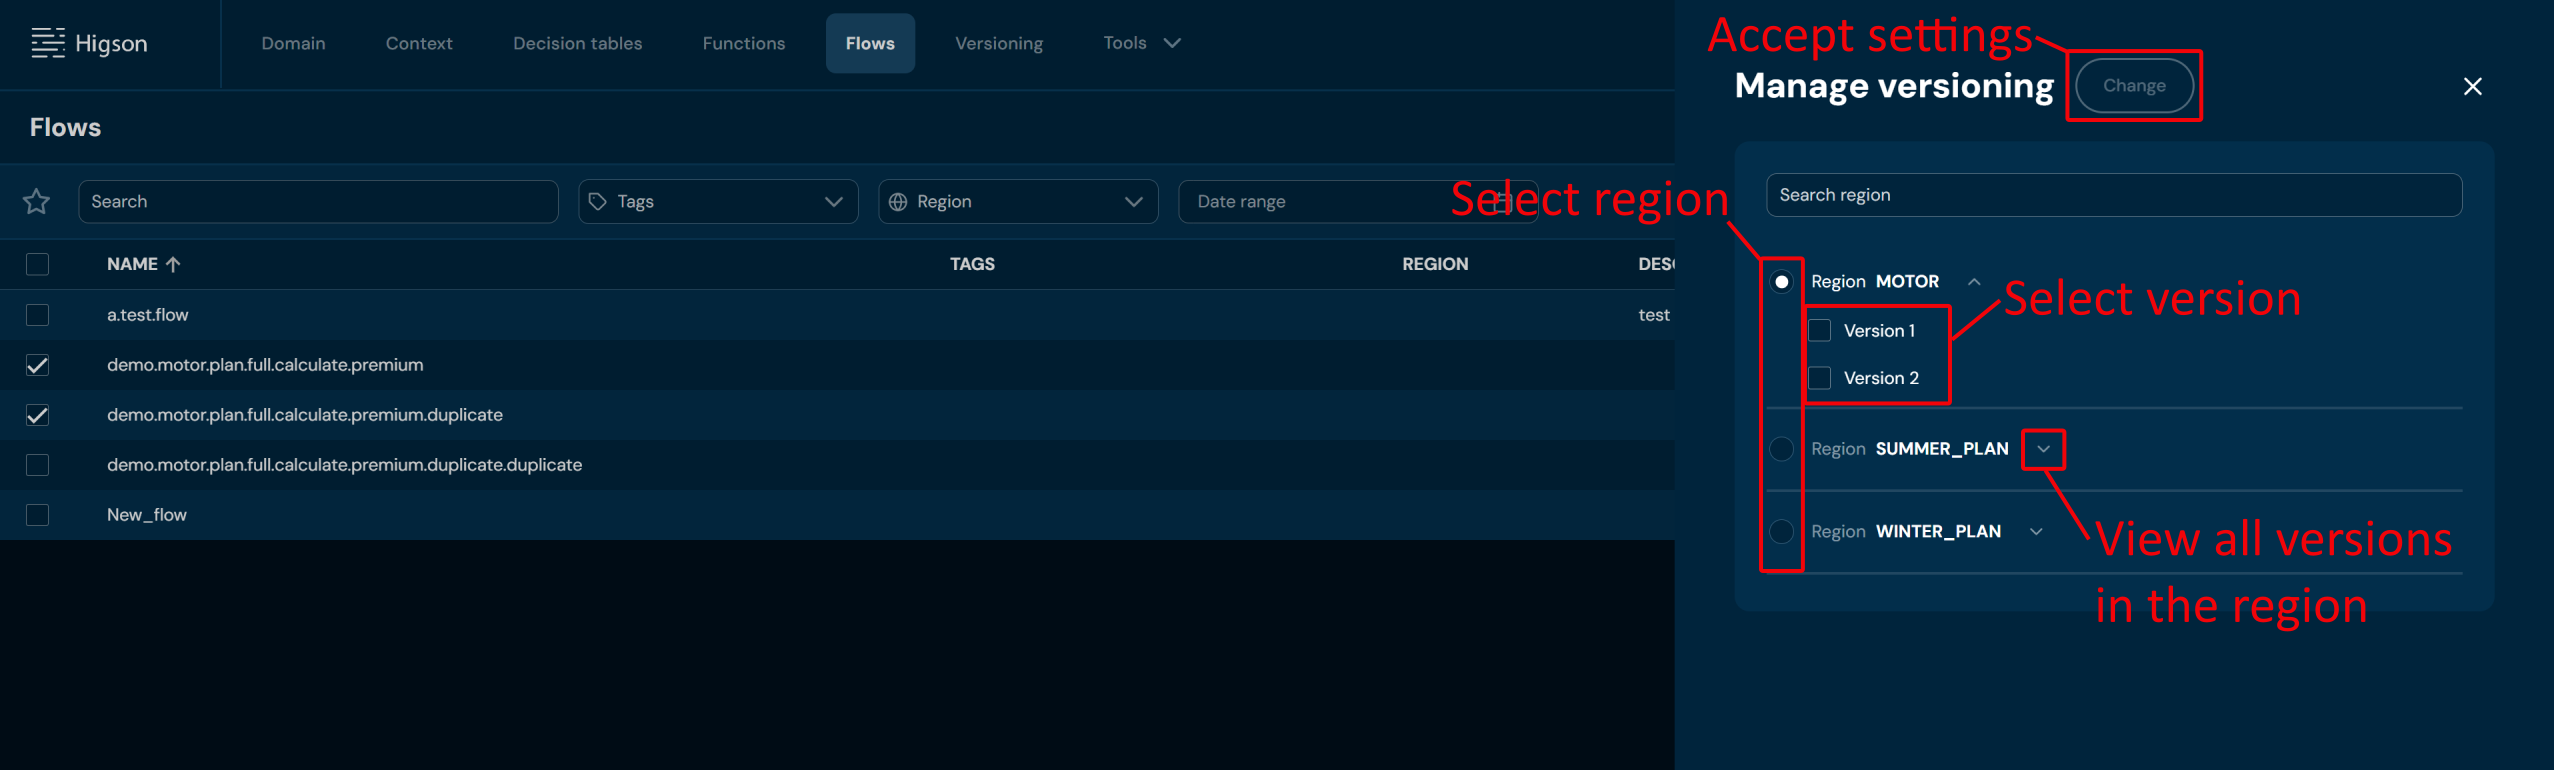
-
Select Region and one or more Version.
-
Choose Change to save settings.
a. Region is being assigned to all flows selected in Step 2.
Delete Region#
If you want to remove region from one or more flows, follow these steps:
-
Choose Flows on the Main toolbar.
-
Select one or more flows with a Region assigned.
a. Select the top checkbox to select all flows in the view, or select individual checkboxes to select one or multiple flows.
-
From drop-down menu More actions choose Delete region.
a. If action Delete region is greyed out, it means that no flow has been selected or the selected flows does not have assigned any region.
b. After choosing Delete region action, confirmation pop-up will appear.
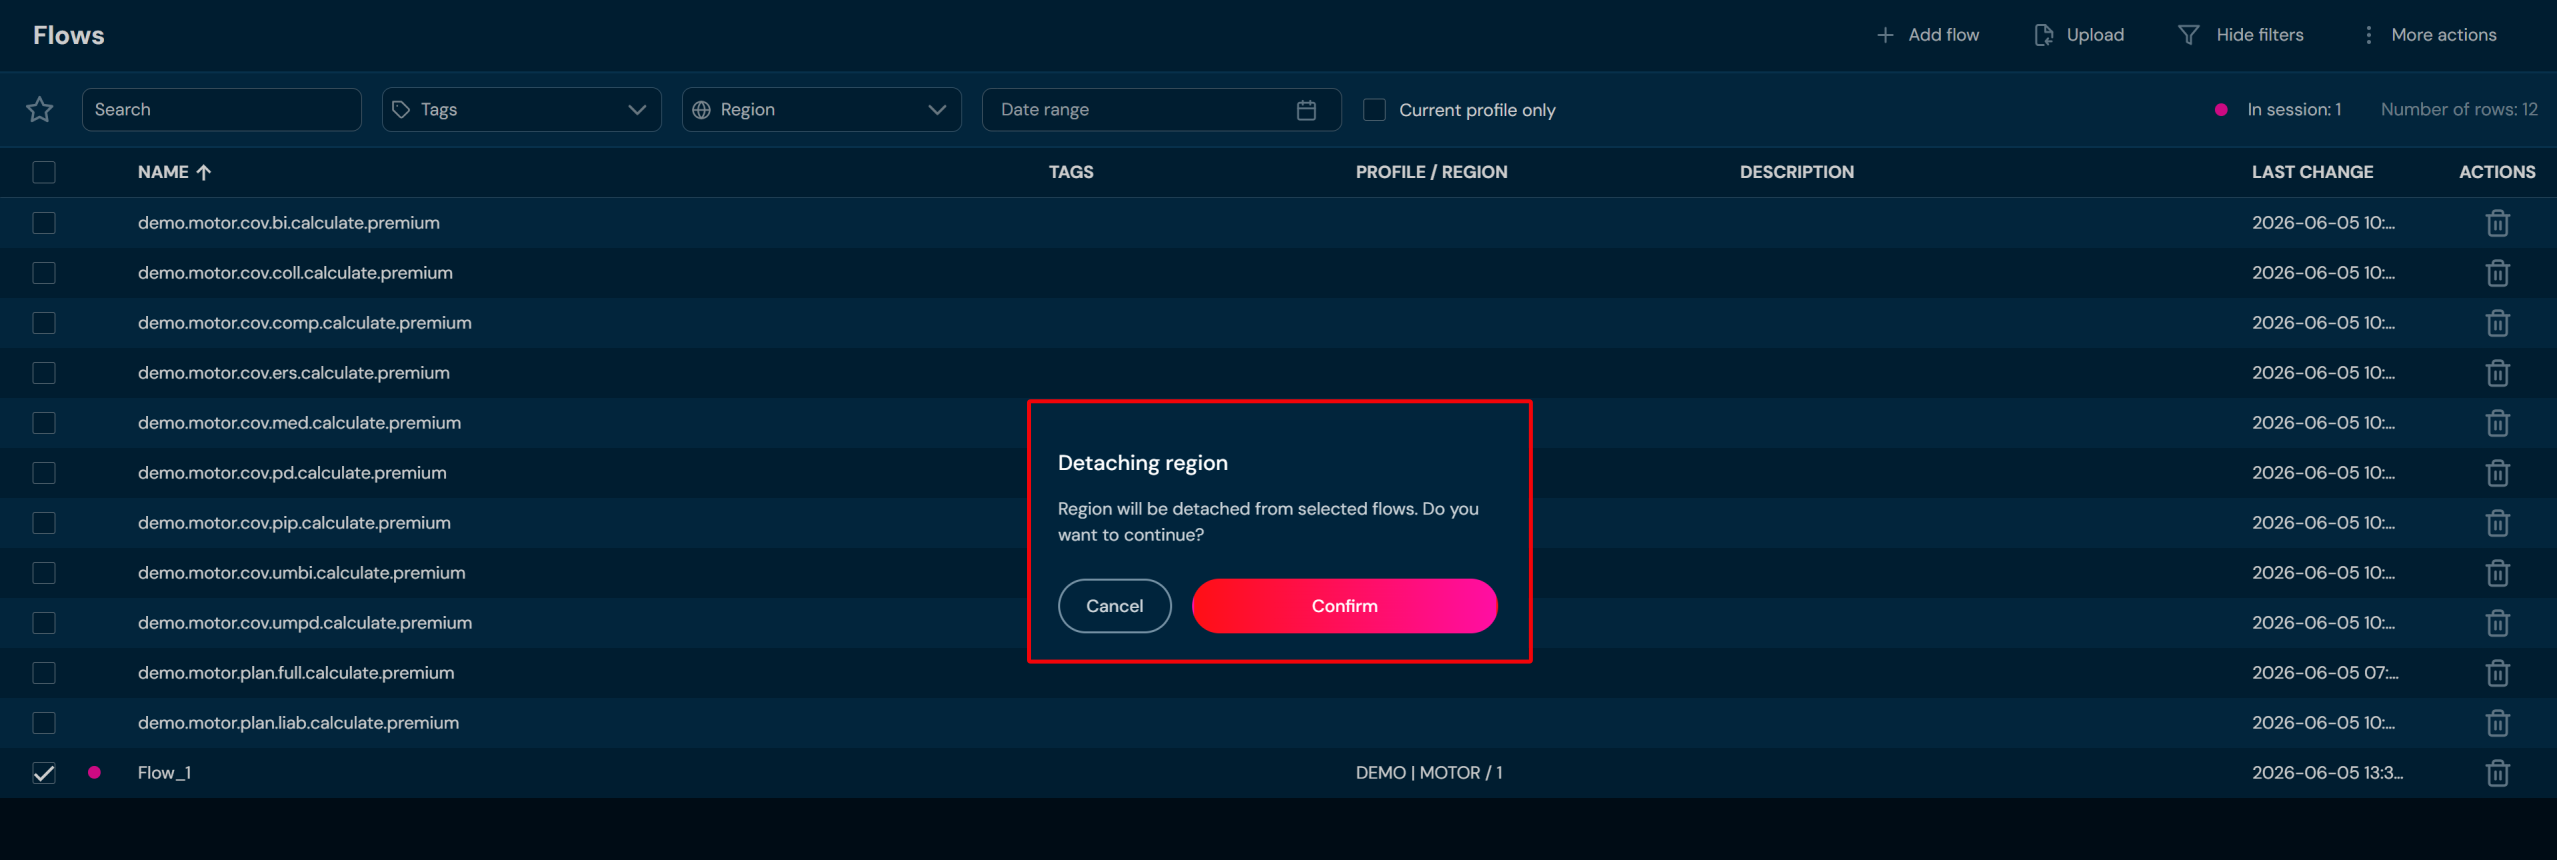
-
Choose Confirm.
a. Regions are being removed from all selected flows.
Manage Tags#
If you want to manage tags for one or more flows, follow these steps:
- Select the Flows on the Main toolbar.
- Select one or more flows.
- From the More Actions drop-down menu, select Manage Tags.
- Select the tags you are interested in and click Save.
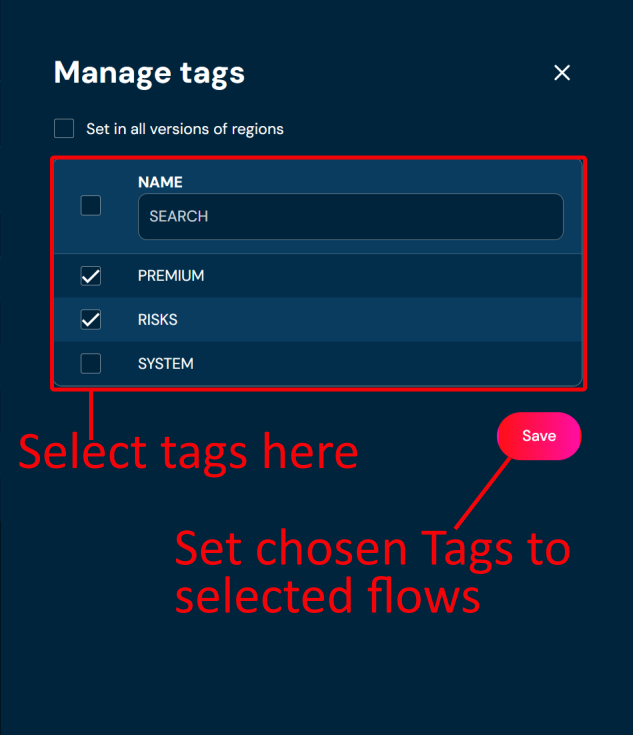
Delete Flow#
If you want to delete one or more flow, follow the steps below:
-
Choose Flows on the Main toolbar.
-
Select one or more flows.
a. Select the top checkbox to select all flows in the view, or select individual checkboxes to select one or multiple flows.
-
From the drop-down menu More actions choose Delete.
a. If action Delete is greyed out, it means that no flow has been selected.
b. After choosing Delete action, confirmation pop-up will appear.
-
Choose Confirm.
a. All selected flows are deleted from the environment.
Add Flow#
If you want to add Flow follow these steps:
-
Choose Flows on the Main toolbar.
-
Choose Add flow in All actions bar. Choosing Add flow opens a step-by-step wizard.
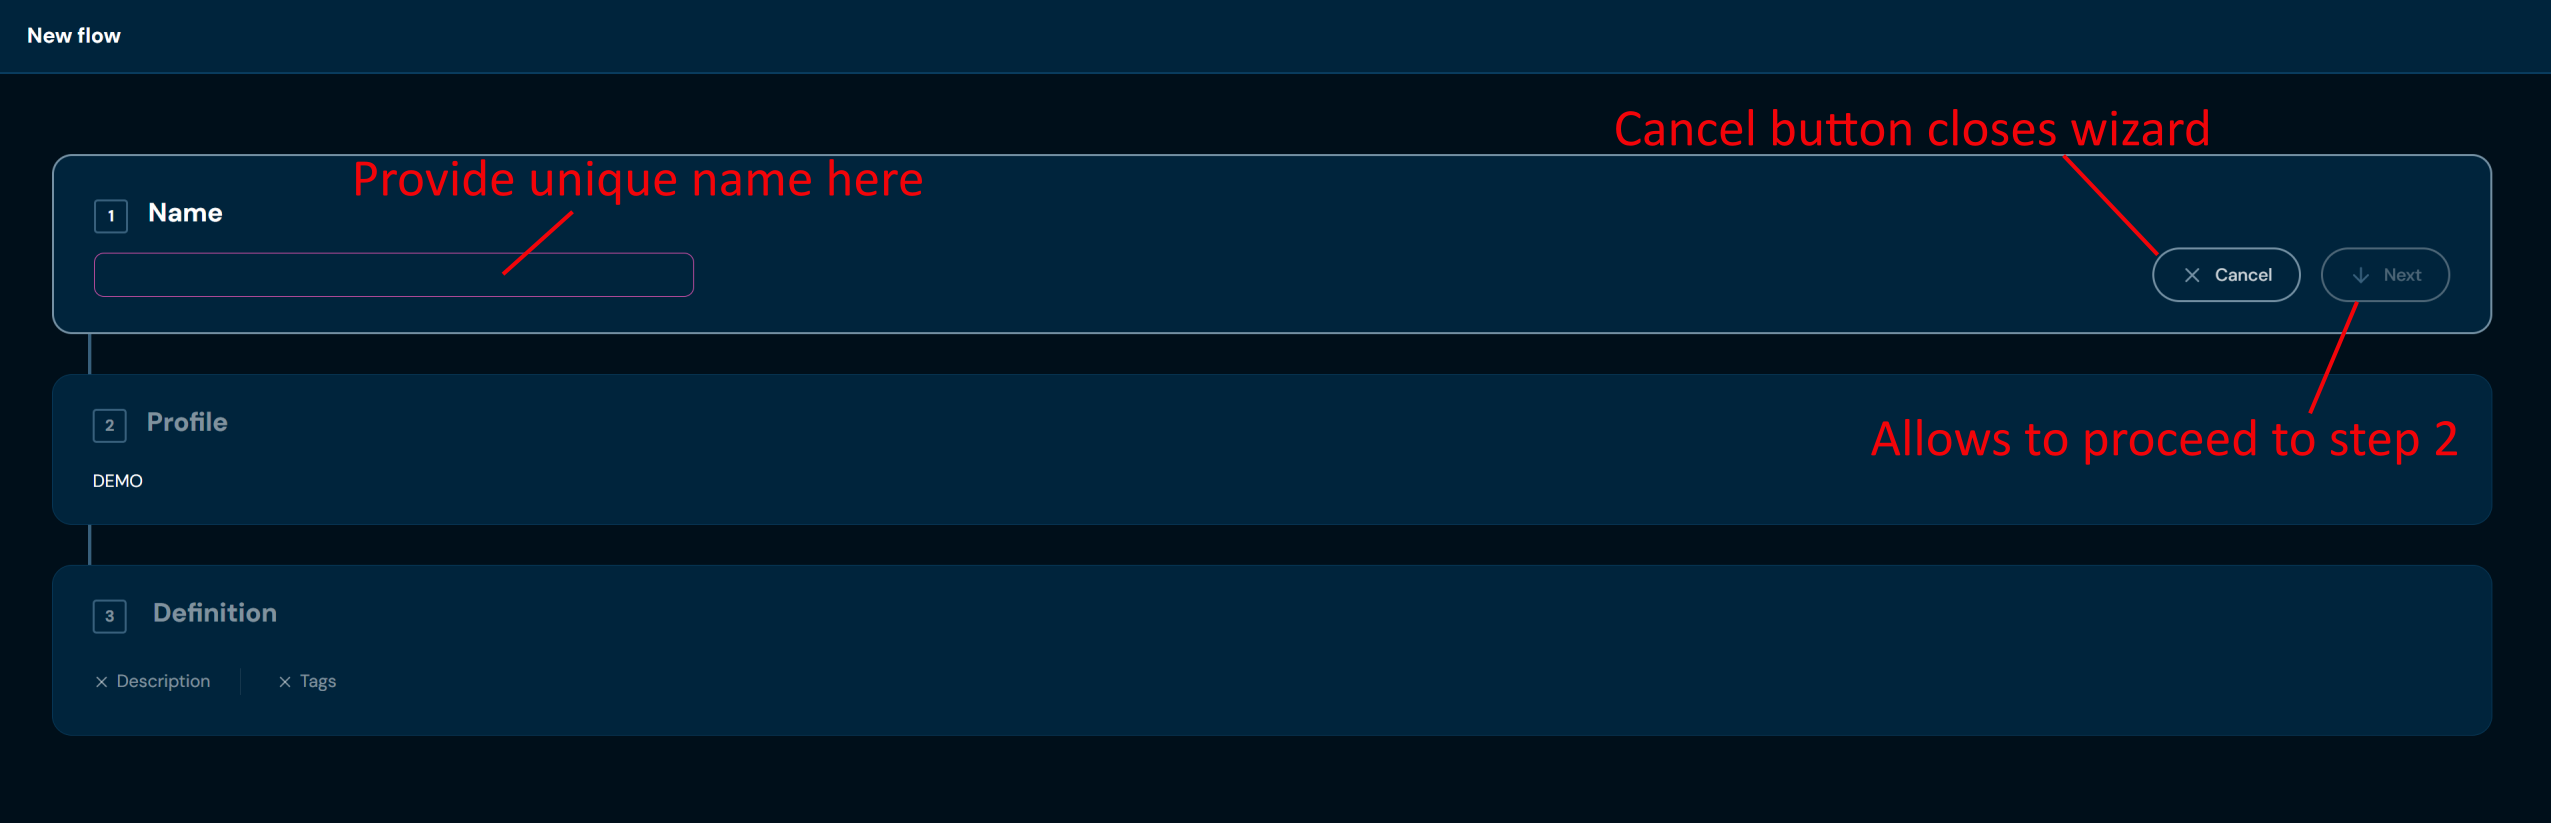
-
In step 1. Name, you need to provide a unique flow code/name. Name can contain only characters from collection a-z; 0-9; “.”; “-”; “_” and it can’t start with “-”.
a. If you changed your mind and don’t want to create a new flow, you can choose Cancel in step 1. Name.
-
Select Next.
-
In step 2. Profile you may assign the flow to a profile by selecting a profile from the drop-down list, or create a global flow by checking No profile (global). Assigning the flow to a profile will ensure that only users with permissions for that profile can access it. Global flows are visible regardless of profile permissions.
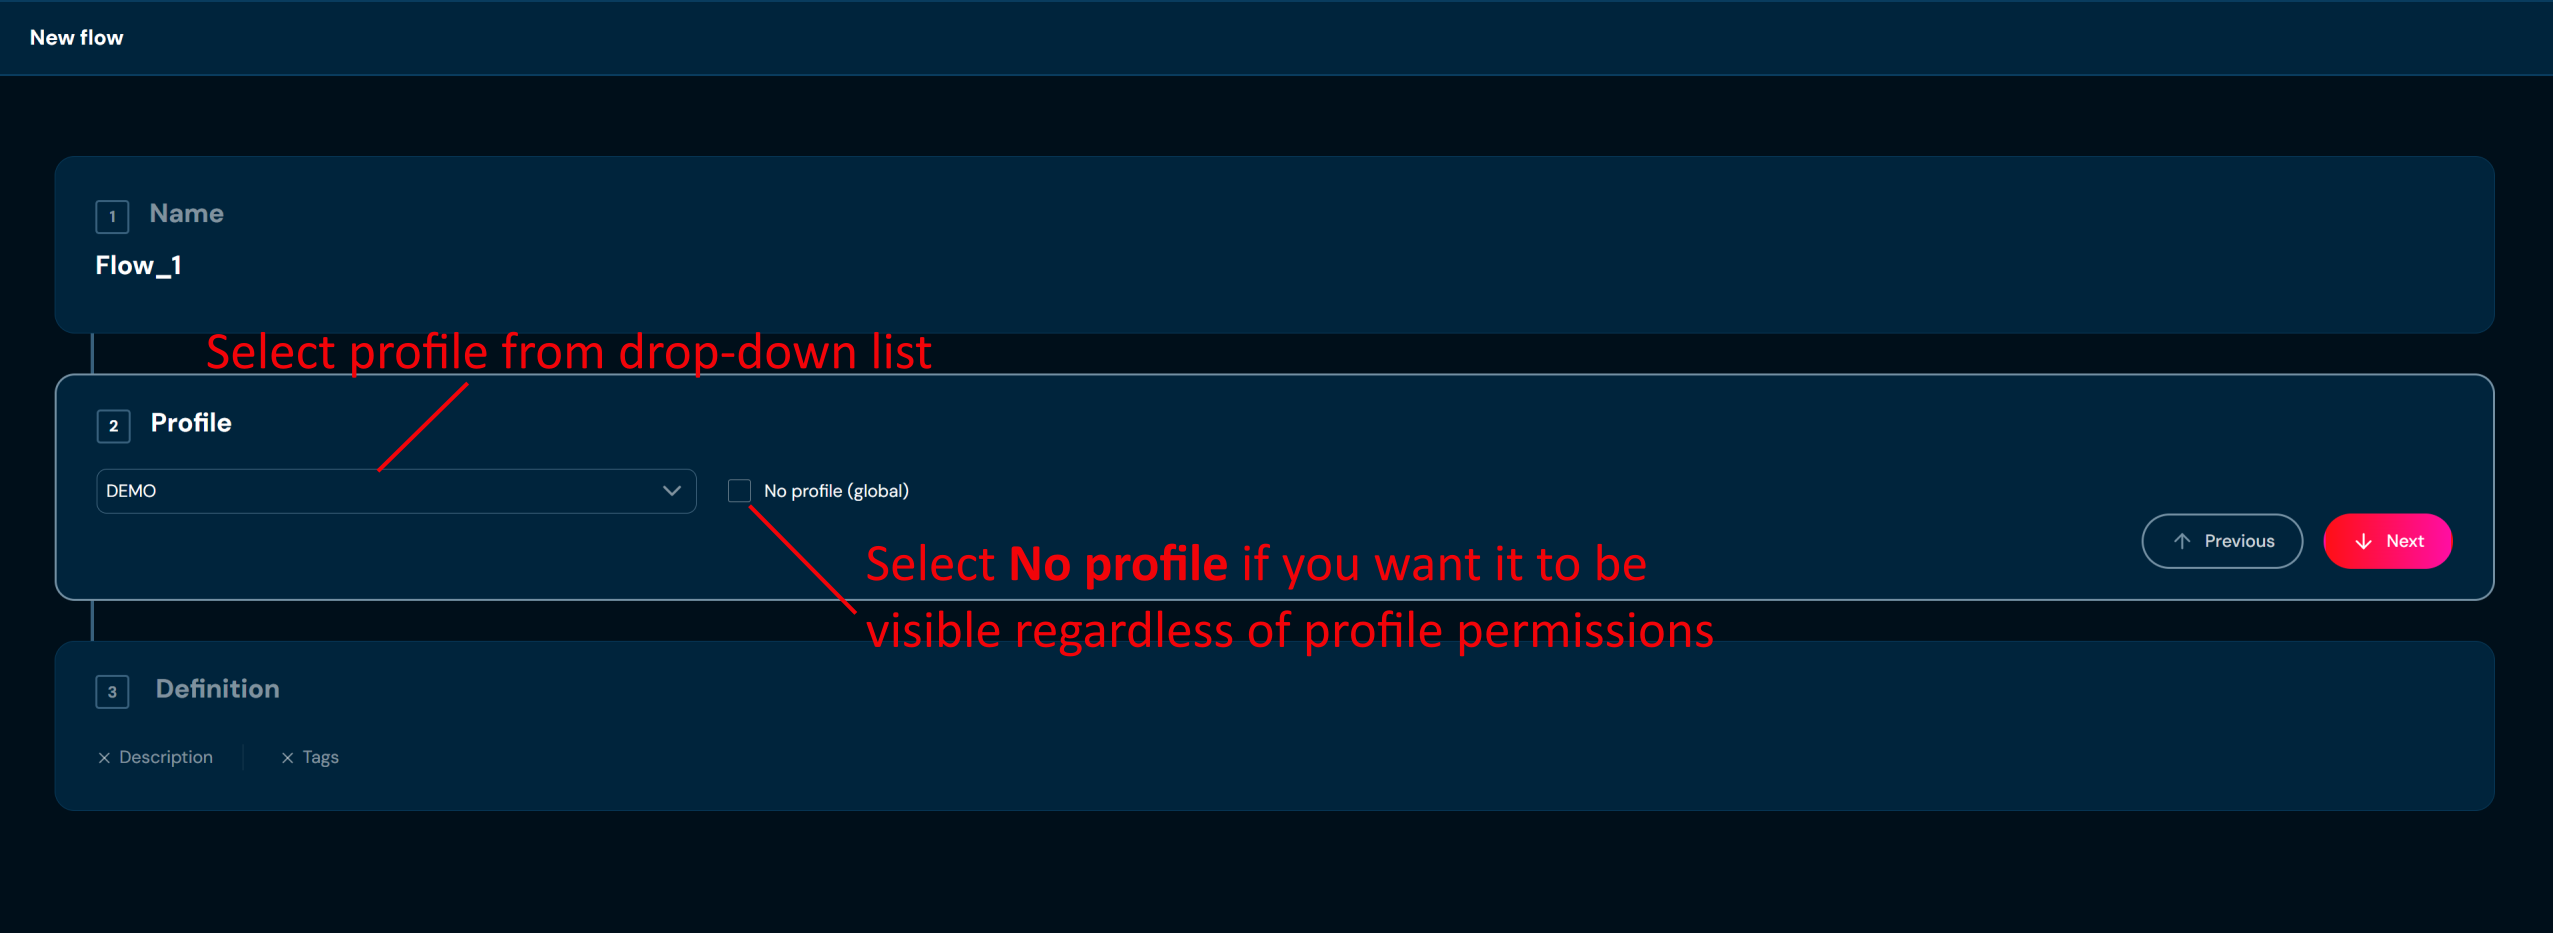
- In step 3. Definition you may optionally add a description and assign tags.
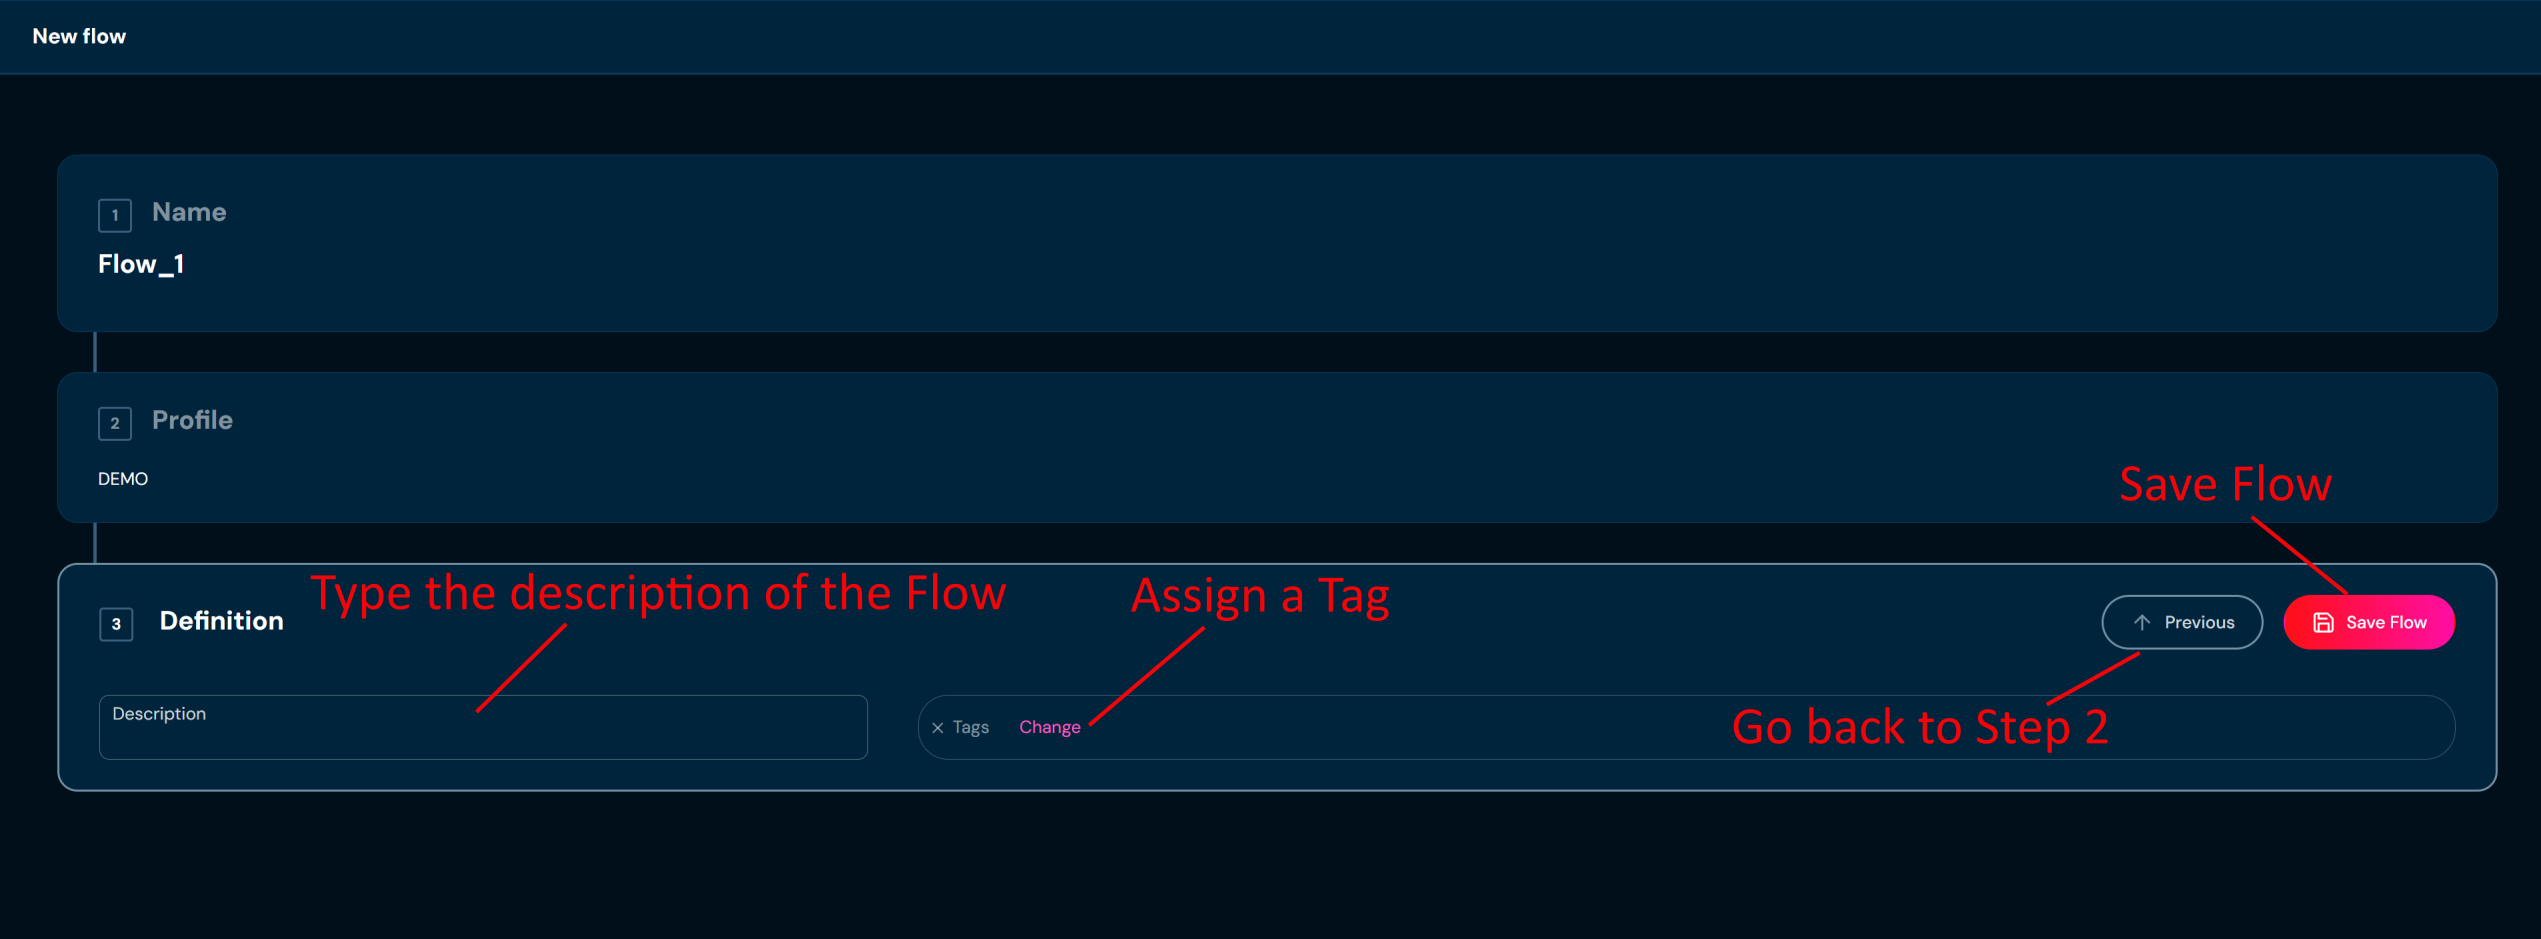
- Save the flow
After saving the flow, you are redirected to the flow details view.
Flow Details Screen#
You can access Flow details by left-clicking on the specific flow in the List of all flows. Flow details screen contains all information about the flow, its Description, assigned Region/Tags, flows body, arguments and variables.
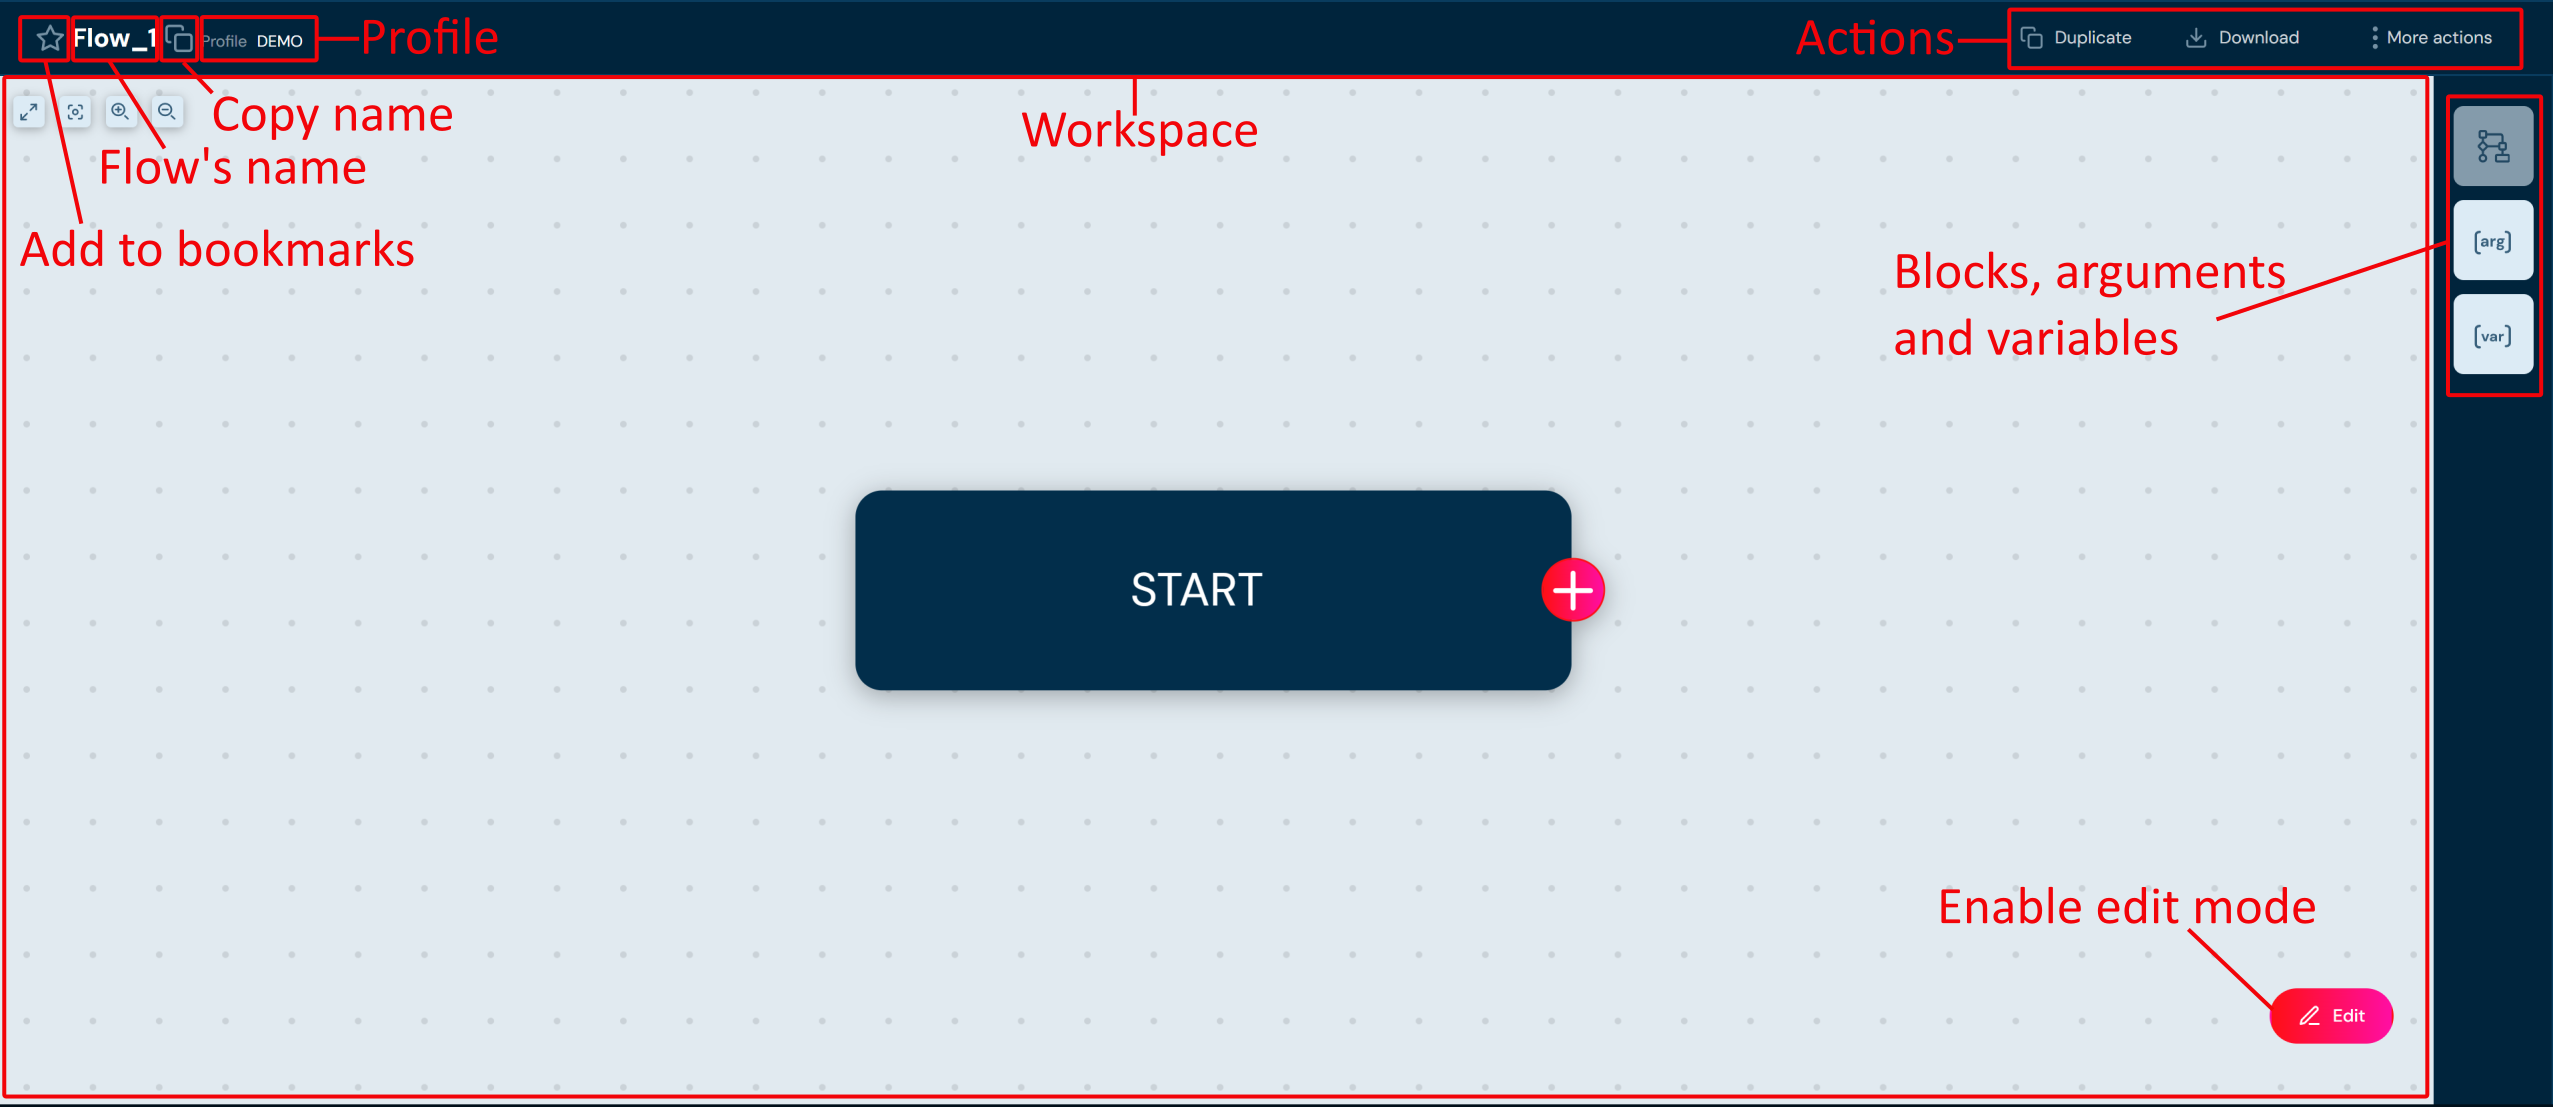
On the flow details screen following actions are available:
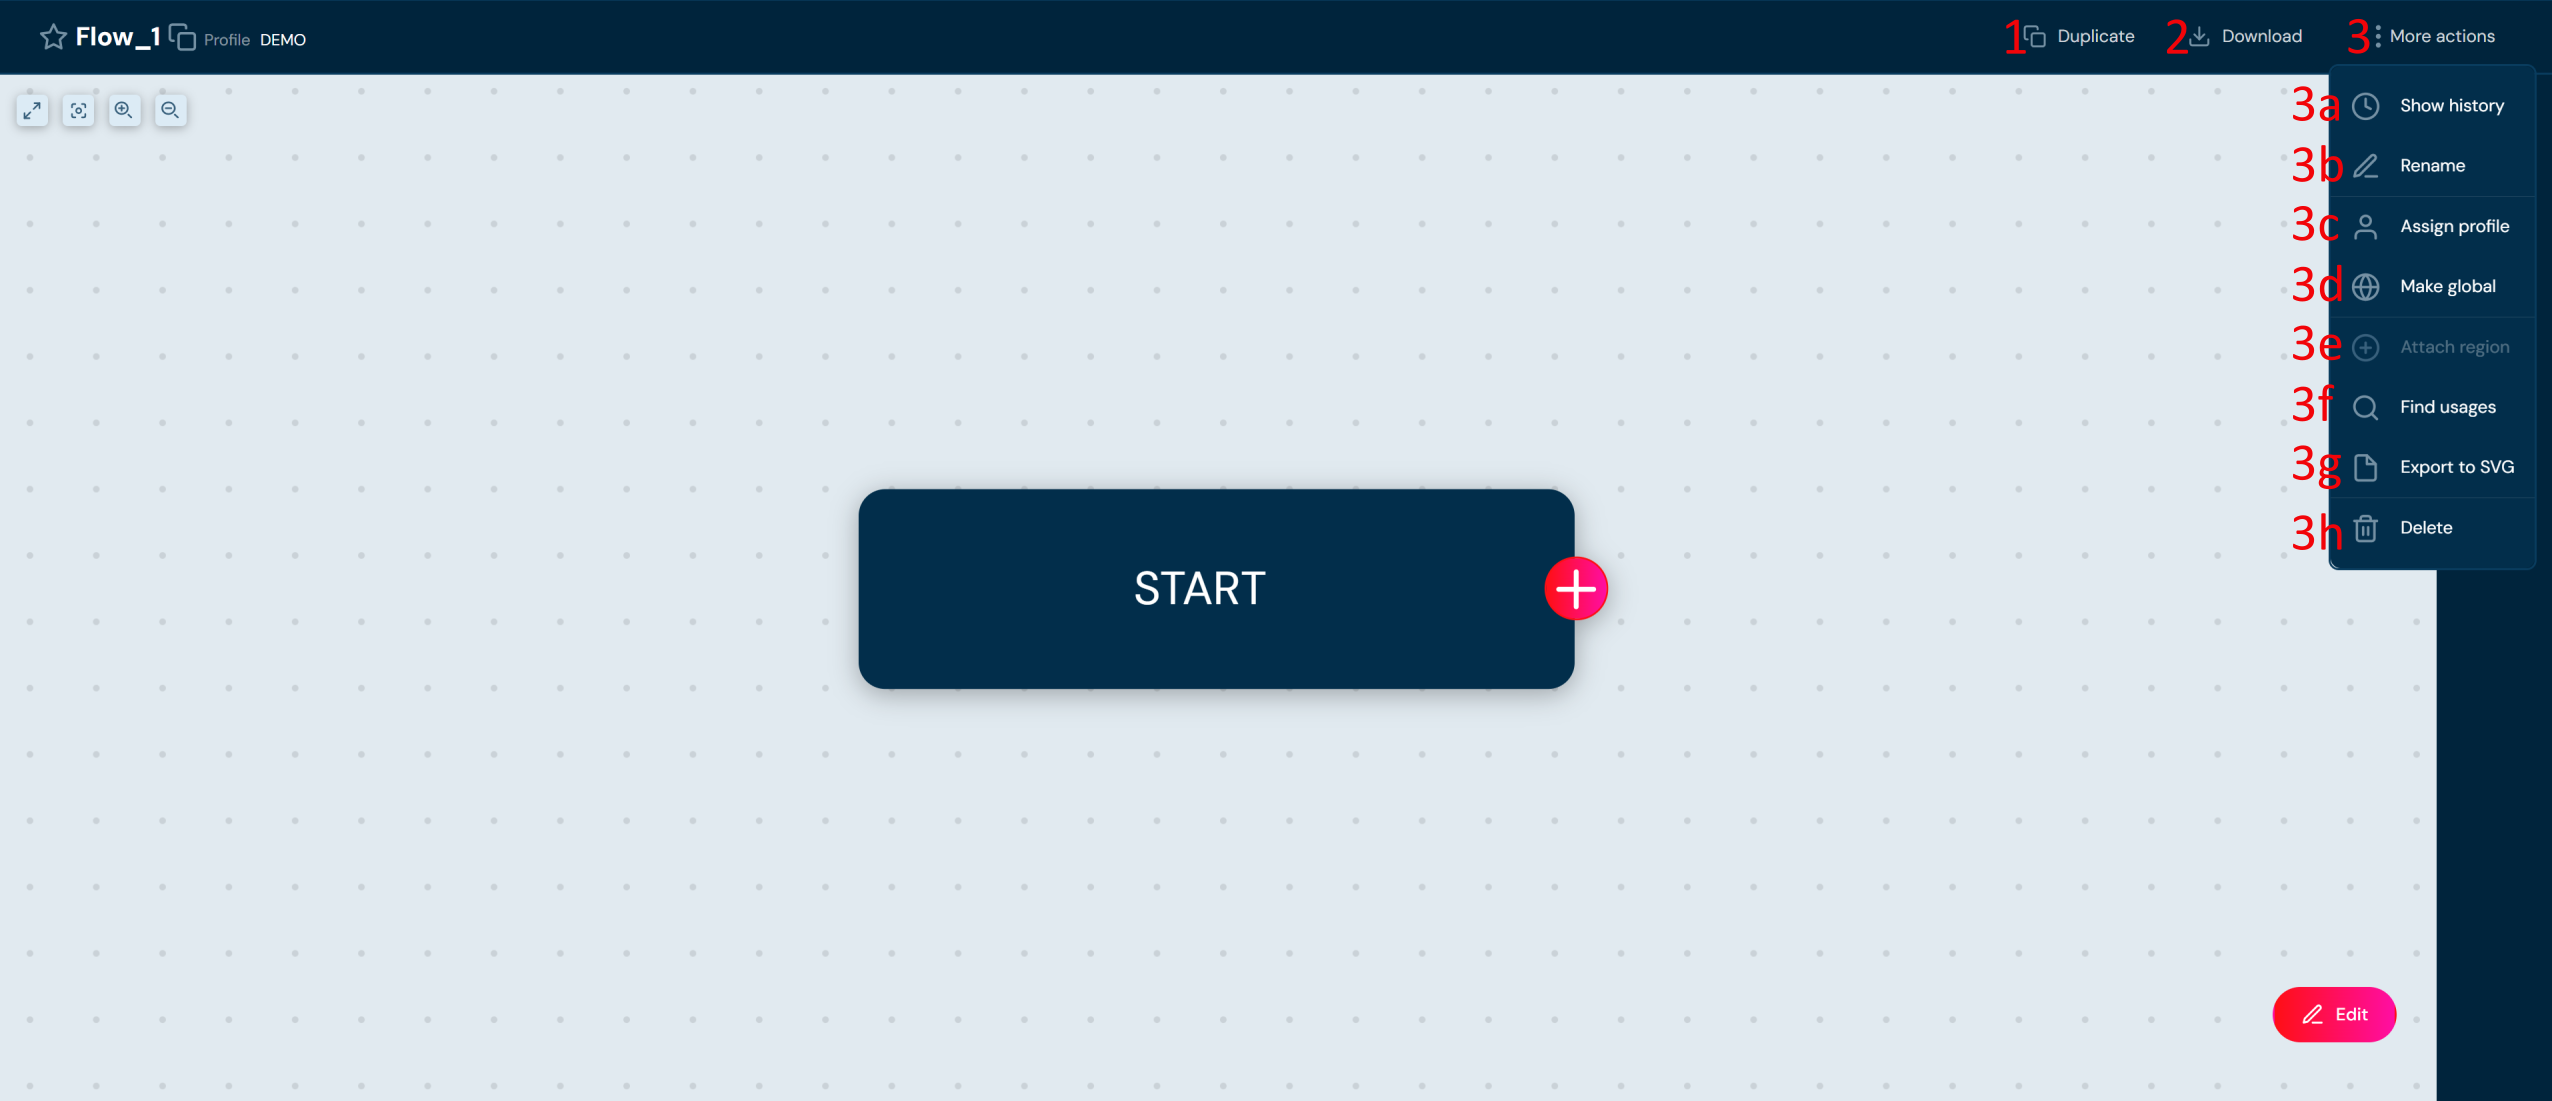
| No. | Action | Description |
|---|---|---|
| 1 | Duplicate | Allows to duplicate the flow. |
| 2 | Download | Allows to download flow to a zip file. |
| 3 | More actions | The drop-down menu that contains actions 3a–3h. |
| 3a | Show history | Allows to view archive versions of the flow. |
| 3b | Rename | Allows to change the name of the flow. |
| 3c | Assign profile | Assigns the flow to a profile. Assigning the flow to a profile will ensure that only users with permissions for that profile can access it. |
| 3d | Make global | Makes the flow global. Global flows are visible regardless of profile permissions. |
| 3e | Attach/Detach region | Allows to attach/detach region and version to the flow. |
| 3f | Find usages | Redirects you to Find usages search where you may find every reference to that flow. |
| 3g | Export to SVG | Allows to export the body of the flow to an SVG file. |
| 3h | Delete | Action removes the flow. |
Edit Flow#
To edit the body of the flow, go to the flow details view and select Edit, to turn on edit mode. In edit mode additional actions are available.
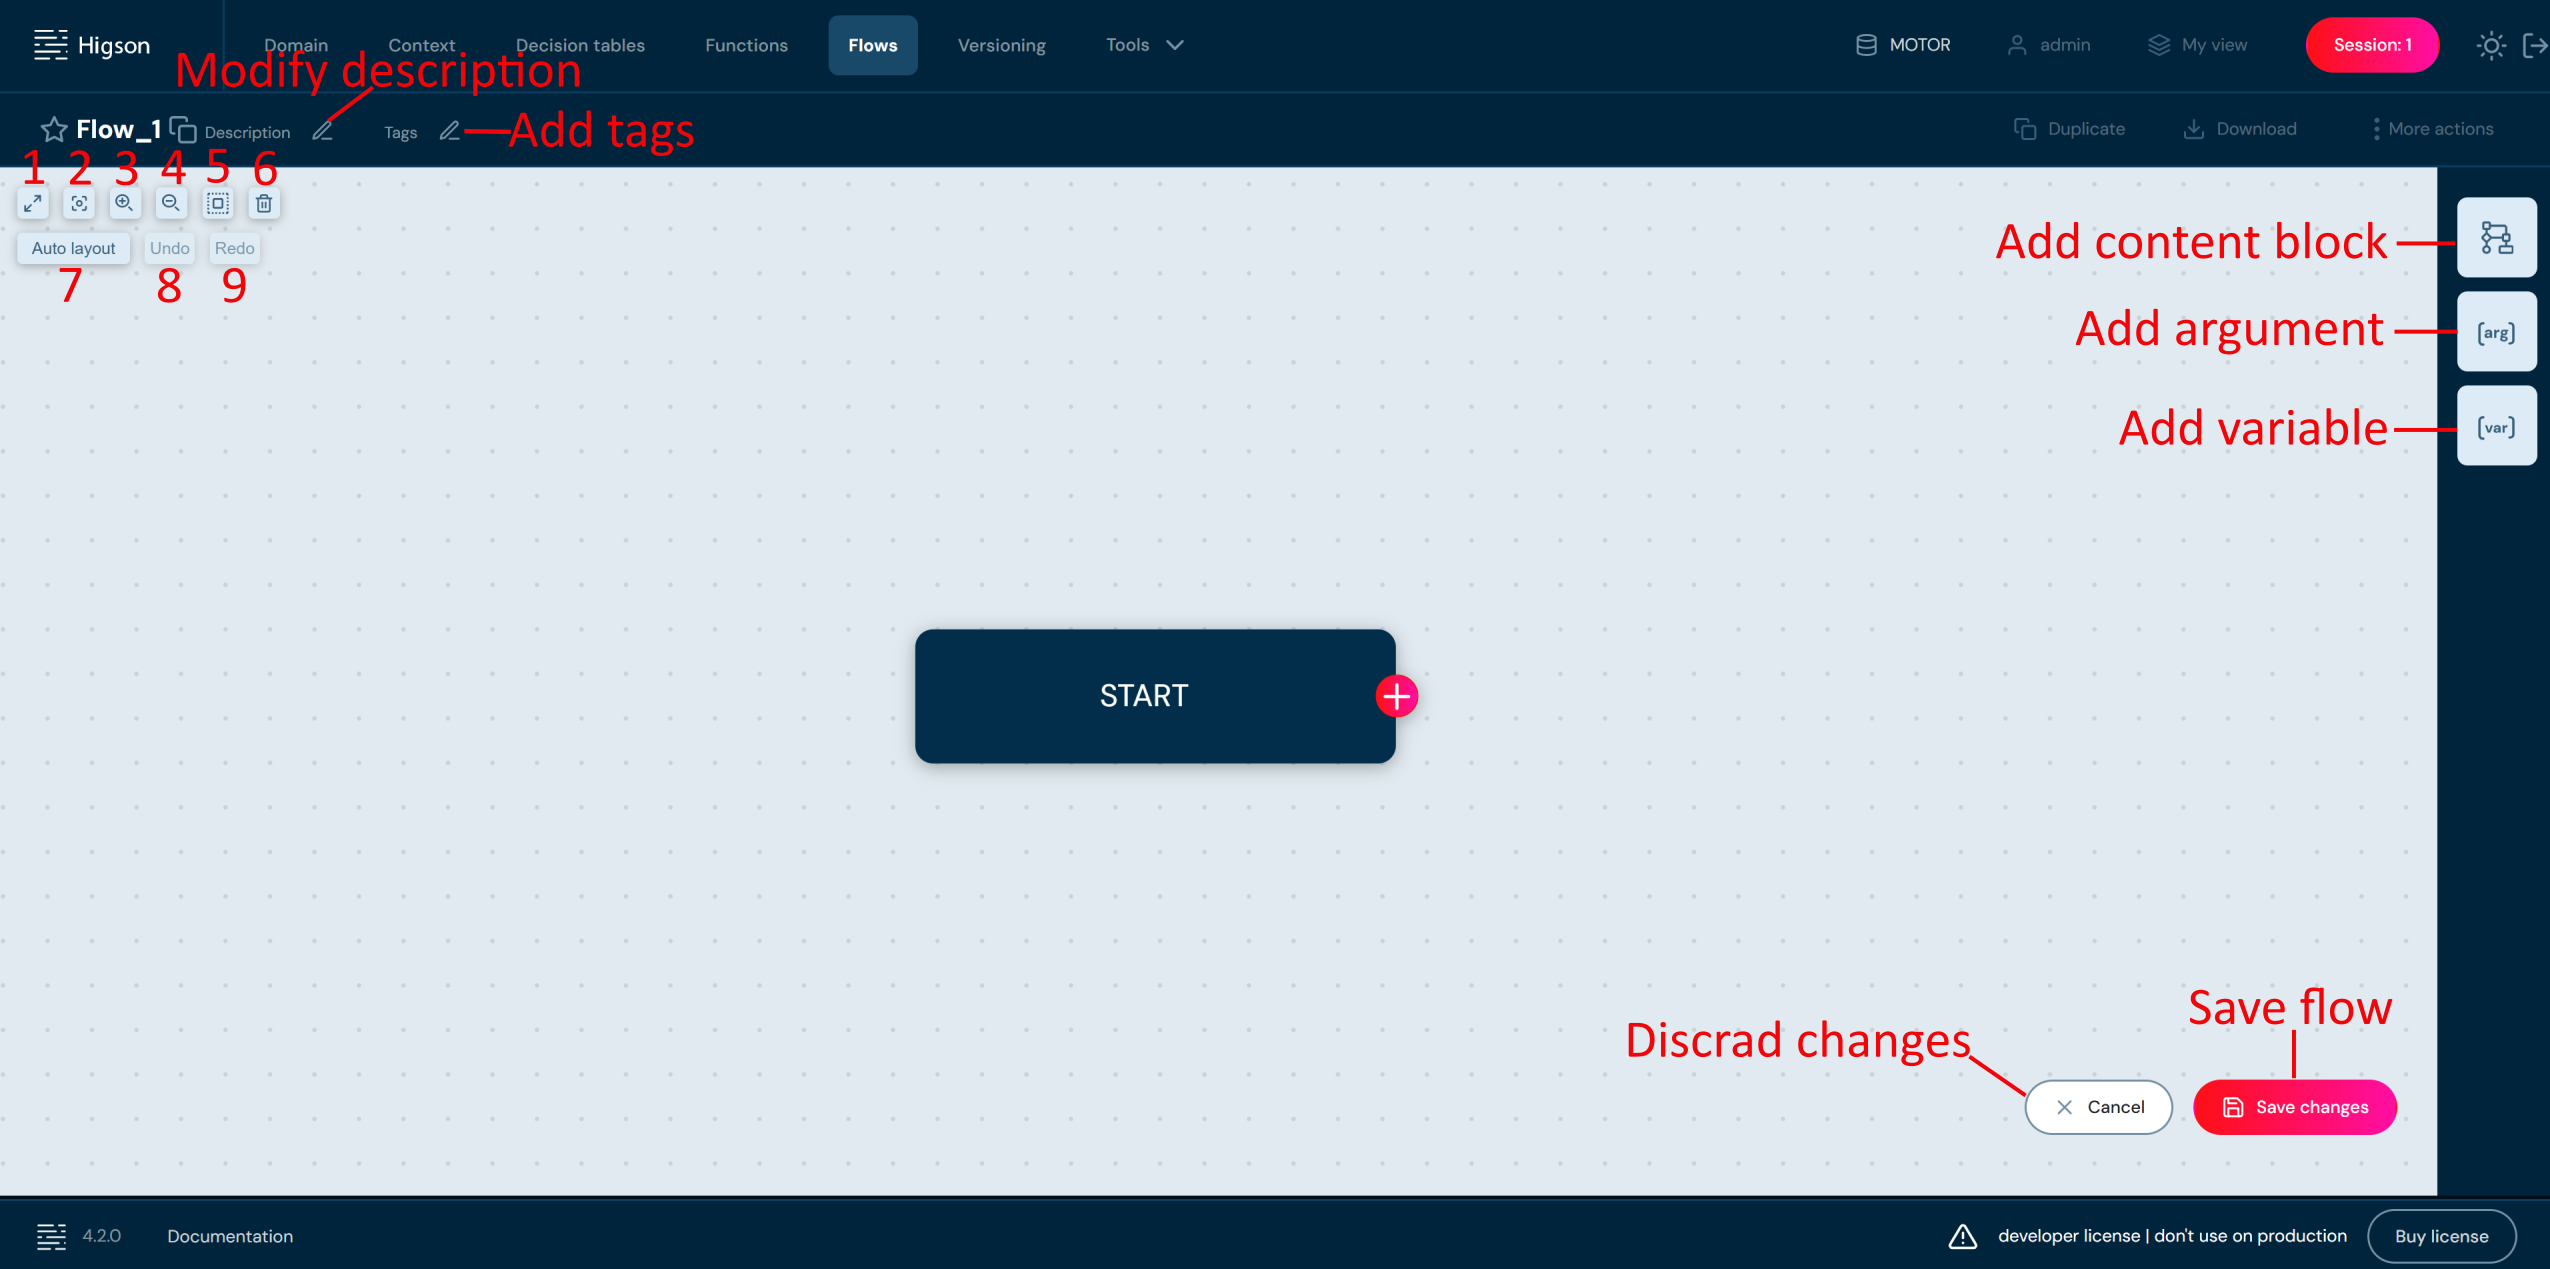
| No. | Action | Description |
|---|---|---|
| 1 | Fit to screen | Fits all content blocks to the screen. |
| 2 | 1:1 | Restores the original scale. |
| 3 | Zoom in | Zoom in. You can also zoom in using mouse scroll. |
| 4 | Zoom out | Zoom out. You can also zoom out using mouse scroll. |
| 5 | Select all | Selects all elements in the workspace. |
| 6 | Delete | Removes selected element. |
| 7 | Auto layout | Automatically positions the elements. |
| 8 | Undo | Reverses a previous action. |
| 9 | Redo | Restores an action that was reversed. |
Add a Variable#
Variables are used to store the results of individual blocks. At least one variable must have the Returned flag selected, which means that it returns the result of the entire flow.
- To add a viariable select Variables button and click Add new variables.
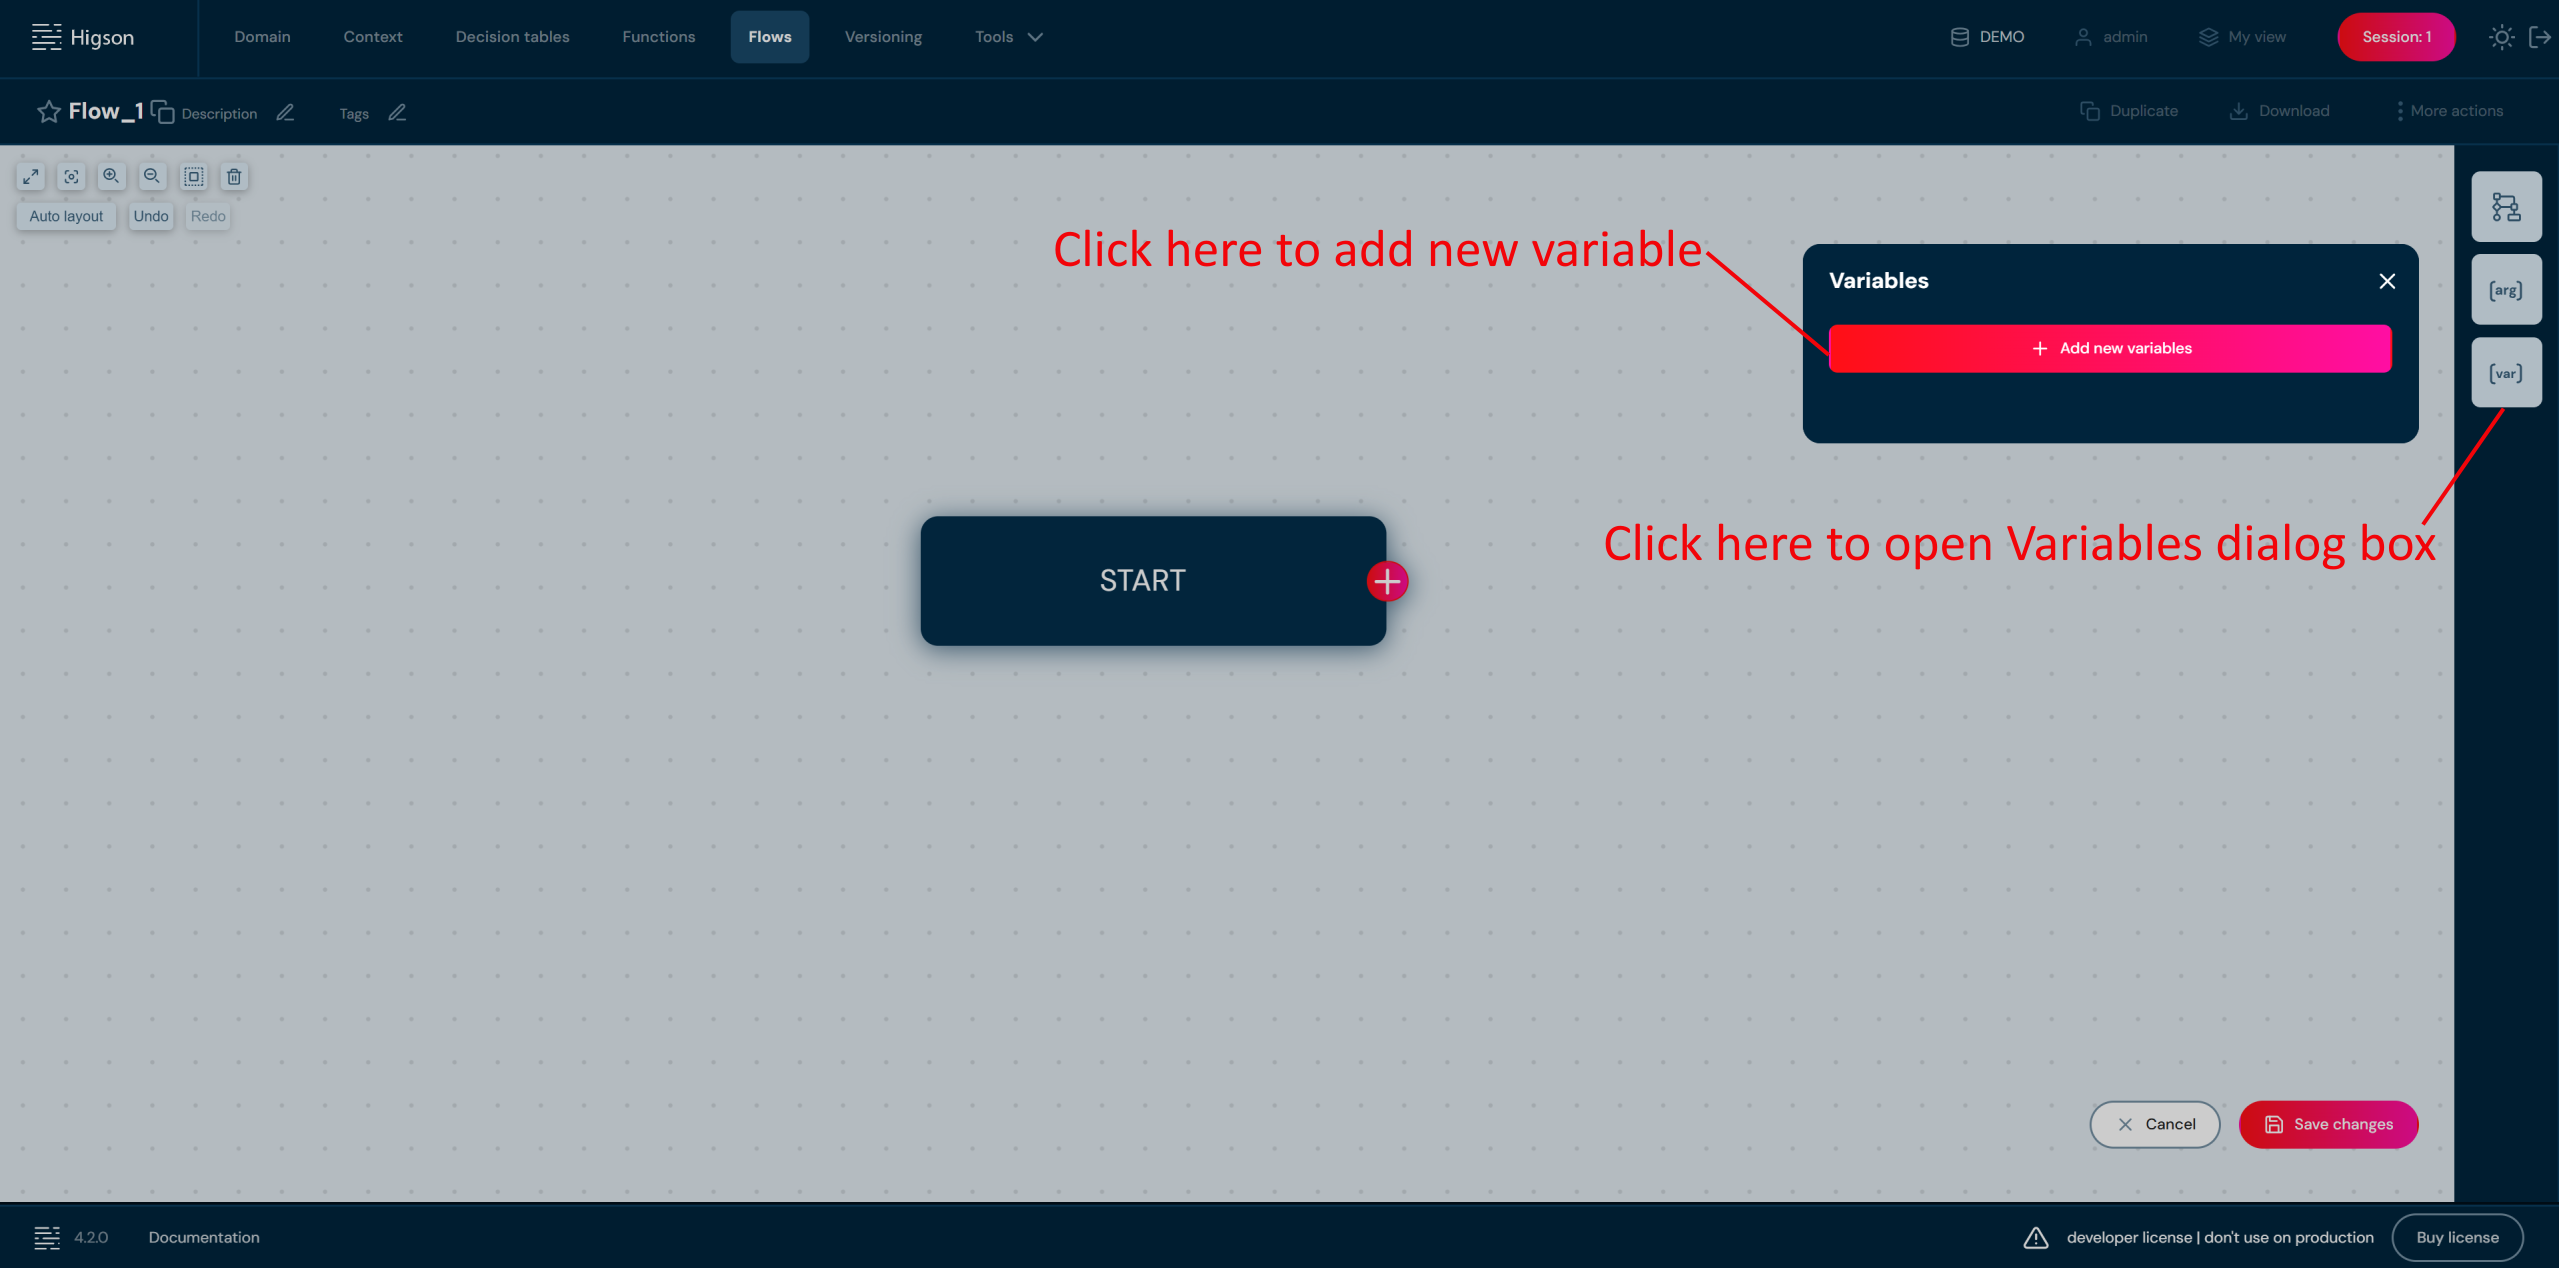
- In pop-up window select Add new variables and fill in the data.
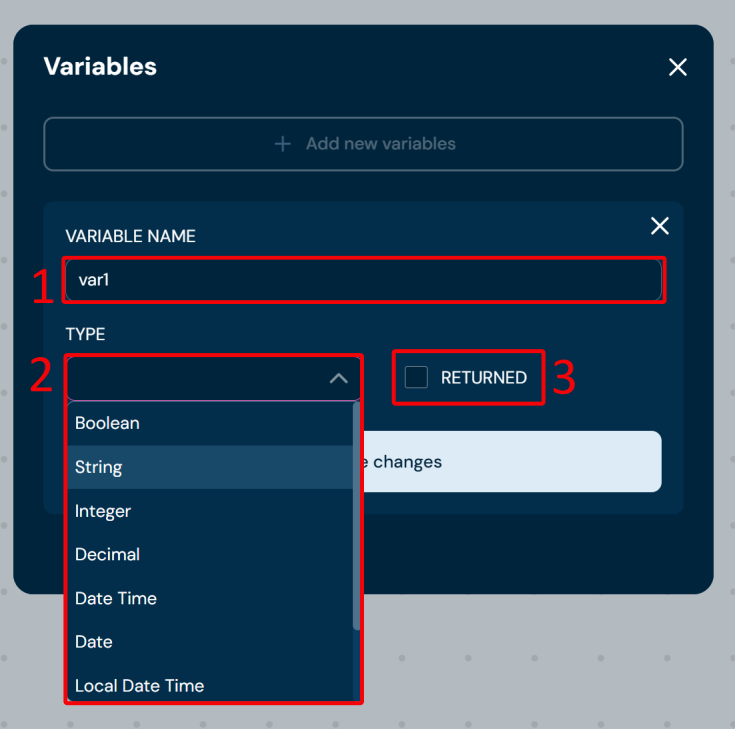
| No. | Name | Description |
|---|---|---|
| 1 | Variable name | Variable name is a mandatory field. Name of the variable must be unique within the flow. |
| 2 | Type | Select data type for the variable. |
| 3 | Return flag | Checking the return flag means that the variable will return the result of the flow. |
- Click Save changes.
Add an Argument#
- If your process requires it, you can add an argument. To add an argument select the Arguments button.
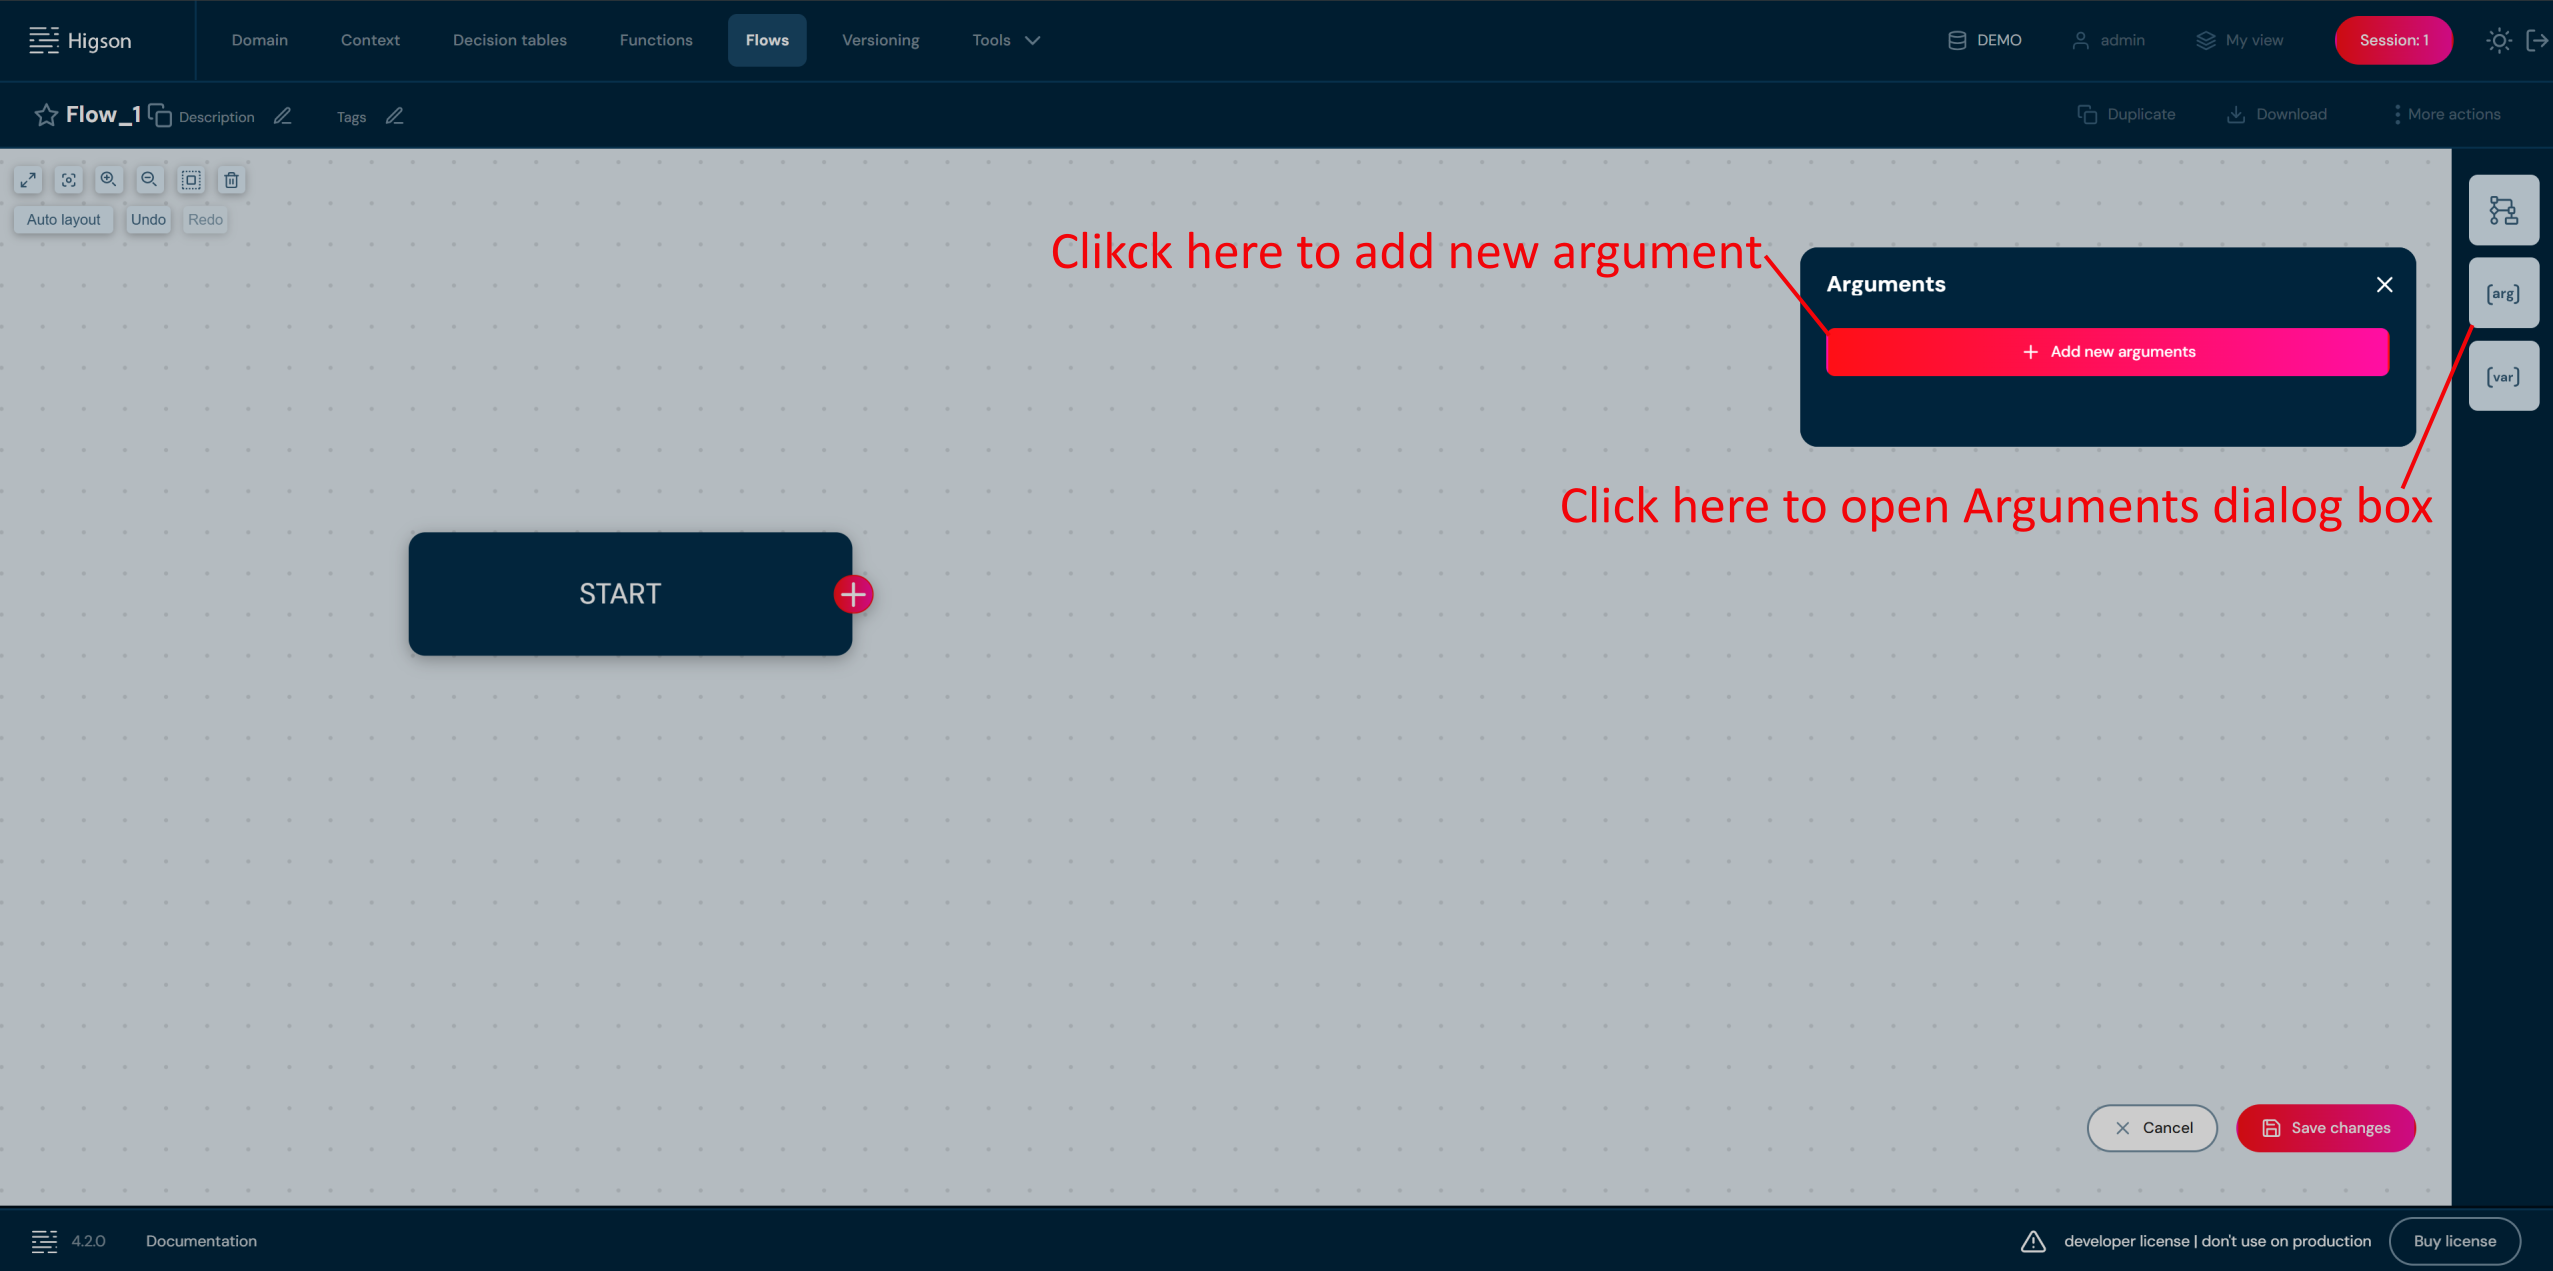
- Complete data:
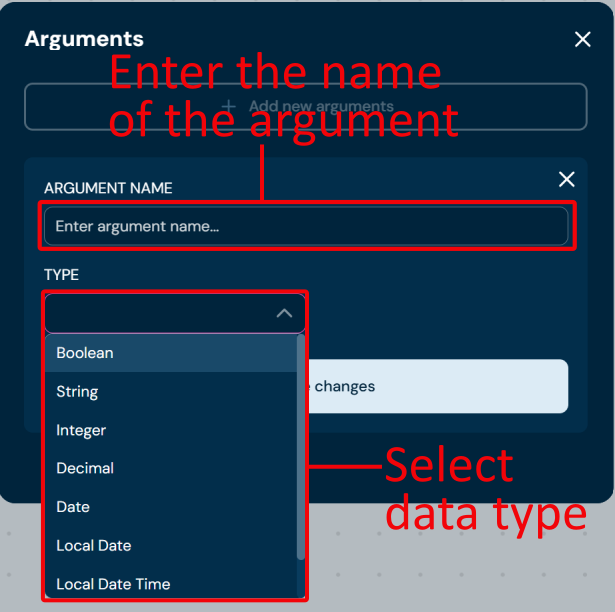
Argument name must be unique within the flow.
- Save changes.
Argument may be used in a flow. The value of the argument is specified when calling the flow.
Adding Decision Table Block#
- To add Decision table block select Content blocks button and choose Decision table by double-click or drag & drop to the workspace.
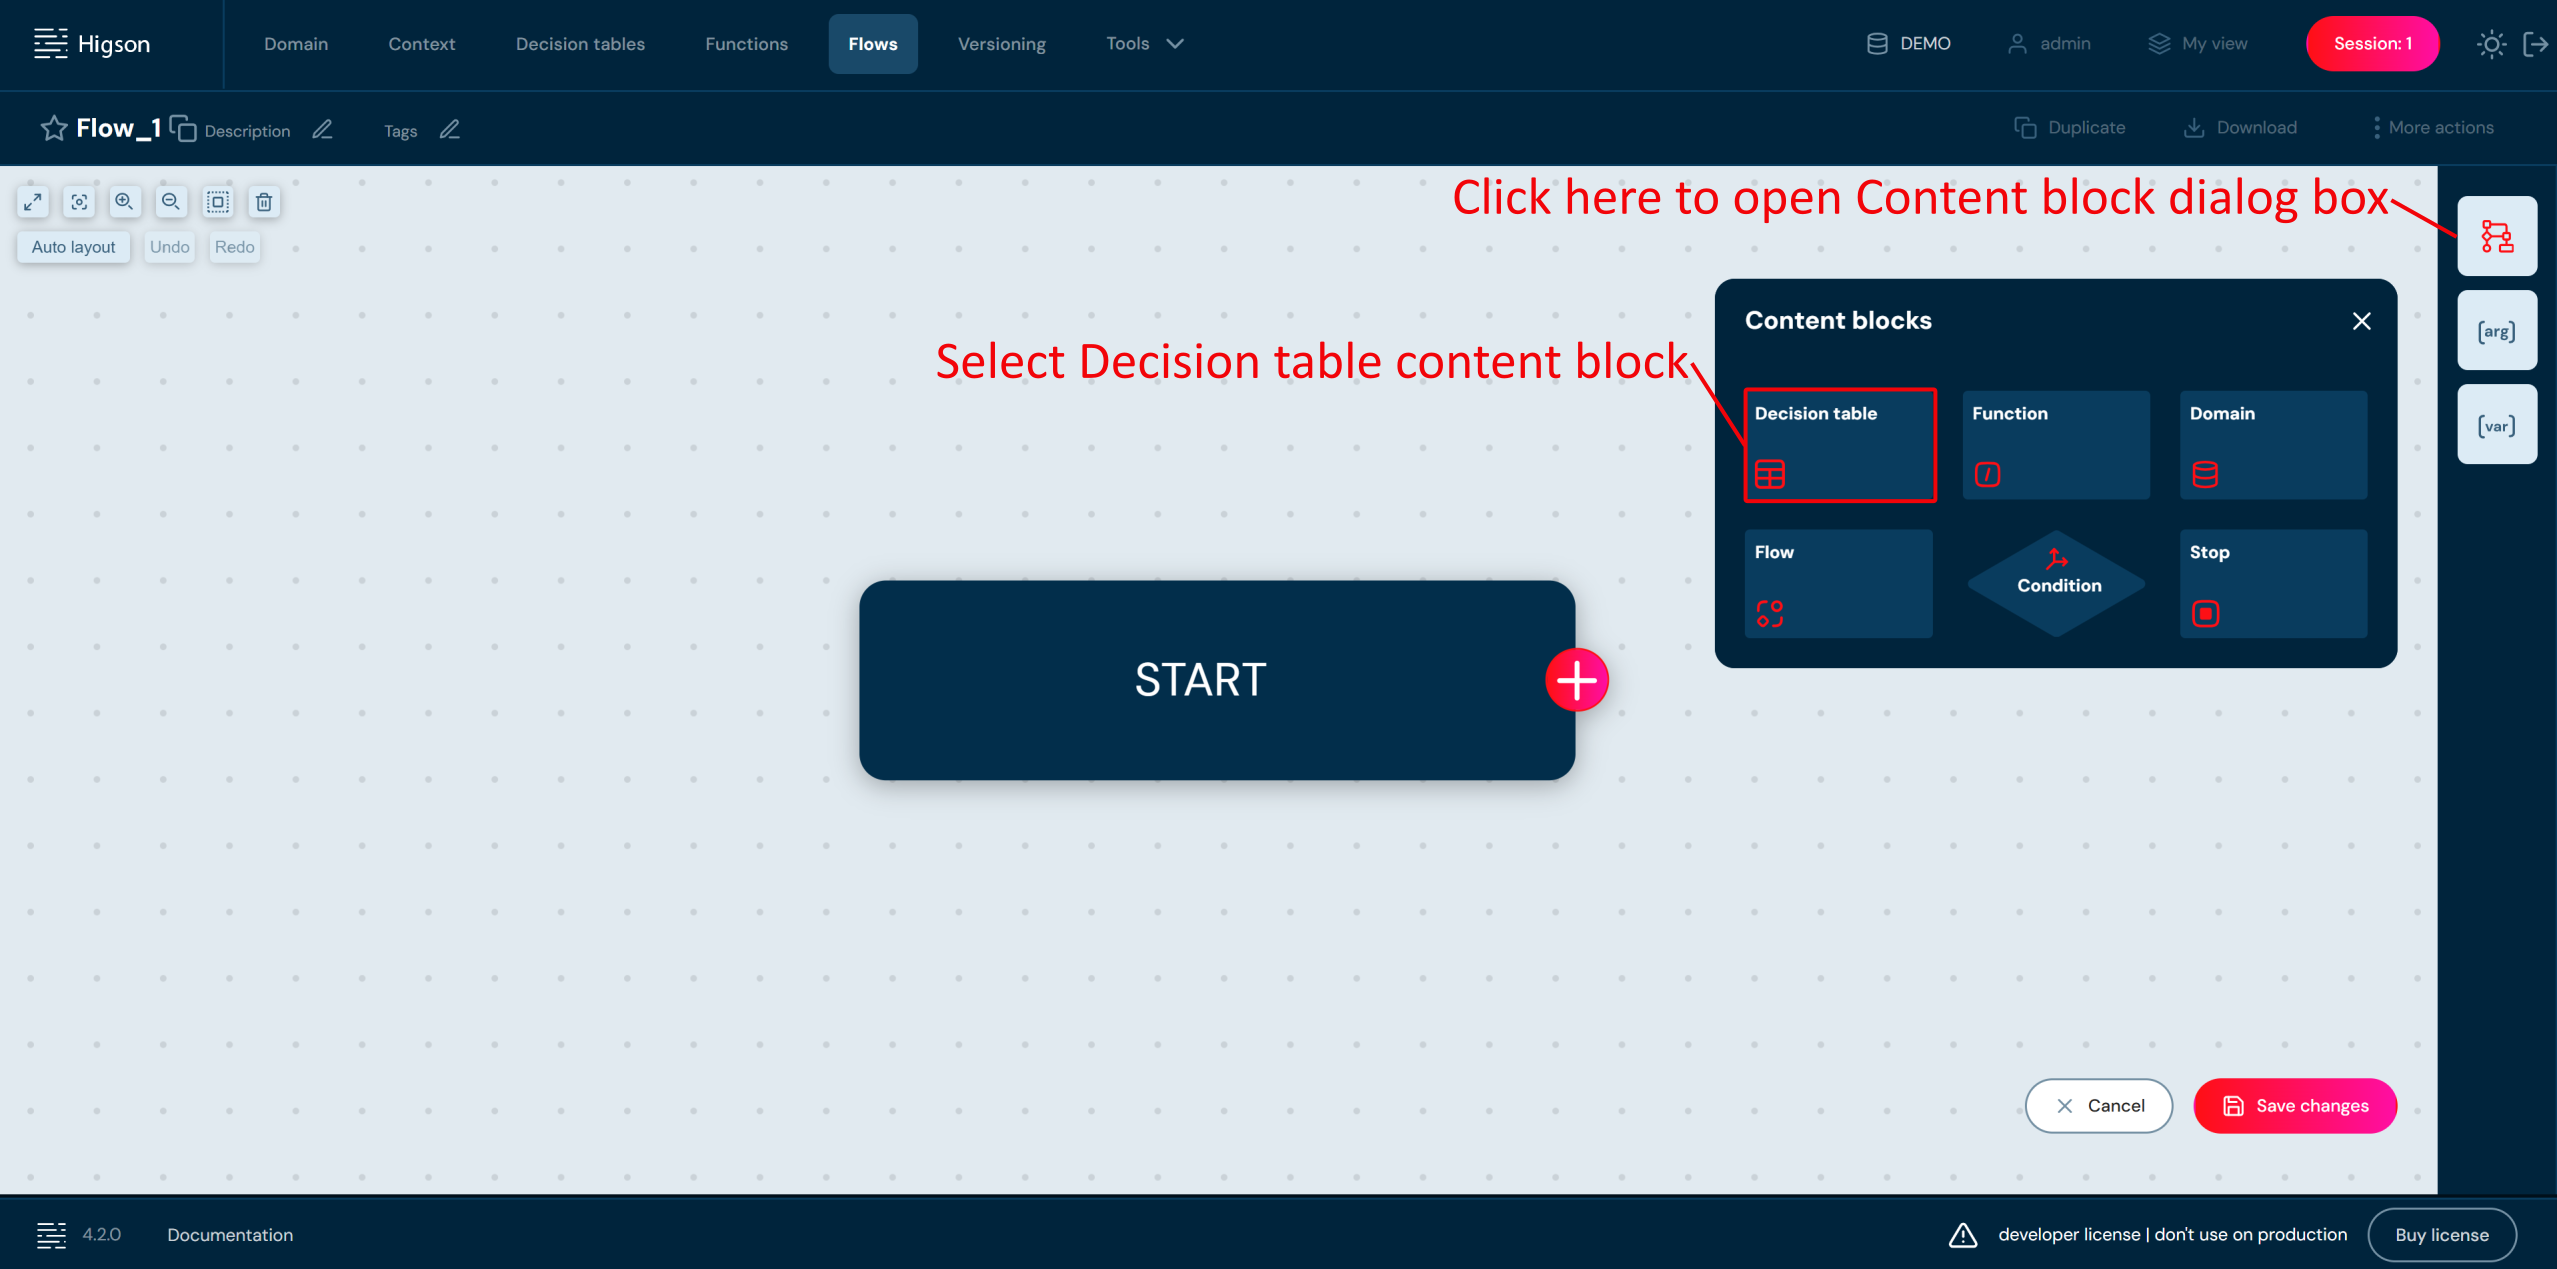
- Double click on a Decisions tables block and complete fields:
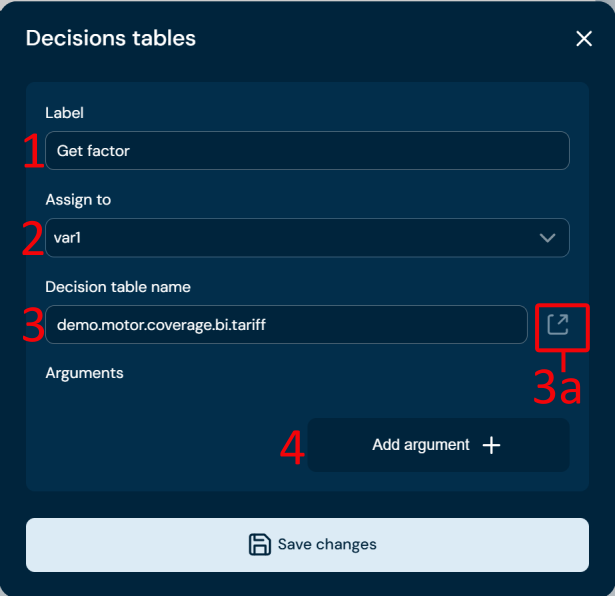
| No. | Field name | Description |
|---|---|---|
| 1 | Label | Label is visible on a tile in a layout view. By default, it will be filled with the name of the decision table. |
| 2 | Assign to | Drop-down list of variables defined in a flow. Choose a variable to which you want to assign the result of the decision table. |
| 3 | Decision table name | Choose the decision table from the list. |
| 3a | Open details | Opens the details of the decision table in a new browser tab. |
| 4 | Add argument | Optionally, it is possible to pass arguments. |
Optionally it is possible to pass arguments. From drop down list you can choose one of the value source of the in levels. As a value, you can specify a variable or argument defined in the flow, or specify a literal value.
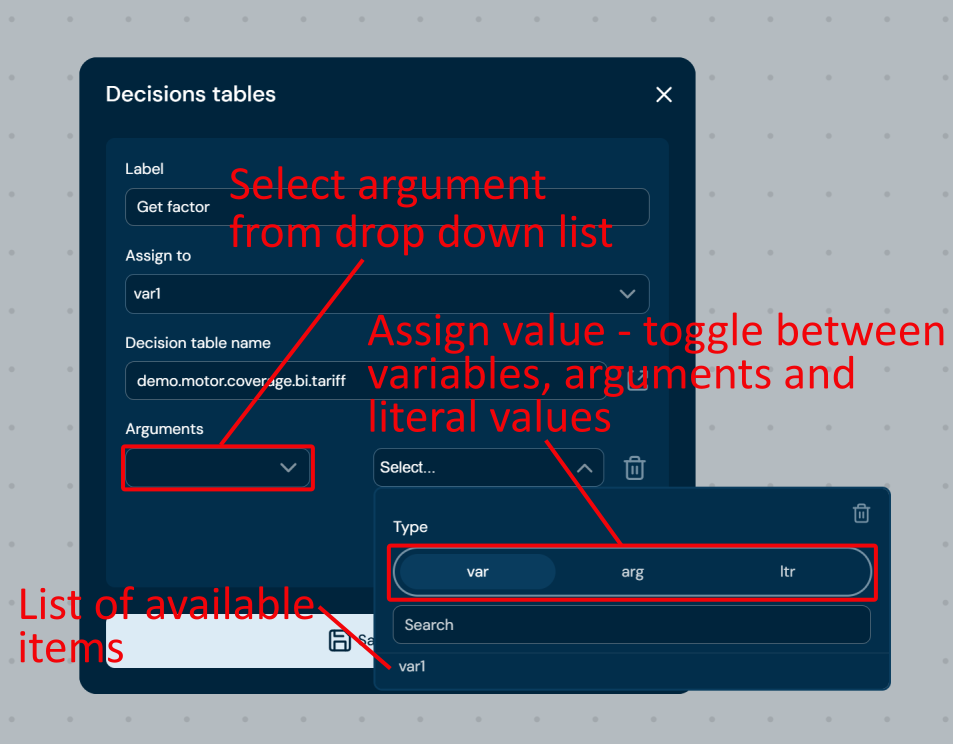
- Save changes.
Decision table content block on a layout view:
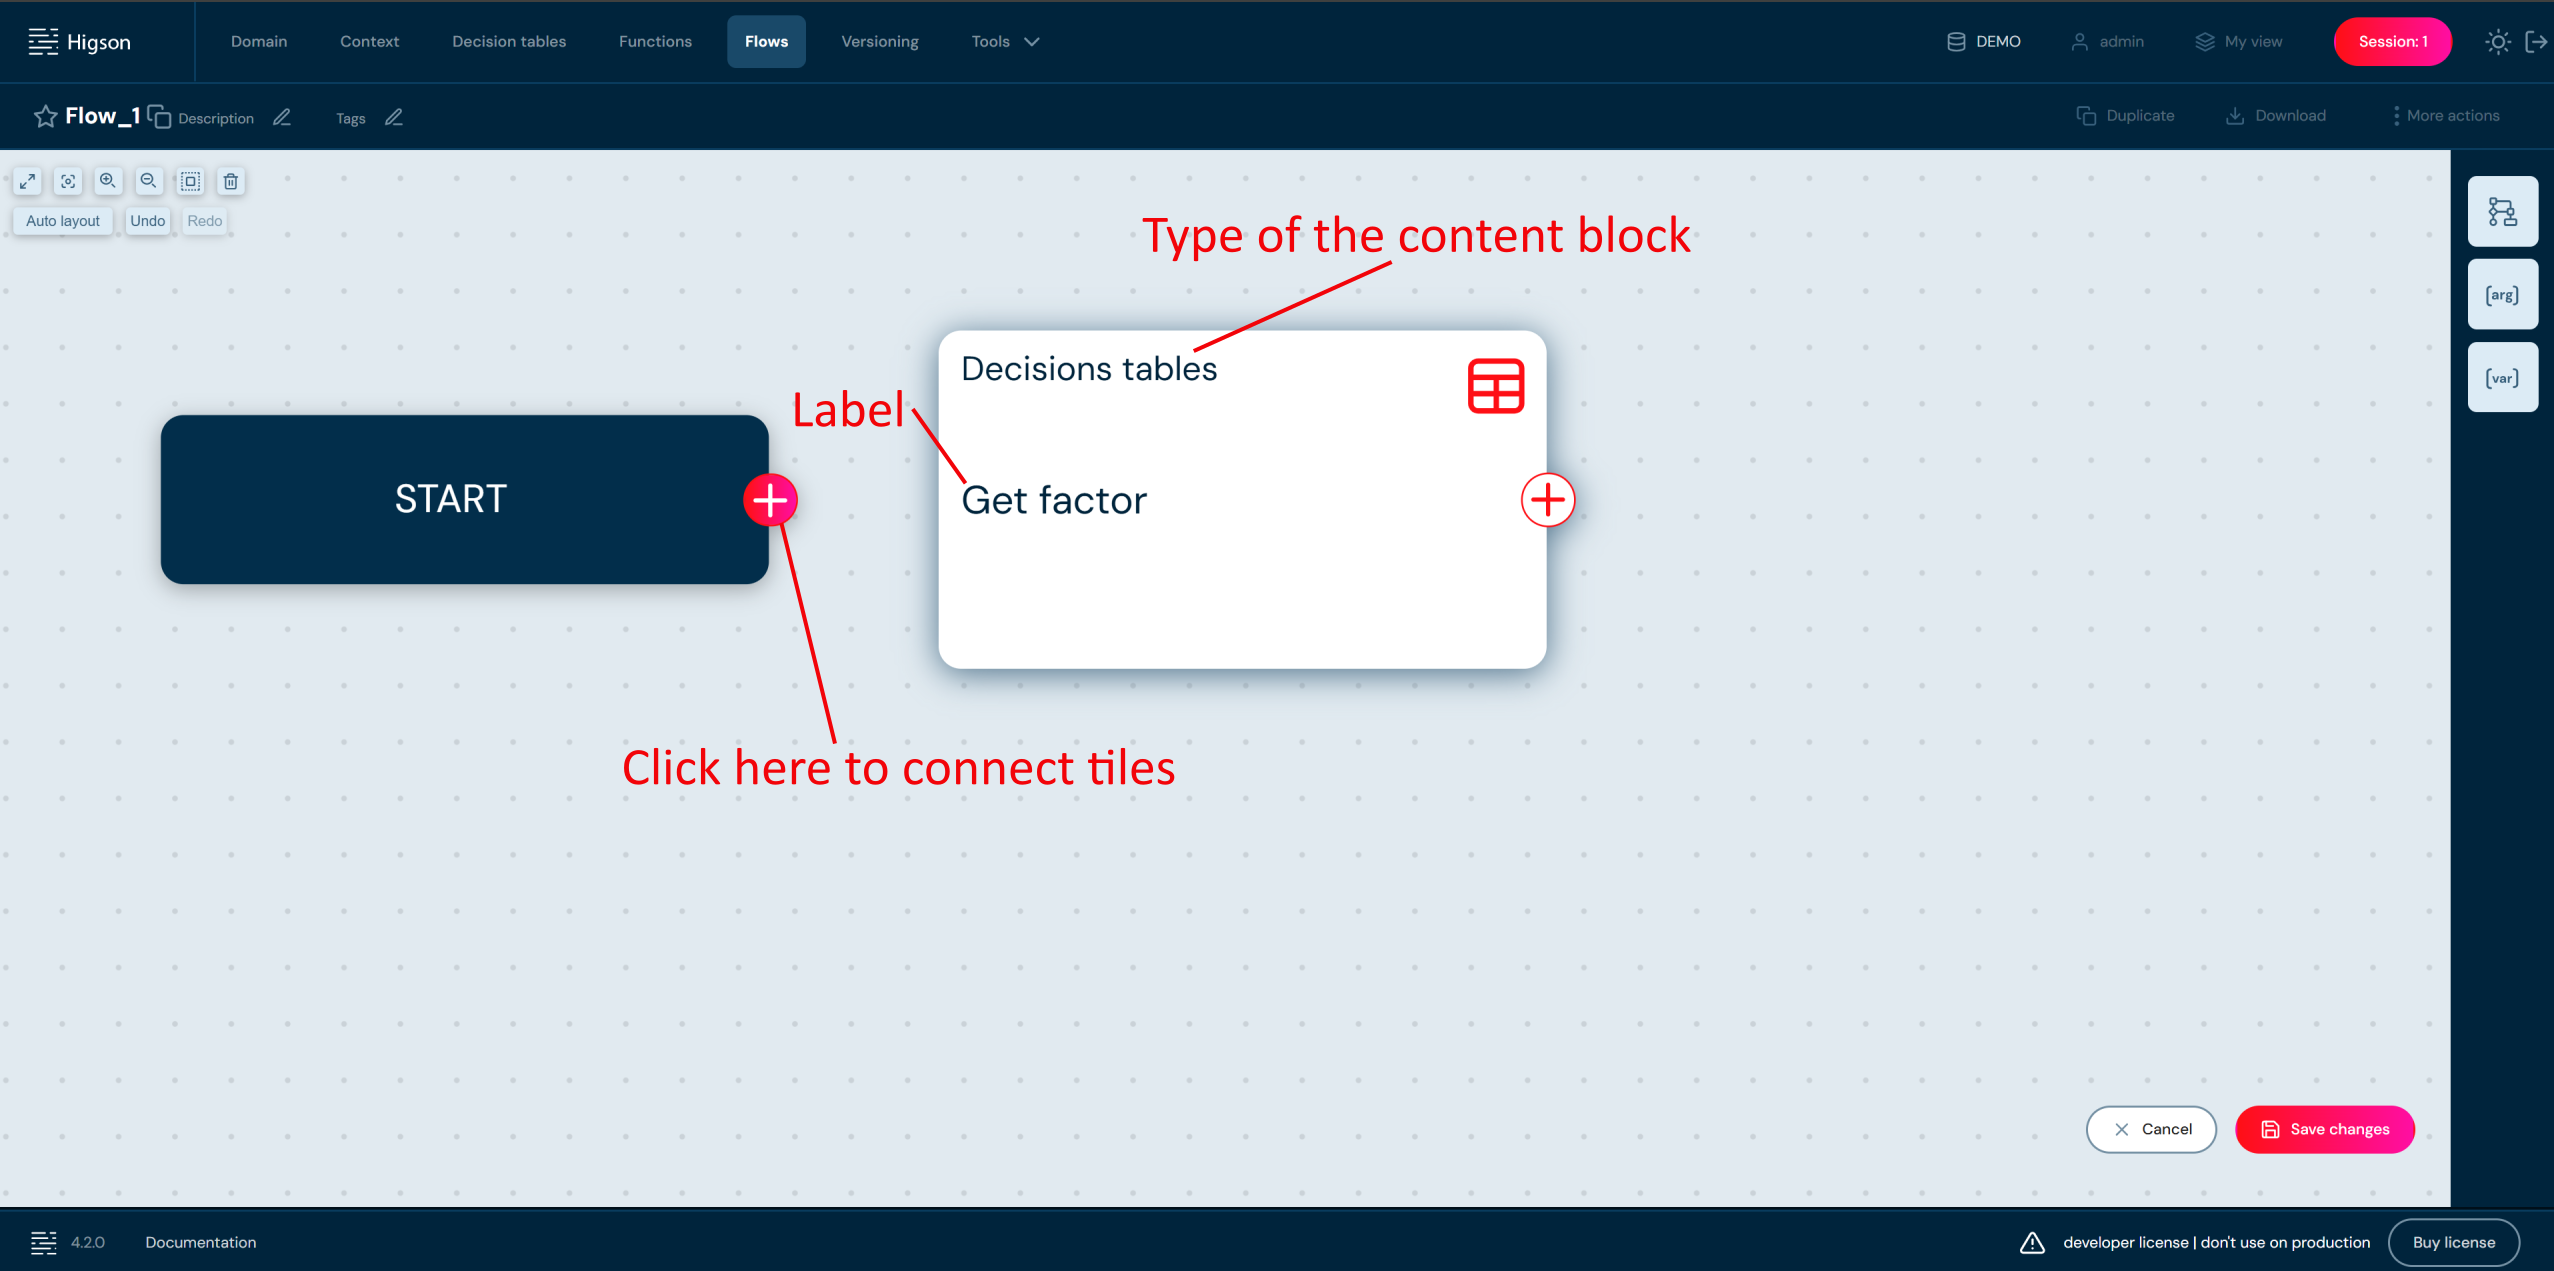
Adding Function Block#
- To add Function block select Content blocks button and choose Function by double-click or drag & drop to the workspace.
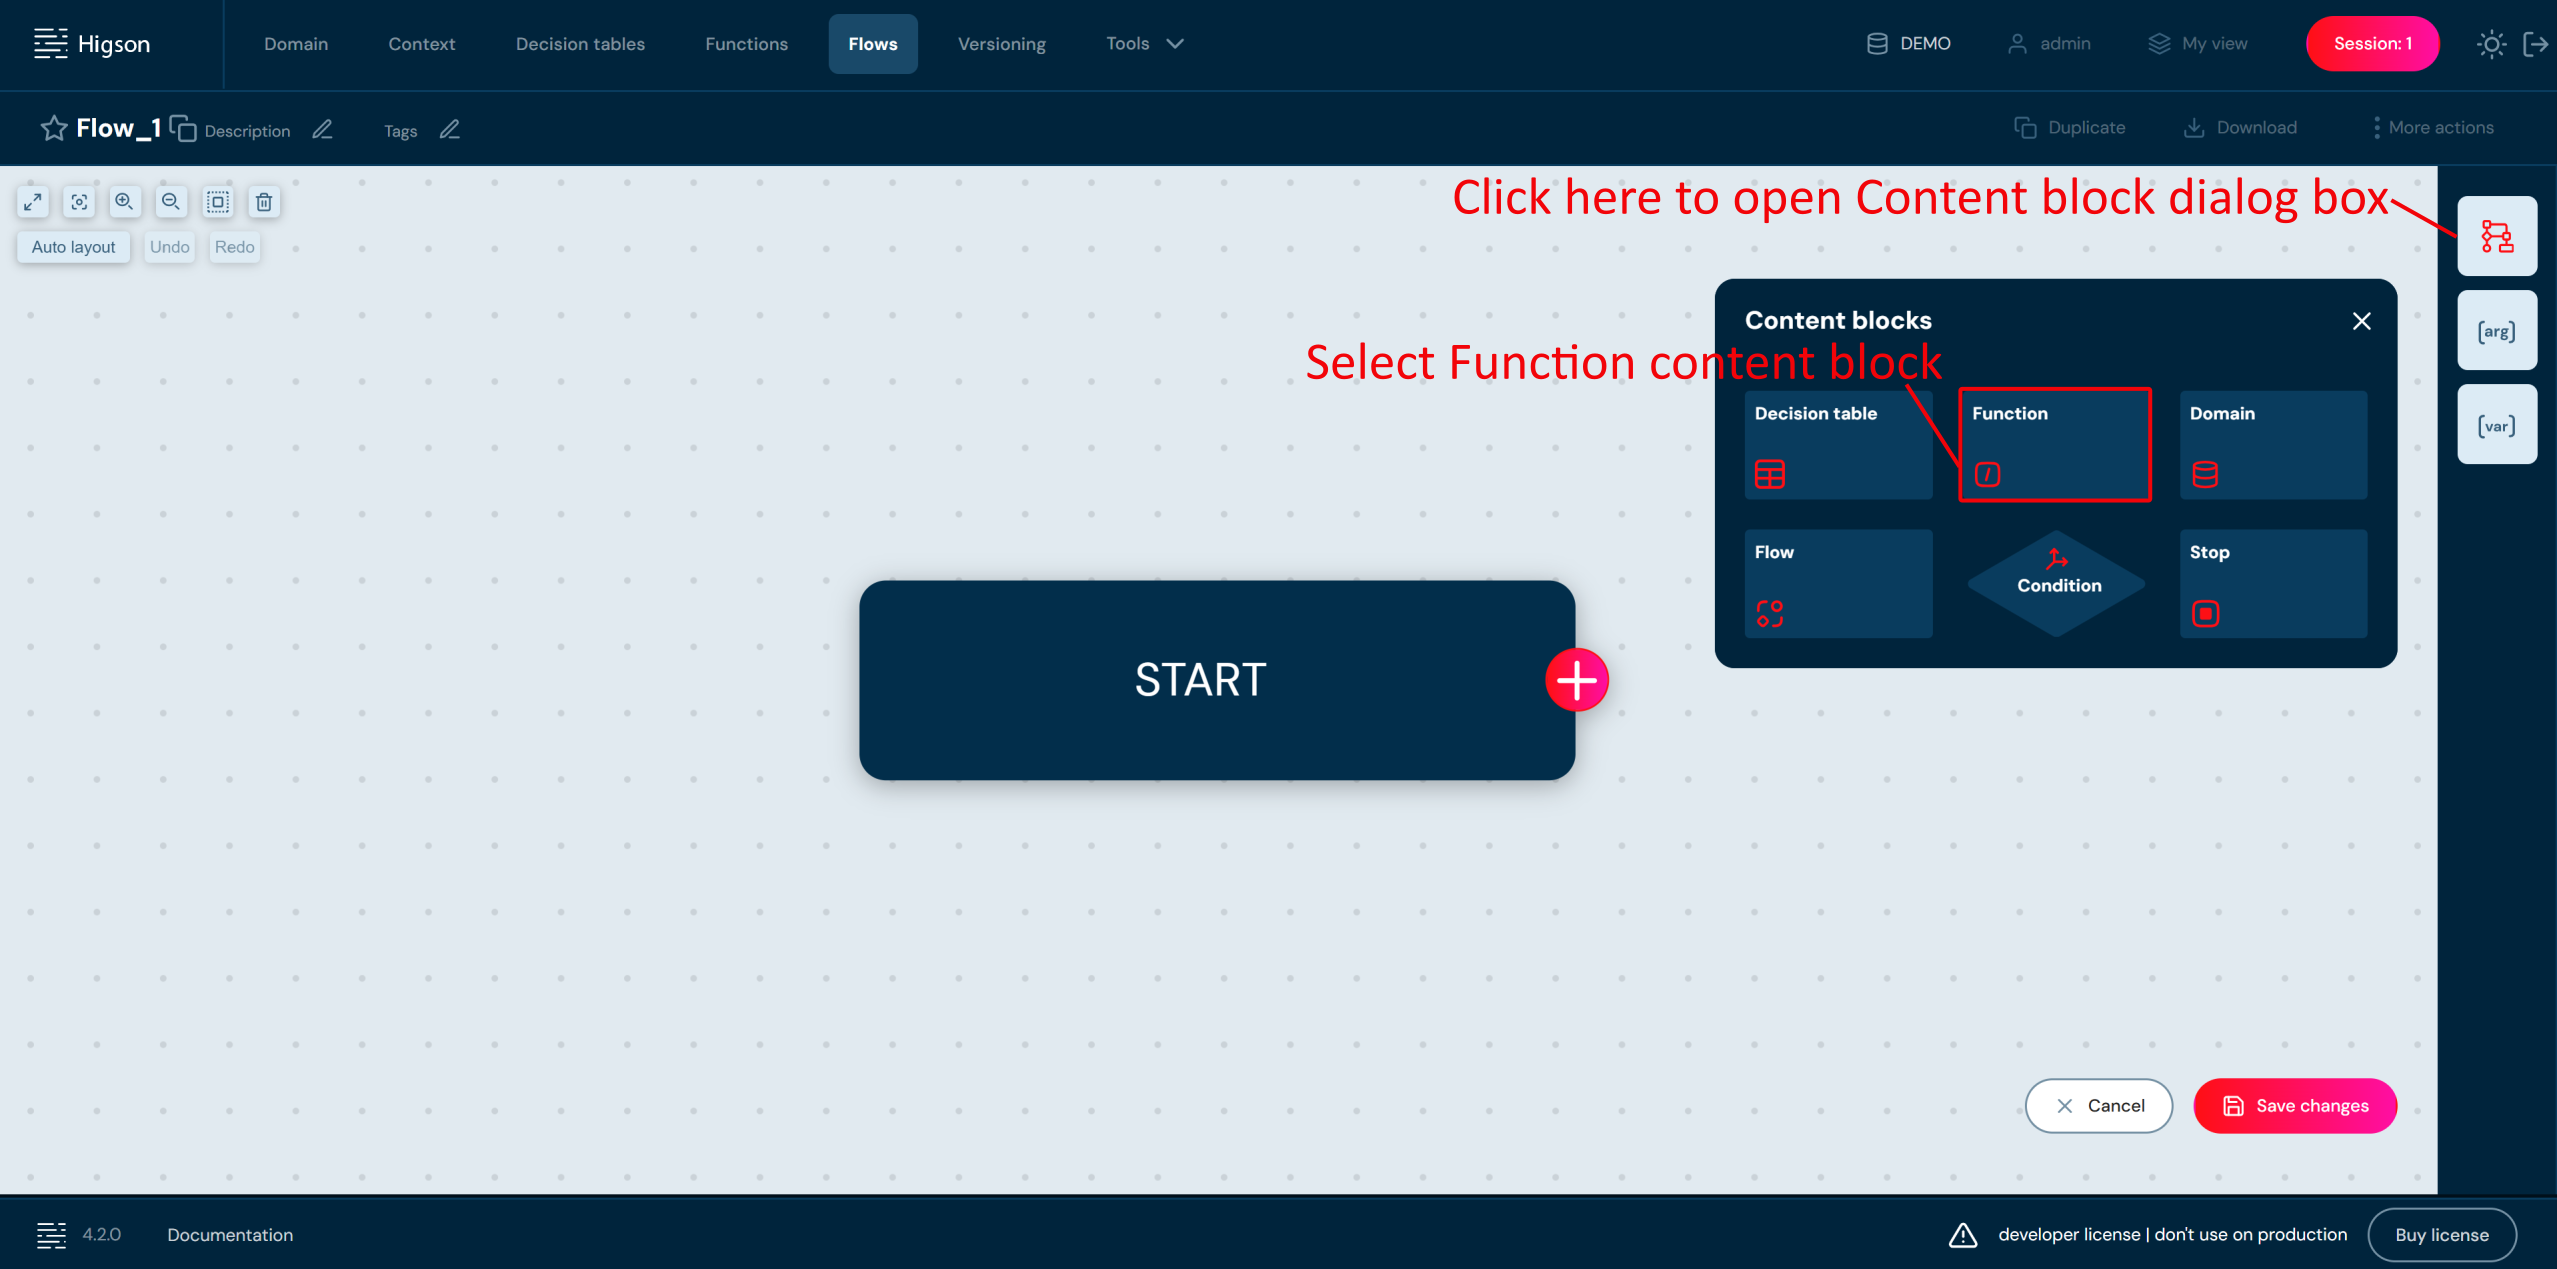
- Double click on a Function tile and complete fields.
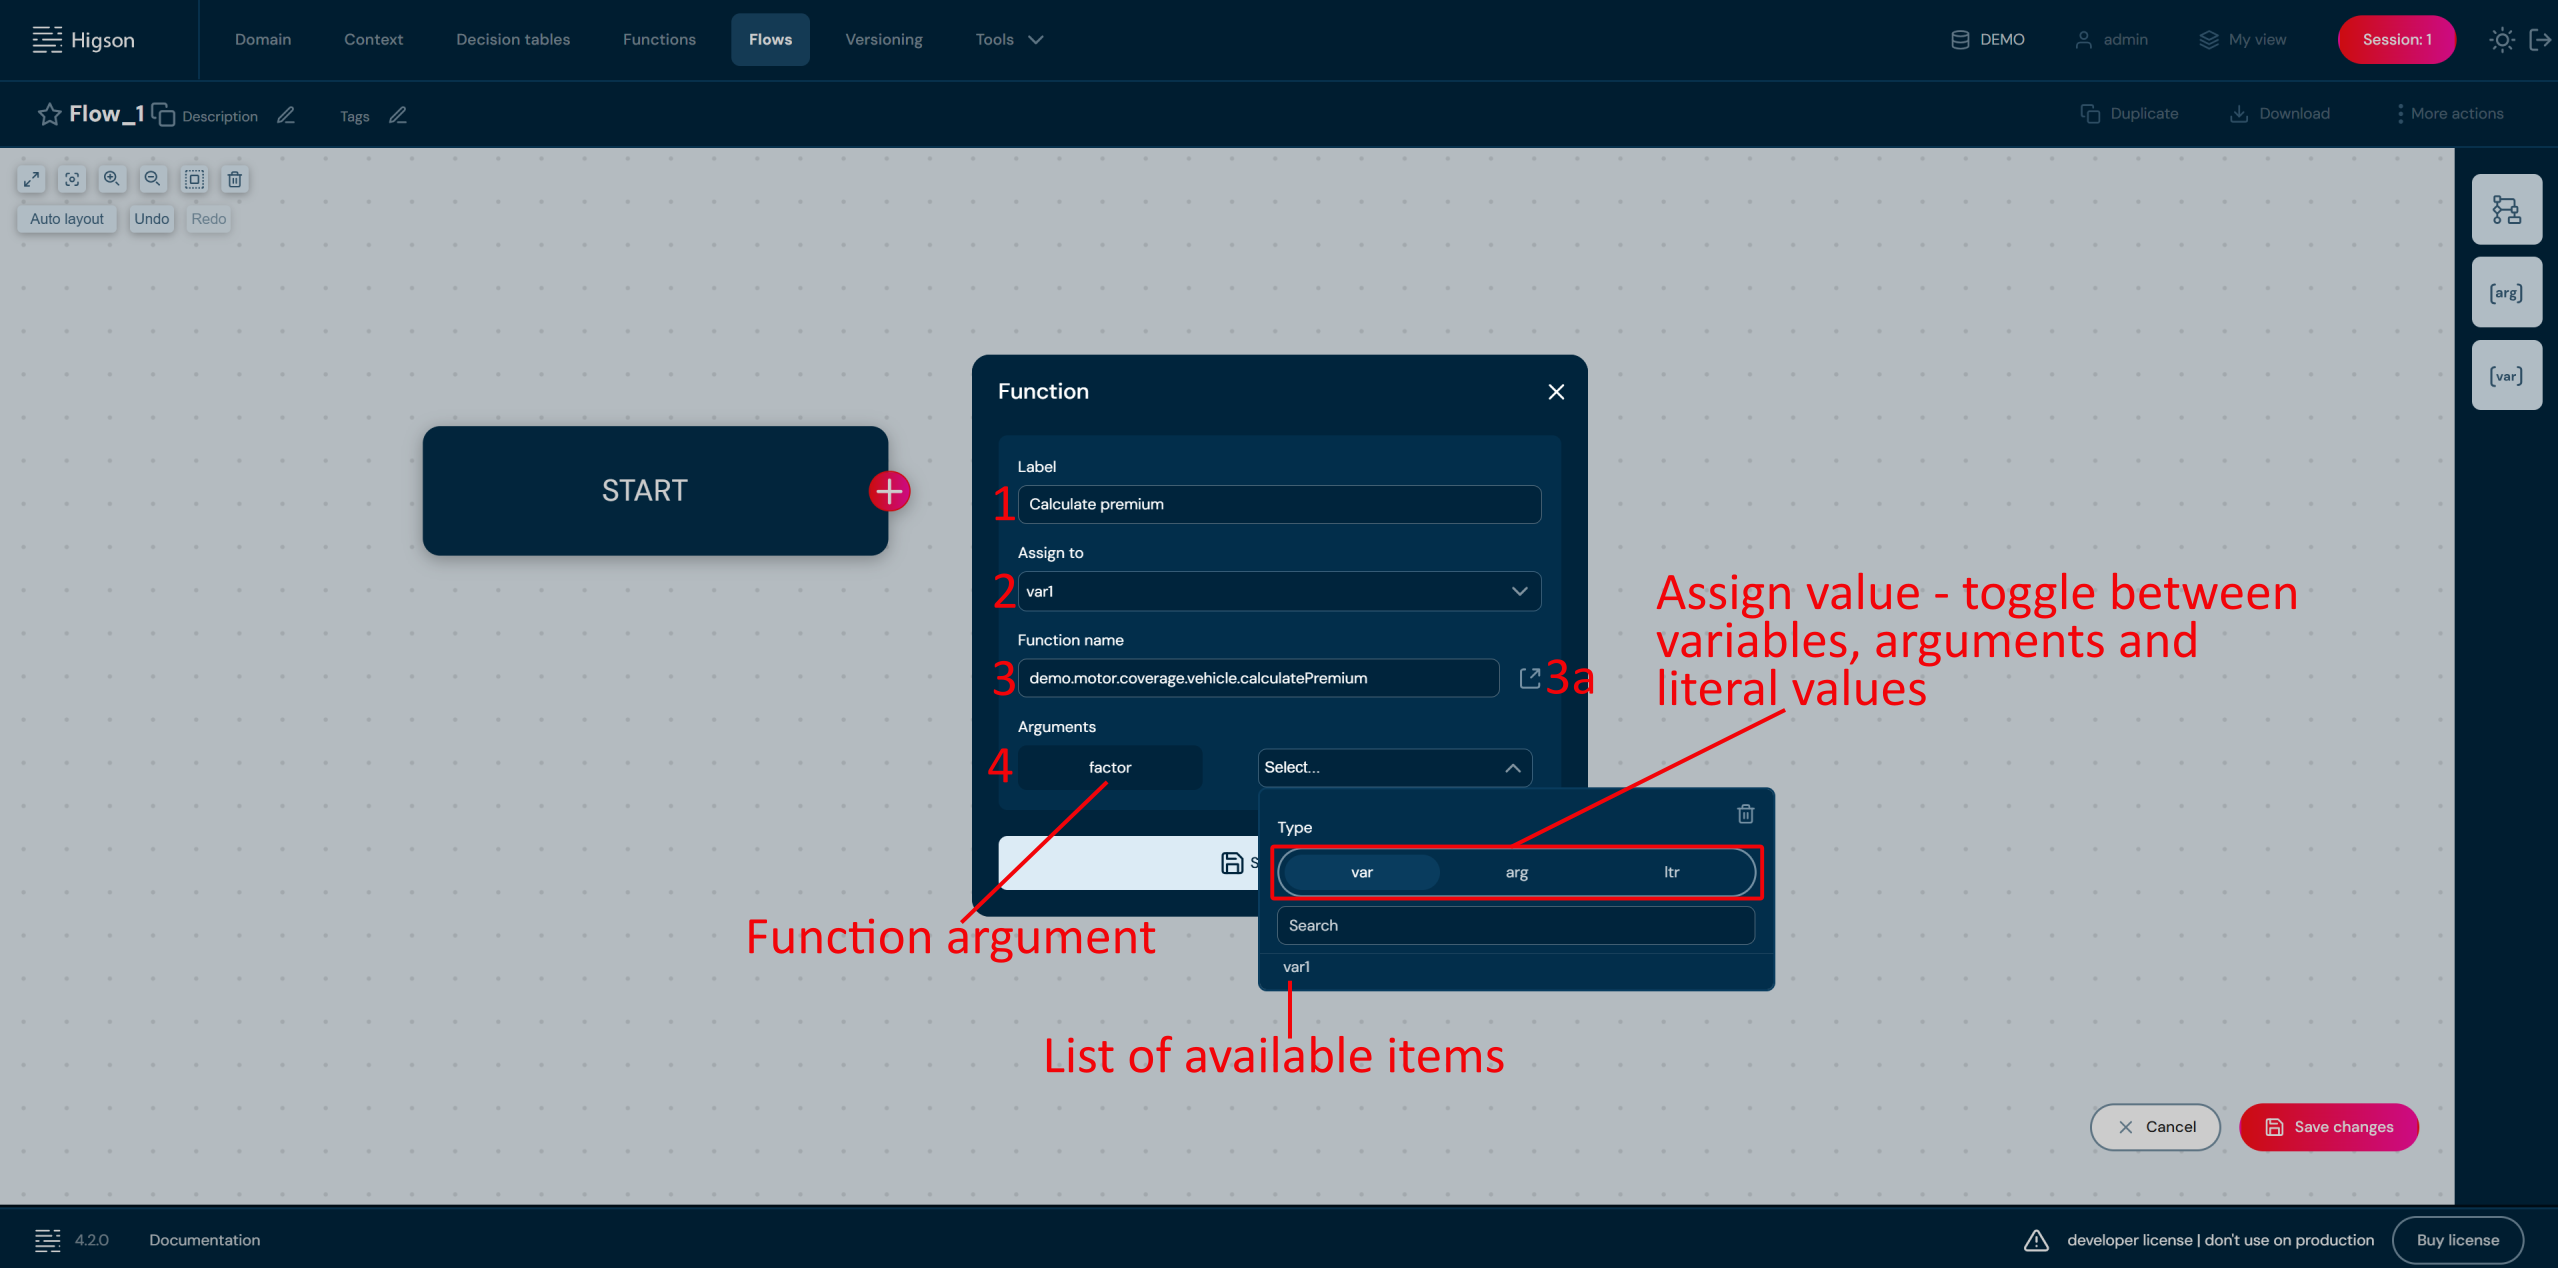
| No. | Field name | Description |
|---|---|---|
| 1 | Label | Label is visible on a tile in a layout view. By default it will be filled with the name of Function. |
| 2 | Assign to | Drop-down list of variables defined in a flow. Choose a variable to which you want to assign the result of Function. |
| 3 | Function name | Choose Function you want to call from the list of functions defined in the environment. |
| 3a | Open details | Opens the details of the function in a new browser tab. |
| 4 | Arguments | Optionally, it is possible to pass arguments. |
- Save changes.
Function content block on a layout view:
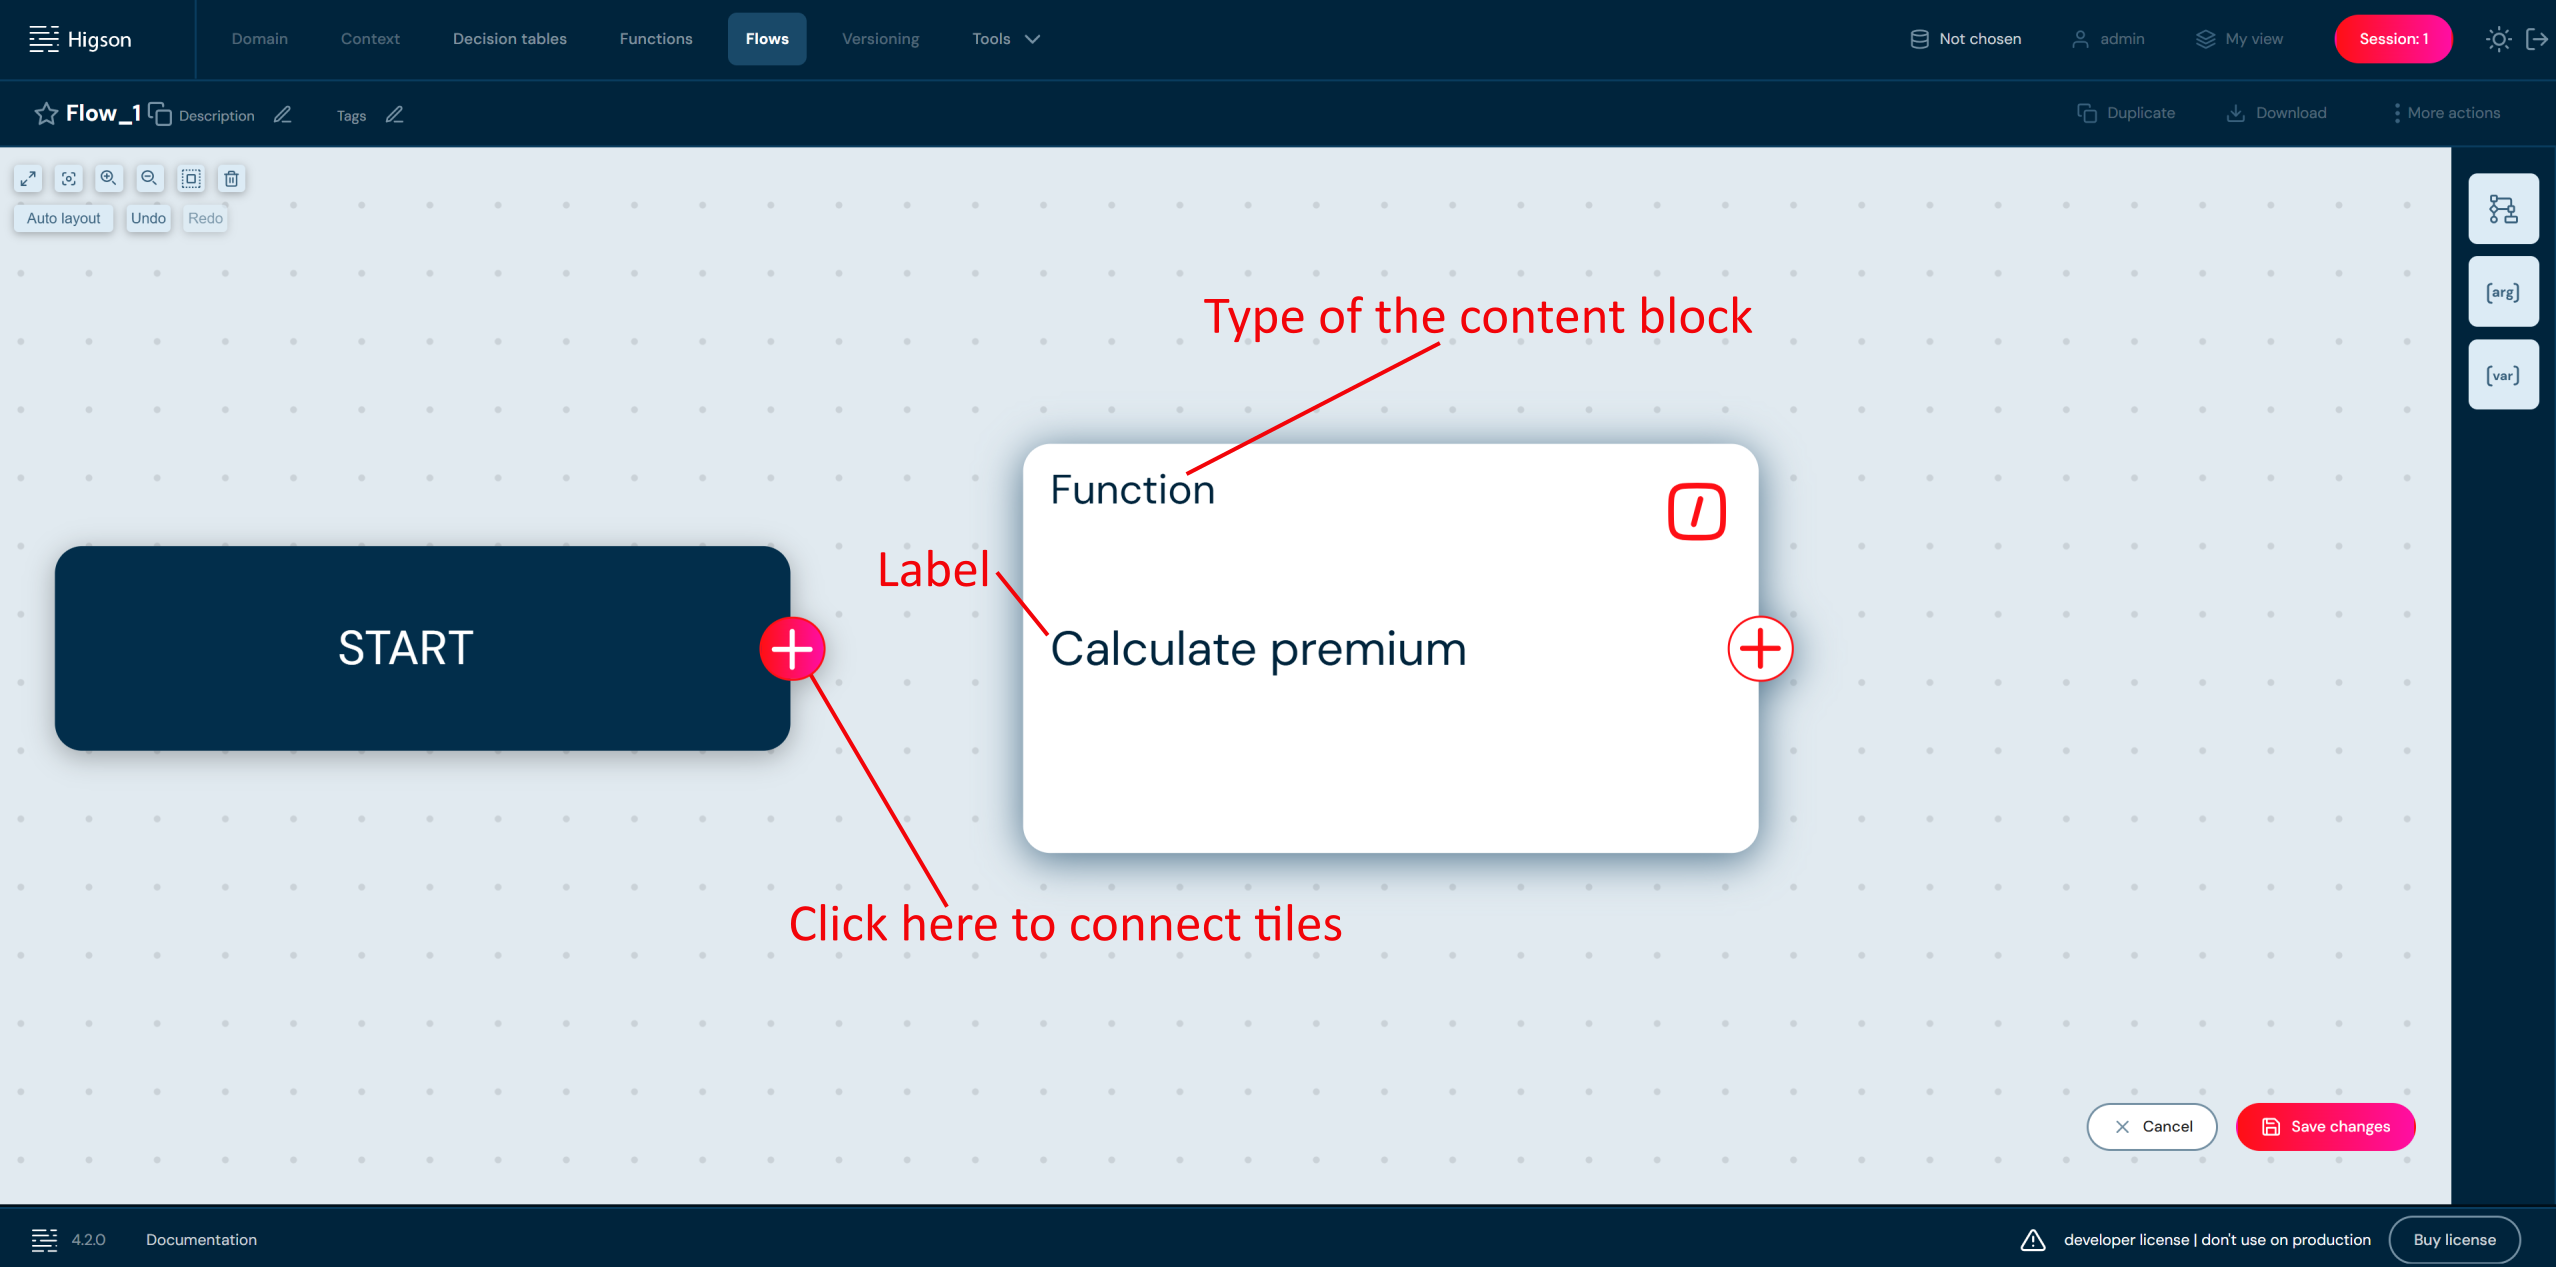
Adding Domain Block#
- To add Domain block select Content blocks button and choose Domain by double-click or drag & drop to the workspace.
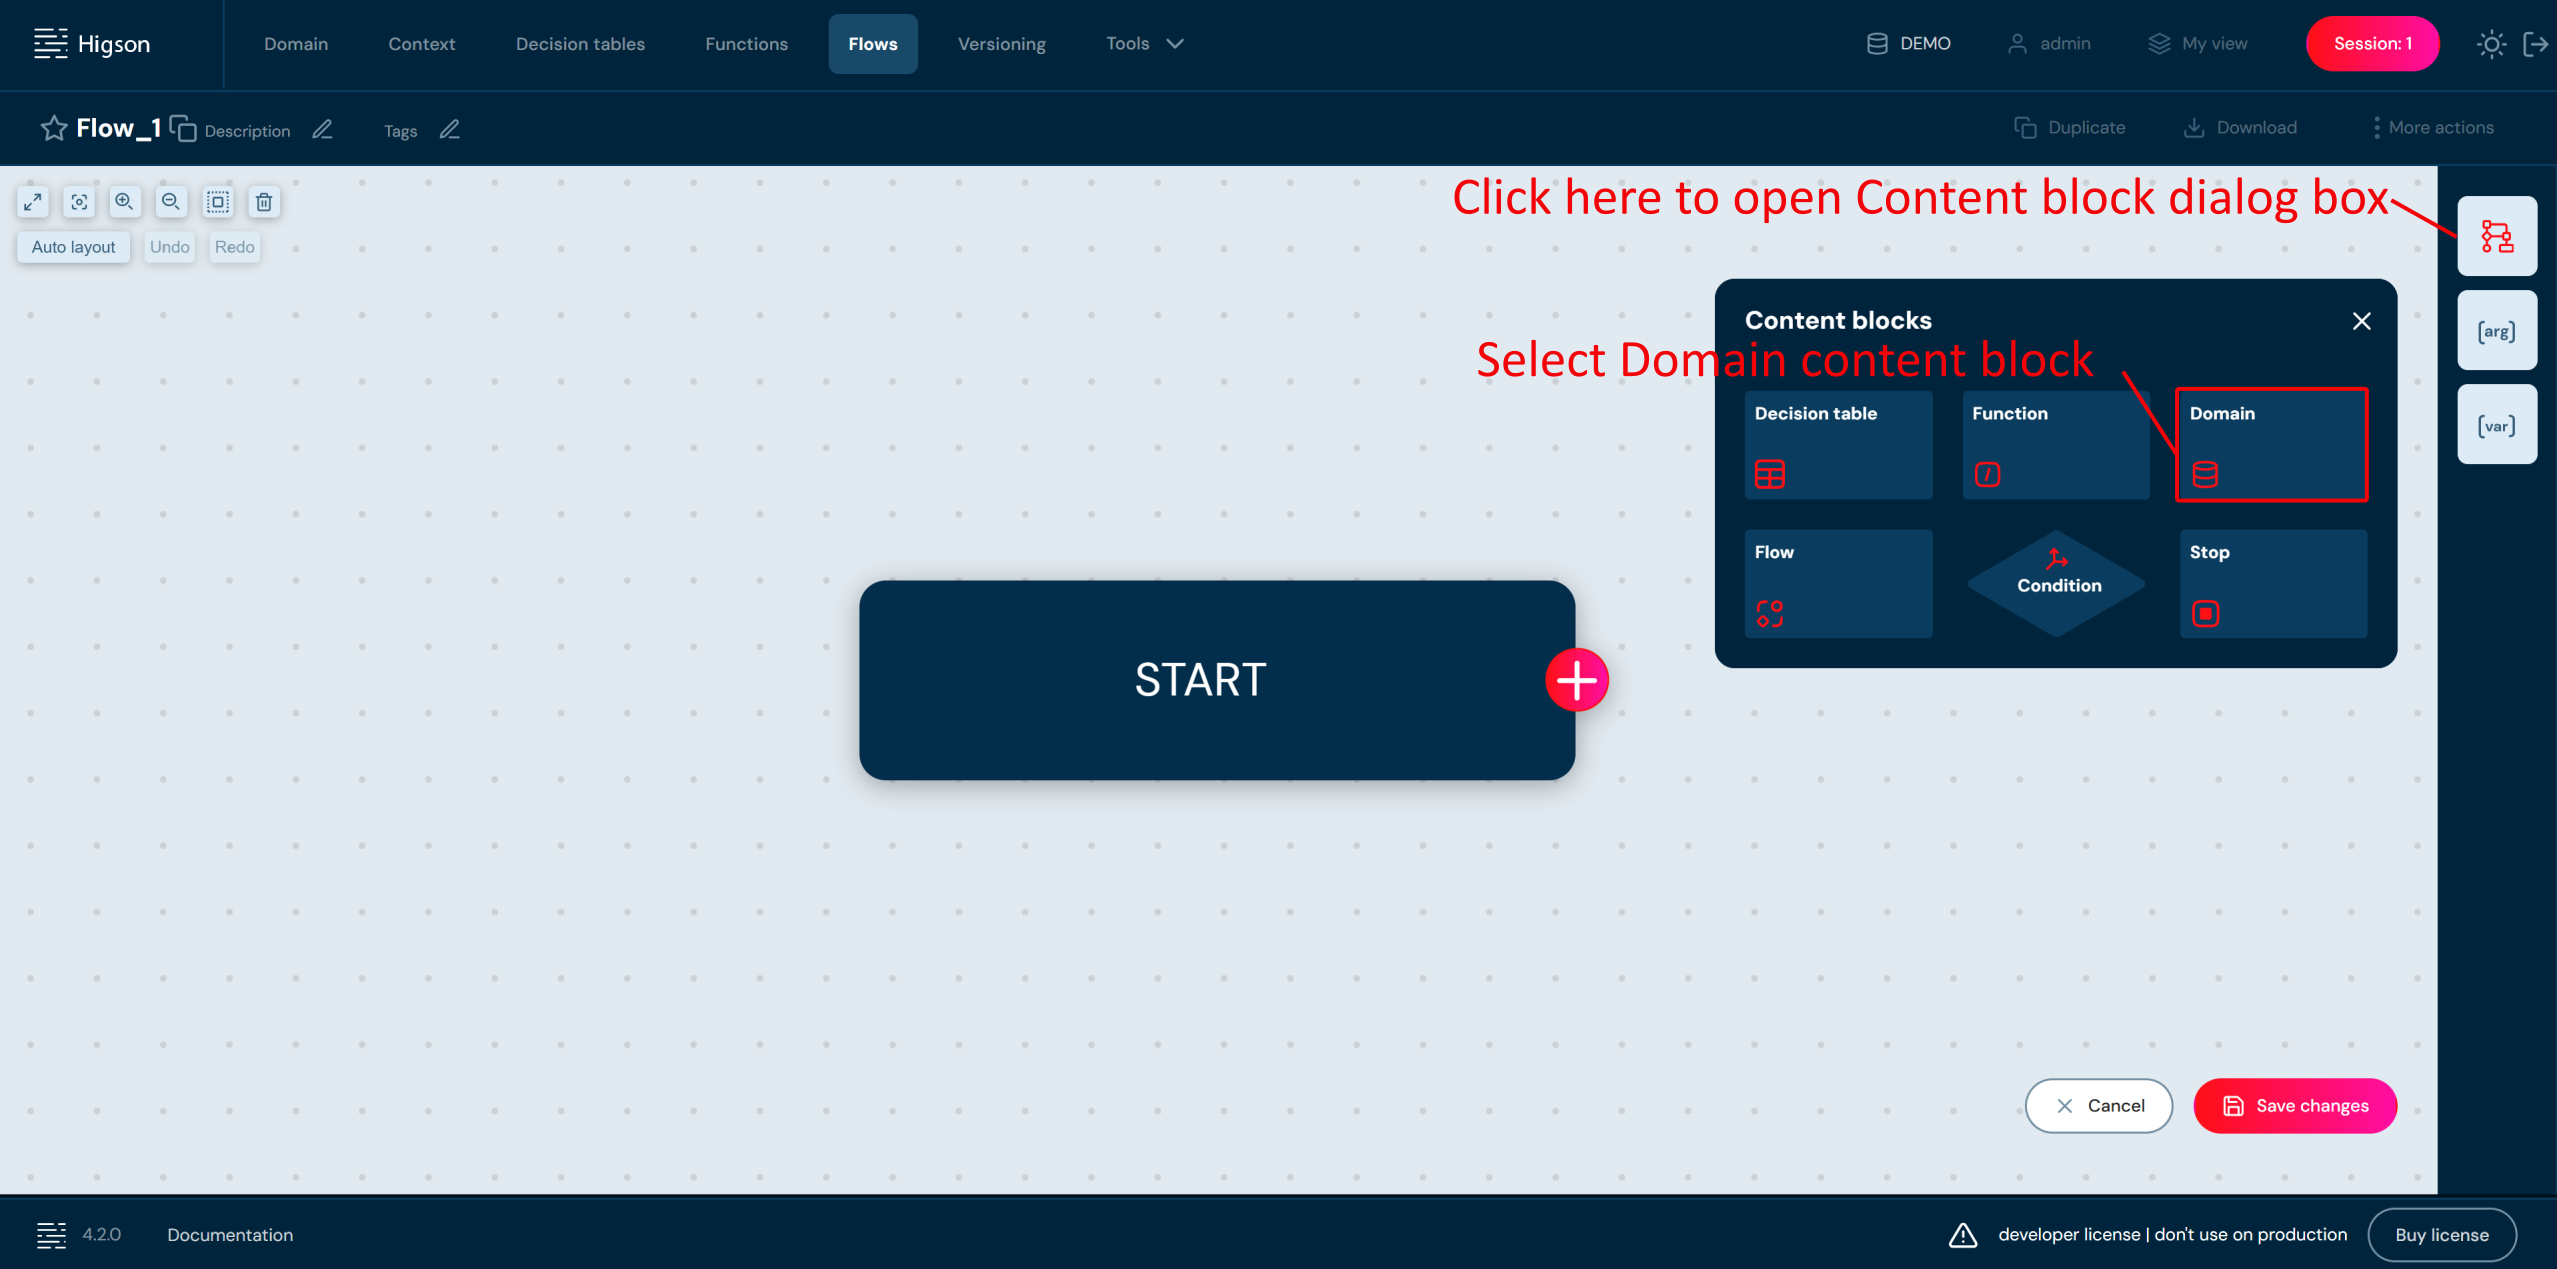
- Double click on a Domain tile and complete fields.
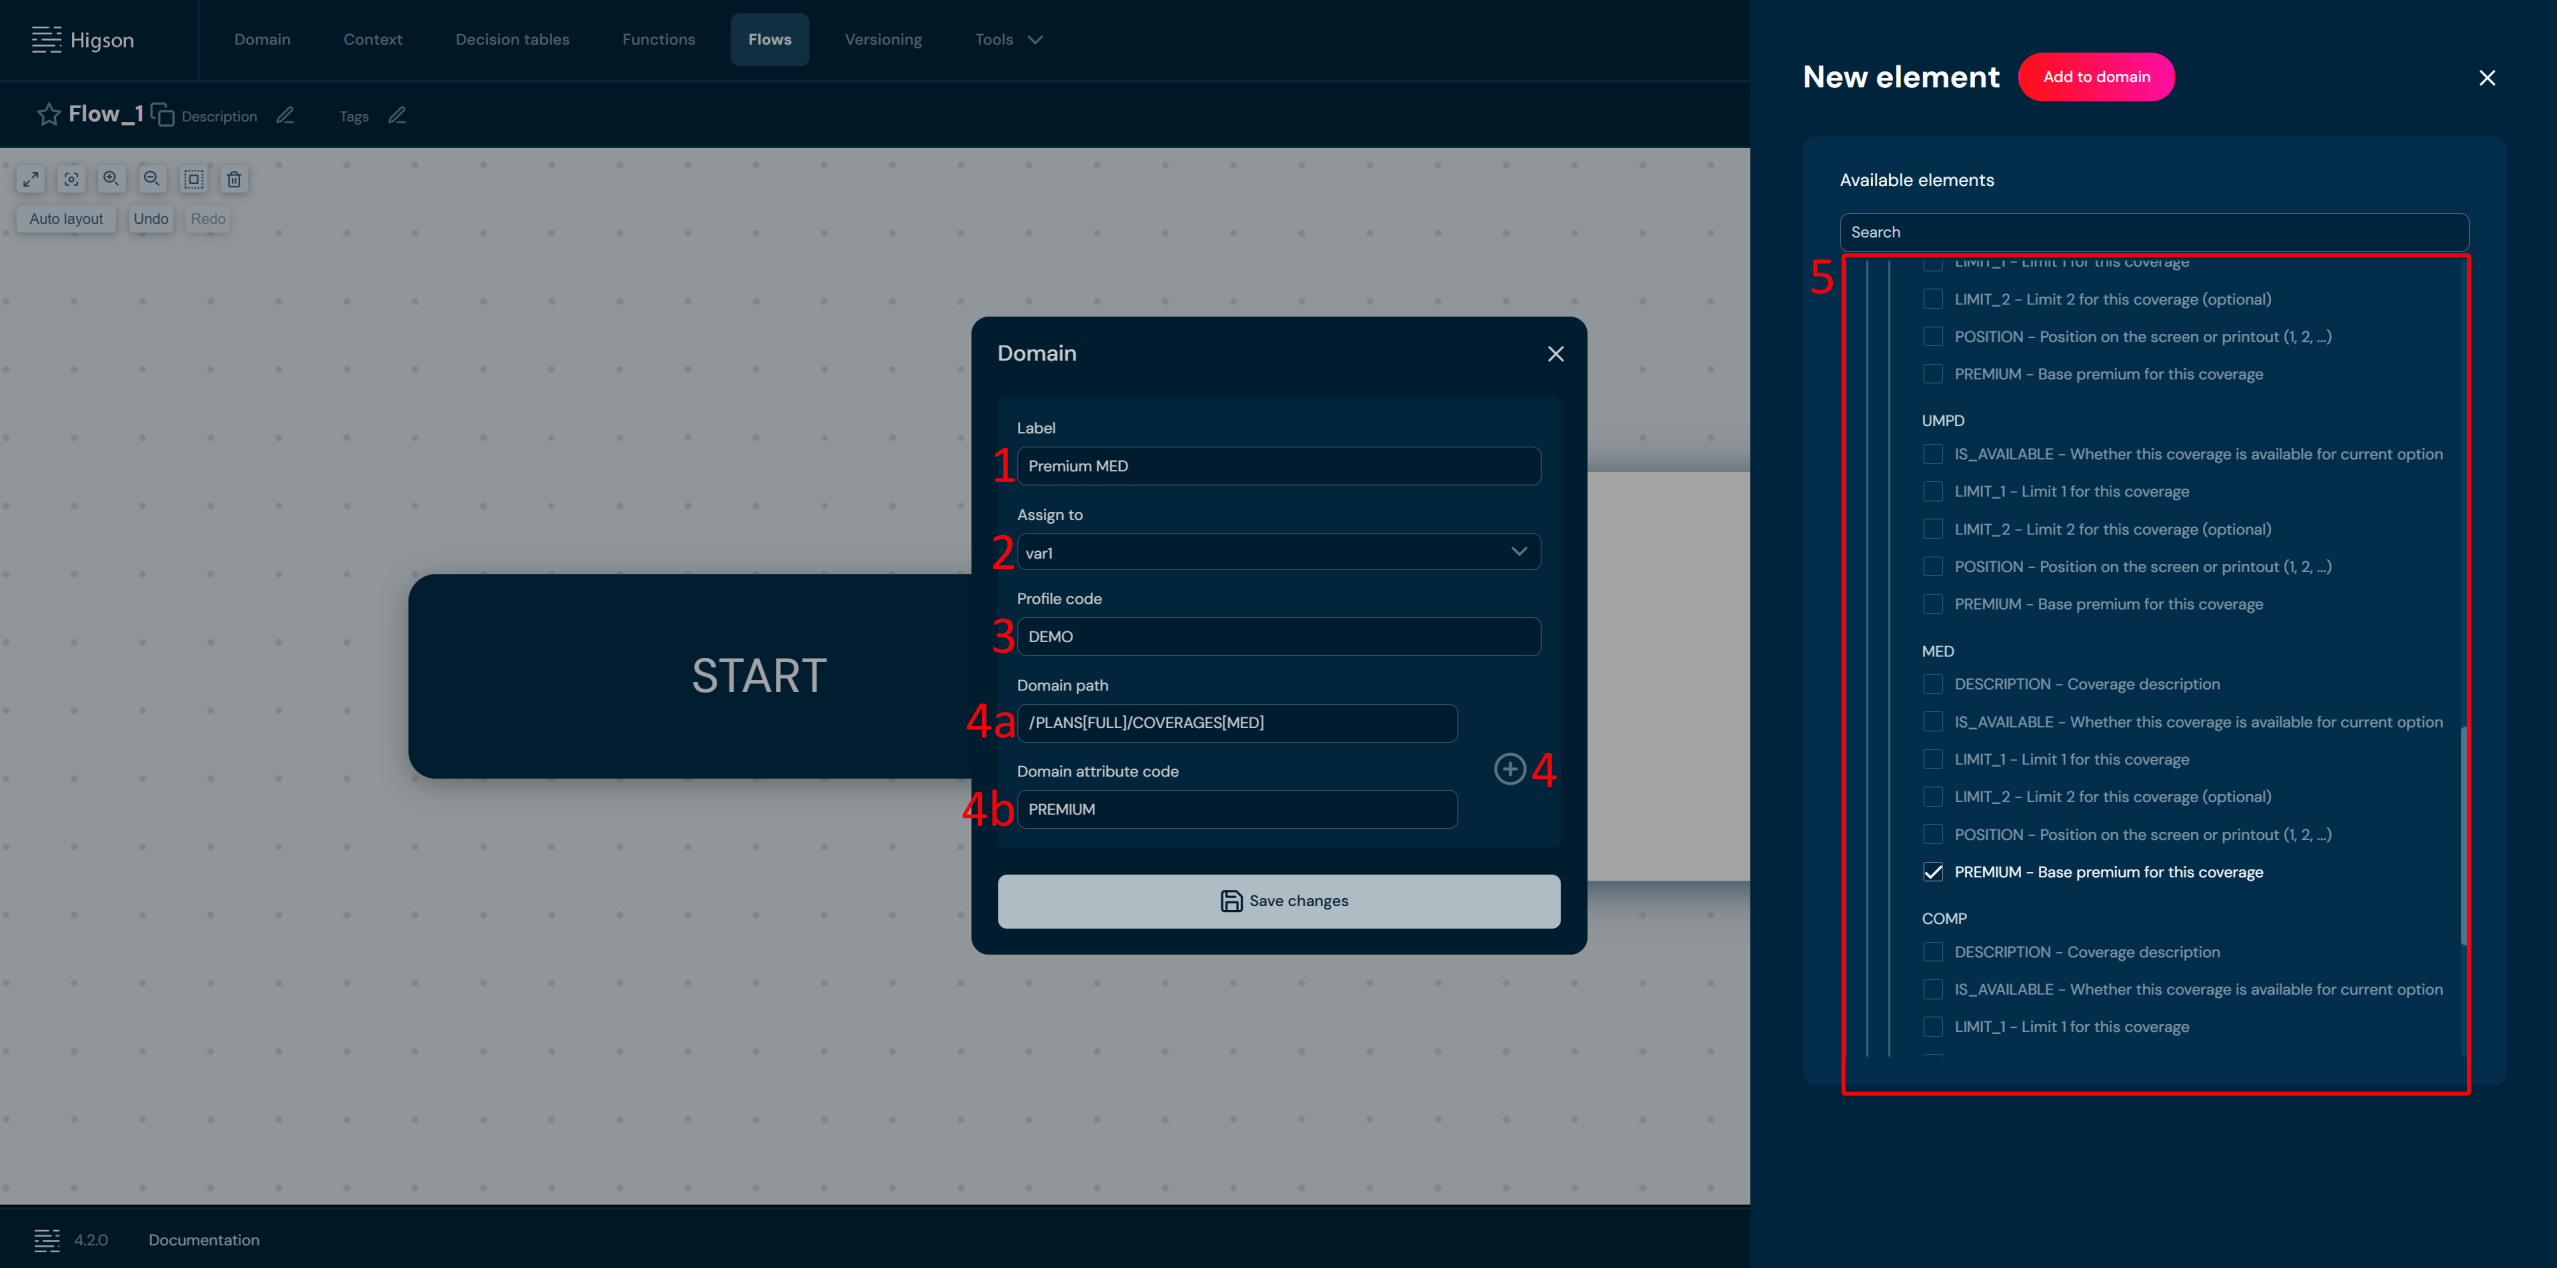
| No. | Field name | Description |
|---|---|---|
| 1 | Label | Label is visible on a tile in a layout view. By default it will be filled with the name of a profile. |
| 2 | Assign to | Drop-down list of variables defined in a flow. Choose a variable to which you want to assign the result of calling a domain element. |
| 3 | Profile code | Complete field with the profile name which domains you want to use. |
| 4 | Add | Add domain path and domain attribute code from the list. By clicking on the plus icon you will be able to choose an element from the domain configuration tree. |
| 4a | Domain path | This field is filled automatically after selecting an item from the list. |
| 4b | Arguments | This field is filled automatically after selecting an item from the list. |
| 5 | List of elements | The list of elements available on a domain configuration tree. After selecting an element fields 4a and 4b will be filled automatically. |
- Save changes.
Domain content block on a layout view:
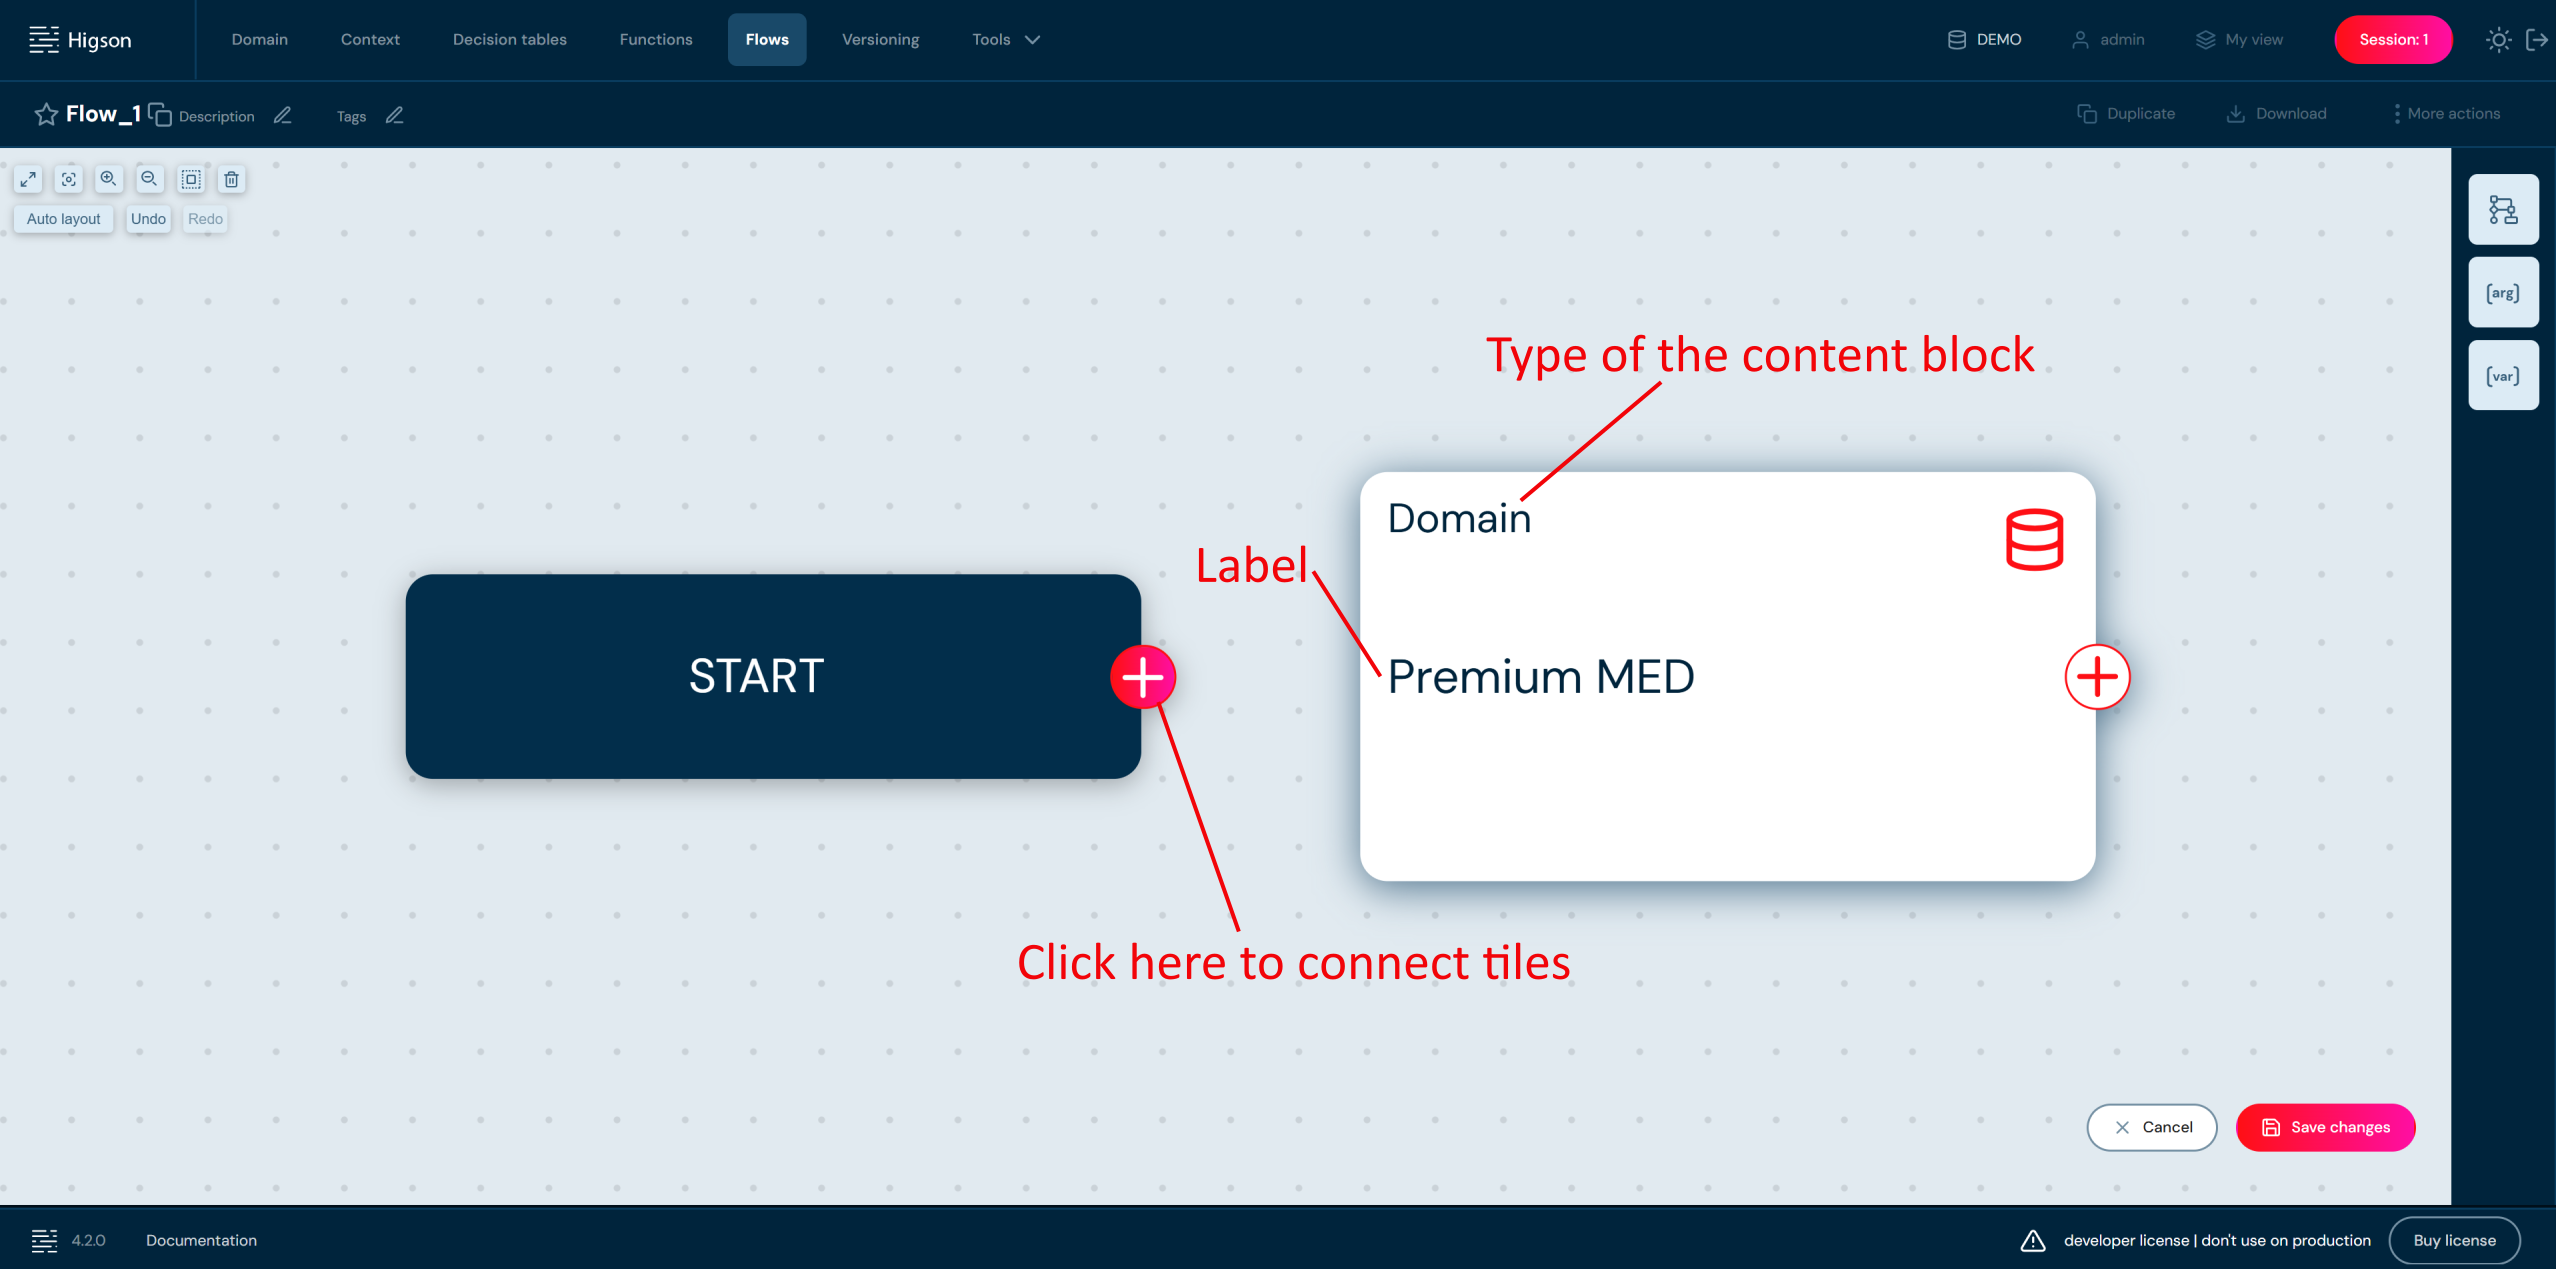
Adding Flow Block#
- To add Flow block select Content blocks button and choose Flow by double-click or drag & drop to the workspace.
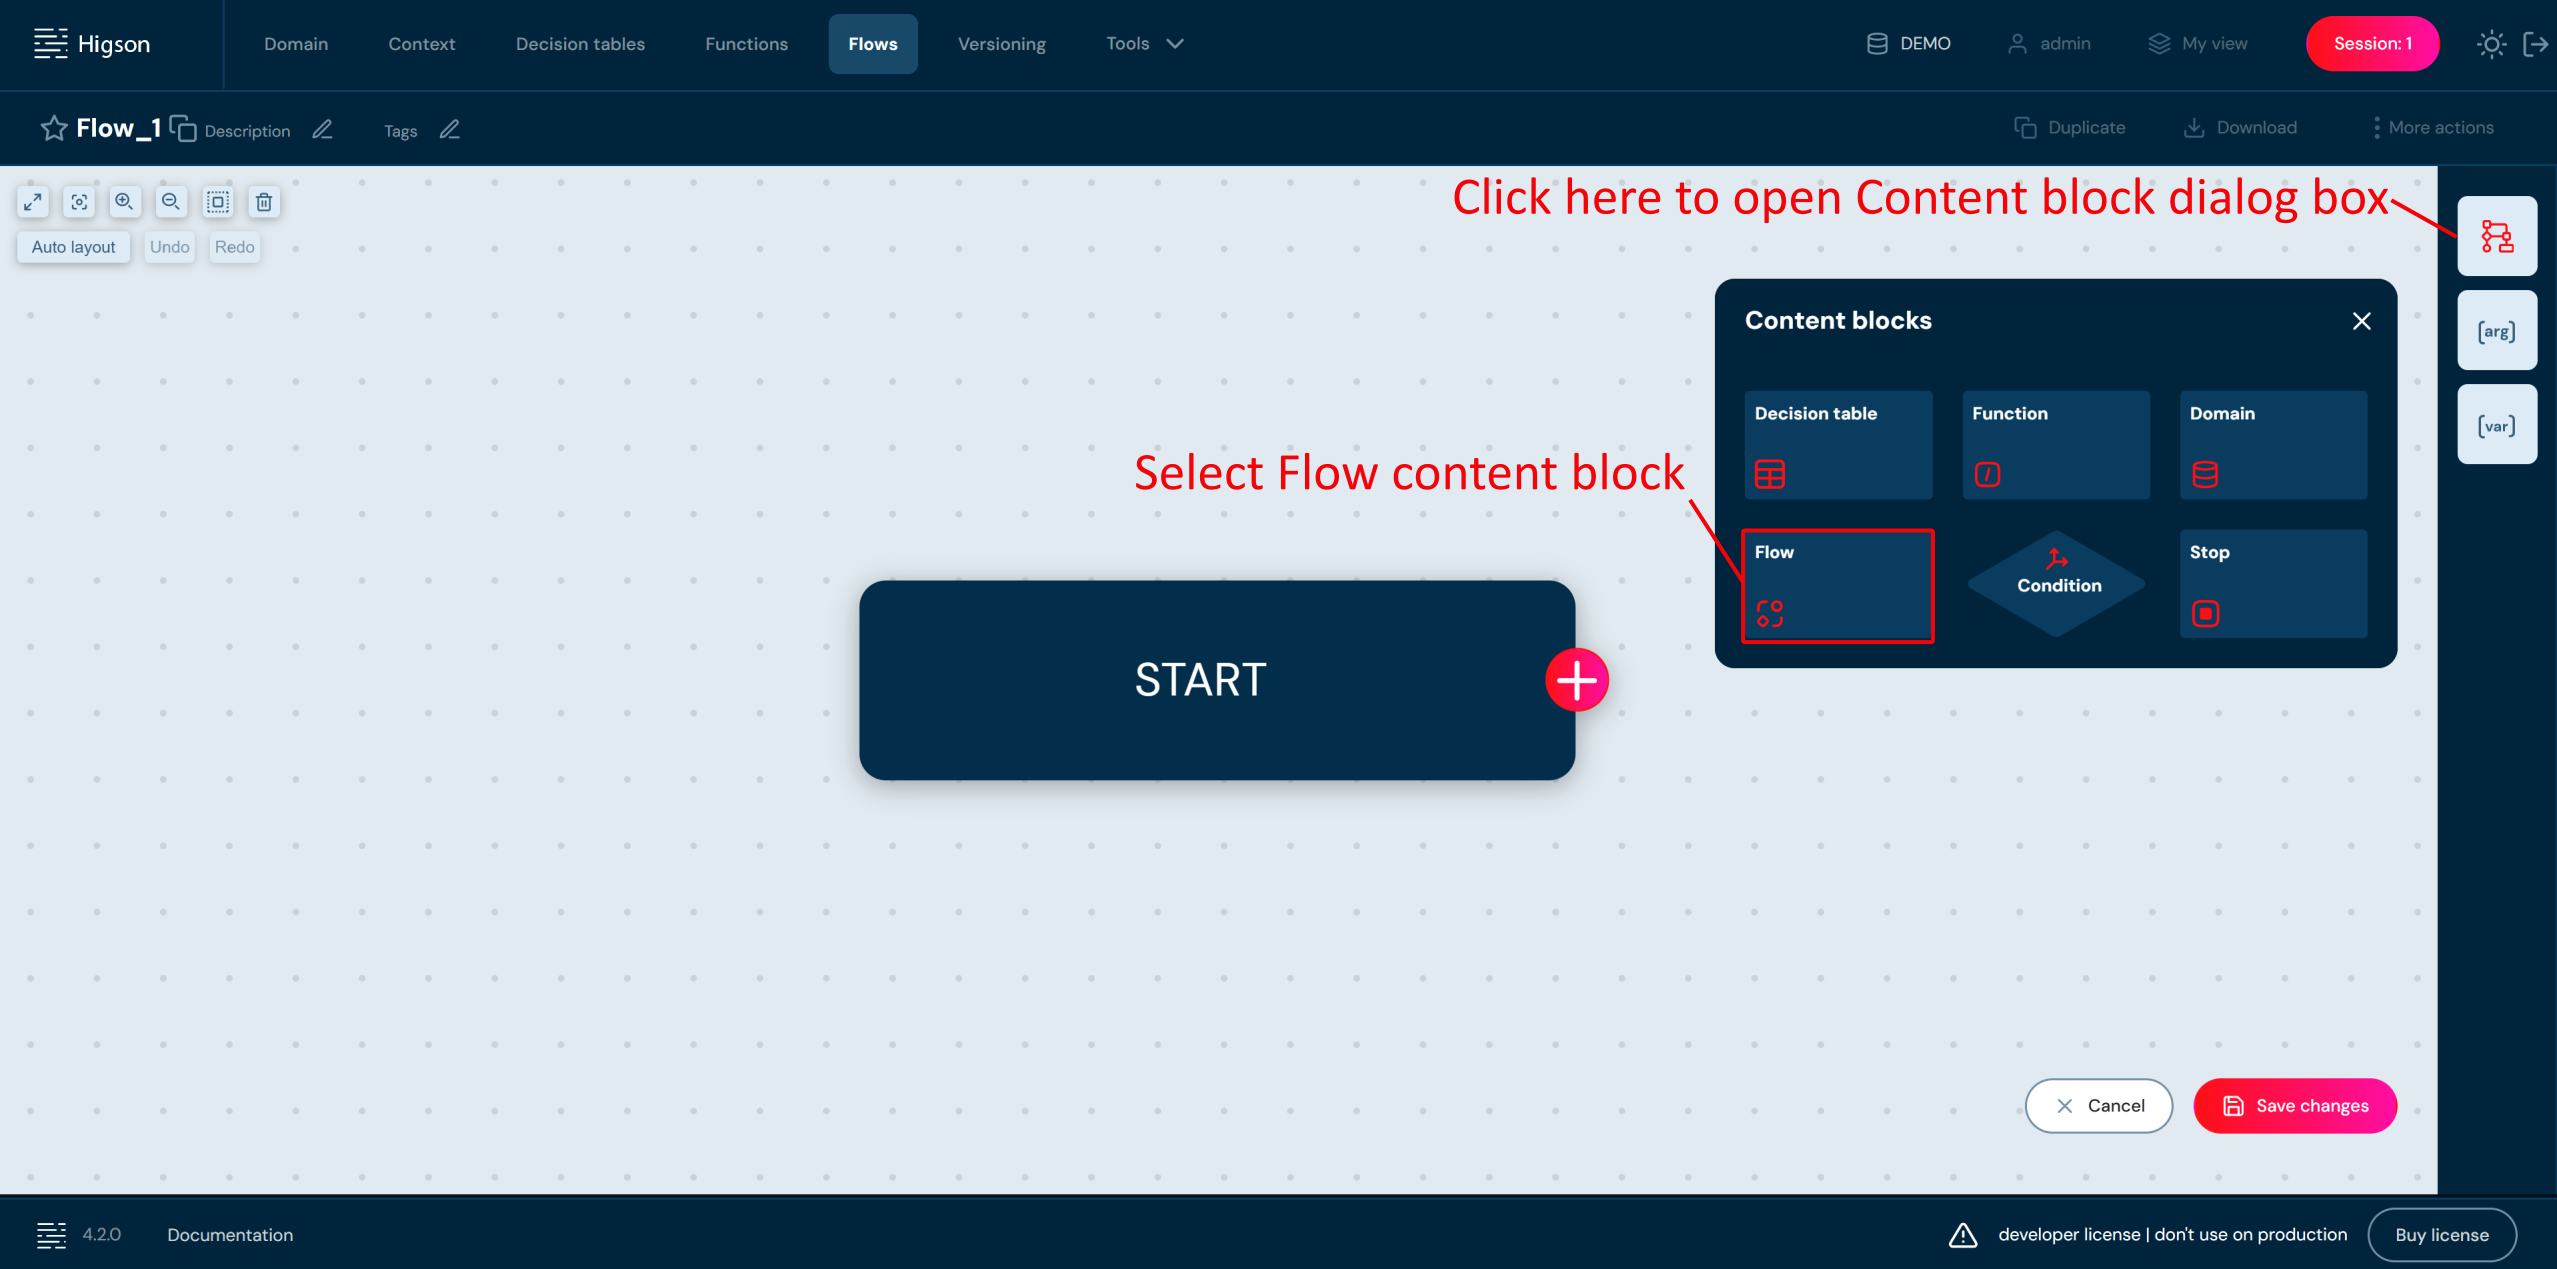
Double click on a Flow tile and complete fields.
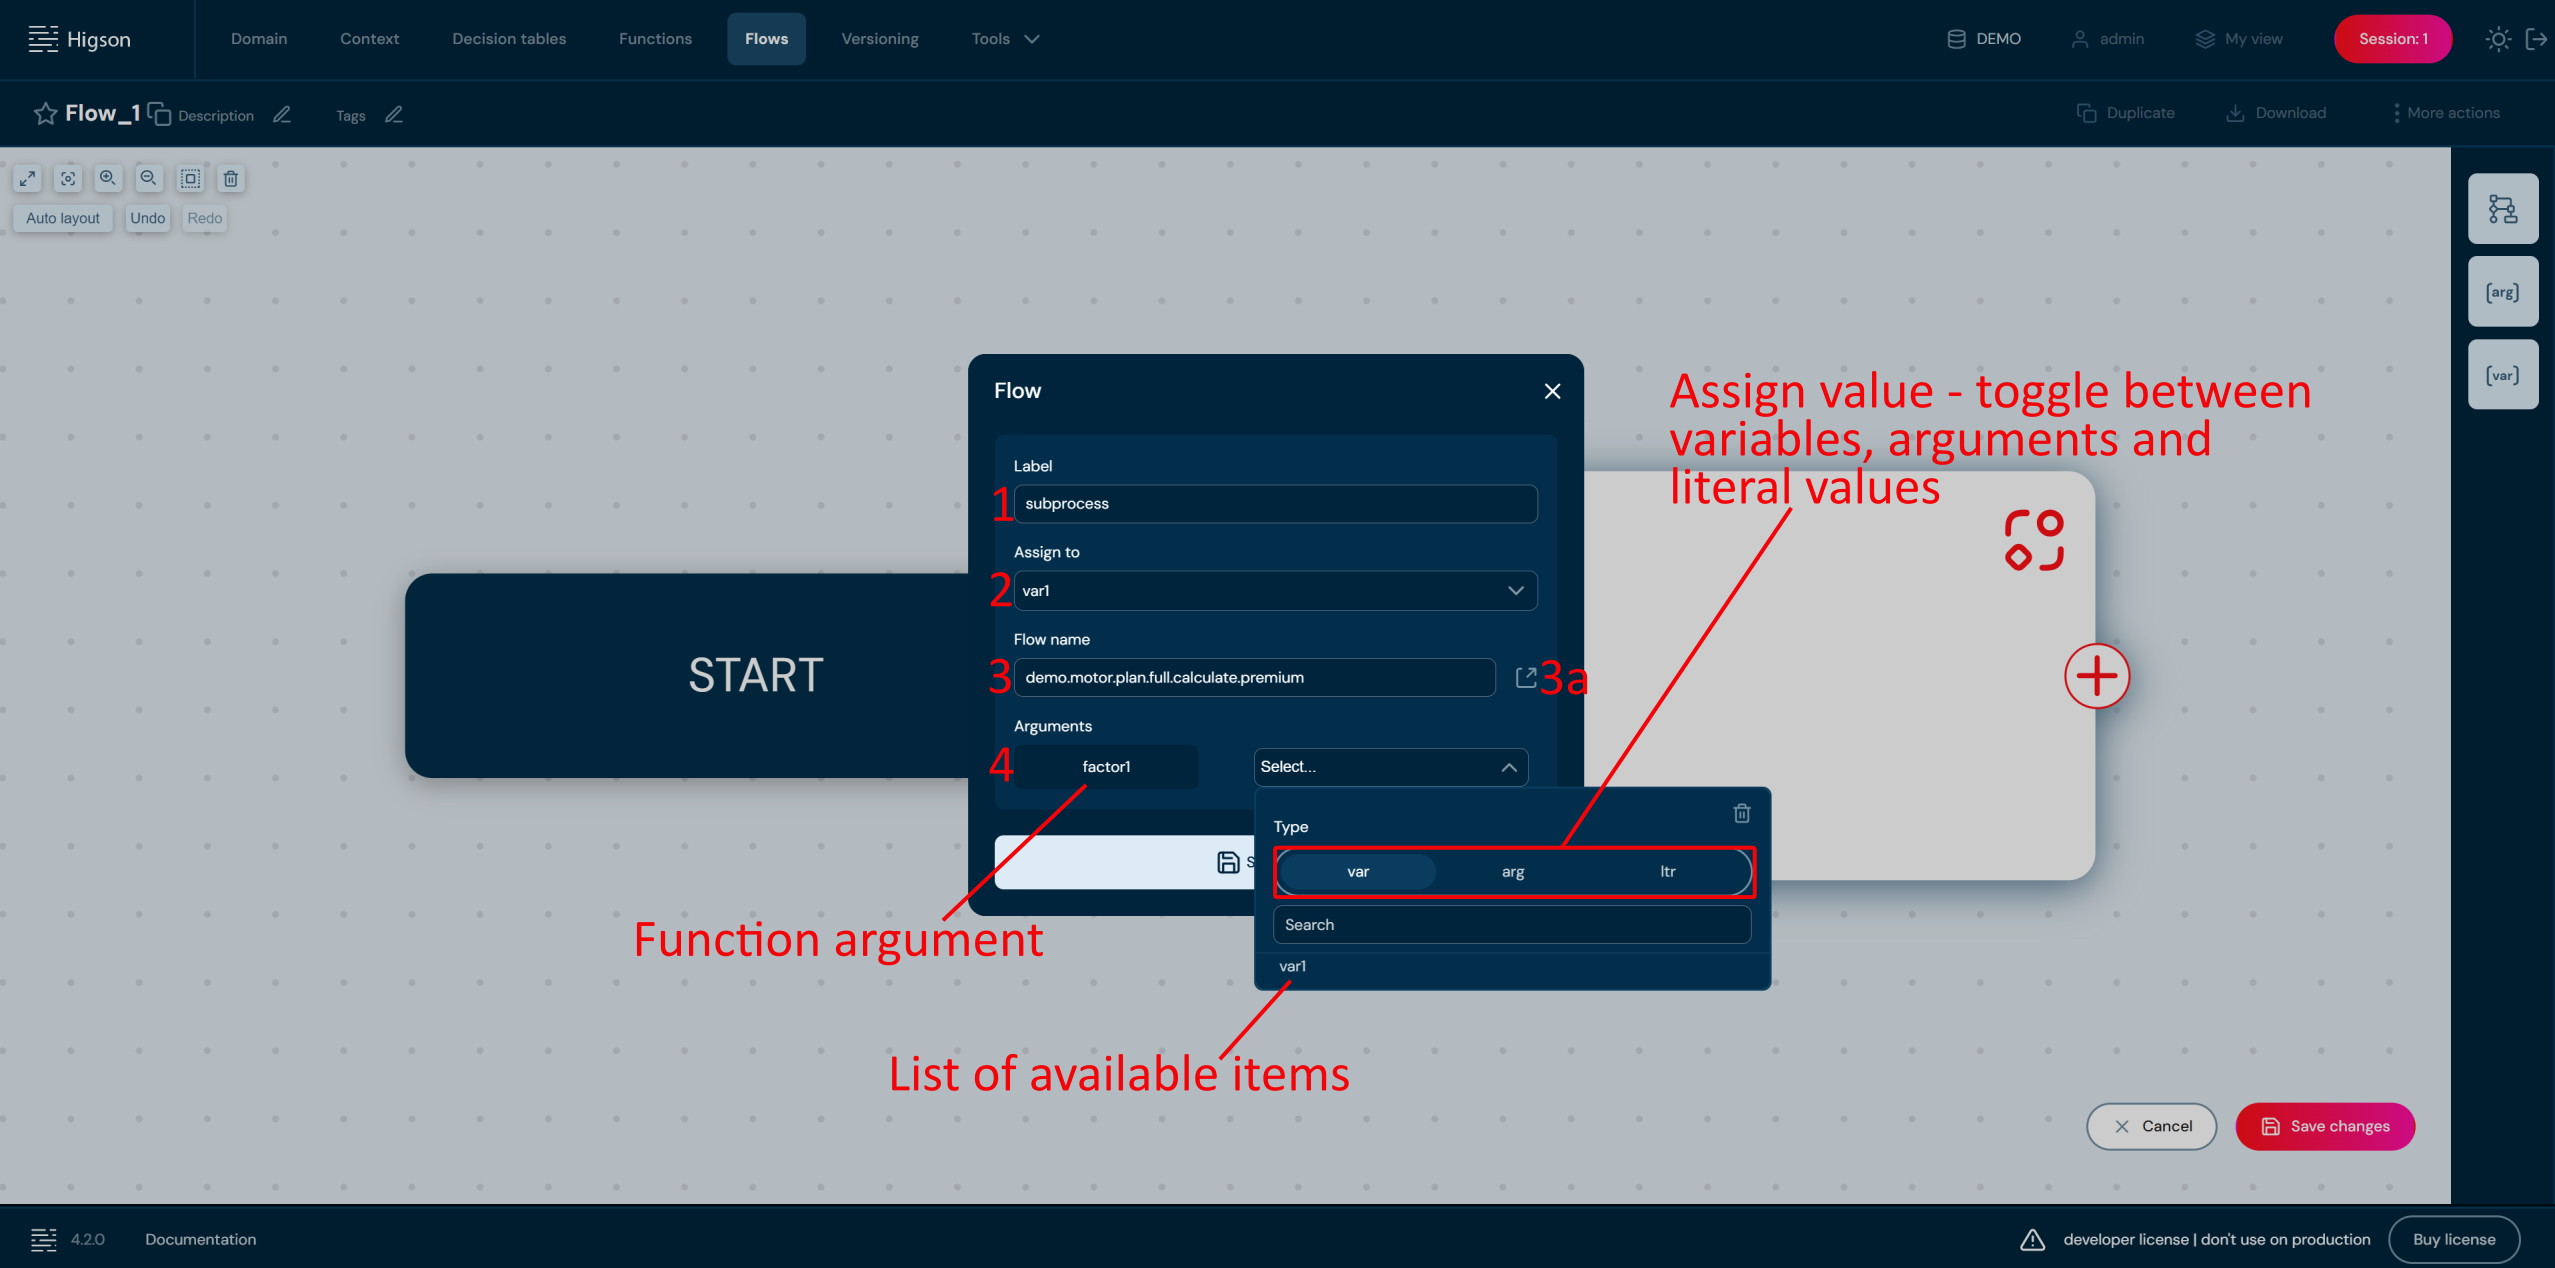
| No. | Field name | Description |
|---|---|---|
| 1 | Label | Label is visible on a tile in a layout view. By default it will be filled with the name of Flow. |
| 2 | Assign to | Drop-down list of variables defined in a flow. Choose a variable to which you want to assign the result of calling a flow. |
| 3 | Flow name | Choose Flow you want to call from the list of flows defined in the environment. |
| 3a | Open details | Opens the details of the flow in a new browser tab. |
| 4 | Arguments | Optionally, it is possible to pass arguments. If flow requires arguments you must pass the value using a variable or an argument defined in the flow, or specify a literal value. |
- Save changes.
Flow content block on a layout view:
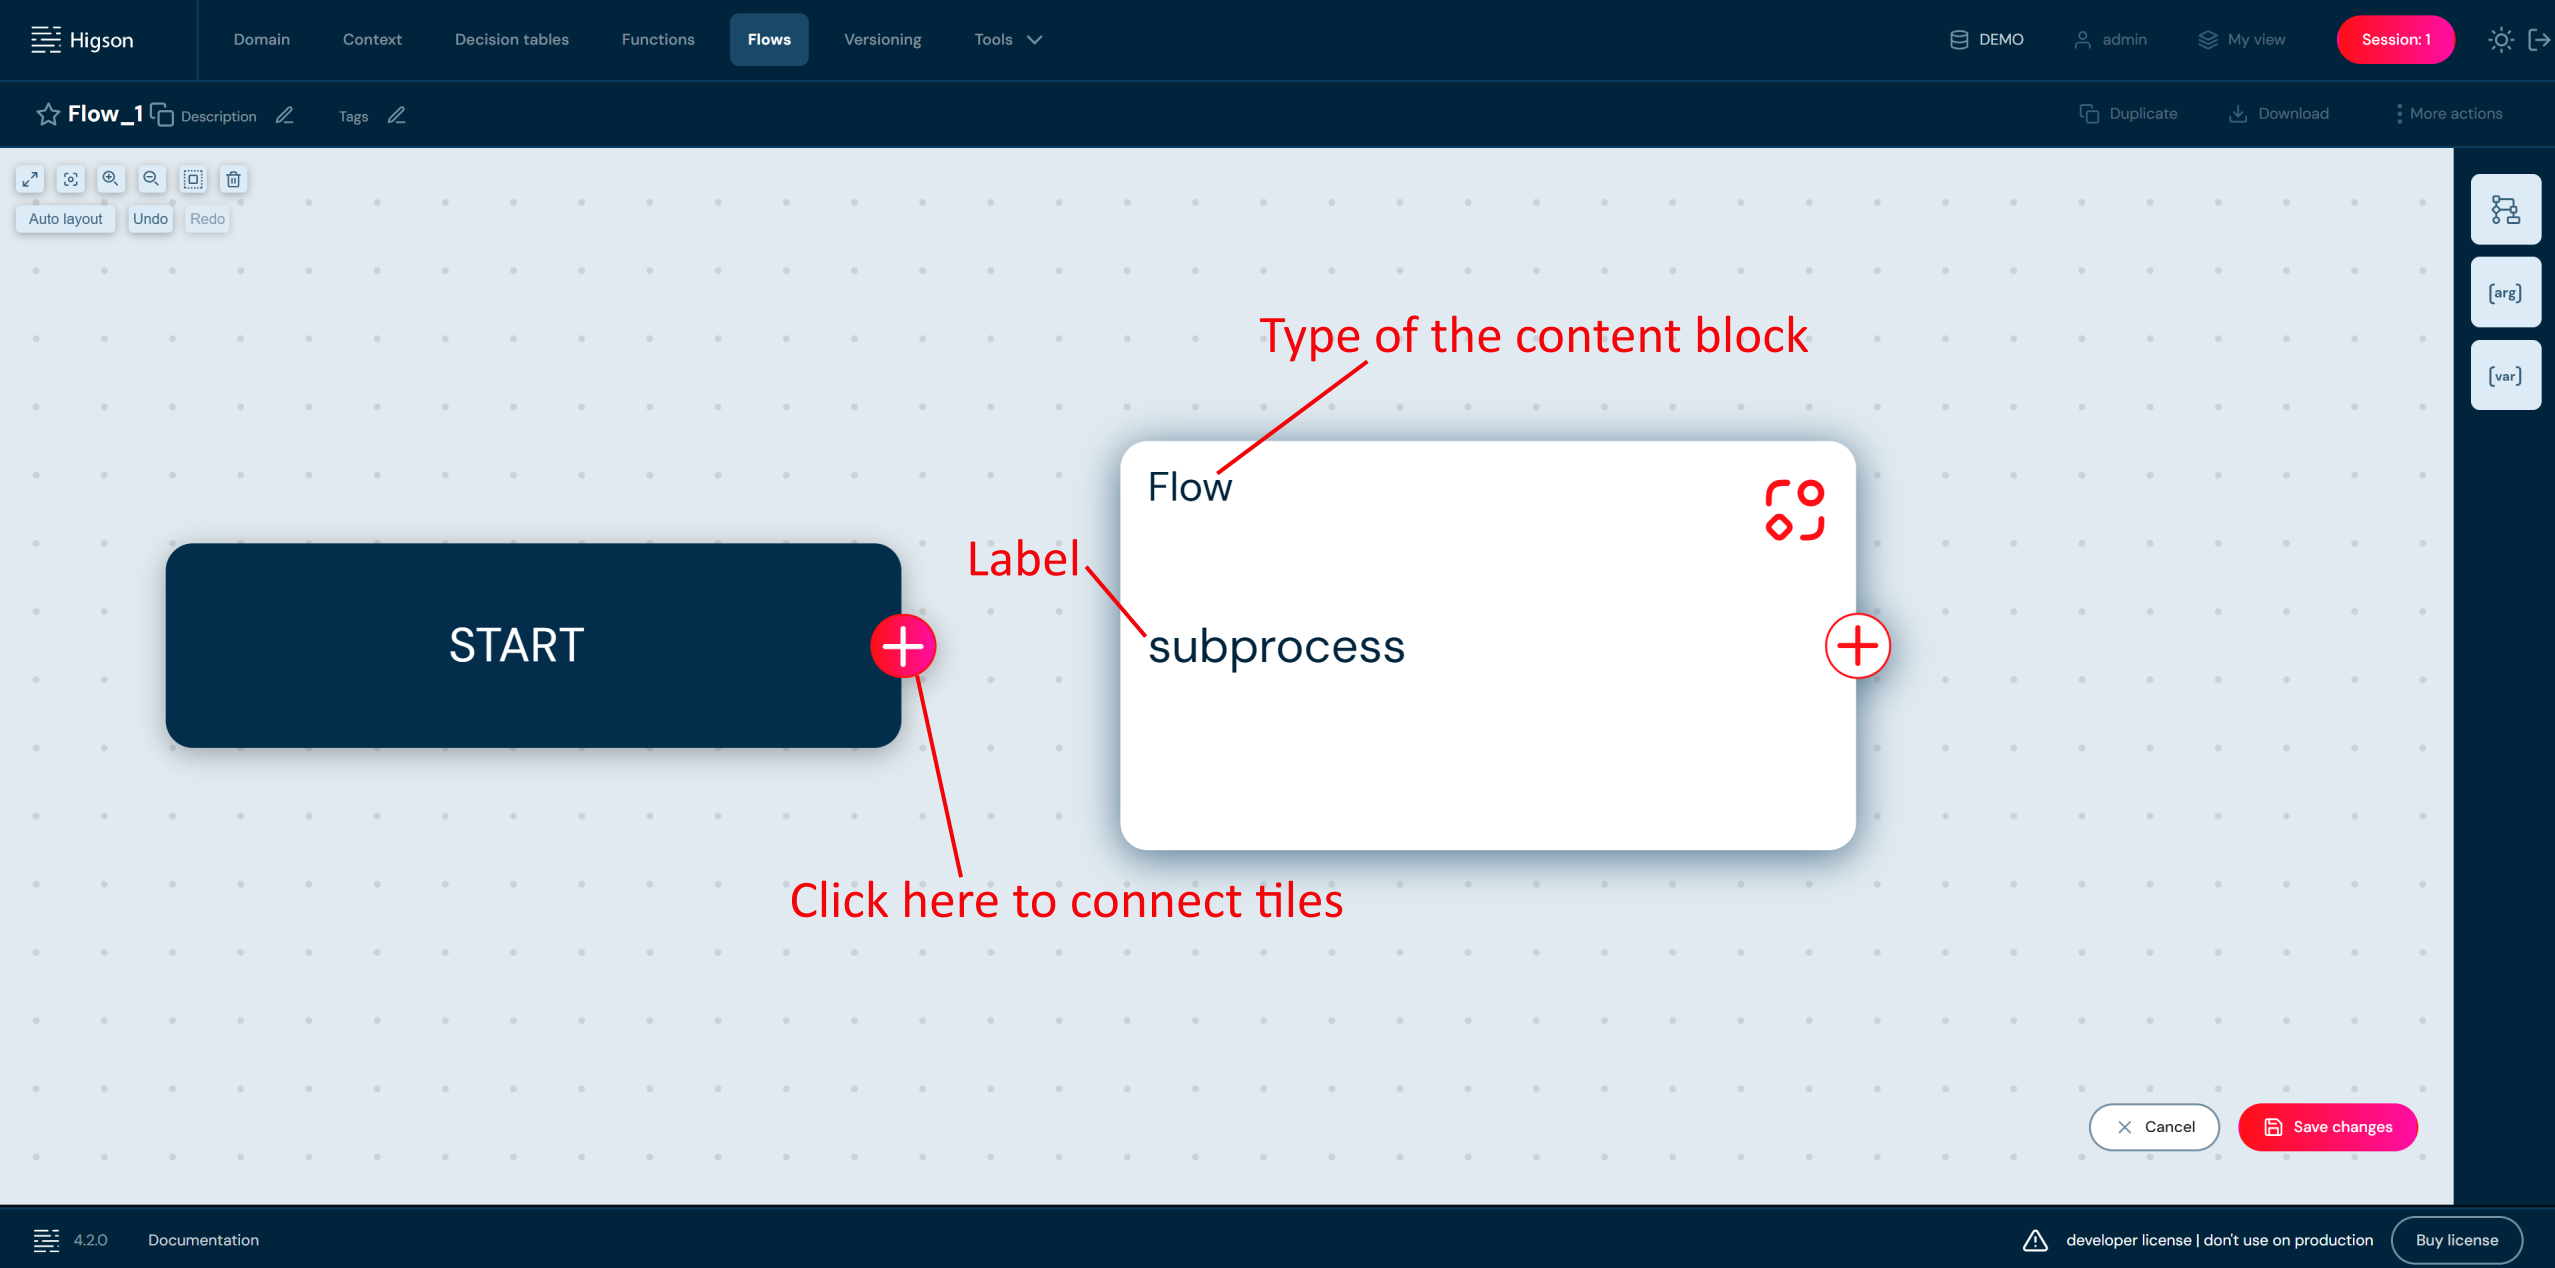
Adding Condition Block#
- To add Condition block select Content blocks button and choose Condition by double-click or drag & drop to the workspace.
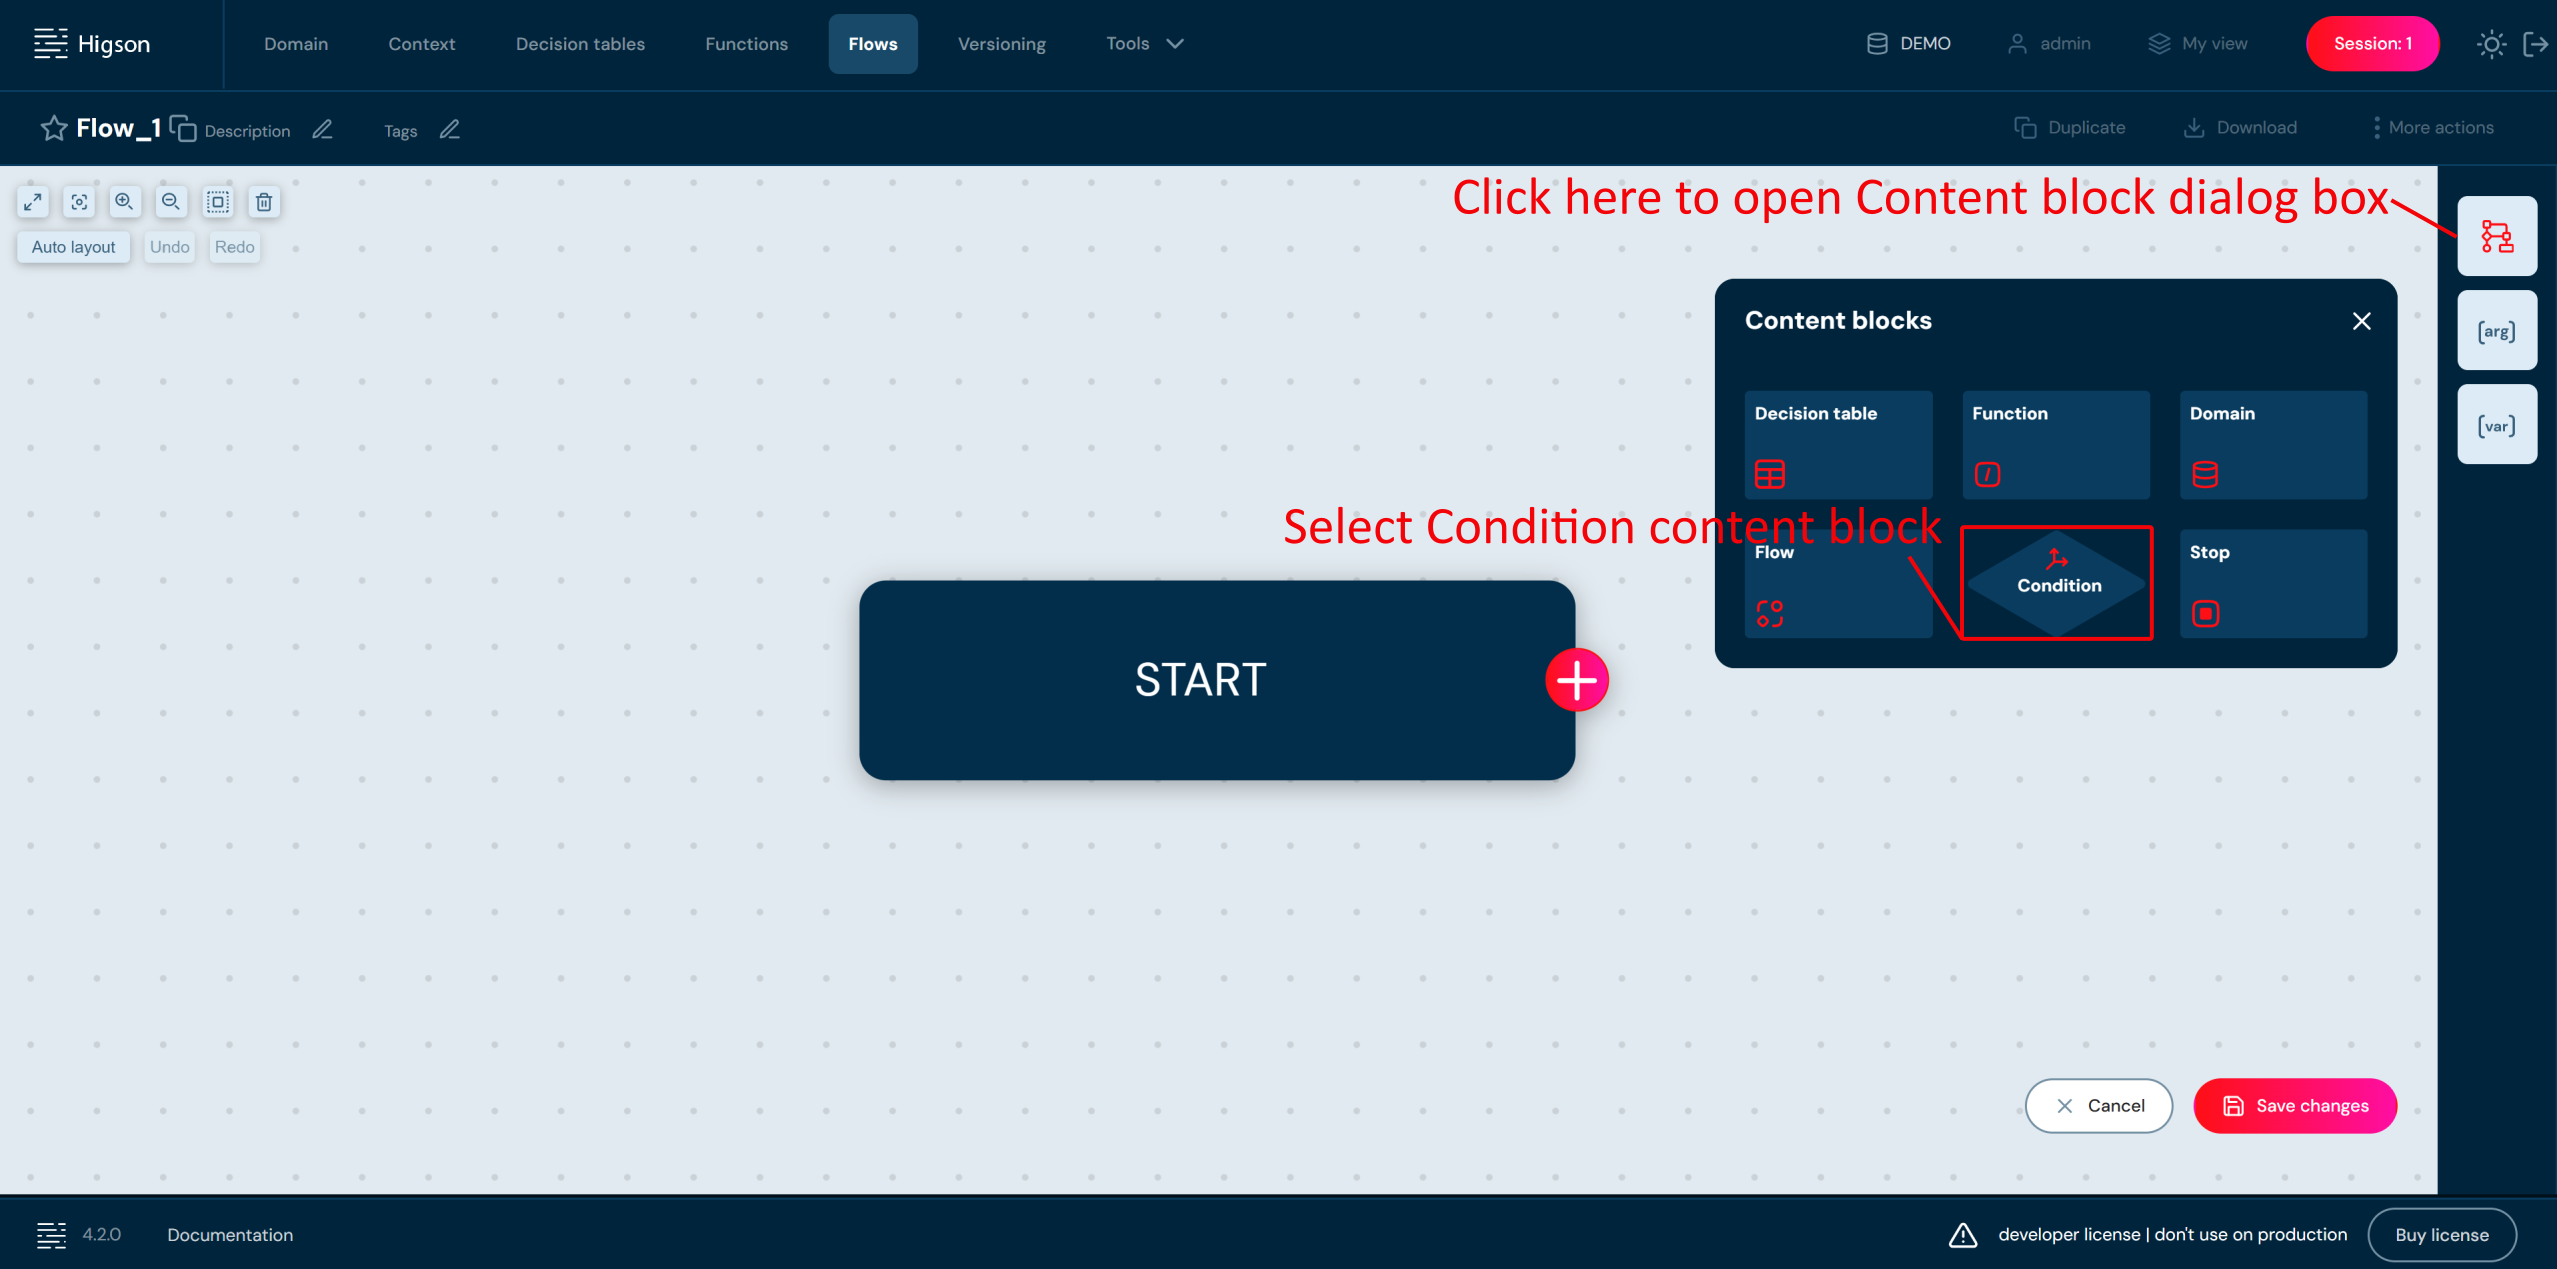
- Double click on a Condition tile and complete fields.
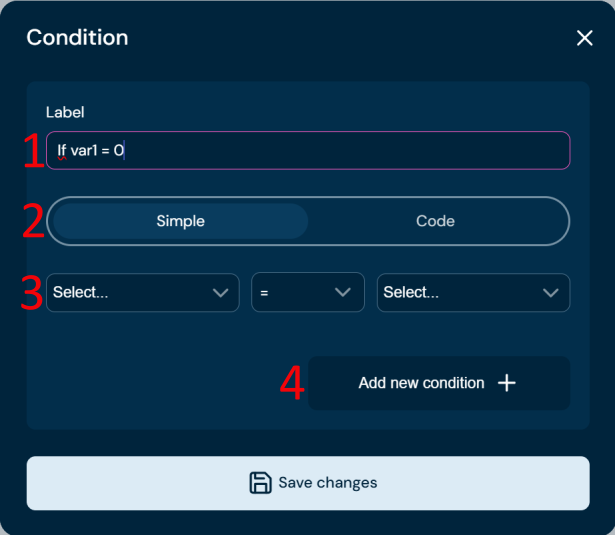
| No. | Field name | Description |
|---|---|---|
| 1 | Label | Label is visible on a tile in a layout view. This field is mandatory. |
| 2 | Condition type | Toggle between Simple and Code. |
| 3 | Condition | Choose element from template. |
| 4 | Add new condition | If necessary, add another condition. |
There are two methods to define a condition Simple and Code. Simple method is by using template with predefined components and operators. On both sides of the condition, we can choose context path, variable, argument or literal value. Code method allows to enter the code manually. It is possible to add multiple conditions by combining them with the operator AND or OR.
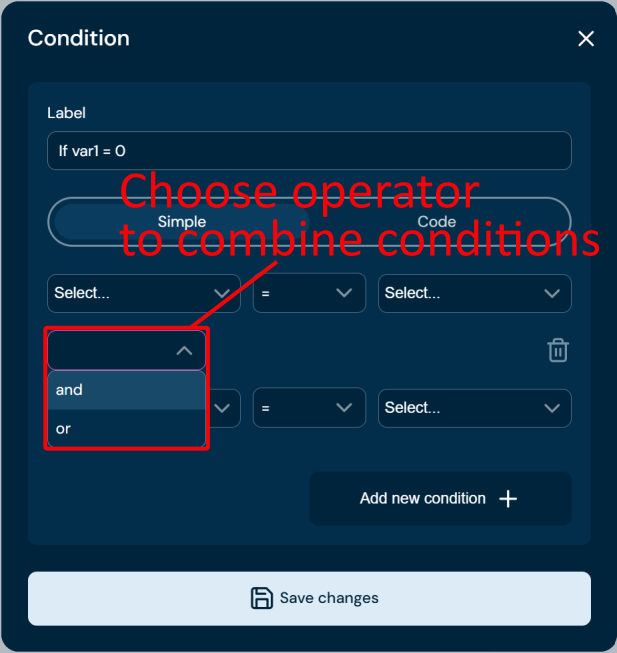
- Save changes.
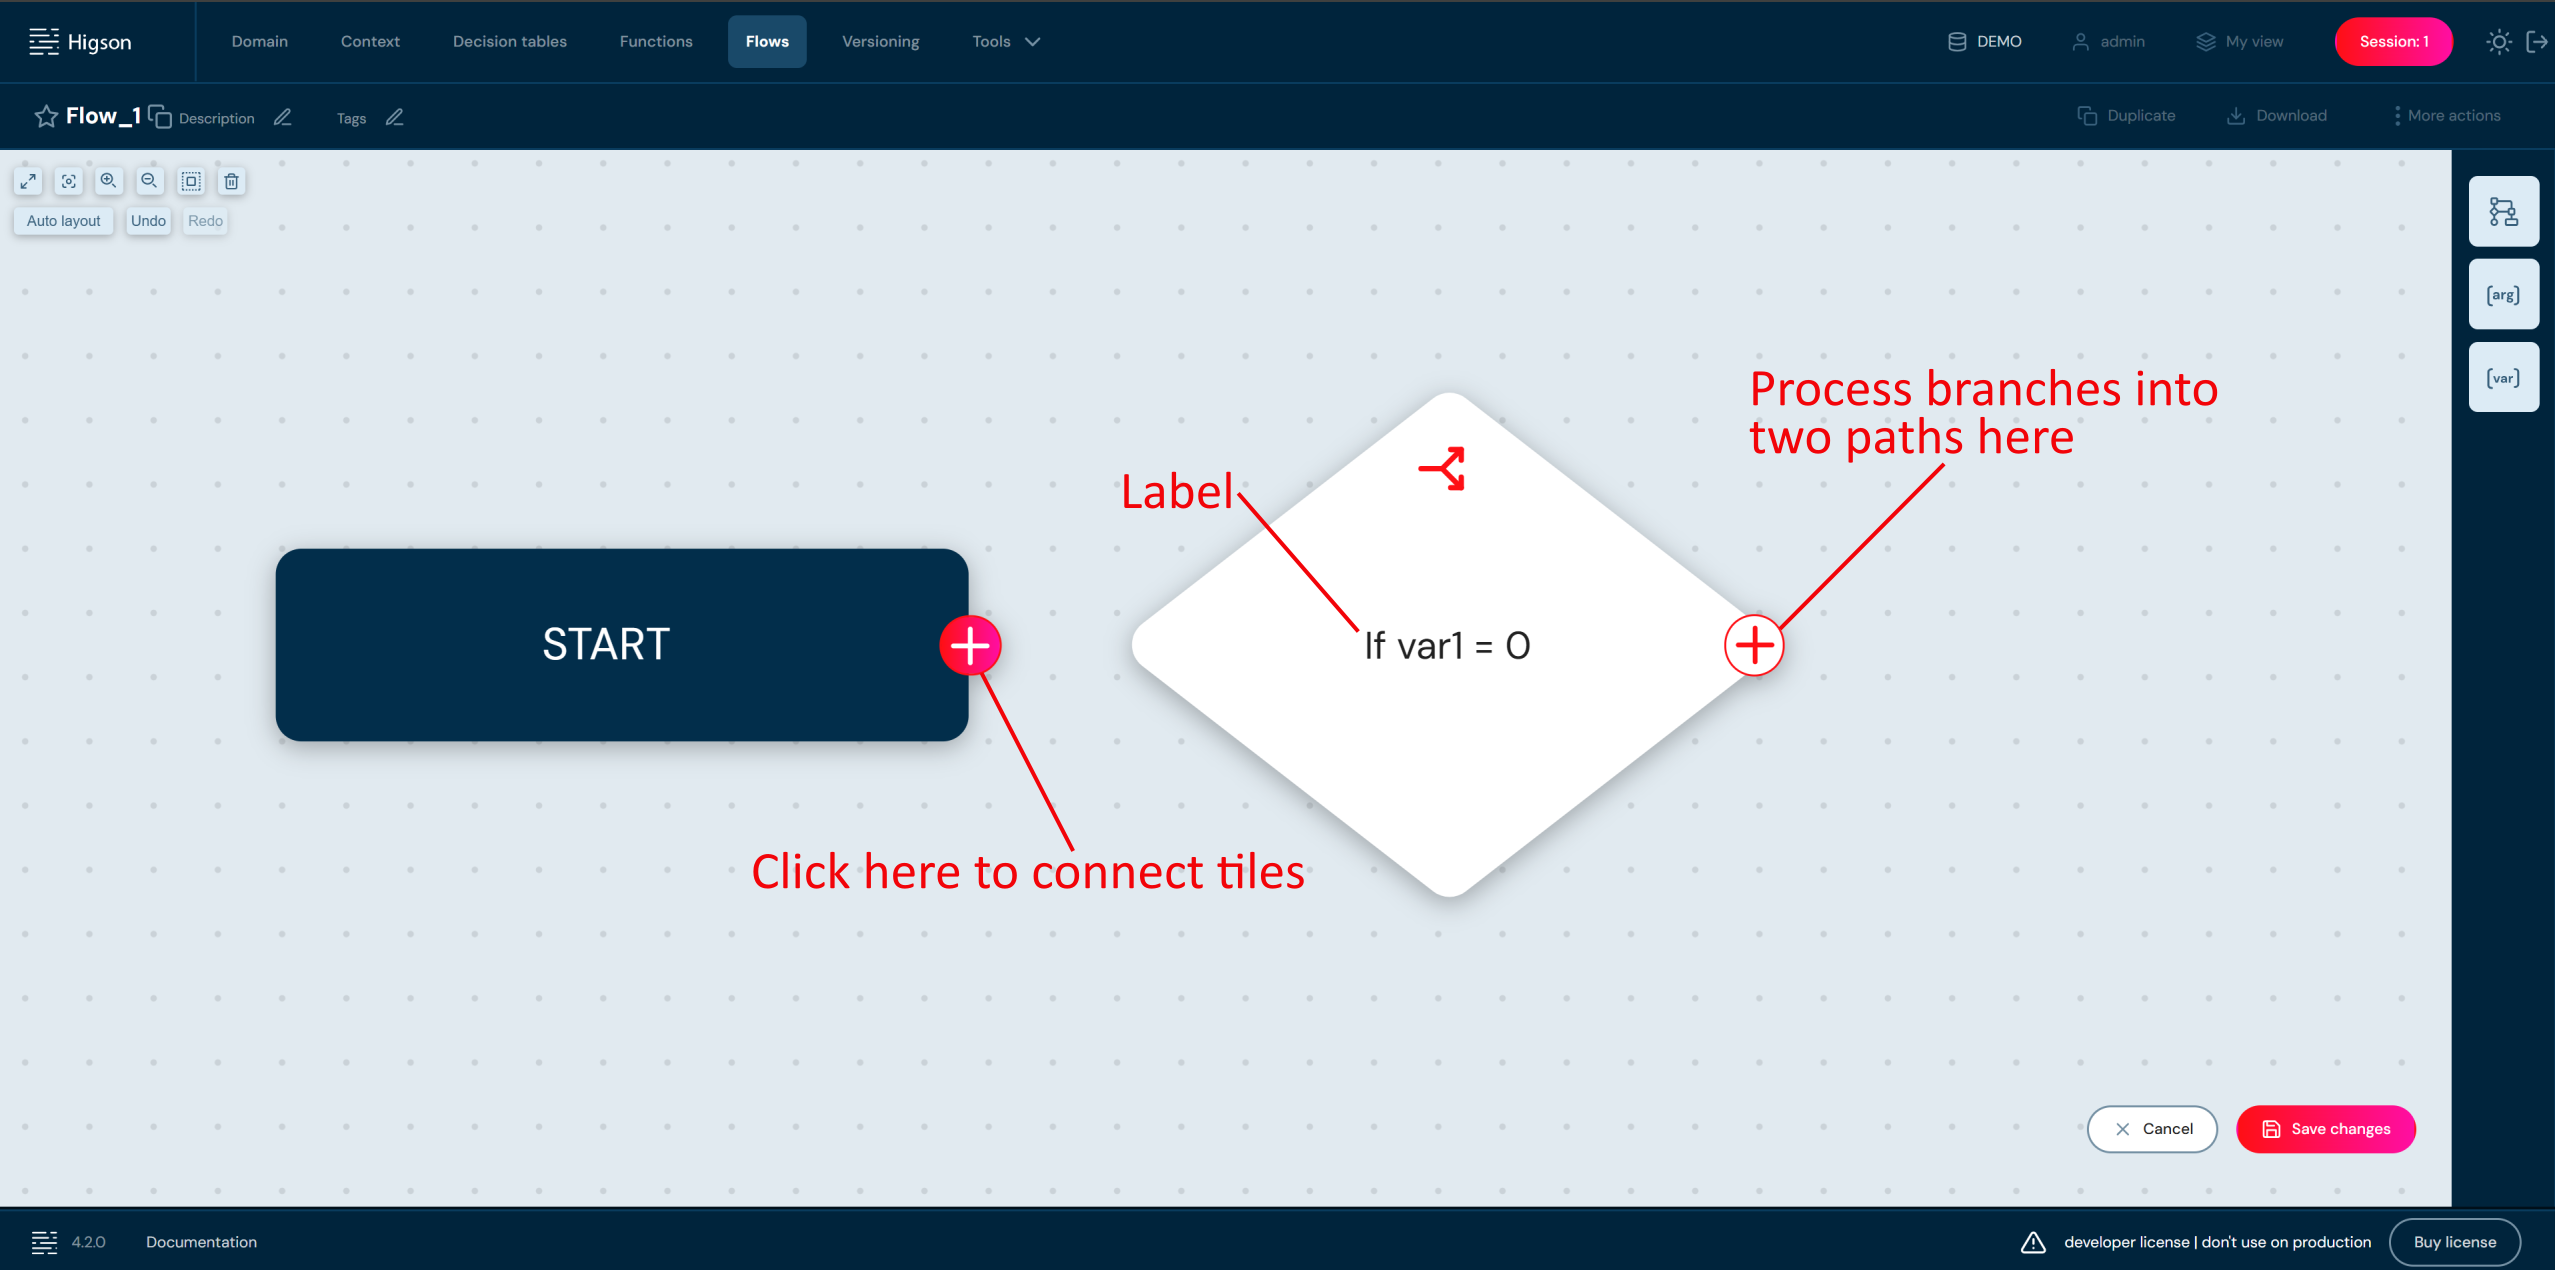
After adding the decision gate, the process branches into two paths depending on the condition met (true/false).
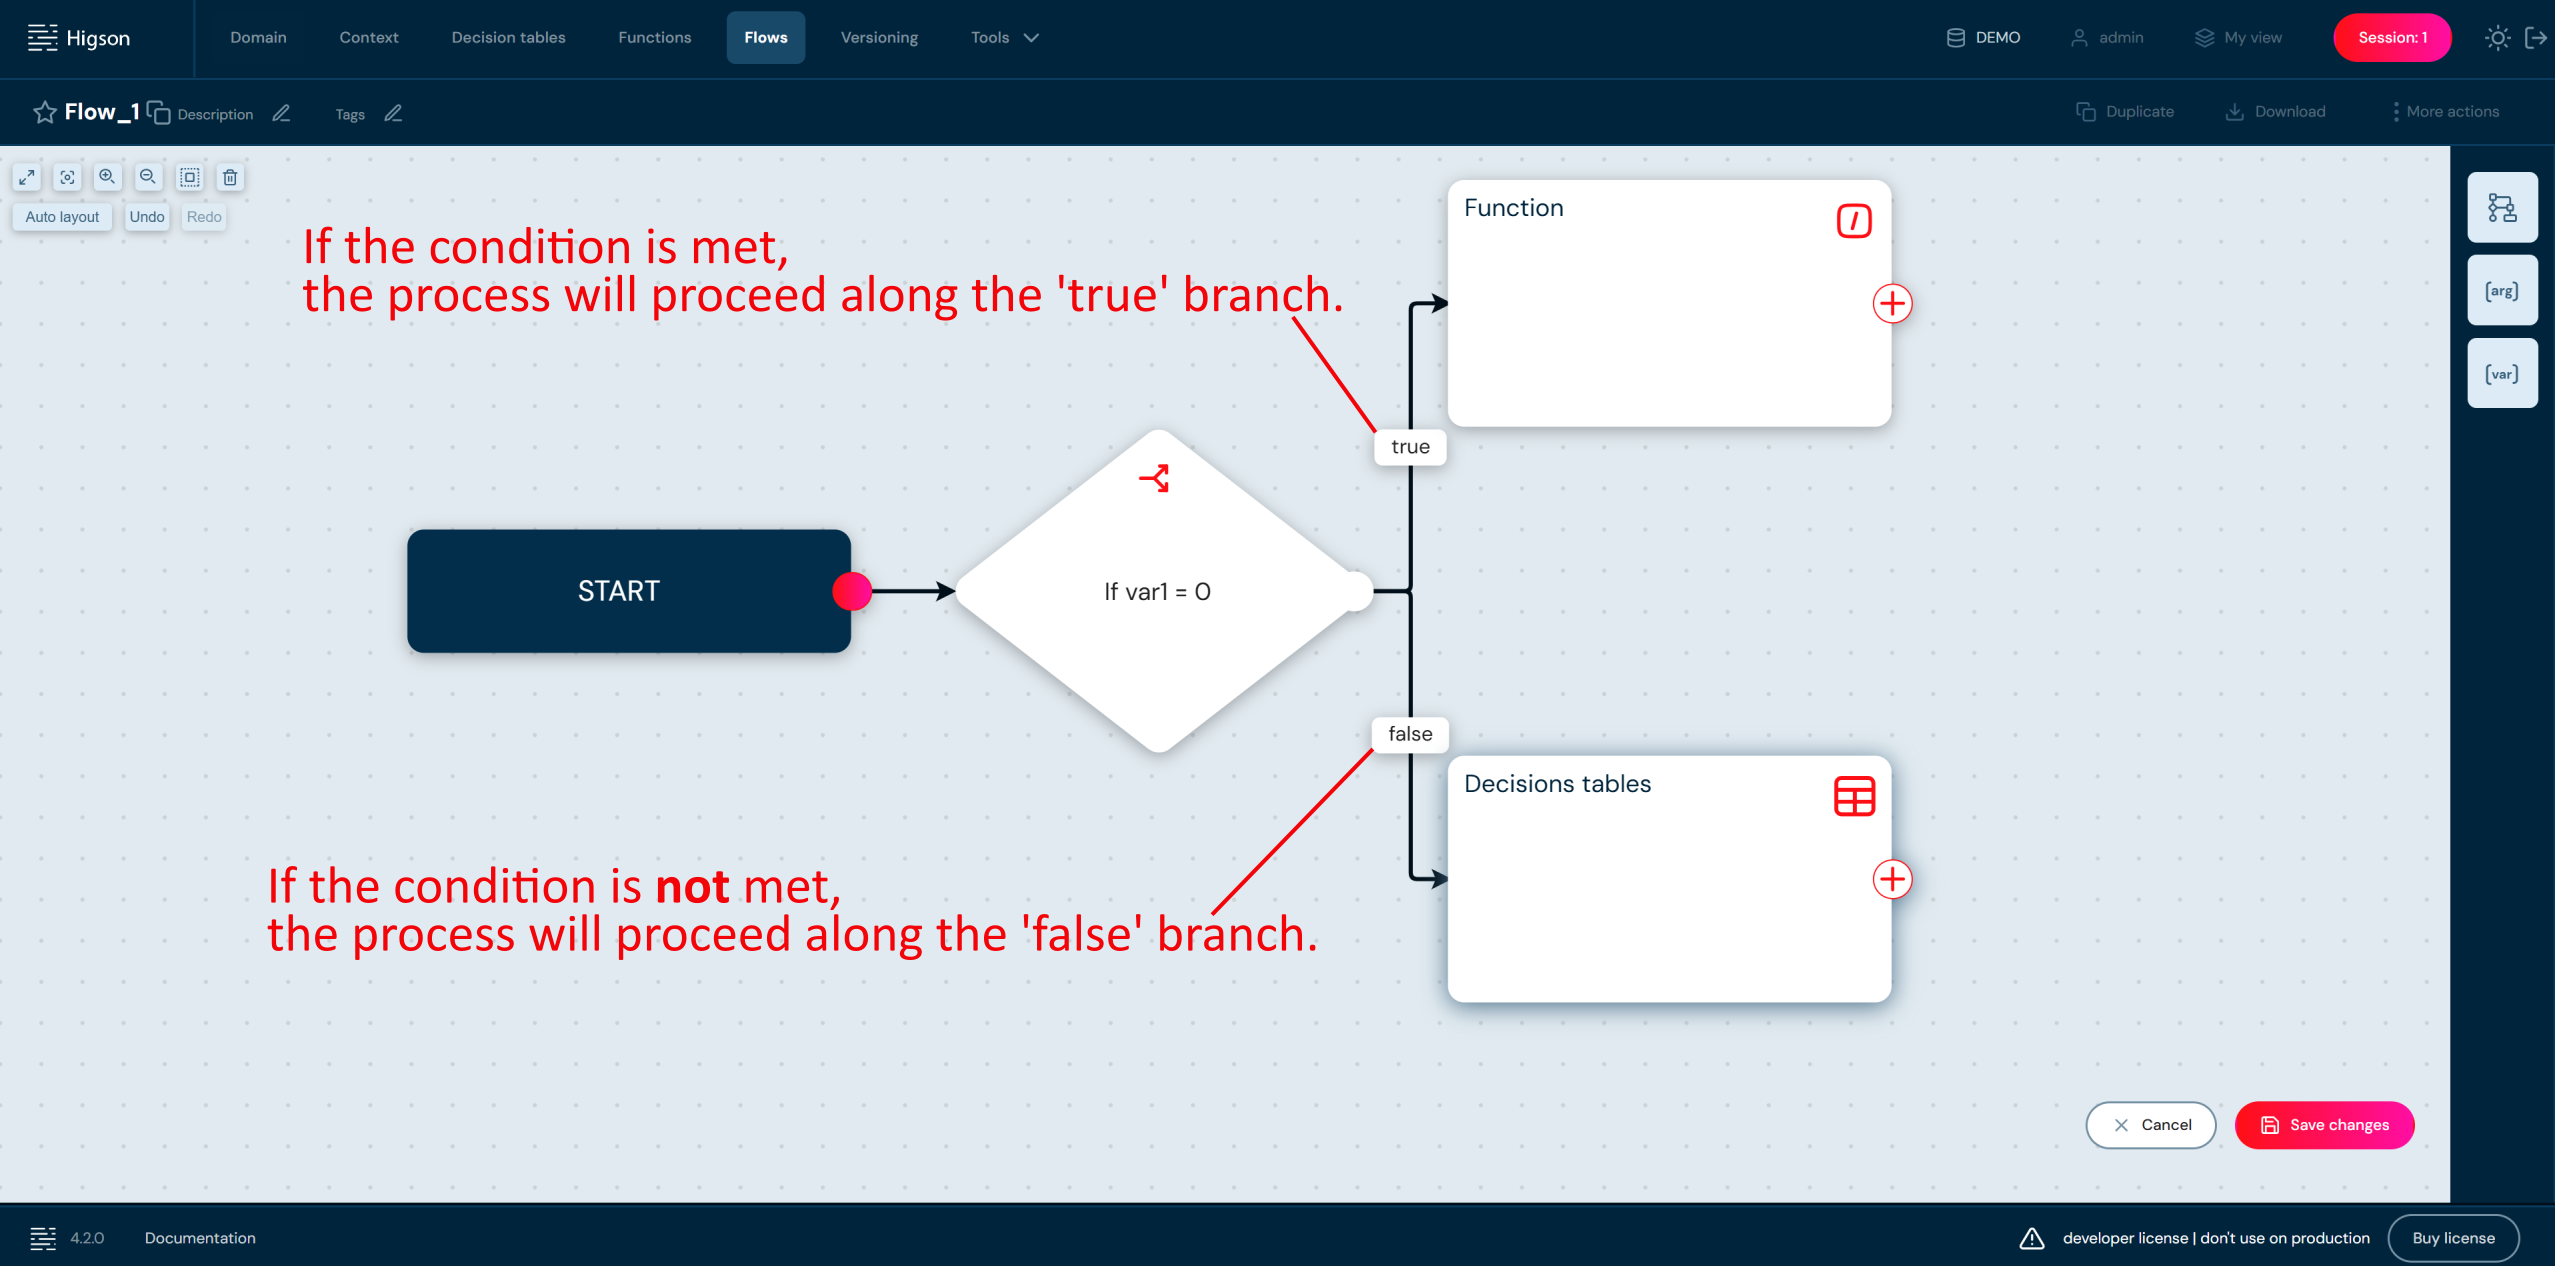
Adding Stop Block#
- To add Stop block select Content blocks button and choose Stop by double-click or drag & drop to the workspace.
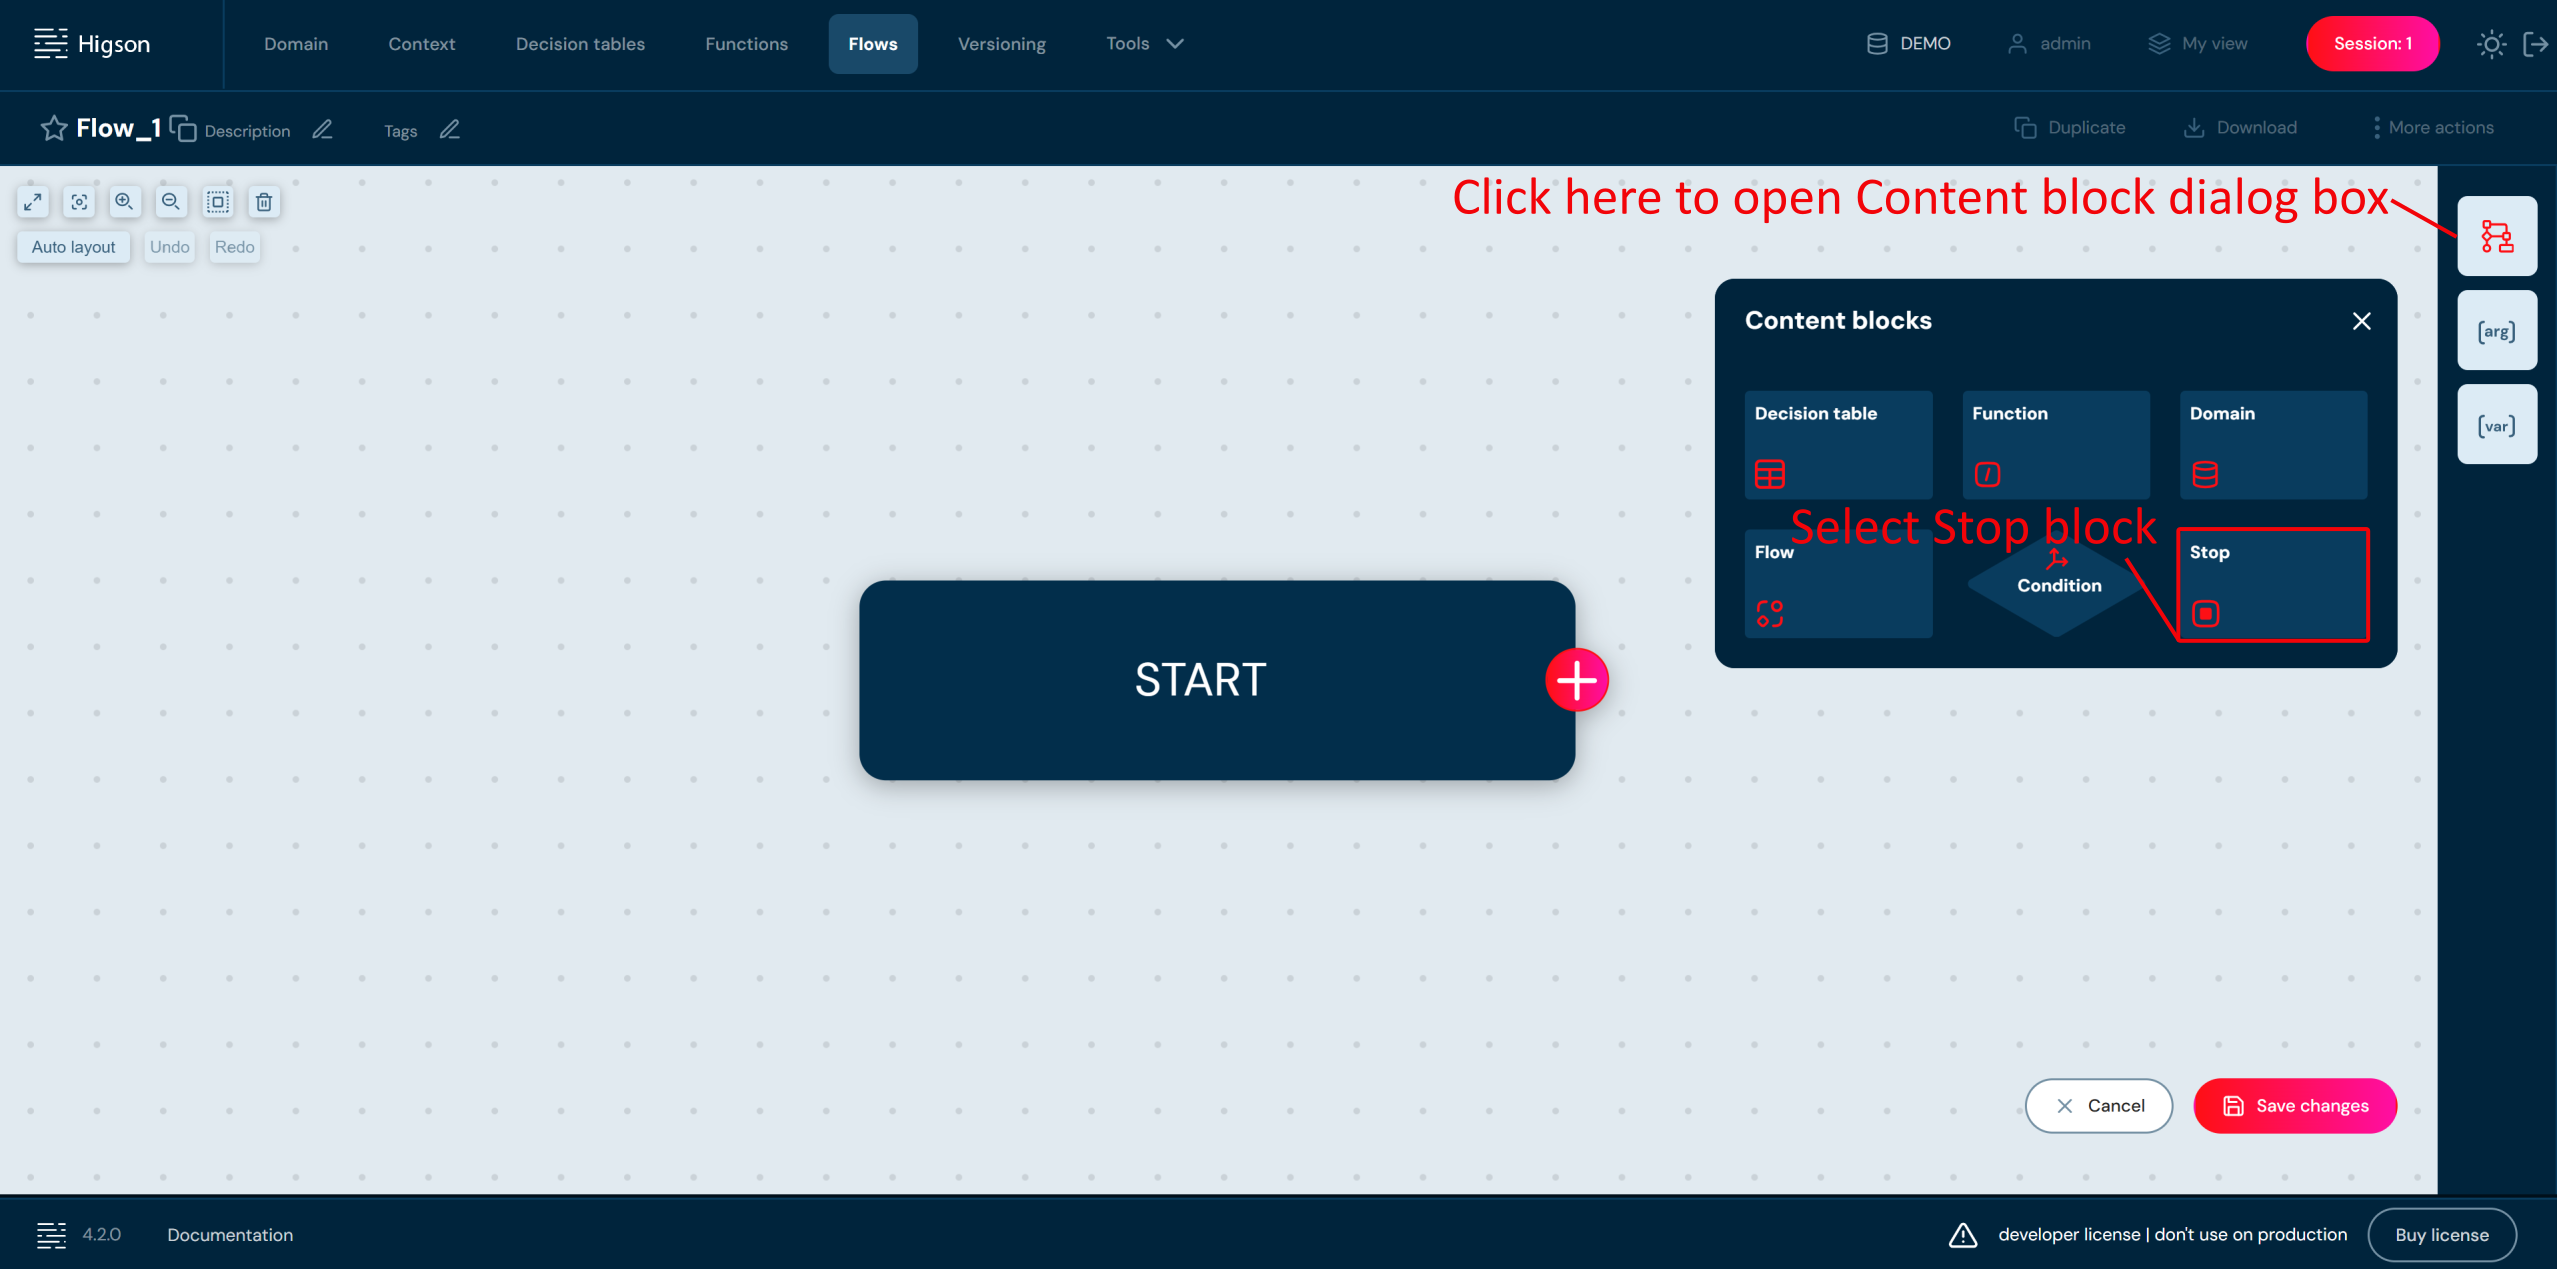
To complete the process you must select Stop tile and connect it accordingly.
- Save changes. Saving the flow is possible if there is at least one variable that returns true and all nodes are completed.
A snapshot is a ZIP file containing the configuration of business logic in Higson Studio. It can include the entire configuration or only selected parts. Its primary purpose is to facilitate the transfer of changes between environments — users can export a snapshot from one environment and import it into another. This makes data migration simple and eliminates the need for administrator intervention, database restores, system downtimes, or other complex operations. The download and upload of ZIP files are performed directly through the Higson Studio GUI.
Snapshot Structure
The folders within a snapshot correspond to the main modules of Higson Studio. A full snapshot contains:
- Domain
- Functions
- Decision Tables (params)
- Flows
- Profiles
- Tags
- Tests
- Test Packages
Additionally, snapshot includes a configuration file in JSON format.
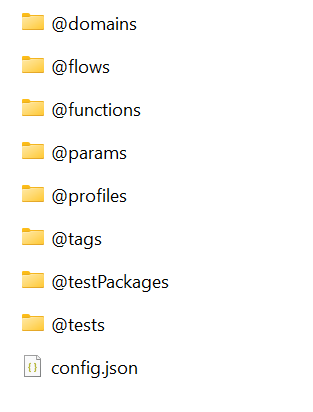
Snapshot Content Control
Users have full control over what data is included in a snapshot. The built-in interface allows filtering of the content during both export and import. During export, selections can be made at two levels:
- General – Users choose which modules to include in the snapshot (domain, profiles - including context, decision tables, functions, tags).
- Detailed – Additional filters can be applied to decision tables and functions.
During import, users maintain full control over which elements are loaded into the environment. After a snapshot is imported, the system generates an import report, and the changes are placed in a session. Only when the session is published do the changes take effect in the environment, allowing users to either approve or discard them.
Snapshot Download#
To see the Download snapshot view select Download snapshot in Tools from Main Toolbar:
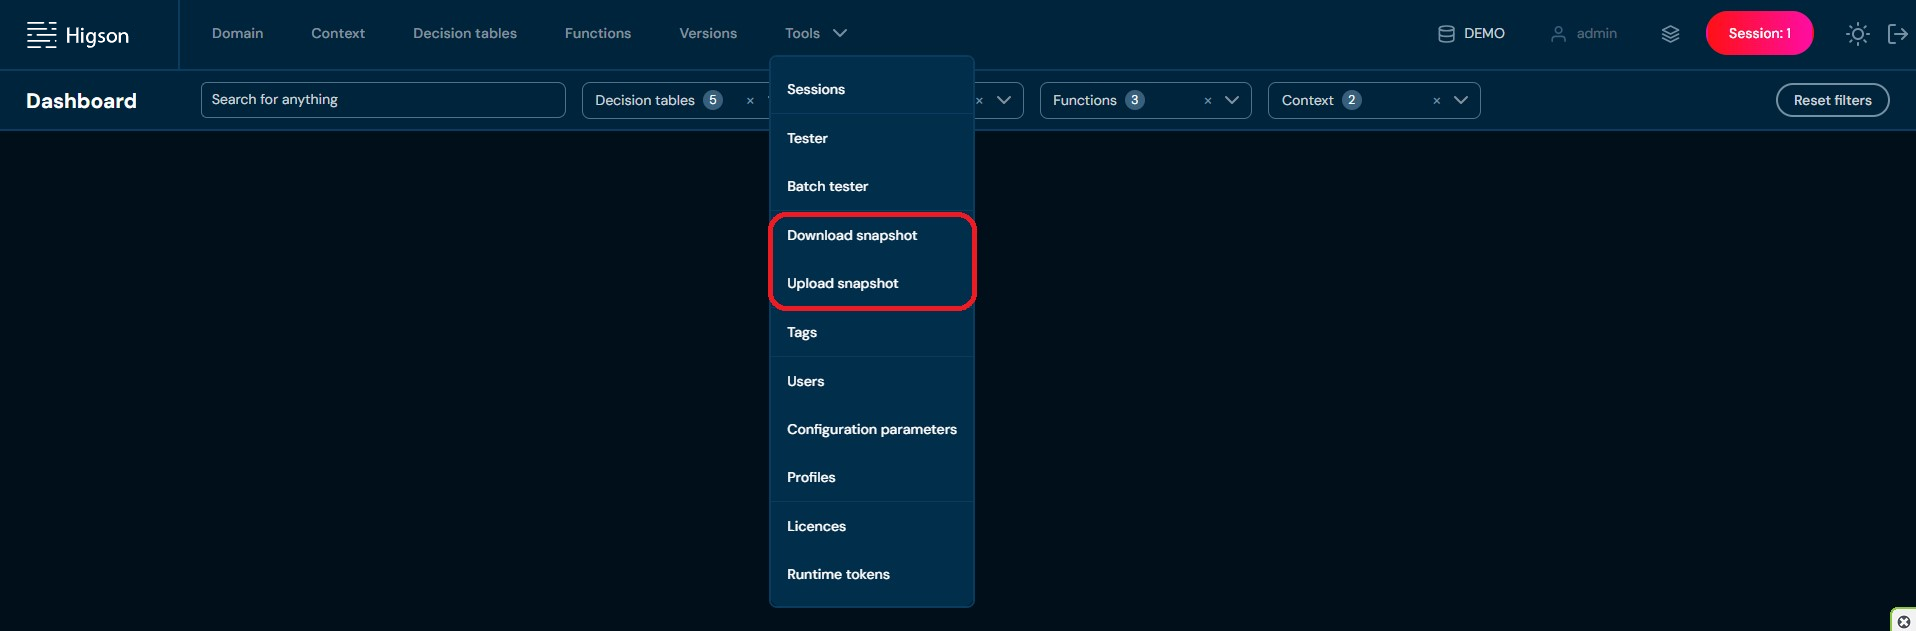
After that, you will see a screen allowing you to choose the elements that you want to be in a snapshot:
-
Profiles
-
Domain
-
Decision tables
-
Functions
-
Flows
-
Tests
-
Test packages
-
Profile
-
Tags
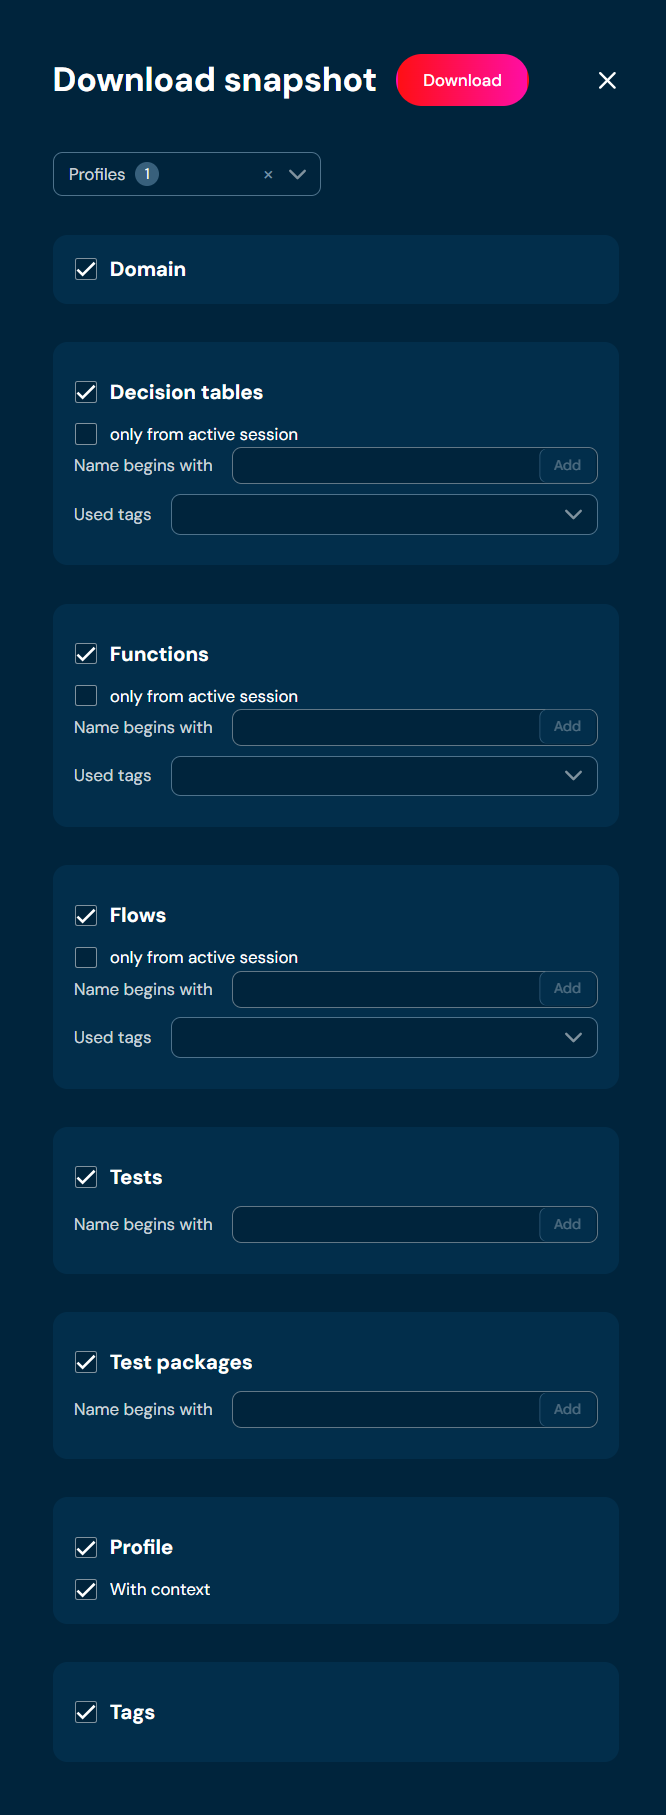
-
Choosing the Profiles:
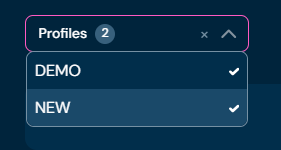
The snapshot download will contain functions, decision tables and flows, which are versioned inside the selected profiles. You can choose one or more profiles. In this case, the snapshot download will contain functions, decision tables and flows from two selected profiles:
-
Choosing the Domain:

When you choose Domain snapshot download will contain the domain with published changes and the current user’s session changes by default.
-
Choosing Decision tables:
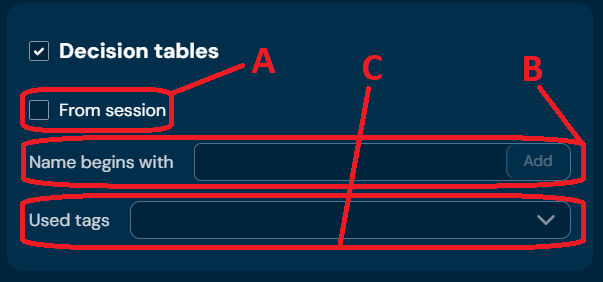
When you choose Decision tables snapshot download will contain decision tables:
a) which will be from the current session if marked (A)
b) which will be filtered by name if filled and added in (B)
c) which will be marked by a specific tag if selected in (C)
-
Choosing Functions:
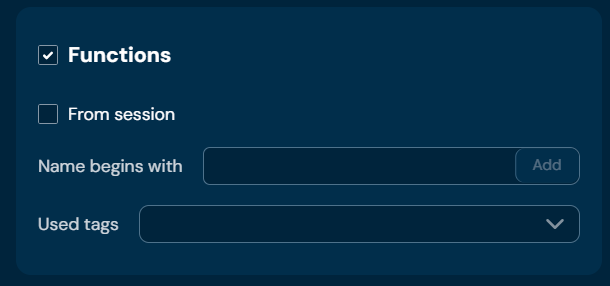
When you choose Functions snapshot download will contain functions - filtered the same way as Decision Tables.
-
Choosing Flows:
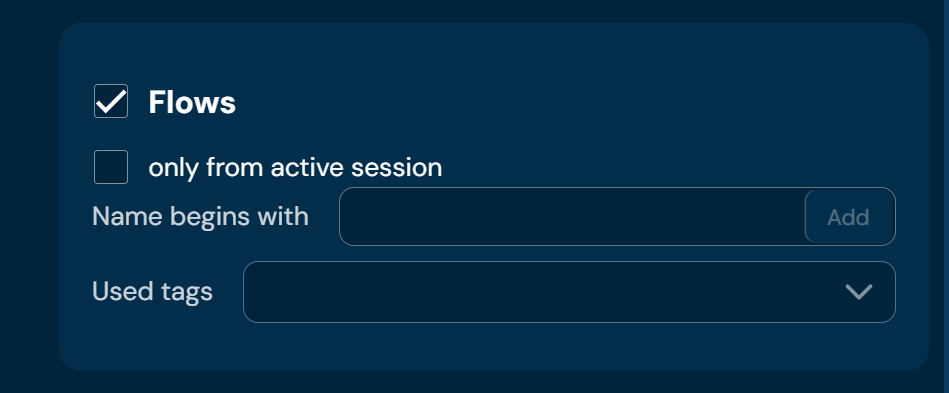
When you choose Flows snapshot download will contain flows - filtered the same way as Decision Tables.
-
Choosing Tests:
When you choose Tests snapshot download will contain Tests. Tests may be filtered by name.
-
Choosing Test packages:
When you choose Test packages snapshot download will contain Test packages. Tests packages may be filtered by name.
-
Choosing Profile:
If you choose Profile, the snapshot download will contain the configuration of the profile.
The data contained in the snapshot may contain elements also from the context (A). Context definition can only be downloaded together with the profile definition. If you do not mark the checkbox Profile, the snapshot download will contain only functions, decision tables, and tags.
-
Choosing Tags:
When you choose Tags snapshot download will contain tags.
Finally, after applying configuration to snapshot download - to download the snapshot, you need to click the Download button (A):

Snapshot Upload#
In order to see Upload snapshot view select Upload snapshot in Tools from Main Toolbar:
Then Upload snapshot view will appear:
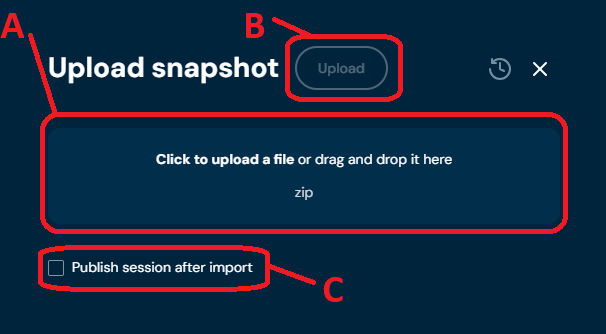
When you choose a file in (A) and click the Upload button (B), the upload will take place. When you choose the upload option (C) all changes from the snapshot will be published right away.
When the snapshot file is selected additional upload options will appear:
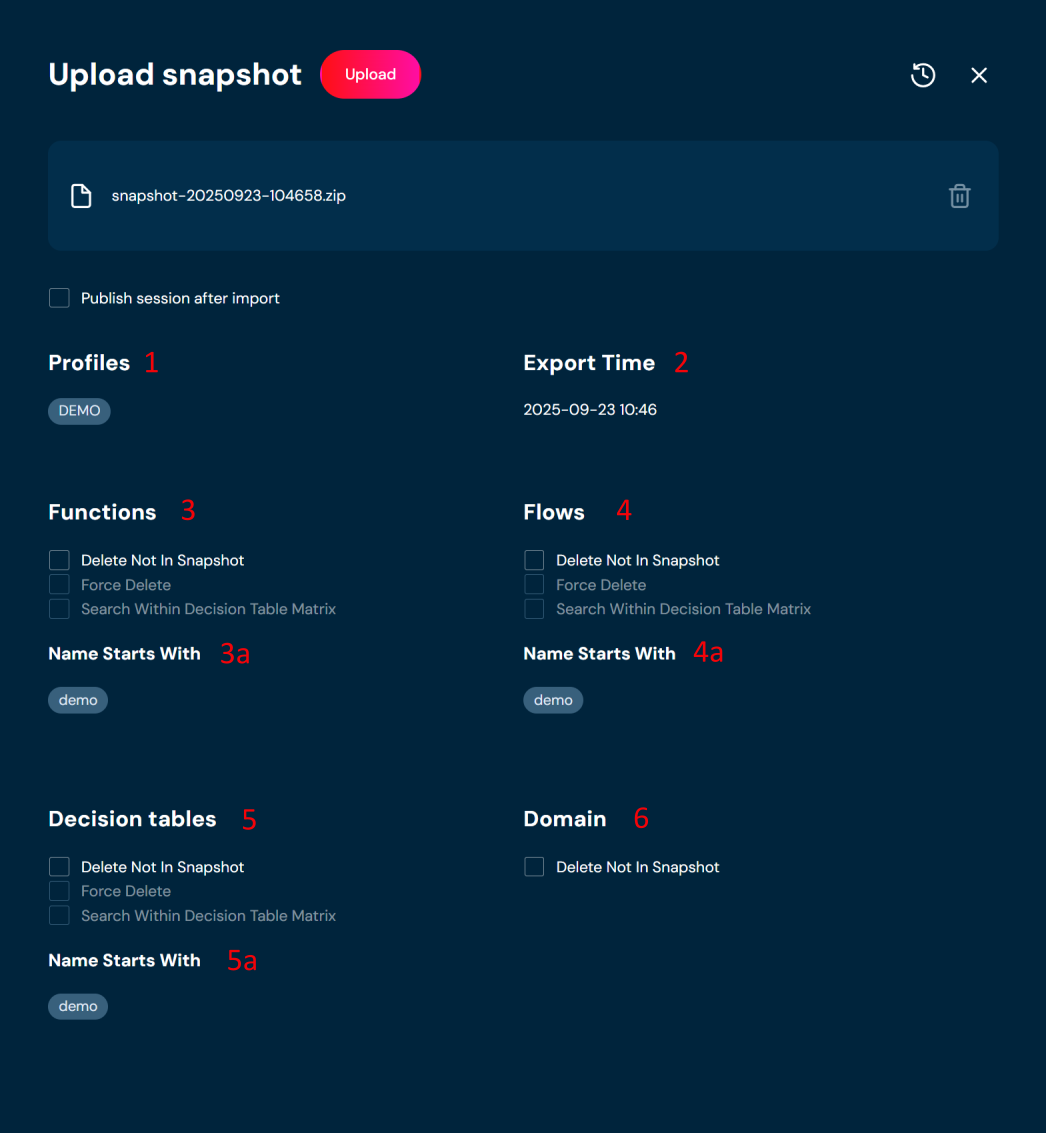
| No. | Item | Description |
|---|---|---|
| 1 | Profiles | List of profiles included in the snapshot. |
| 2 | Export time | Export time of the snapshot |
| 3 | Functions | Options available for functions during snapshot import. You will find details below. |
| 3a | Function filters | List of filters used for functions during snapshot export – the same criteria will also apply during the import. You will find details below. |
| 4 | Flows | Options available for flows during snapshot import. You will find details below. |
| 4a | Flows filters | List of filters used for flows during snapshot export – the same criteria will also apply during the import. You will find details below. |
| 5 | Decision tables | Options available for decision tables during snapshot import. You will find details below. |
| 5a | Decision tables filters | List of filters used for decision tables during snapshot export – the same criteria will also apply during the import. You will find details below. |
| 6 | Domain | Removes domain configuration elements which do not exist in the snapshot. |
Removing not in snapshot
- Remove not in snapshot - removes objects that are on the environment and are not in the snapshot file. During the snapshot upload, the export parameters used during the snapshot creation are taken into account. This means that if filters were applied during the export — such as Name begins with, Used tag, etc. — the same criteria will also apply during the import.
Example:
The environment contains 10 decision tables (first column of the table below). We want to import a snapshot that was exported with the filter Name begins with = ‘demo’ (second column of the table below). During the import, we enable the Remove not in snapshot option for decision tables. In this case, only the decision tables whose names start with ‘demo’ will be considered during the import. As a result, if the decision table demo.motor.coverage.availability is not present in the snapshot, it will be removed from the target environment. However, tables with names starting with dictionary or pl will remain in the environment — even if they are not included in the snapshot — because they do not match the Name begins with = ‘demo’ condition.
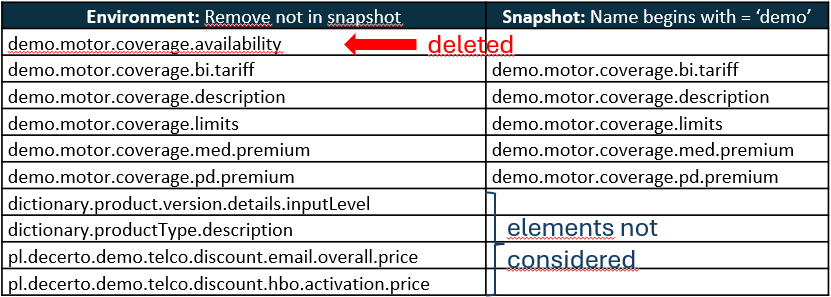
If an element scheduled for deletion is referenced by another component — for example, a function used as the value source in the IN level of a decision table — the element will be retained. A warning indicating the dependency will be logged in the snapshot upload report (see screenshot below). This mechanism is designed to maintain referential integrity within the environment and prevent deletion of in-use objects.
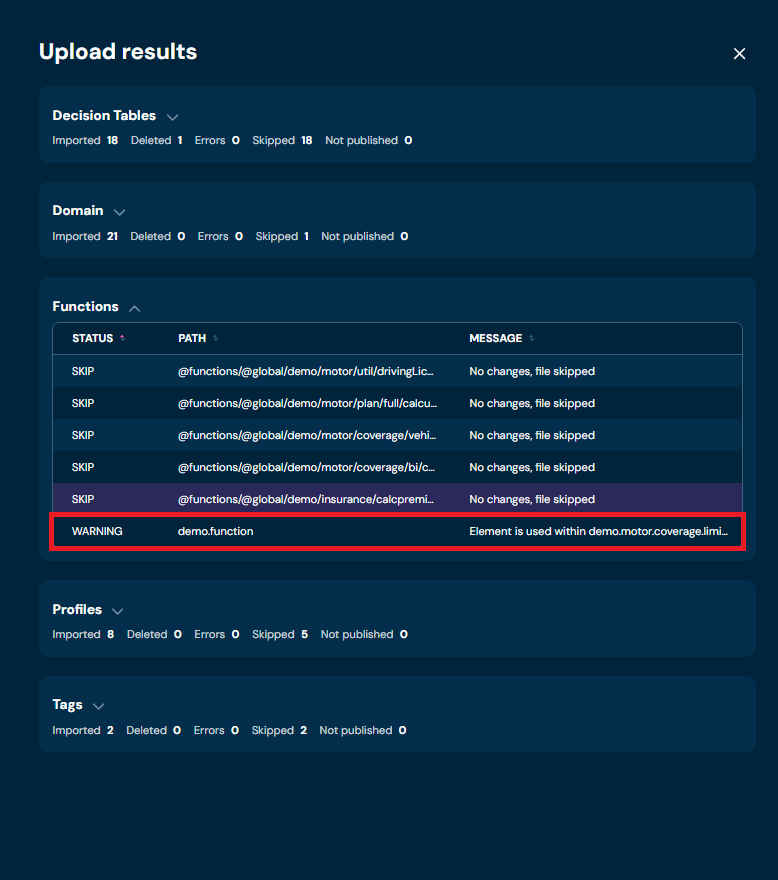
- Force Delete - The force delete flag allows you to force the deletion of items for which, for some reason, this deletion is not recommended. If the element is in use, removing it will cause errors.
- Search Within Parameter Matrix - Selecting this option will ensure that if a decision table or function is not present in the snapshot, not only domain elements and source value of IN levels decision tables will be searched, but also the matrices of the decision tables. This mechanism is designed to maintain referential integrity within the environment and prevent deletion of in-use objects. In the basic version, Higson does not check the matrix for performance reasons. If it finds a conflict it returns a warning (see screenshot below).
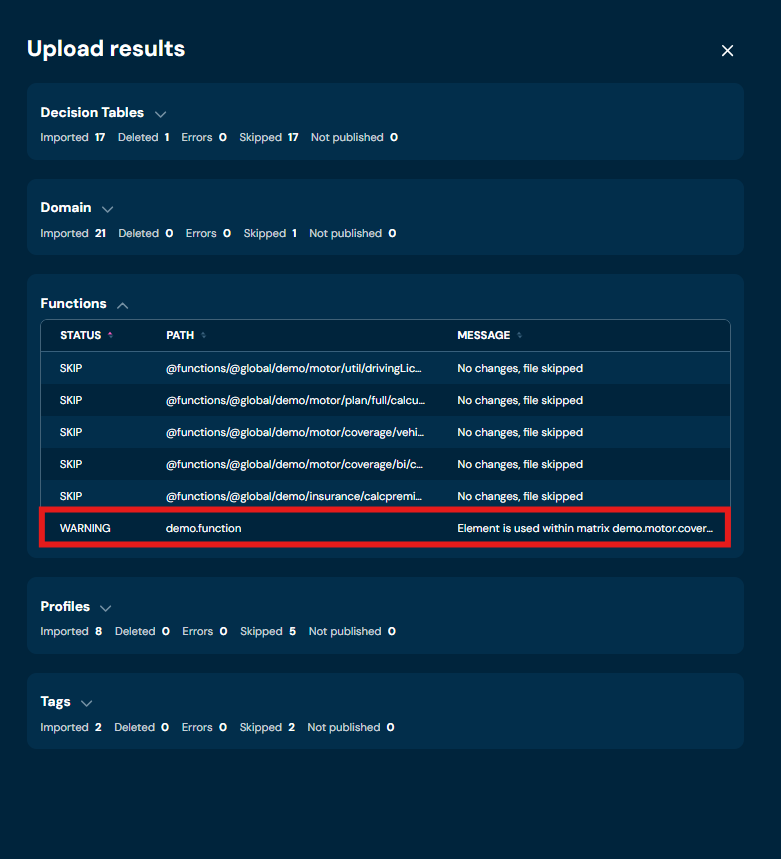
After the snapshot uploads, summary results with detailed information will appear in a dropdown list form:
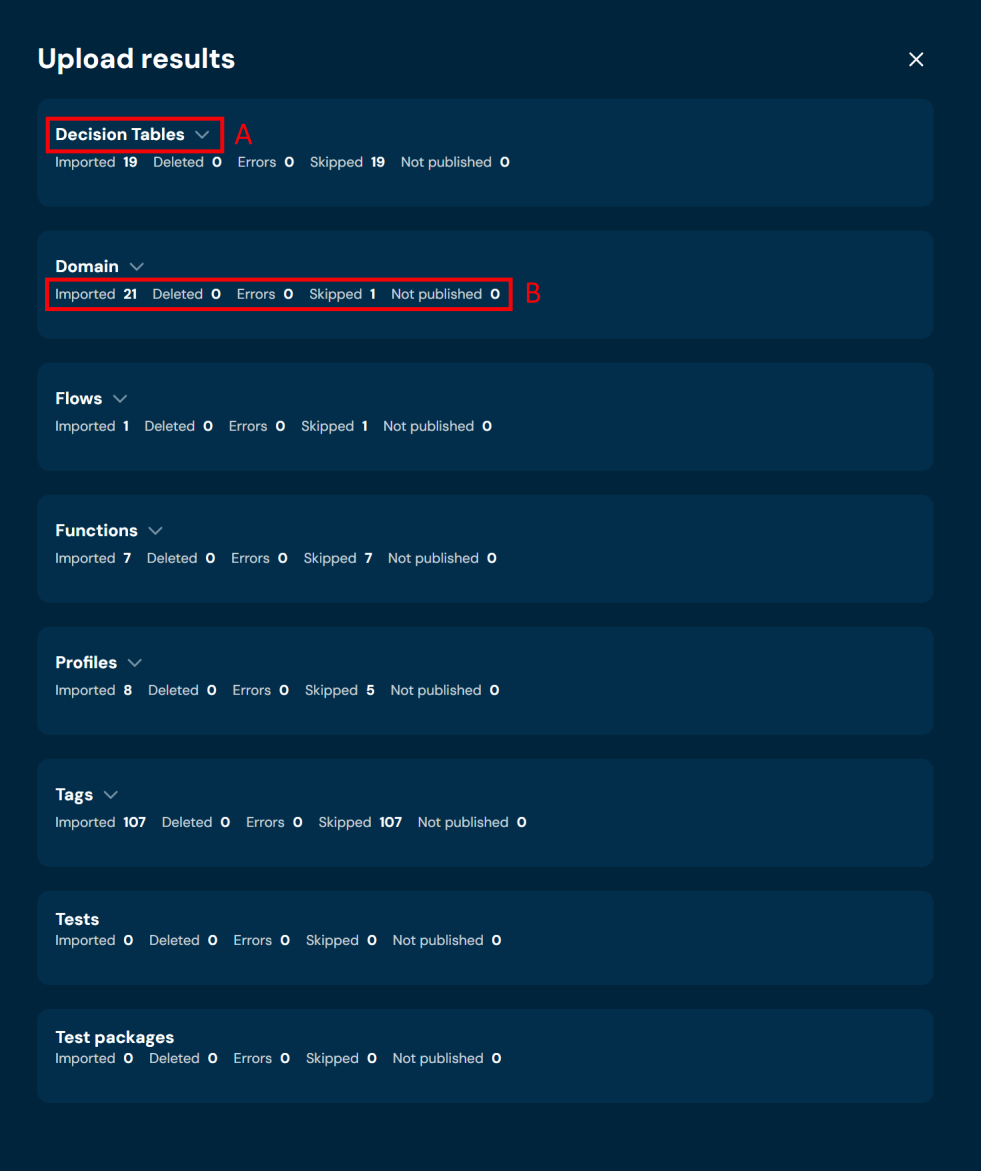
In summary, there is information on how many elements were in status:
| No. | Status | Description |
|---|---|---|
| 1. | Imported | Elements imported |
| 2. | Deleted | Elements deleted |
| 3. | Errors | Elements with errors occurred |
| 4. | Skipped | Elements skipped |
| 5. | Not published | Elements not published |
Every status section can be expanded (A) for more detailed information with a description per element, e.g.:
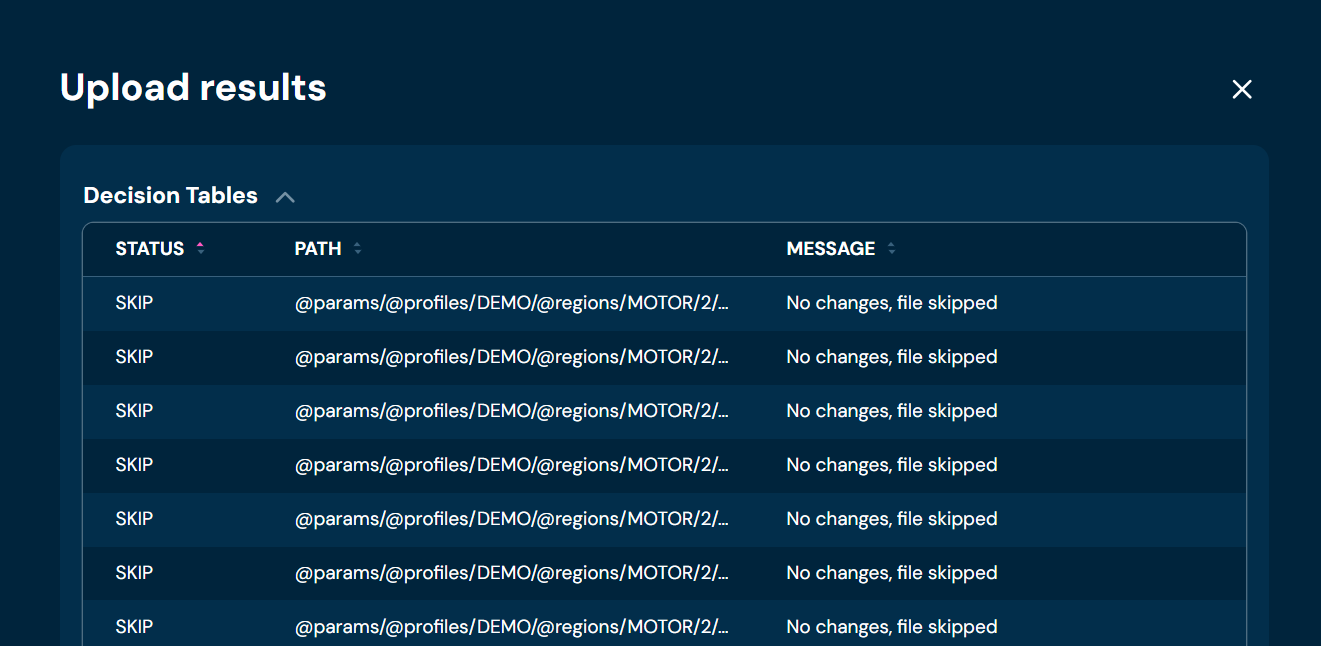
Historical Snapshot Uploads#
There is also a historical Snapshot uploads view available. After clicking on (A) from the Upload snapshot view:
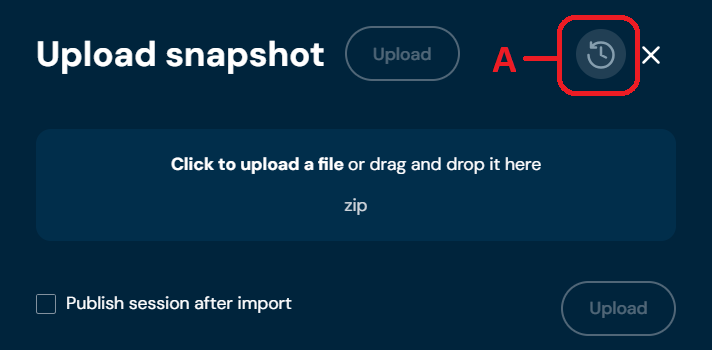
you will see the Snapshot uploads view with historical uploads in the form of a table:
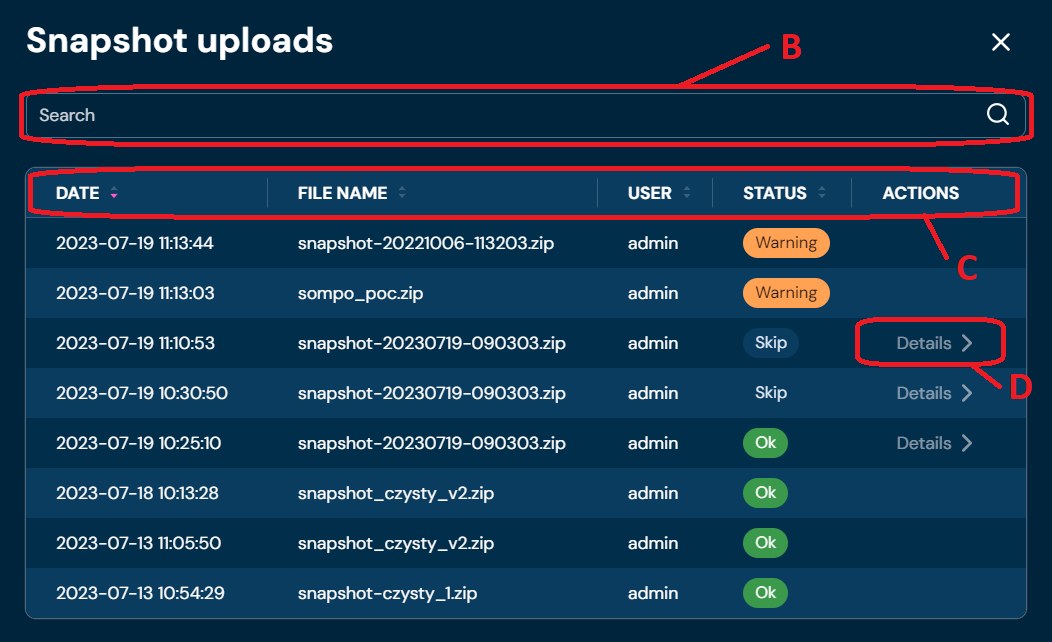
with column names (C):
| No. | Column name | Description |
|---|---|---|
| 1. | Date | Date of snapshot upload |
| 2. | File name | The file name of the file from which the snapshot was uploaded |
| 3. | User | User name which performed snapshot upload |
| 4. | Status | Summary status of snapshot upload: Warning, Skip, Ok, Error |
| 5. | Actions | Contains expandable Details (D) if any message upload exists |
After clicking on (D) you will be redirected to view with detailed information as a dropdown list like in the Upload Snapshot summary view.
Insertable field (B) allows filtering table data by Date and File name column.
Async Import Configuration#
Snapshot import in Higson is processed asynchronously. When a user submits an import, the request is placed in a queue and processed in the background — the user does not need to wait on screen for the import to finish.
The queue is checked by a poller — a mechanism that wakes up at regular intervals, looks at the queue, and picks up pending import jobs for processing. Each wake-up cycle is called a tick.
Each import job goes through the following statuses:
| Status | Description |
|---|---|
| QUEUED | The job is waiting in the queue to be processed. |
| RUNNING | The import is currently being processed. |
| DONE | The import completed without interruption. Does not mean the import is free of warnings or errors — check the report. |
| FAILED | The import ended with an error. The error message is available in the report. |
Only one import per user can be in RUNNING status at a time. If the poller picks up a second job for the same user while their first import is still running, it returns that job to QUEUED and retries in the next tick.
Poller Properties#
| Property | Default | Description |
|---|---|---|
higson.studio.snapshot.async.poll.interval-ms |
5000 |
How often (in milliseconds) the poller checks the queue for new jobs. |
higson.studio.snapshot.async.poll.initial-delay-ms |
10000 |
How long (in milliseconds) the poller waits after application startup before checking the queue for the first time. |
higson.studio.snapshot.async.poll.batch-size |
3 |
How many QUEUED jobs the poller picks up from the queue in a single tick. |
higson.studio.snapshot.async.poll.max-concurrent-jobs |
6 |
How many imports can run in parallel on a single instance. |
When to adjust:
interval-ms— Decrease if imports are waiting too long to start. Increase if the server is under heavy load.initial-delay-ms— Increase if the application needs more time to fully initialize before handling imports.batch-size— Should not be greater thanmax-concurrent-jobs. In multi-instance deployments, dividing the value across instances allows each instance to pick up a portion of the load while leaving room for others.max-concurrent-jobs— Decrease on low-resource machines. Increase on powerful machines. In multi-instance deployments, each instance has its own limit — the total throughput is the sum across all instances.
Multi-instance configuration examples:
Two equal instances, max-concurrent-jobs=4 each:
instance 1: max-concurrent-jobs=4, batch-size=2
instance 2: max-concurrent-jobs=4, batch-size=2
Each instance picks up 2 jobs per tick, distributing the load evenly. The optimal values depend on your specific usage patterns and deployment setup.
Orphan Watcher Properties#
If the server crashes or loses its database connection during an import, the job may become stuck in RUNNING status indefinitely. Note that a server crash also stops the watcher — it only resumes searching for orphaned jobs after the application restarts, once the initial-delay-ms delay has passed and the threshold-minutes threshold is exceeded. The orphan watcher detects such jobs and automatically returns them to the queue so they can be retried.
A job is considered orphaned when it has been in RUNNING status without a heartbeat signal for longer than the configured threshold.
| Property | Default | Description |
|---|---|---|
higson.studio.snapshot.async.orphan.threshold-minutes |
5 |
How many minutes without a heartbeat before a RUNNING job is considered orphaned and reset to QUEUED. |
higson.studio.snapshot.async.orphan.interval-ms |
60000 |
How often (in milliseconds) the watcher checks for orphaned jobs. |
higson.studio.snapshot.async.orphan.initial-delay-ms |
60000 |
How long (in milliseconds) the watcher waits after application startup before running for the first time. |
When to adjust:
threshold-minutes— The watcher considers a job orphaned when its heartbeat has not been updated for longer than this value. A running import updates its heartbeat every 30 seconds, so healthy imports are not interrupted. Increase this value only if you observe false positives — jobs being reset despite being actively processed.interval-ms— Decrease for faster detection of stuck imports. Increase if the server is under heavy load.initial-delay-ms— Increase if the application needs more time to stabilize after startup.
Note: In the event of a critical infrastructure failure (e.g., out-of-memory error), the lock held by the affected user may not be released automatically — even by the orphan watcher. In such cases, manual administrator intervention is required before the user can submit new imports.
Tester allows you to verify if the created Decision Table, Function and Domain Elements are working as intended. In order to see Tester, select Tools → Tester in Main Toolbar.
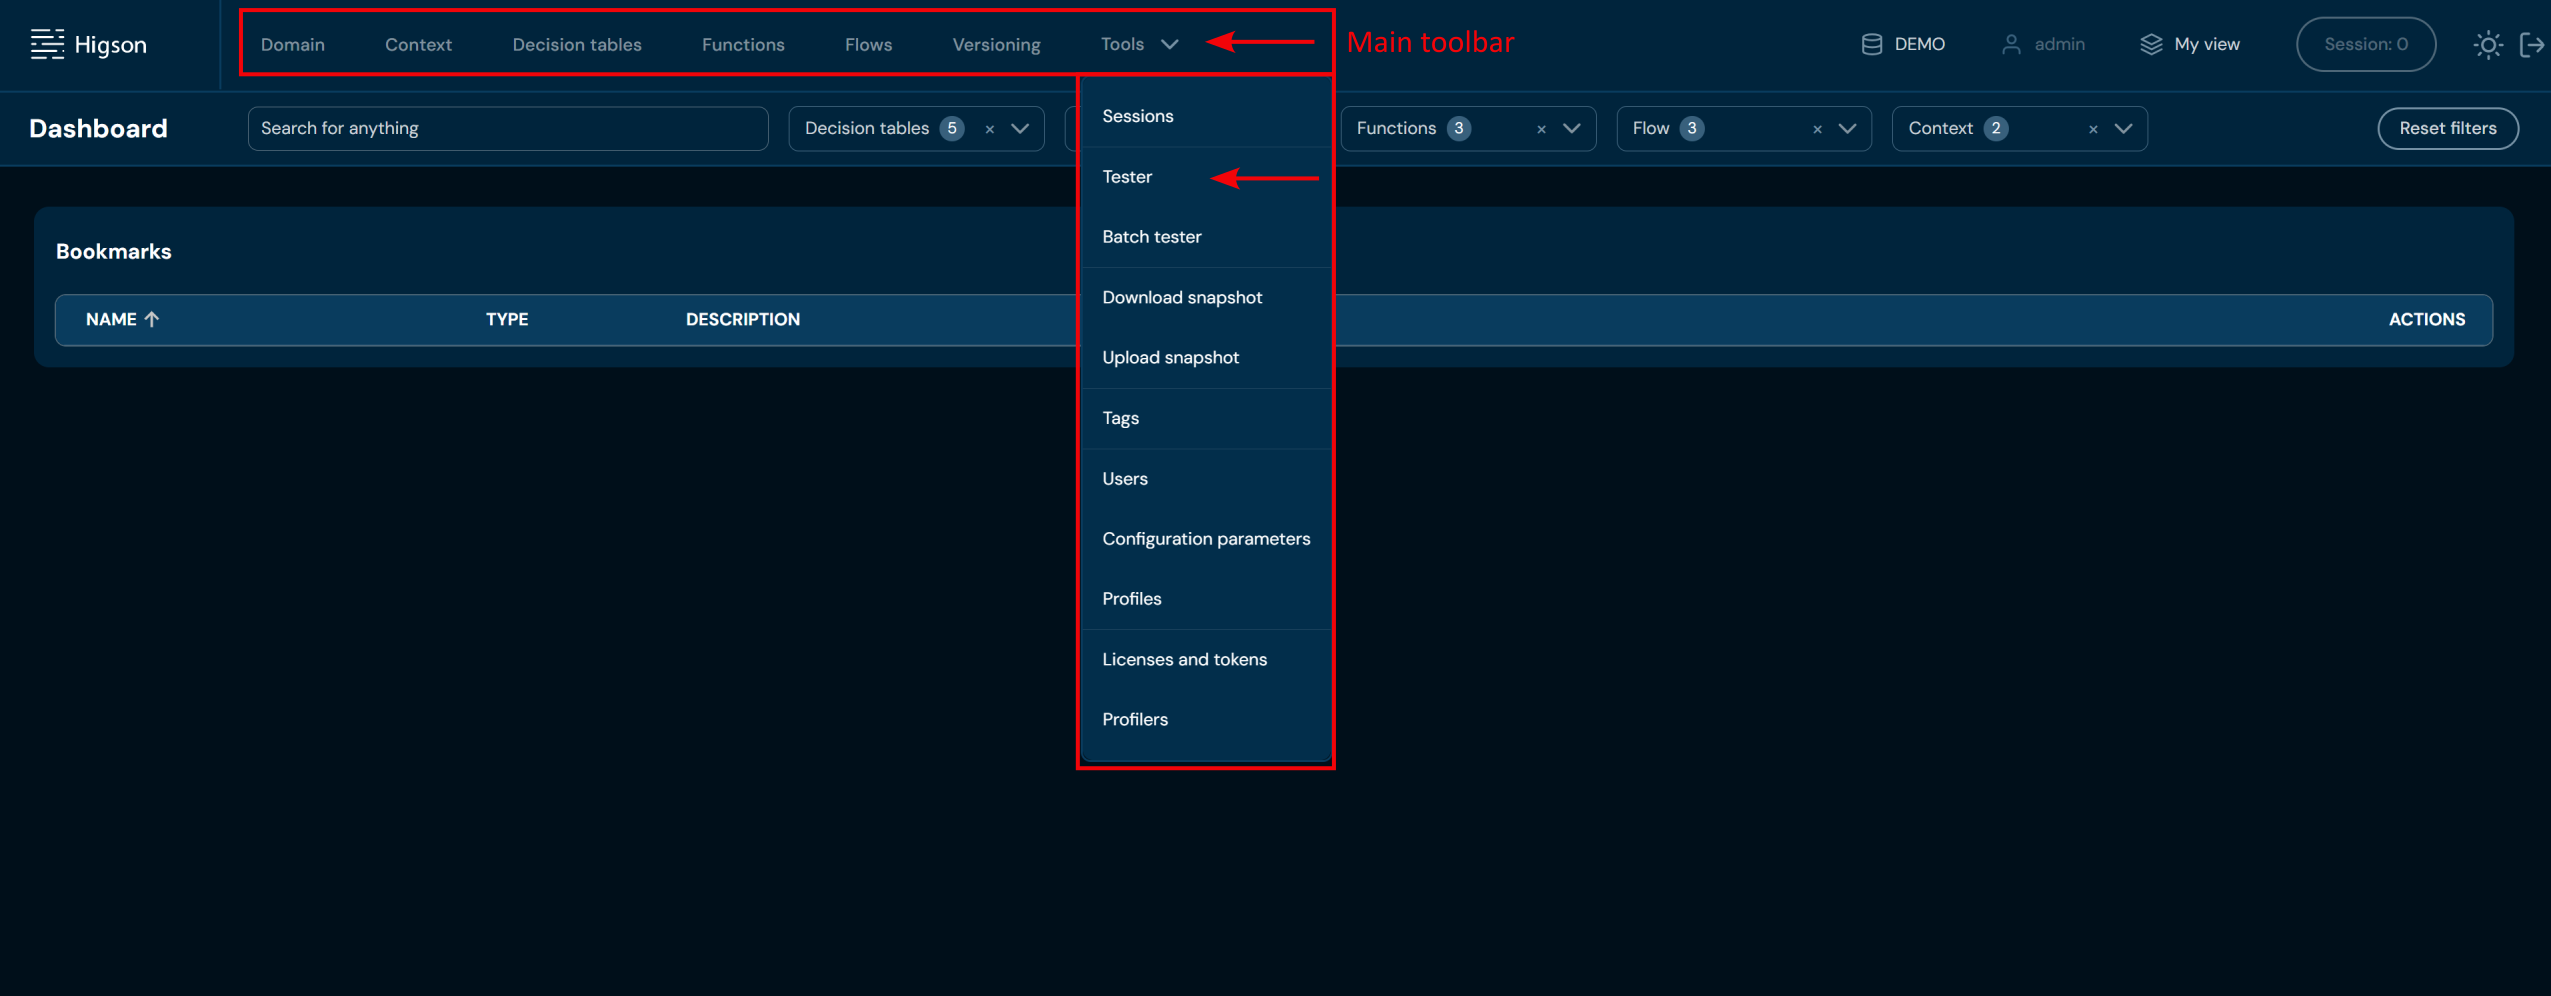
After you enter Tester you will see Test panel with a list of all tests:
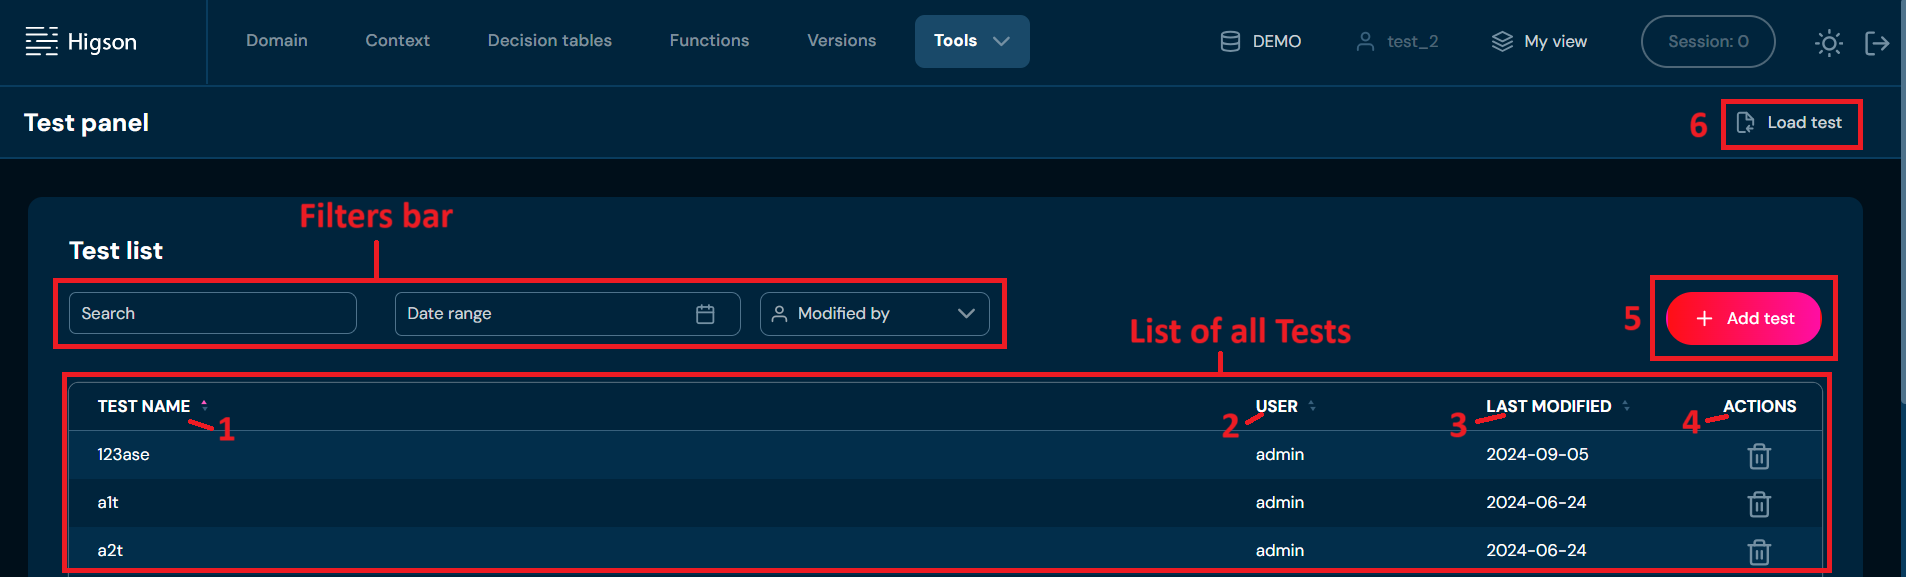
| No. | Column / Action Name | Description |
|---|---|---|
| 1. | Test Name | Full test case name. You can sort this column by left-clicking on the arrows visible next to the label. |
| 2. | User | User’s login that made the last modification in the test case. You can sort this column by left-clicking on the arrows visible next to the label. |
| 3. | Last Modified | The last modification date of the test case. You can sort this column by left-clicking on the arrows visible next to the label. |
| 4. | Actions | List of quick access actions. Currently only the Remove action (bin icon) is available here. The Remove action deletes the desired test case. To learn more about removing a specific test case, go here. |
| 5. | + Add Test | Allows creating a new Test case. To learn more about adding Test cases, go here. |
| 6. | Load Test | Allows uploading Test case from an XLSX file. To learn more about uploading Test cases, go here. |
You can see all Filters available in a Test panel below:

| No. | Filter Name | Description |
|---|---|---|
| 1. | Search Text Field | Filter by any string provided by the user. |
| 2. | Date Range | Filter by last modified date in format YYYY/MM/DD-YYYY/MM/DD. |
| 3. | Modified By | Filter by users who made the last modification in test cases. |
Upload Test#
If you want to load a test case from Test panel screen, follow these steps:
-
Choose Tools → Tester in Main toolbar.
-
Choose Load test.
a. Choosing Load brings up Load test case screen.
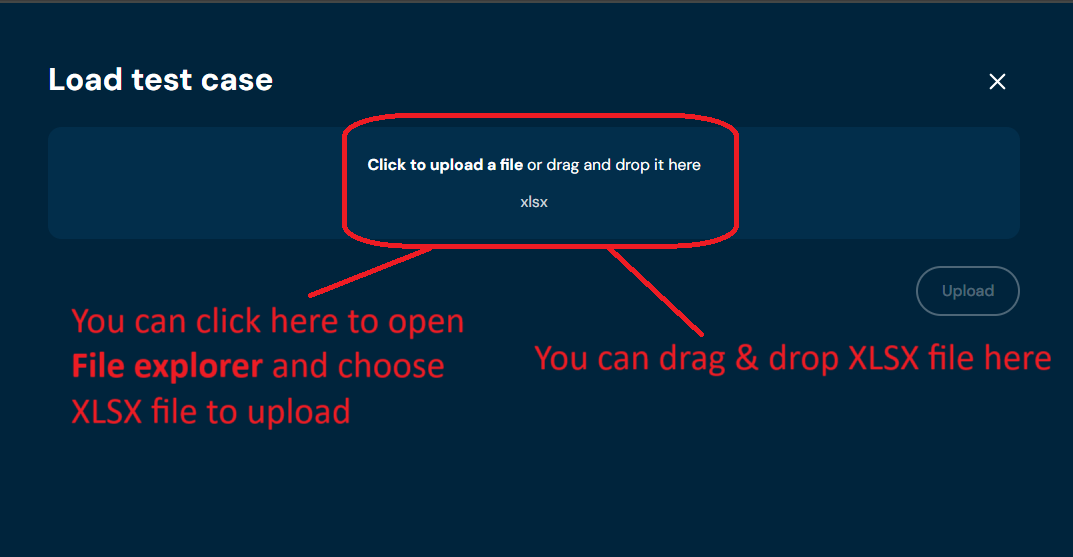
-
Drag&drop desired file or Click to upload a file and choose file in File explorer.
a. If you choose a file with extension other than XLSX, then validation error will pop up.
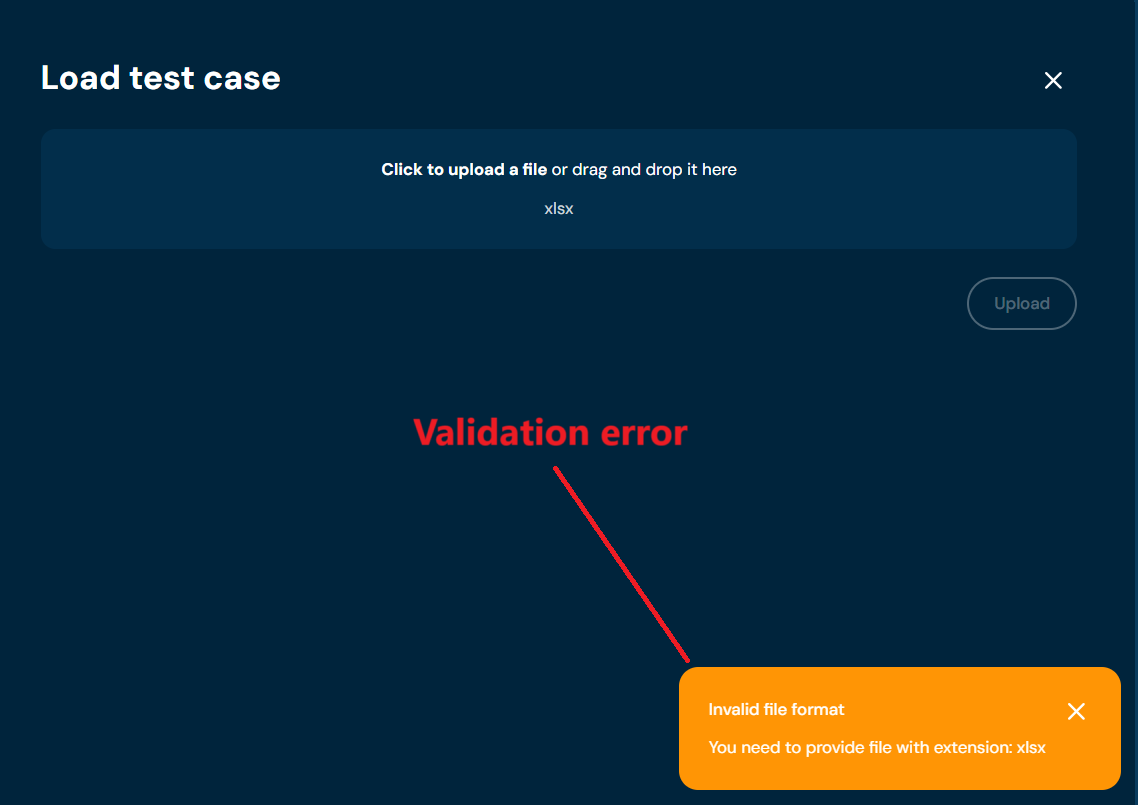
-
When the message Upload successful appears, it means that test was loaded correctly. Close Load test case screen.
a. You will be redirected to the loaded Test case screen. Bear in mind, that Test case has not been saved yet. In order to save loaded Test case, choose Save test.
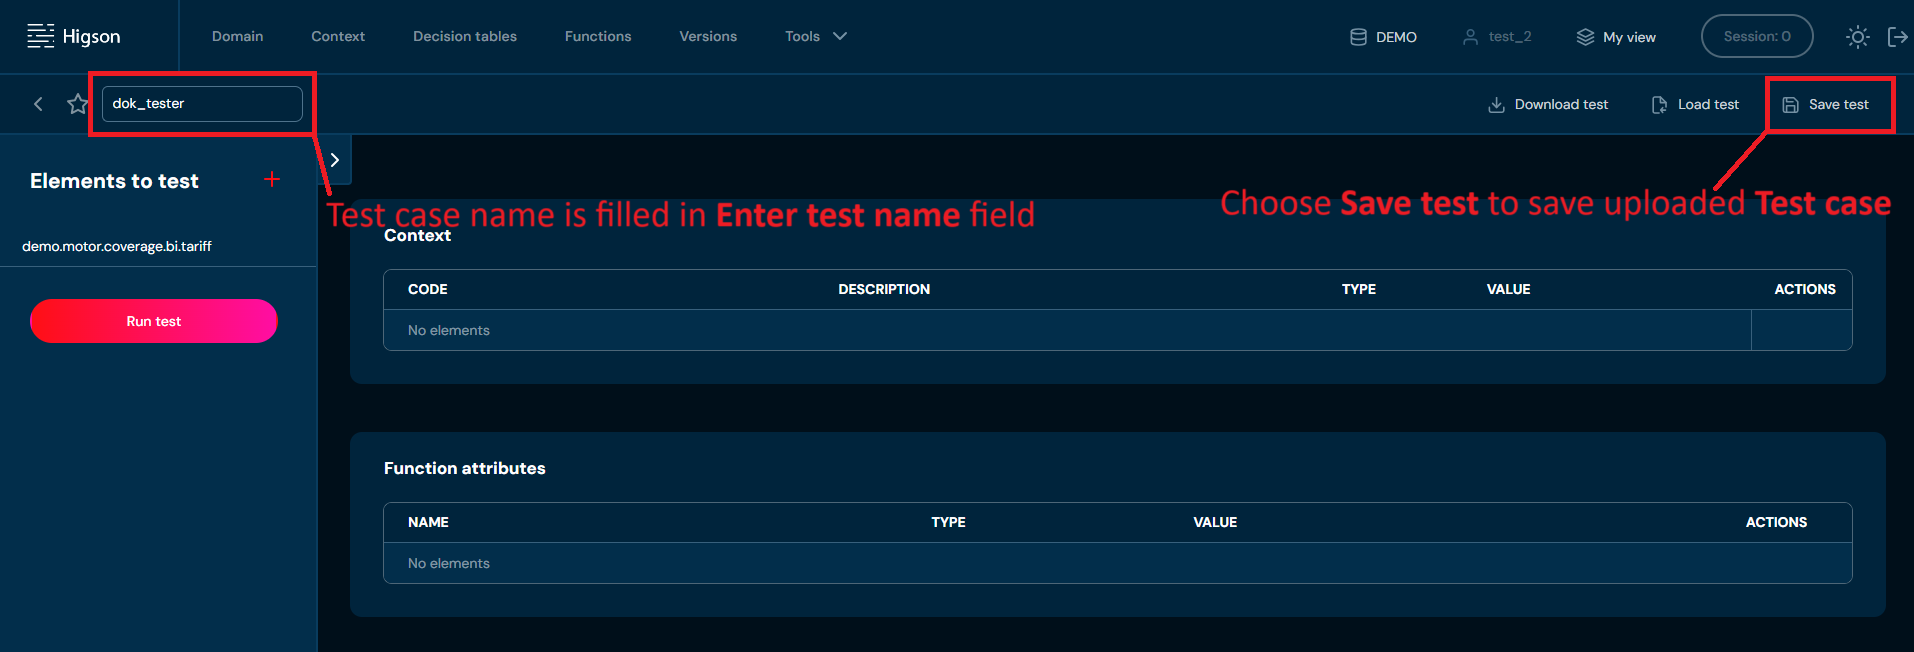
b. If validation error occurs (see above), then an upload process is being aborted.
Add Test Case#
If you want to add a new test case, follow these steps:
-
Choose Tools → Tester in Main toolbar.
-
Choose + Add test.
a. Choosing + Add test opens New Test case screen.
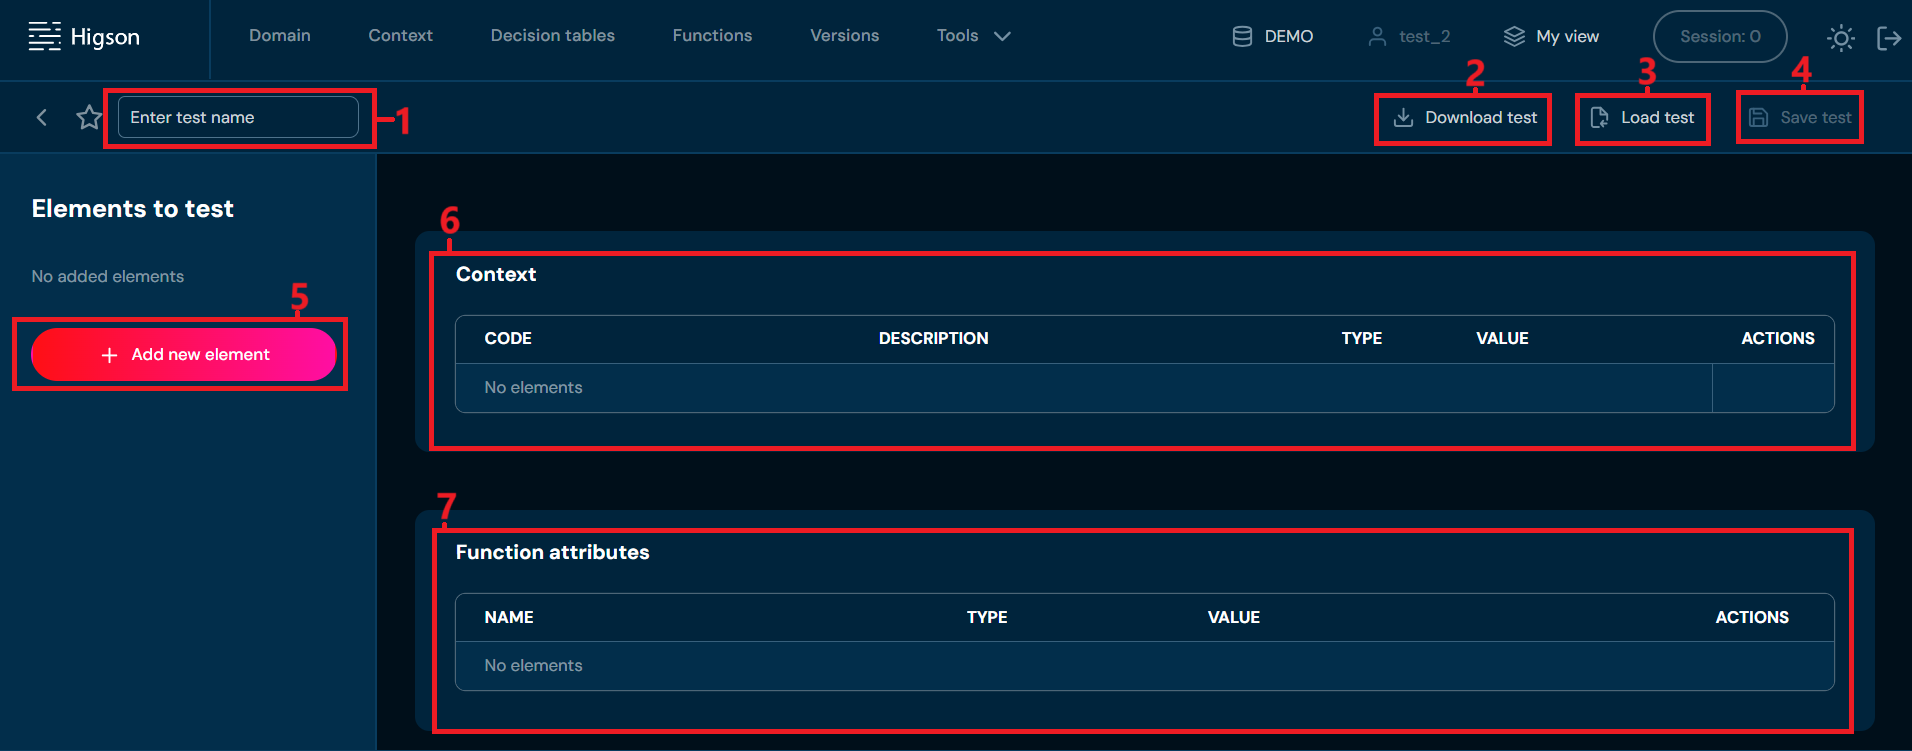
No. Name Description 1. Enter Test Name Enter unique test case name here. Test case name can contain only characters from collection a-z; 0-9; “-”, “_”, and it can’t start with “-”. 2. Download Test Downloads an XLSX file that contains all data from the currently opened Test Case 3. Load Test Allows loading Test Case from an XLSX file. To learn more about loading Test Cases, go here. 4. Save Test Allows saving Test Case. Action is grayed out until Tested Elements are provided. 5. + Add New Element Opens Add New Element screen. You can choose here which elements will be added to the Test Case. Available elements are: - Decision Tables - Functions - Domain Configuration Elements 6. Context Data Allows to complete input test data which refers to the context 7. Function Attributes Allows to complete inputa data which refers to arguments of the functions -
Choose + Add new element. This step is necessary to save Test case.
a. Choosing + Add new element brings up New element screen.
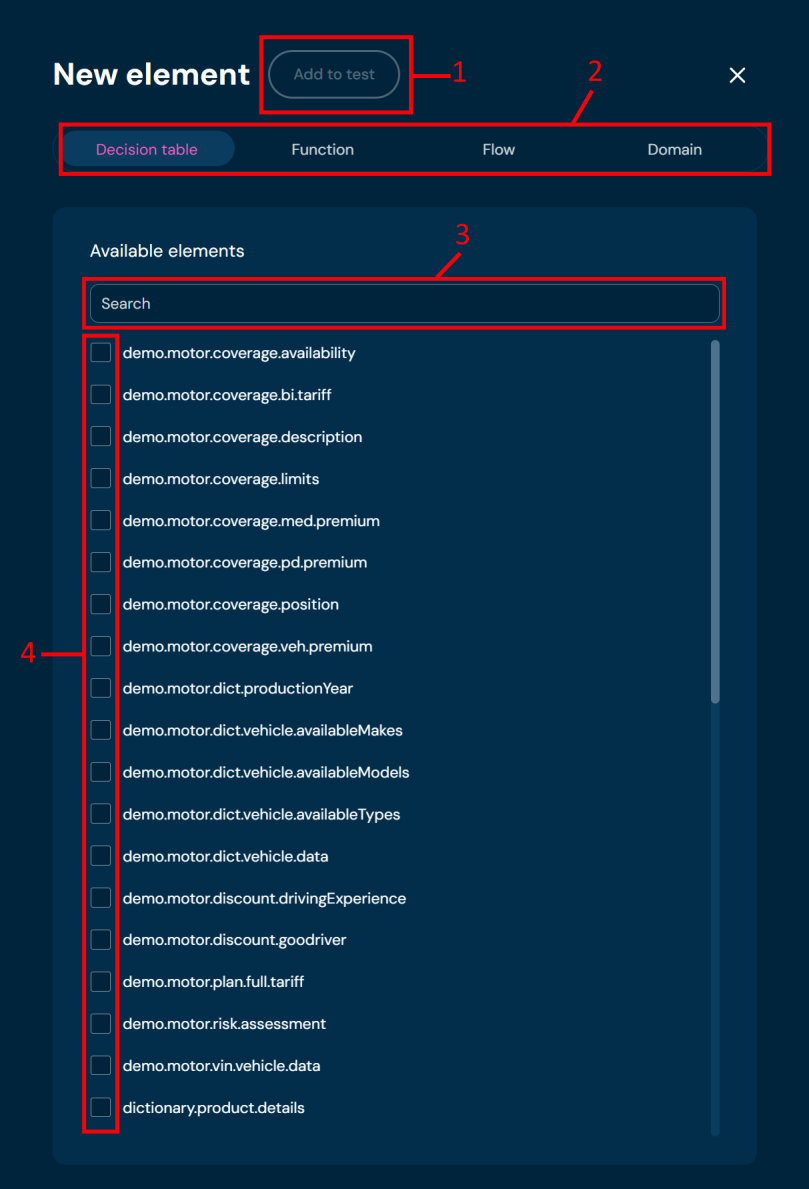
No. Name Description 1. Add to Test Add selected elements to the Test Case. Greyed out until at least one element is selected. 2. Element Type Bar Allows switching between visible Element Types. Note that switching between different tabs will not uncheck already-checked elements. 3. Elements Search Field Filters visible elements by any string provided by the user. 4. Checkboxes Select one or multiple checkboxes to add elements to the Test Case. -
Select elements you wish to add to Test case.
a. After you select at least one element, then Add to test button will activate.
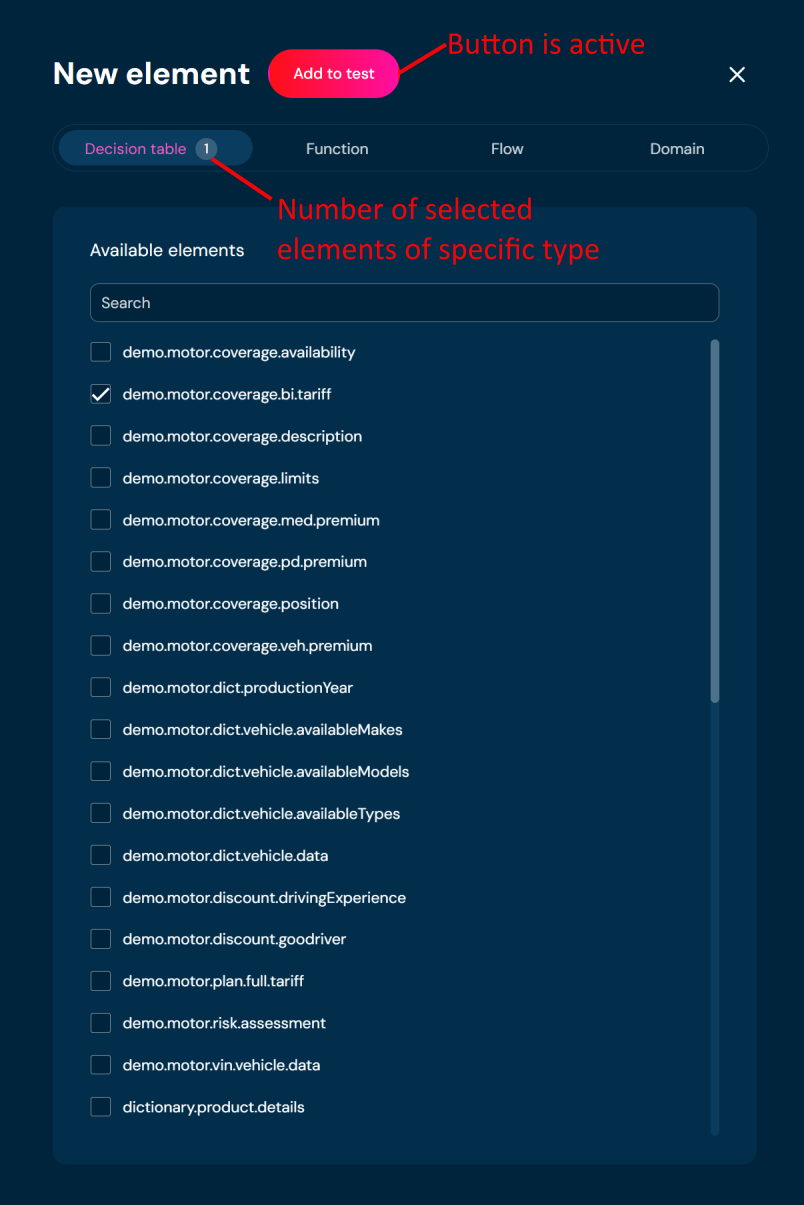
-
Choose Add to test.
a. Selected elements are added to the Test case.
b. Context and Function attributes are added automatically based on selected elements.
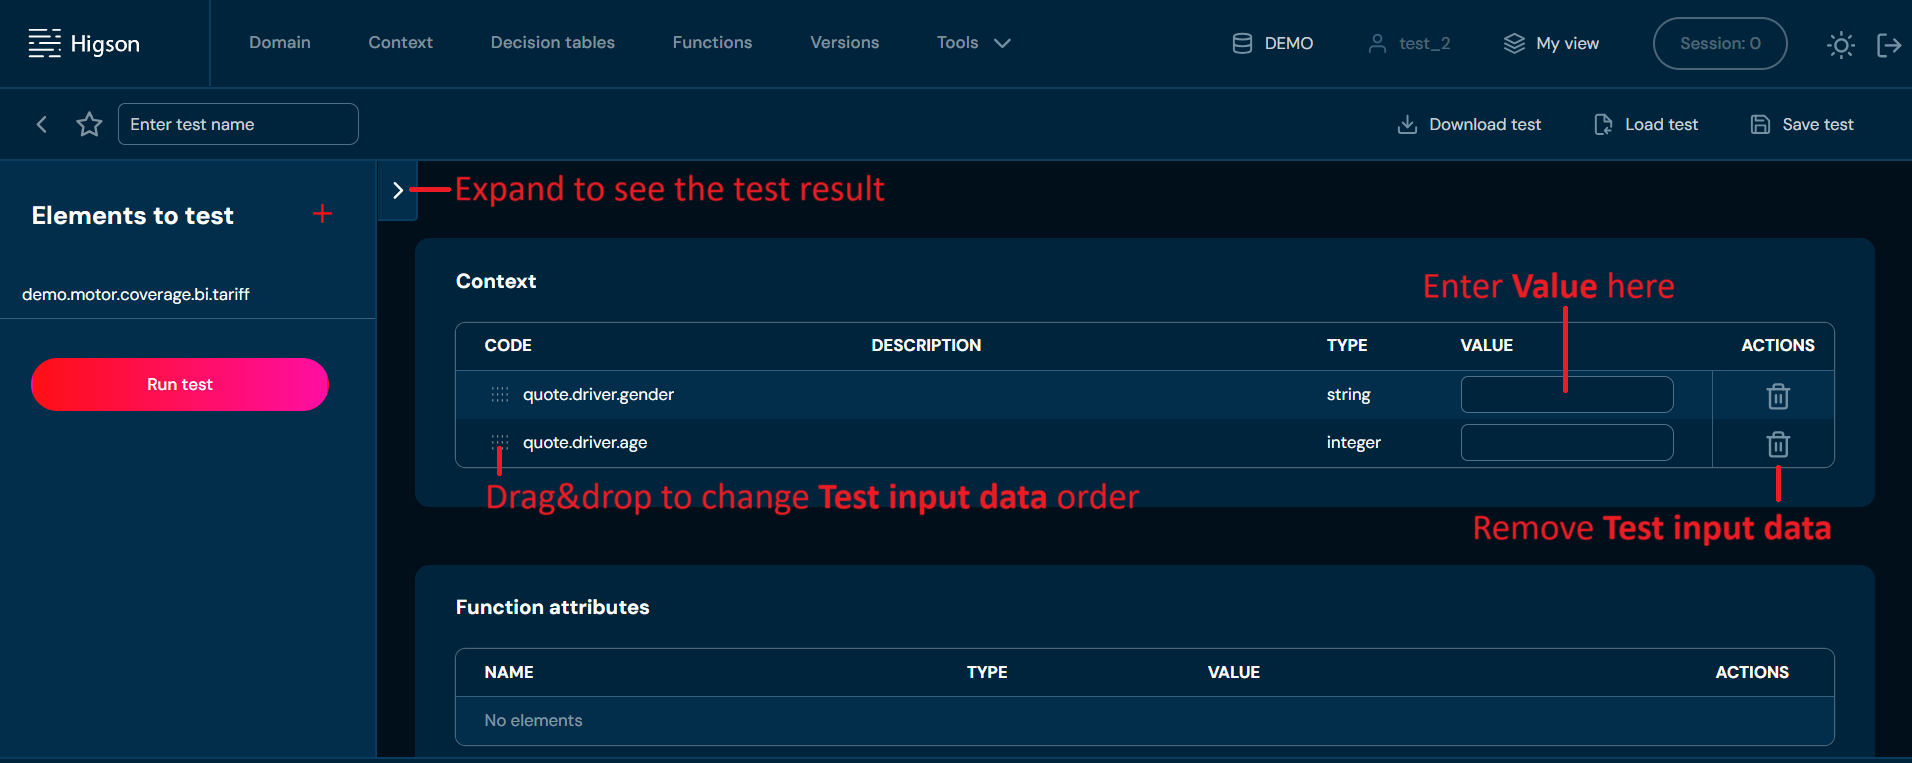
c. If the context allows the use of a collection of elements, the tester displays the $size attribute, which specifies the number of elements in the collection. The individual elements are then numbered from 0…n. For example, if the collection contains 4 elements, then $size = 4, and the elements are labeled as [0], [1], [2], and [3].
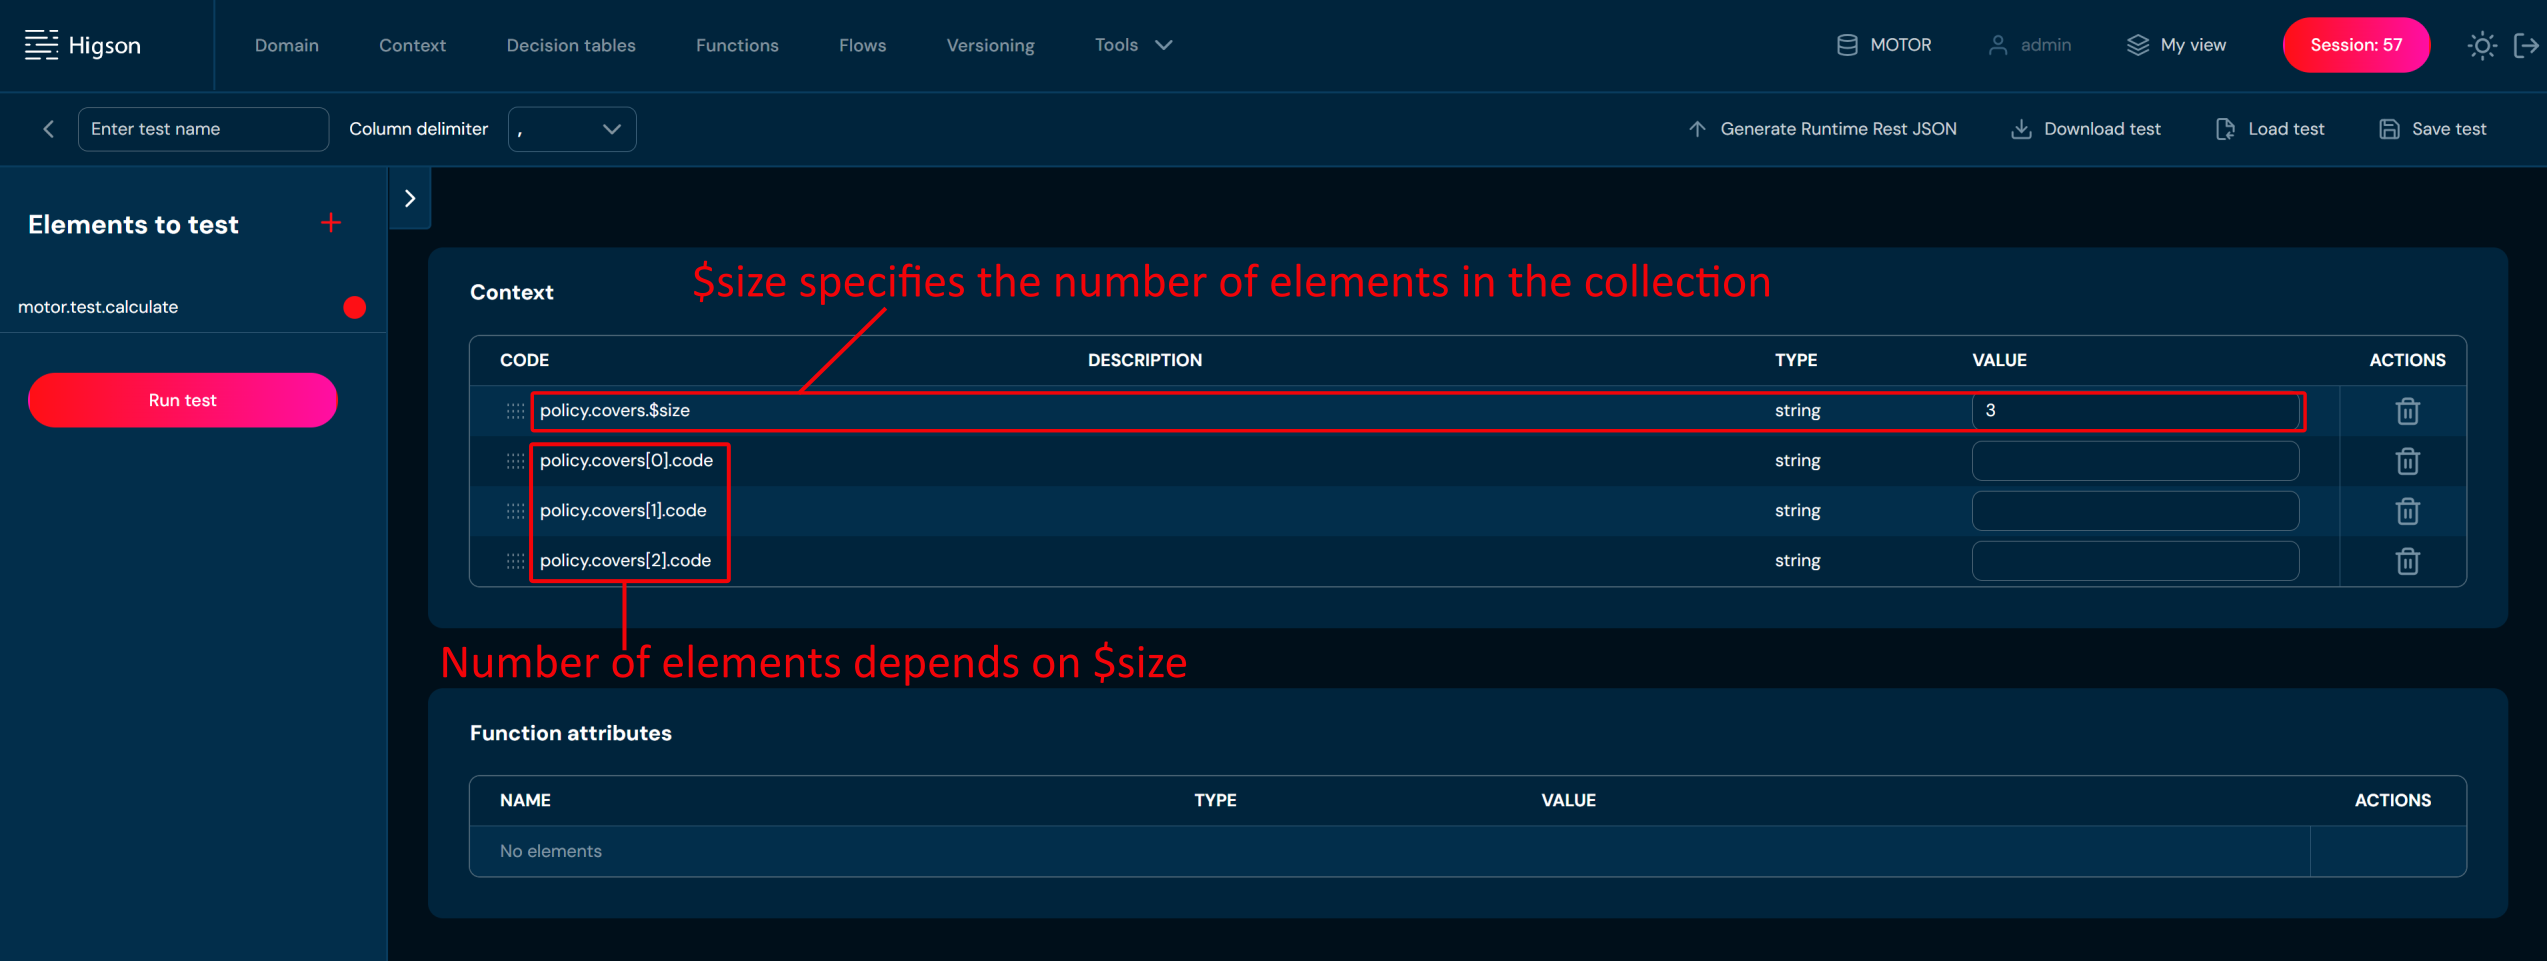
-
In Enter test name field enter unique test name.
-
In Context and Function Attributes table fill Value fields accordingly. This step is optional to save a test case.
-
Expand Elements to test to enter Expected value. This step is optional to save a test case.
-
Choose Save test.
a. Test case with data you provided is saved.
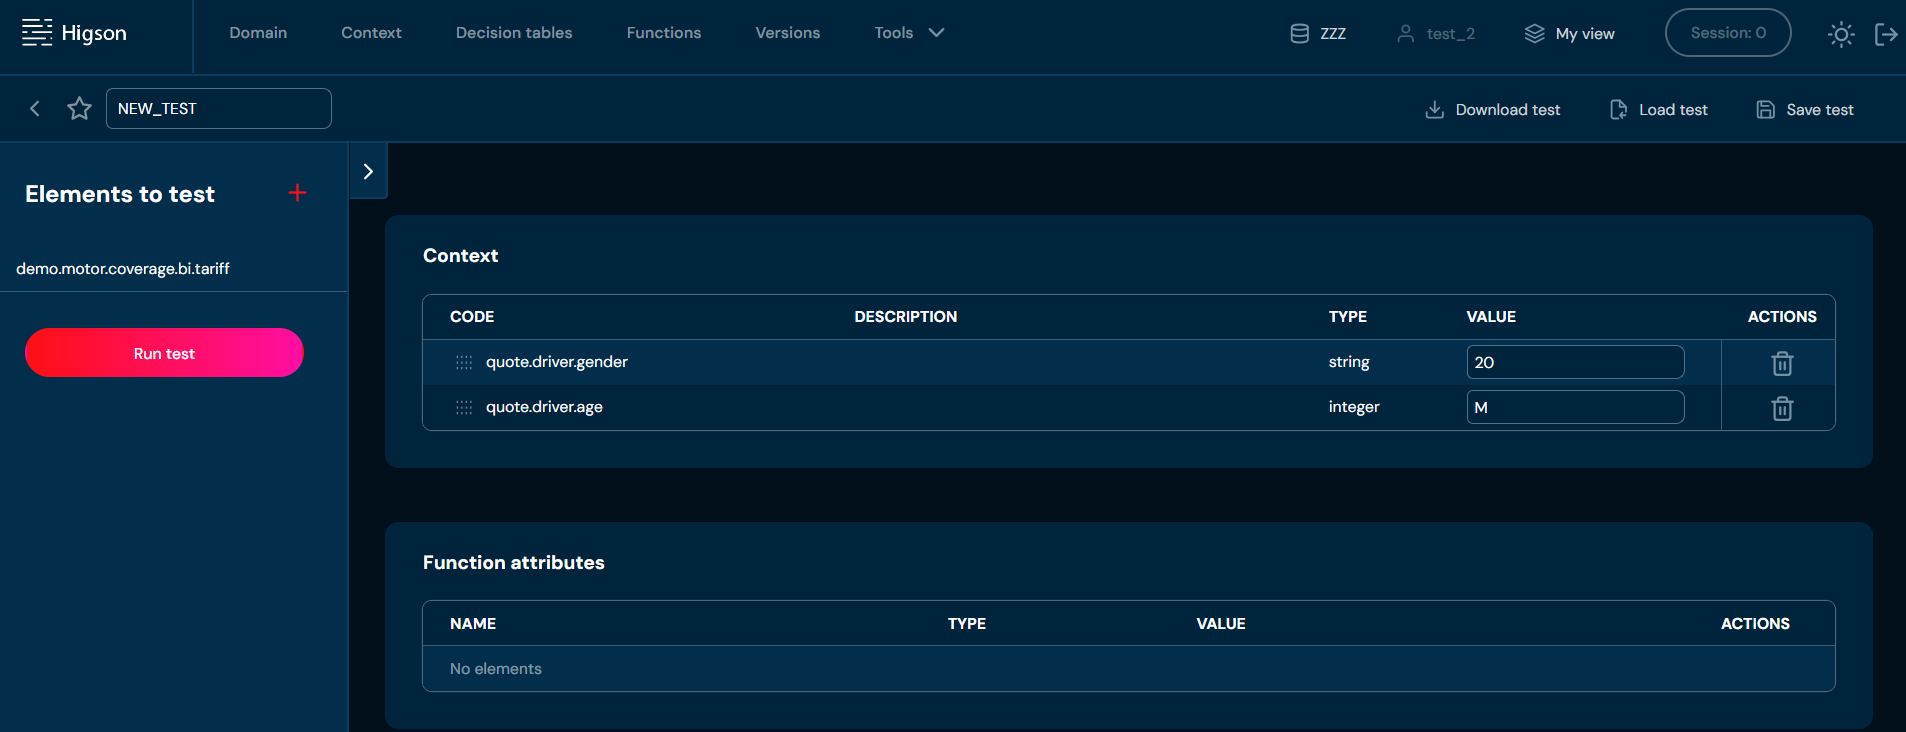
b. If you enter the same name as one of the Test cases already created, then validation error will appear.
Remove Test Case#
If you want to remove a specific test case, follow these steps:
-
Choose Tools → Tester in Main toolbar.
-
Choose Remove action (bin icon) for Test case you want to delete.
a. After choosing Remove action, confirmation pop up will appear.
-
Choose Confirm.
a. Specific Test case is being removed from the environment. This action is irreversible.
Test Case Details Screen#
You can access Test case details screen by left-clicking on specific Test case in Test panel.
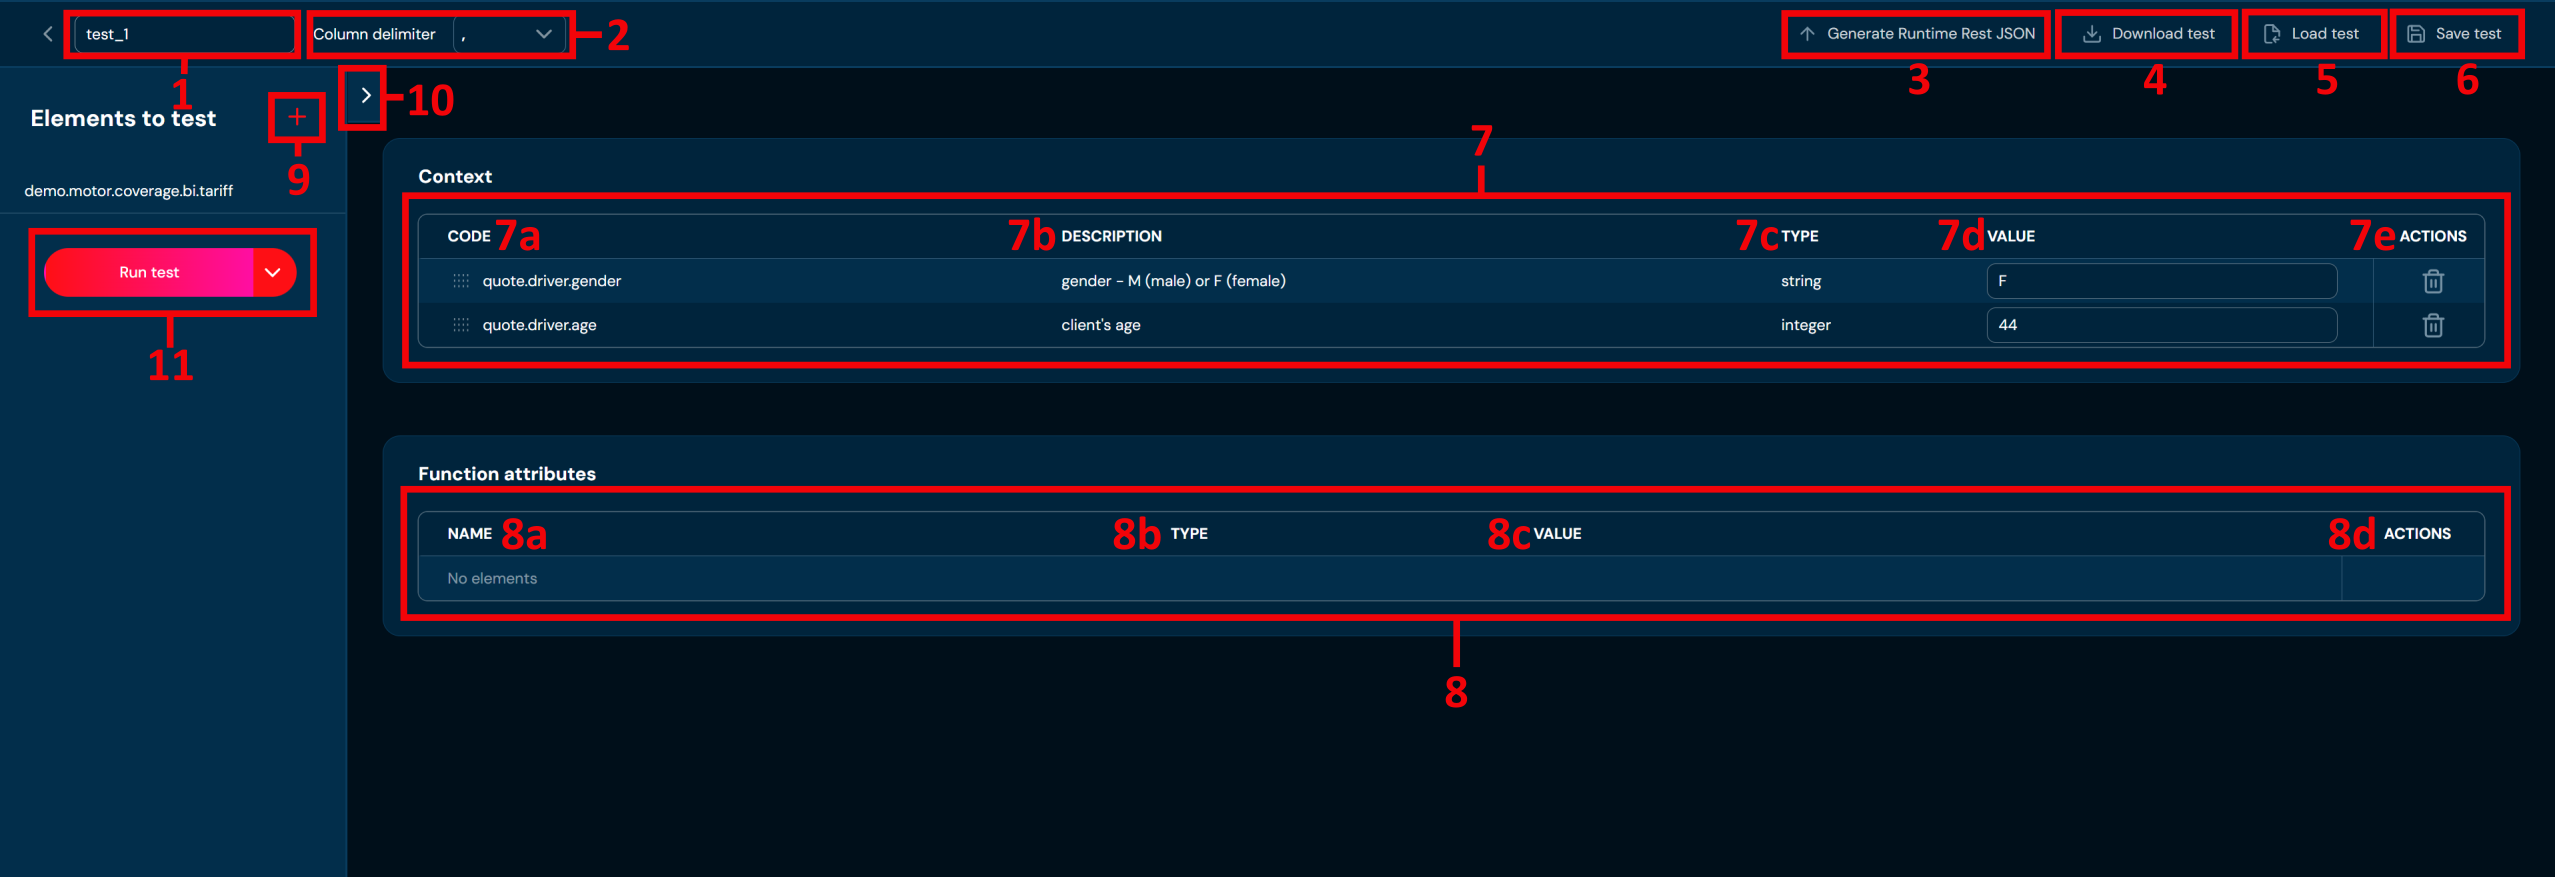
| No. | Name | Description |
|---|---|---|
| 1. | Test case name | Enter unique test case name here. Test case name can contain only characters from the collection a-z; 0-9; “-”, and “_”, and it can’t start with ‘-’. |
| 2. | Column delimiter | Select the delimiter character used to separate columns in the test data. |
| 3. | Generate Runtime Rest JSON | Generates a Runtime Rest JSON file based on the currently opened Test case. |
| 4. | Download test | Downloads an XLSX file that contains all data from the currently opened Test case. To learn more about downloading Test cases, go here. |
| 5. | Load test | Allows loading a Test case from an XLSX file. To learn more about loading Test cases, go here. |
| 6. | Save test | Allows saving the Test case. Action is greyed out until Tested elements are provided. |
| 7. | Context | List of all available Test input data from context for Tested elements. |
| 7a. | Code | Full Test input data code. You can change the order of Test input data by drag & dropping each of them. |
| 7b. | Description | Description of Test input data. |
| 7c. | Type | Type of Test input data i.e. string, integer, date etc. |
| 7d. | Value | Value of Test input data entered by the user. |
| 7e. | Actions | Available action for each Test input data: - Remove (bin icon): Removes Test input data from Test case. Bear in mind, that deleting Test input data may cause errors in test results. |
| 8. | Function attributes | List of all available inputs from the function’s arguments |
| 8a. | Name | Name of the function and function argument. |
| 8b. | Type | Type of the function argument. |
| 8c. | Value | Value of Test input data entered by the user. |
| 8d. | Actions | Available action for each Test input data: - Remove (bin icon): Removes Test input data from Test case. Bear in mind, that deleting Test input data may cause errors in test results. |
| 9. | Add new element | Click to add new element to the test. |
| 10. | Elements to test | Click to expand Elements to test screen. |
| 11. | Run test | Runs the currently opened Test case with set input values. When the process is finished, then Test results will be updated for each Tested element in Elements to test screen. |
Download Test Case#
If you want to download a specific test case, follow these steps:
-
Choose Tools → Tester in Main toolbar.
-
Left-click on Test case you wish to download.
a. Left-clicking on Test case opens Test case details screen.
-
Choose Download test.
a. Choosing Download test downloads an XLSX file that contains data from currently opened Test case.
Load Test Case#
If you want to load a test case from Test case details screen, follow these steps:
-
Choose Tools Tester in Main toolbar.
-
Choose + Add test or left-click on existing Test case in Test panel.
a. choosing + Add test and left-clicking on Test case opens New Test case screen or Test case details screen accordingly.
-
Choose Load test.
a. Choosing Load test brings up Load test case screen.
-
Drag&drop desired file or Click to upload a file and choose file in File explorer.
a. If you choose a file with extension other than XLSX, then validation error will pop up.
-
When the progress bar reaches 100%, it means that Test case was loaded correctly.
a. If a validation error occurs (see above), then a load process is being aborted.
b. Bear in mind, that if in step 2 you chose existing Test case, then loaded Test case will overwrite it.
Run Test Case#
If you want to run a test case, follow these steps:
-
Choose Tools → Tester in Main toolbar.
-
Left-click on Test case you wish to Run test for.
-
Choose Run test.
a. When Run test process is finished, then Test result column on the Elements to test screen will be updated for each Tested element.
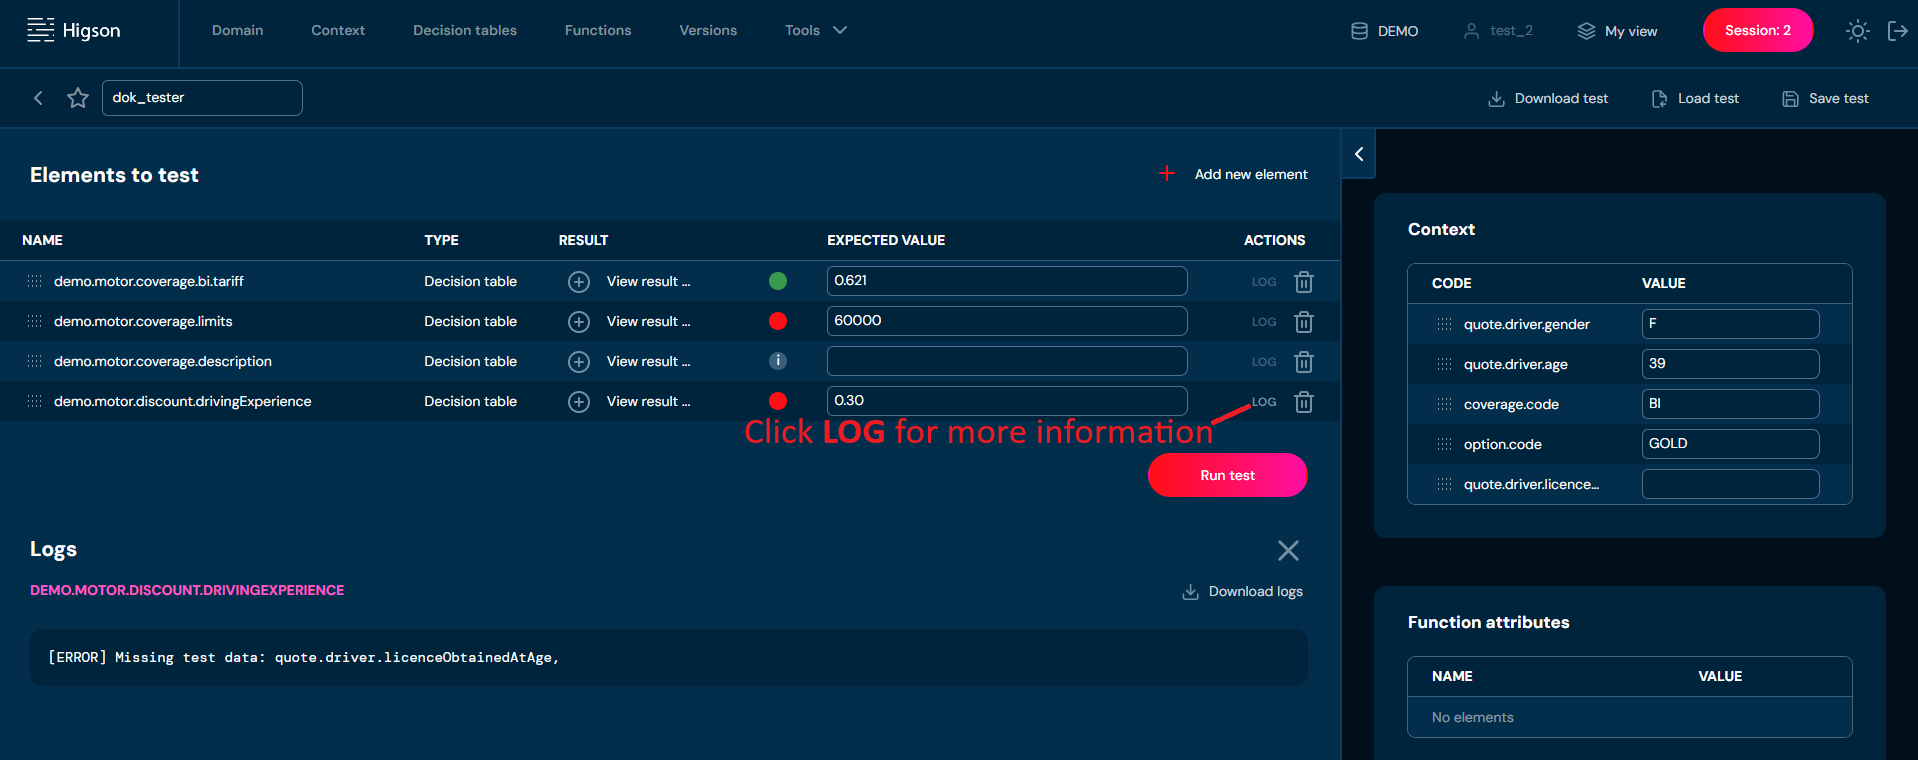
Test result can take status as:
i. Success - Expected value matches value returned by system based on Test input data values
ii. Failure - Expected value does not match value returned by system based on Test input data values or an error occurred while running test for specific Tested element. Check LOG in ACTIONS column for more information.

iii. No expected value - Run test process finished with no errors, but there is no Expected value to compare with value returned by system based on Test input data values.
You can click on the plus icon in the Result column to see value returned by system for each tested element.
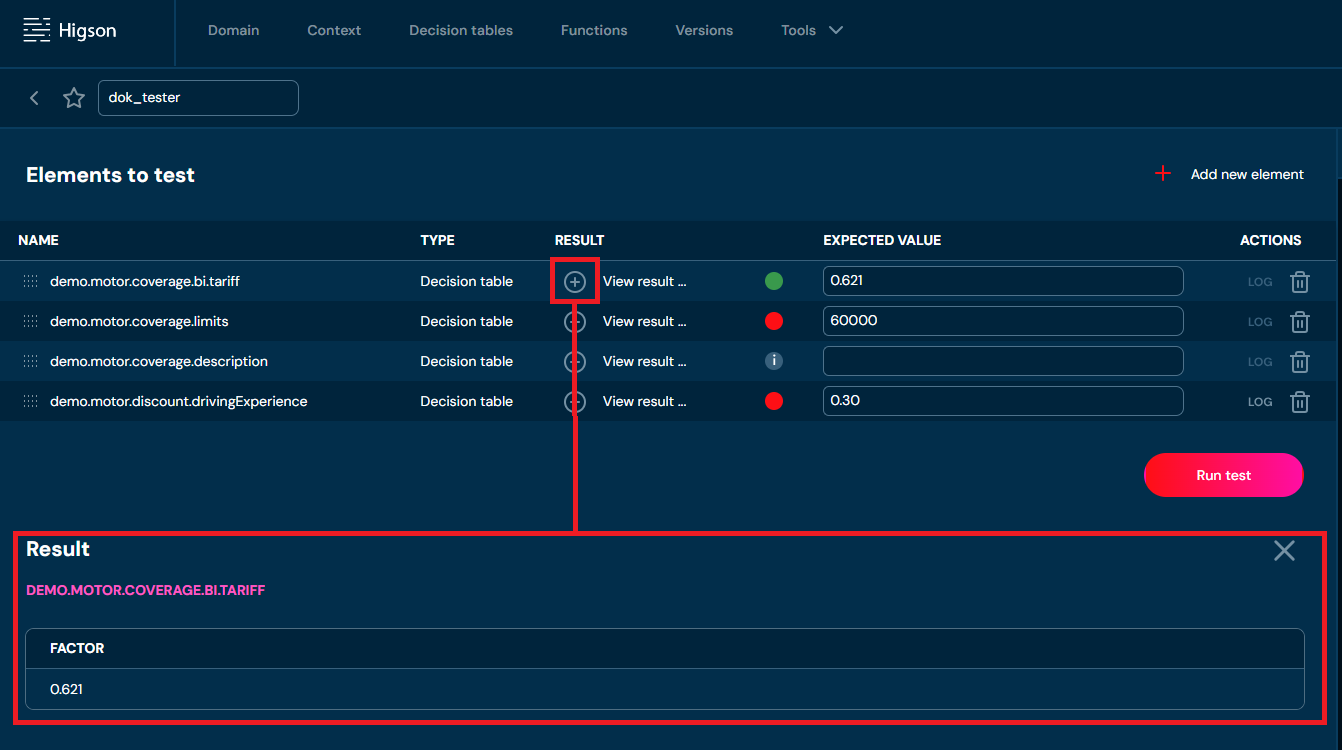
If you want to run a test case with profiler:
- Select drop-down next to Run test button.
- Select one fo the options By count or By duration.
- Fill in the count/duration [s].
- Click Run.
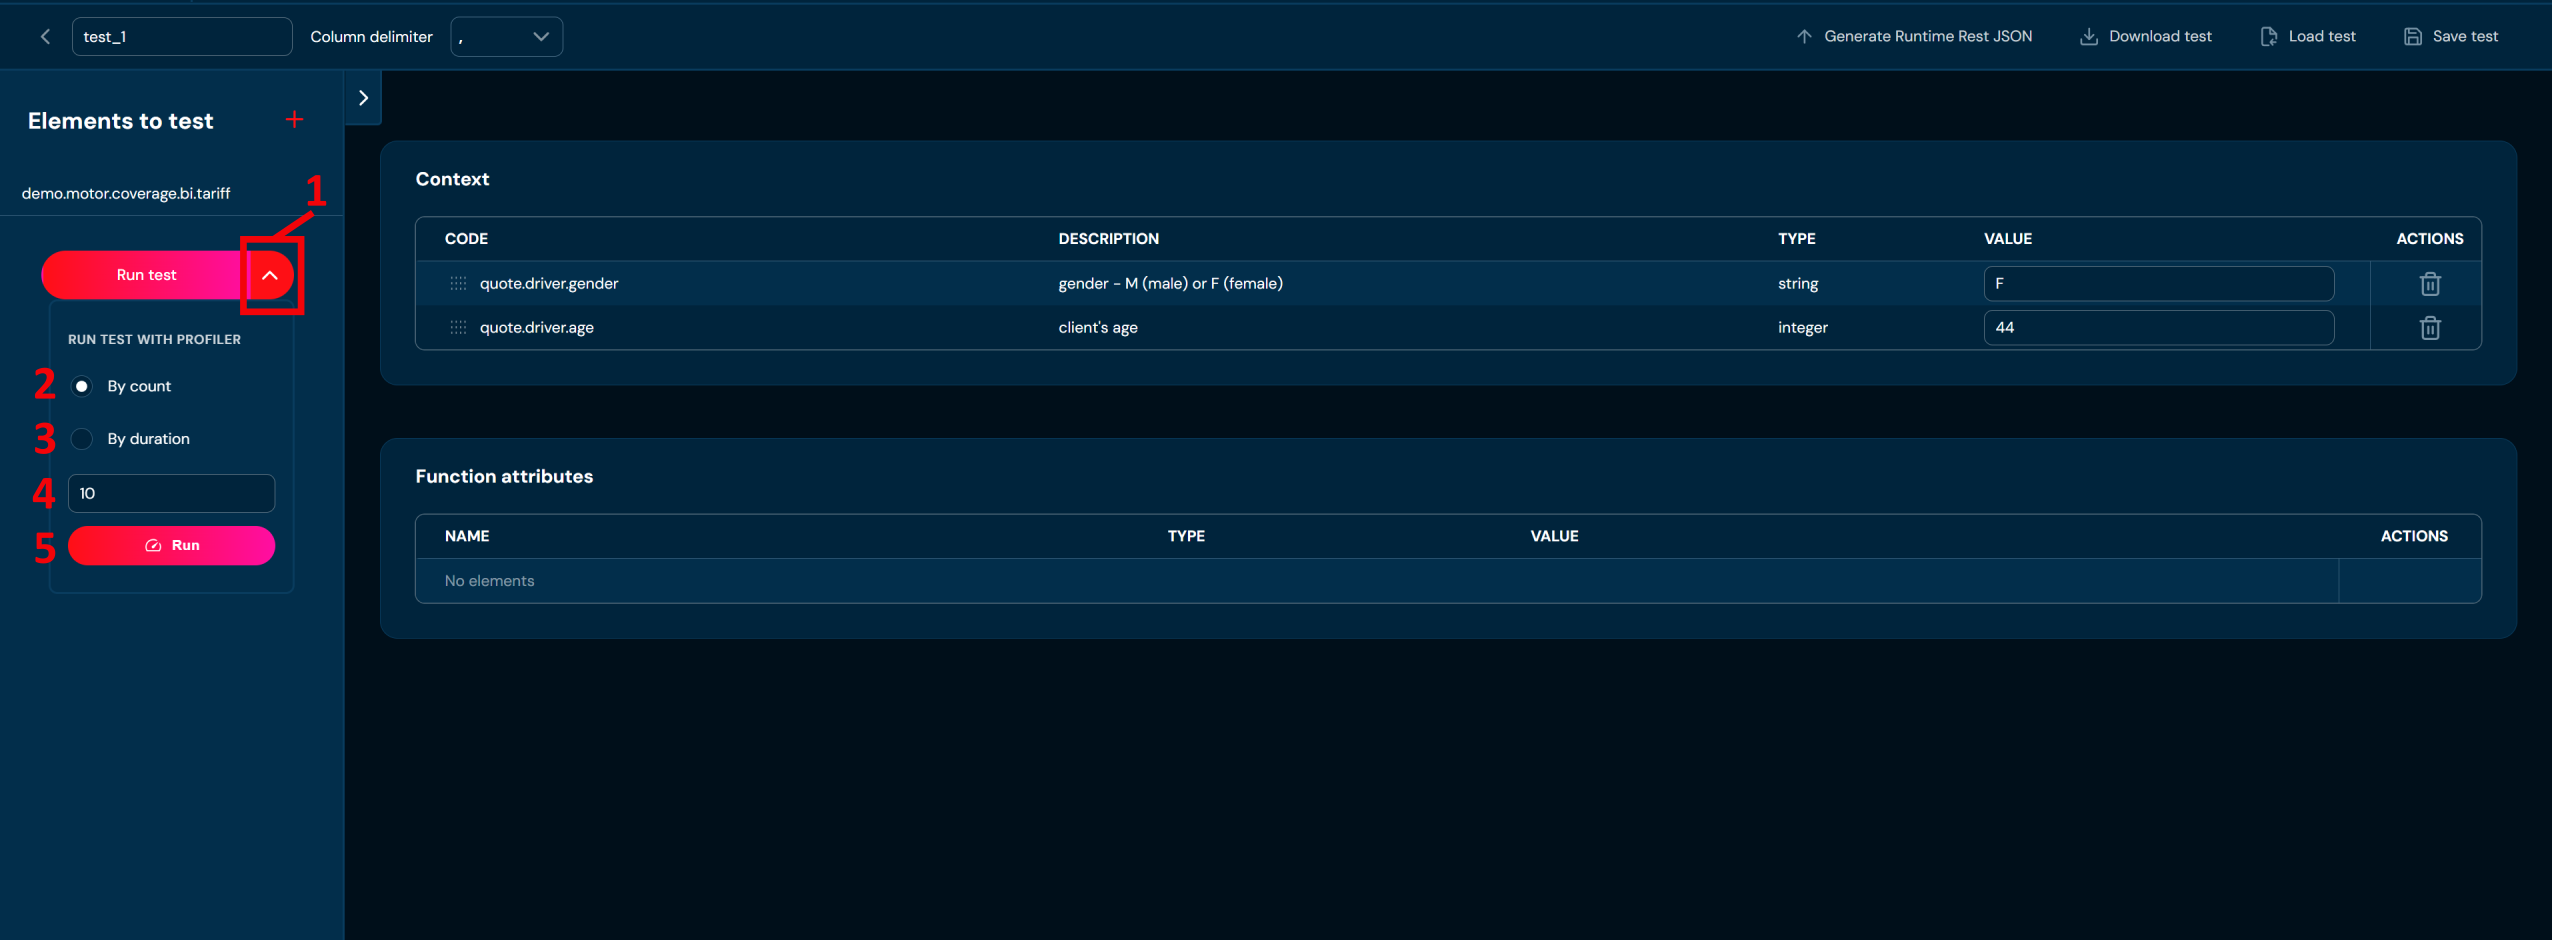
| No. | Name | Description |
|---|---|---|
| 1. | Expand | Click to expand the Run test with profiler options. |
| 2. | By count | Select to run the test a specified number of times. |
| 3. | By duration | Select to run the test for a specified duration in seconds. |
| 4. | Count/Duration | Enter the number of iterations or duration [s] for the profiler run. |
| 5. | Run | Click to start the test with profiler using the selected settings. |
Testing modules allows to test parts or the whole algorithm design in Higson Studio. Using batch tester gives the ability to perform test for series of data, not just a singular set. Create and save mass tests to control how changes it the algorithm influence the results. Each batch test is created from unit test (design in singular tester). To learn more about the Unit tests read the Tester chapter.
To go to batch tester, select Tools/Batch Tester in Main Toolbar.
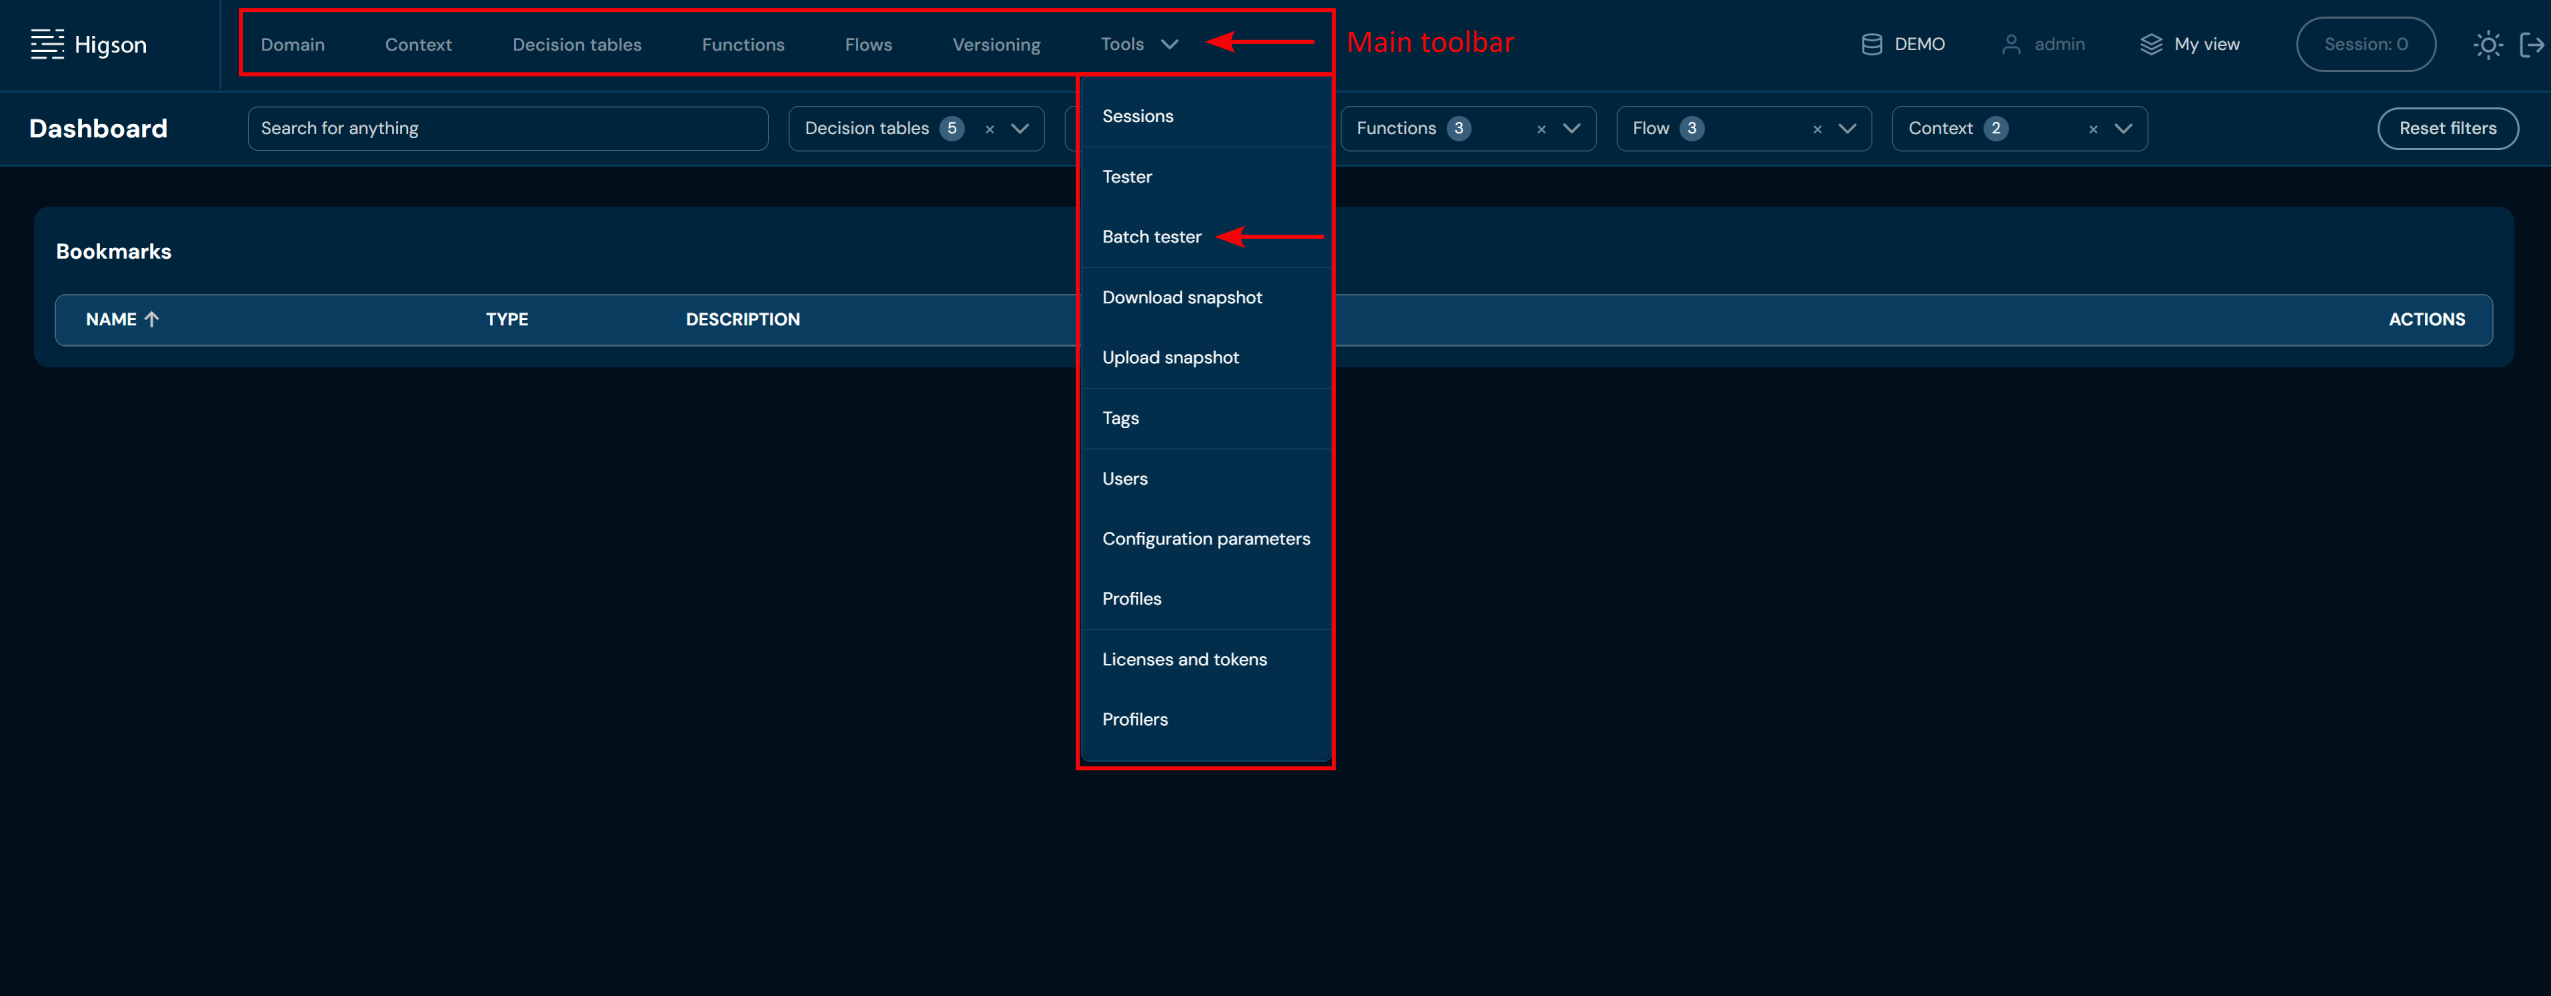
You will see the tile view of all saved batch tests
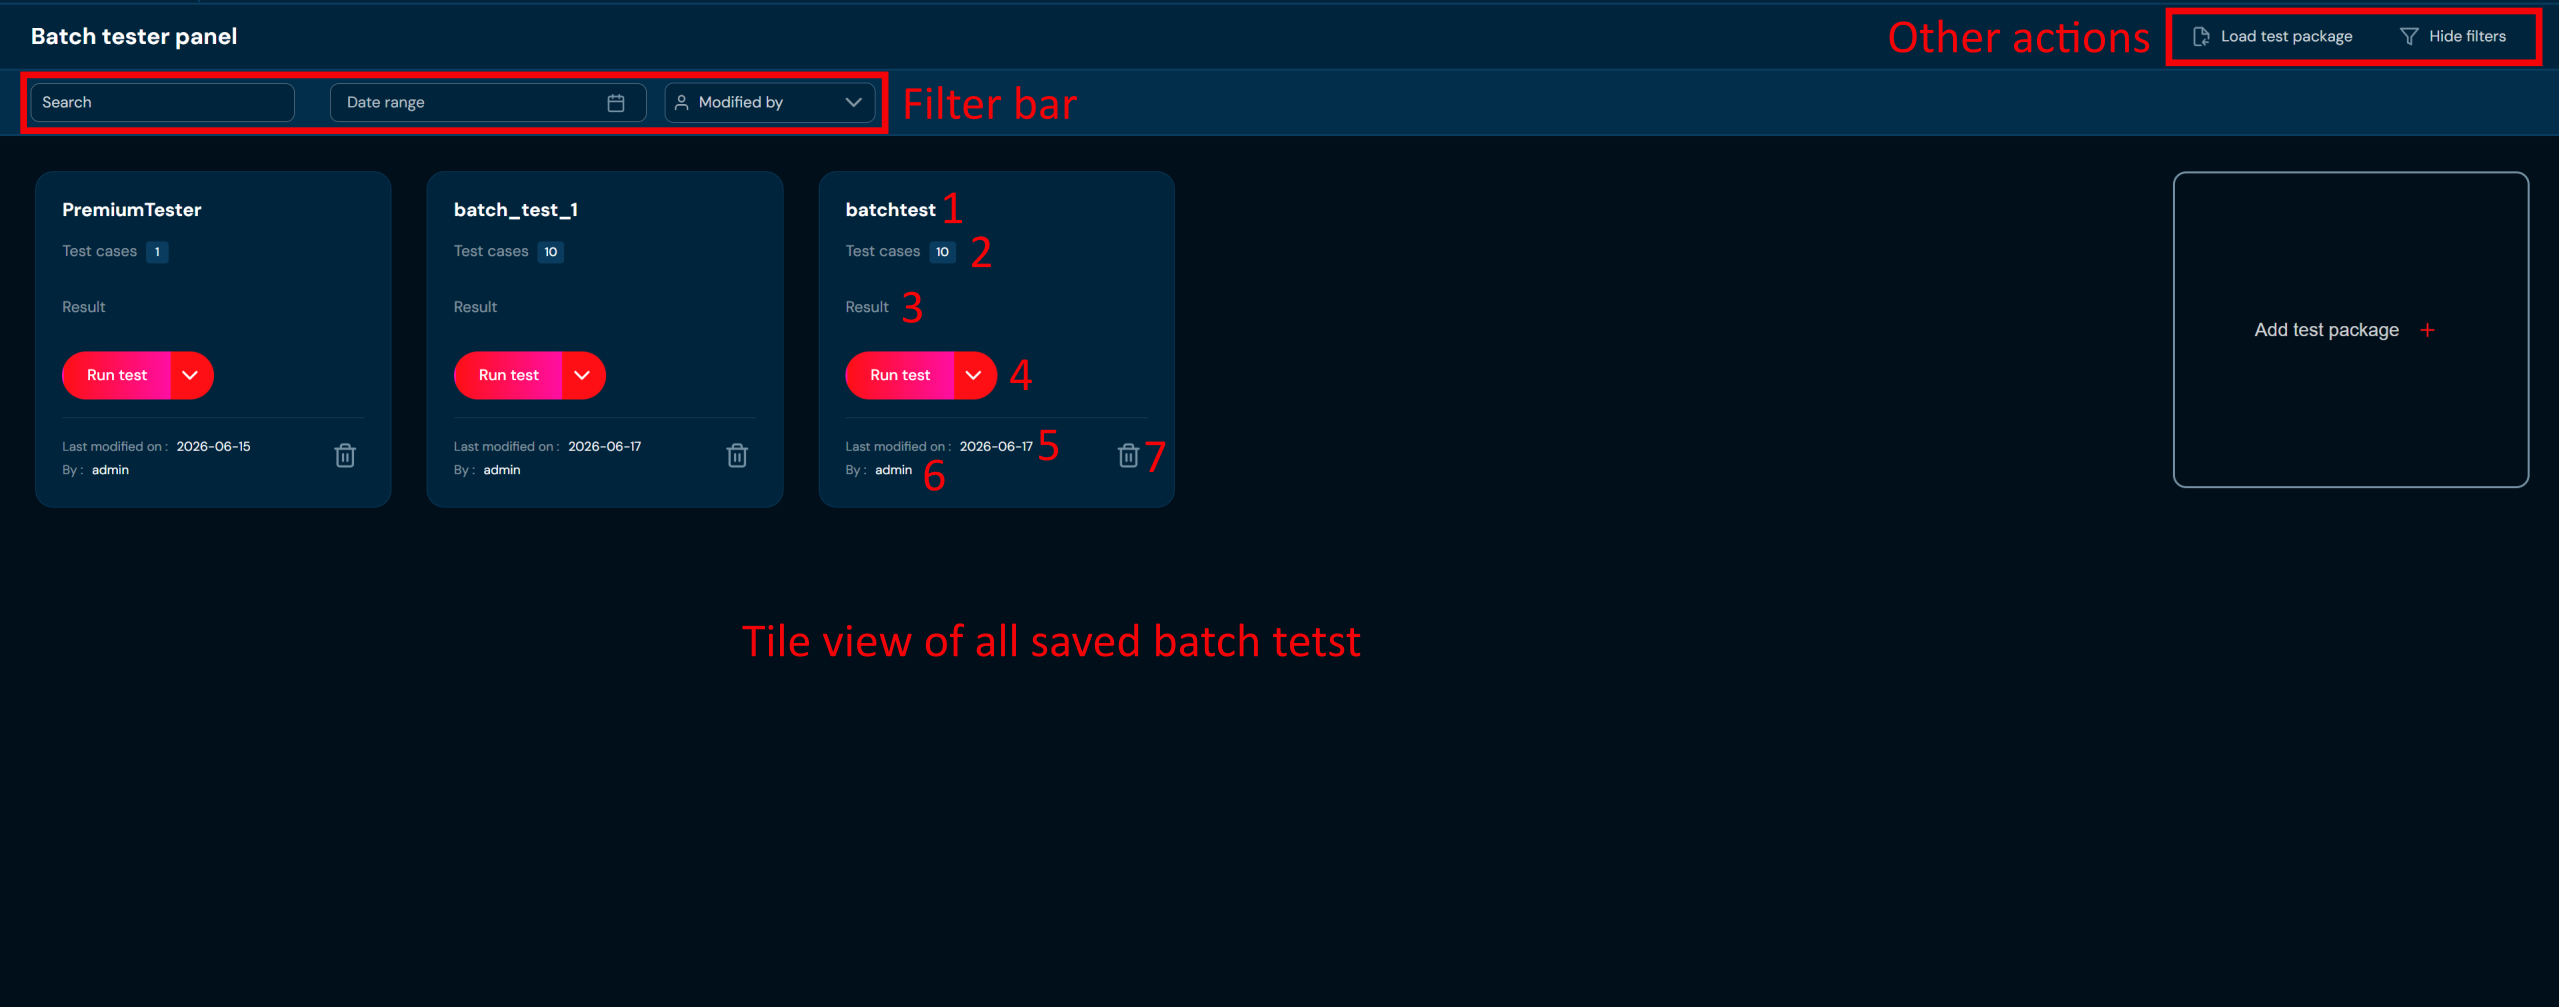
Each tile represents a batch test saved in the environment. Each batch test is described by the following information:
| No. | Item | Description |
|---|---|---|
| 1. | Test Name | Batch test name. Each batch test should have a unique name. |
| 2. | Test cases | Number of test cases in the batch test. |
| 3. | Result | Information about the status of the result is shown after running the batch test. |
| 4. | Run test | Button to execute batch test. |
| 5. | Modification date | Last modification date. |
| 6. | Modified by | Information on the user who modified the batch test. |
| 7. | Delete | Delete action. |
Additionally you can use available actions:
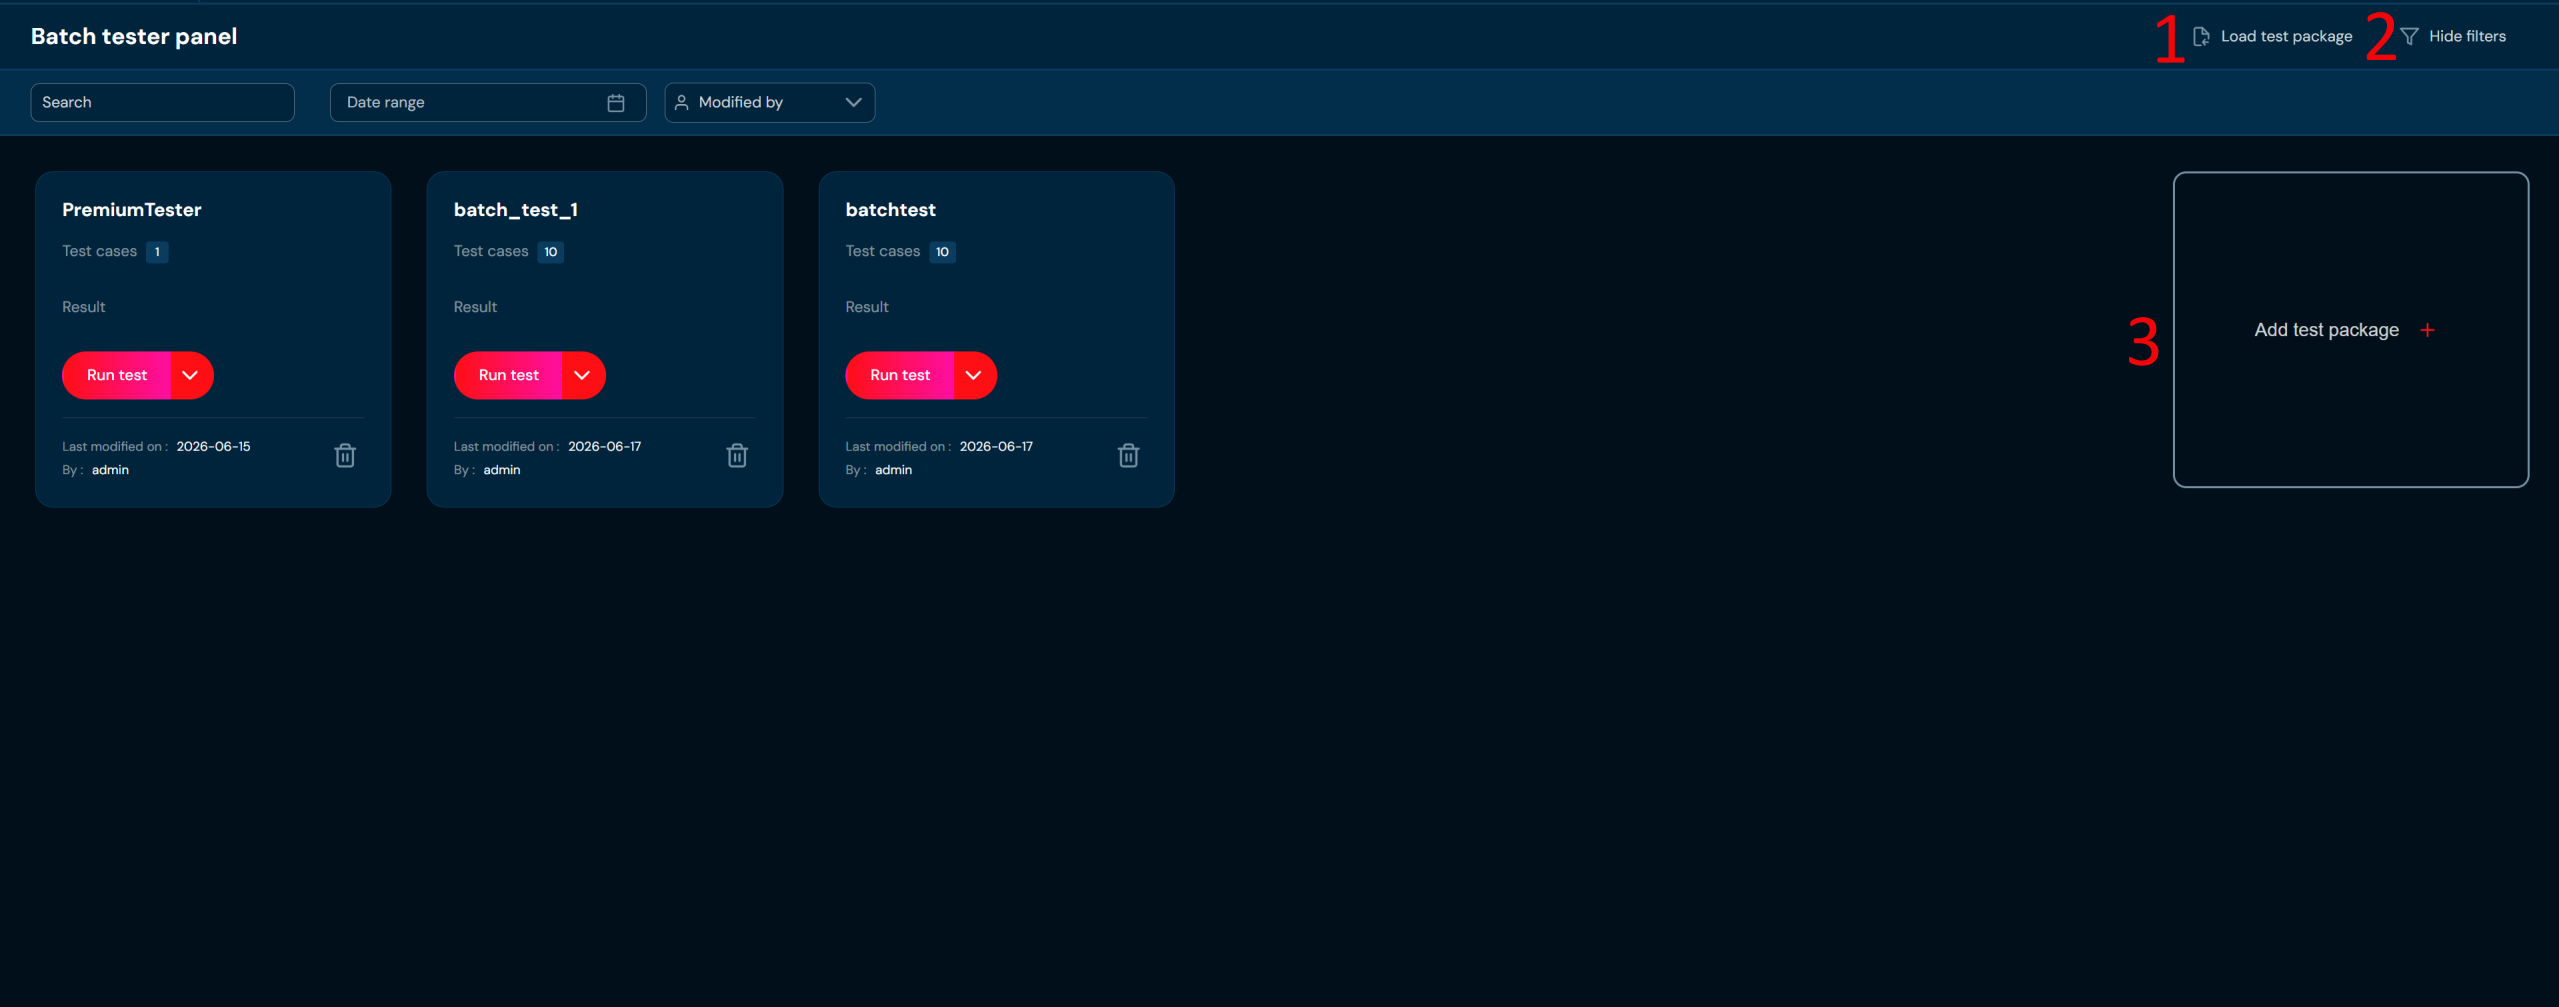
| No. | Action | Description |
|---|---|---|
| 1. | Load test package | Allows to load batch test from XLSx file |
| 2. | Hide/Show filters | Hides or reveals Filters bar accordingly. If Filter bar: - is visible, then action Hide filters is available. - is hidden, then action Show filters is available. |
| 3. | + Add test package | Opens a batch test creator. |
Use filters to search for preferred batch test:

| No. | Filter name | Description |
|---|---|---|
| 1. | Search text field | Filter by any string provided by user. |
| 2. | Date range | Filter by last change date in format YYYY/MM/DD-YYYY/MM/DD . |
| 3. | Modified by | Filter by user who last modified the batch test. |
Batch Tester Creator#
To create new batch test unit test must already exist. You can create unit test using the Tester. When this condition is met you can start creating batch tests based on existing unit tests. To go to the batch test creator you need to click on the Add test package action.
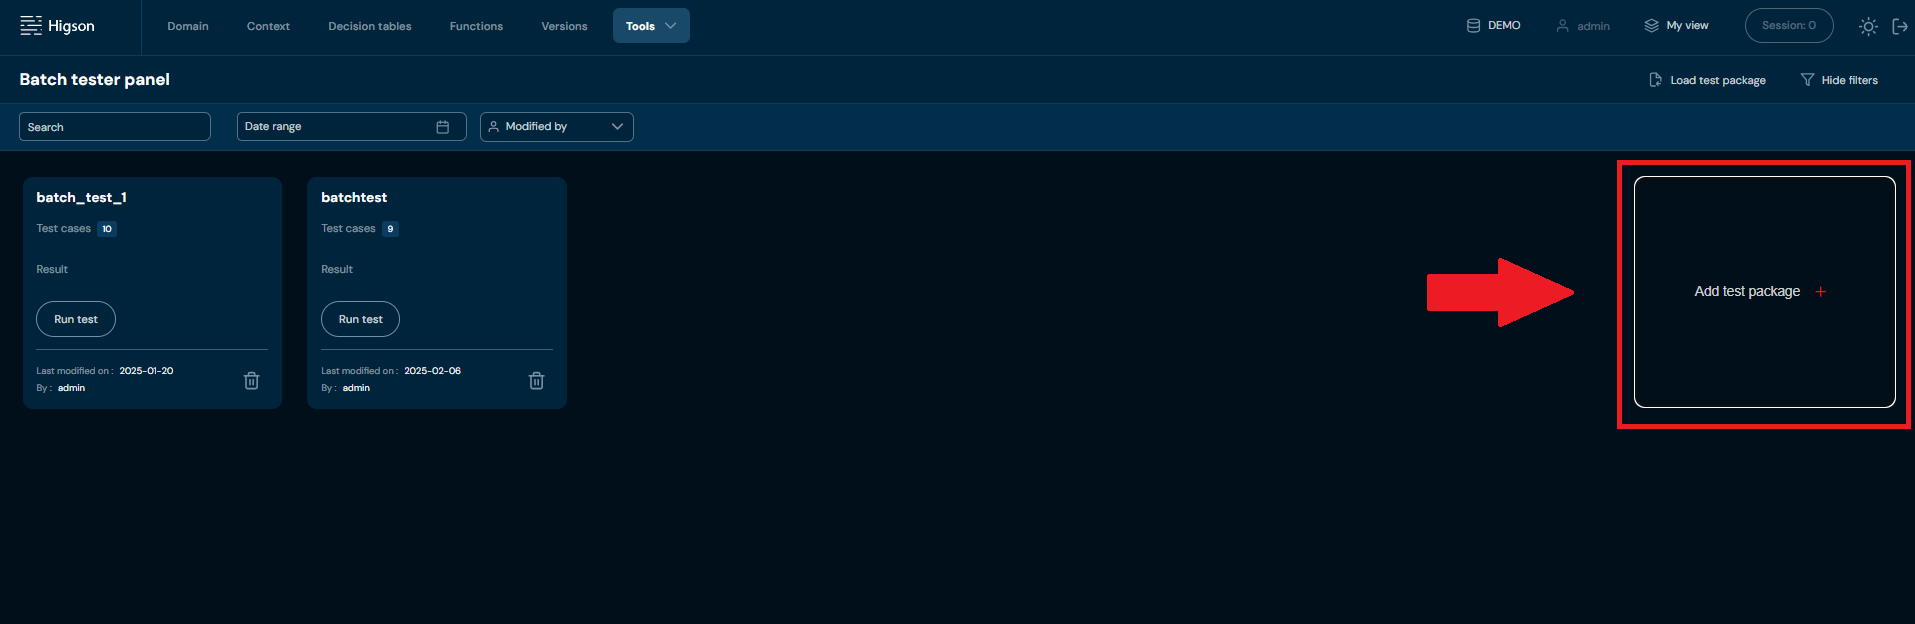
The Batch Test creator:
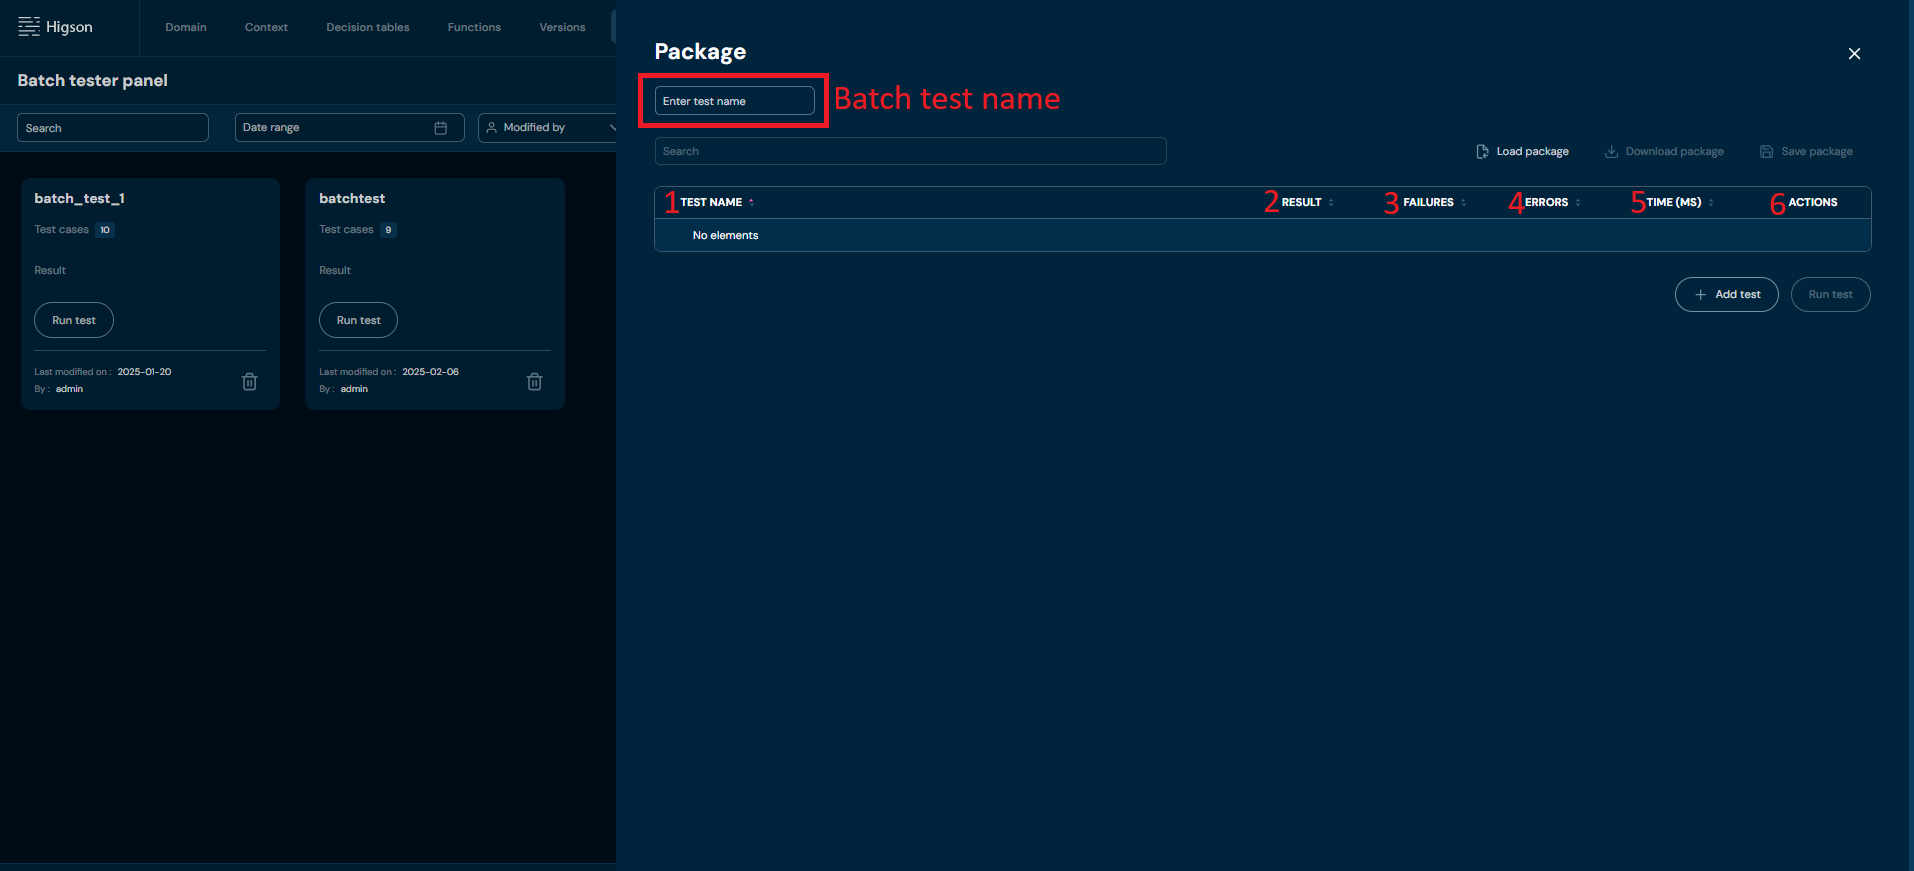
For each unit test, which creates batch test, six information is given:
| No. | Column name | Description |
|---|---|---|
| 1. | Test Name | Full test name. Test name is loaded from selected unit test. Test name can be changed (or added) through import of the XLSx file. |
| 2. | Result | Test case status provided by comparison of the evaluated value with expected value. |
| 3. | Failures | Number of failures within unit test case. Where evaluated value differs from expected value. |
| 4. | Errors | Number of errors which occurred during the unit test. |
| 5. | Time (ms) | Time taken to perform the unit test. |
| 6. | Actions | List of quick access actions. Currently only Remove action (bin icon) is available here. Remove action deletes desired unit test. |
By those the list of unit test can be sorted if needed. In addition, the following actions are available on the batch tester wizard screen:
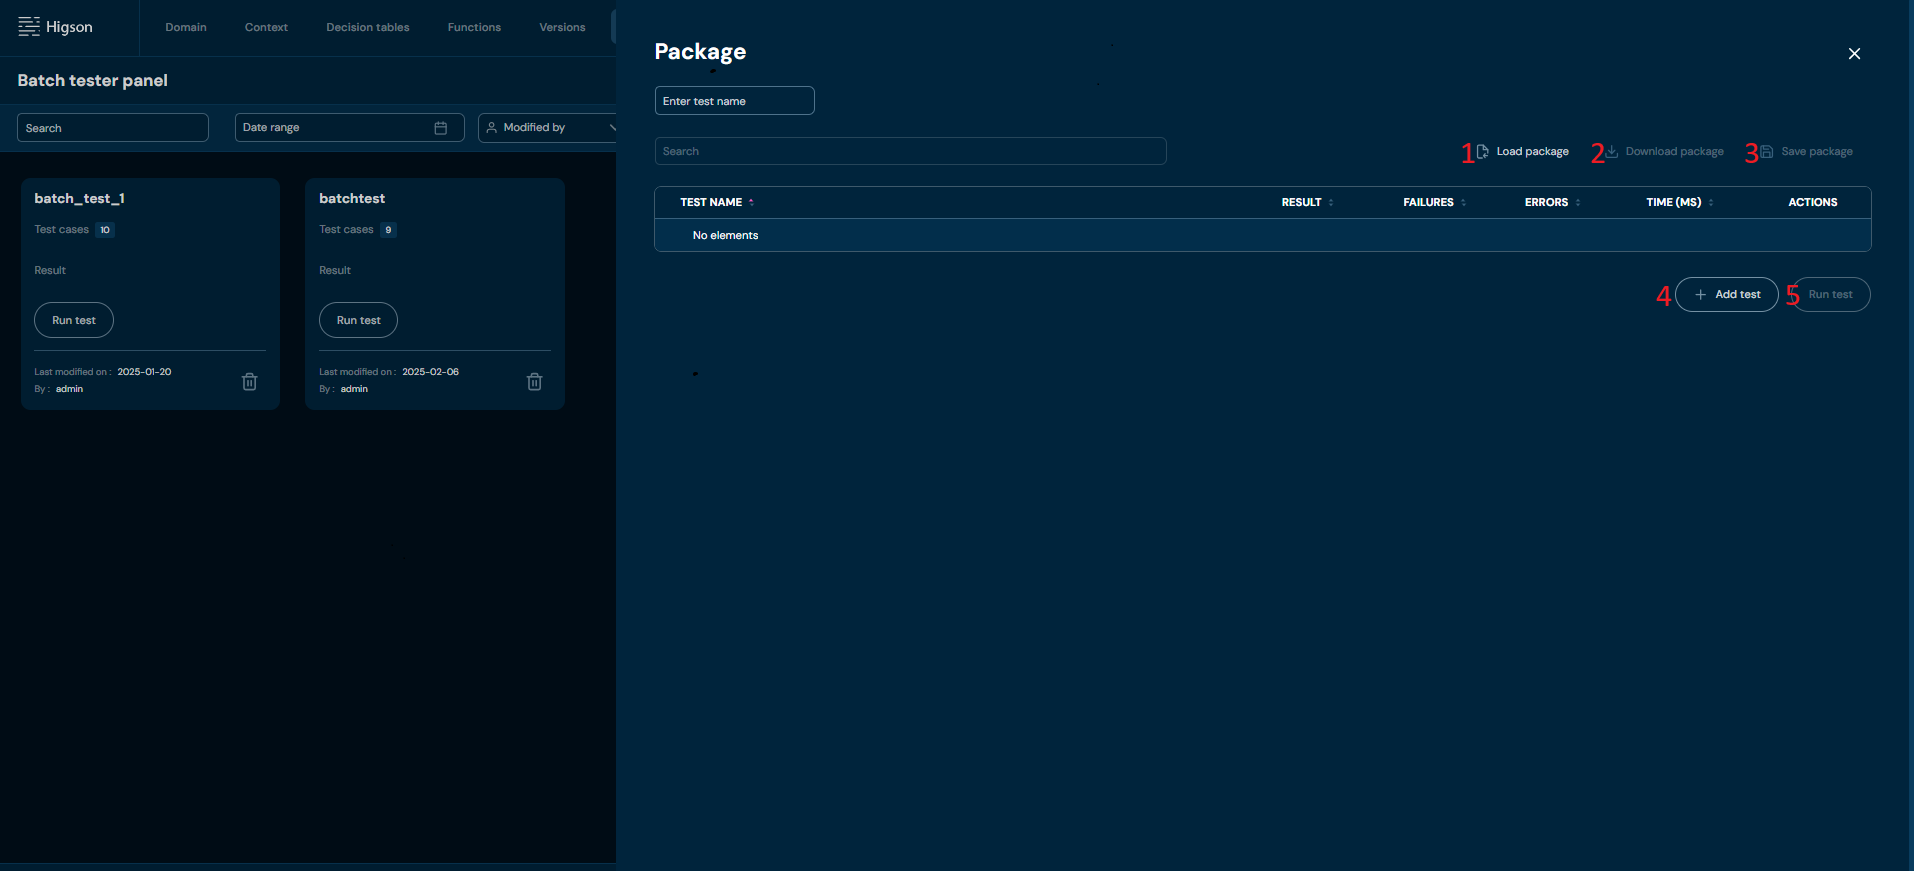
| No. | Action | Description |
|---|---|---|
| 1. | Load package | Allows to load batch test from XLSx file. |
| 2. | Download package | Allows to download batch test from XLSx file. |
| 3. | Save package | Saves batch test for further use. |
| 4. | + Add test | Opens a batch test creator. |
| 5. | Run test | Runs batch test, performs all unit test cases added to viewed batch test. Every batch test can be run (even not saved). |
Creating a Batch Test#
To create new batch test, follow these steps:
-
Go to Main Toolbar
a. Select Tools
b. in Tools select Batch Tester
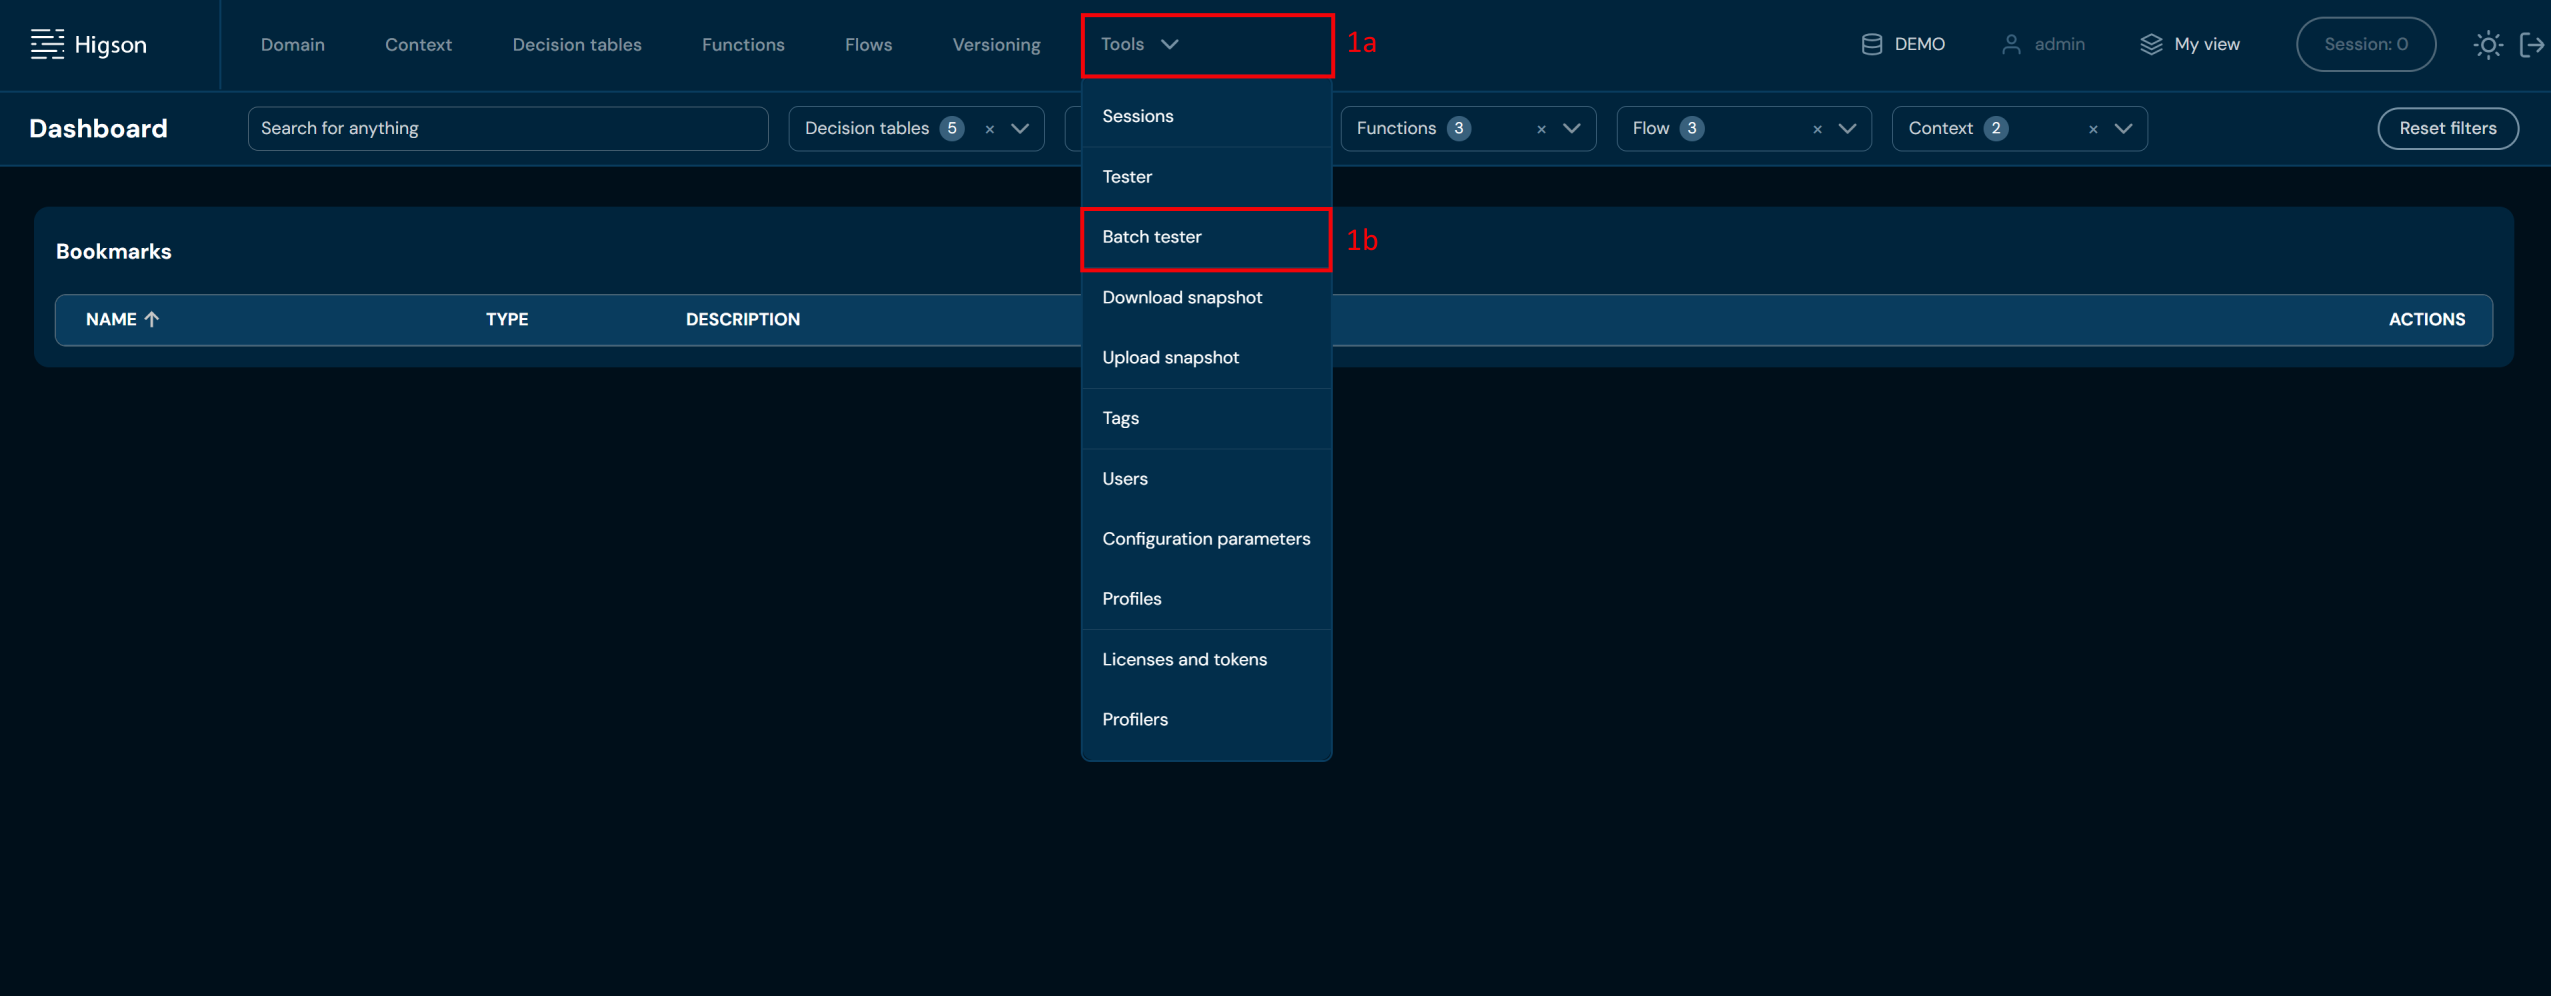
-
Click “Add test package”
-
Your first action should be filling the Name for the Batch Test. Name can contain only characters from collection a-z; A-Z; 0-9; “-”; “_”.
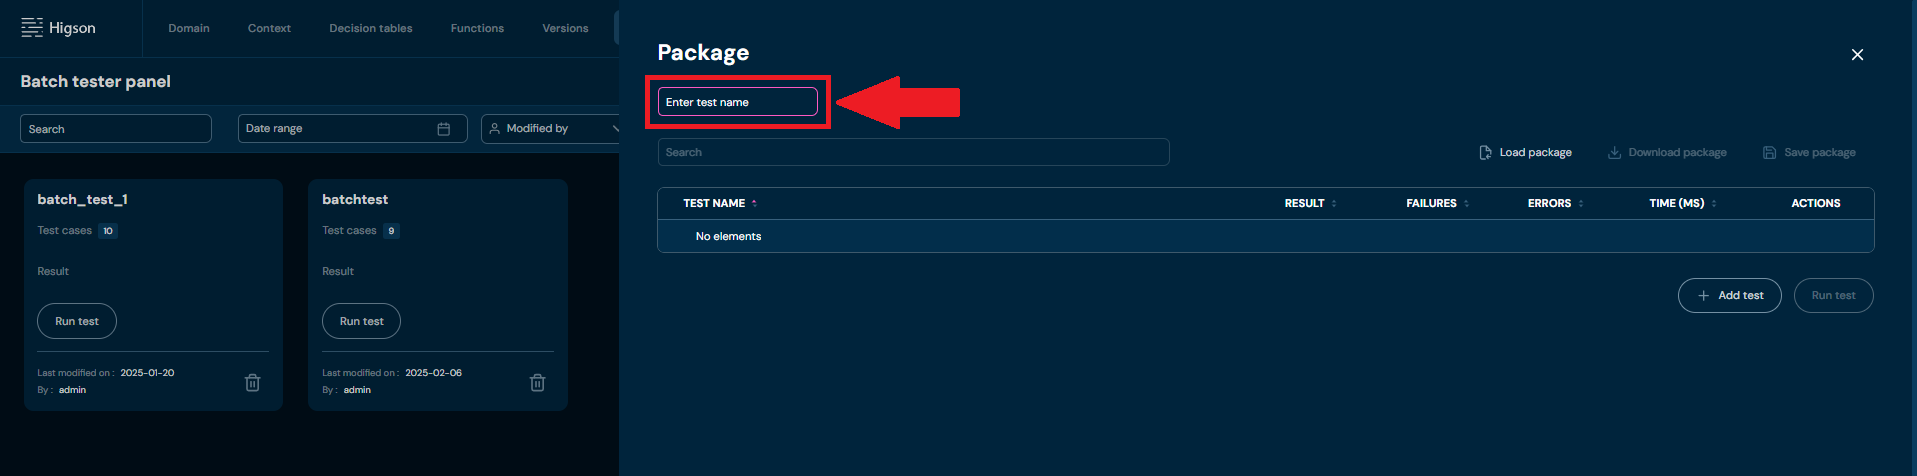
-
Next click +Add test
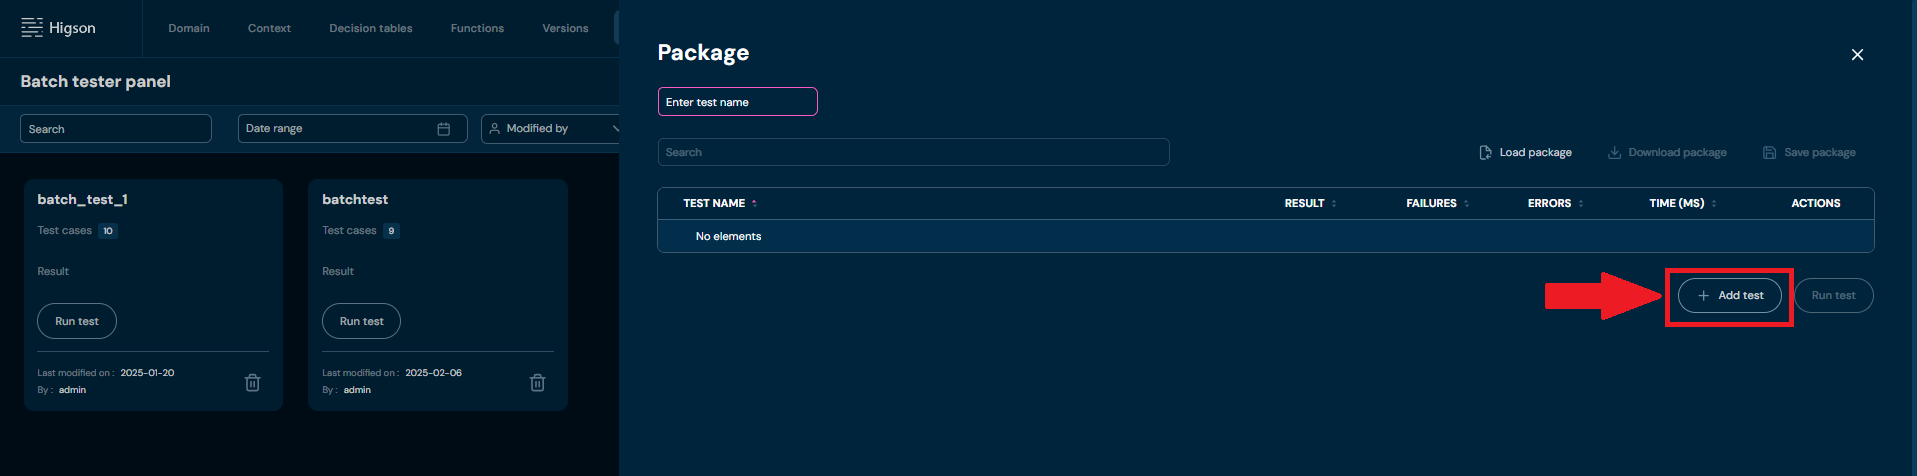
a. Select unit test you wish to base the batch test on
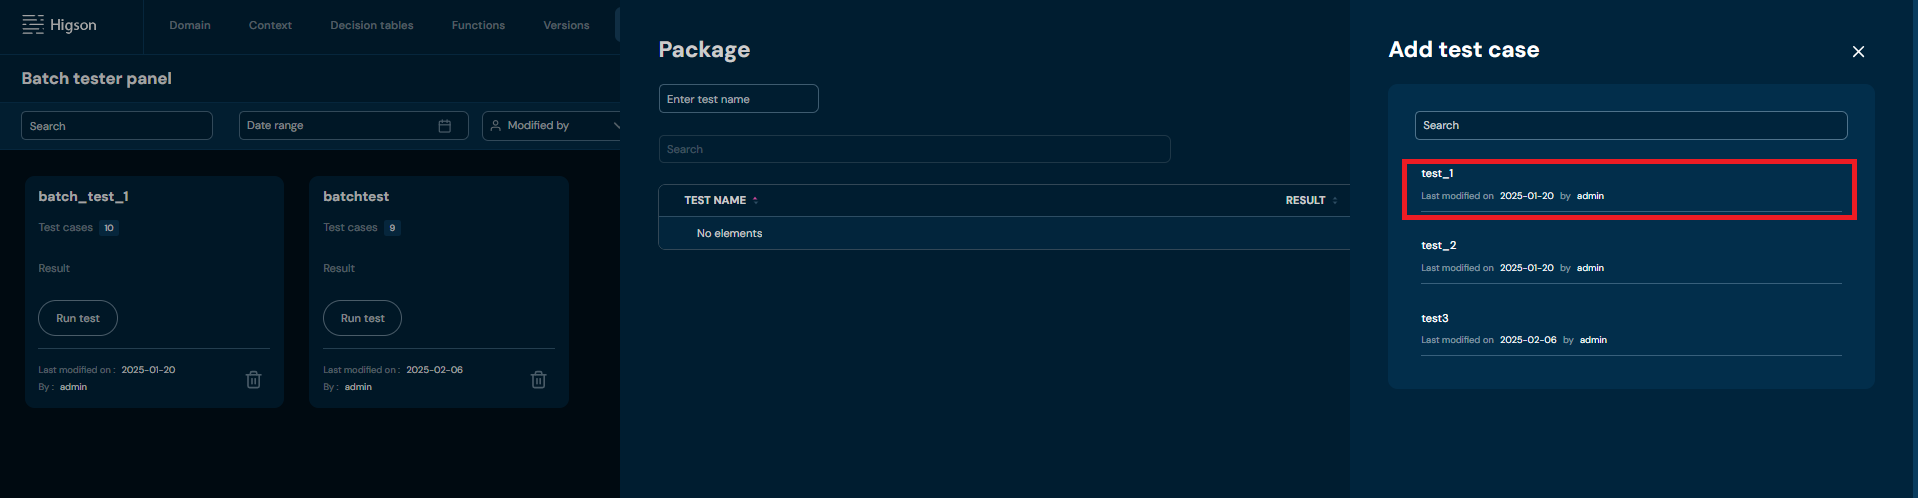
b. If test loaded correctly to batch tester it will show on the list of the unit tests
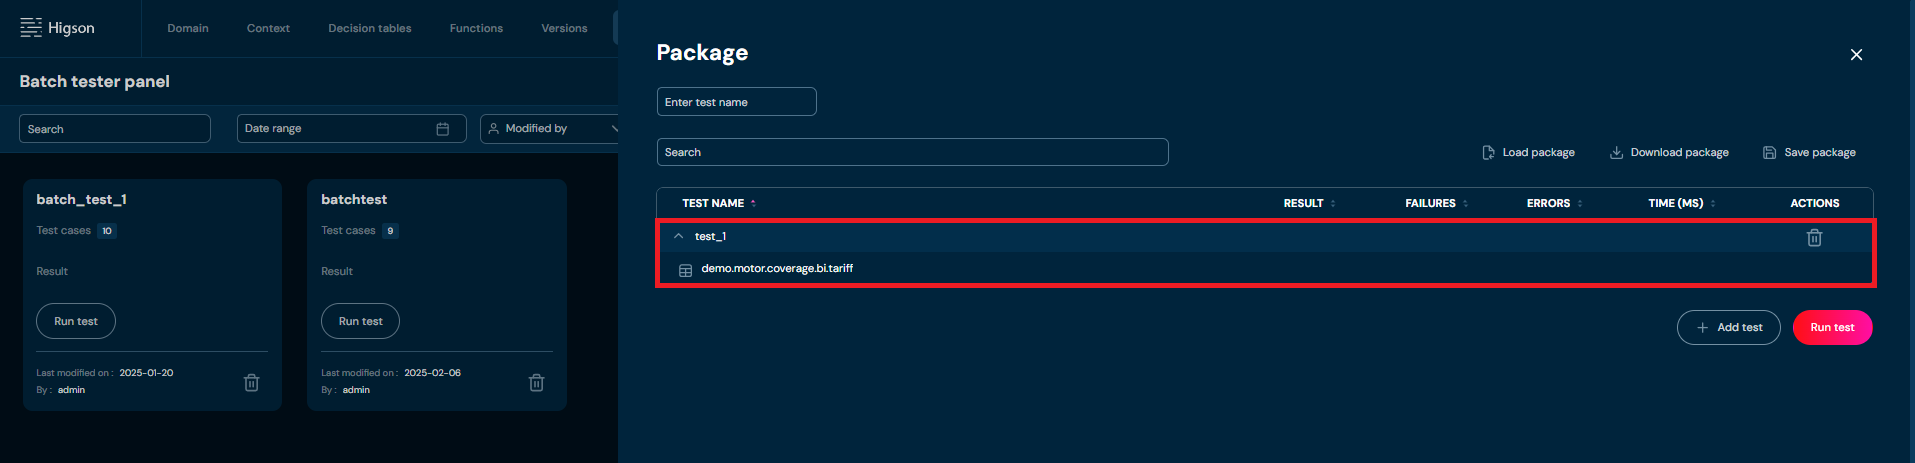
-
Click on Run test to get the results
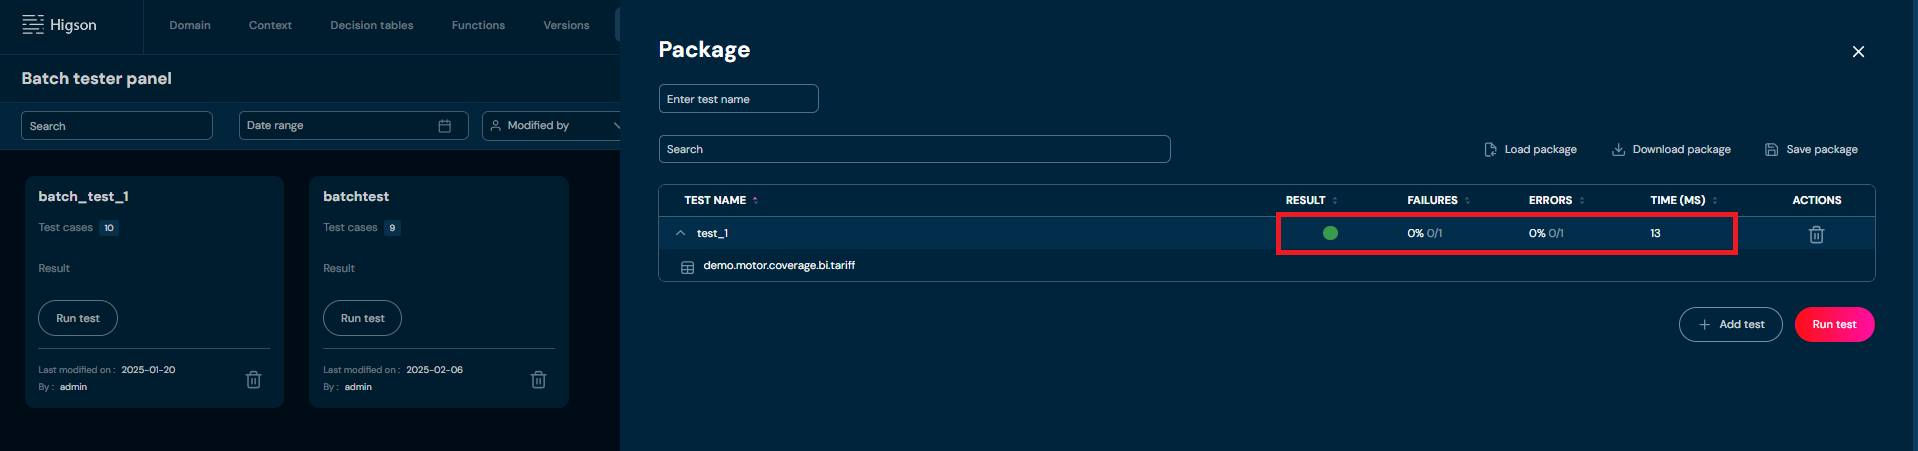
-
Now, when the template has been provided you can Download the batch test to your computer as XLSx file. Click on Download package

-
Open the XLSx file
a. The template should look similar to this

b. add data series according to your needs
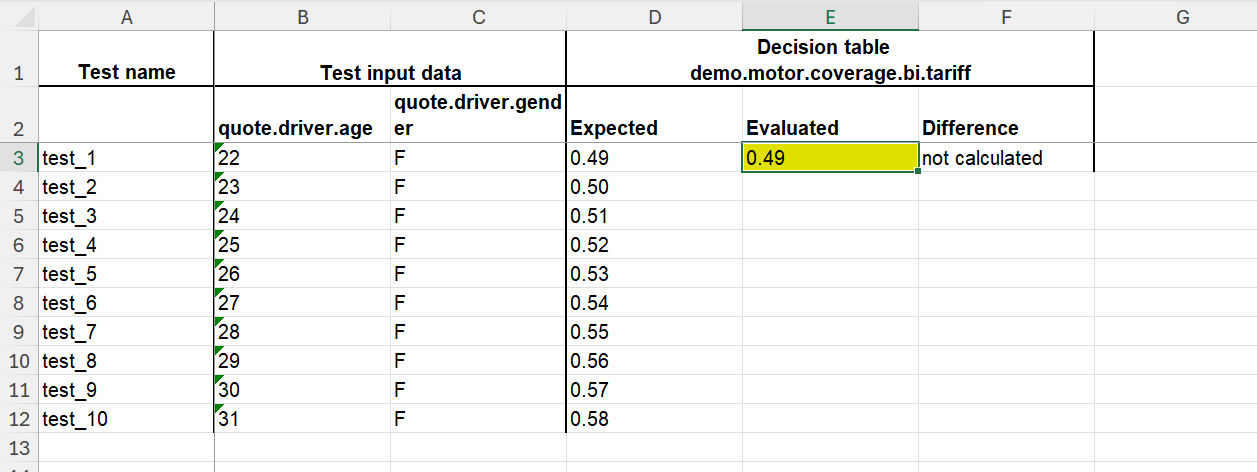
c. save the edited file
-
Load the batch test:
a. Click on Load package
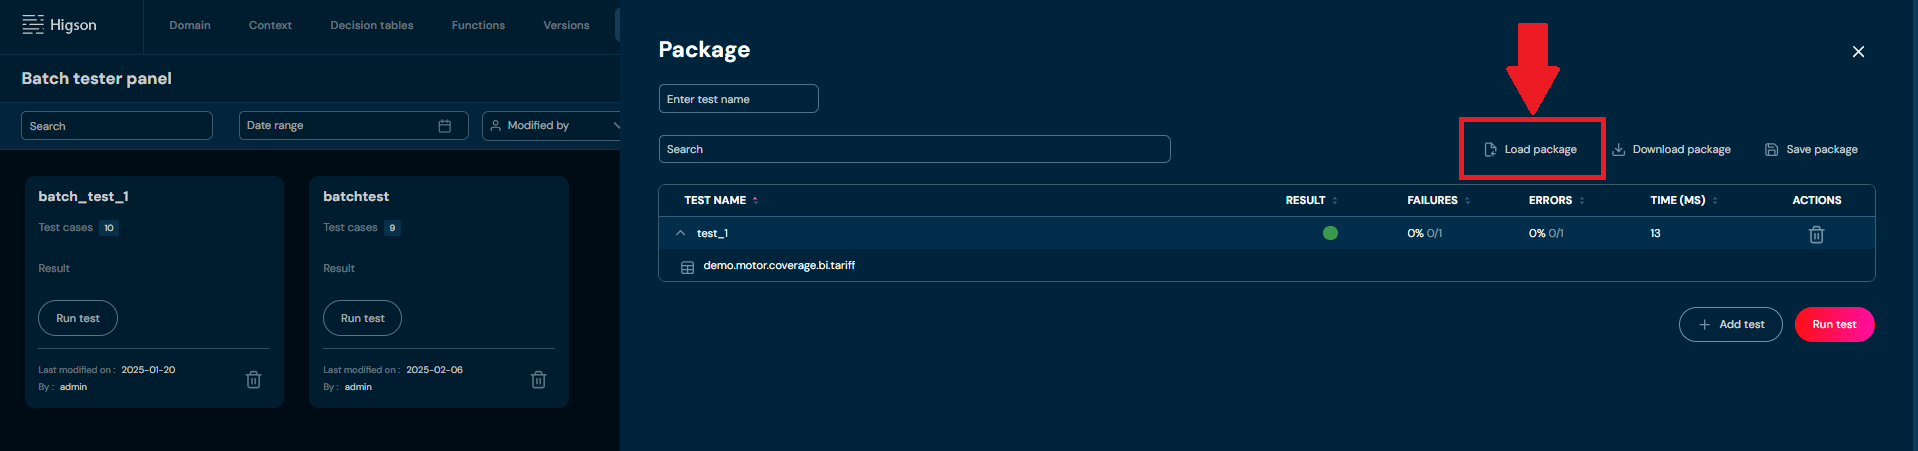
b. Load the updated file from your computer
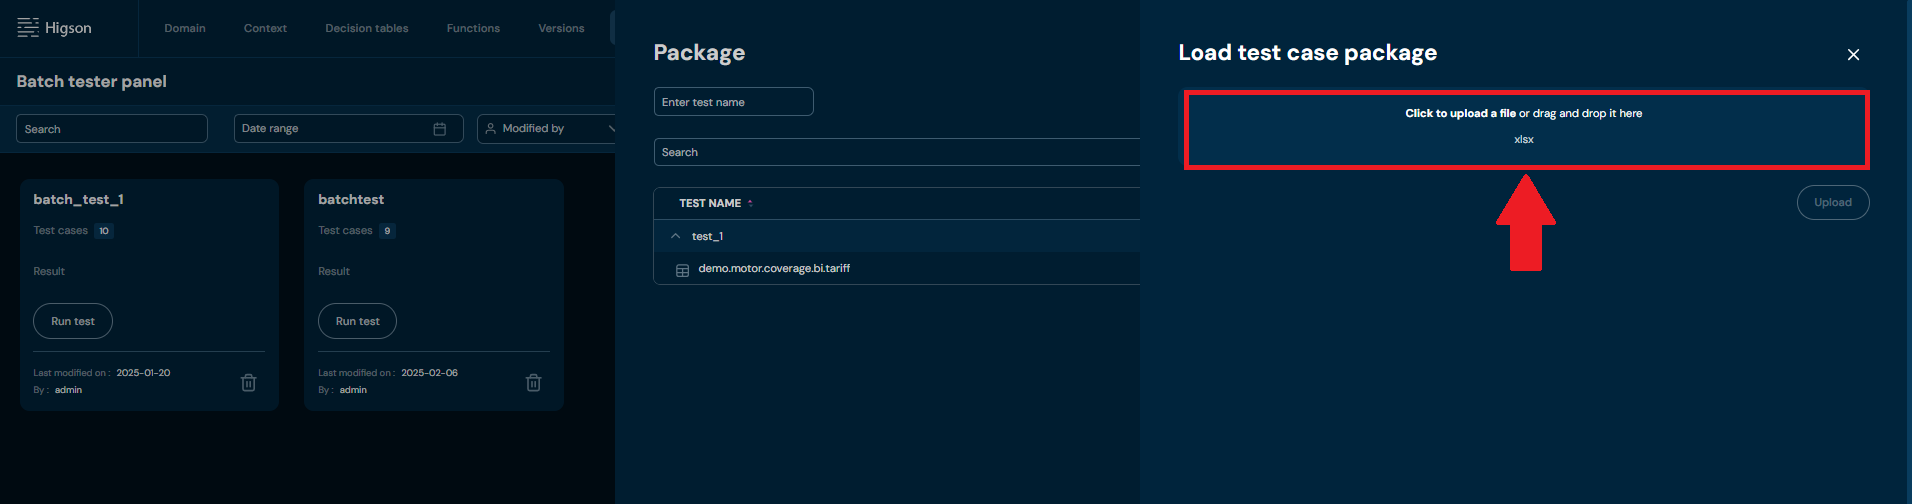
c. Click Upload
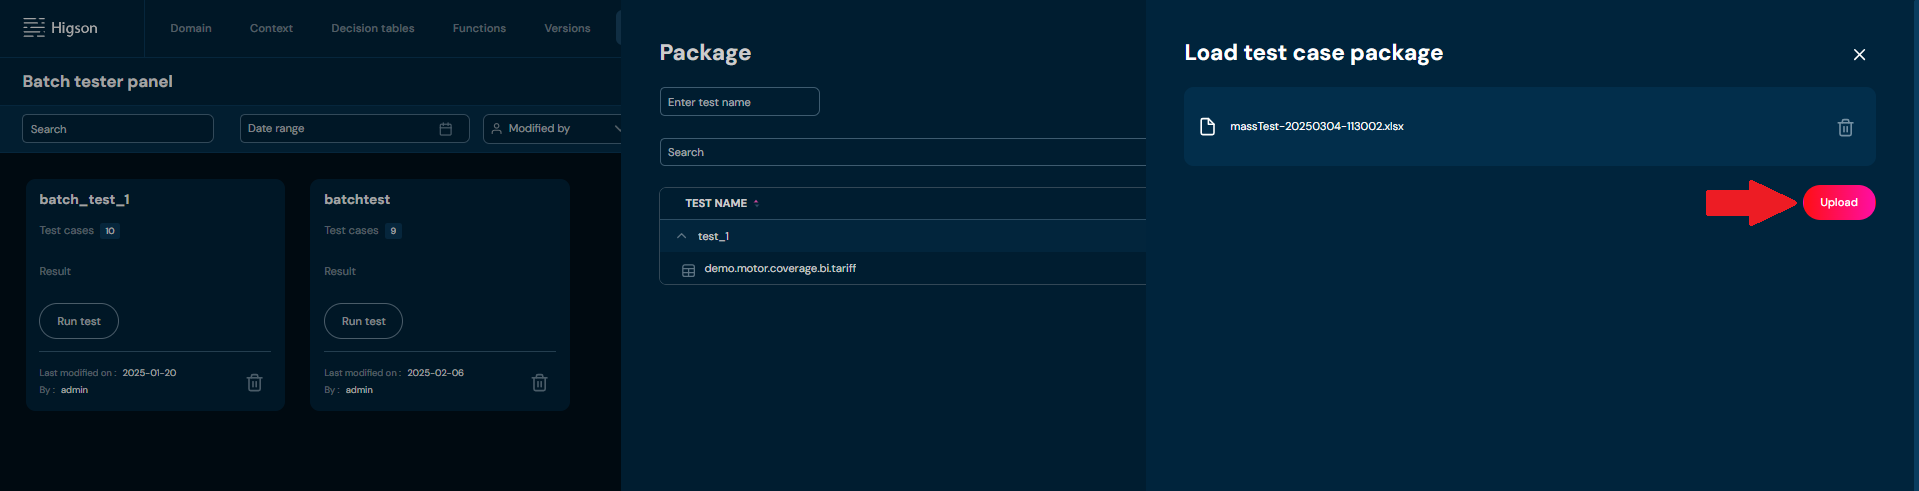
-
When the file is loaded correctly and you will click Run test again the result of all loaded test cases should show
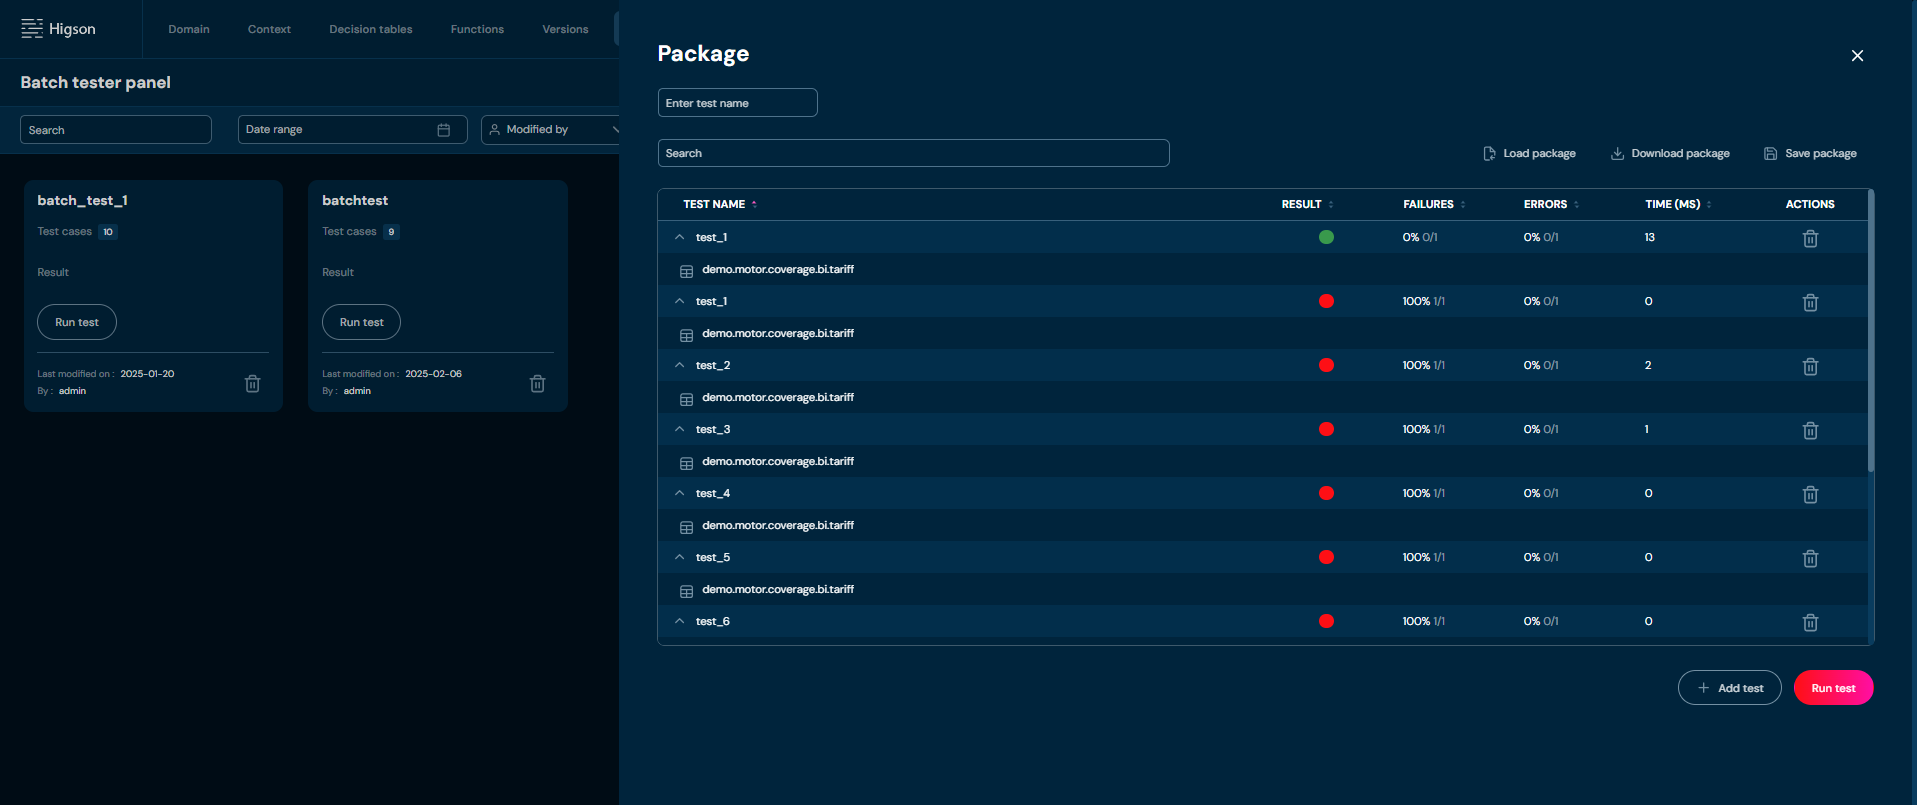
-
Lastly, to be able to get back to created batch test case you must save it by clicking : Save package:
a. add the name for the batch test, if you have not added it yet. For Batch test name allowed characters are a-z, A-Z and symbols: -_
b. click on Save package
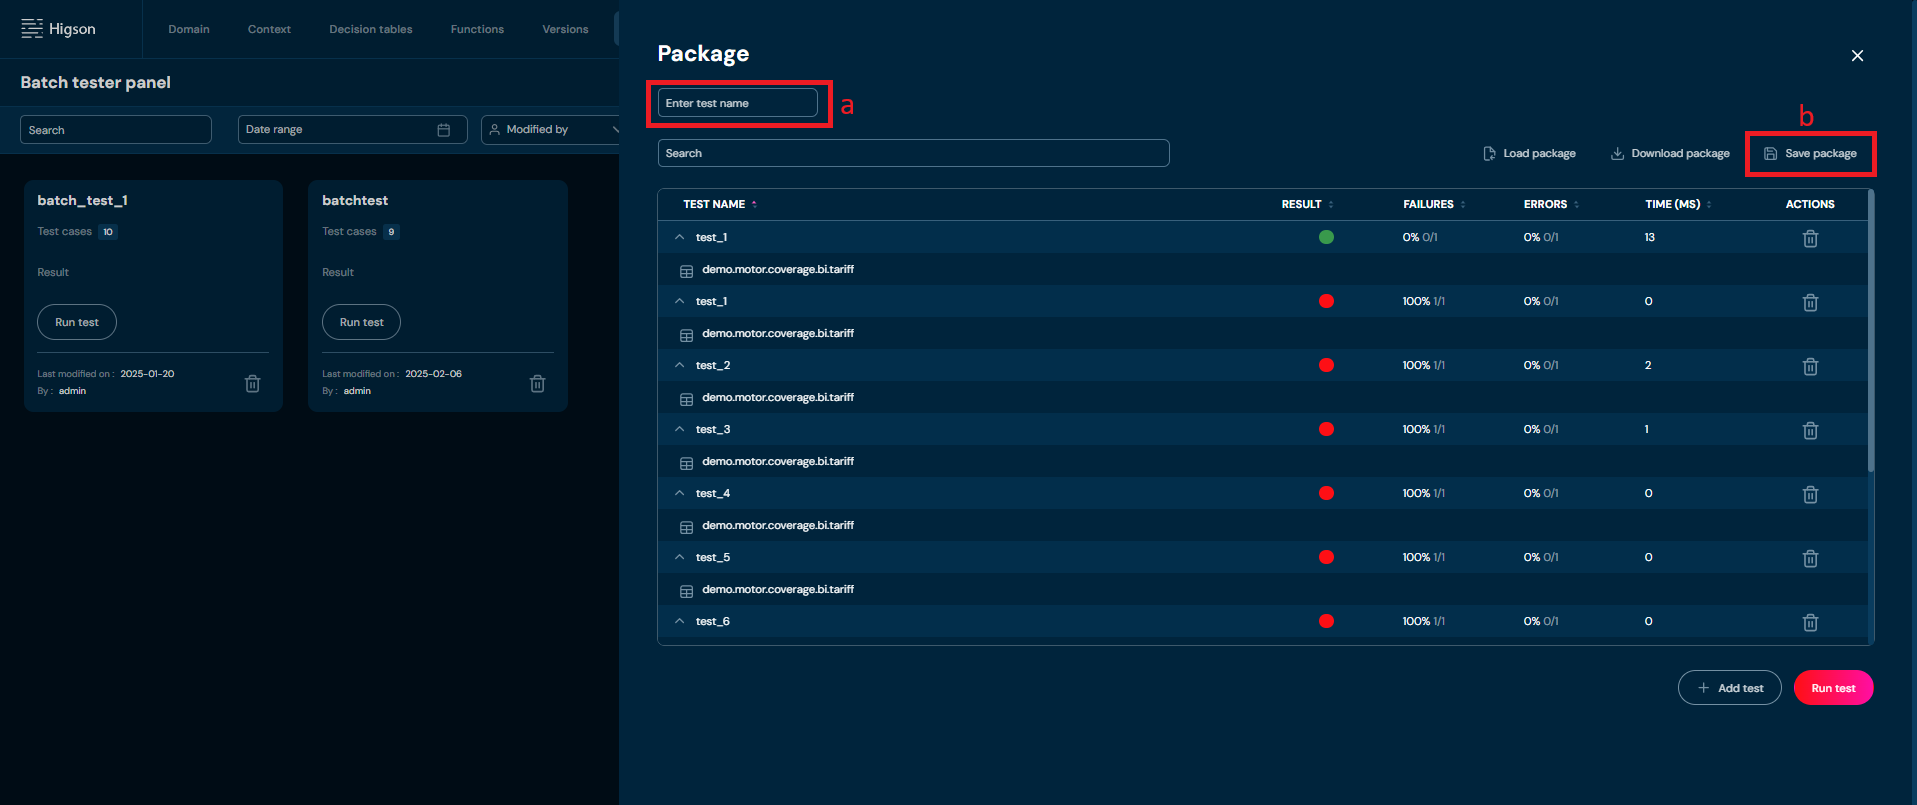
Load a Batch Test#
You can load test package in two ways. First from the Batch Tester Panel:
-
Click on Load test package:
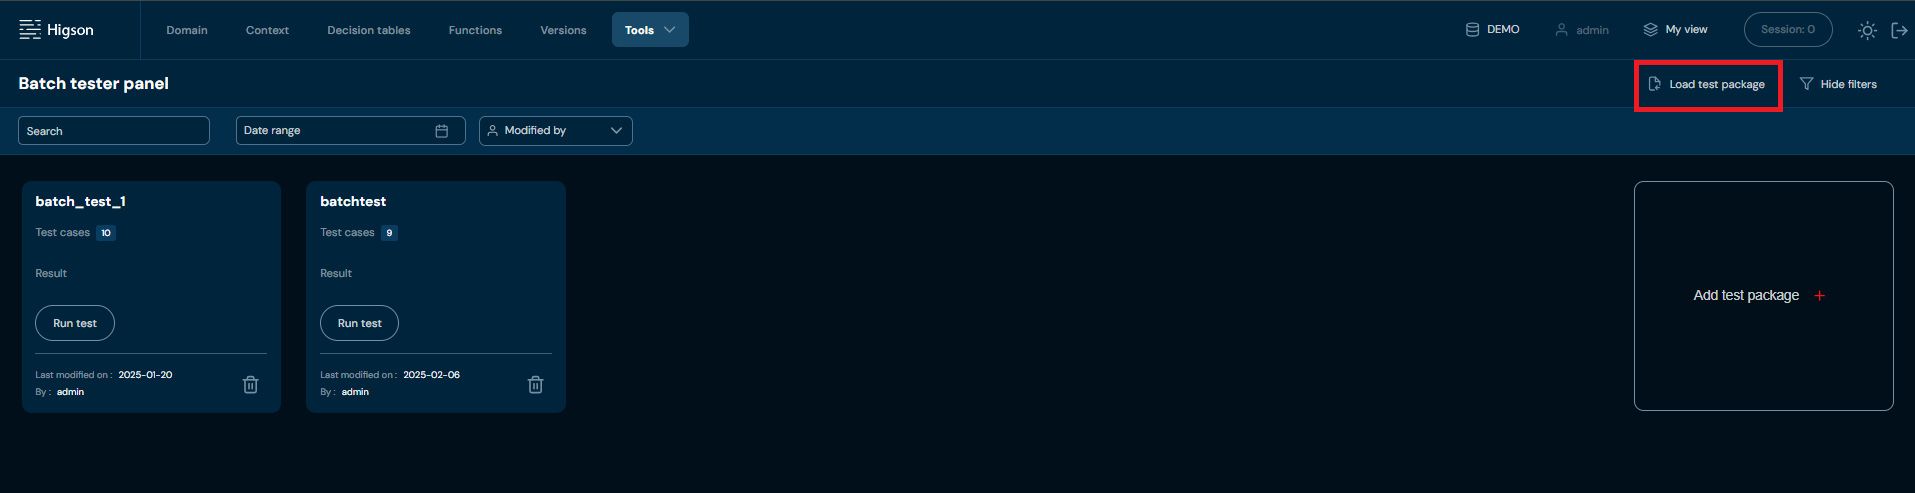
-
Load the file from your computer
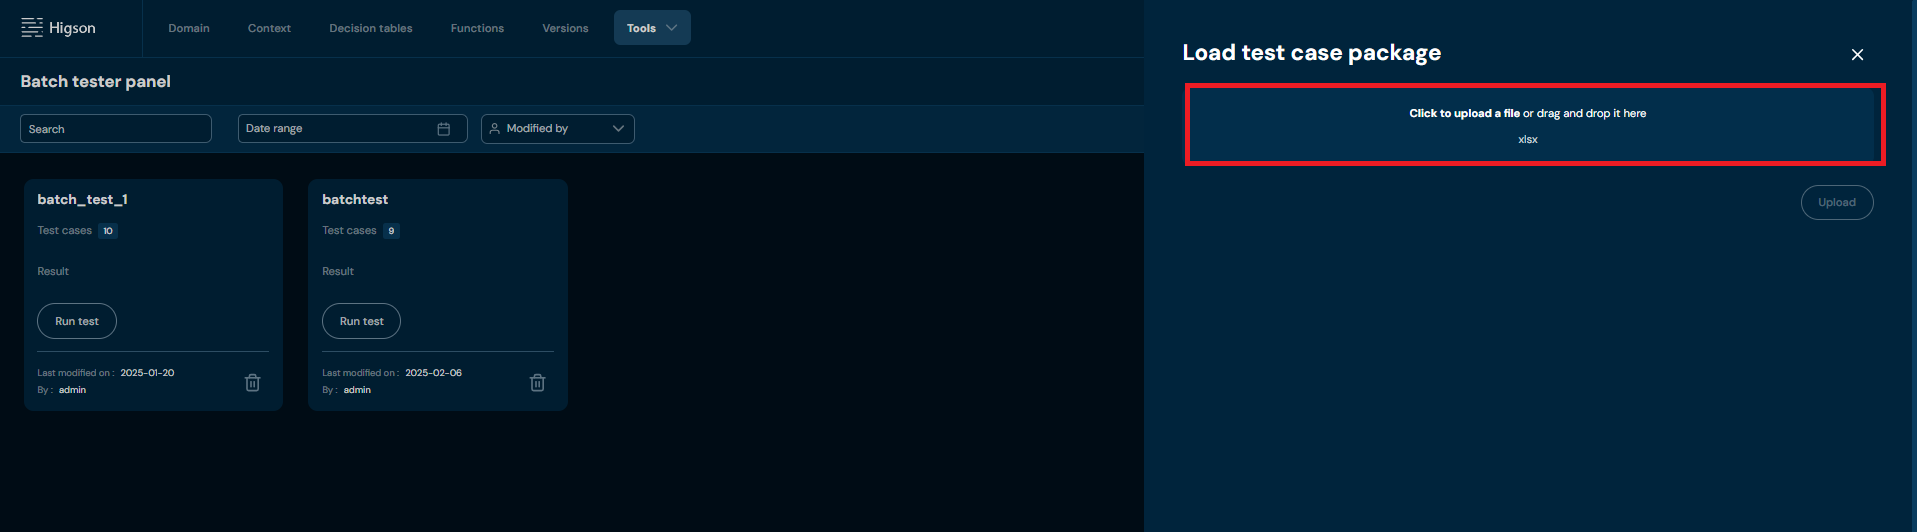
-
Click Upload button to accept the selected file for upload
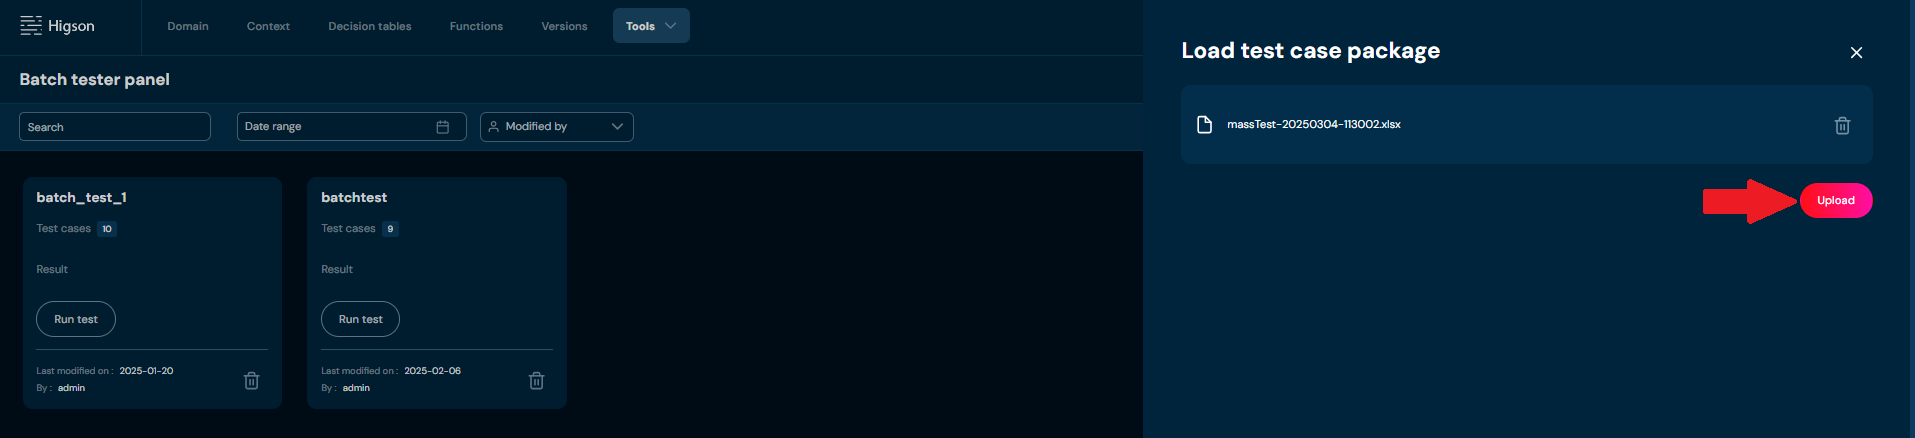
-
The uploaded batch test should show on the list
The other way is to create new batch test:
-
In the Batch Tester Panel click on Add test package (in tile view)
-
On batch test creator view, in action panel click on Load package
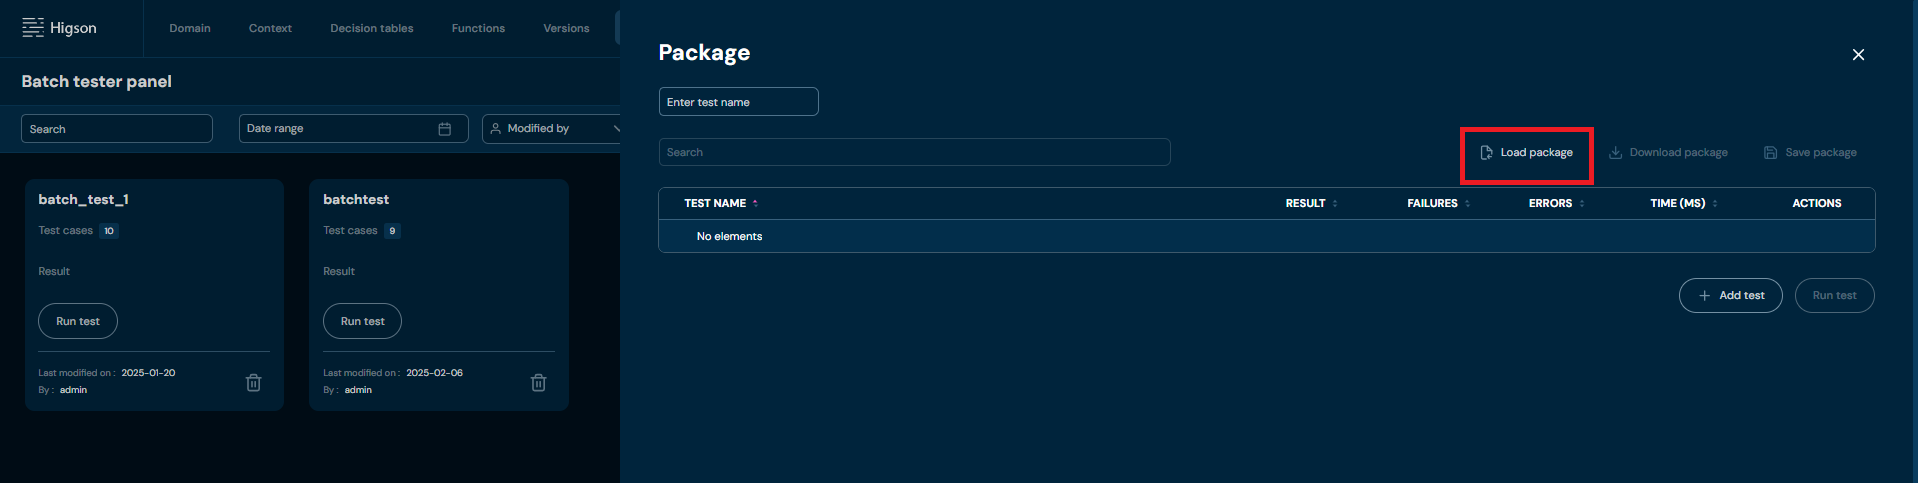
-
Select the XLSx file with the definition of the batch test
a. Load file
b. Click upload
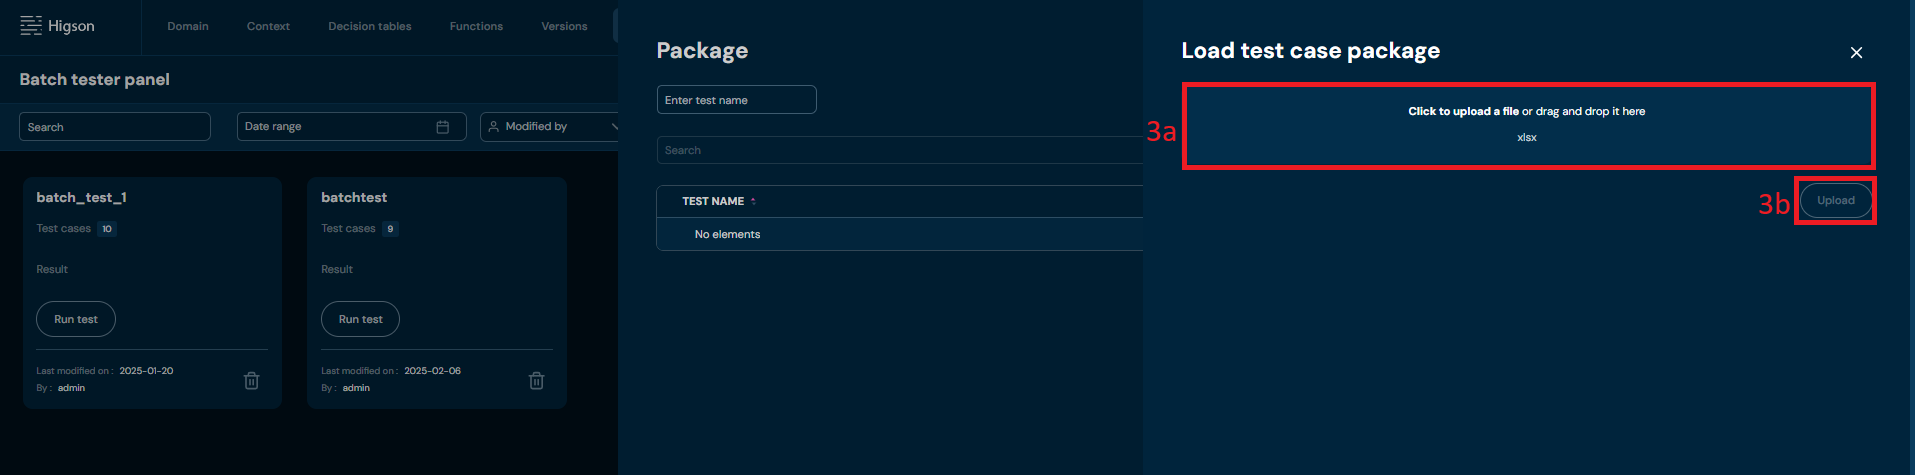
-
After successful upload remember to:
a. Provide the batch test name
a. Save the batch test
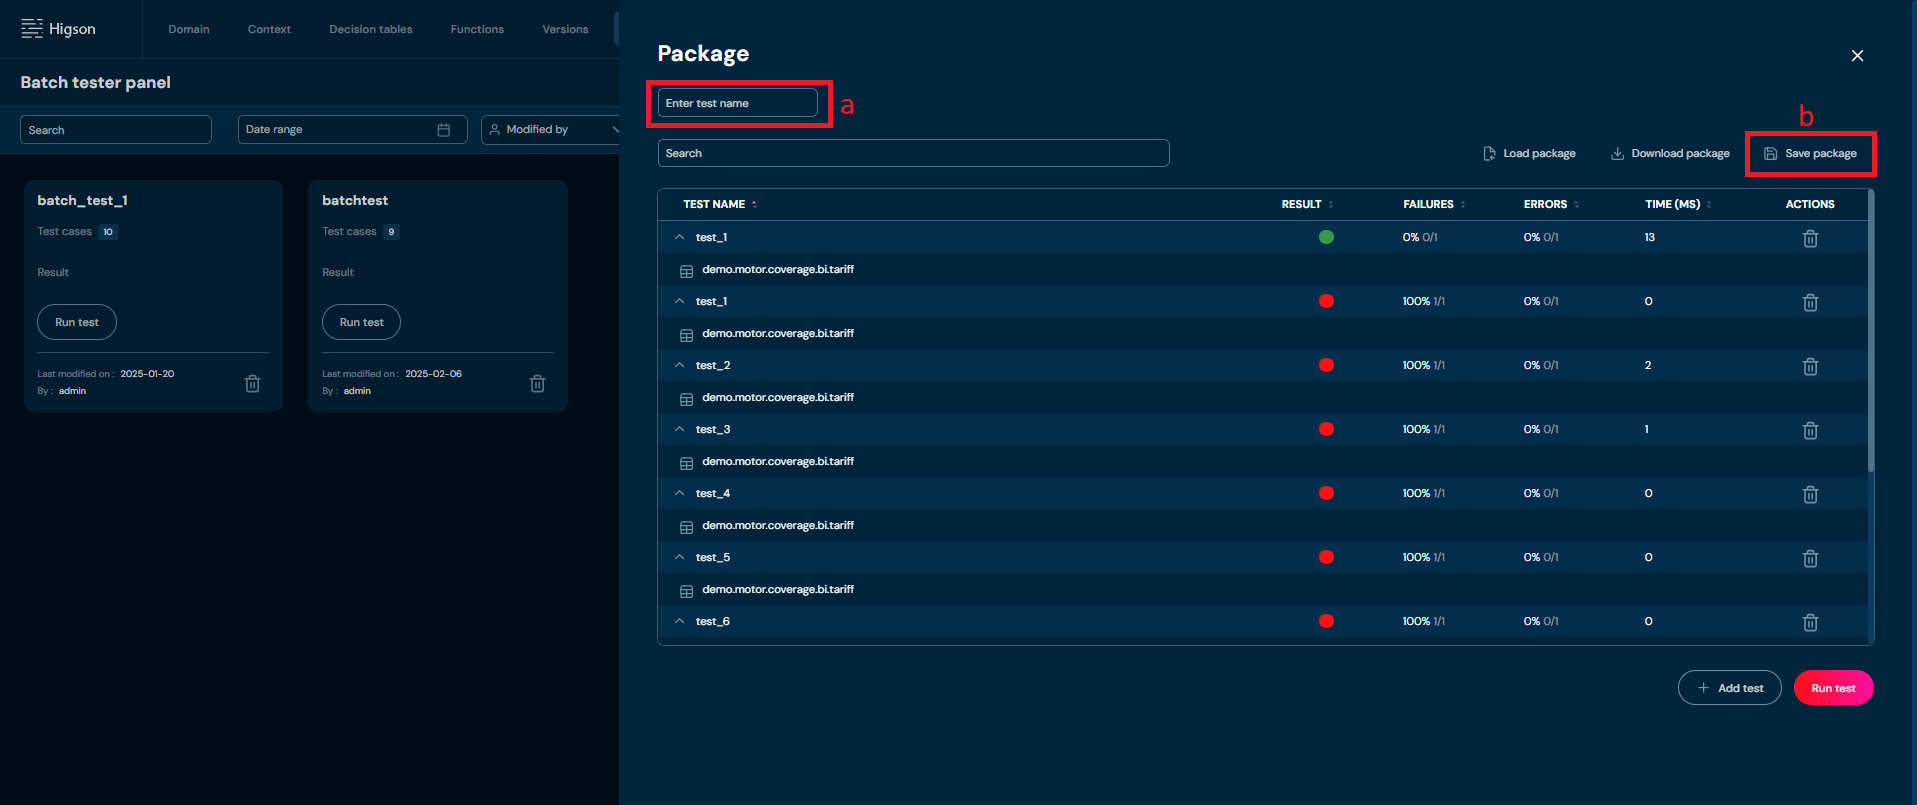
Download a Batch Test#
When working on selected batch test:
-
Click on Download package
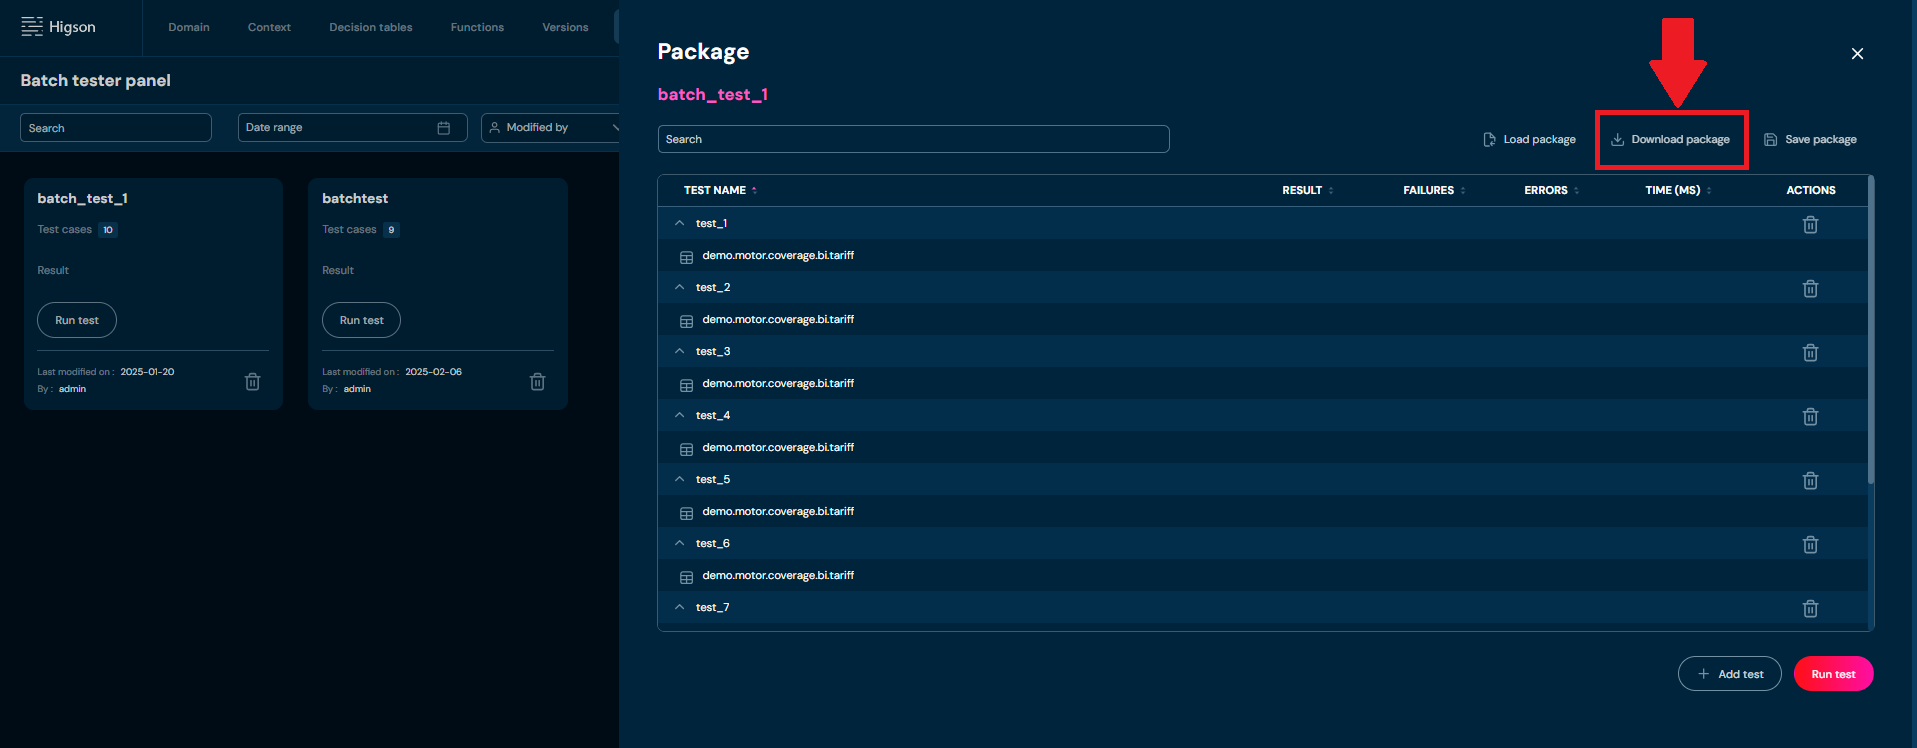
-
The XLSx file will be generated with definition of the batch test, save the file.
Reading & Editing the XLSx File#
Each XLSx from batch test is created according to the rules:
- There are always three sections with data
- Each section may have multiple columns
- Data sections are separated by the bold line
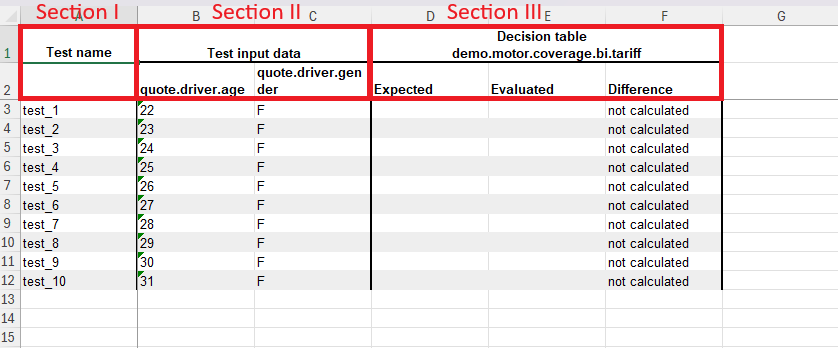
First section:
- contains one column with the test case name
Second section:
- contains columns for input data involved to the test case. Column headers are indicators of what kind of variable is needed. Usually in the context header is a context path which is used in tested elements.
Third section:
- for each tested element three columns are created
- first column contains expected value for one of the tested elements
- second column contains evaluated value for the tested element
- third column contains value of the difference between calculated result and expected result
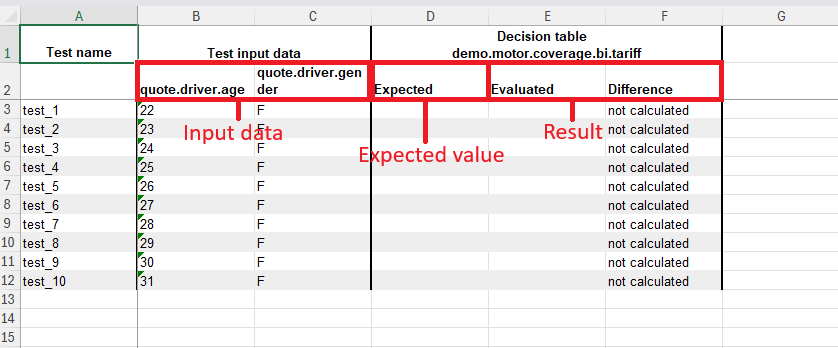
In the header are stored:
-
Type of element in the test case
- Attribute for domain business attribiute
- Decision table for decision table
- Function for function
-
Code of that element
- in case of Attribute after element type domain path is given
- in case of Decision table or Function under element type element code is given
The following values are stored in the columns of the third section:
- Expected - expected value to check if the test case is correct. The value must be provided by business users.
- Evaluated - for columns holding values evaluated by the algorithm
- Difference - for the value of the difference between what was calculated and what was expected
Run Batch Test#
To Run an existing batch test follow these steps:
-
Go to Main Toolbar
a. Select Tools
b. in Tools select Batch Tester
-
You will see Batch Tester Panel, filled with all existing batch tests
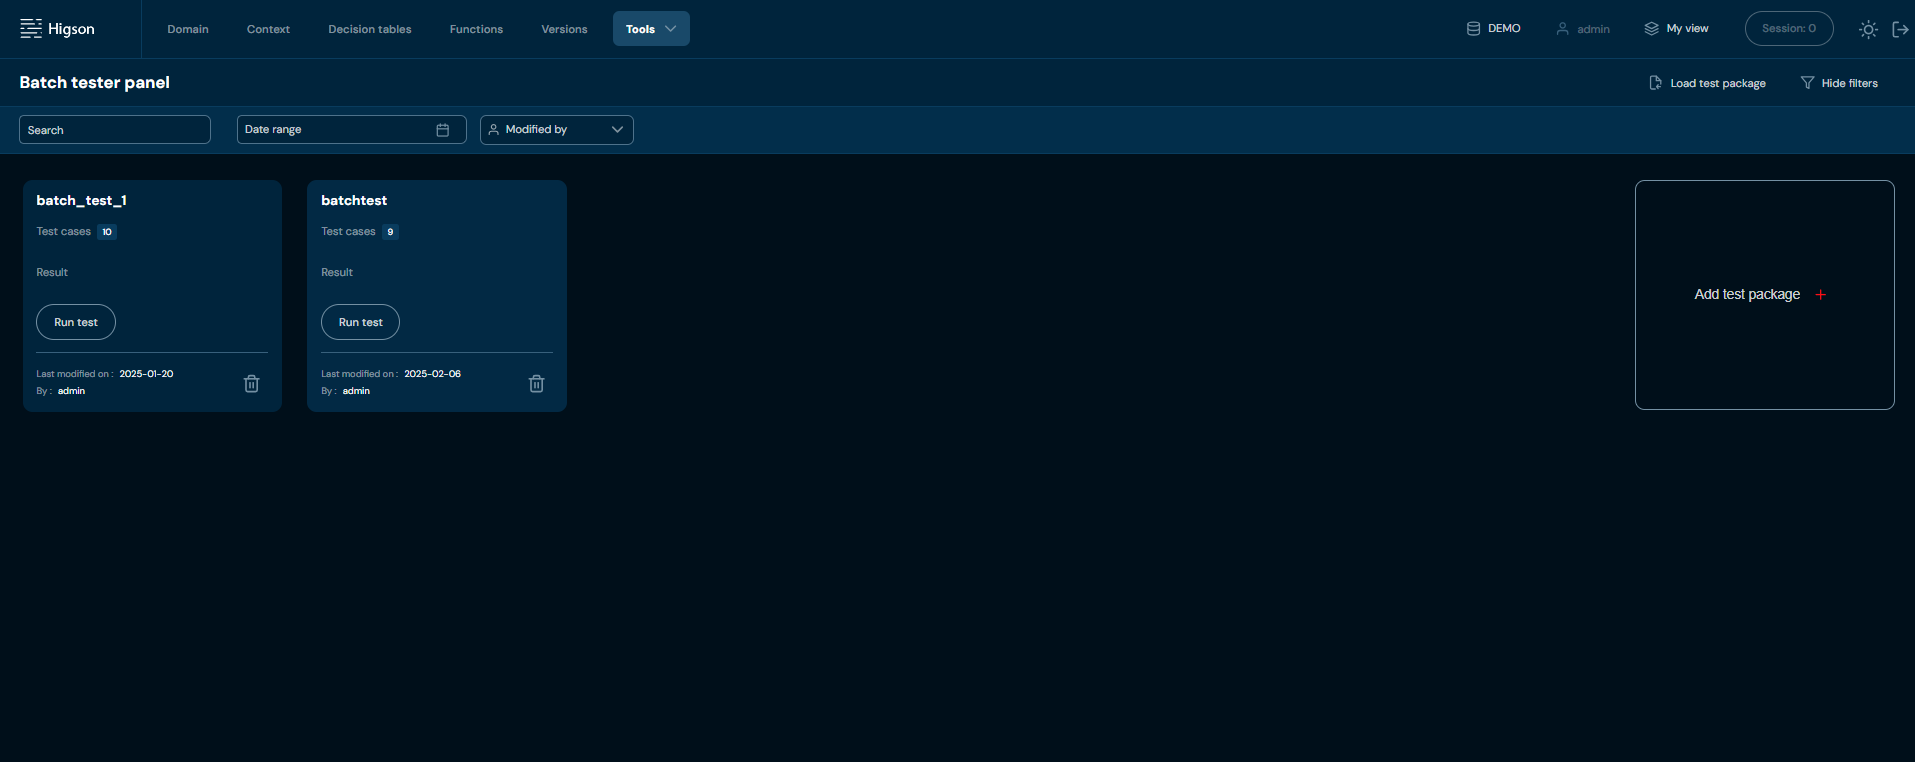
-
Click on selected batch test, to view it’s details
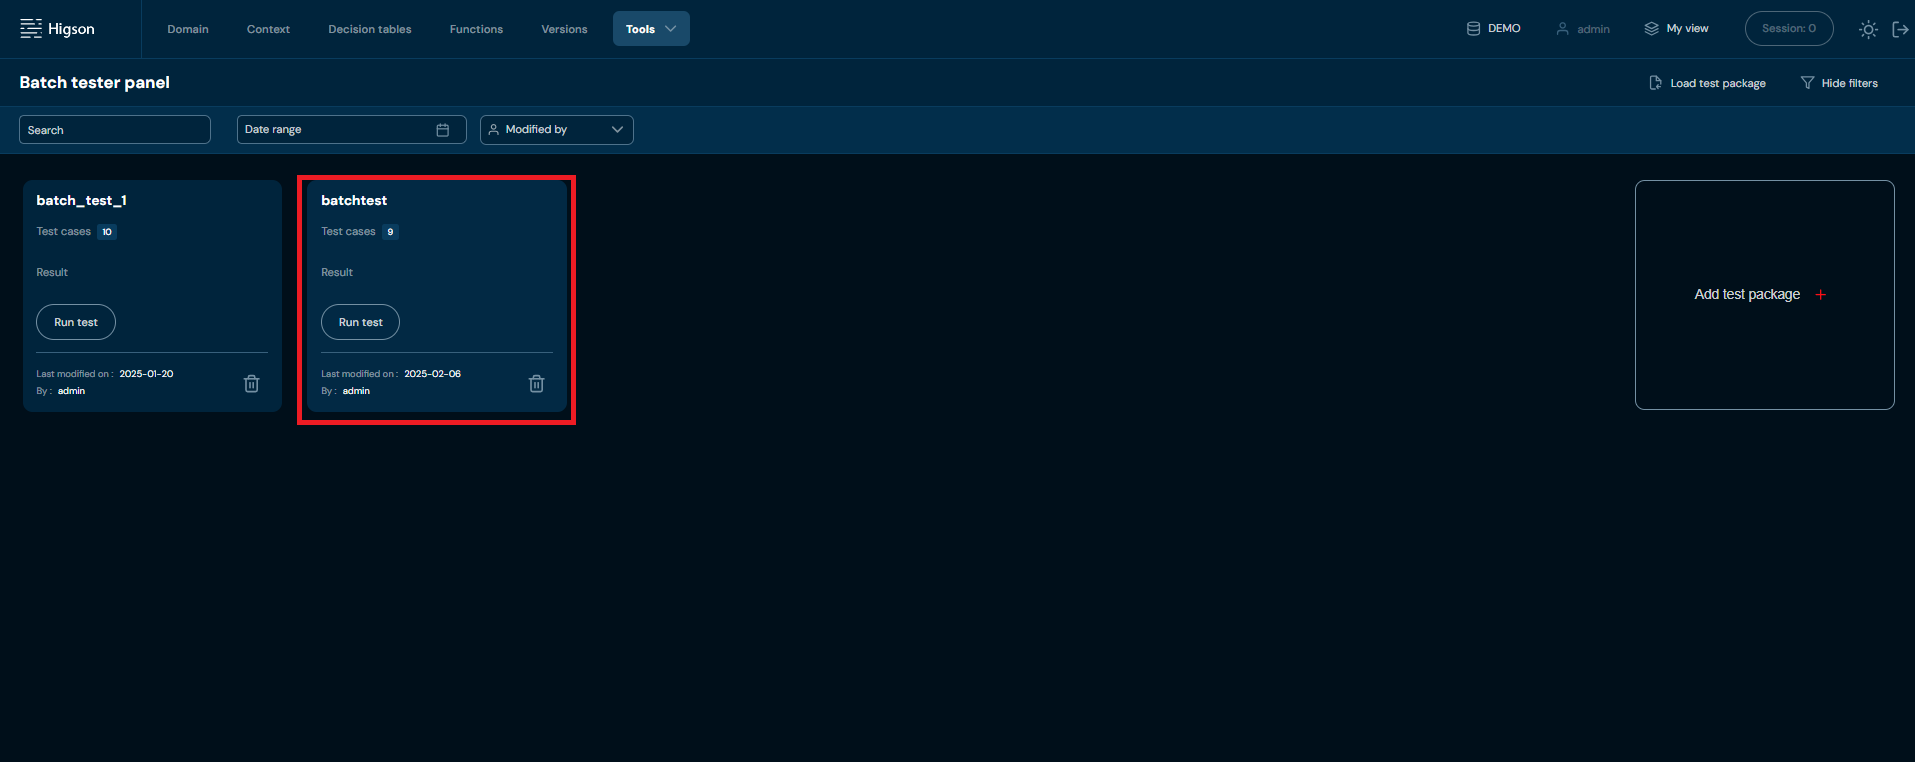
-
Batch test view, in our example:
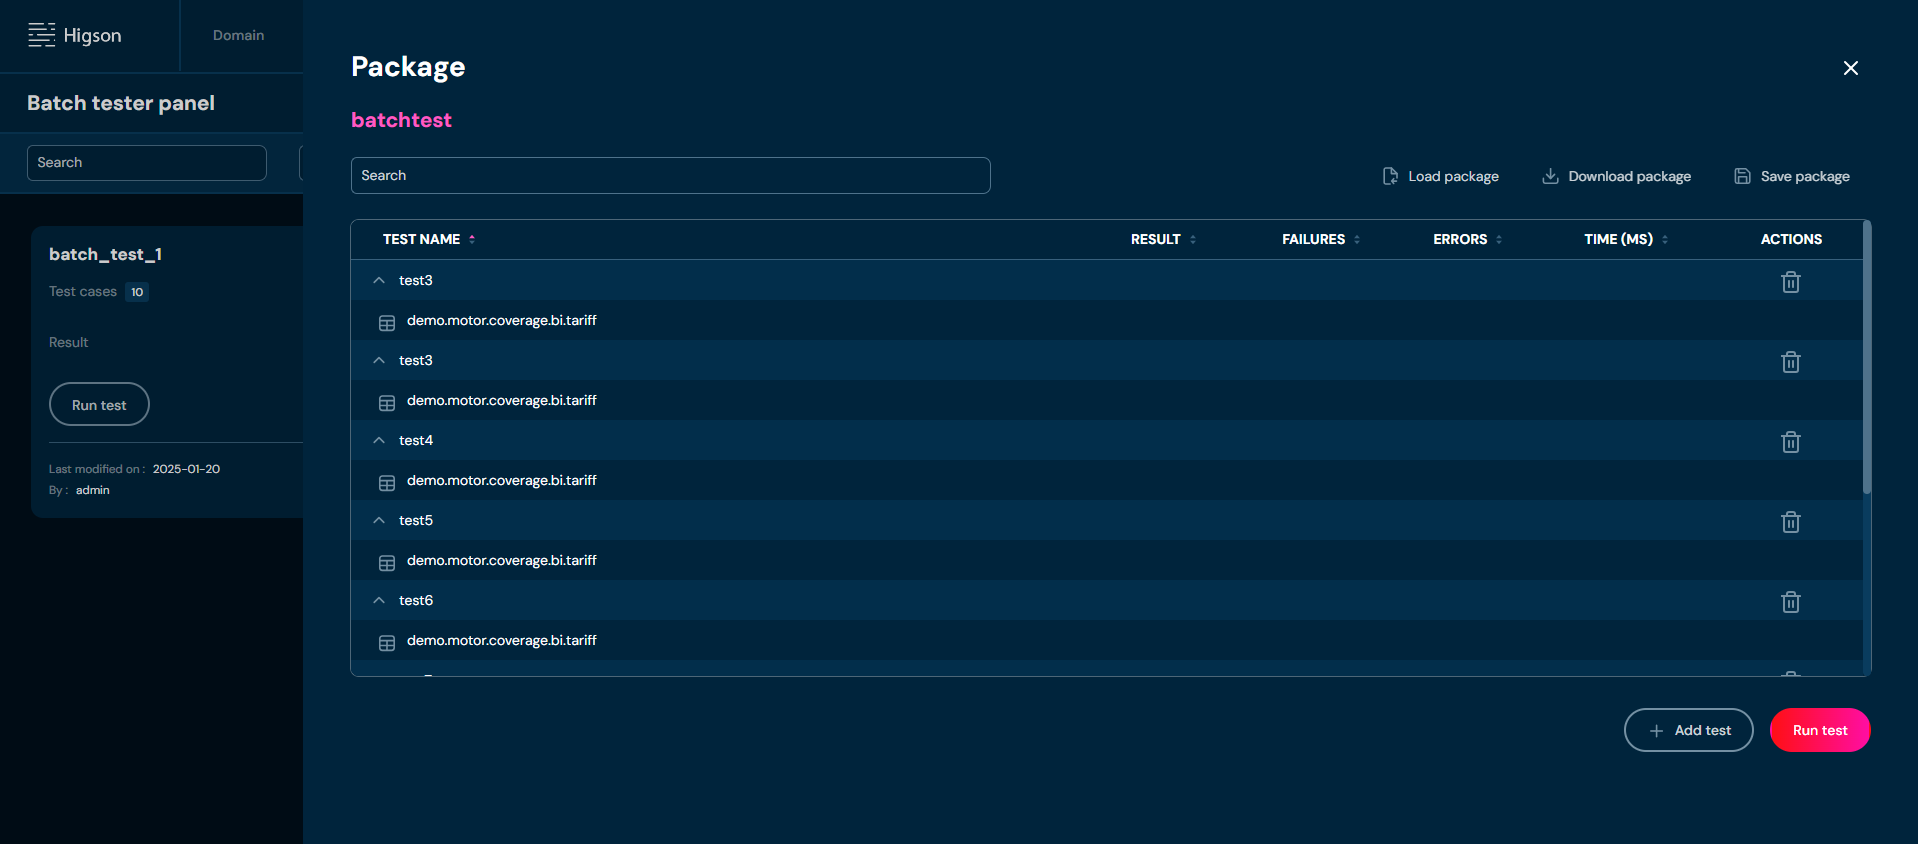
-
When you click on selected test
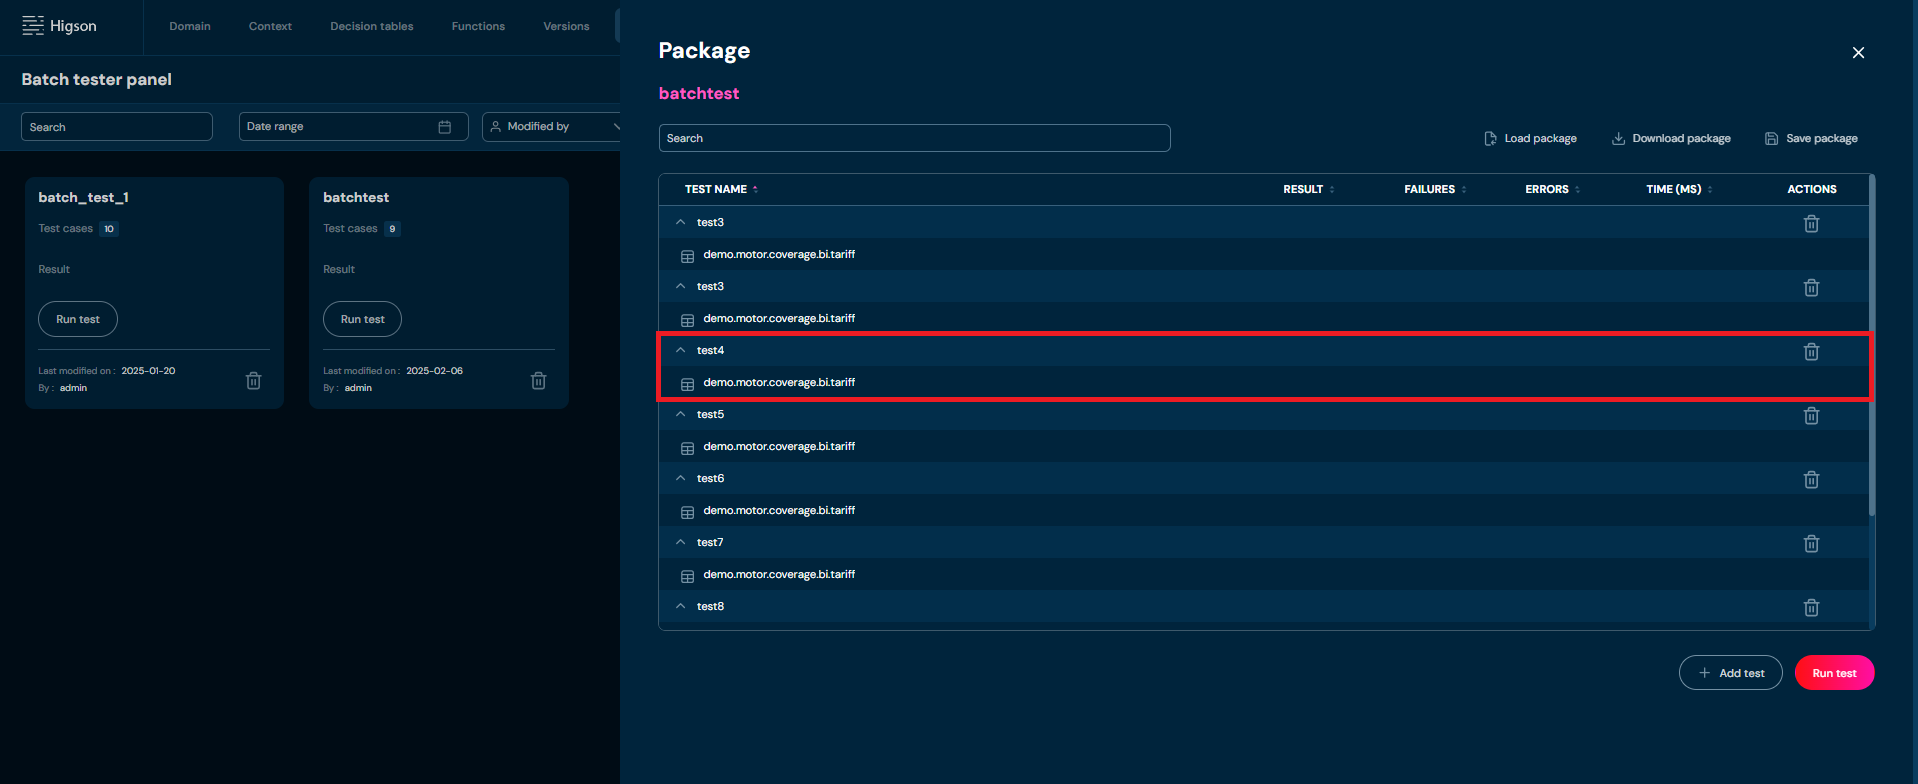
-
Here you are able to view test details and if needed change:
a. Input values
b. Expand Elements to test screen
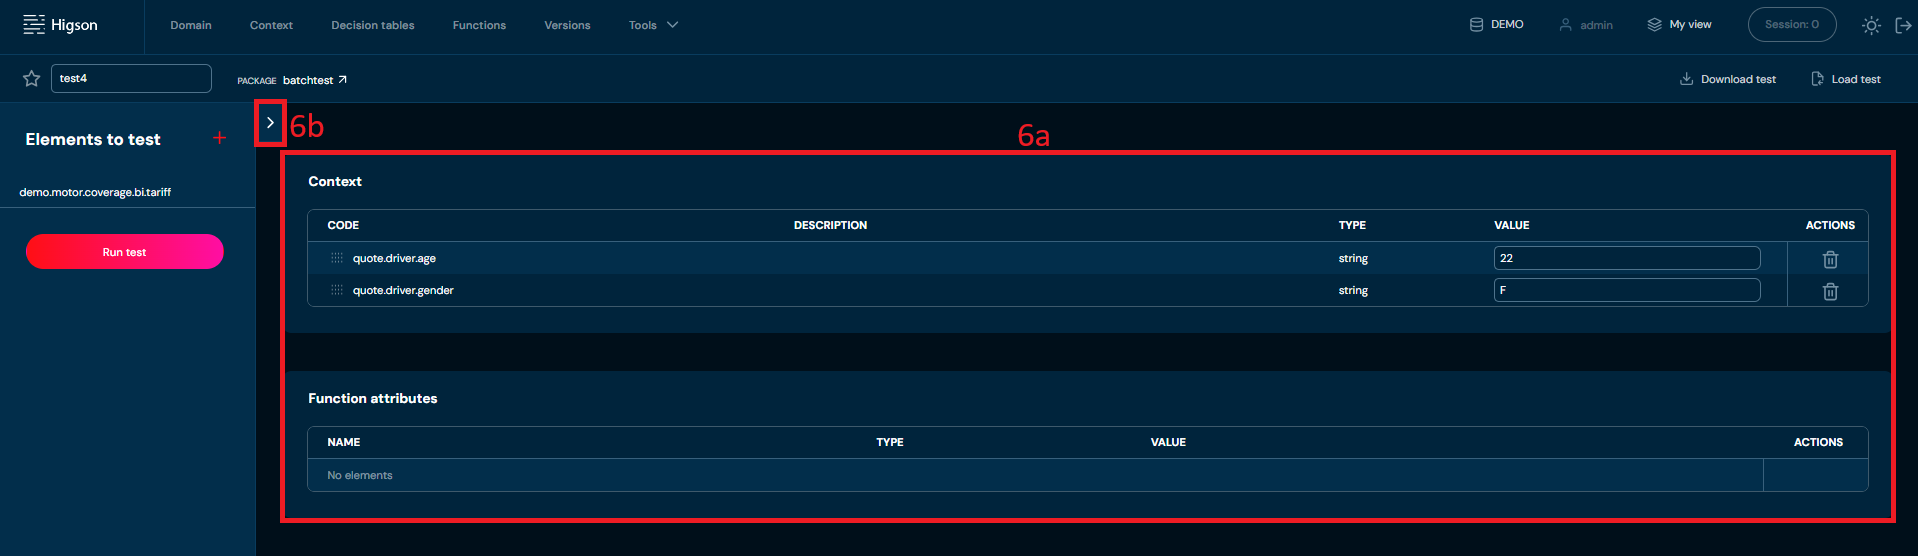
c. Expected values
d. Or even change tested elements in selected unit test case (full description on how to create and edit
Unit Test Cases can be found in the User Guide Tester chapter)
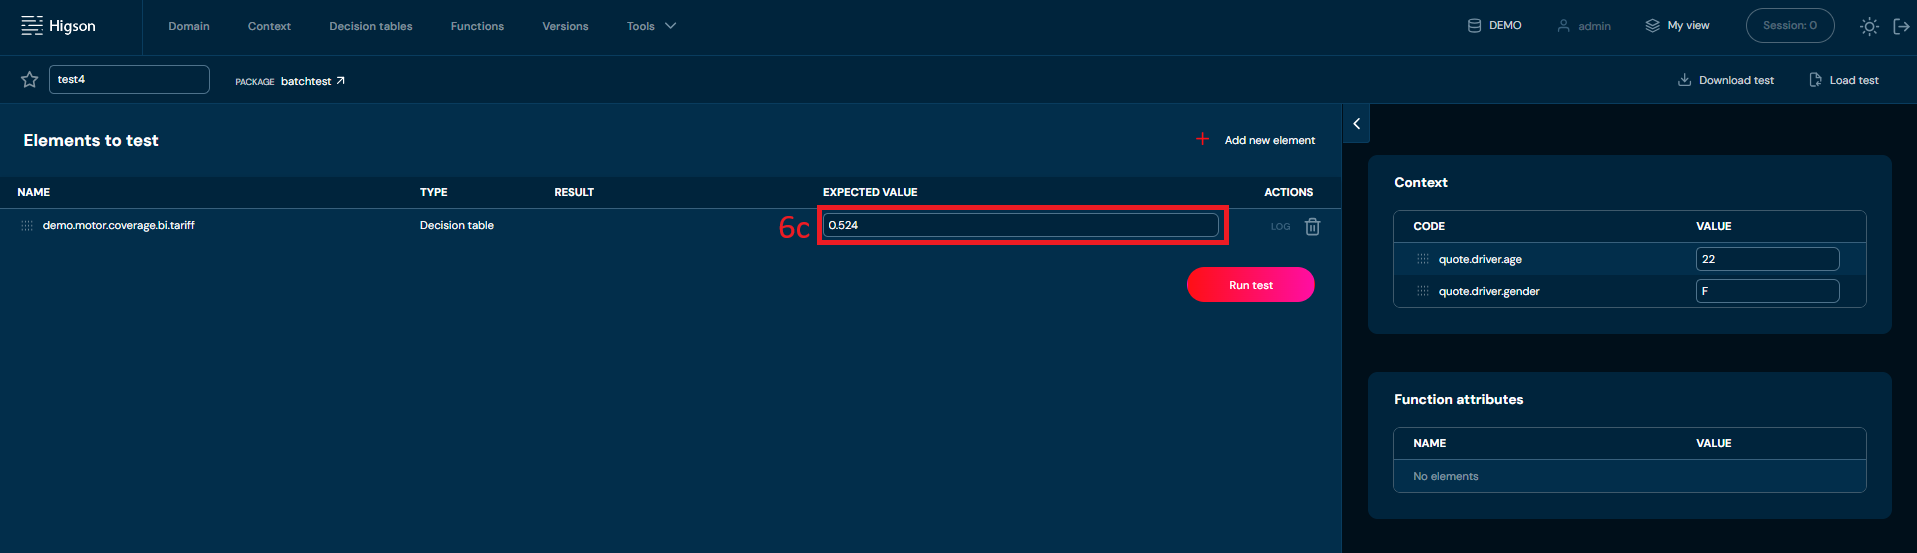
-
When all the changes are made
a. If you want to save this Unit test and be able to view it in singular Tester just click Save test
b. It’s not obligatory to Save test as you would in Unit Tester. Just get back to the batch test by clicking the Package button
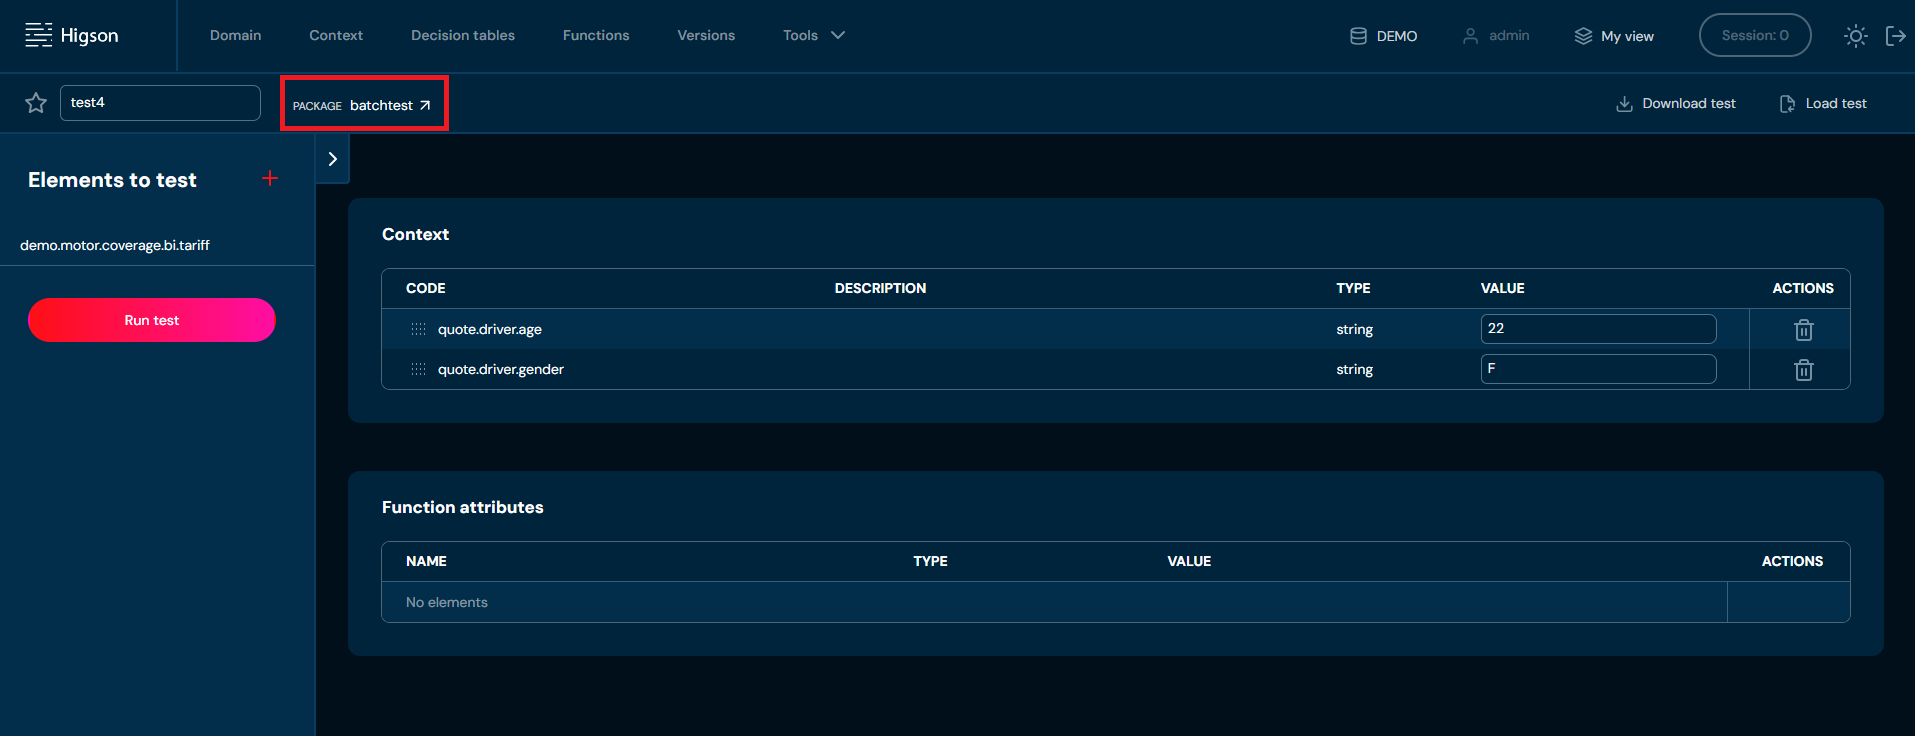
-
On the batch test view click Run test package to perform your tests
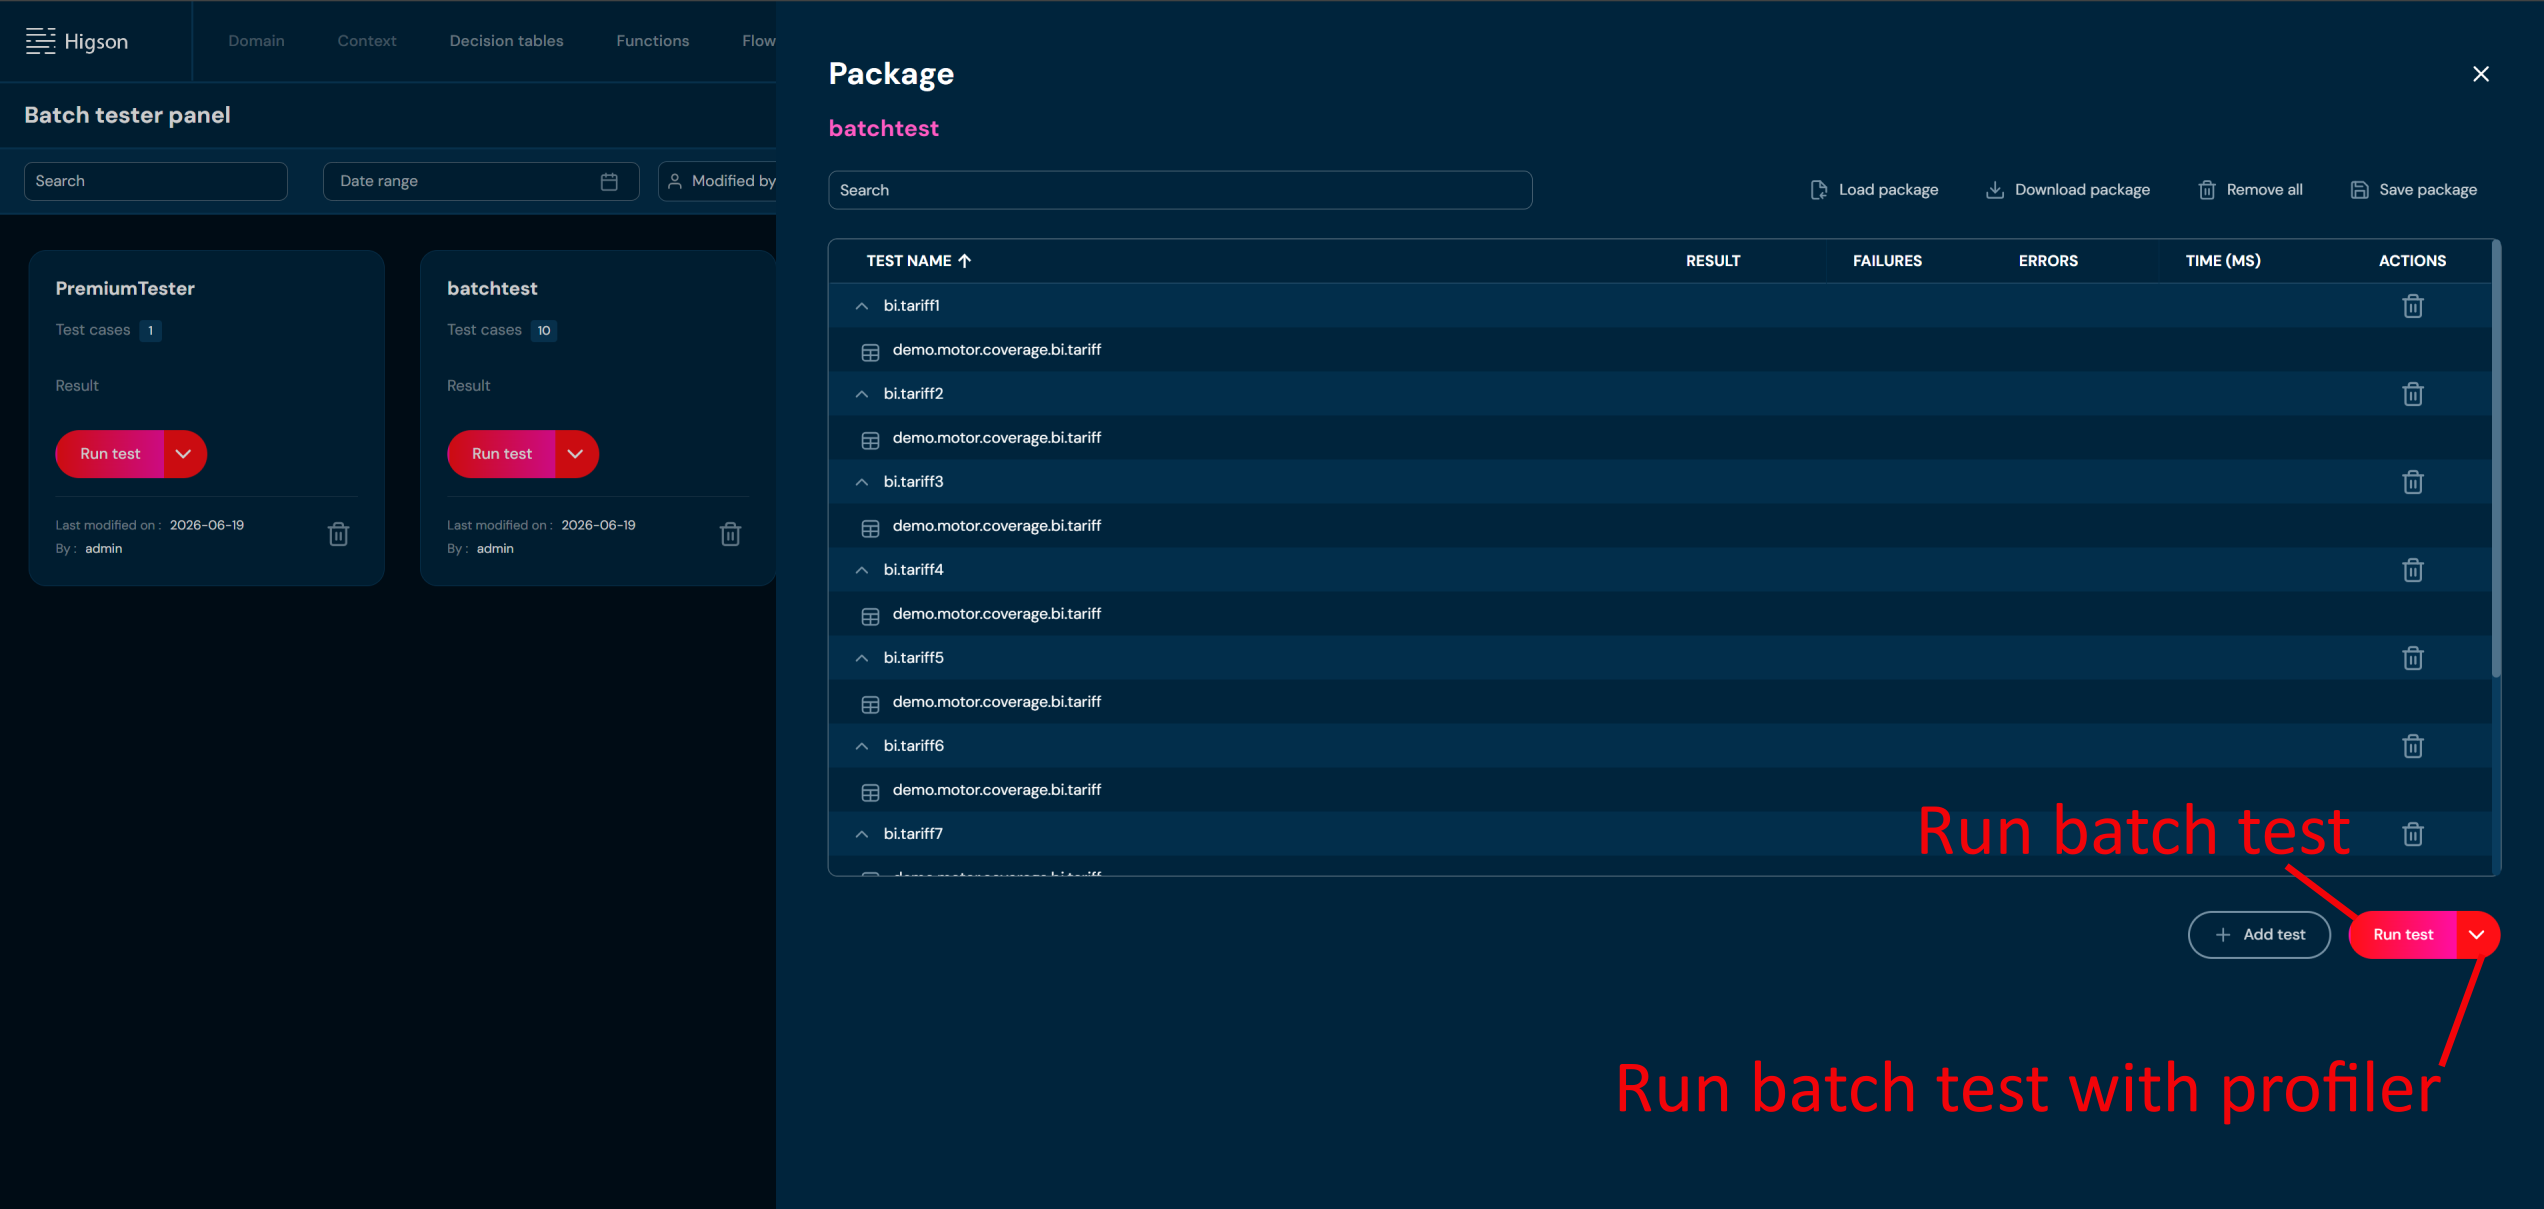
If you want to run a batch test with profiler:
- Select drop-down next to Run test button.
- Select one fo the options By count or By duration.
- Fill in the count/duration [s].
- Click Run.
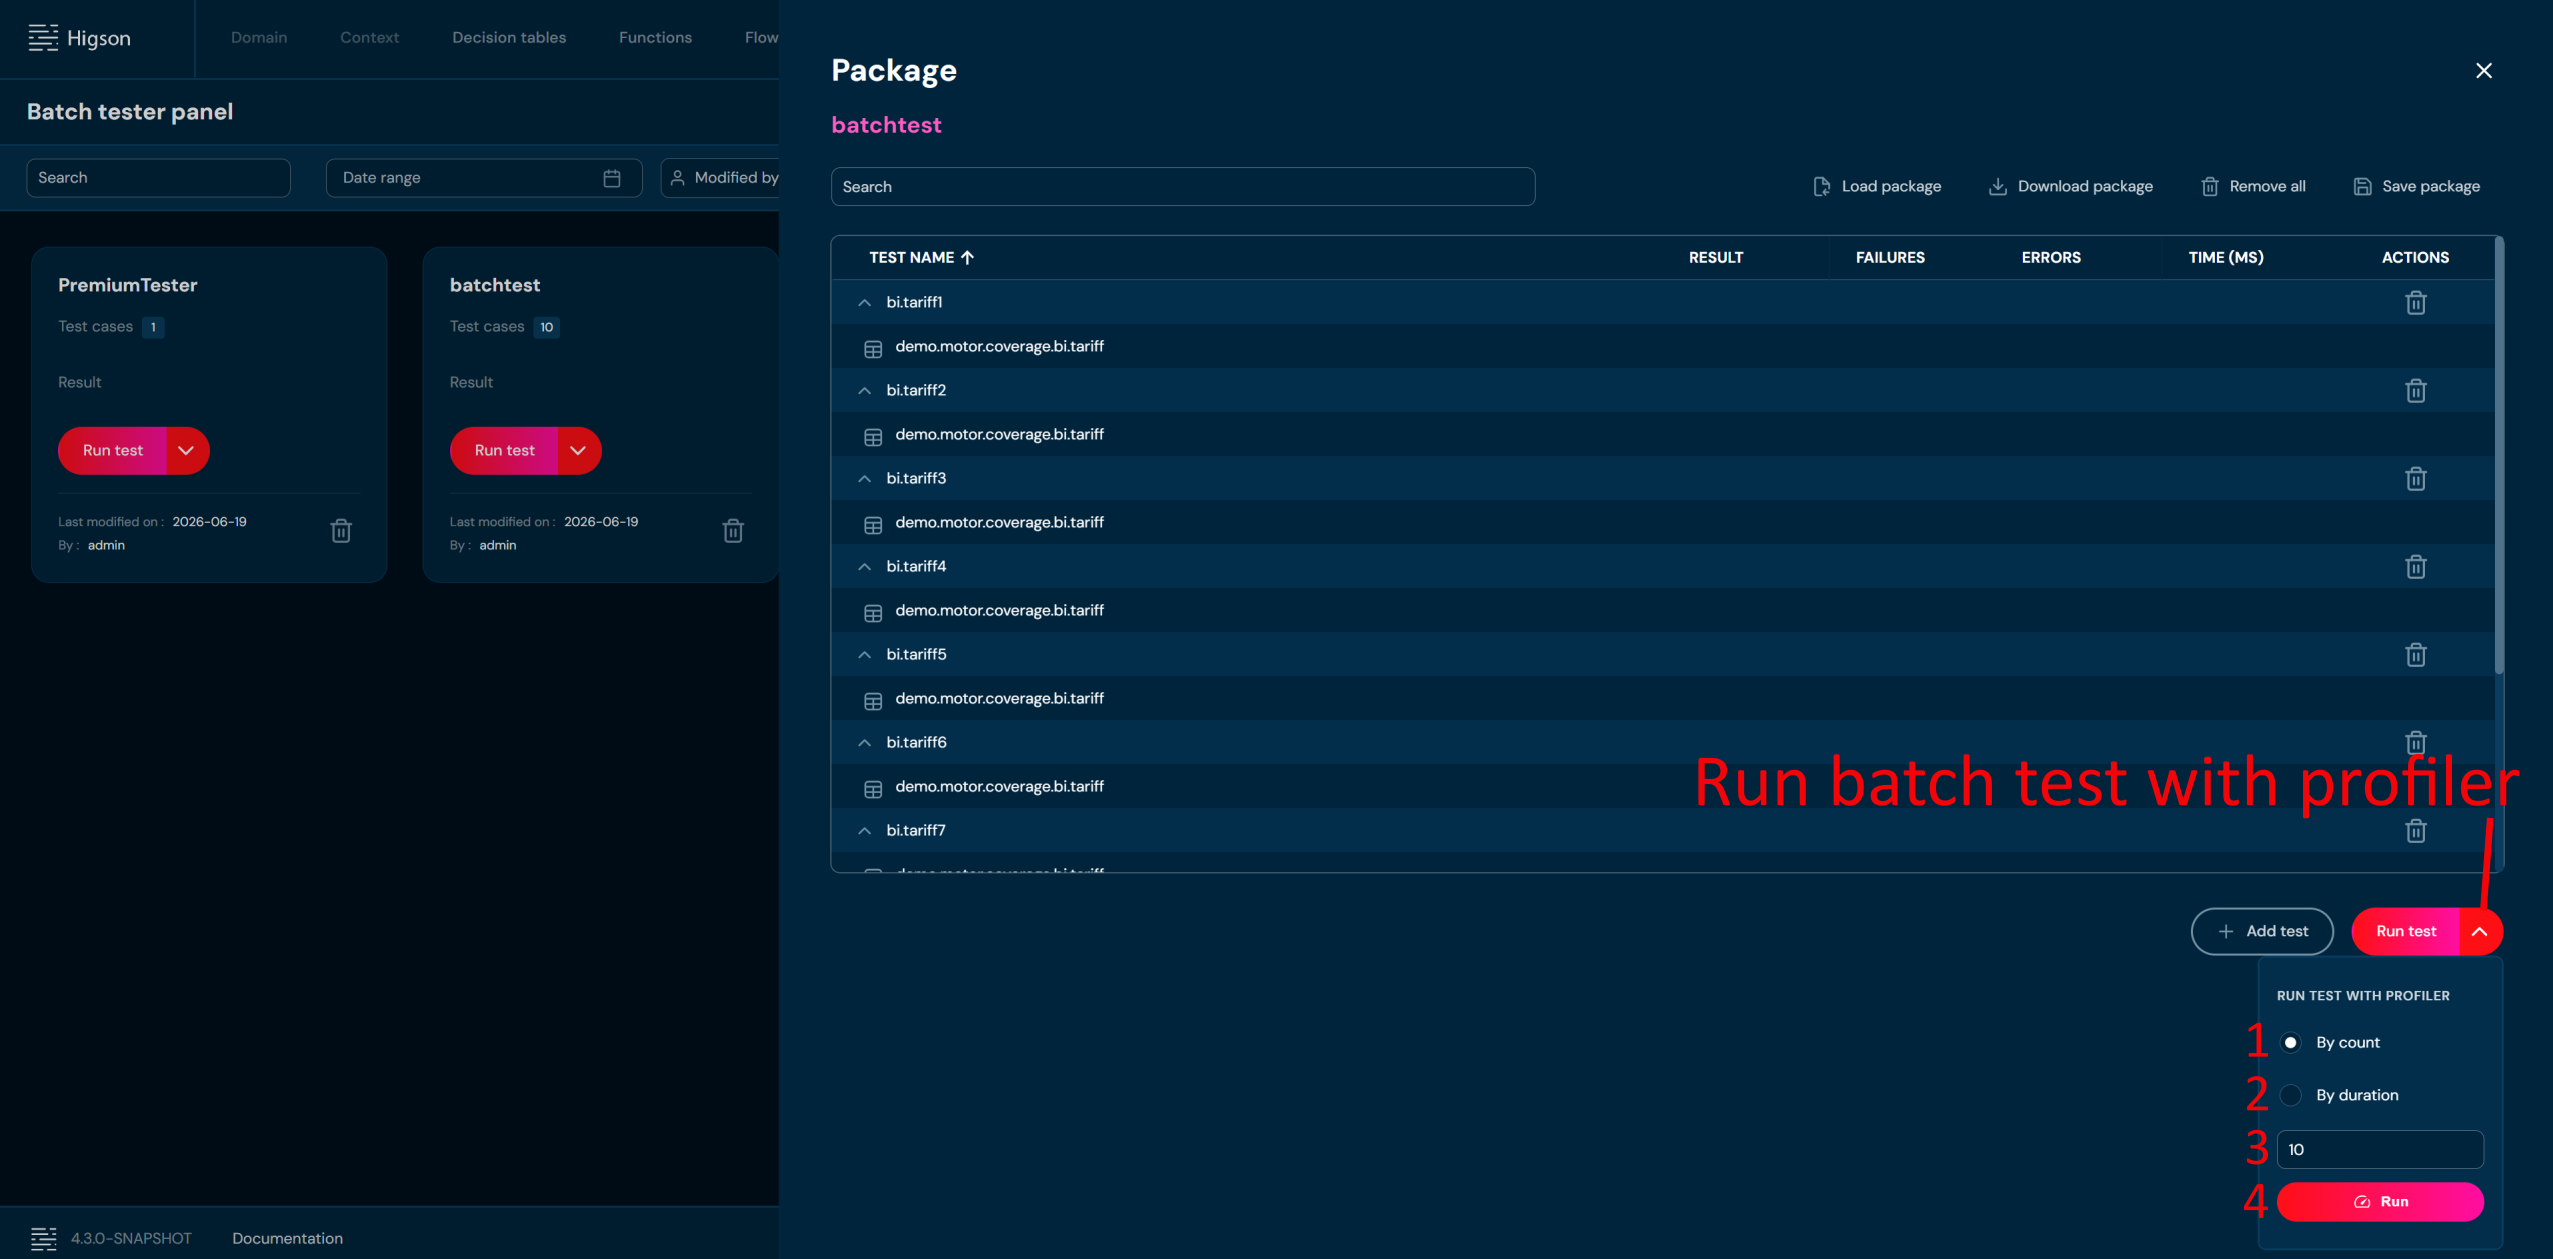
| No. | Name | Description |
|---|---|---|
| 1. | Expand | Click to expand the Run test with profiler options. |
| 2. | By count | Select to run the batch test a specified number of times. |
| 3. | By duration | Select to run the batch test for a specified duration in seconds. |
| 4. | Count/Duration | Enter the number of iterations or duration [s] for the profiler run. |
| 5. | Run | Click to start the batch test with profiler using the selected settings. |
-
For each unit test a result status will show:
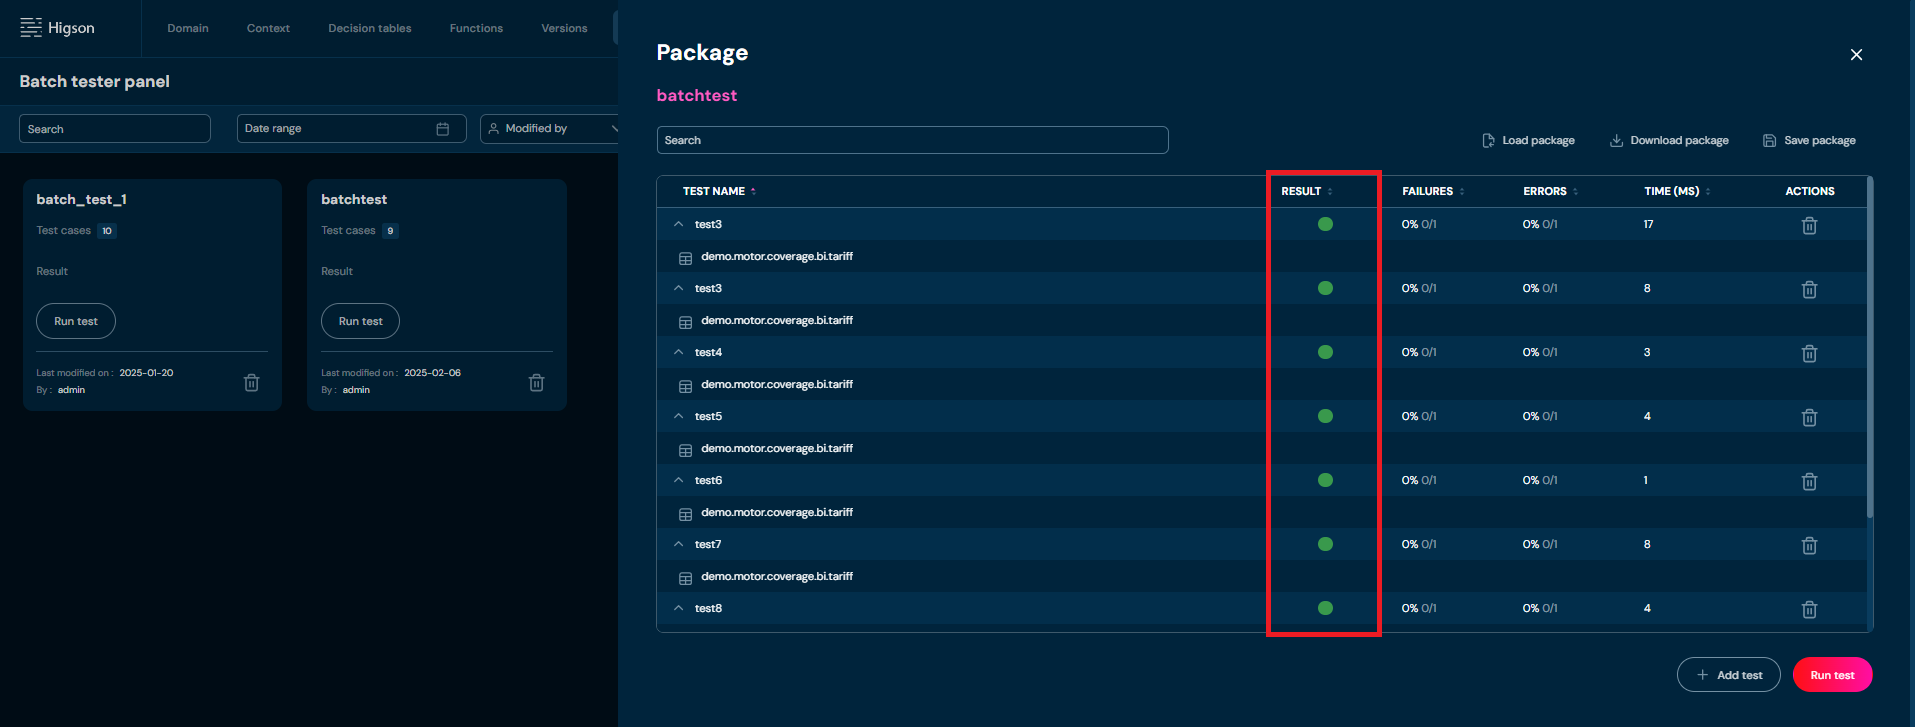
All possible statuses are described here:
No. Status Description 1. Success Green label. When unit test performs without problems and result value is equal to expected value. 2. Failure Red label. Can occur in two situations:
- The result value is not equal to expected value
- The Error occur during performing the unit test -
Beside Status there are other information given by batch tester

| No. | Column name | Description |
|---|---|---|
| 1. | Result | Test case status (Success/Failure) depending on whether test was performed with positive result. |
| 2. | Failures | Number of failures within unit test case. Where evaluated value differs from expected value. |
| 3. | Errors | Number of errors which occurred during the unit test. |
| 4. | Time (ms) | Time taken to perform the unit test. |
Versions is a very useful option when the calculation mechanism in your product is changing through time. In Versions, you can create new Regions and Versions of Regions
In order to see Versions, select Versioning in Main Toolbar.
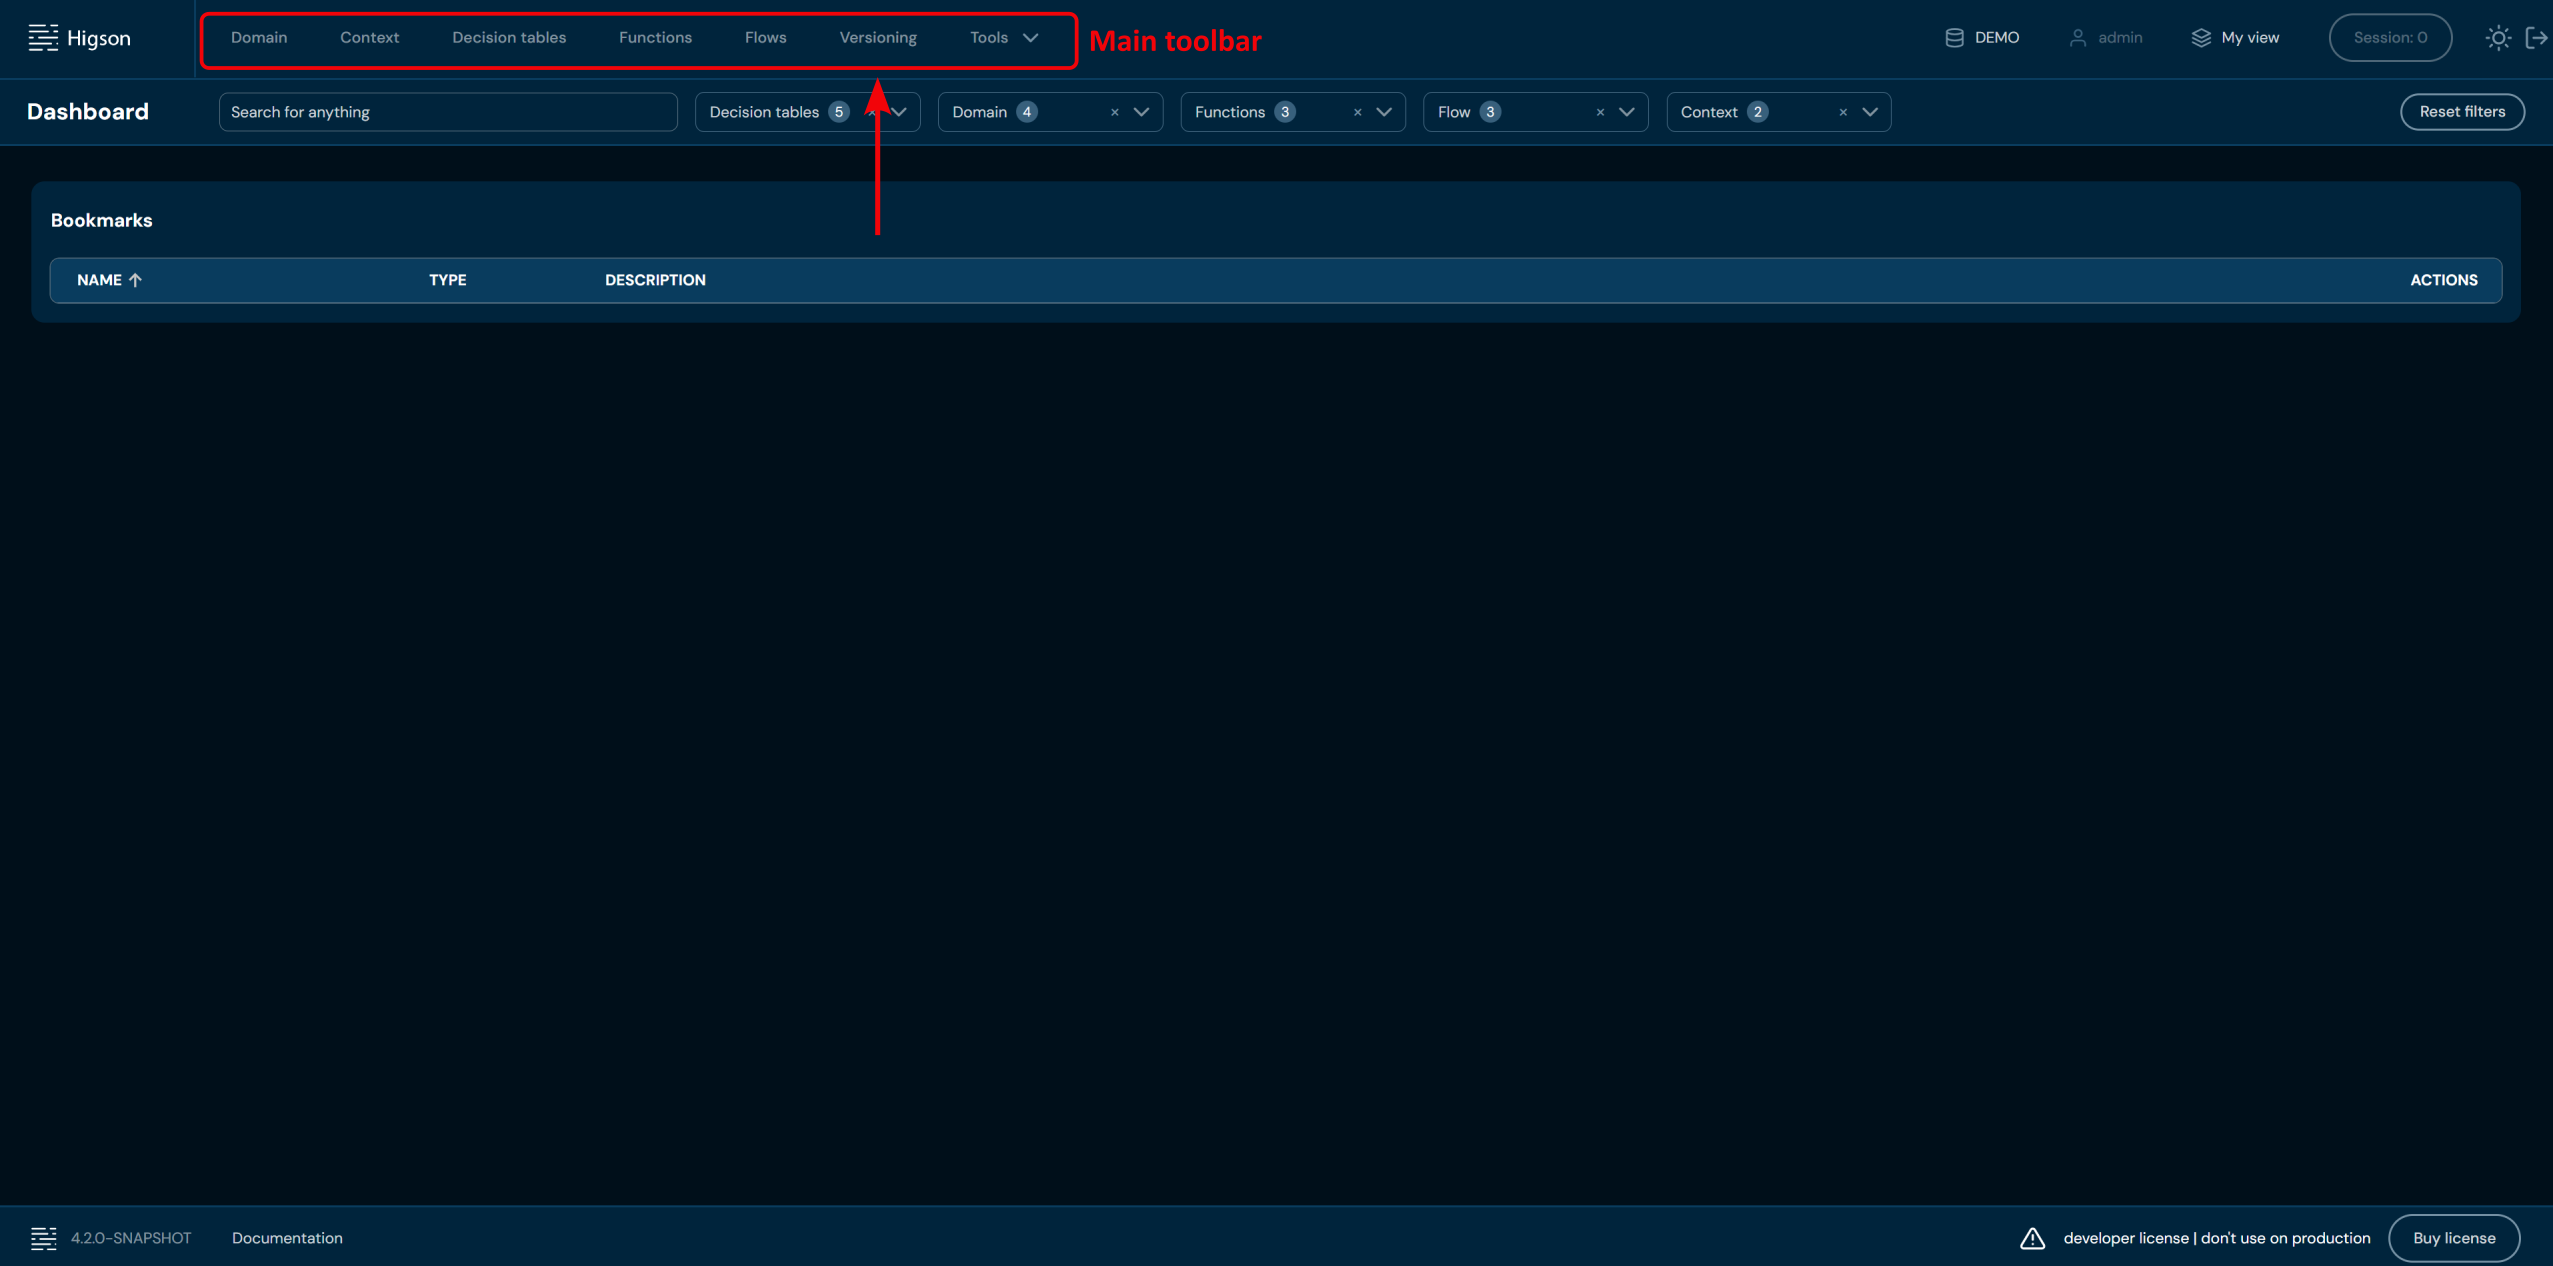
After you enter Versioning you will see screen of all Regions:
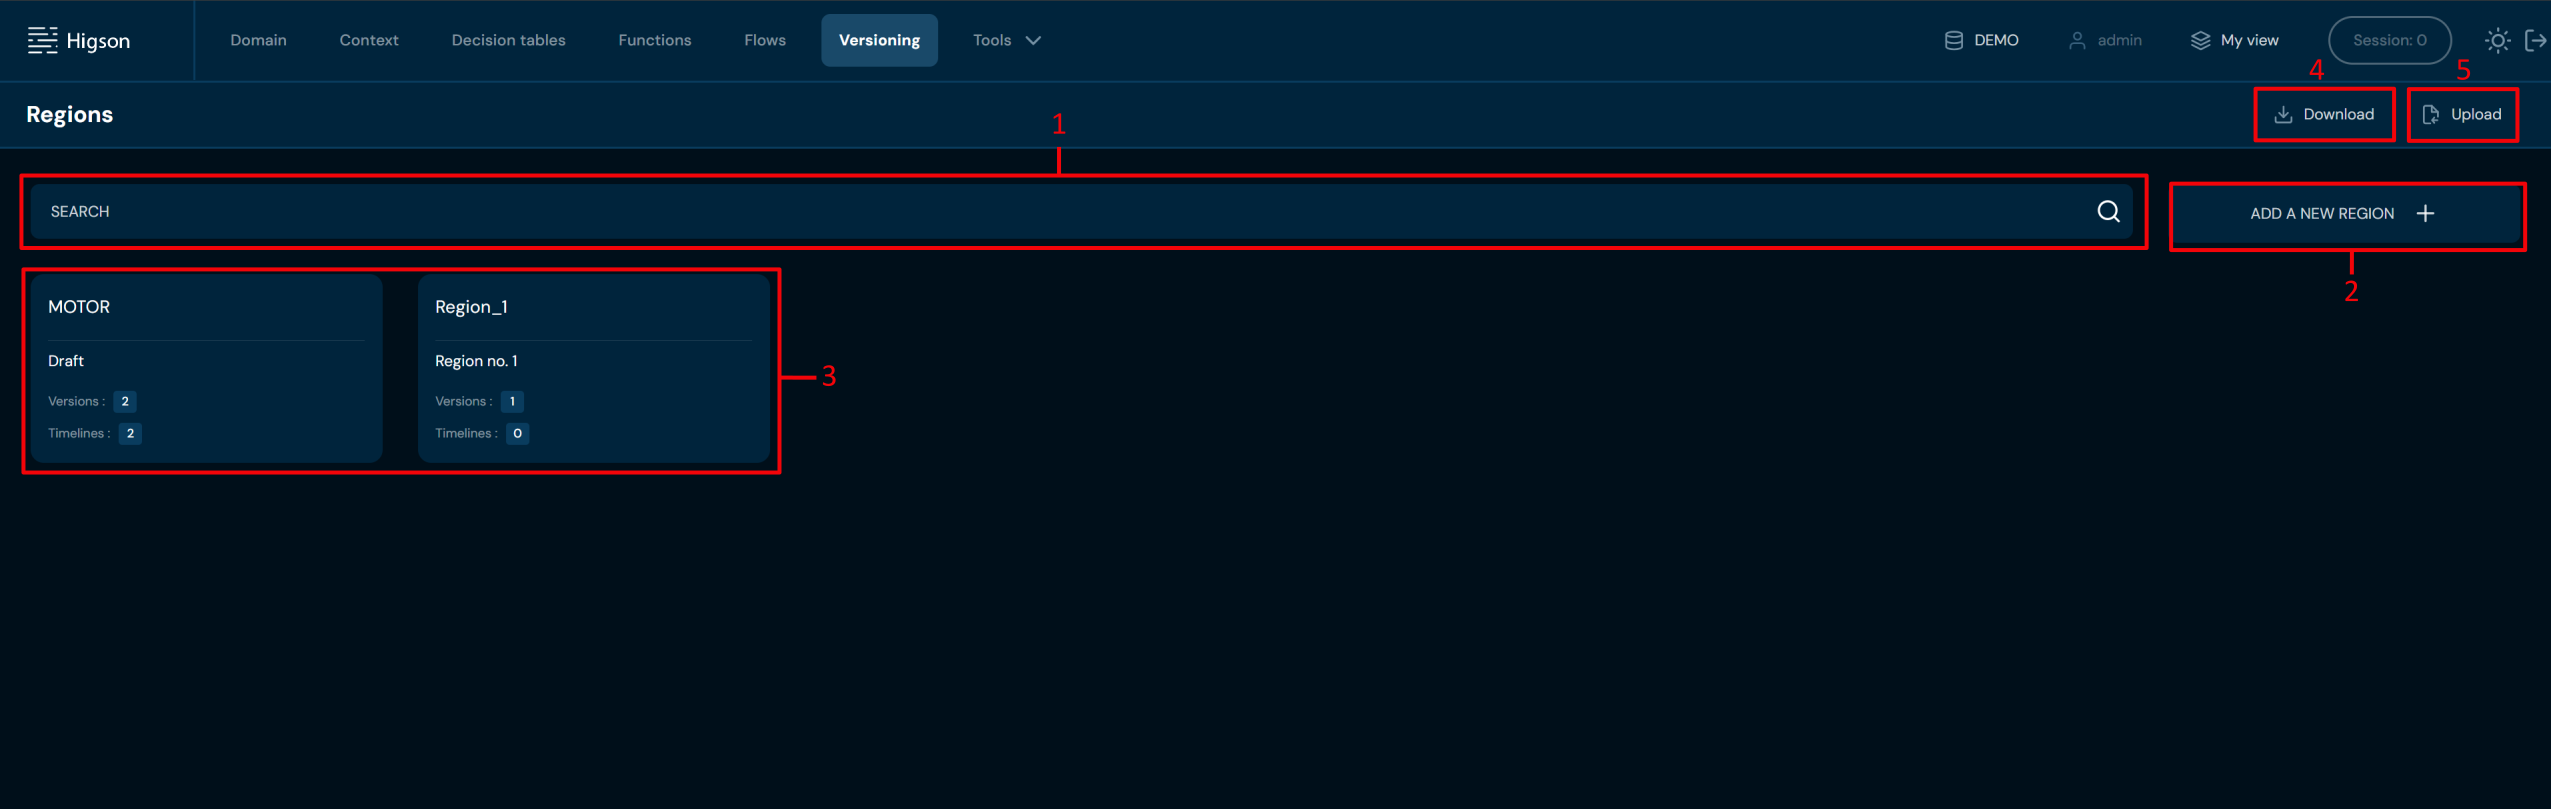
| No. | Name | Description |
|---|---|---|
| 1 | Regions search | Filter by any string provided by the user. All Regions matching the provided criteria are filtered. |
| 2 | Add a new Region | Allows creating new Regions. To learn more about adding Regions, go here. |
| 3 | All Regions | Displays every Region created. |
| 4 | Download Regions | Downloads an XLSX file containing all Regions and Versions of Regions. To learn more about downloading Regions, go here. |
| 5 | Upload Regions | Allows uploading Regions from an XLSX file. To learn more about uploading Regions, go here. |
Region tile:
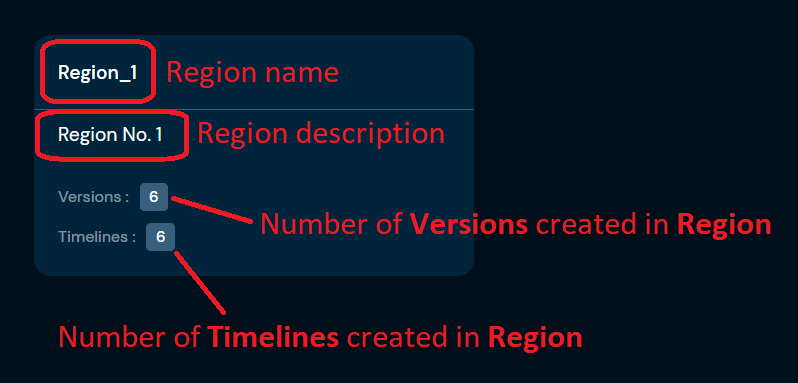
Add a New Region#
If you want to add a new region, follow these steps:
-
Choose Versions in Main toolbar.
-
Choose ADD A NEW REGION +
a. Choosing ADD A NEW REGION + opens Add new region screen.
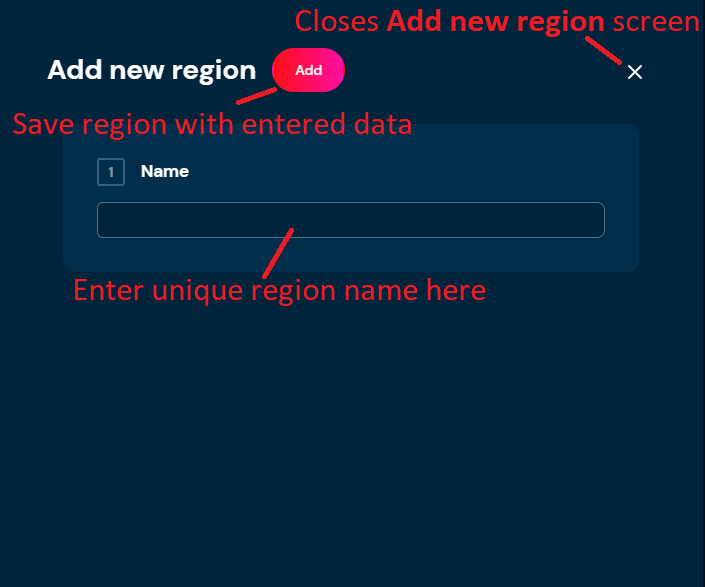
-
Provide unique Region name. Name can contain only characters from the collection: a-z; A-Z; 0-9; “-”; “_” and white-space characters.
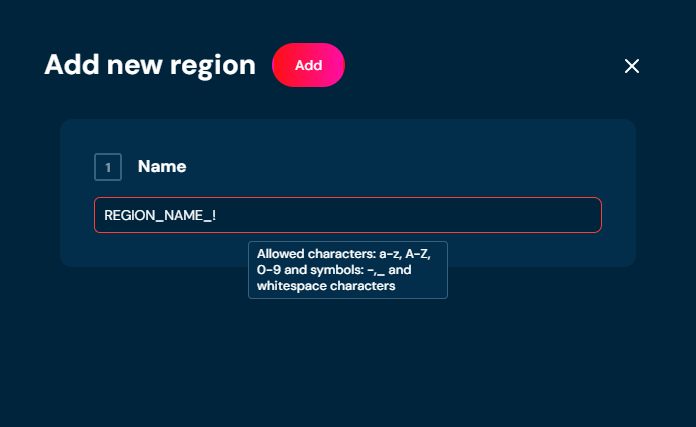
-
Choose Add.
a. Region with data you provided is created.
b. If you enter the same name as one of the Regions already created, then validation error will appear.
Download Regions#
If you want to download Regions, follow these steps:
-
Choose Versions in Main toolbar.
-
Choose Download.
a. Choosing Download downloads a XLSX file, that contains all Regions and Versions of Regions.
Upload Regions#
If you want to upload Regions, follow these steps:
-
Choose Versions in Main toolbar.
-
Choose Upload.
a. Choosing Upload brings up Upload regions screen.
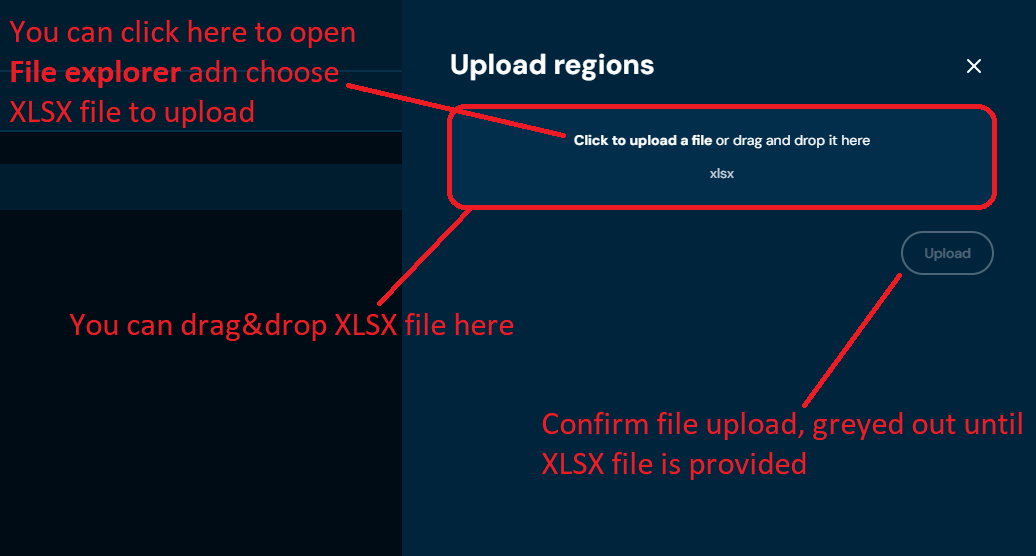
-
Drag&drop desired file or Click to upload a file and choose file in File explorer.
a. If you choose a file with extension other than XLSX, then validation error will pop up.
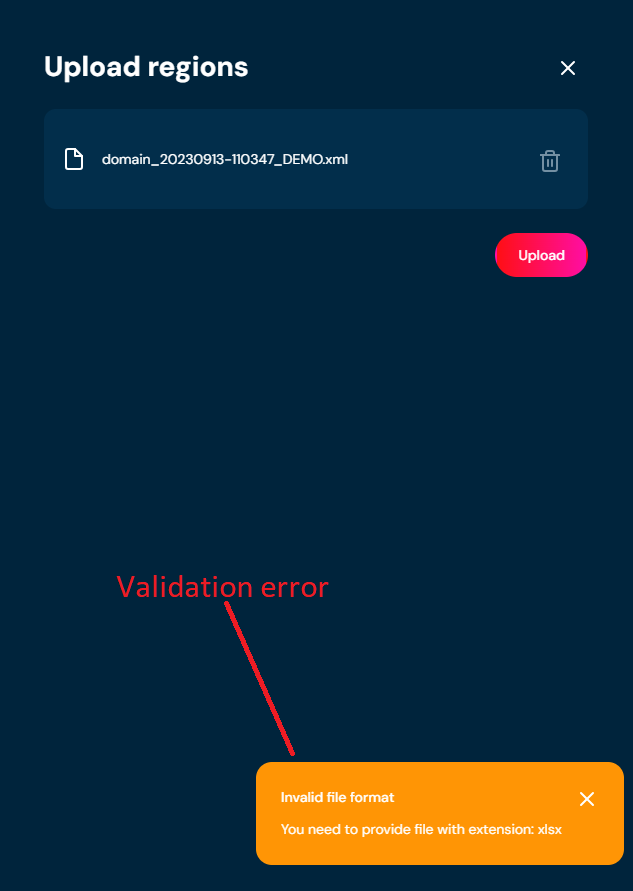
b. If there is something wrong with data in XLSX file, then validation error will appear.
-
Choose Upload.
-
When the progress bar reaches 100%, it means that regions were uploaded correctly.
a. If a validation error occurs (see above), then an upload process is being aborted.
Region Details Screen#
You can access Region details by left-clicking on the specific region tile in the screen of all Regions. You can also see Region details by changing from Tiles view to List view.
An important difference in the Versions screen is that Regions have no read-only mode. Another important difference is that changes made in Regions are instant, without session mechanism.
Data in Regions is editable all the time.
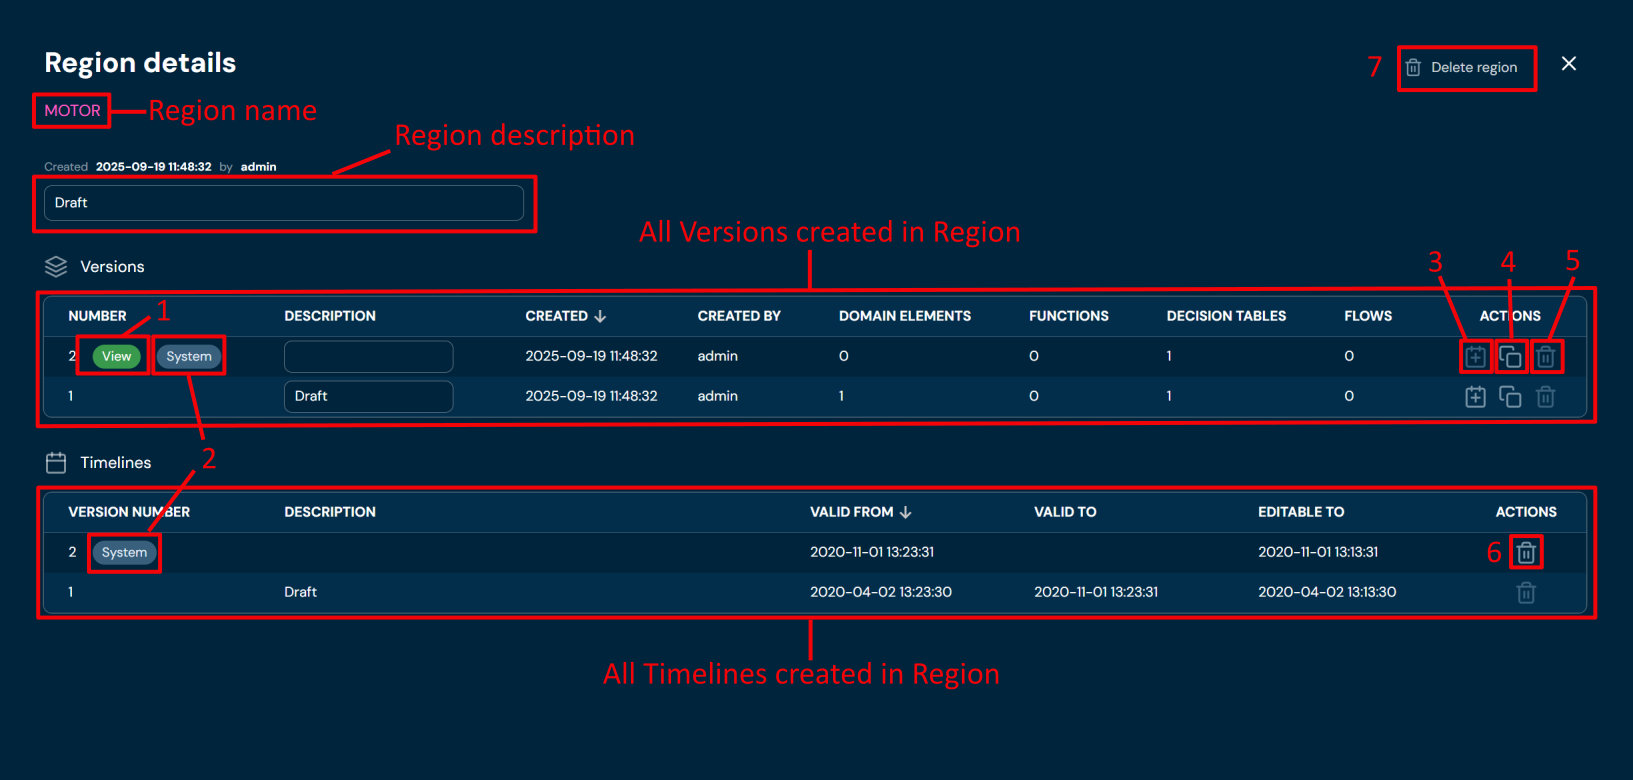
| No. | Name | Description |
|---|---|---|
| 1 | View | Indicates which Version is currently visible based on My View settings. To learn more about My View, go here. |
| 2 | System | “System” Version is set by Timeline based on VALID TO and VALID FROM dates. Currently valid Version is labeled as “System”. |
| 3 | Add to | Allows adding Version to Timelines. User cannot add Version to Timelines twice in a row; in this case, the action will be greyed out. To learn more about adding a version to Timelines, go here. |
| 4 | Clone | Allows cloning Version. To learn more about cloning a version, go here. |
| 5 | Delete Version | Deletes a version of the region. If the action is greyed out, it means that the version is assigned to Timelines and cannot be deleted. To learn more about deleting a version, go here. |
| 6 | Delete Timelines | Deletes Timelines; only the newest Timeline can be deleted. “Delete” action is greyed out for older Timelines. To learn more about deleting Timelines, go here. |
| 7 | Delete region | Deletes a Region. To learn more about deleting regions, go here. |
Add Version to Timelines#
If you want to add a version to Timelines, follow these steps:
-
Choose Versions.
-
Left-click on a region you wish to add Timelines to.
a. Left-clicking on region brings up Region details screen.
-
Choose Add to Timelines action for desired Version.
a. If action is greyed out, it means that this particular Version was added to the newest Timeline. You cannot add the same Version to Timelines twice in a row.
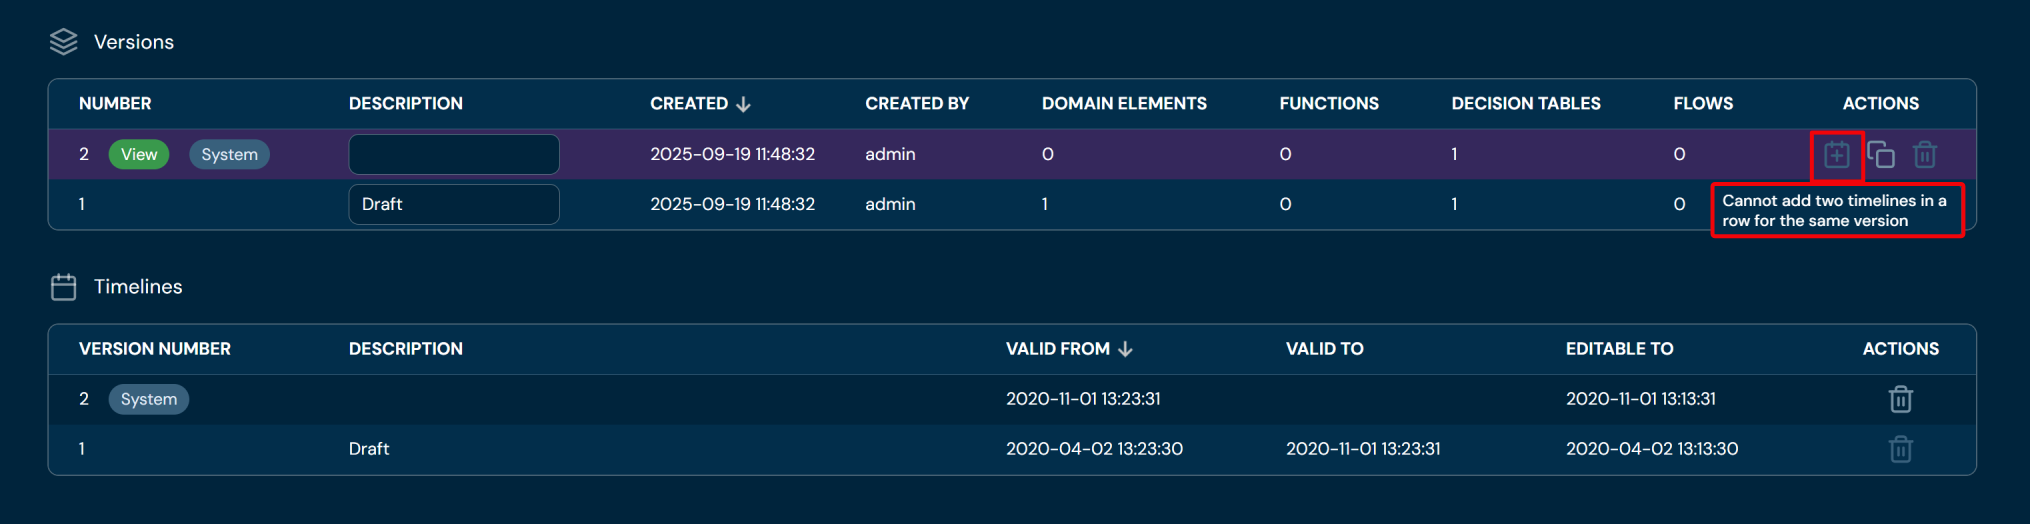
-
Choose VALID FROM date in calendar.
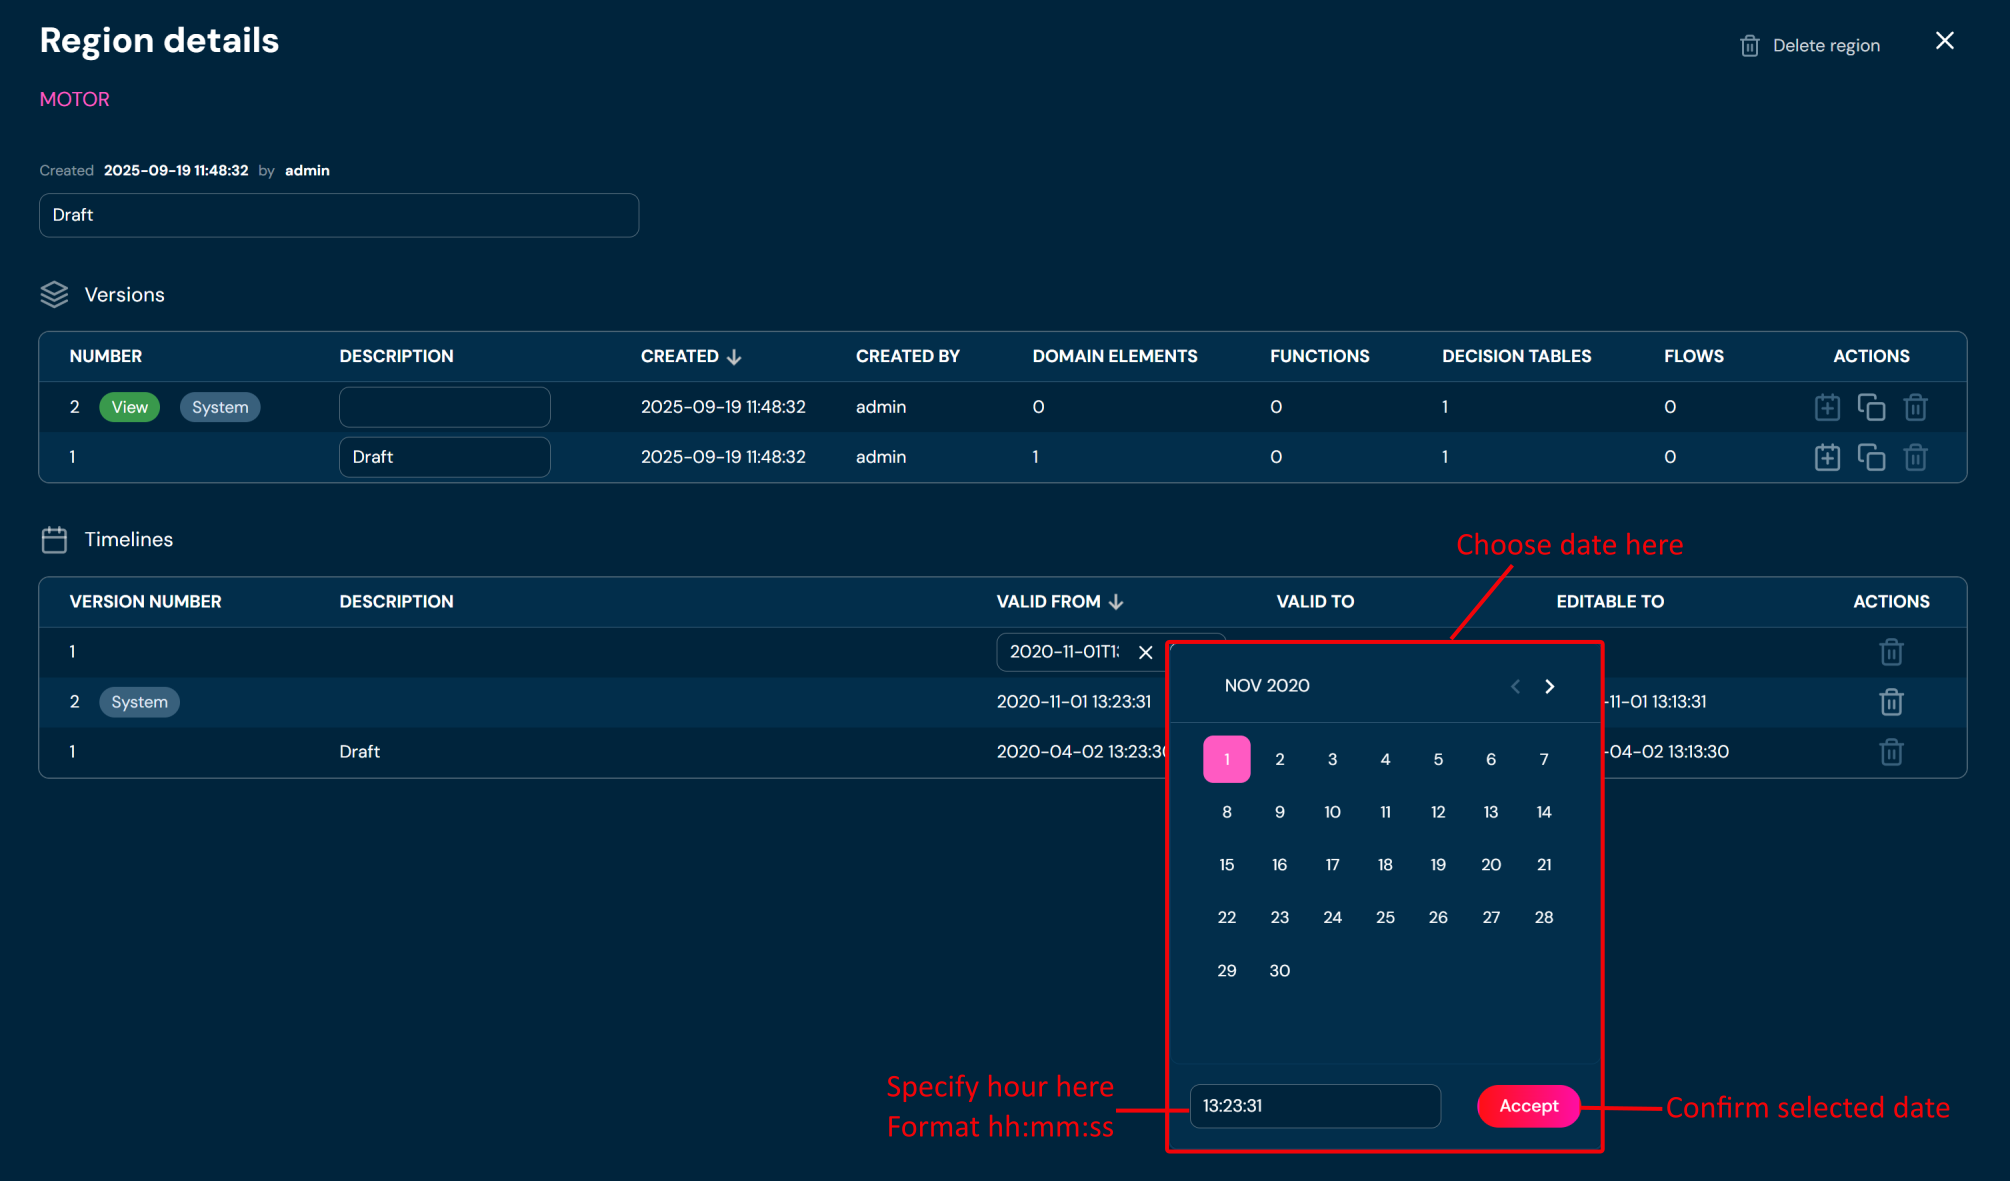
-
Choose Accept.
a. New Timeline is created.
b. If you choose a date older than the VALID FROM date of the currently newest Timeline, then a validation error will appear.
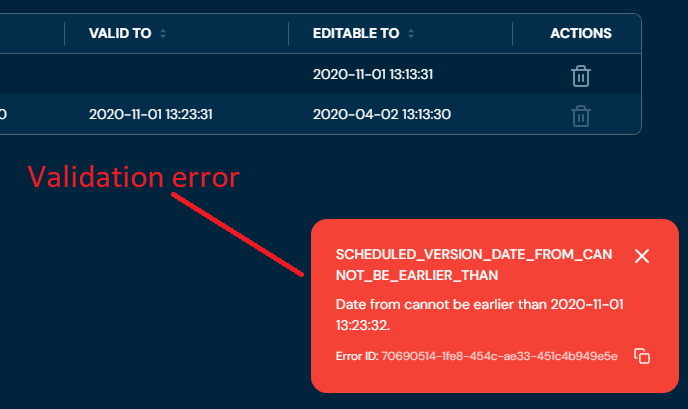
Clone Version#
If you want to clone a version, follow these steps:
-
Choose Versions.
-
Left-click on a region you wish to clone a version.
a. Left-clicking on region brings up Region details screen.
-
Choose Clone version action for desired Version.
a. The New version is created as a clone.
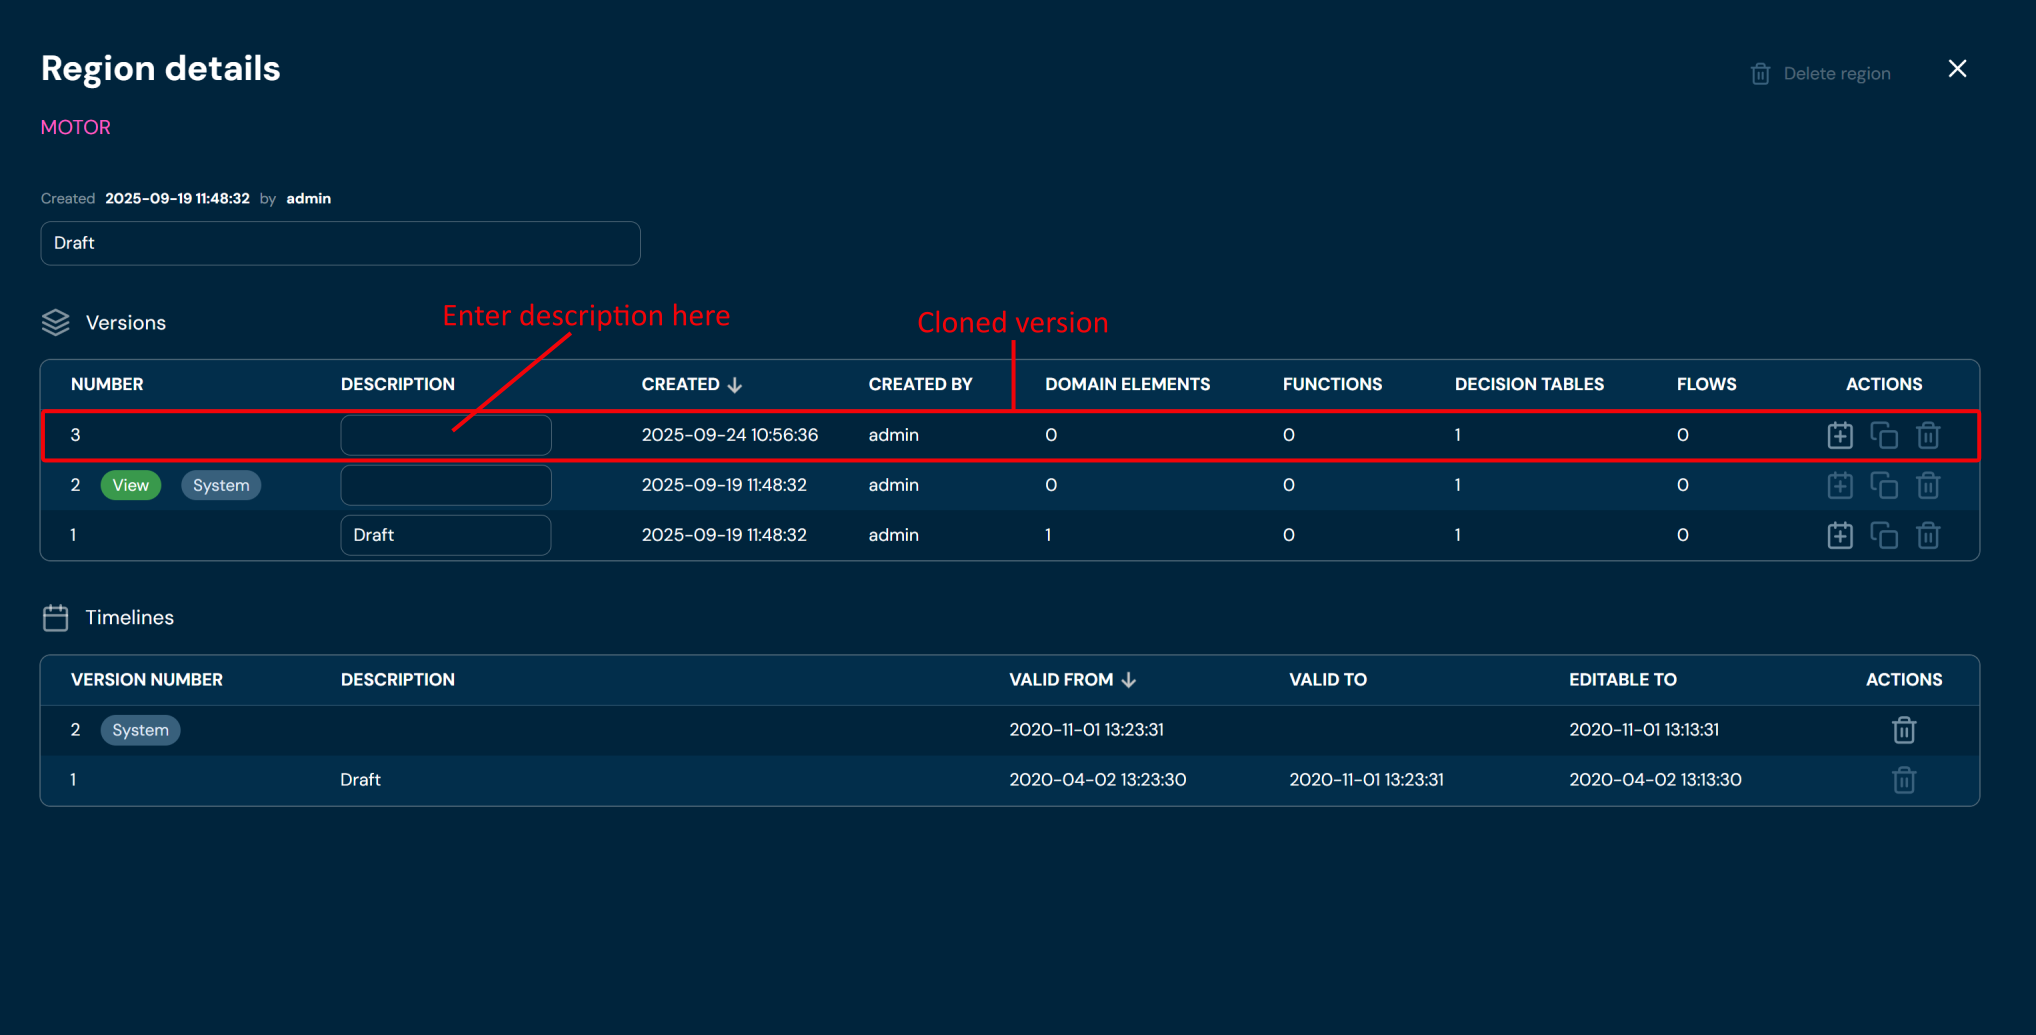
-
You can enter the description for created version.
Delete Version#
If you want to delete a version, follow these steps:
-
Choose Versions.
-
Left-click on a region you wish to clone a version.
a. Left-clicking on region brings up Region details screen.
-
Choose Delete version action for desired Version.
a. After choosing Delete version action, confirmation pop up will appear.
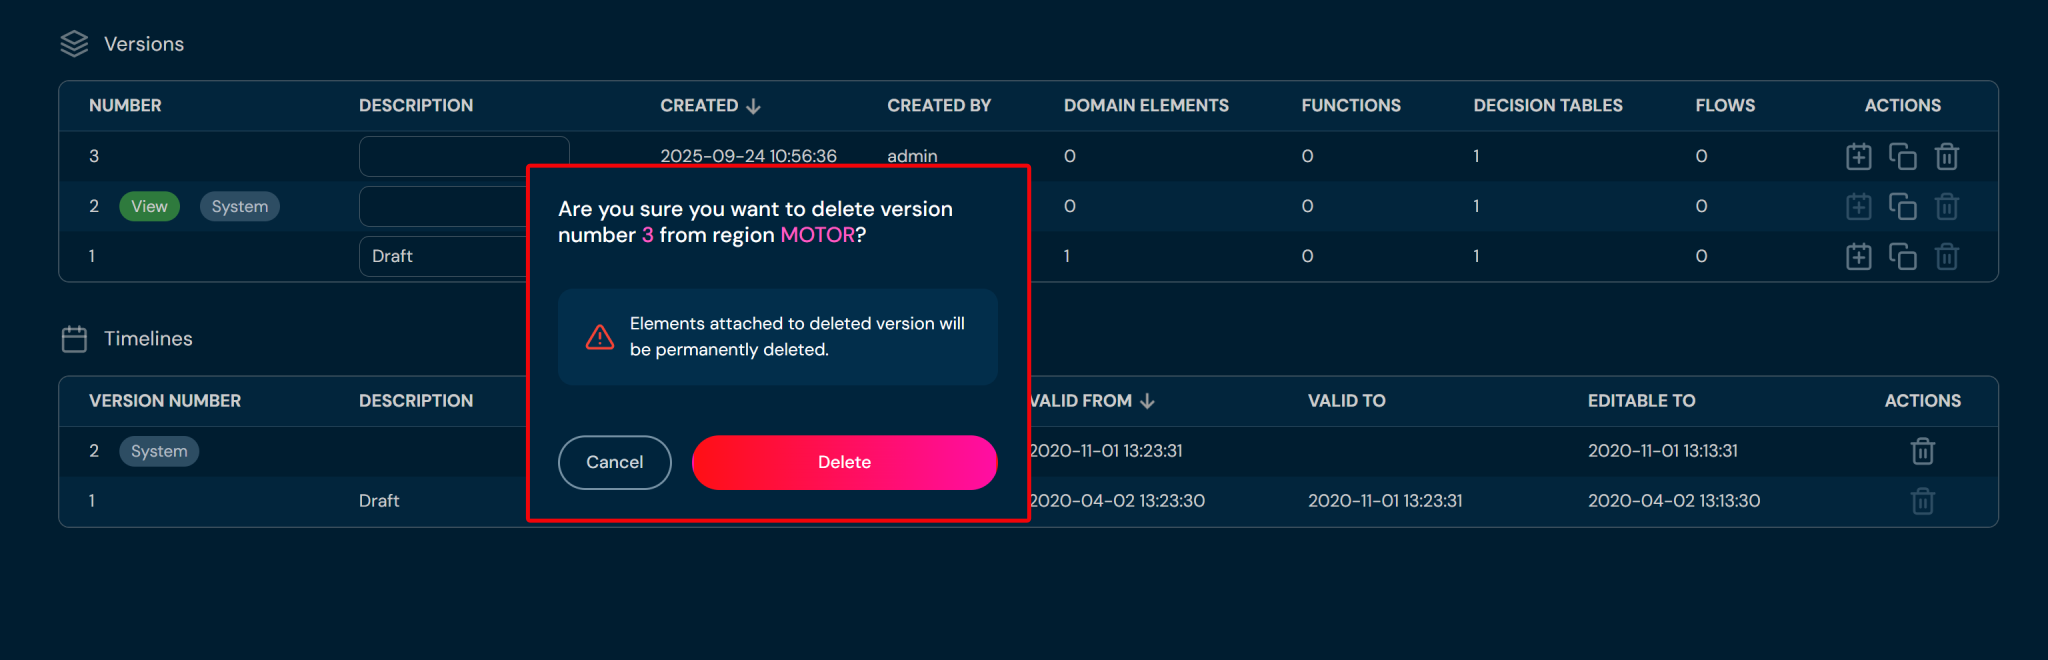
-
Choose Delete.
a. Version is being deleted from Region.
b. Bear in mind that deleting version will also permanently delete all attached elements (Decision Tables, Functions, Domain Configuration elements).
Delete Timelines#
If you want to delete timelines, follow these steps:
-
Choose Versions.
-
Left-click on a region you wish to clone a version.
a. Left-clicking on region brings up Region details screen.
-
Choose Delete timeline action for the newest timeline.
a. Bear in mind that only the newest timeline can be deleted. Delete action for older timelines is greyed out.
Delete Region#
If you want to delete a region, follow these steps:
-
Choose Versions.
-
Left-click on a region you wish to delete.
a. Left-clicking on region brings up Region details screen.
-
Choose Delete region.
a. After choosing Delete region action, confirmation pop up will appear.
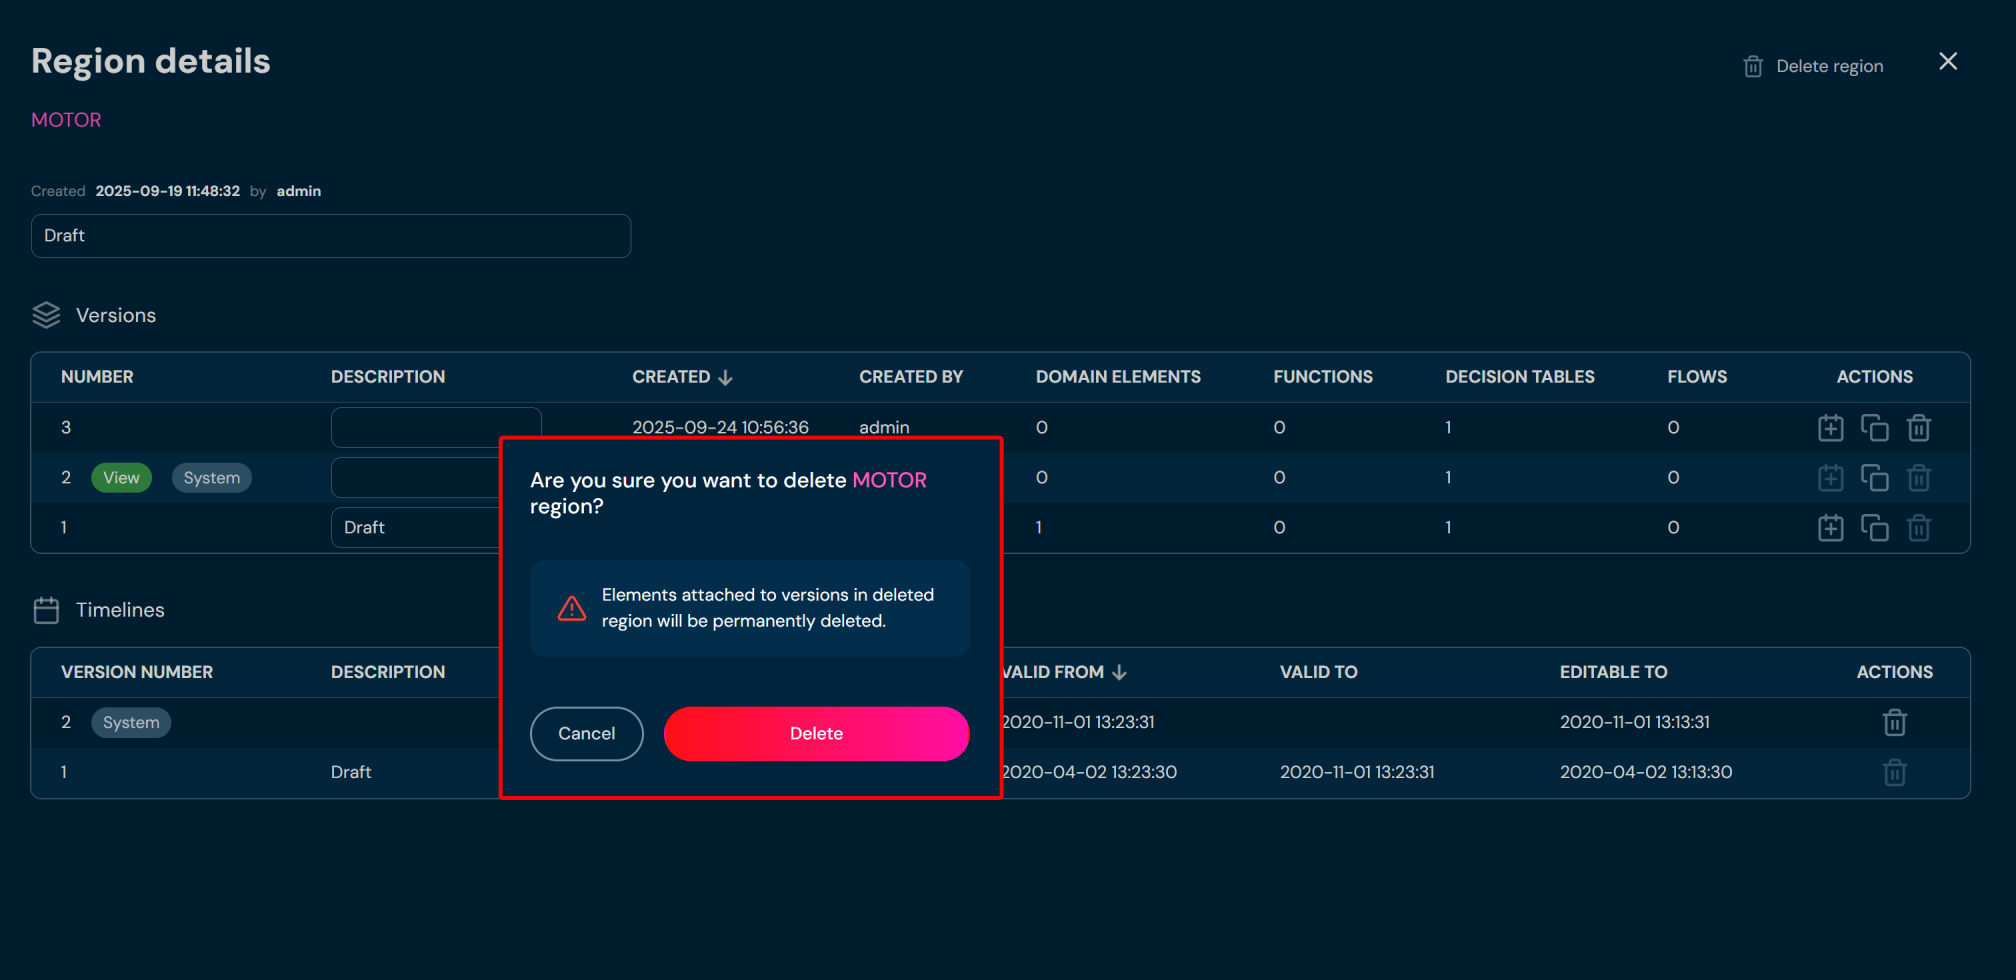
-
Choose Delete.
a. The Region is being deleted from the environment.
b. Bear in mind that deleting region will also permanently delete all attached elements (Decision Tables, Functions, Domain Configuration elements).
Tags are helpful tools to search for decision tables and functions. They work as label, which can be assign to different elements in the system. Tags have no influence on work of Higson system, they are there only for our convenience.
In order to see Tags, select Tools → Tags in Main Toolbar.
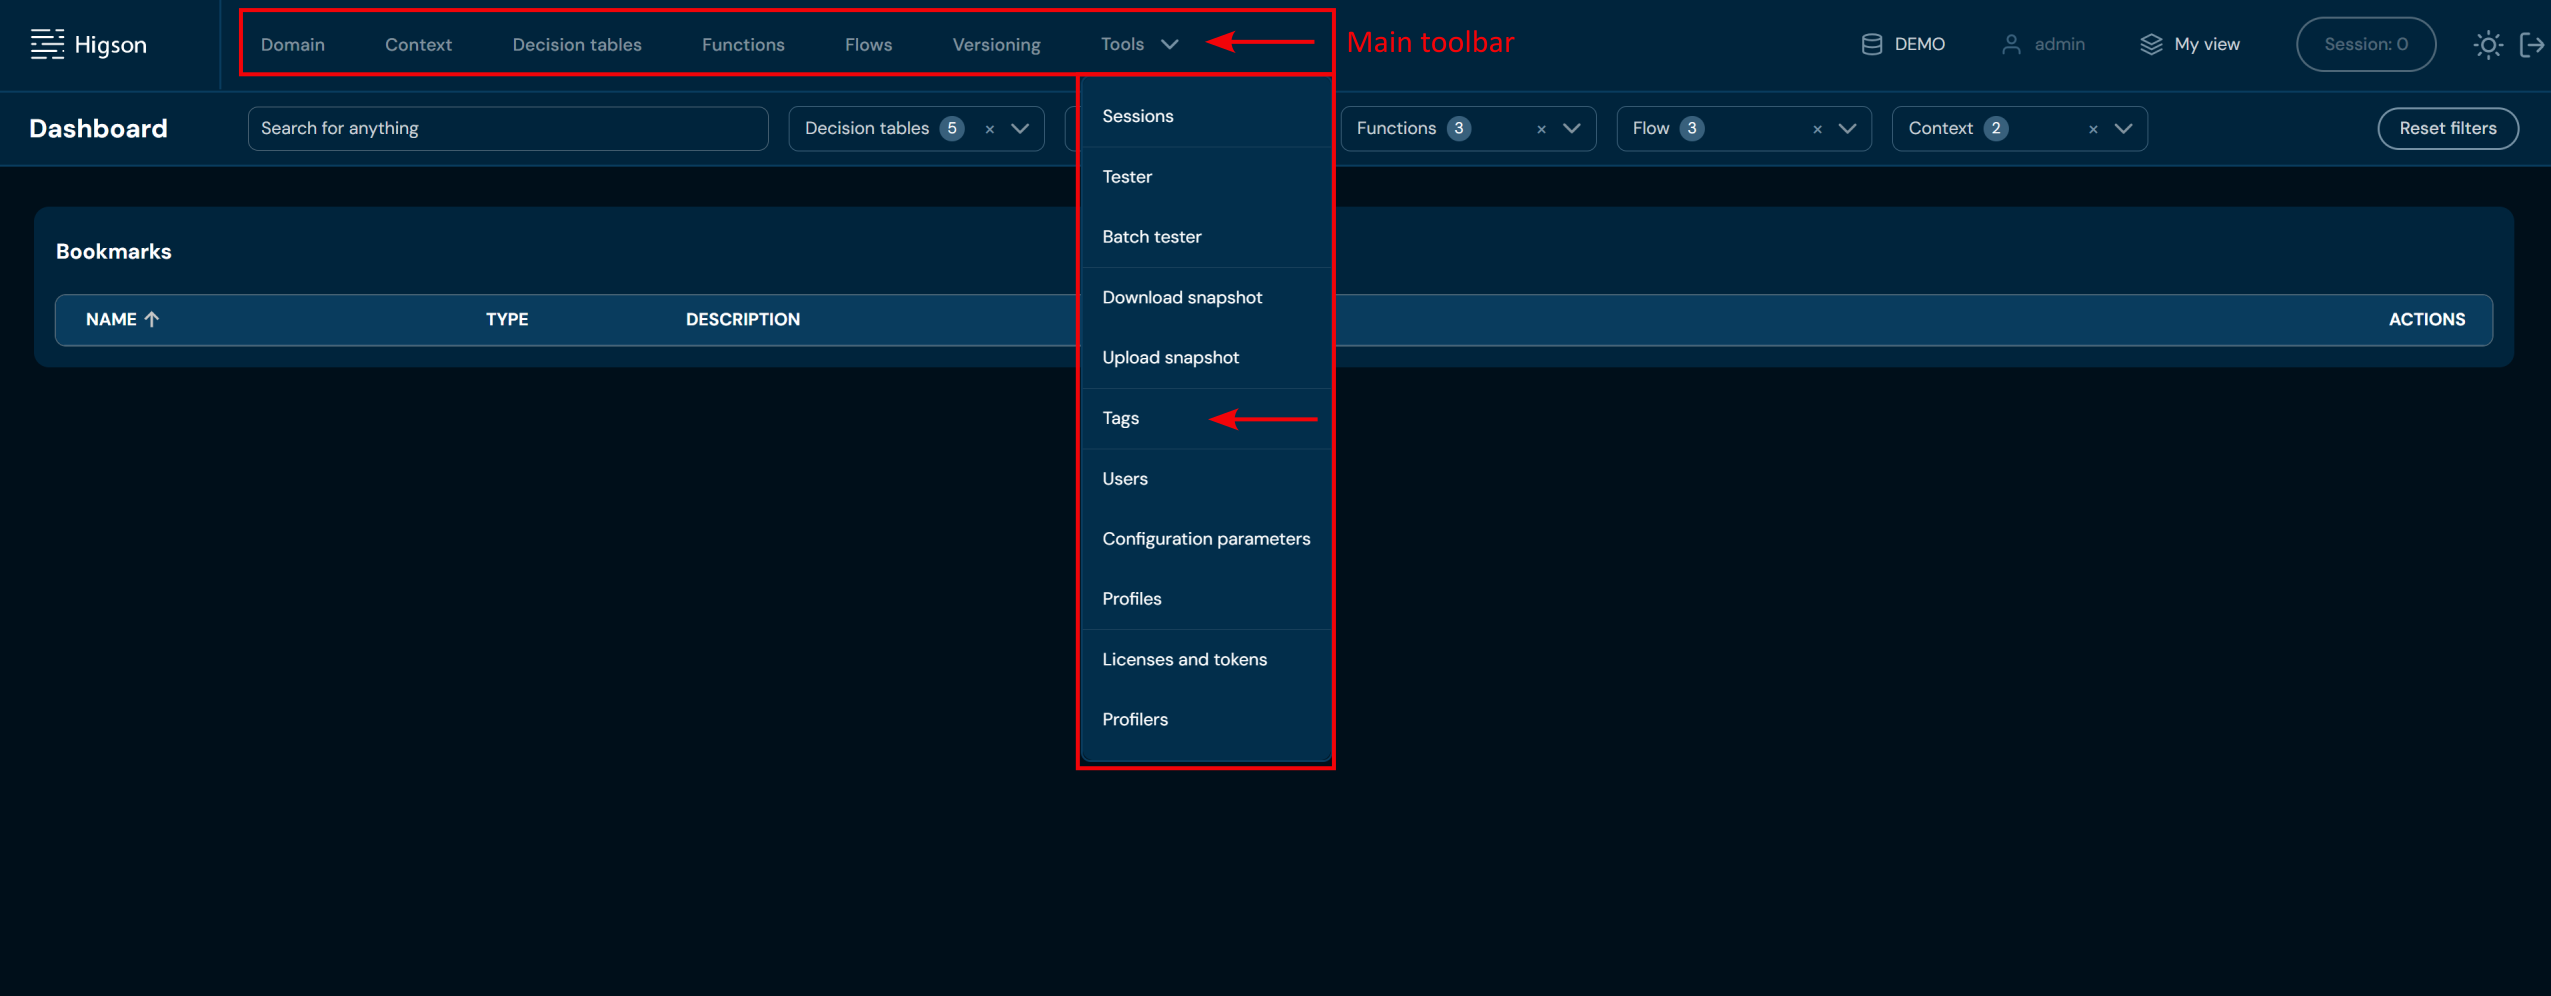
After you enter Tags you will see screen of all Tags:
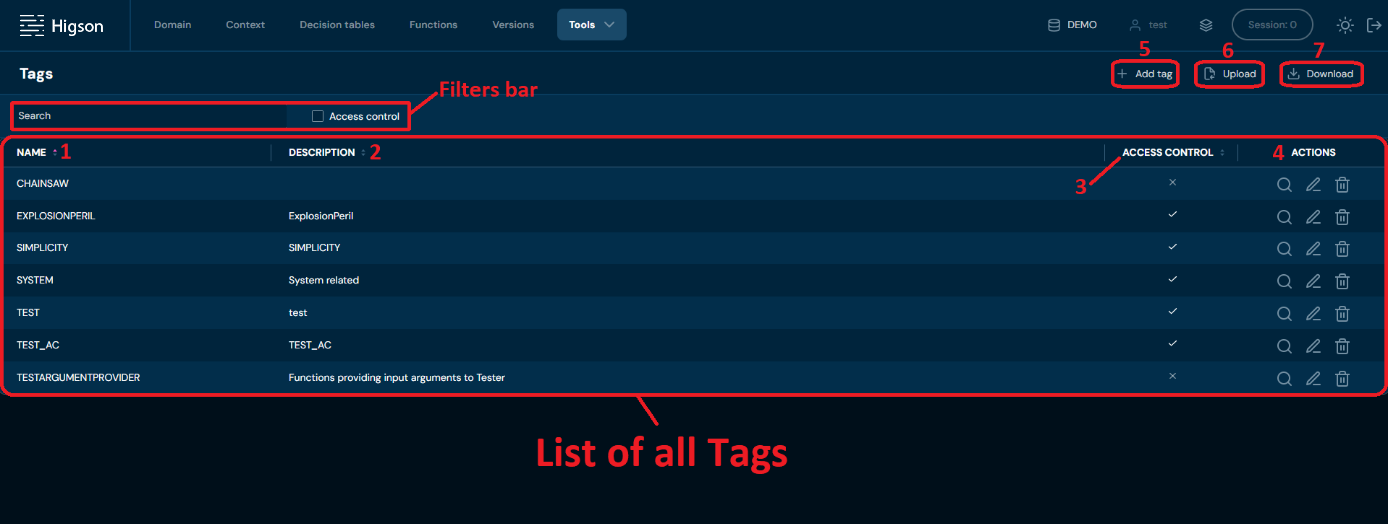
| No. | Column/Action name | Description |
|---|---|---|
| 1. | Name | Full tag name. You can sort this column by left-clicking on the arrows visible next to the label. |
| 2. | Description | Full tag description. You can sort this column by left-clicking on the arrows visible next to the label. |
| 3. | Access control | Shows which tags have restricted access. You can sort this column by left-clicking on the arrows visible next to the label. |
| 4. | Actions | List of quick access actions available for each user. Available actions are: - Find usages - Edit - Delete |
| 5. | Add tag | Allows to create new Tags. To learn more about adding Tags go here. |
| 6. | Upload tags | Allows to upload Tags from a XLSX file. To learn more about uploading Tags go here. |
| 7. | Download tags | Downloads a XLSX file that contains data of all Tags currently on the environment. To learn more about downloading Tags go here |
You can see all Filters available in Tags below:
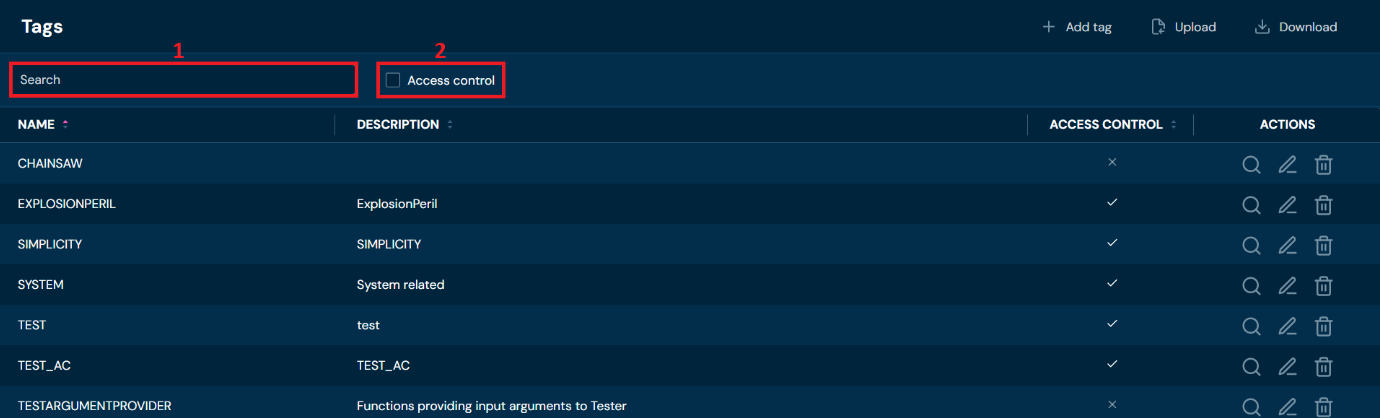
| No. | Filter name | Description |
|---|---|---|
| 1. | Search text field | Filter by any string provided by user. Filtered by Name column. |
| 2. | Access control checkbox | Filter by Access control column. |
All actions visible in quick access action list are listed below:
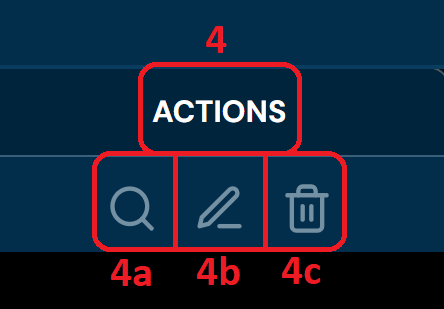
| No. | Name | Description |
|---|---|---|
| 4. | Actions | List of quick access actions available for each tag. |
| 4a. | Find usages | Redirects to Global search with the correct filters applied. To learn more about finding usages go here |
| 4b. | Edit | Allows to edit tag’s data. To learn more about editing tag’s data go here. |
| 4c. | Delete | Deletes tag. To learn more about deleting tag go here. |
Add Tag#
If you want to add a new tag, follow these steps:
-
Choose Tools → Tags in Main toolbar.
-
Choose + Add tag.
a. Choosing + Add tag adds new empty record to the List of all Tags.
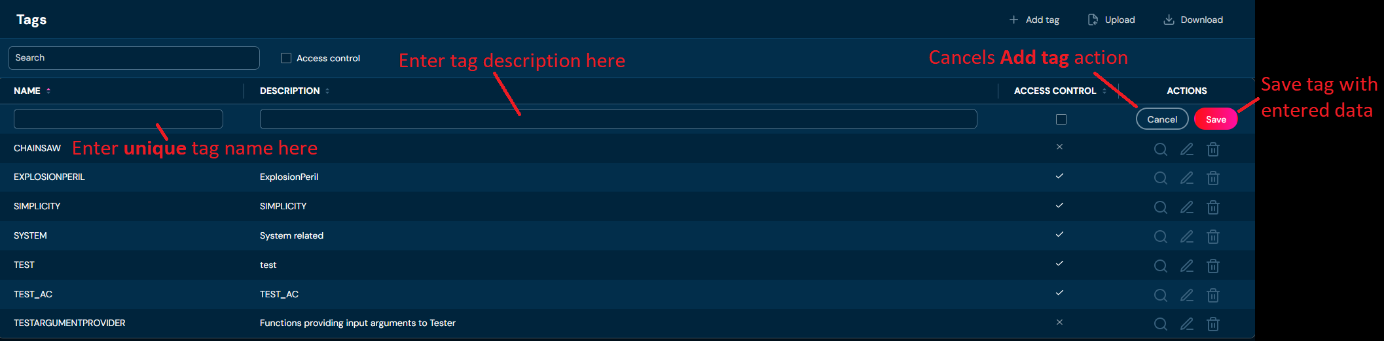
-
You:
a. need to provide unique Tag name. Name can contain only characters from collection a-z; 0-9; “.”; “-”; “_” and it can’t start with “-”. i. If you entered illegal characters in name field, then borders will be highlighted with red color and you will not be able to save tag.
 b. can provide Tag description. Description can contain any characters.
c. can select Access control checkbox to determine if Tag should have restricted access.
b. can provide Tag description. Description can contain any characters.
c. can select Access control checkbox to determine if Tag should have restricted access. -
Choose Save. a. Tag with entered data is created. b. If you entered the same name as one of Tags already created, then validation error will appear.
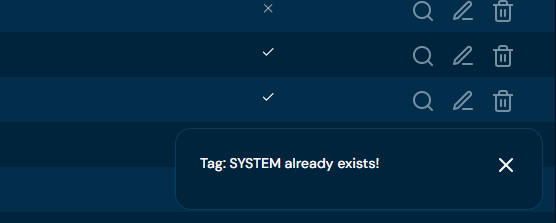
Upload Tags#
If you want to upload tags, follow these steps:
-
Choose Tools → Tags in Main toolbar.
-
Choose Upload. a. Choosing Upload brings up Upload tags screen.
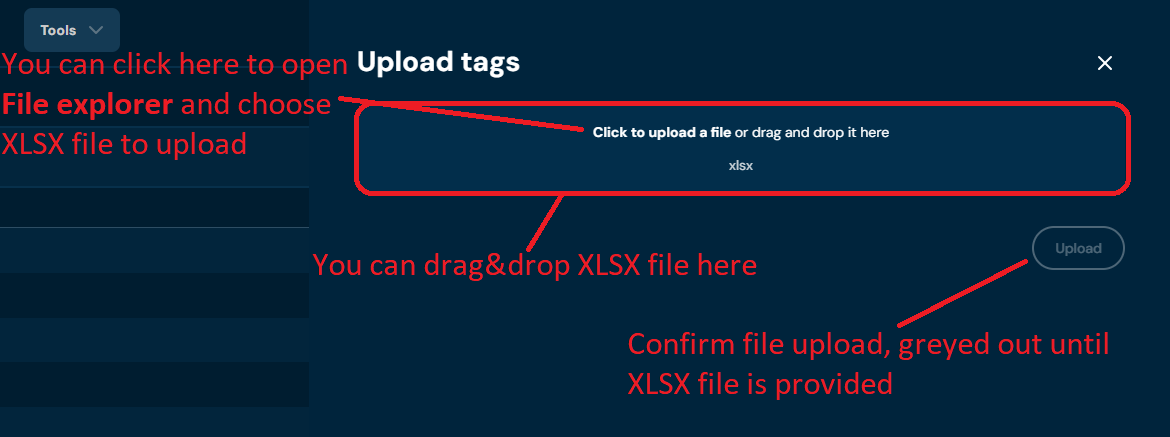
-
Drag&drop desired file or Click to upload a file and choose file in File explorer. a. If you will choose a file with extension other than XLSX, then validation error will pop-up.
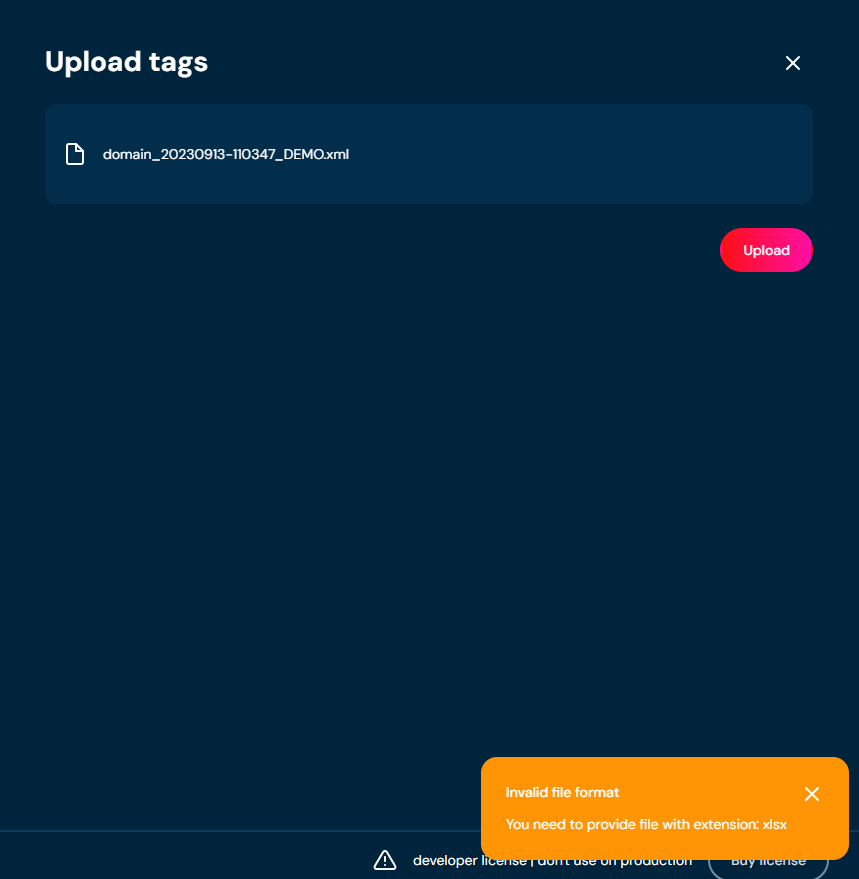
-
Choose Upload.
-
When progress bar reach 100%, it mean that file was uploaded correctly.
a. If validation error will occur (see above), then upload process is being aborted.
Download Tags#
If you want to download all tags currently on the environment, follow these steps:
-
Choose Tools → Tags in Main toolbar.
-
Choose Download.
a. Choosing Download downloads a XLSX file, that contains data of all tags currently on the environment.
Find Usages#
If you want to know which elements use certain tags, follow these steps:
- Choose Tools → Tags in Main toolbar.
- Choose Find usages actions for desired Tag.
 a. Choosing Find usages redirects to Global search with the correct filters applied.
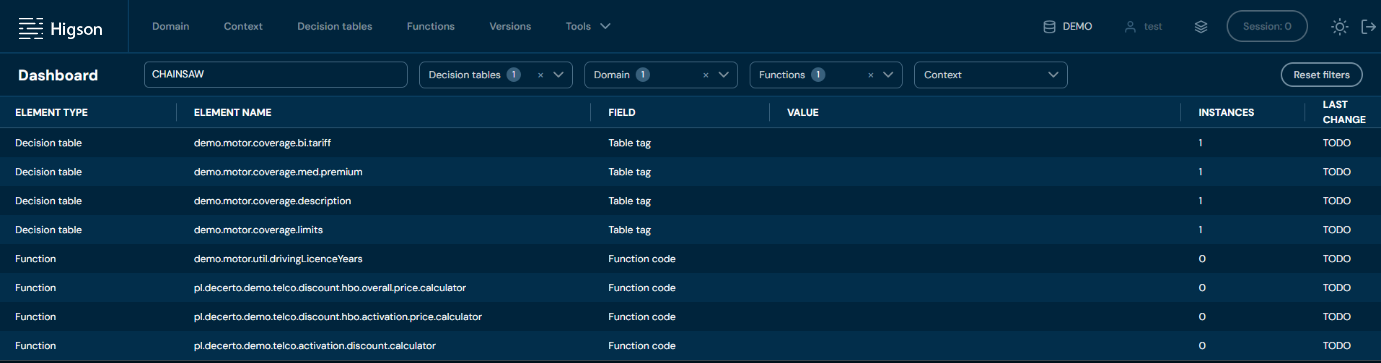
Edit Tag#
If you want to edit data in specific tag, follow these steps:
-
Choose Tools → Tags in Main toolbar
-
Choose Edit action for desired tag.
a. If Tag is being used by any Elemetn, then Edit action is greyed out.
 b. Highlighted borders indicate, that edit mode is active.
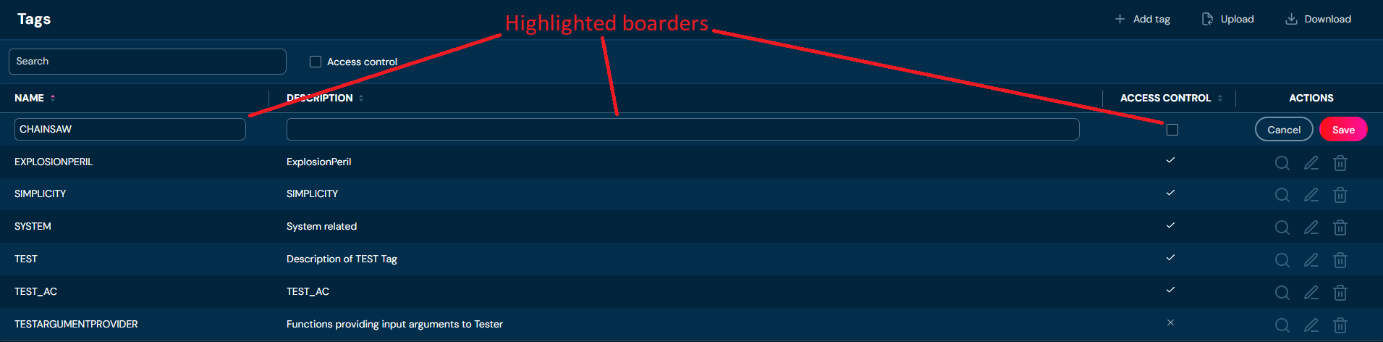
-
Edit any data you need.
a. Name can contain only characters from collection a-z; 0-9; “.”; “-”; “_” and it can’t start with „-’’. If you entered illegal characters in name field, then borders will be highlighted with red color and you will not be able to save tag.
-
Choose Save.
a. Tag is being updated. b. If you entered the same name as one of Tags already created, then validation error will appear.

Delete Tag#
If you want to delete specific tag, follow these steps:
-
Choose Tools → Tags in Main toolbar.
-
Choose Delete action for desired tag.
 a. If Tag is being used by any Element, then Delete action is greyed out.
 b. After choosing Delete action, confirmation pop-up will appear
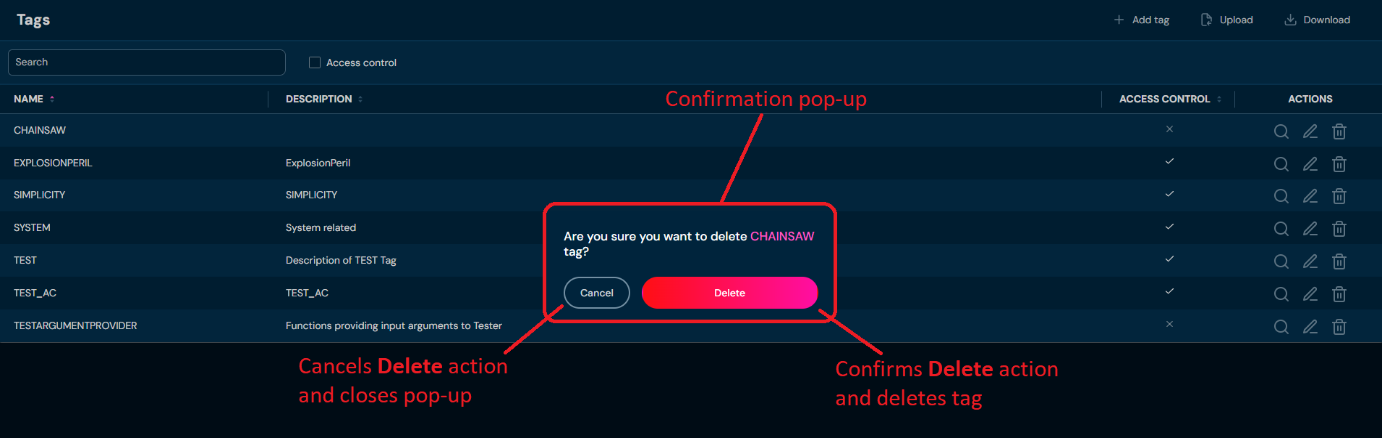
-
Choose Delete.
a. Specific Tag is being deleted from the environment. This action is irreversible.
A profile is a self-contained data module. The domain and context are directly assigned to a profile and cannot exist without one. All profiles available in the environment are listed in the dropdown on the right side of the toolbar.

Profile-Scoped and Global Elements#
Decision tables, functions, and flows can either be assigned to a specific profile or be global.
- Profile-scoped elements are tied to a single profile. When a profile is selected, the list views display both global elements and elements assigned to that profile.
- Global elements are not assigned to any profile and are always visible, regardless of which profile is currently selected.
When no profile is selected (not-chosen), only global elements are visible.
When creating a new decision table, function, or flow, you choose whether to assign it to a profile or make it global. You can also change this assignment at any time using the Assign Profile or Make Global actions available in the list view and on the details screen.
Access Control#
Assigning an element to a profile restricts its visibility: only users with permissions for that profile can see and modify it. Global elements are accessible to all users regardless of their profile permissions.
Use profile assignment to isolate business logic that belongs to a specific product, line of business, or team. Use global elements for shared utilities that need to be reusable across multiple profiles.
Regions and Profiles#
A region can only be attached to an element that is already assigned to a profile, because a region belongs to a profile. If you intend to use versioning on a decision table, function, or flow, assign it to a profile first.
Selecting Profile#
-
Open the dropdown menu on the right side of the toolbar.
-
Choose a profile from the list.

Profiles Screen#
In order to access profiles screen open Tools in Main Toolbar and select profiles.
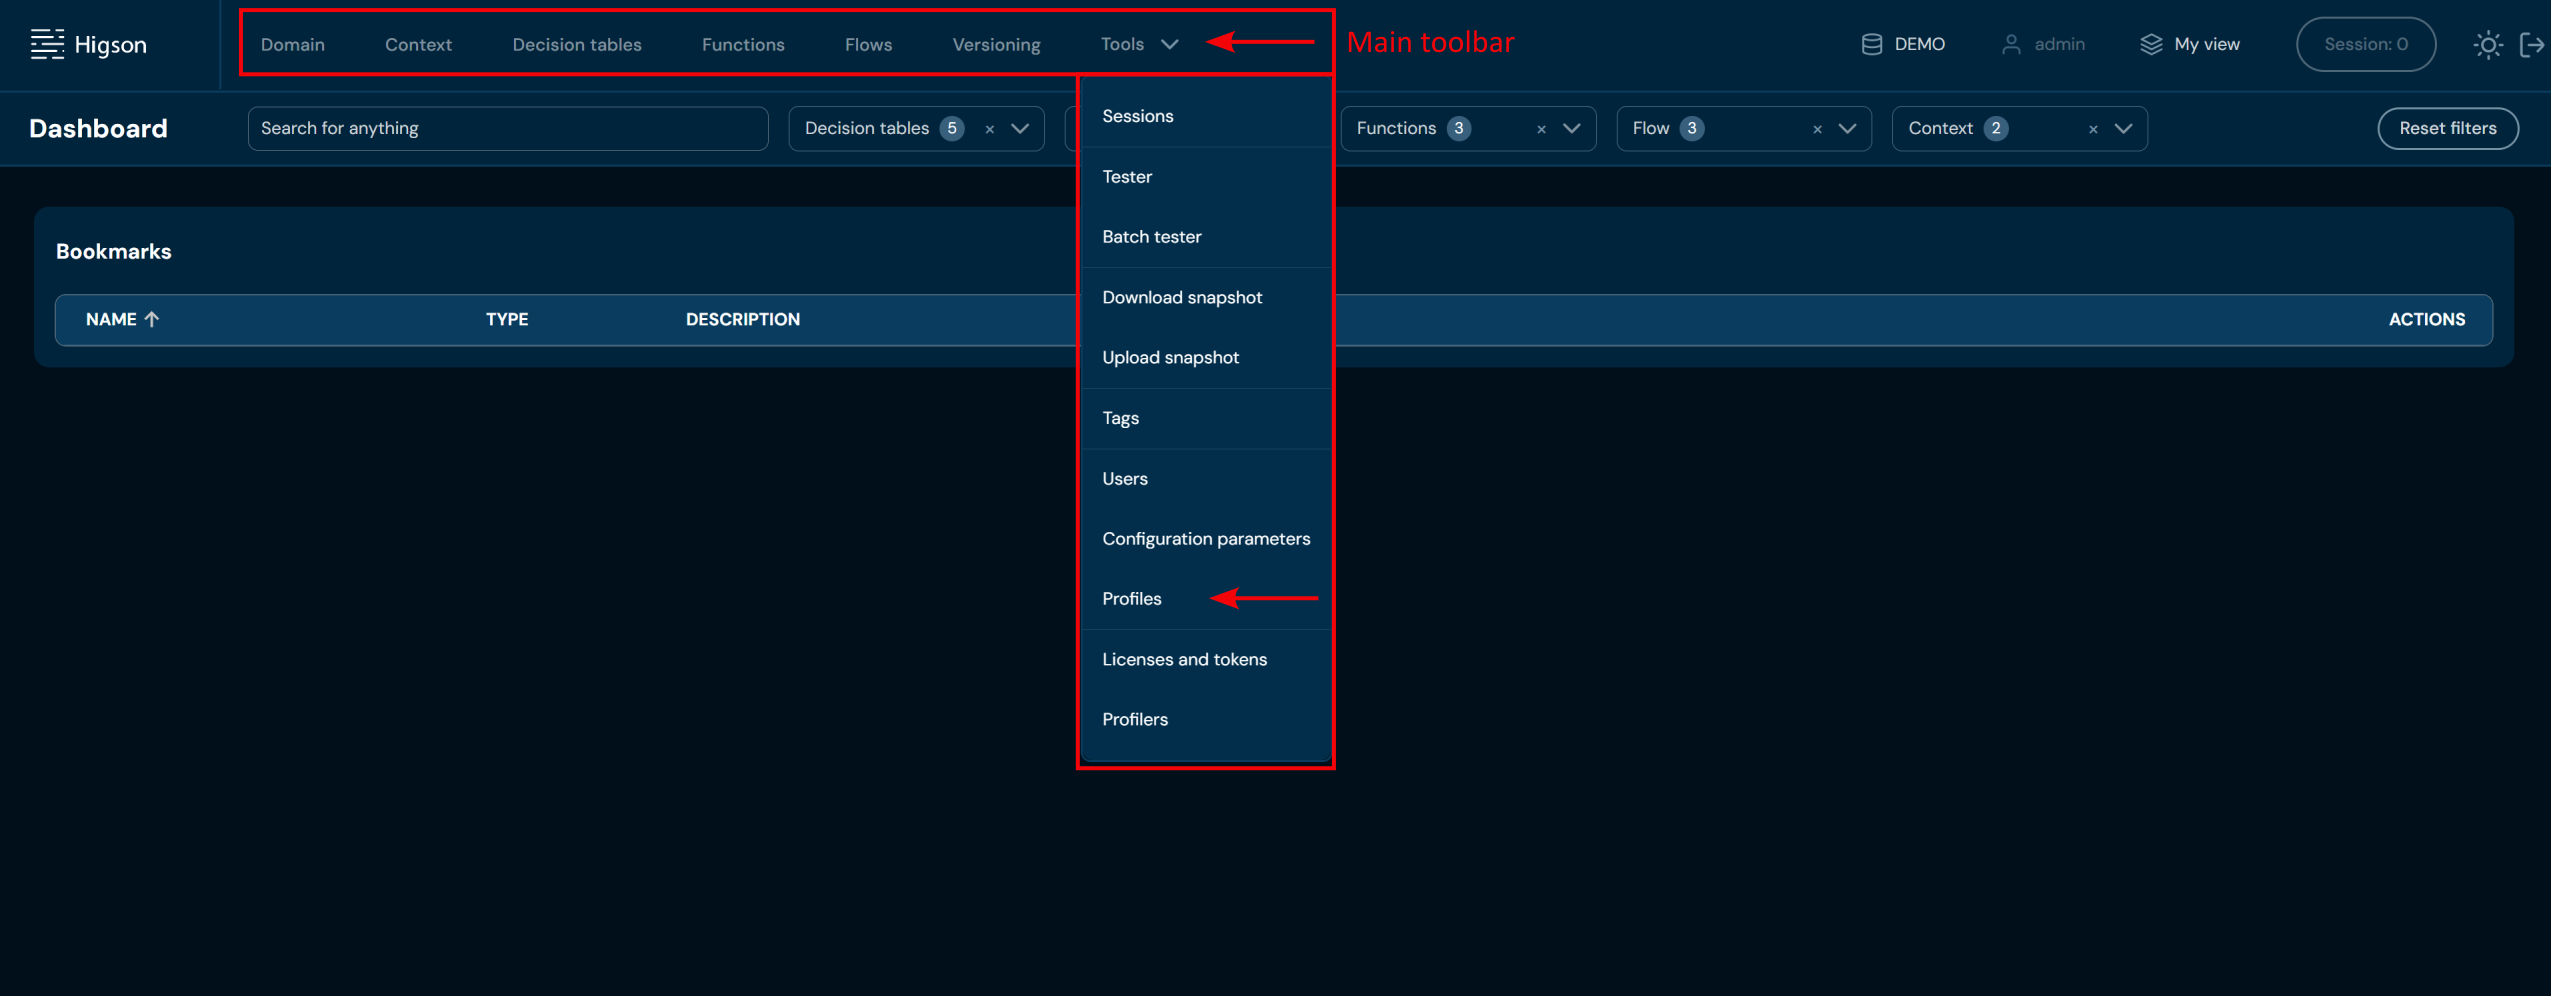
After you enter Profiles you will see screen of all profiles:
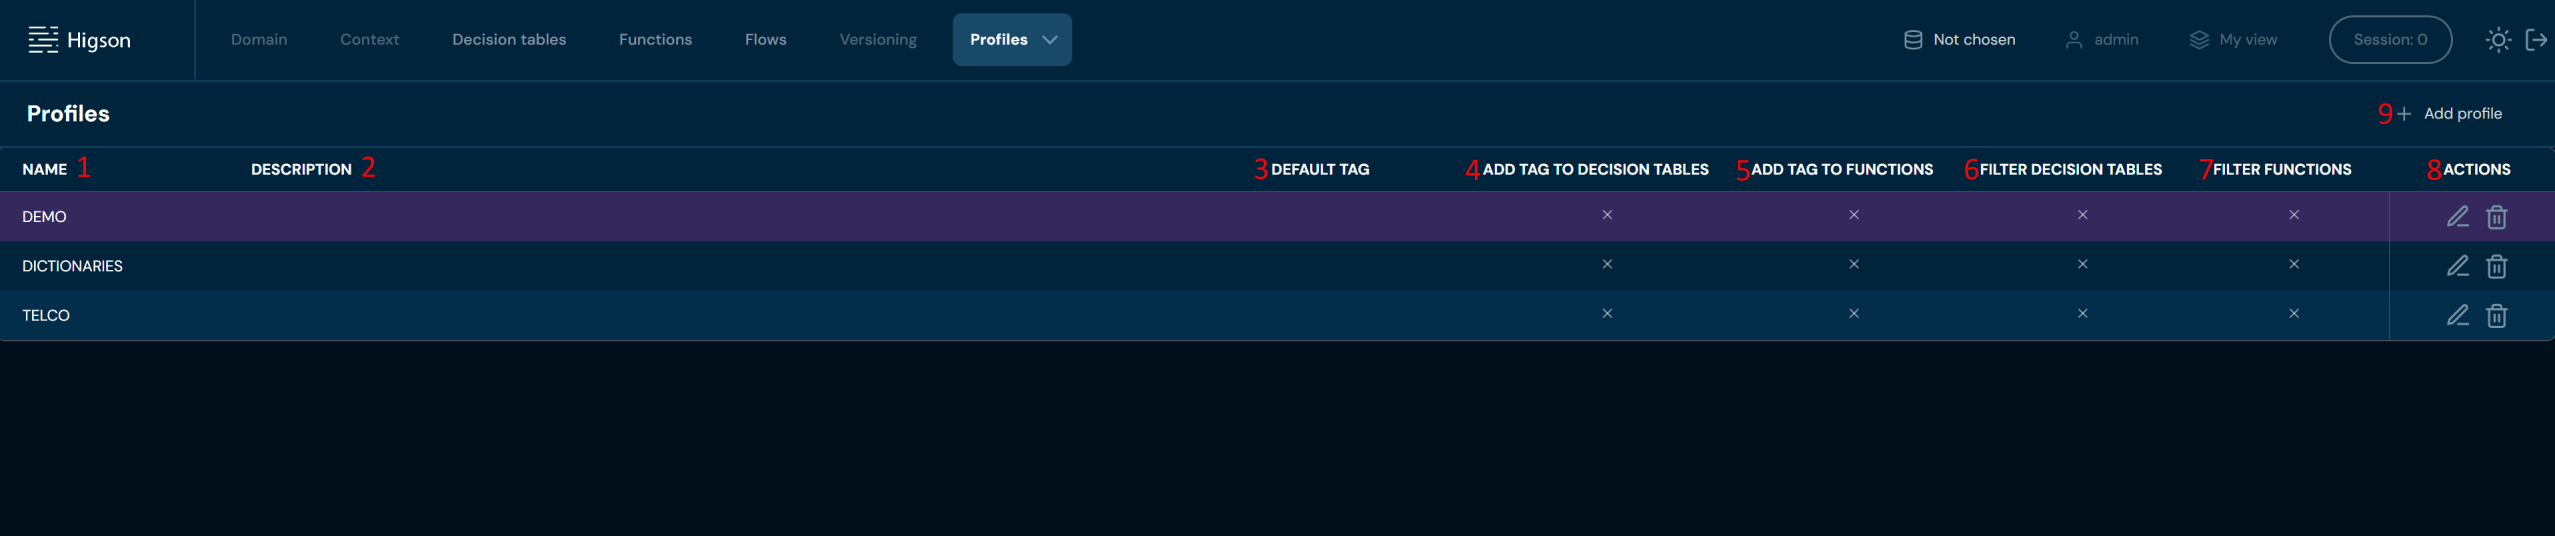
| No. | Column name | Description |
|---|---|---|
| 1. | Name | Full profile name. |
| 2. | Description | Optional profile description. |
| 3. | Default tag | Tag assigned to the profile. To learn more about tags, go to Tags. |
| 4. | Add tag to decision table | Flag that automatically adds the selected tag to each new decision table created within the given profile. |
| 5. | Add tag to functions | Flag that automatically adds the selected tag to each new function created within the given profile. |
| 6. | Filter decision tables | Flag that filters the decision tables list to show only tables containing the selected tag. |
| 7. | Filter functions | Flag that filters the functions list to show only functions containing the selected tag. |
| 8. | Actions | List of quick access actions. Edit action (pencil) allows changing other columns within a profile. After it’s selected, two buttons will emerge in its place: click Save to save changes or Cancel to reject them. Remove action (bin icon) deletes the desired profile. |
| 9. | Add profile | Adds a new profile. Enter its name and optionally other data to save it. You can click Cancel to remove it. |
Adding New Profile#
In order to add a new profile, you need to:
-
Choose + Add profile
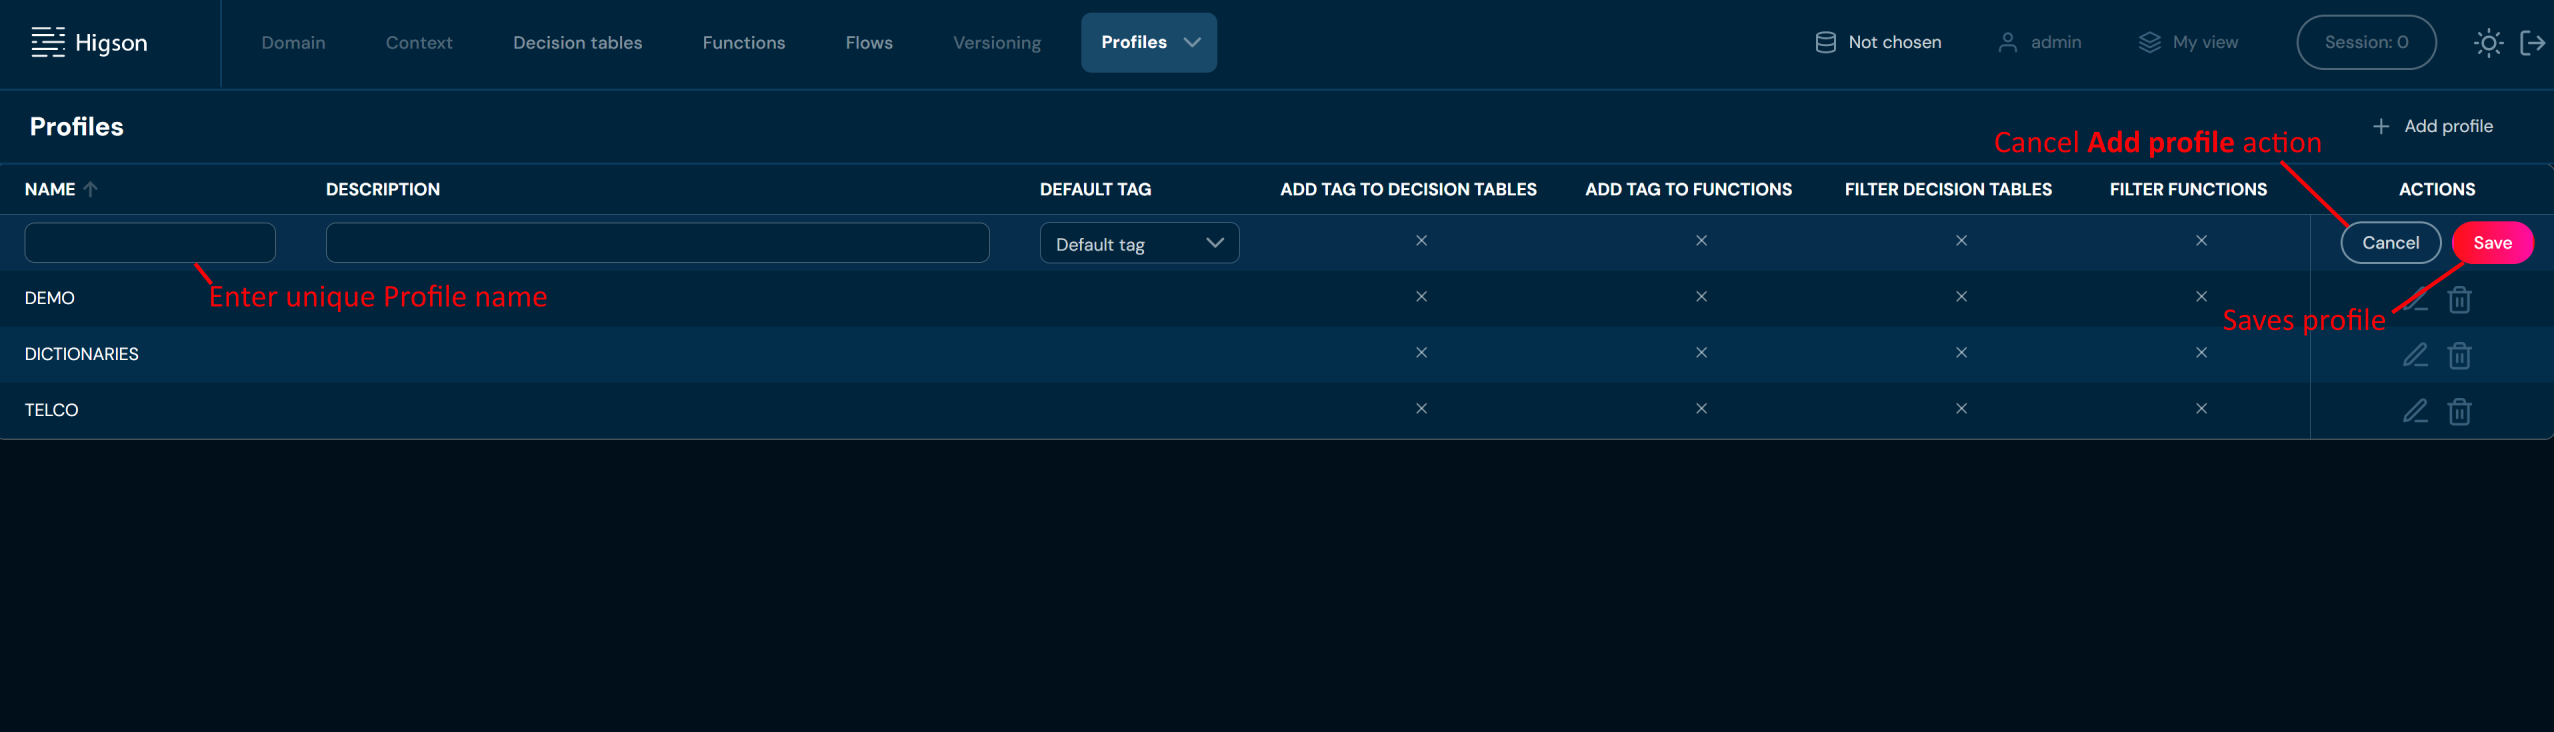
-
Provide unique Profile name. Name can contain only characters from collection a-z; 0-9; “.”; “-”; “_” and it can’t start with “-”.
a. If you enter illegal characters in name field, then borders will be highlighted with red color, and you will not be able to save tag.
-
Optional: add description and the rest of profile properties
-
Choose Save
a. Profile with entered data is created.
b. If you enter the same name as one of the Profiles already created, then validation error will appear.
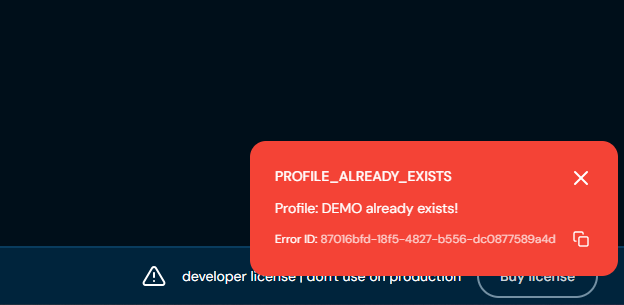
Access Management
The access management system in Higson Studio is structured around three core components:
- Users
- Roles – Bundles of grants defining what a user can access and do.
- Grants – Specific rights that enable or restrict actions within the platform. Each user can be assigned one or more roles, and each role consists of a set of grants. This design allows for a secure, scalable, and flexible access model, supporting the principle of least privilege.
Below is a table outlining the available grants categorized by their function:
| # | Grant | Description |
|---|---|---|
| 1 | PROFILE_READ_<PROFILE_NAME> | Read-only access to a specific profile. |
| 2 | PROFILE_WRITE_<PROFILE_NAME> | Write access to a specific profile. |
| 3 | PROFILE_READ_ALL | Read access to all profiles and profile-related elements (domain, context, etc.). |
| 4 | PROFILE_WRITE_ALL | Write access to all profiles and profile-related elements (domain, context, etc.). |
| 5 | TAG_READ_<TAG_NAME> | Read access to elements marked with access control tag. |
| 6 | TAG_WRITE_<TAG_NAME> | Write access to elements marked with access control tag. |
| 7 | SNAPSHOT_DOWNLOAD | Permission to download snapshots. |
| 8 | SNAPSHOT_UPLOAD | Permission to upload snapshots. |
| 9 | RULE_ELEMENTS_READ | Read access to rule elements (functions, decision tables, flows), excluding those with tags. |
| 10 | RULE_ELEMENTS_WRITE | Write access to rule elements (functions, decision tables, flows), excluding those with tags. |
| 11 | RULE_ELEMENTS_READ_ALL | Read access to all rule elements (functions, decision tables, flows), including tagged ones. |
| 12 | RULE_ELEMENTS_WRITE_ALL | Write access to all rule elements (functions, decision tables, flows), including tagged ones. |
| 13 | SESSION_READ_ALL | Permission to read all sessions. |
| 14 | SESSION_WRITE_ALL | Permission to write all sessions. |
| 15 | SYSTEM_CONFIG_ACCESS | Permission to access and configure system-level settings. |
Default Roles in Higson Studio#
The system defines the following default roles:
| Role Name | Description | Grants Included |
|---|---|---|
| MPP_ADMIN | Full administrator access | RULE_ELEMENTS_WRITE_ALL, PROFILE_READ_ALL, SNAPSHOT_UPLOAD, PROFILE_WRITE_ALL, RULE_ELEMENTS_READ_ALL, SNAPSHOT_DOWNLOAD, SYSTEM_CONFIG_ACCESS, RULE_ELEMENTS_READ, RULE_ELEMENTS_WRITE, SESSION_READ_ALL, SESSION_WRITE_ALL, TESTER WRITE |
| MPP_SYSTEM_SCHEDULER | System scheduling access | TAG_WRITE_SYSTEM, TAG_READ_SYSTEM |
| MPP_USER | Full standard user access | SNAPSHOT_UPLOAD, SNAPSHOT_DOWNLOAD, RULE_ELEMENTS_READ, RULE_ELEMENTS_WRITE, TESTER WRITE |
| MPP_USER_READONLY | Read-only access to Hyperon Studio | PROFILE_READ_ALL, RULE_ELEMENTS_READ_ALL, RULE_ELEMENTS_READ |
Examples of Role Configurations#
Profile-Specific Role
When a new profile is created, two grants are generated:
- PROFILE_READ_<PROFILE_NAME>
- PROFILE_WRITE_<PROFILE_NAME>
To create a role that grants access only to global elements and the DEMO profile, assign the following grants:
- PROFILE_READ_DEMO
- PROFILE_WRITE_DEMO
- RULE_ELEMENTS_READ
- RULE_ELEMENTS_WRITE
Such a user:
- Will not have access to other profiles and their domain and context.
- Will see global elements and elements assigned to regions within the DEMO profile only.
Access-Control Tag Role
When a tag with access control is created (via Menu → Tools → Tags), the system generates grants:
- TAG_READ_<TAG_NAME>
- TAG_WRITE_<TAG_NAME>
These grants are listed under Tools → Users → Grants.
To grant access only to elements tagged with a specific tag:
- TAG_READ_<TAG_NAME>
- TAG_WRITE_<TAG_NAME>
To grant access to both tagged and global elements:
- TAG_READ_<TAG_NAME>
- TAG_WRITE_<TAG_NAME>
- RULE_ELEMENTS_READ
- RULE_ELEMENTS_WRITE
To grant access to all tagged and global elements:
- RULE_ELEMENTS_READ_ALL
- RULE_ELEMENTS_WRITE_ALL
Grant Codes Since Version 4.1#
| # | Grant code 4.0 | Grant code 4.1 | Description |
|---|---|---|---|
| 1 | PROD_R_<PROFILE_NAME> | PROFILE_READ_<PROFILE_NAME> | Read-only access to <PROFILE_NAME> profile details. |
| 2 | PROD_W_<PROFILE_NAME> | PROFILE_WRITE_<PROFILE_NAME> | Read-only access to <PROFILE_NAME> profile details. |
| 3 | PROD_R_ALL | PROFILE_READ_ALL | Read access to all profiles and profile-related elements (domain, context, rule elements attached to region). |
| 4 | PROD_W_ALL | PROFILE_WRITE_ALL | Modification access to all profiles and profile-related elements (domain, context, rule elements attached to region ). |
| 5 | PAR_R_CAT_<TAG_NAME> | TAG_READ_<TAG_NAME> | Read-only access to rule elements (decision tables, functions, flows) controlled by access control tag <TAG_NAME>. |
| 6 | PAR_W_CAT_<TAG_NAME> | TAG_WRITE_<TAG_NAME> | Modification access to rule elements (decision tables, functions, flows) controlled by access control tag <TAG_NAME>. |
| 7 | SNAPSHOT_DOWNLOAD | SNAPSHOT_DOWNLOAD | Download snapshot access. |
| 8 | SNAPSHOT_UPLOAD | SNAPSHOT_UPLOAD | Upload snapshot access. |
| 9 | PAR_R | RULE_ELEMENTS_READ | Read access to rule elements (decision tables, functions, flows), excluding rule elements with access control tags. |
| 10 | PAR_W | RULE_ELEMENTS_WRITE | Modification access to rule elements (decision tables, functions, flows), excluding rule elements with access control tags. |
| 11 | PAR_R_ALL | RULE_ELEMENTS_READ_ALL | Read access to rule elements (decision tables, functions, flows), including rule elements with access control tags. |
| 12 | PAR_W_ALL | RULE_ELEMENTS_WRITE_ALL | Modification access to rule elements (decision tables, functions, flows), including rule elements with access control tags. |
| 13 | SYSTEM_CONFIG_ACCESS | SYSTEM_CONFIG_ACCESS | System configuration access |
It is also important to note that only users with administrator privileges can create users, define roles, and assign grants to others.
Roles are the set of selected grants, multiple grants may be assigned to one Role. Roles screen contains information about all roles that are created.
In order to see Roles, select Tools → Users in Main Toolbar.
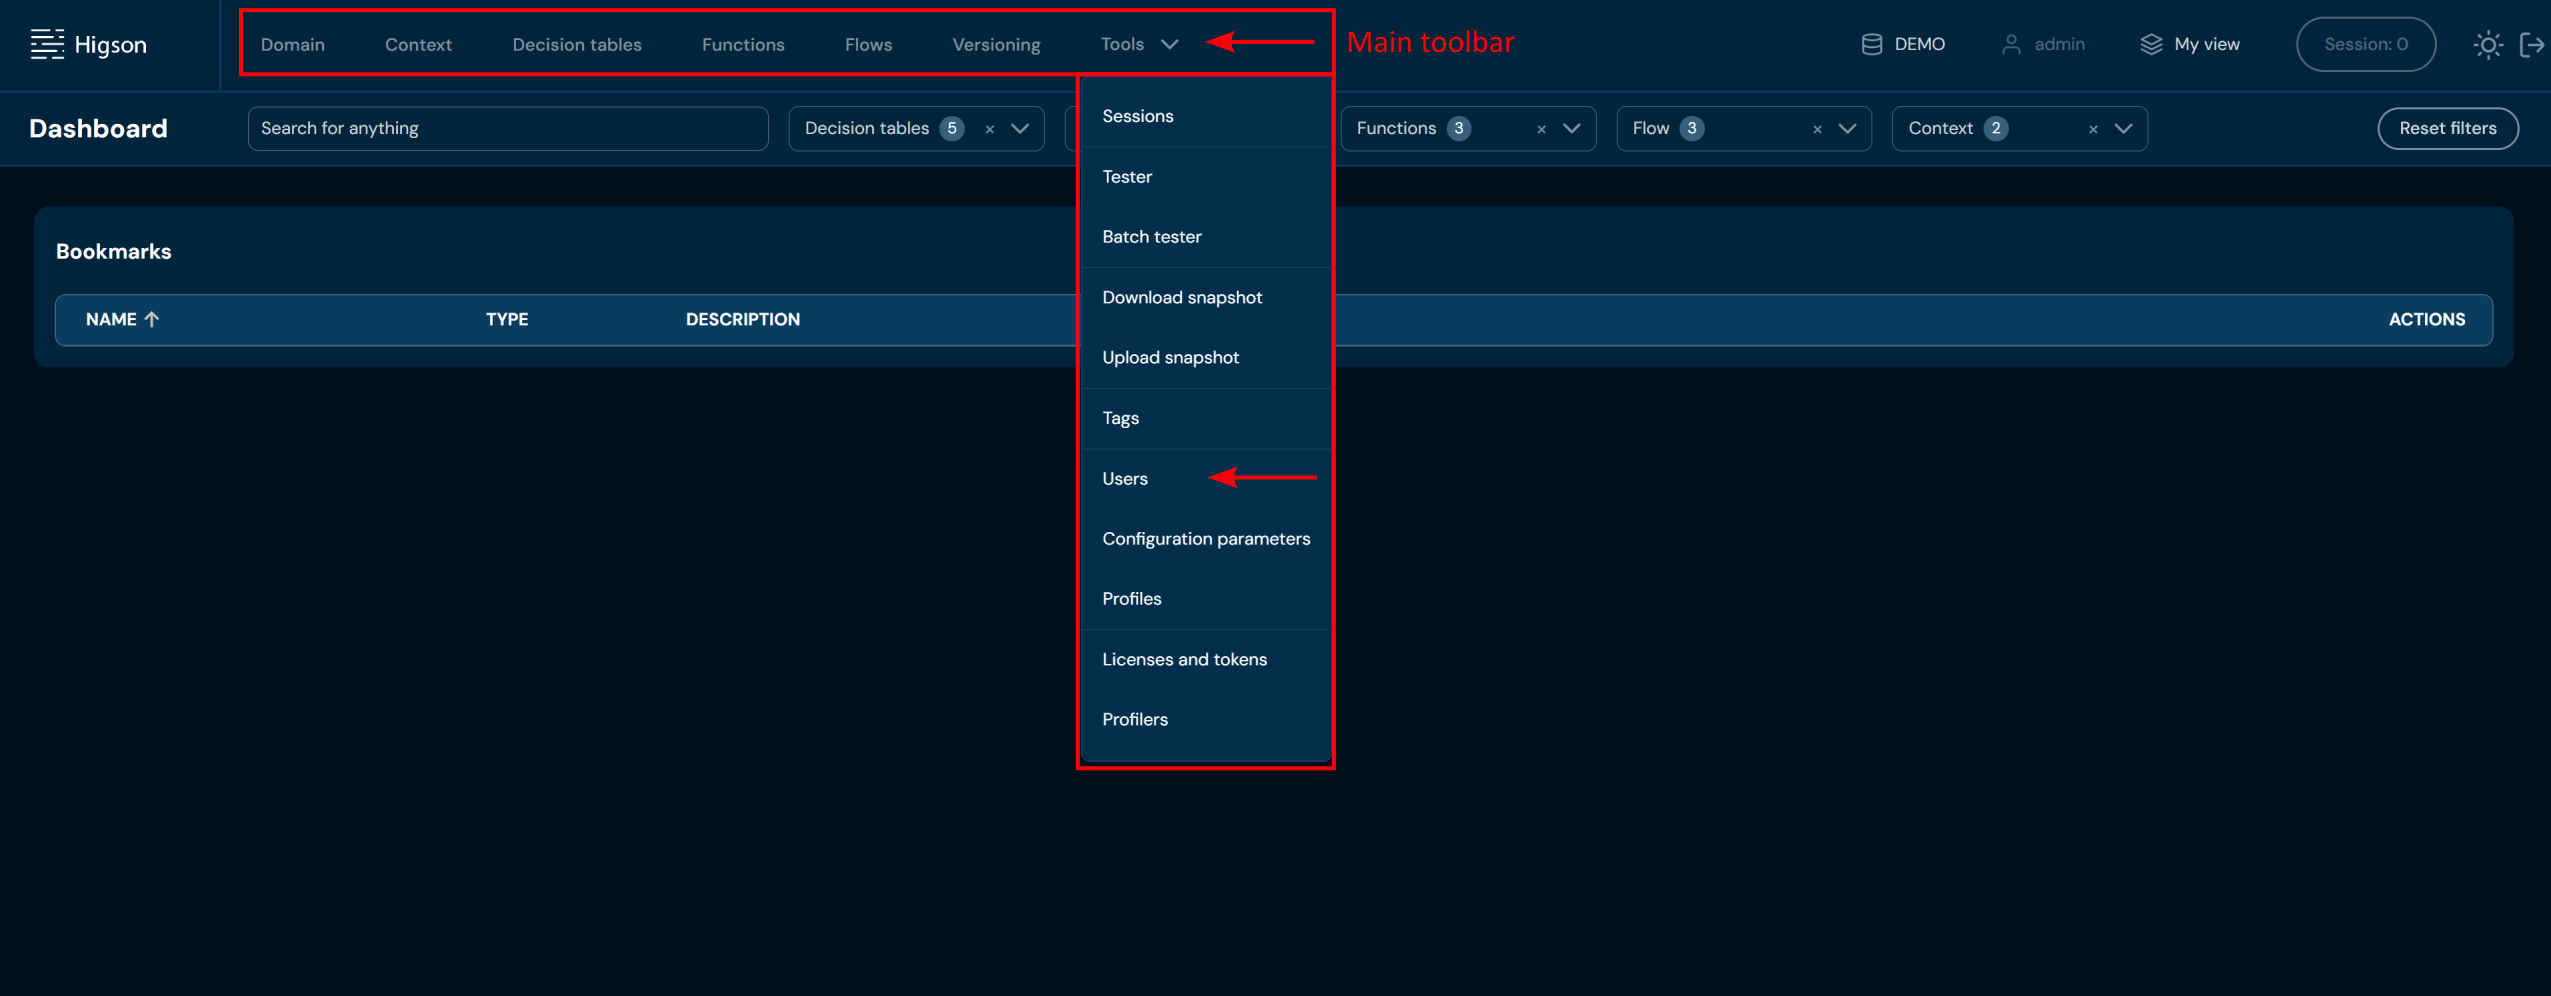 Then, select Roles tab.
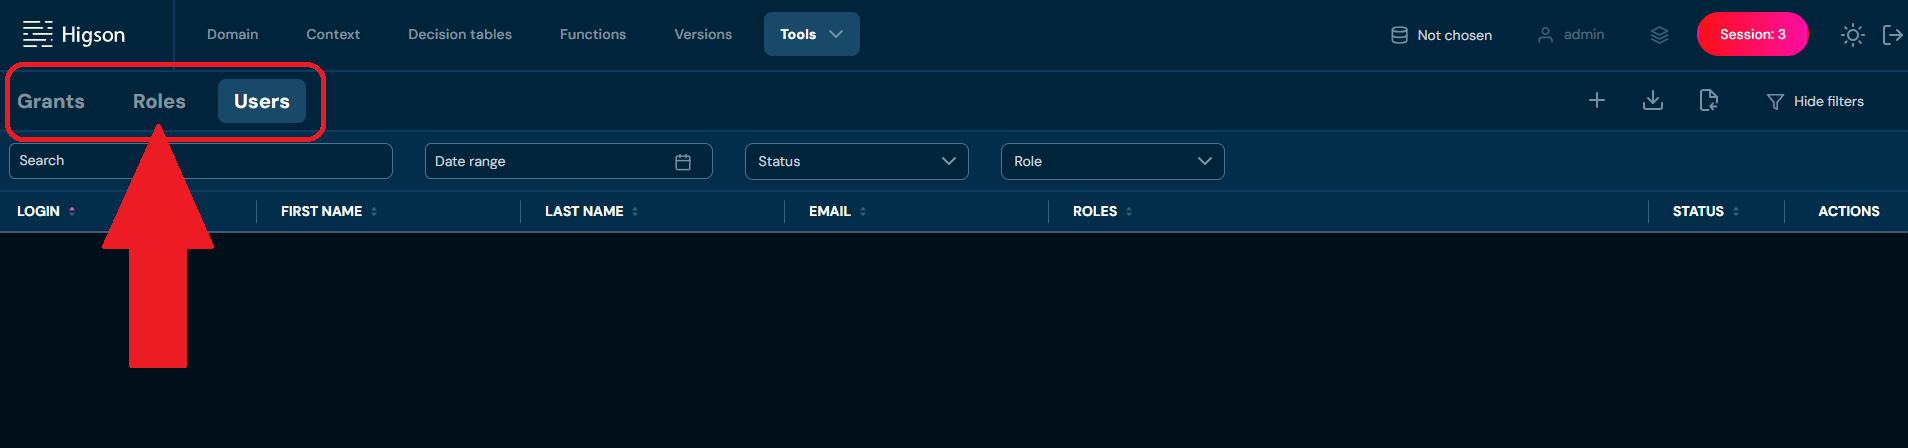 After you enter Roles you will see screen of all Roles:
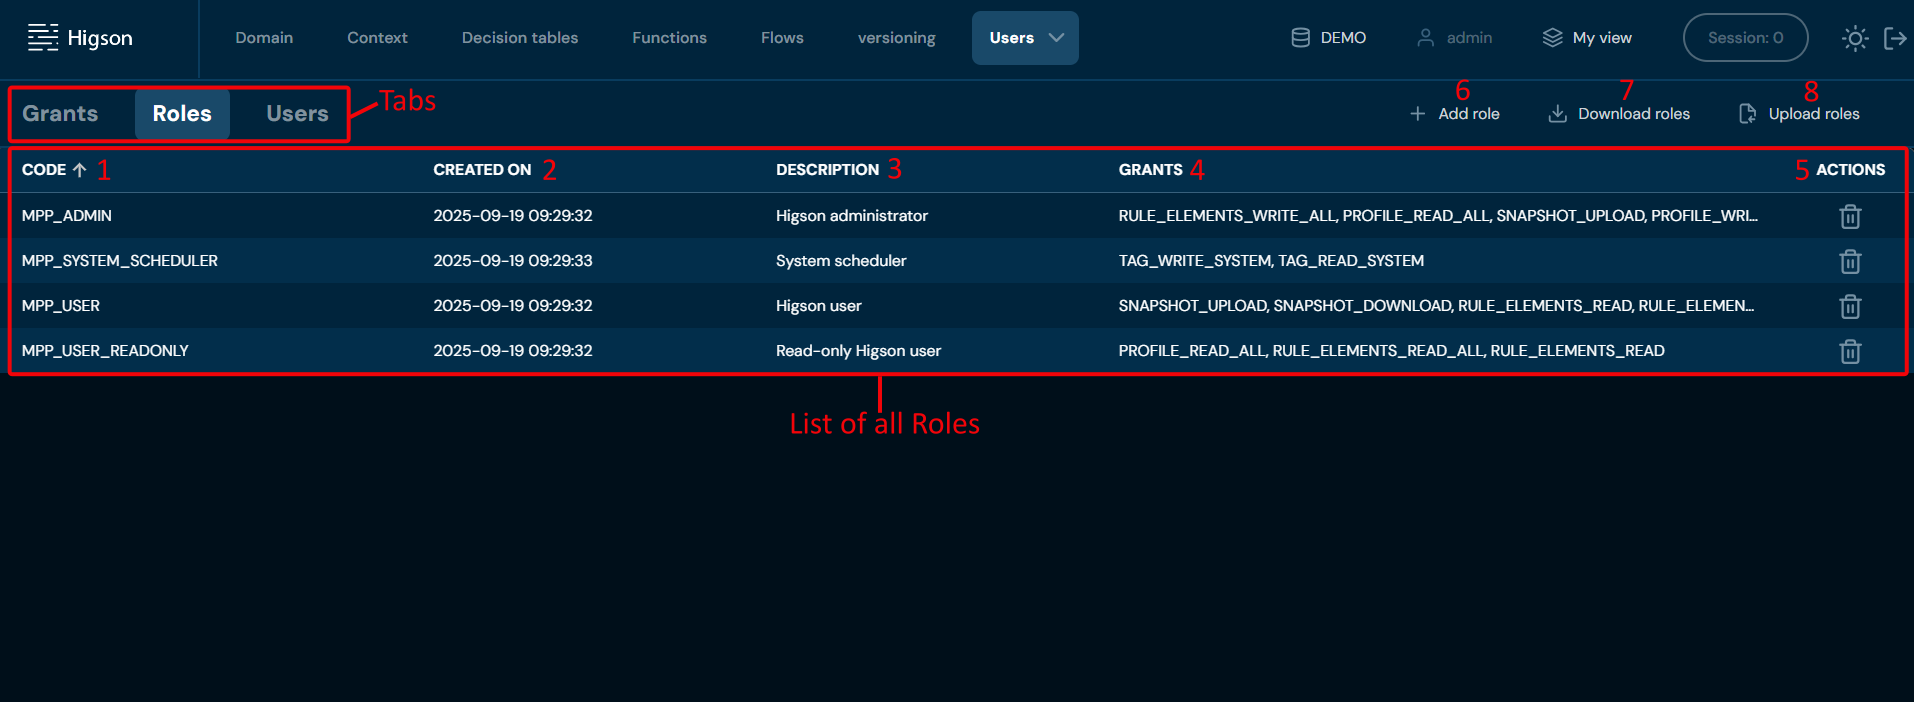
| No. | Column/Action Name | Description |
|---|---|---|
| 1. | Code | Full role code/name. Role code and Role name are interchangeable. You can sort this column by left-clicking on the arrow visible next to the label. |
| 2. | Created on | Date of creation of a role. You can sort this column by left-clicking on the arrow visible next to the label. |
| 3. | Description | Full role description. You can sort this column by left-clicking on the arrow visible next to the label. |
| 4. | Grants | List of all grants assigned to the role. |
| 5. | Actions | Quick access to Delete role (bin icon) action. To learn more about deleting roles go here. |
| 6. | Add role | Allows to create new Roles. To learn more about adding Roles go here. |
| 7. | Download roles | Downloads an XLSX file that contains data of all Roles currently on the environment. To learn more about downloading Roles go here. |
| 8. | Upload roles | Allows to upload Roles from an XLSX file. To learn more about uploading Roles go here. |
You can switch between Grants, Roles and Users screens by left-clicking on the desired Tab.

Add Role#
If you want to add a new role, follow these steps:
-
Choose Tools → Users in Main toolbar.
-
Switch to Roles tab.
-
Choose Add role.
a. Choosing Add role opens Role screen.

-
In Description section you:
a. need to enter unique role code/name. Code/name can contain only characters from collection a-z; 0-9; “.”; “-”; “_” and it can’t start with „-’'.
i. If you enter illegal characters in name field, then borders will be highlighted with red color, and you will not be able to save a role.
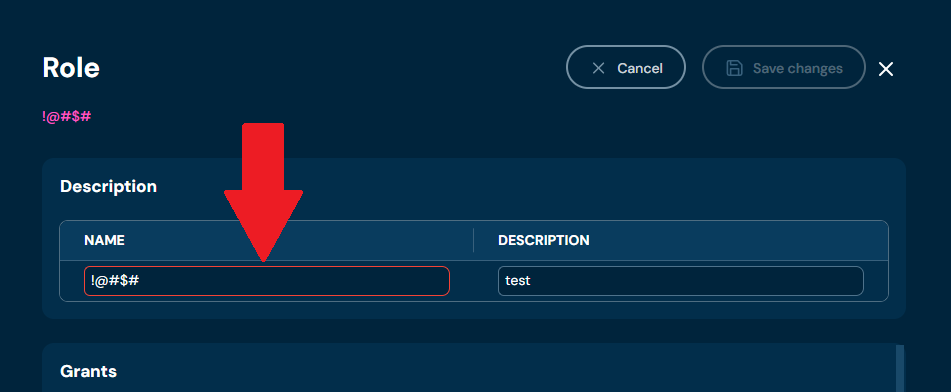
b. need to provide role Description
-
In the Grants section, you can select one or more grants to assign to a role.
-
Choose Save changes.
a. Role with entered data is created.
b. If you enter the same name as one of the Roles already created, then validation error will appear.
Download Roles#
If you want to download data of all roles currently in the environment, follow these steps:
-
Choose Tools → Users in Main toolbar.
-
Switch to Roles tab.
-
Choose Download roles.
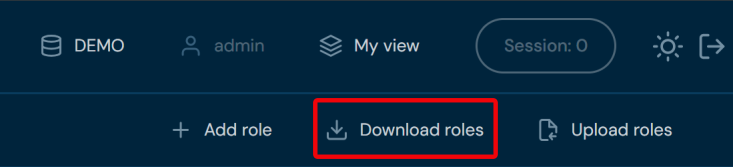
a. Choosing Download roles downloads an XLSX file that contains data of all roles currently in the environment.
Upload Roles#
If you want to upload roles, follow these steps:
-
Choose Tools → Users in Main toolbar.
-
Switch to Roles tab.
-
Choose Upload roles.
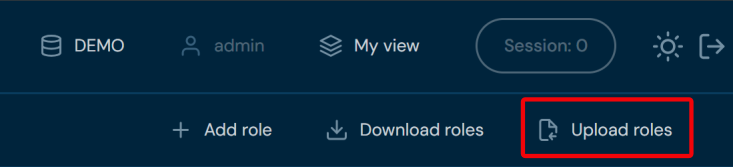
a. Choosing Upload roles brings up Upload roles screen.
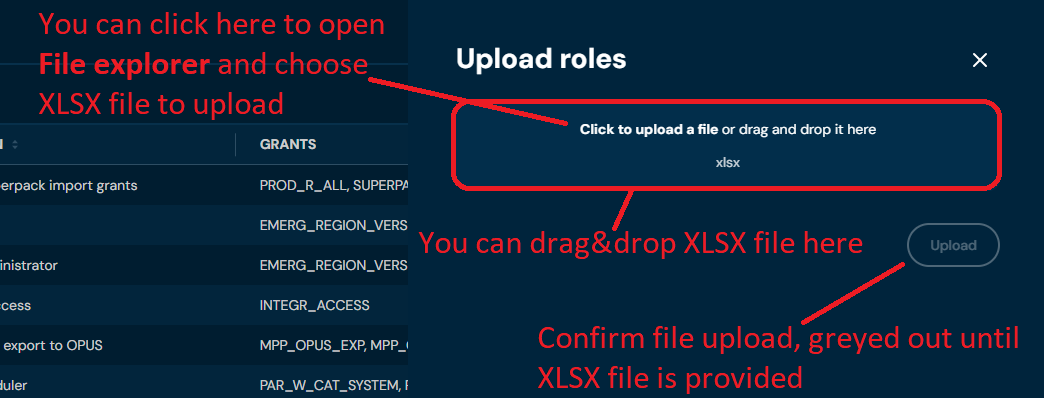
-
Drag&drop desired file or Click to upload a file and choose file in File explorer.
a. If you choose a file with extension other than XLSX, then validation error will pop up.
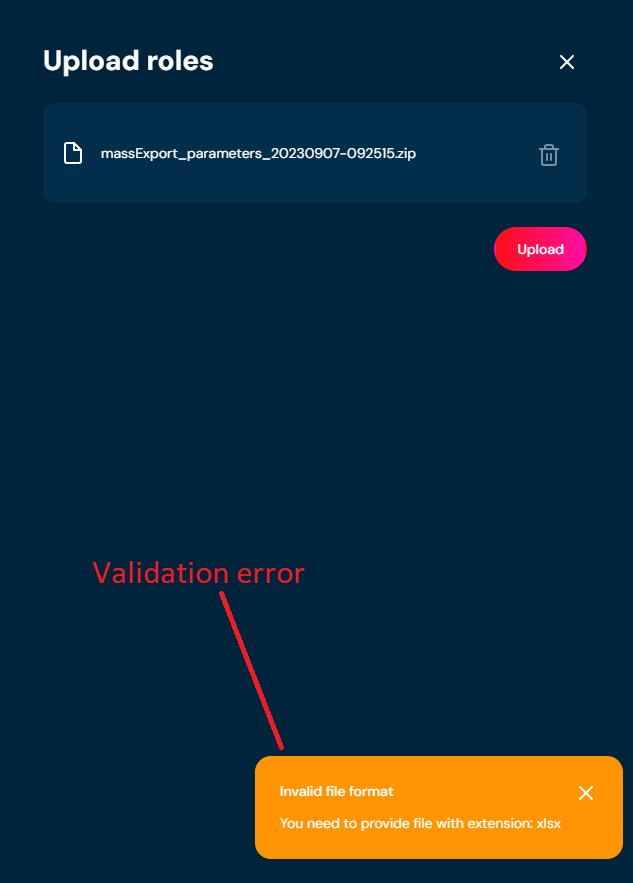
-
Choose Upload.
a. If there is something wrong with data in XLSX file, then validation error will appear.
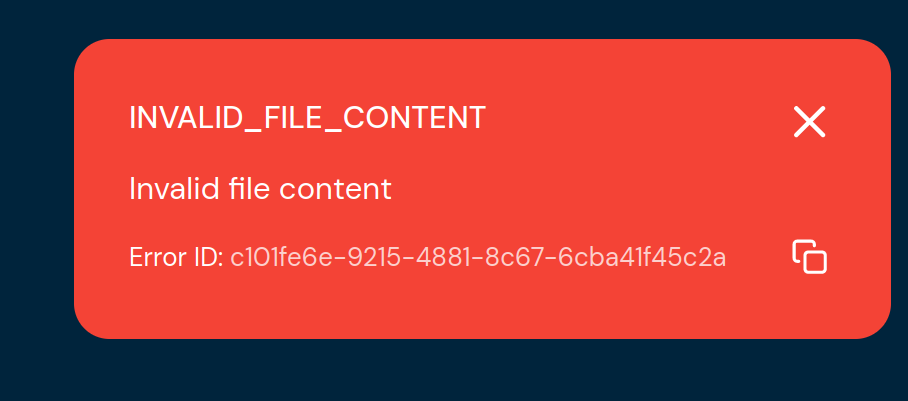
-
When the progress bar reaches 100%, it means that file was uploaded correctly.
a. If a validation error occurs (see above), then an upload process is being aborted.
Delete Role#
If you want to delete a specific role, follow these steps:
-
Choose Tools → Users in Main toolbar.
-
Switch to Roles tab.
-
Choose Delete role(bin icon) action for a role you wish to delete.
b. After choosing Delete role action, confirmation pop-up will appear.
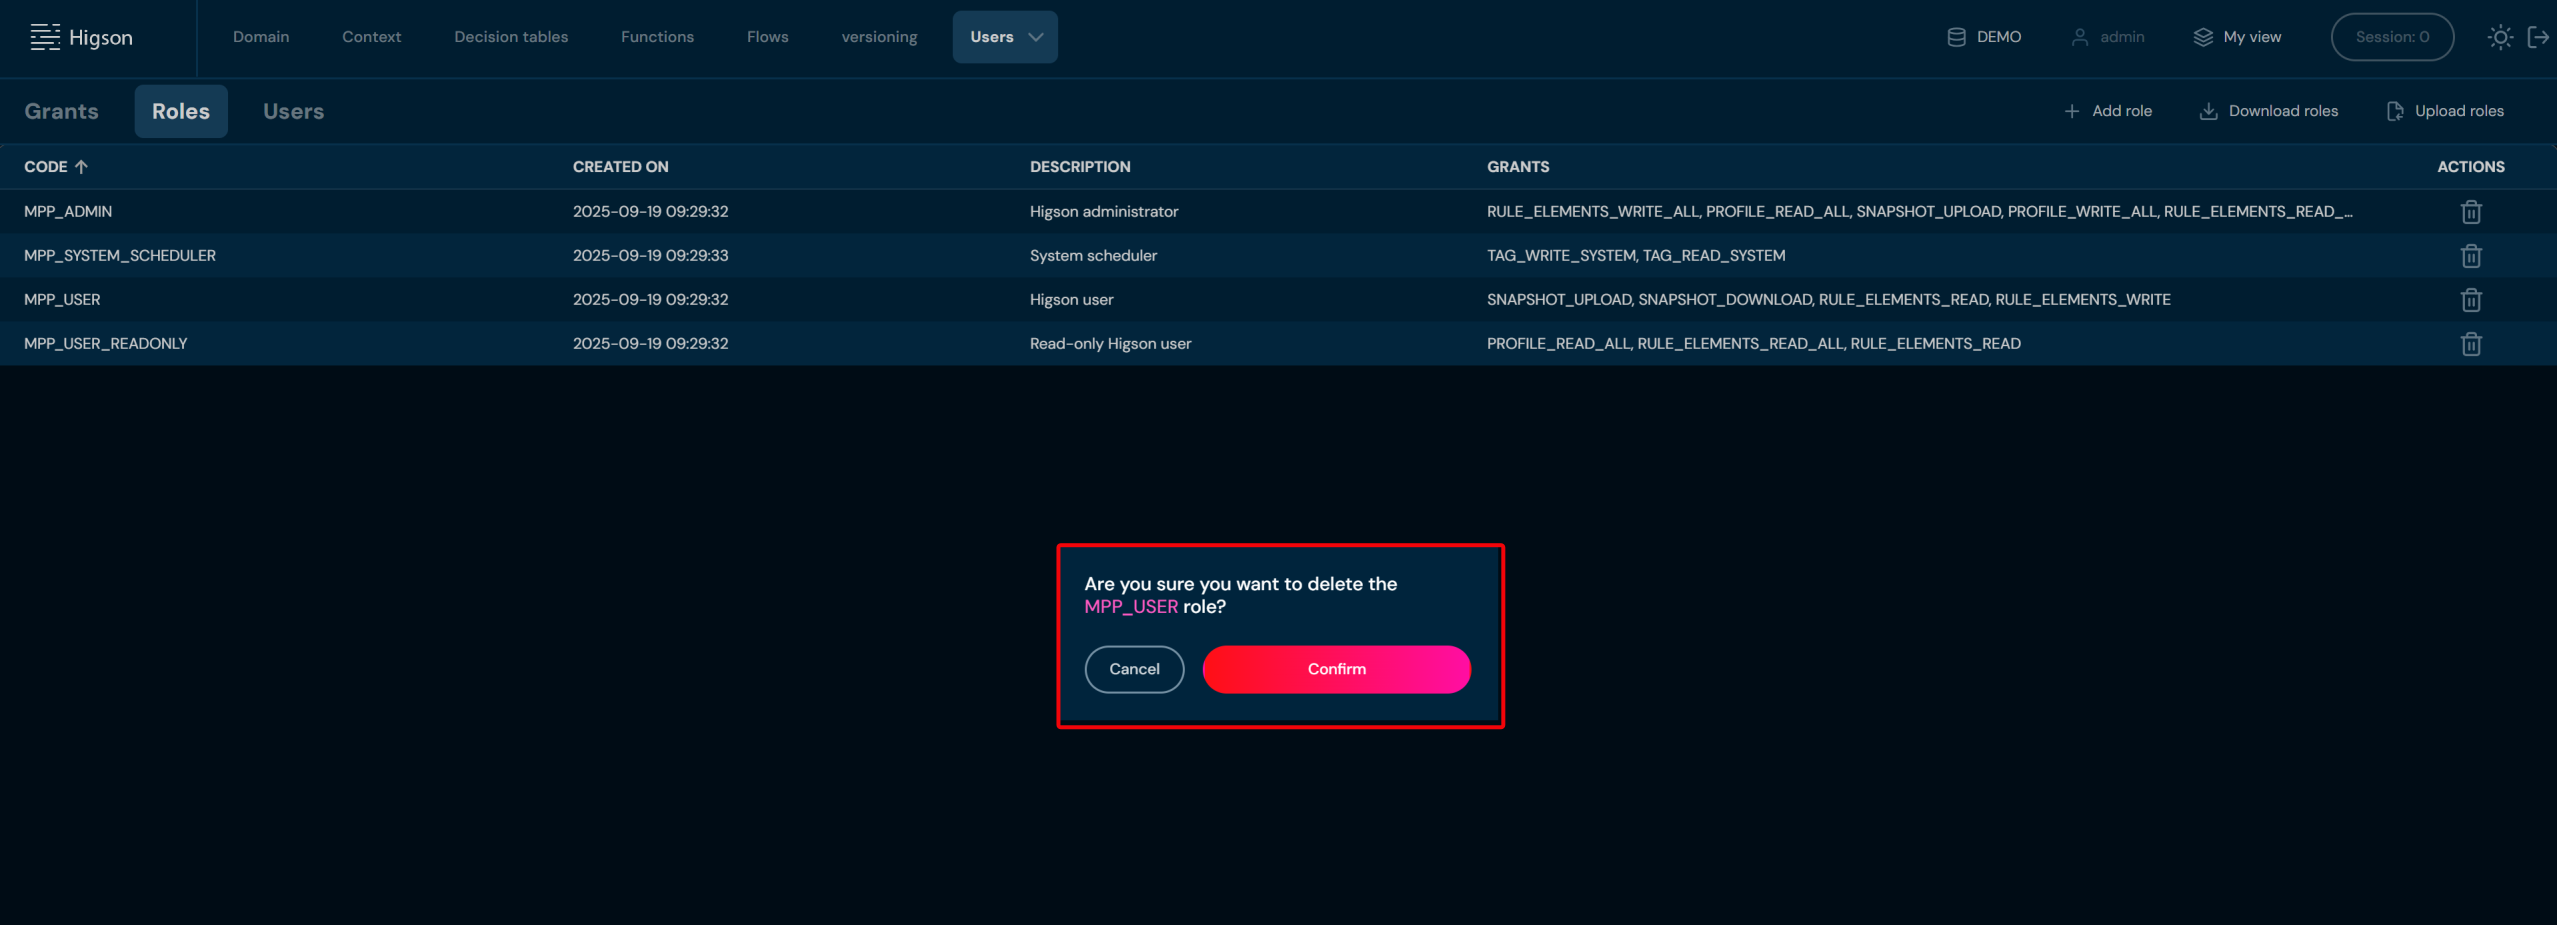
-
Choose Confirm.
a. Specific Role is being deleted from the environment. This action is irreversible.
Users’ screen contains information about all users that are created. Only those users have access to Higson module that you are working on. In order to see Users, select Tools → Users in Main Toolbar.
After you enter Users you will see screen of all Users:
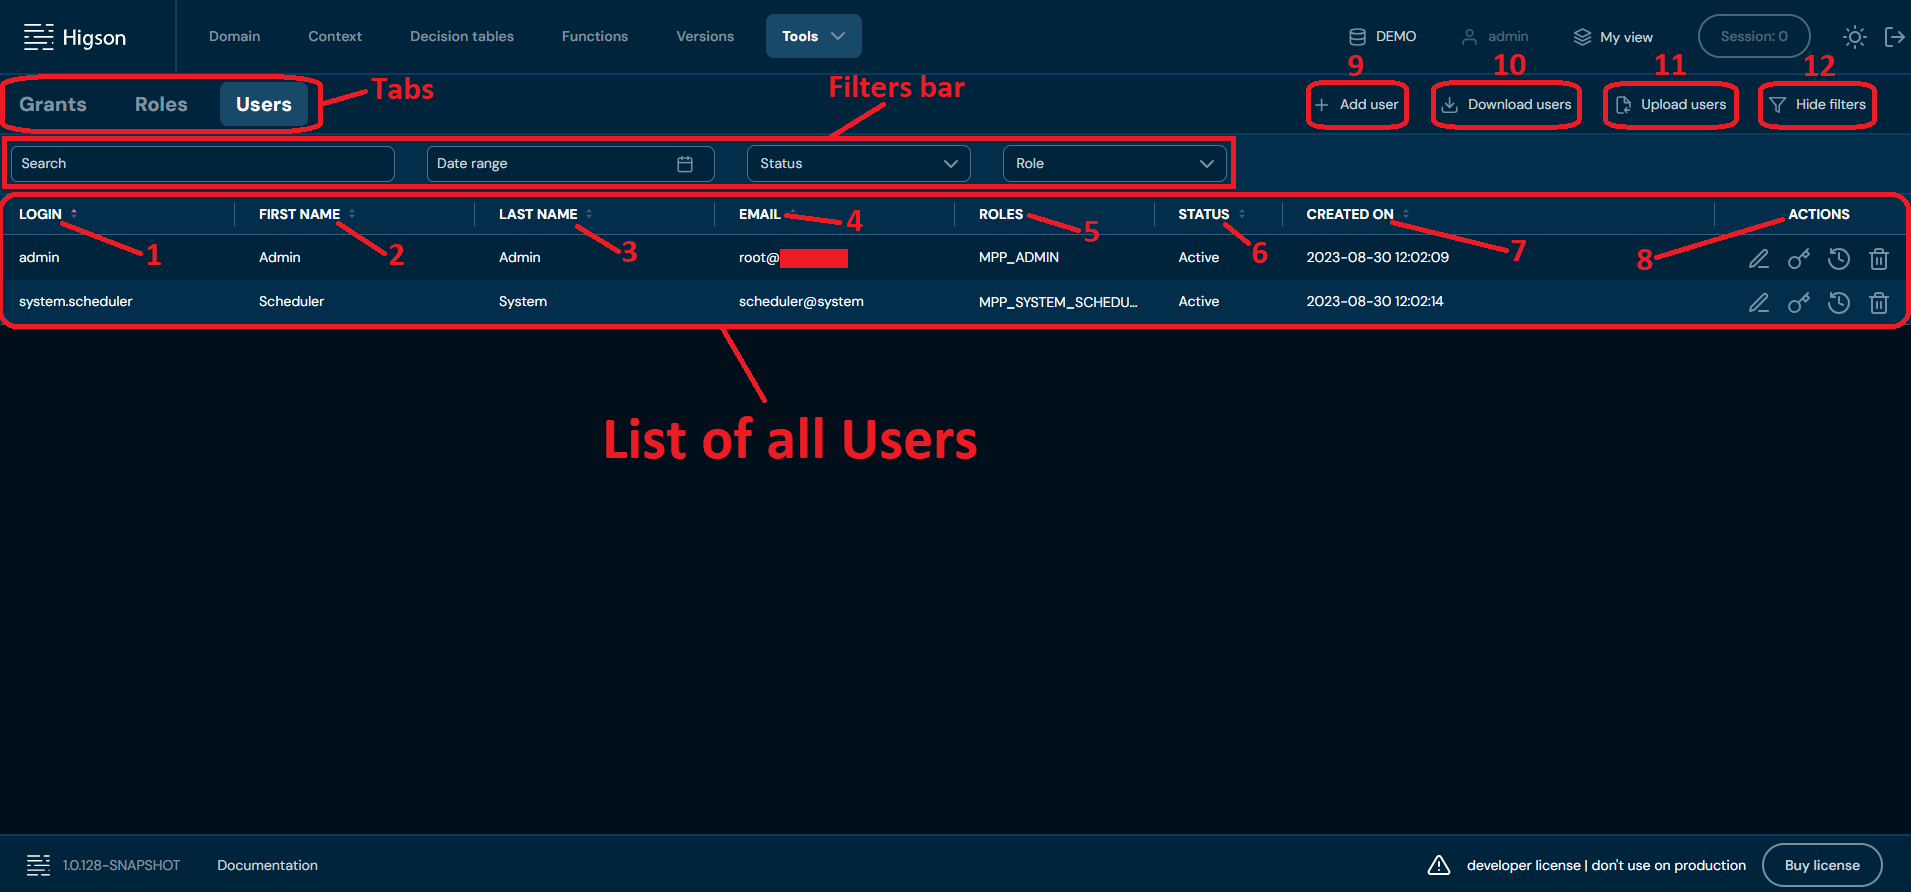
| No. | Column/Action | Description |
|---|---|---|
| 1 | Login | Login associated with the account. Used for logging in to your Higson module. You can sort this column by left-clicking on the arrows visible next to the label. |
| 2 | First name | First name of the user associated with the account. You can sort this column by left-clicking on the arrows visible next to the label. |
| 3 | Last name | Last name of the user associated with the account. You can sort this column by left-clicking on the arrows visible next to the label. |
| 4 | E-mail address of the user associated with the account. You can sort this column by left-clicking on the arrows visible next to the label. | |
| 5 | Roles | All roles assigned to the account. You can sort this column by left-clicking on the arrows visible next to the label. |
| 6 | Status | Current status of the account: - New, inactive - Active - Blocked - Closed You can sort this column by left-clicking on the arrows visible next to the label. |
| 7 | Created on | Date of creation of a user. You can sort this column by left-clicking on the arrows visible next to the label. |
| 8 | Actions | List of quick access actions available for each user. Available actions are: - Edit - Update password - Show login history - Delete user |
| 9 | + Add user | Allows creating new Users. To learn more about adding Users, go here. |
| 10 | Download users | Downloads an XLSX file that contains data of all Users currently on the environment. To learn more about downloading Users, go here |
| 11 | Upload users | Allows uploading Users from an XLSX file. To learn more about uploading Users, go here. |
| 12 | Hide/Show filters | Hides or reveals Filters bar accordingly. If Filter bar: - is visible, then action Hide filters is available. - is hidden, then action Show filters is available. |
You can switch between Grants, Roles and Users screens by left-clicking on the desired Tab.
You can see all Filters available in Users tab below:

| No. | Filter Name | Description |
|---|---|---|
| 1. | Search text field | Filter by any string provided by the user. Filtered by the Login column. |
| 2. | Date range | Filter by created on date in the format YYYY/MM/DD-YYYY/MM/DD. |
| 3. | Status | Filter by the user’s account status. |
| 4. | Role | Filter by assigned roles. |
Number in Hide/Show filters action indicates how many filters are active.

All actions visible in a quick access action list are listed below:
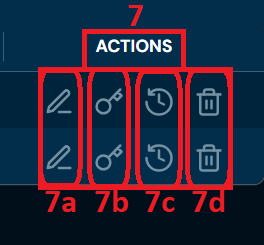
| No. | Name | Description |
|---|---|---|
| 7. | Actions | List of quick access actions available for each user. |
| 7a. | Edit | Allows to edit user data. To learn more about editing user data go here. |
| 7b. | Update password | Allows updating the user’s password. To learn more about updating the user’s password go here. |
| 7c. | Show login history | Shows login history. To learn more about login history go here. |
| 7d. | Delete user | Deletes user. To learn more about deleting the user go here. |
Add User#
If you want to add a new user, follow these steps:
-
Choose Tools → Users in Main toolbar.
-
Choose Add user
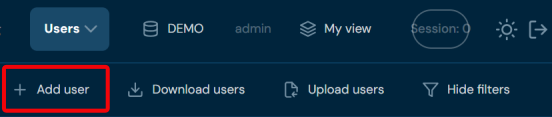
a. Choosing Add user opens a step-by-step Add a new user wizard.
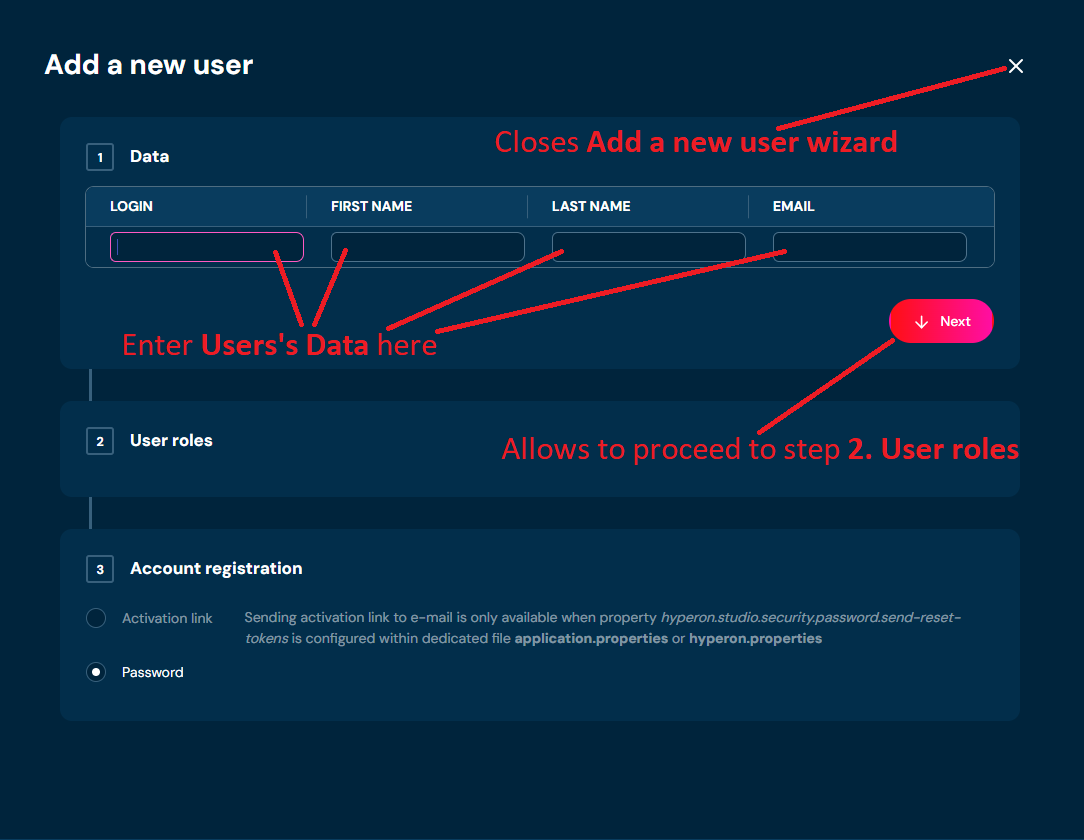
-
In step 1. Data, you:
a. need to provide unique user’s login. Login can contain only characters from collection a-z; 0-9; “.”; “-”; “_” and it can’t start with “@”.
b. need to provide user’s First name. First name can contain only characters from collection a-z; diacritical marks; space; “-”.
c. need to provide user’s Last name. Last name can contain only characters from collection a-z; diacritical marks; space; “-”.
d. need to provide unique user’s e-mail address. E-mail address can contain only characters from collection a-z; 0-9; “.”; “-”; “_”; “@”.
-
Choose Next.
a. If you enter illegal characters in any field, then adequate validation error will appear.
i. For Login field
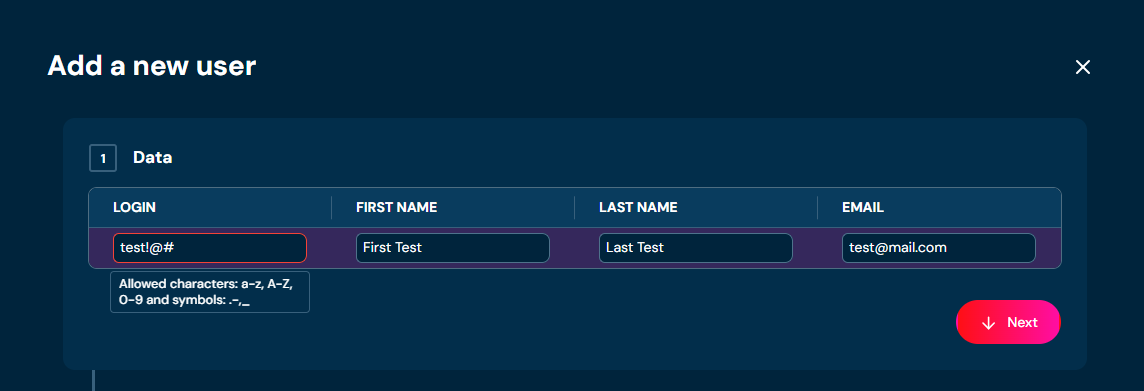
ii. For First name field
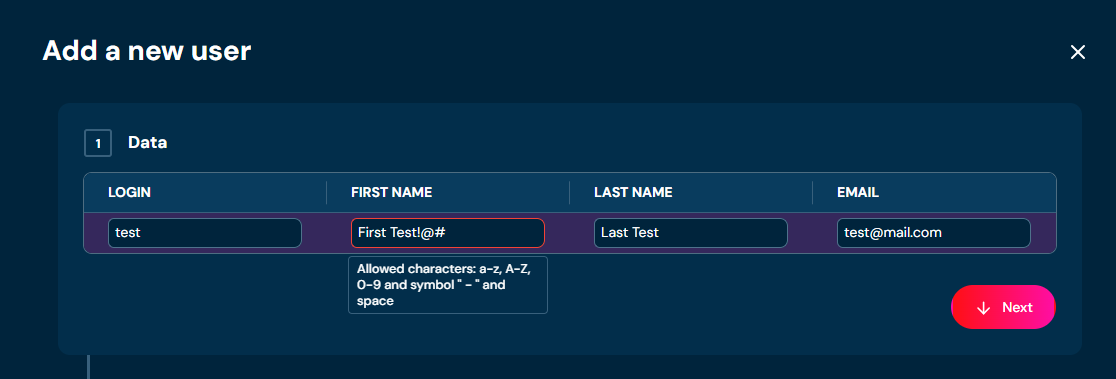
iii. For Last name field
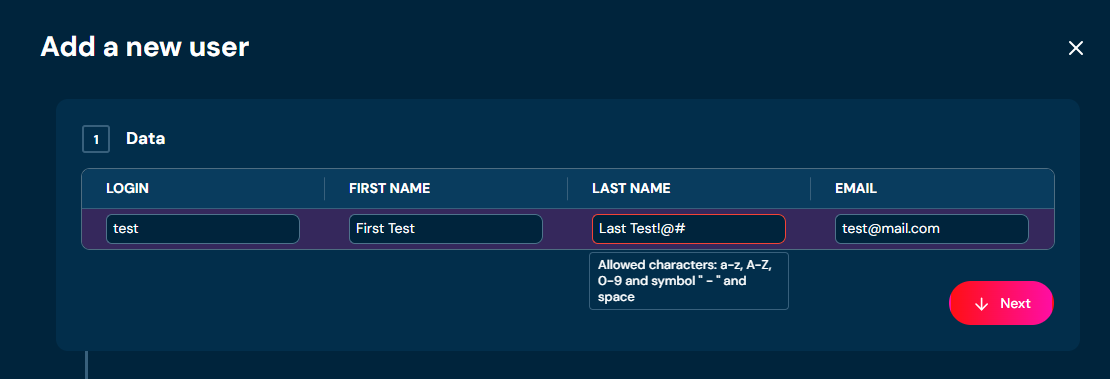
iv. For Email field
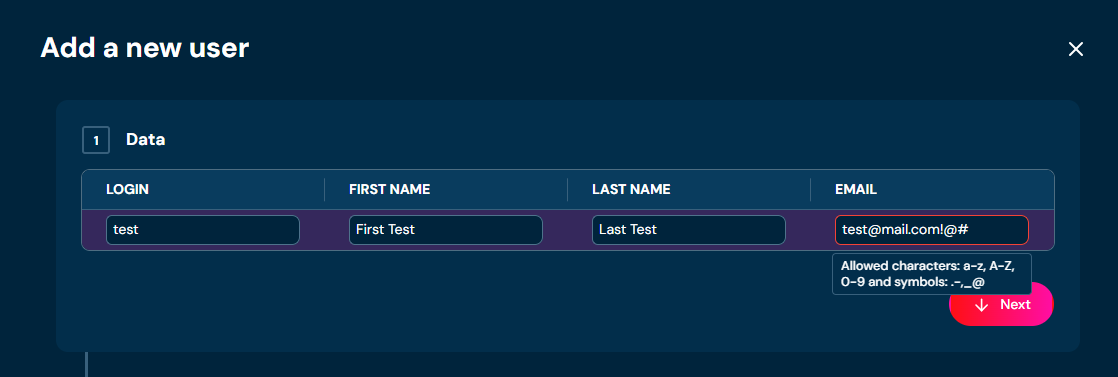
b. If you enter Login or Email already used by another account, then adequate validation error will appear.
i. For Login field
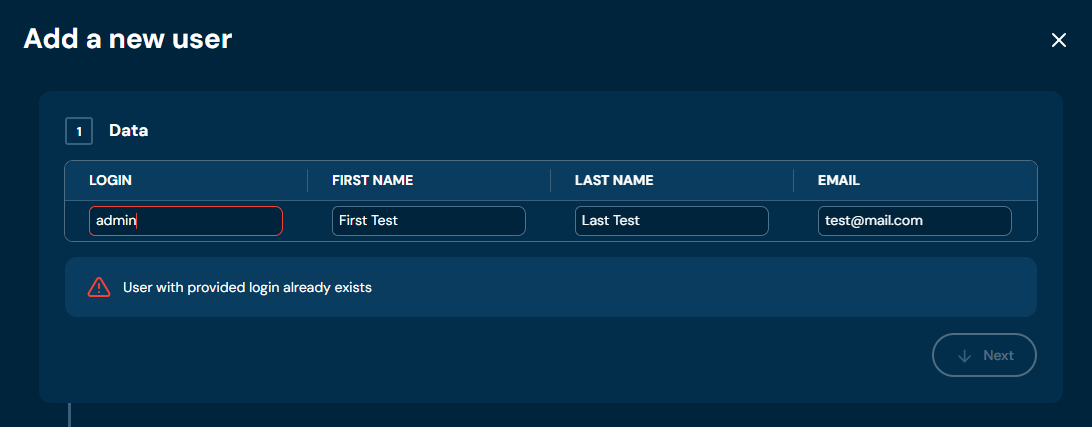
ii. For Email field
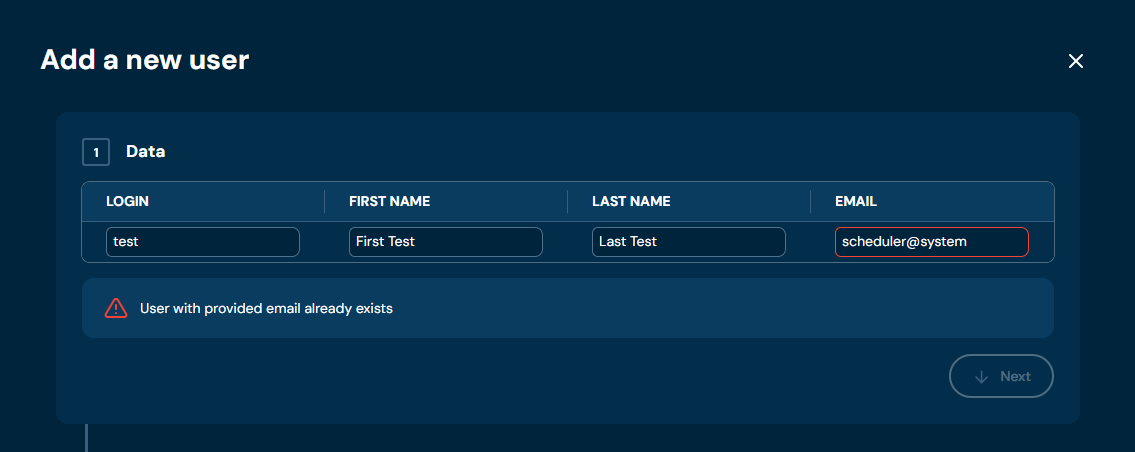
-
In step 2. User roles you can assign Roles from a drop-down list. You can select multiple roles. This step is optional to add user.
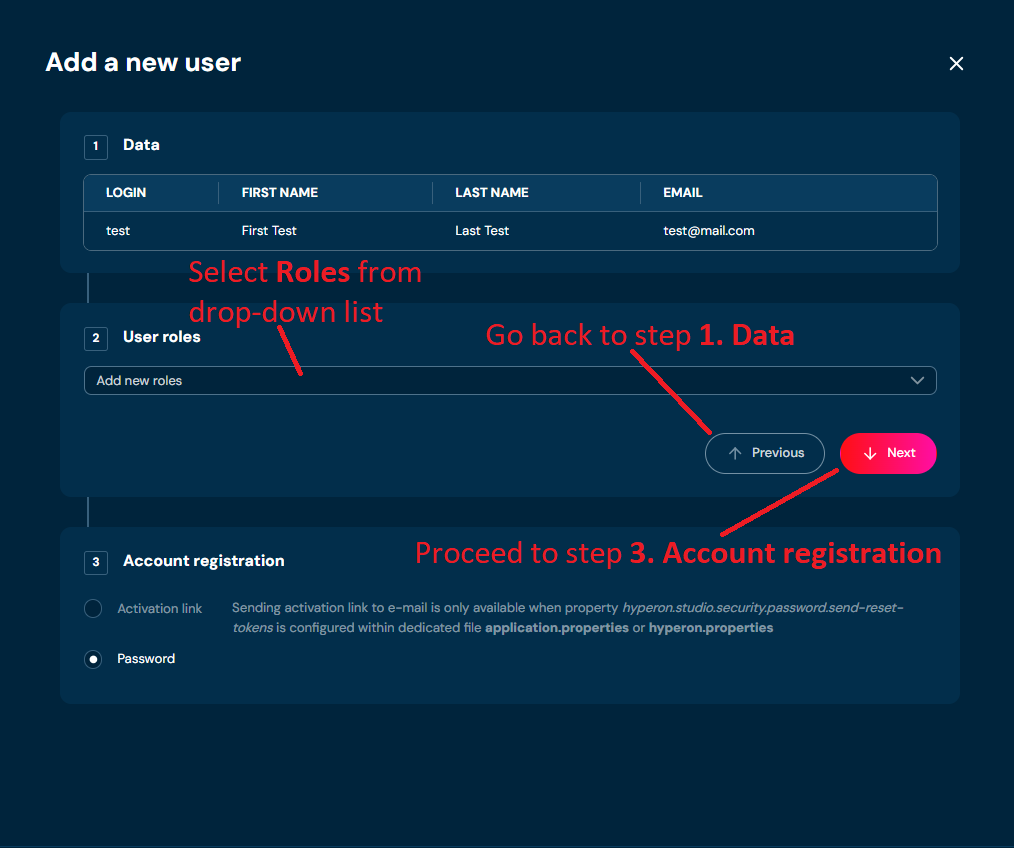
-
Choose Next.
-
In step 3. Account registration you can select if you want to manually set password for user, or you can send activation link to the e-mail address entered in step 1. Data.
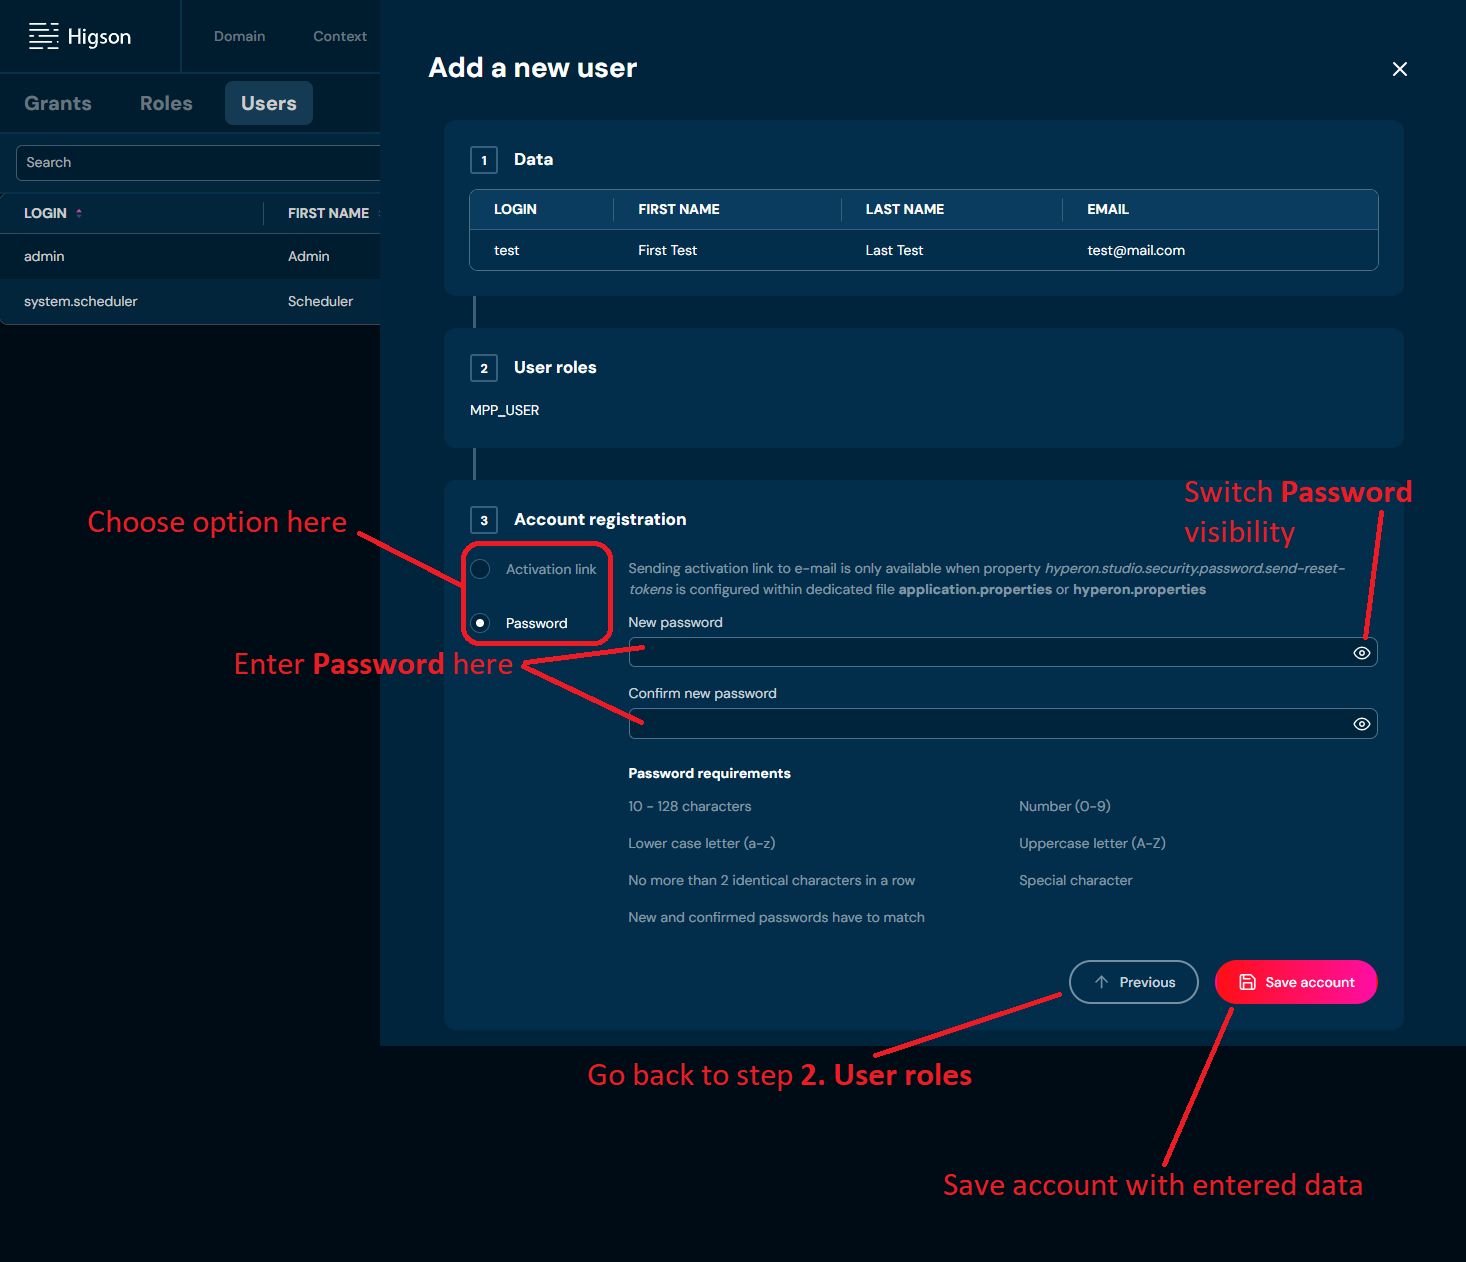
a. Bear in mind, that Activation link option is only available when property higson.studio.security.password.send-reset-tokens is configured within dedicated file application.properties or higson.properties
b. If you choose the Password option, then there are a few Password requirements that need to be met in order to save an account. These requirements are:
i. 10-128 characters—password can’t be shorter than 10 characters and can’t be longer than 128 characters
ii. Lower case letter (a-z) - password must contain at least one lower case letter
iii. No more than 2 identical characters in a row - you can’t type more than two identical characters in a row i.e. CC; cc; Cc is acceptable but CCC; ccc; CcC is not
iv. New and confirmed password have to match - password typed in New password and Confirm new password must be exactly the same.
v. Number (0-9) - password must contain at least one number
vi. Uppercase letter (A-Z) - password must contain at least one upper case letter
vii. Special character - password must contain at least one special character i.e. !; @; #; $; %; etc.
-
Choose Save account.
a. Account with entered data is created.
b. If Password requirements aren’t met, then adequate requirement will be highlighted with red color, and you will not be able to save an account.
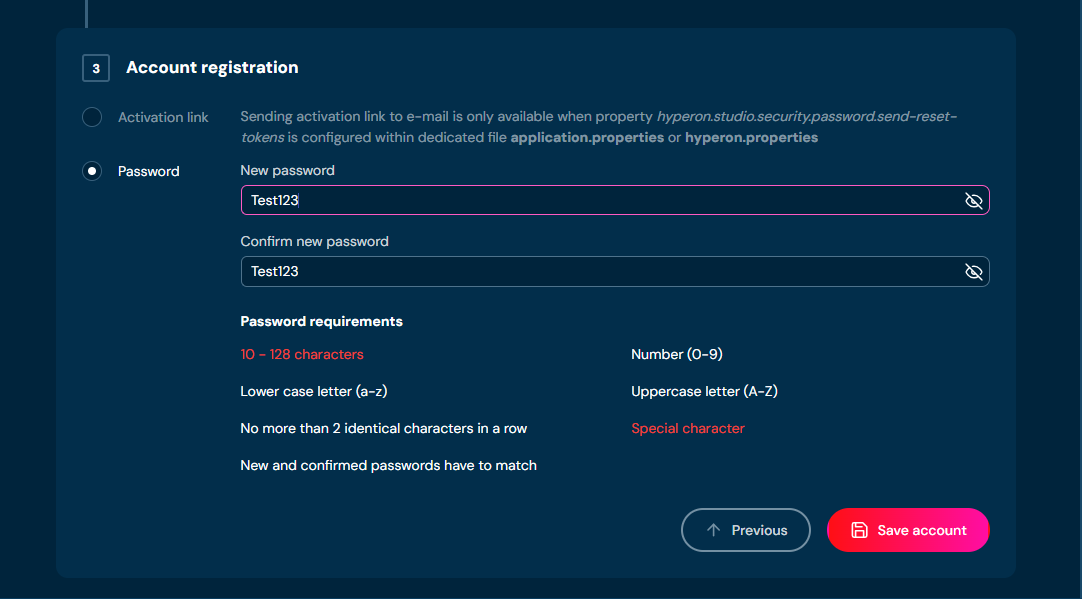
Download Users#
If you want to download data of all users currently in the environment, follow these steps:
-
Choose Tools → Users in Main toolbar.
-
Choose Download users.
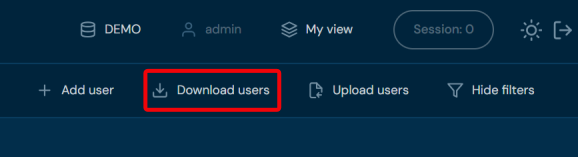
a. Choosing Download users downloads a XLSX file, that contains data of all users currently in the environment.
Upload Users#
If you want to upload users, follow these steps:
-
Choose Tools → Users in Main toolbar.
-
Choose Upload users.
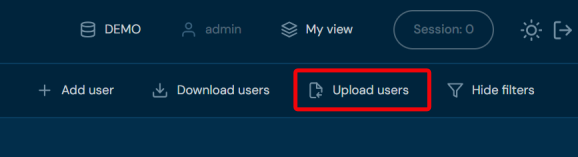
a. Choosing Upload users brings up Upload users screen.

-
Drag&drop desired file or Click to upload a file and choose file in File explorer.
a. If you choose a file with extension other than XLSX, then validation error will pop up.
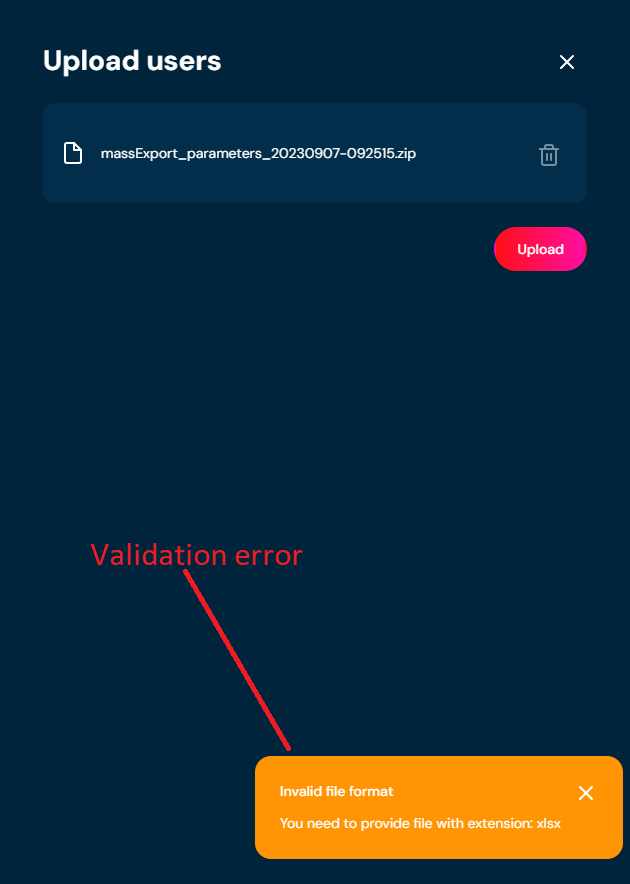
-
Choose Upload.
-
When the progress bar reaches 100%, it means that file was uploaded correctly.
a. If a validation error occurs (see above), then an upload process is being aborted.
Edit User#
If you want to edit data of a specific user, follow these steps:
-
Choose Tools → Users in Main toolbar.
-
Choose Edit action for the desired user.
a. Highlighted borders indicate that edit mode is active
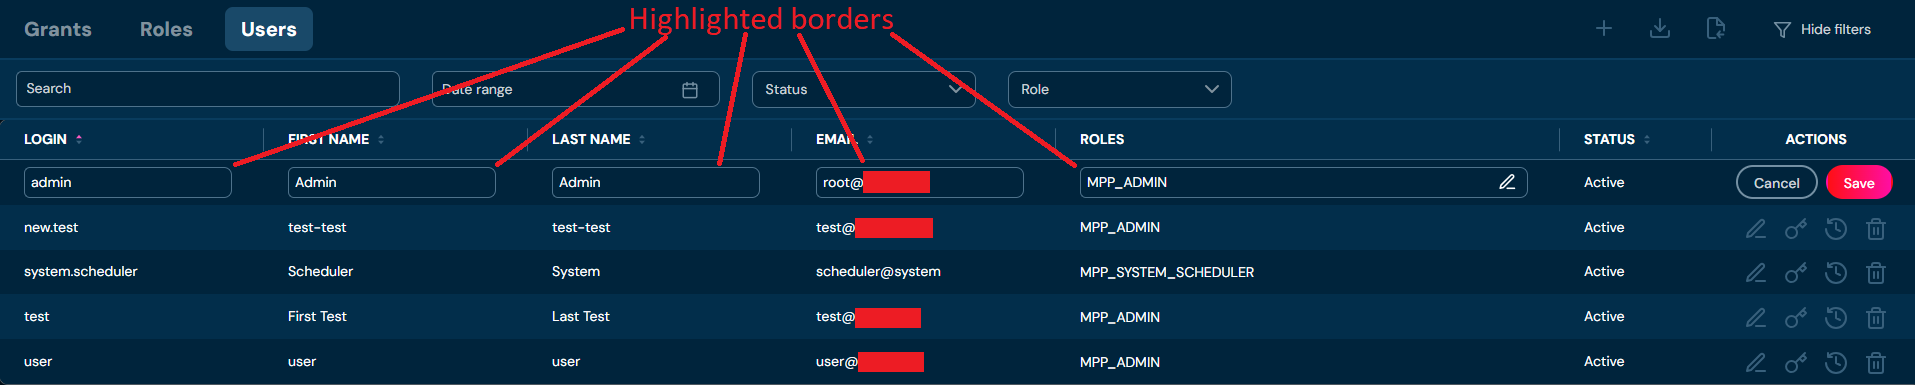
-
Edit any data you need:
a. Login can contain only characters from collection a-z; 0-9; “.”; “-”; “_” and it can’t start with “@”.
b. First name can contain only characters from collection a-z; diacritical marks; space; “-”.
c. Last name can contain only characters from collection a-z; diacritical marks; space; “-”.
d. E-mail address can contain only characters from collection a-z; 0-9; “.”; “-”; “_”; “@”.
-
Choose Save.
a. User’s account data is being updated.
b. If you enter illegal characters in any field, then adequate validation error will appear.
i. For Login field

ii. For First name field

iii. For Last name field

iv. For Email field

c. If you entered Login or Email already used by another account, then adequate validation error will appear.
i. For Login field
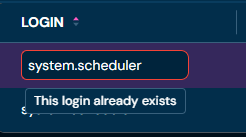
ii. For Email field
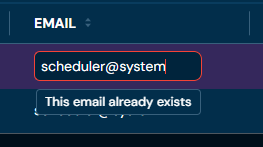
Update User’s Password#
If you want to update the password of a specific user, follow these steps:
-
Choose Tools → Users in Main toolbar.
-
Choose Update password action for desired user.
a. Choosing Update password brings up Update password screen.
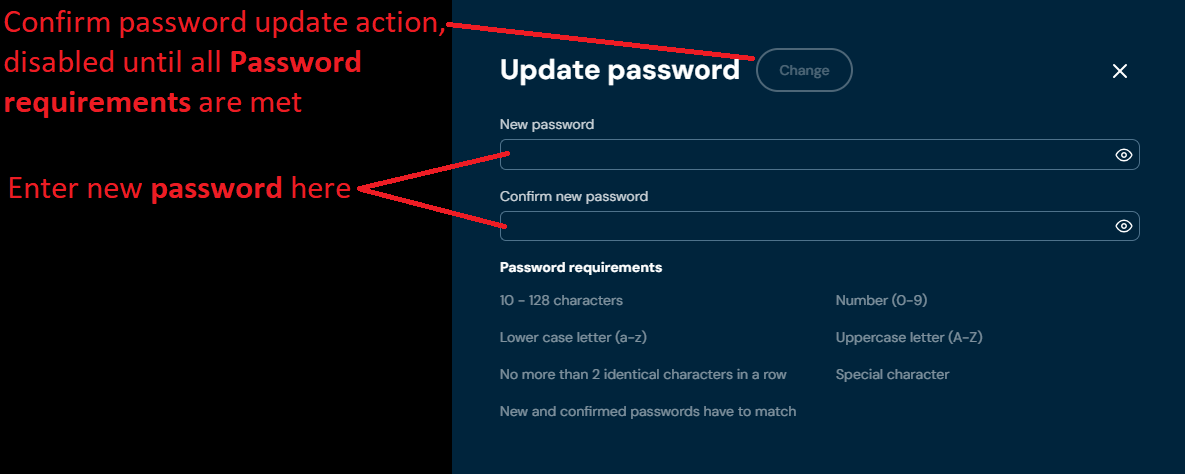
-
Enter new password in New password and Confirm new password fields.
a. There are a few Password requirements that need to be met in order to update password. These requirements are:
i. 10-128 characters - password can’t be shorter than 10 characters and can’t be longer than 128 characters
ii. Lower case letter (a-z) - password must contain at least one lower case letter
iii. No more than 2 identical characters in a row - you can’t type more than two identical characters in a row i.e. CC; cc; Cc is acceptable but CCC; ccc; CcC is not
iv. New and confirmed password have to match - password typed in New password and Confirm new password must be exactly the same.
v. Number (0-9) - password must contain at least one number
vi. Uppercase letter (A-Z) - password must contain at least one upper case letter
vii. Special character - password must contain at least one special character i.e. !; @; #; $; %; etc.
-
Choose Change.
a. The Password to the user’s account is being updated.
Show Login History#
If you want to check the login history of a specific user’s account, follow these steps:
-
Choose Tools → Users in Main toolbar.
-
Choose Show login history action for desired user.
a. Choosing Show login history brings up Login history screen.
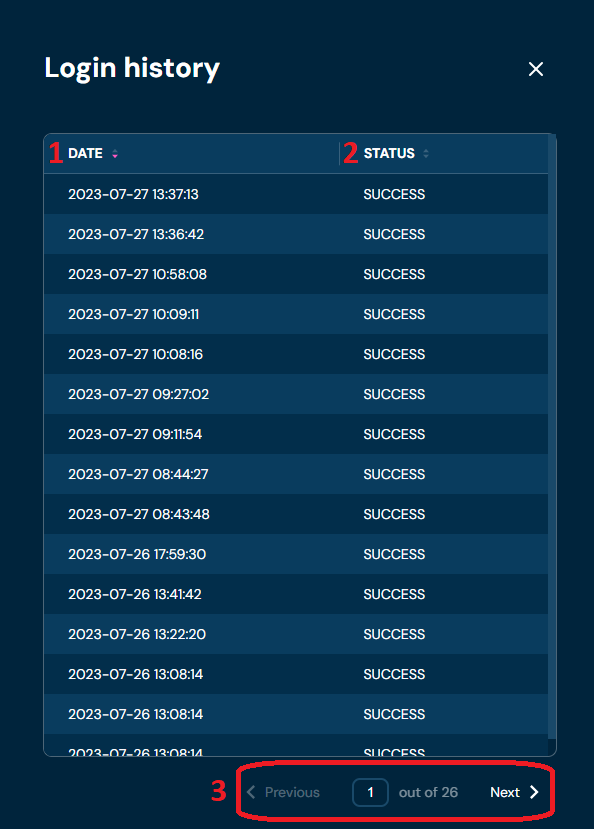
| No. | Name | Description |
|---|---|---|
| 1 | Date | Day and precise hour of login attempt. You can sort this column by left-clicking on the arrows visible next to the label. |
| 2 | Status | Status of login attempt. Available statuses are: - Success - login attempt was successful. User logged in to Higson system. - Bad_credentials - login attempt failed. User provided the wrong password and was not able to login to Higson system. You can sort this column by left-clicking on the arrows visible next to the label. |
| 3 | Page | Allows cycling through pages. Use buttons < Previous and Next > to change pages one at a time or type a specific page number in the text field to move directly to it. |
Delete User#
If you want to delete a specific user, follow these steps:
-
Choose Tools → Users in Main toolbar.
-
Choose Delete user(bin icon) action for user you wish to delete.
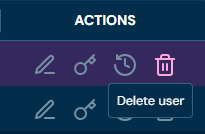
a. After choosing Delete user action, confirmation pop-up will appear.
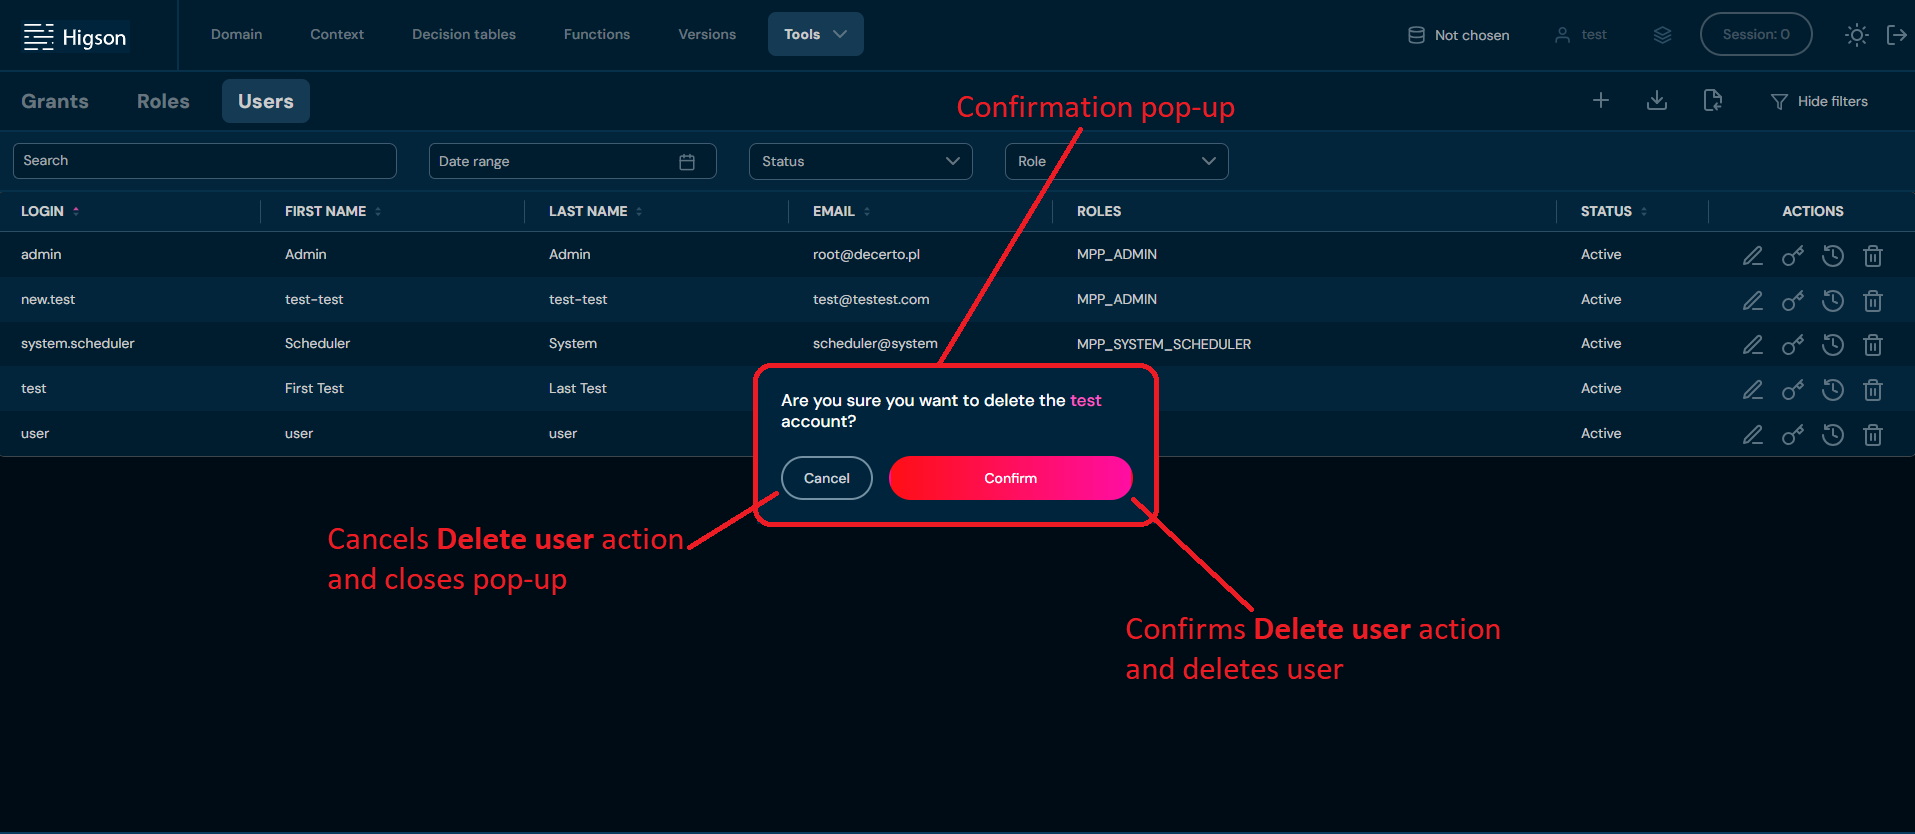
-
Choose Confirm.
a. Specific User is being deleted from the environment - this user’s status changes to closed. This action is irreversible.
Grant allows using one or few functions in a Higson system, for example, authority to read a list of decision tables, change decision tables, etc… designers form these kinds of privileges available to users from the Higson team. Nevertheless, nothing stay on your way to set new grants.
In order to see Grants, select Tools → Users in Main Toolbar.
Then, select Grants tab.
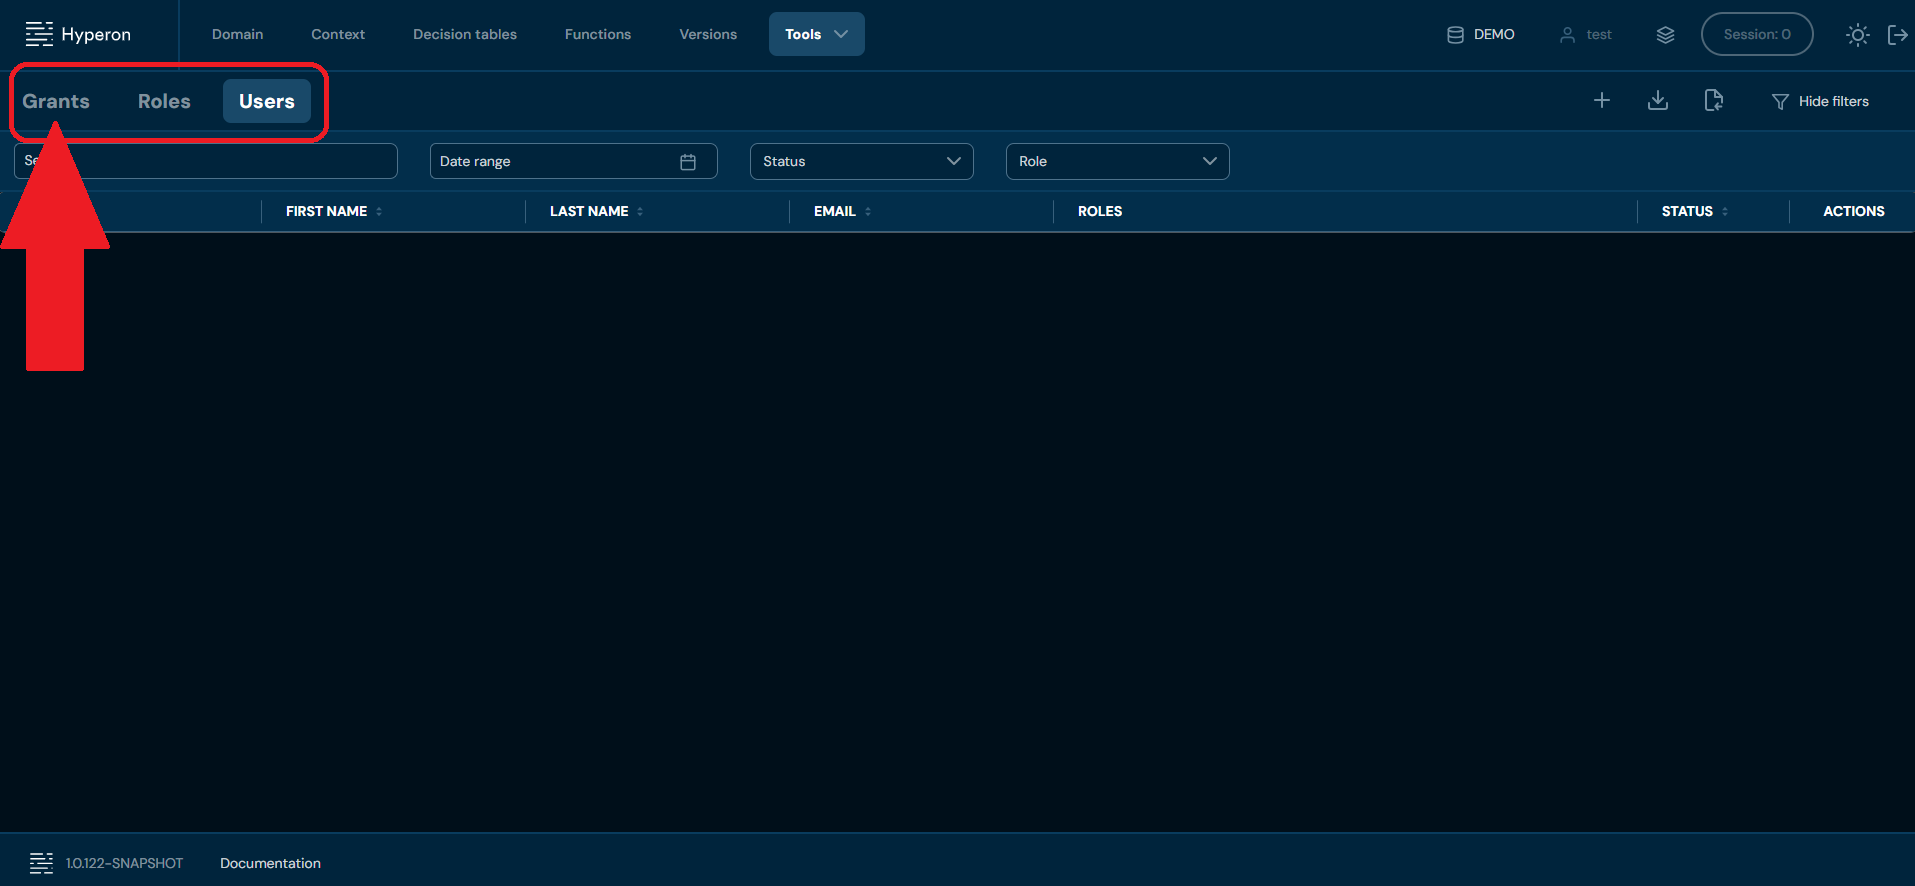 After you enter Grants you will see screen of all Grants:
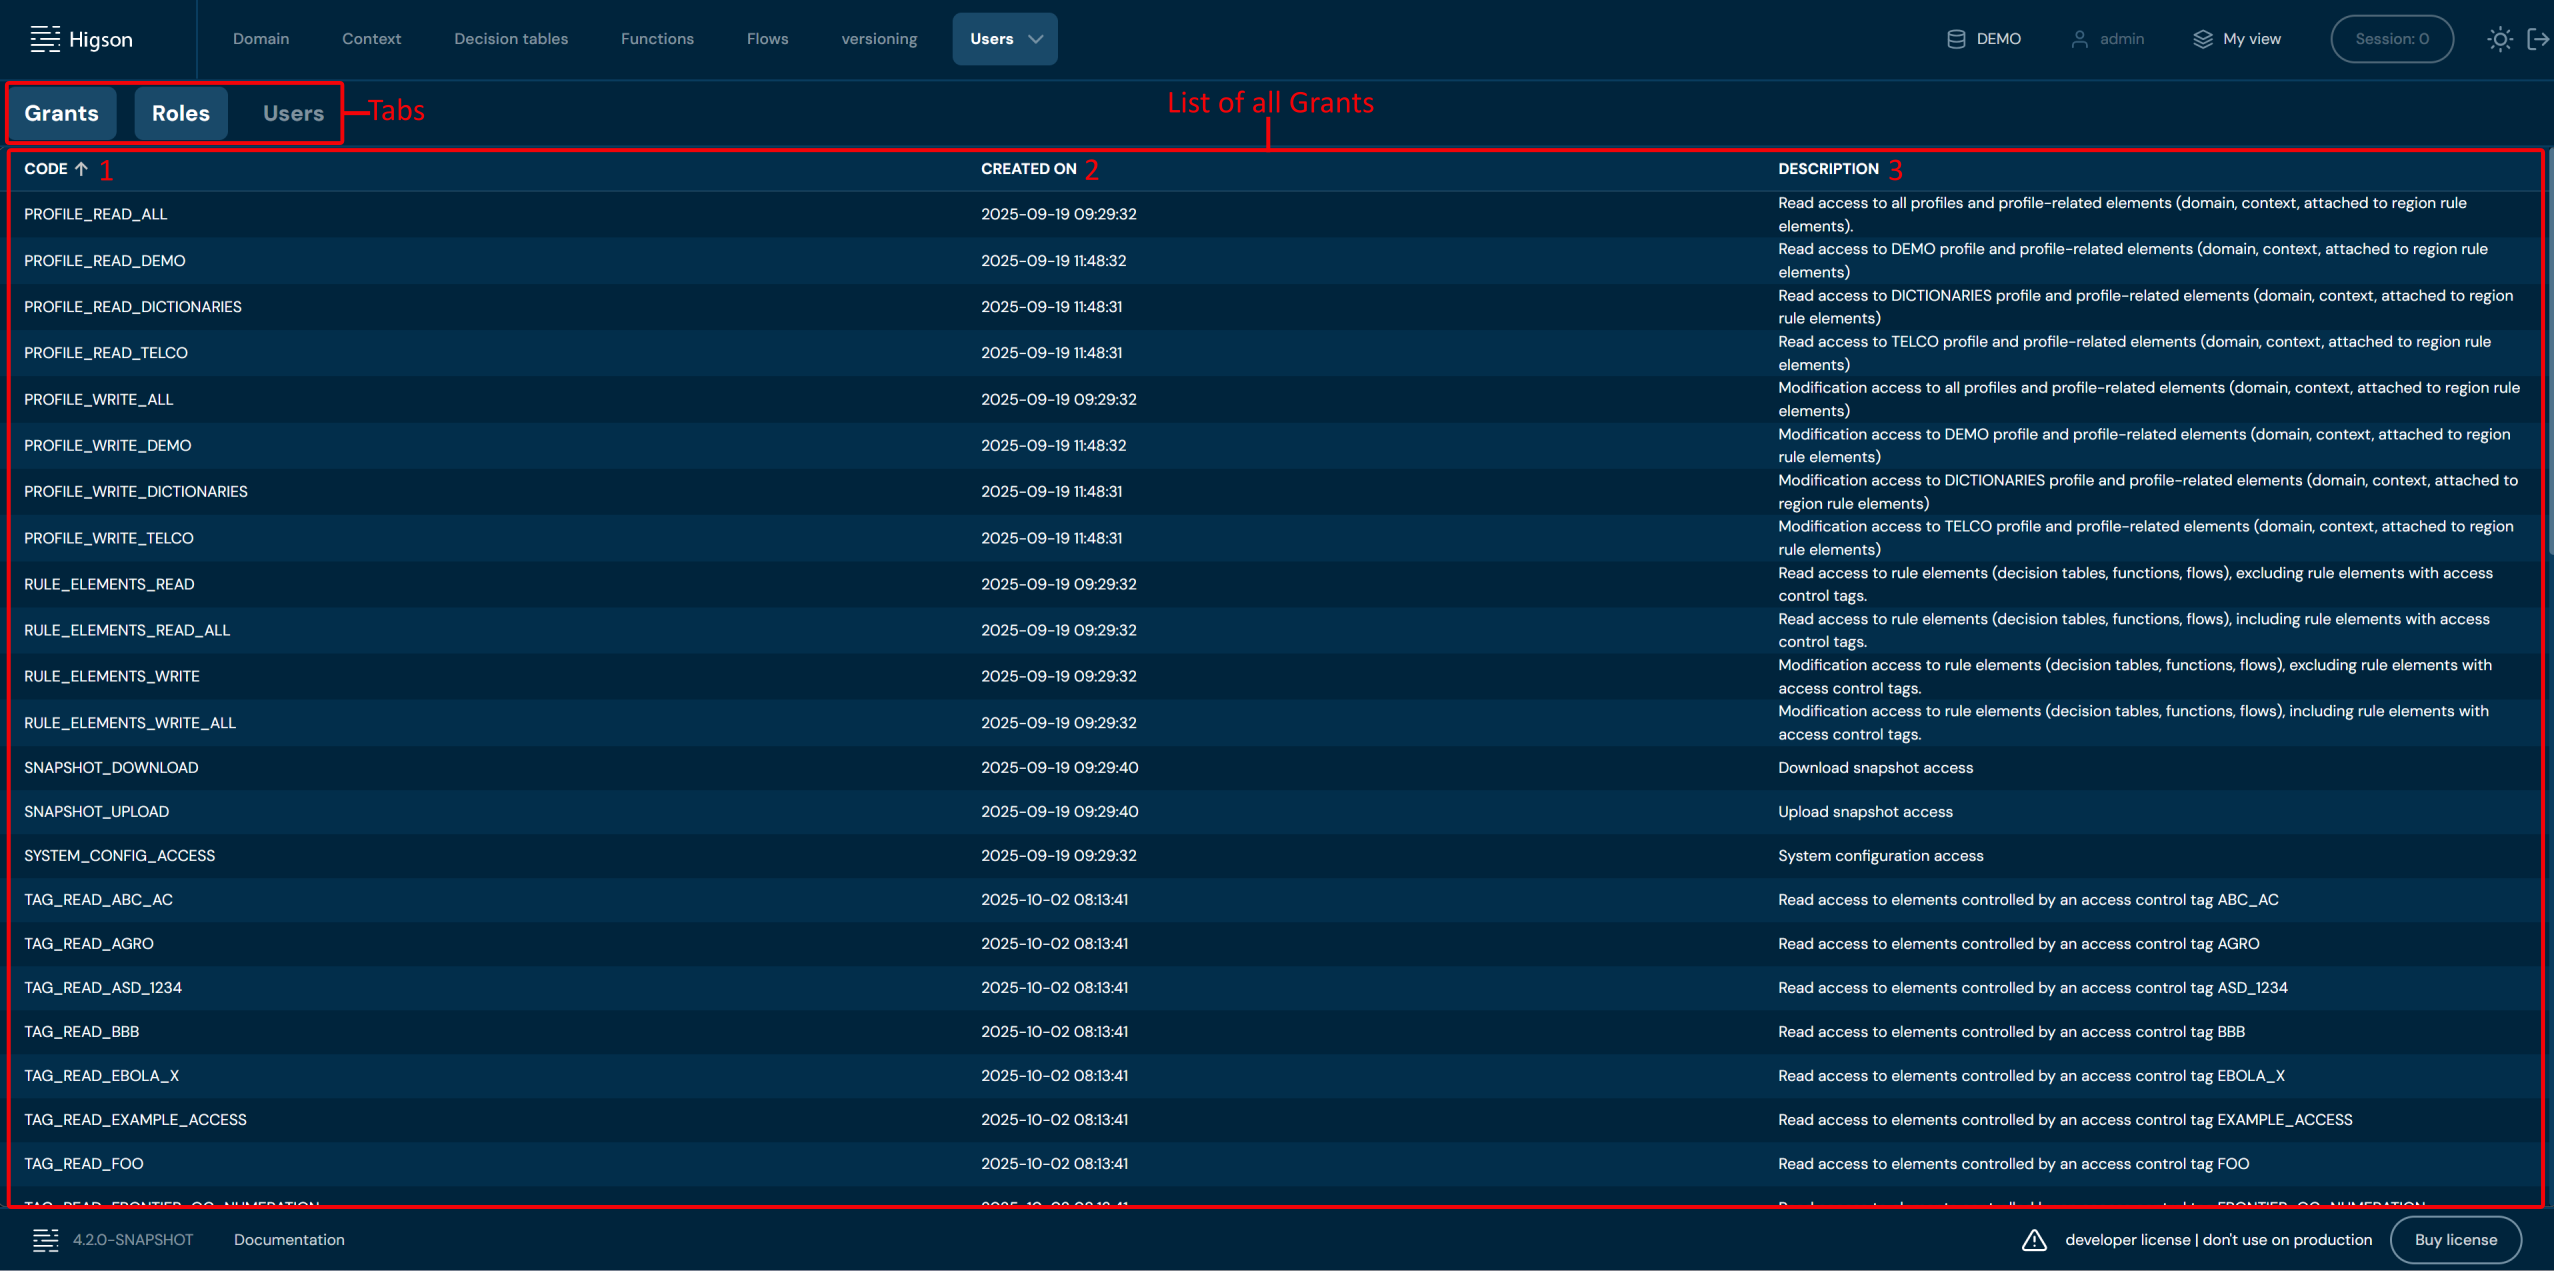
| No. | Column | Description |
|---|---|---|
| 1. | Code | Full grant code/name. Grant code and Grant name are interchangeable. You can sort this column by left-clicking on the arrows visible next to the label. |
| 2. | Created on | Date of creation of a grant. You can sort this column by left-clicking on the arrows visible next to the label. |
| 3. | Description | Full grant description. You can sort this column by left-clicking on the arrows visible next to the label. |
You can switch between Grants, Roles and Users screens by left-clicking on the desired Tab.
Configuration of the product in Higson is composed of:
- Domain configuration
- Decision tables
- Functions
Operators make changes in configuration in work session. Open session (by this we understand every change made in range of configuration) is visible only to operator, who is making changes. In the moment of publication that session changes are seen by all the users and are applied to structure.
There are two basic ways to publish your session: by Main toolbar > Tools > Sessions or shortcut session button in the top right corner of the application Higson.
-
When a user chooses to go through the main toolbar (A):

the screen will show with a list of all sessions:
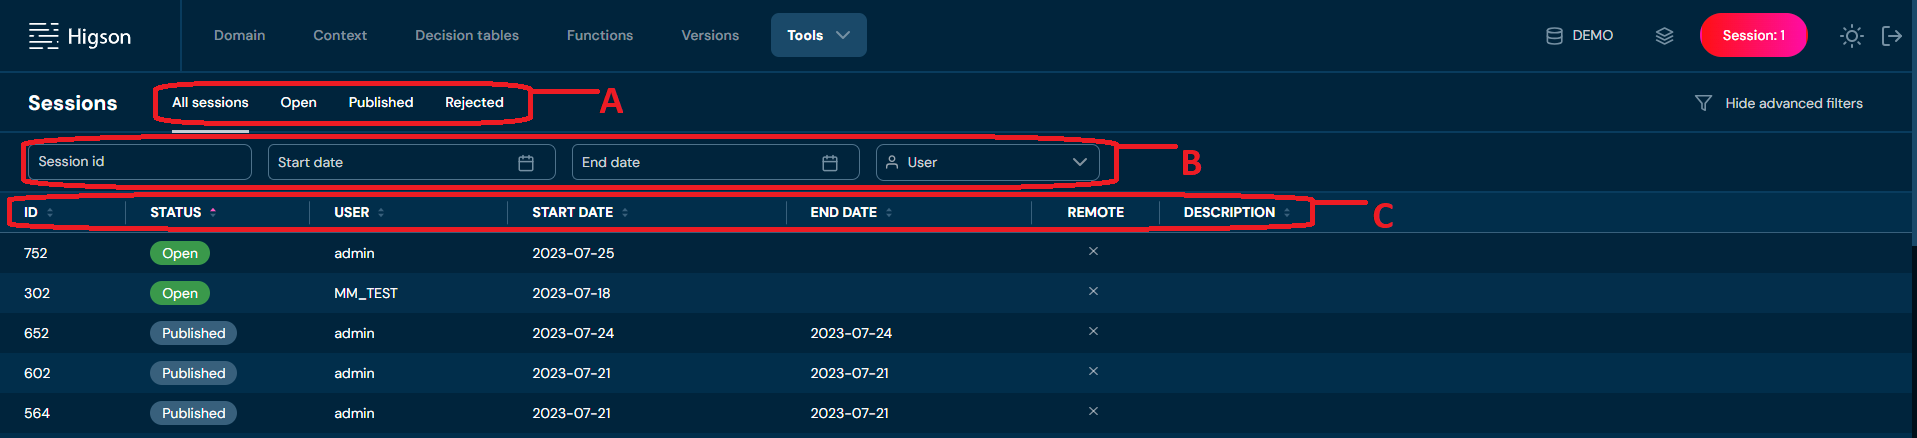
While looking for specified session may filter possible matches by:
-
All sessions, Open, Published, Rejected (A)
-
Session id, Start date, End date, User (B)
Your guidelines will be applied automatically. There is no need to fill all search cells or filter decision tables at once. Input only those which you find necessary. Sessions view is in the form of a table with columns (C):
Id. Column name Description 1. Status Status of session: Published, Open, Rejected 2. User The user who owns the session 3. Start date Date of creation of session 4. End date Date of publishing or rejecting session 5. Remote Flag informing if the session created by higson runtime rest 6. Description Description of a session after publishing or rejecting When a session from the list is selected (by clicking on it) detail information will show:
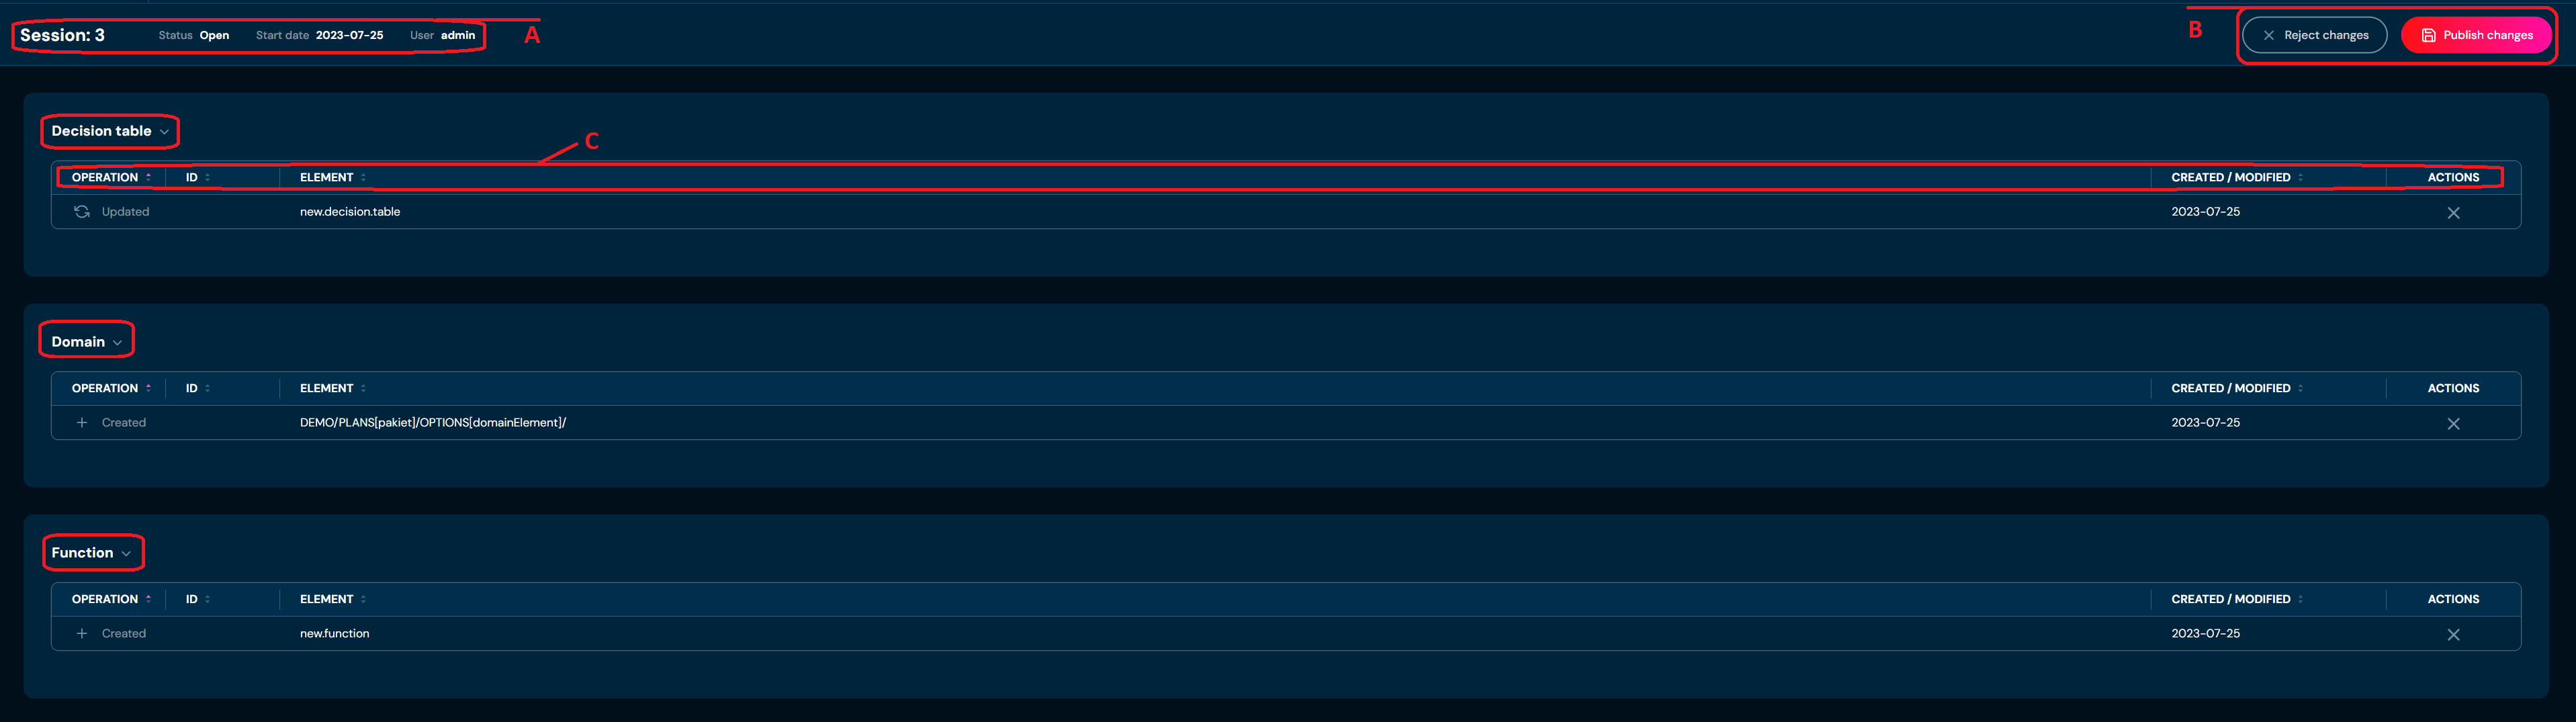
In this view, we can see a summary of the selected session: elements number, the start date of the session, and user owner (A).We can publish or reject changes in (B) (only if the Session in (A) is marked as Open). This view also contains three sections: Decision table, Domain, and Function with assigned table containing columns (C):
Id. Column name Description 1. Operation Operation on the element: Create, Update, or Delete 2. ID ID number of element 3. Element Element name 4. Created/Modified Date of operation executed at the element 5. Actions Column for reverting changes on one separate element on this session -
-
When the user chooses to go through the shortcut session button (B) in the top right corner of the application Higson**:**

very similar session details to the previous one view will appear:
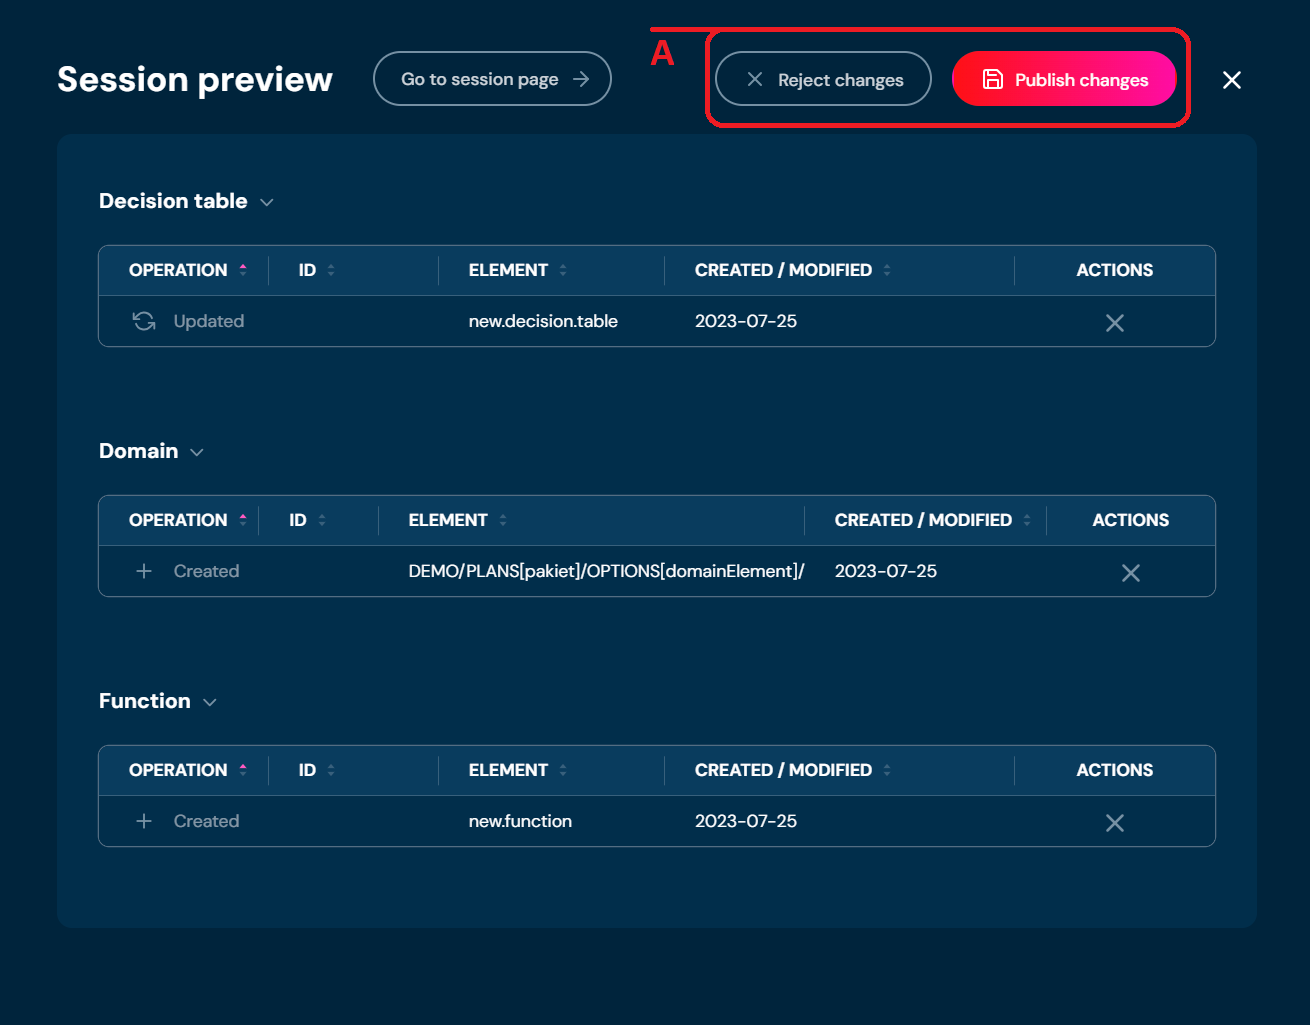
After clicking on (A) Reject or Publish changes view will pop up:
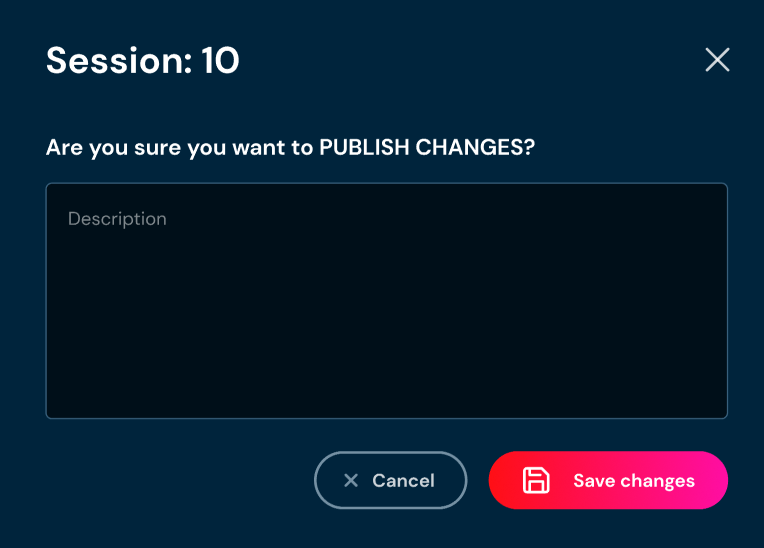
After confirmation, changes will be PUBLISH or REJECT with no message or a message in the description field filled.
Session conflicts#
A conflict may occur when two users modify the same element. In such cases, the session that is published first will be successfully applied. The publication of the second session will be blocked, and a report will be displayed listing the elements that are preventing the session from being published. The session publishing mechanism prioritizes the user who publishes their session first.
EXAMPLE
User_A begins editing the decision table named Table. The matrix of the decision table is initially empty. They add a new row with the values 10 and 1 to the matrix and save the changes. This modification is stored in a session of User_A. The session remains open — User_A has not yet published the changes.
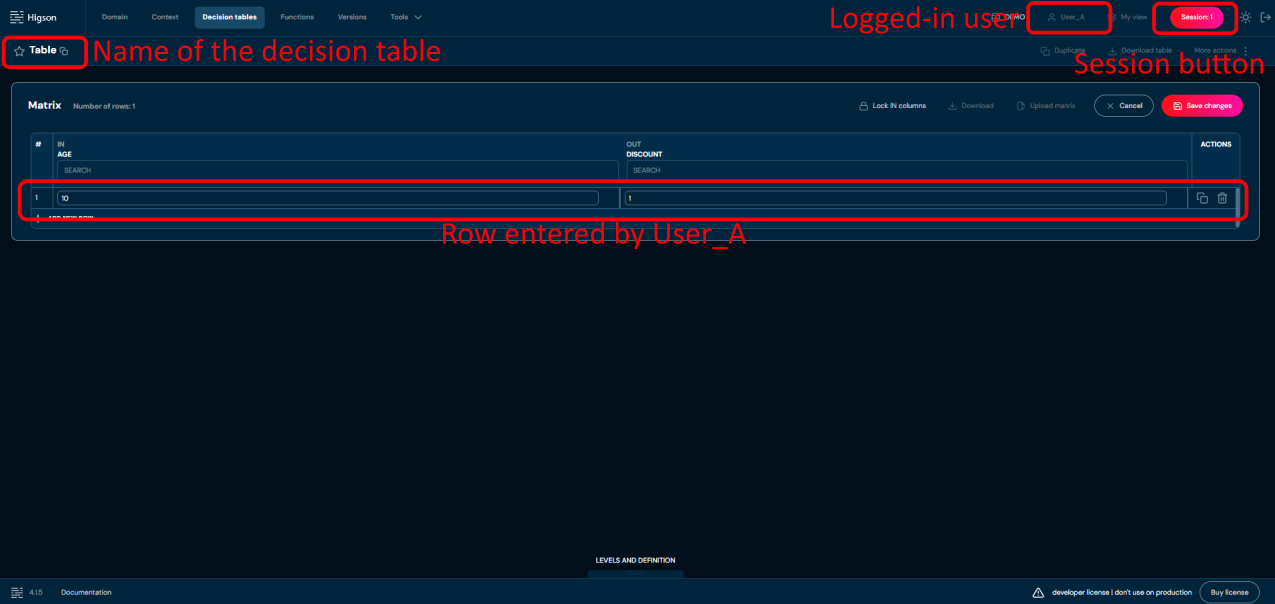
Meanwhile, User_B also begins editing the same decision table named Table. At the time of opening the edit session, the matrix appears empty because User_A’s changes have not yet been published.
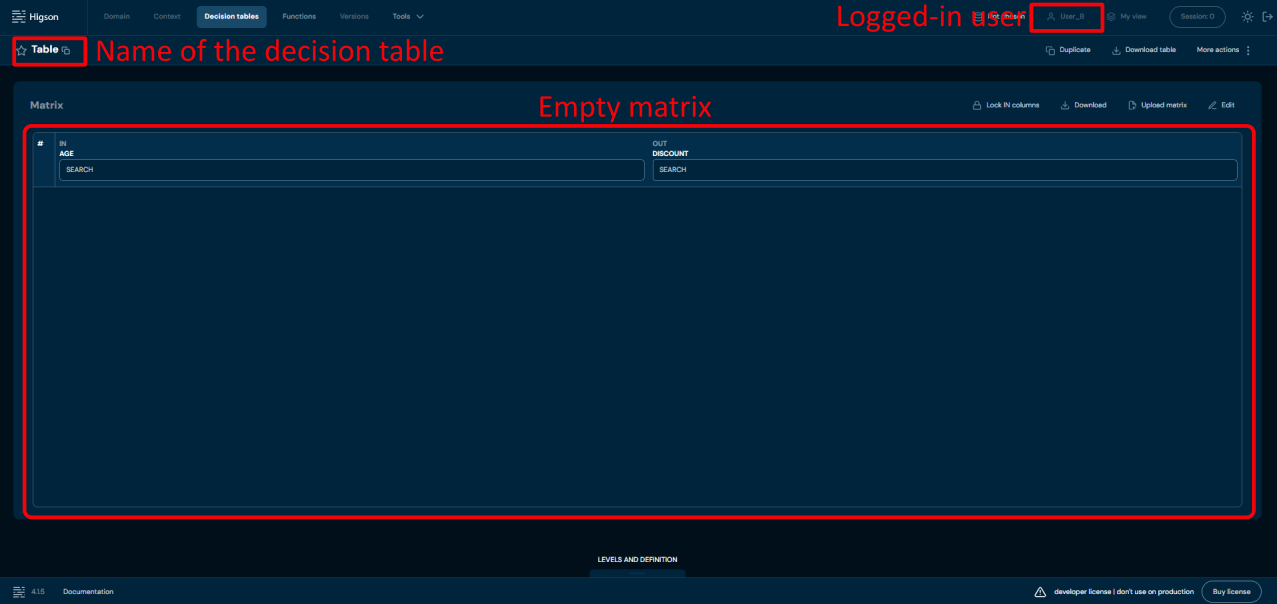
User_B adds a row with the values 20 and 2 and saves the changes. This modification is stored in a session of User_B.
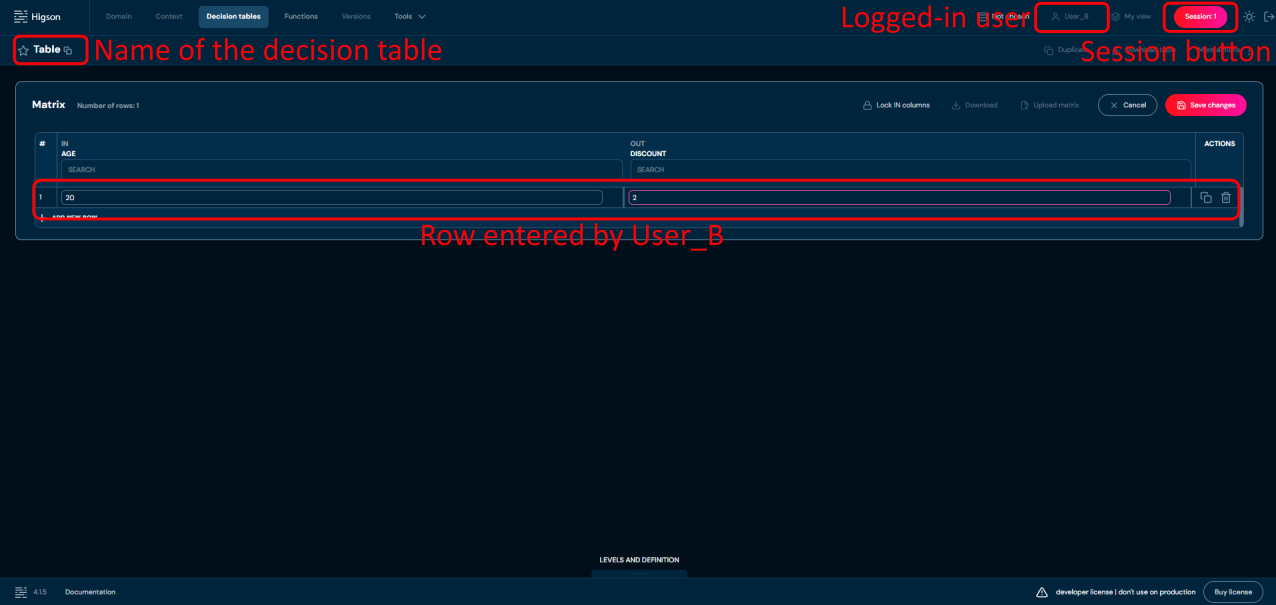
User_A then proceeds to publish their session. The publication completes successfully since there are no conflicts.
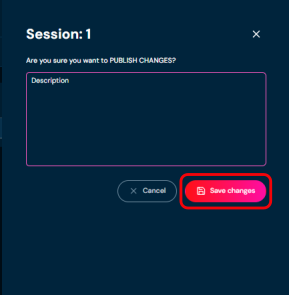
Next, User_B attempts to publish their session. However, the operation is blocked. At this point, the table already contains a row with the values 10 and 1, which were added by User_A. User_B’s edits were made based on an outdated (empty) version of the table, which no longer matches the current state. As a result, the system blocks the publication of User_B’s session due to a version conflict. An appropriate message is displayed to inform the user.
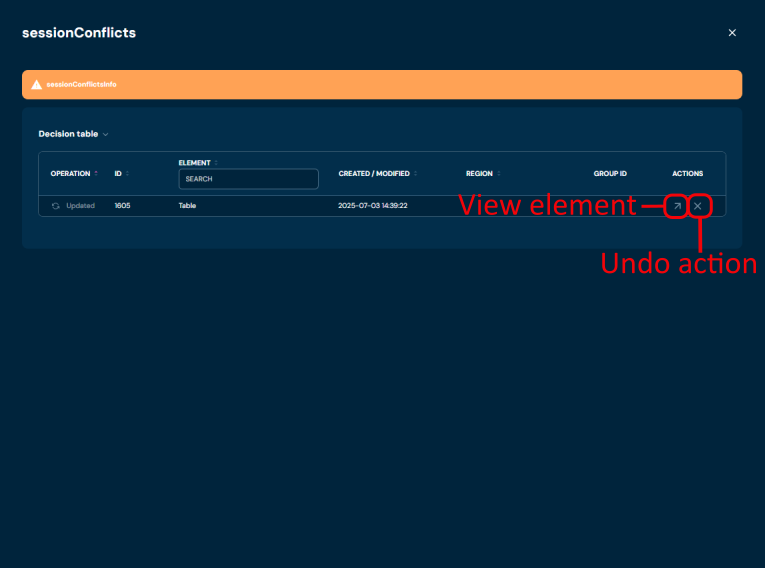
In the event of a collision during session publication, users are required to discard their changes by clickig Undo action. The pop-up will apear to confirm action.

However, to avoid losing valuable work — as some of the modifications might still be needed — the decision table can be exported to Excel. Before discarding the session go to the decsion table view and click Download table to get xlsx file.
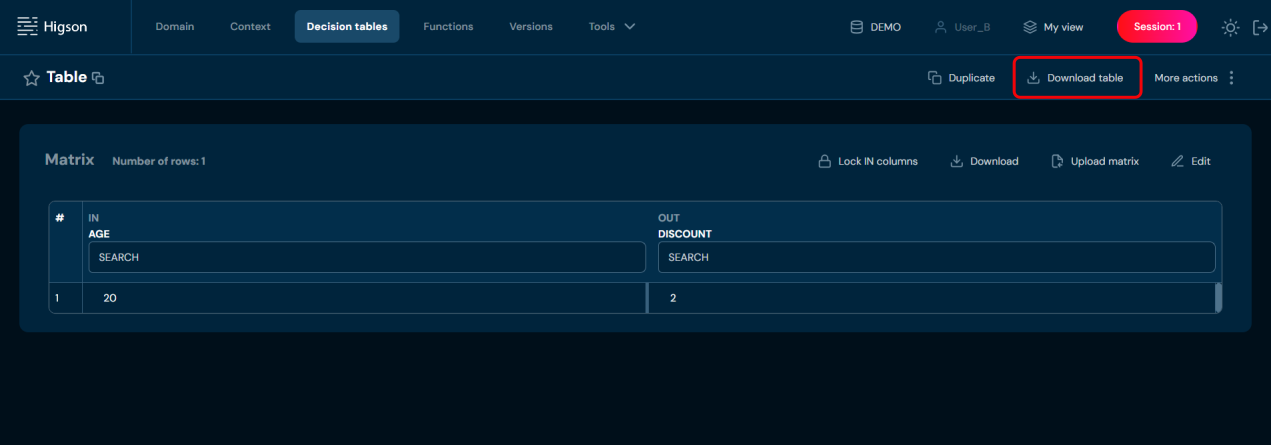
This allows users to preserve their changes. Once the session is discarded, the table will reflect the changes published by the other user, and the exported modifications can then be reapplied to this updated state.
After downloading the table, the user can return to the session preview and discard changes by clicking Undo Action and confirming the prompt. As a result, the session publication is canceled, and a message indicating that the conflict has been resolved will appear.
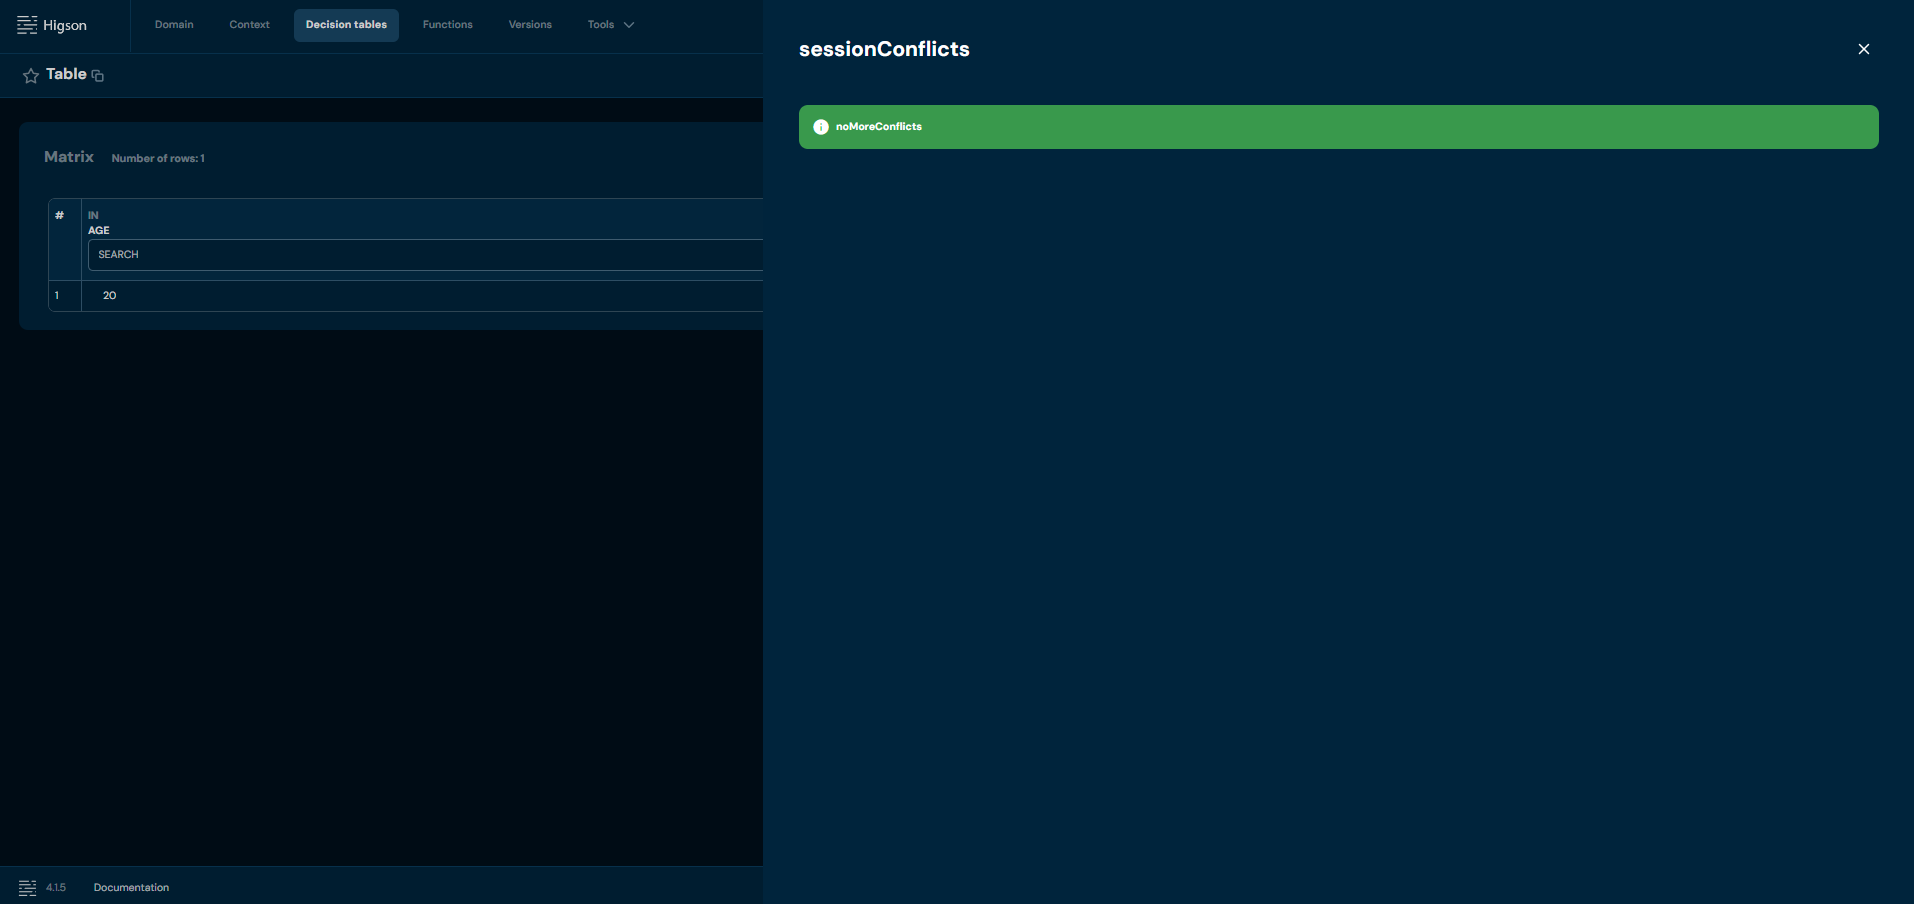
The session publishing mechanism ensures conflict-free collaboration and maintains configuration consistency. Since the mechanism prioritizes the user who publishes their session first, it is recommended to organize configuration work in a way that prevents overlapping edits between different users.
The session mechanism in Higson Studio is the foundation of safe and structured configuration management in a shared environment. It enables users to independently introduce, test, and modify changes without risking interference with others’ work. Awareness of which actions are session-based and which are applied immediately in the environment helps maintain consistency and reduces the risk of configuration errors. By properly managing sessions — for example, by establishing standards for session descriptions or dividing work to avoid unnecessary conflicts — teams can retain full control over ongoing modifications and ensure high-quality collaboration within Higson Studio.
Tokens screen allows you to manage tokens. You can add new tokens and remove them if necessary.
There are two types of tokens:
- Runtime REST token – used to authorize calls made to the Higson Runtime REST interface.
- Studio token – used to authorize API calls in Higson Studio, only for the import and upload snapshot endpoints (access to all other endpoints in Studio is authorized using an Access token).
All tokens are automatically deleted after their expiration date. For security reasons, it is recommended to set a short validity period for tokens. If necessary, tokens can also be manually deleted before they expire.
To access the tokens screen, select Tools in Main Toolbar and select Licences and tokens.
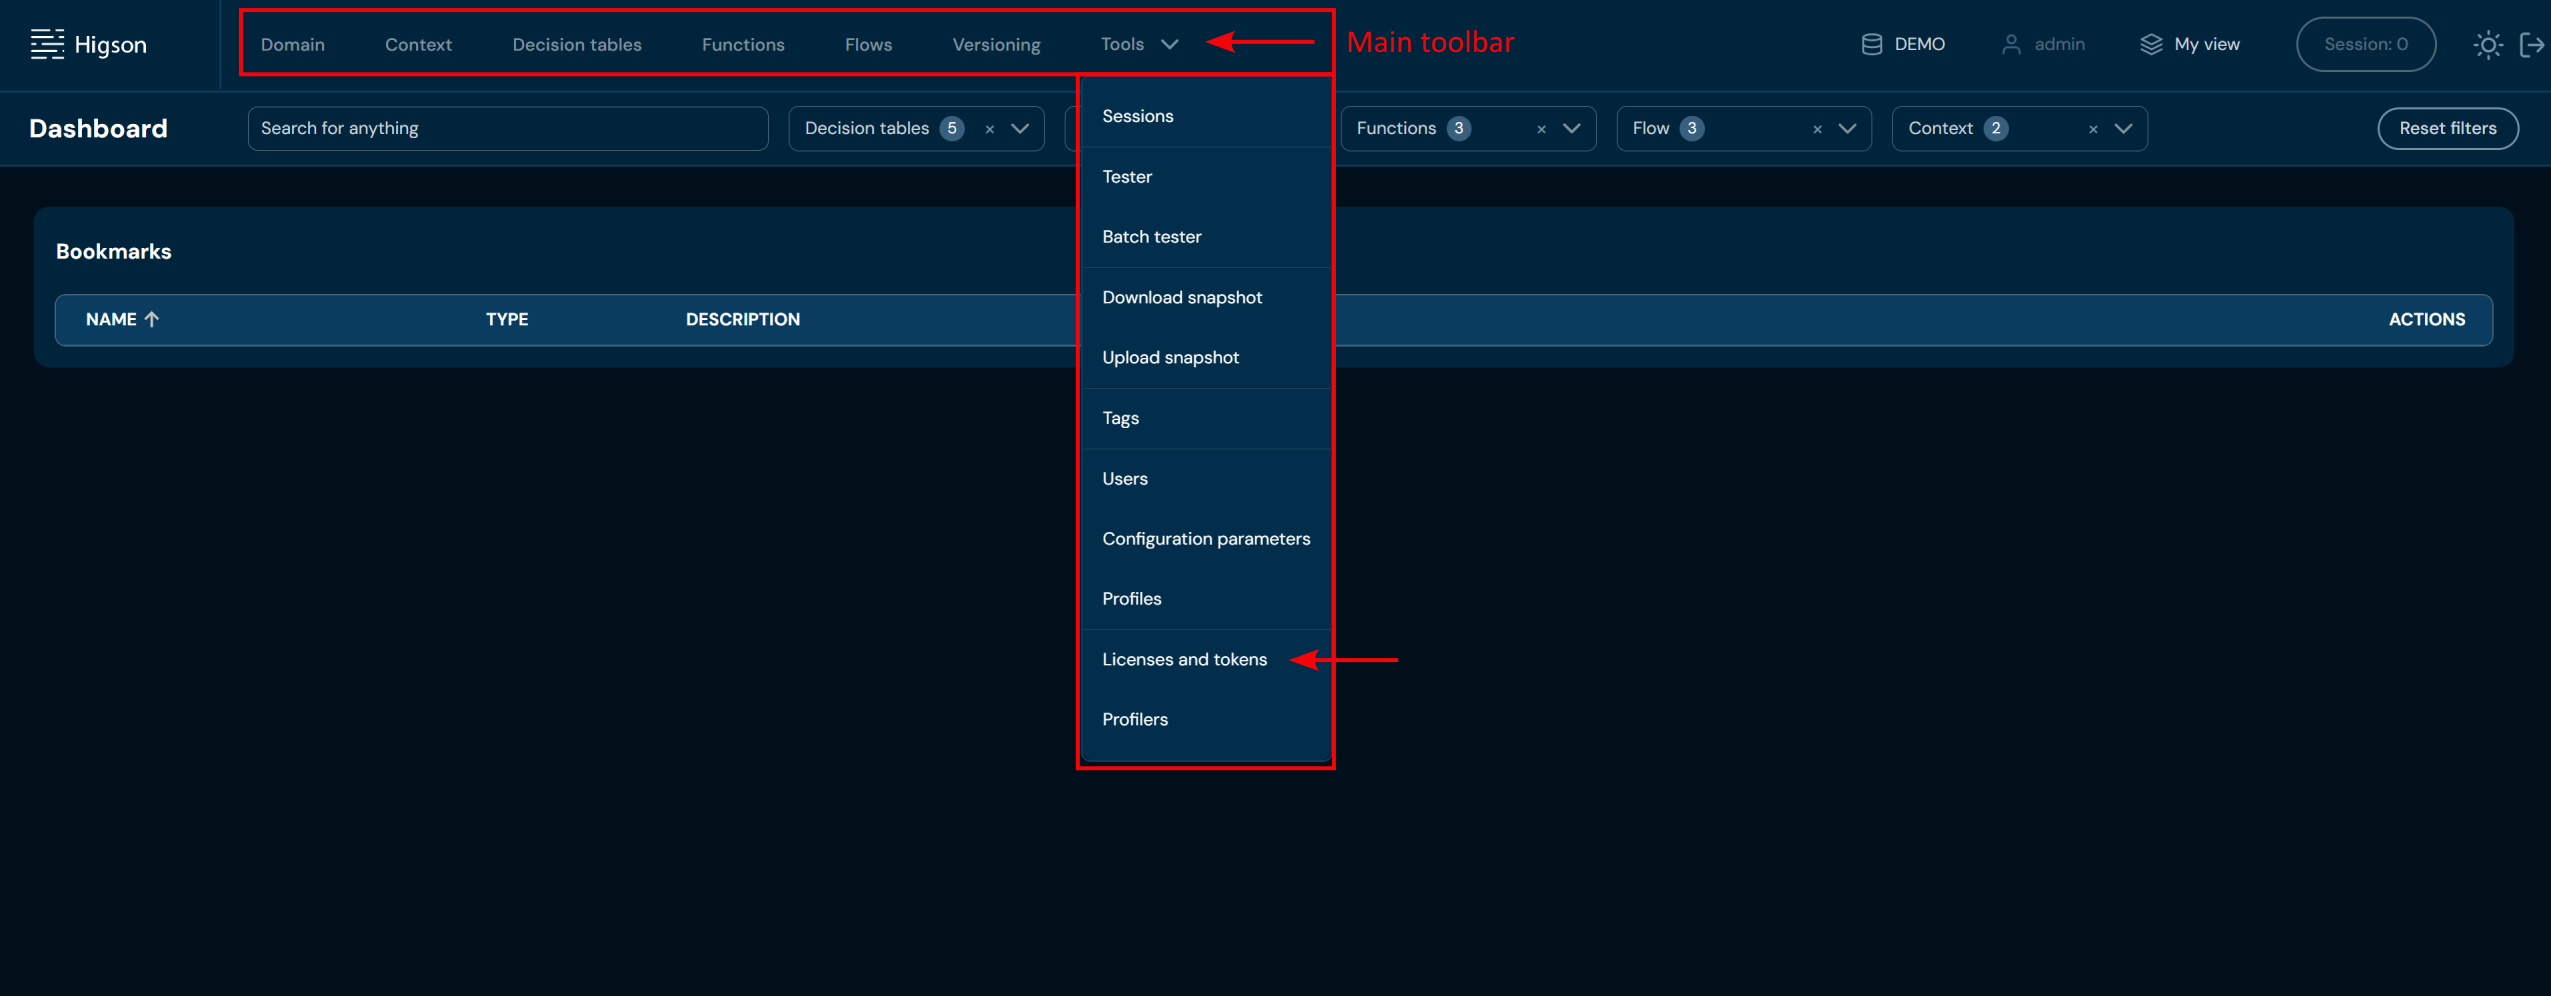
Then select Tokens tab.
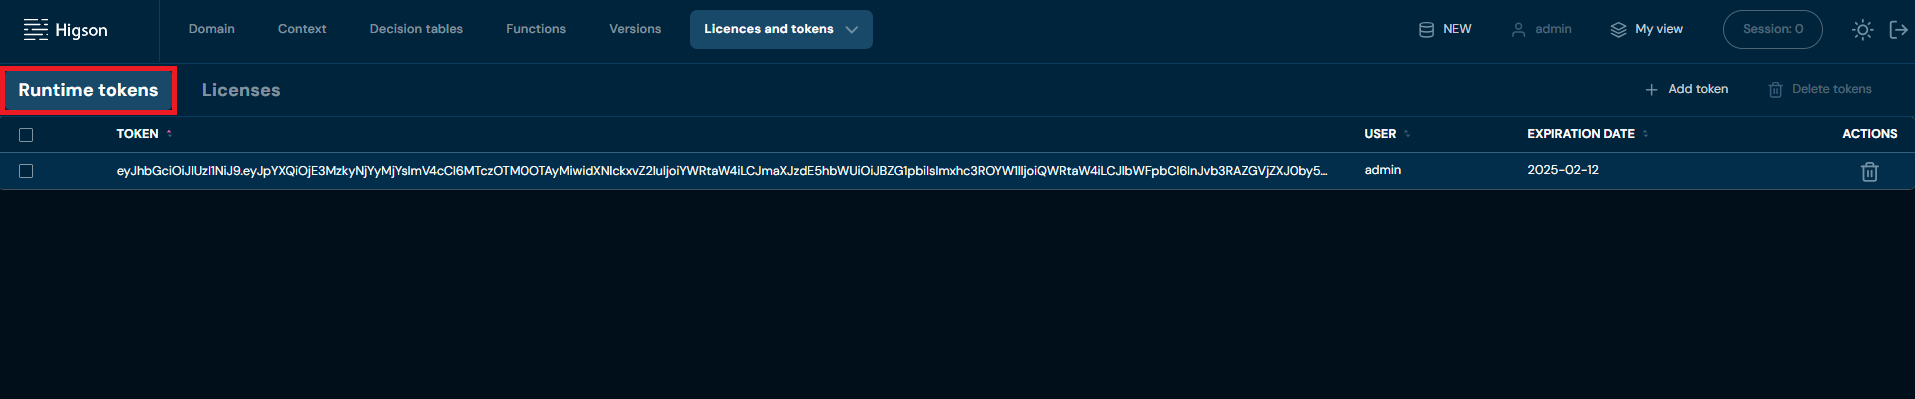
After you enter Tokens you will see the list of all tokens:
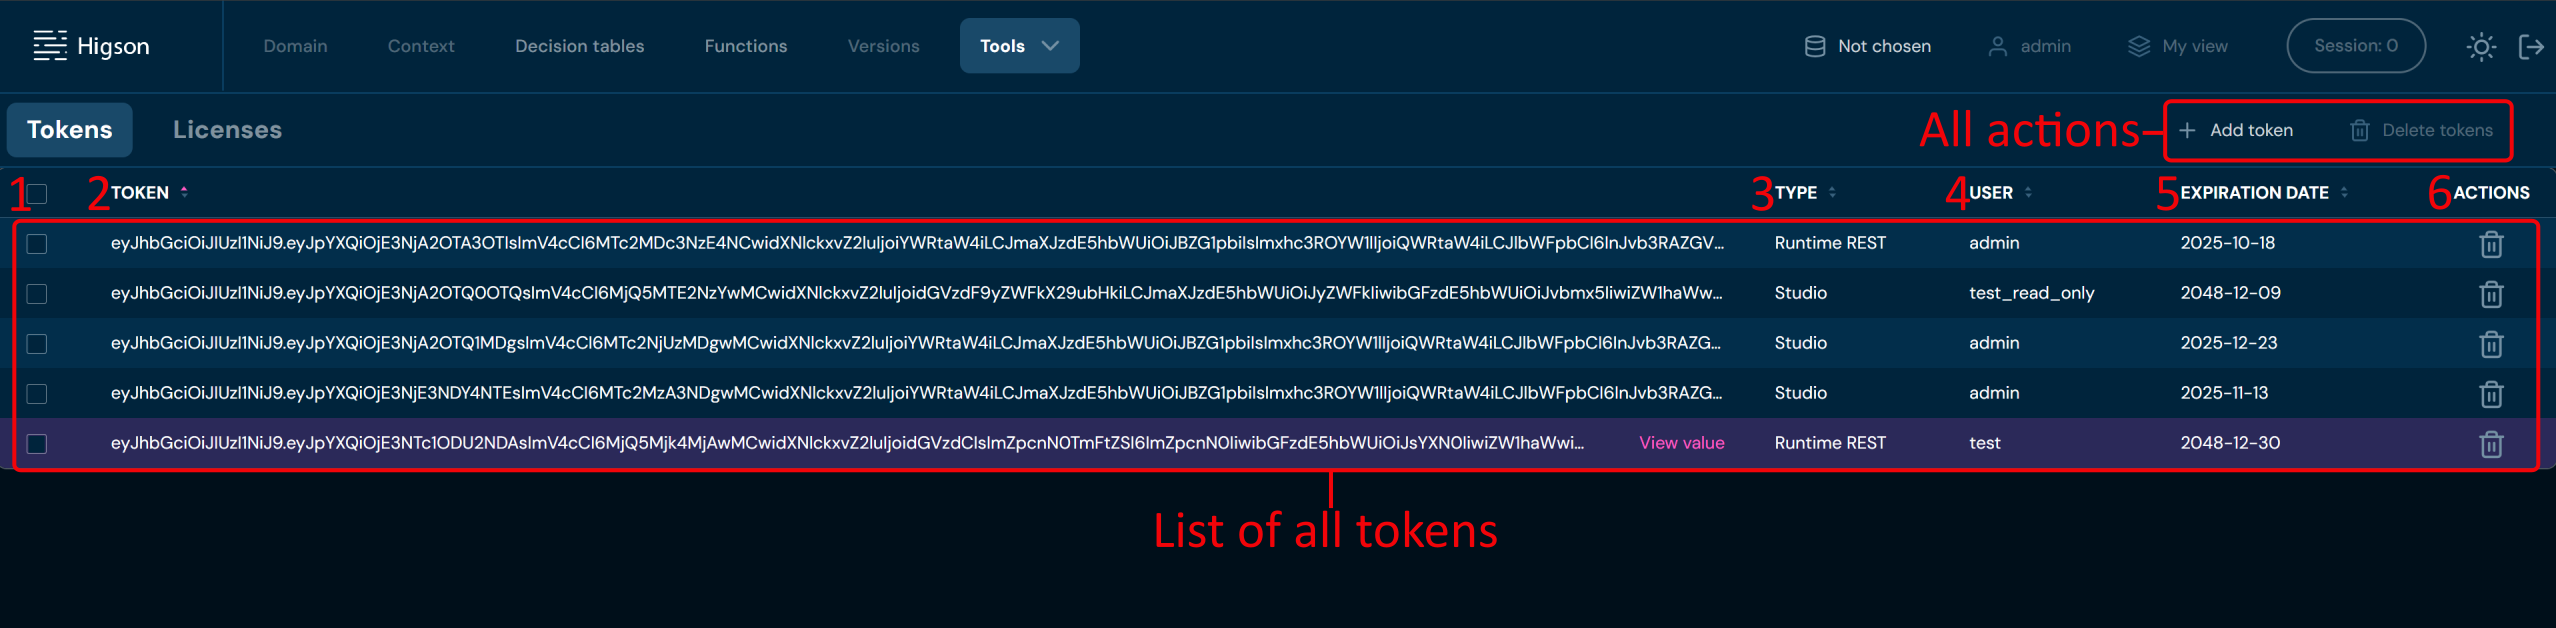
| No. | Column name | Description |
|---|---|---|
| 1. | Checkbox | Checkbox allows you to select all tokens. |
| 2. | Token | Present token value. |
| 3. | Type | Type of token. |
| 4. | User | User to whom the token is assigned. |
| 5. | Expiration | Token validity period date. |
| 6. | Actions | List of quick access actions. Currently, only the Remove action is available here. The Remove action deletes the desired license. |
If you hover on table row, you can click View value to see full Token value
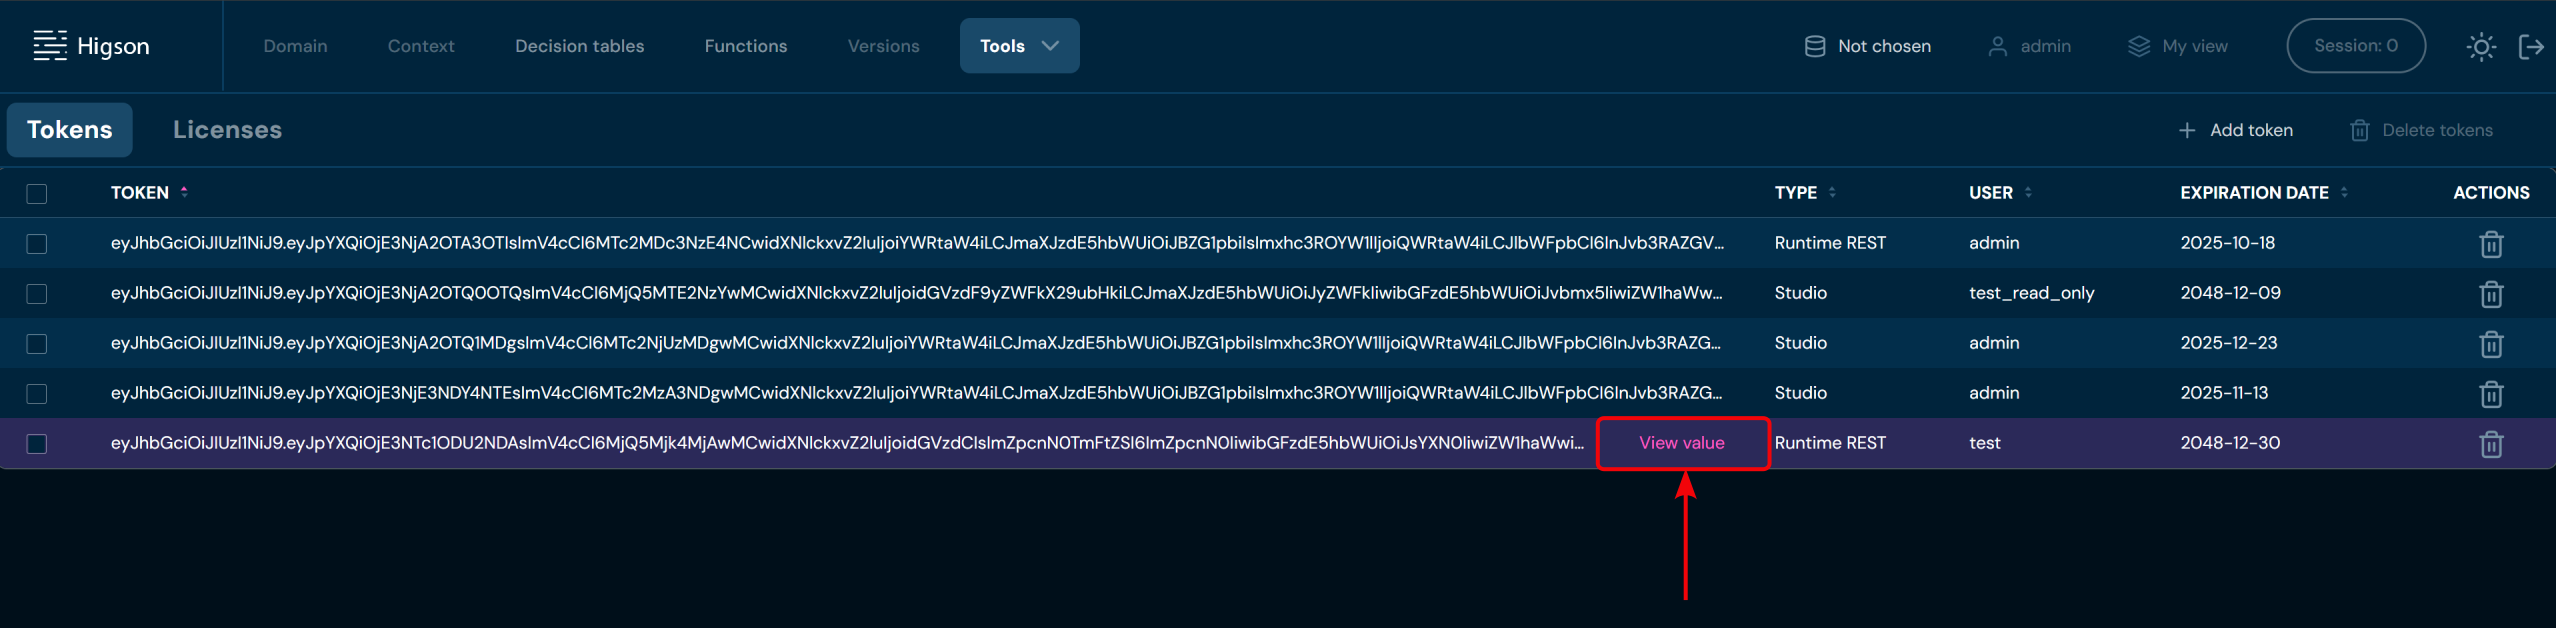
The view of full value of a token:
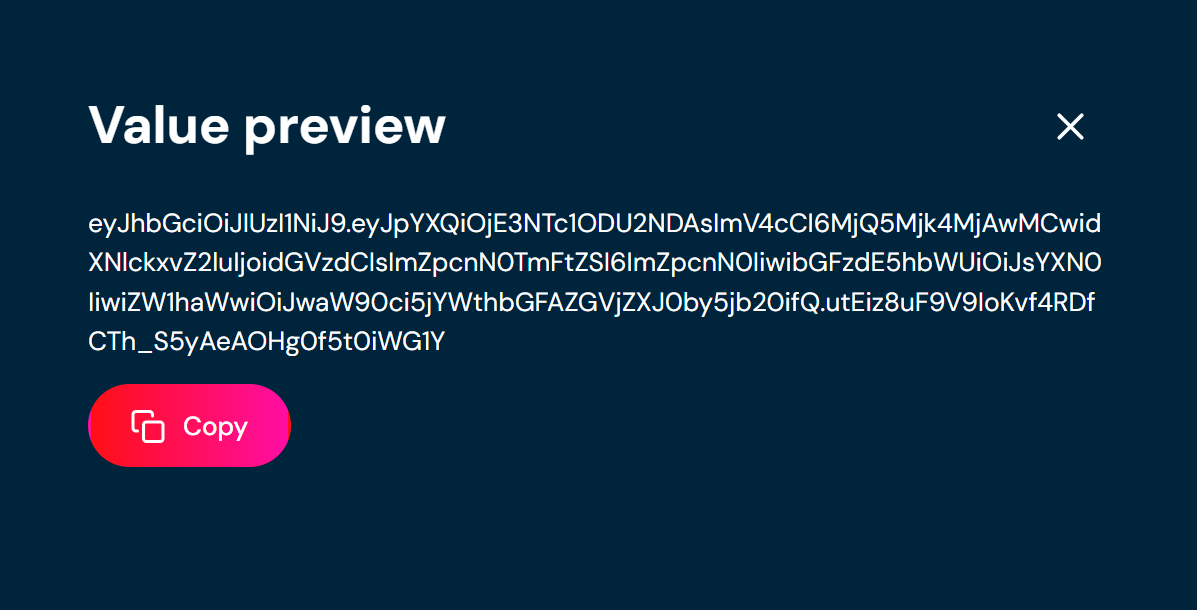
Token Actions#
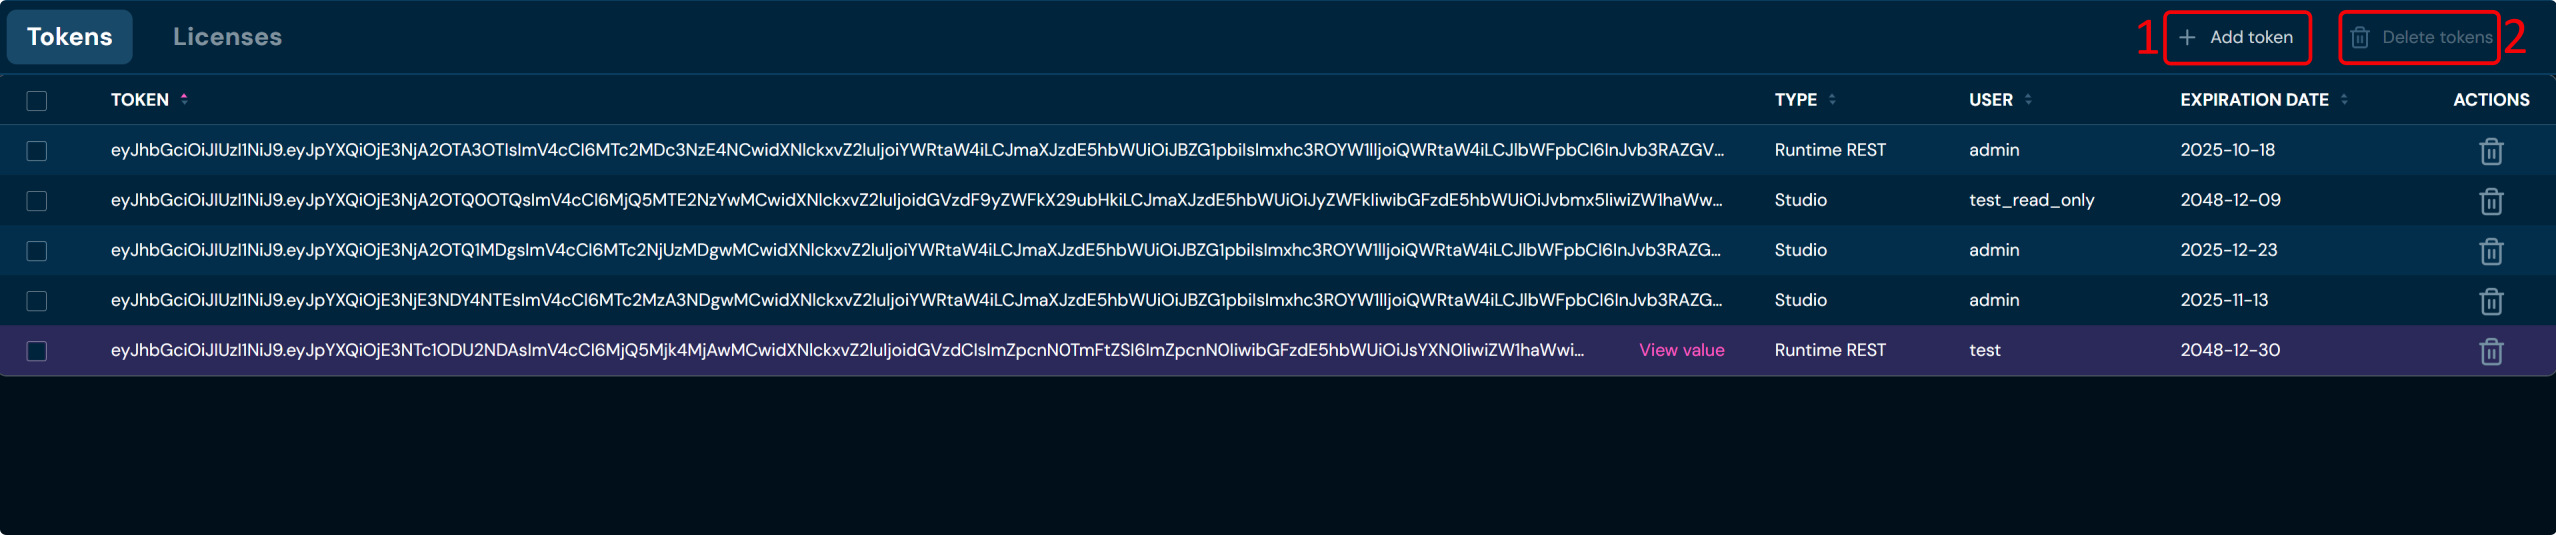
| No. | Action name | Description |
|---|---|---|
| 1. | Add token | Opens a token wizard. Allows generating new tokens. |
| 2. | Delete tokens | Allows removing all selected tokens. |
Add Token#
If you want to generate a new token for user, follow these steps:
-
Select Tools in Main Toolbar and select Licences and tokens and go to the Tokens tab.
-
Chose + Add token
-
Complete required data.
-
In point 1 select the user for whom the token should be generated.
-
In point 2 select the type of the token.
-
In point 3 choose the date until which the token should be valid.
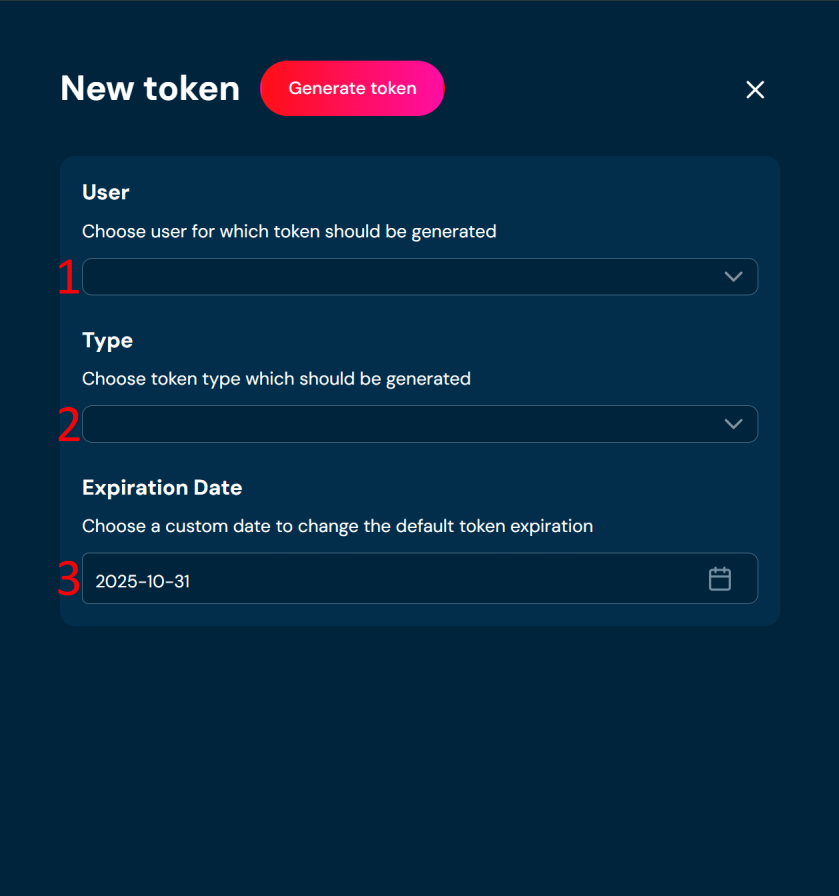
- Generate token by clicking in Generate token button.
Delete Tokens#
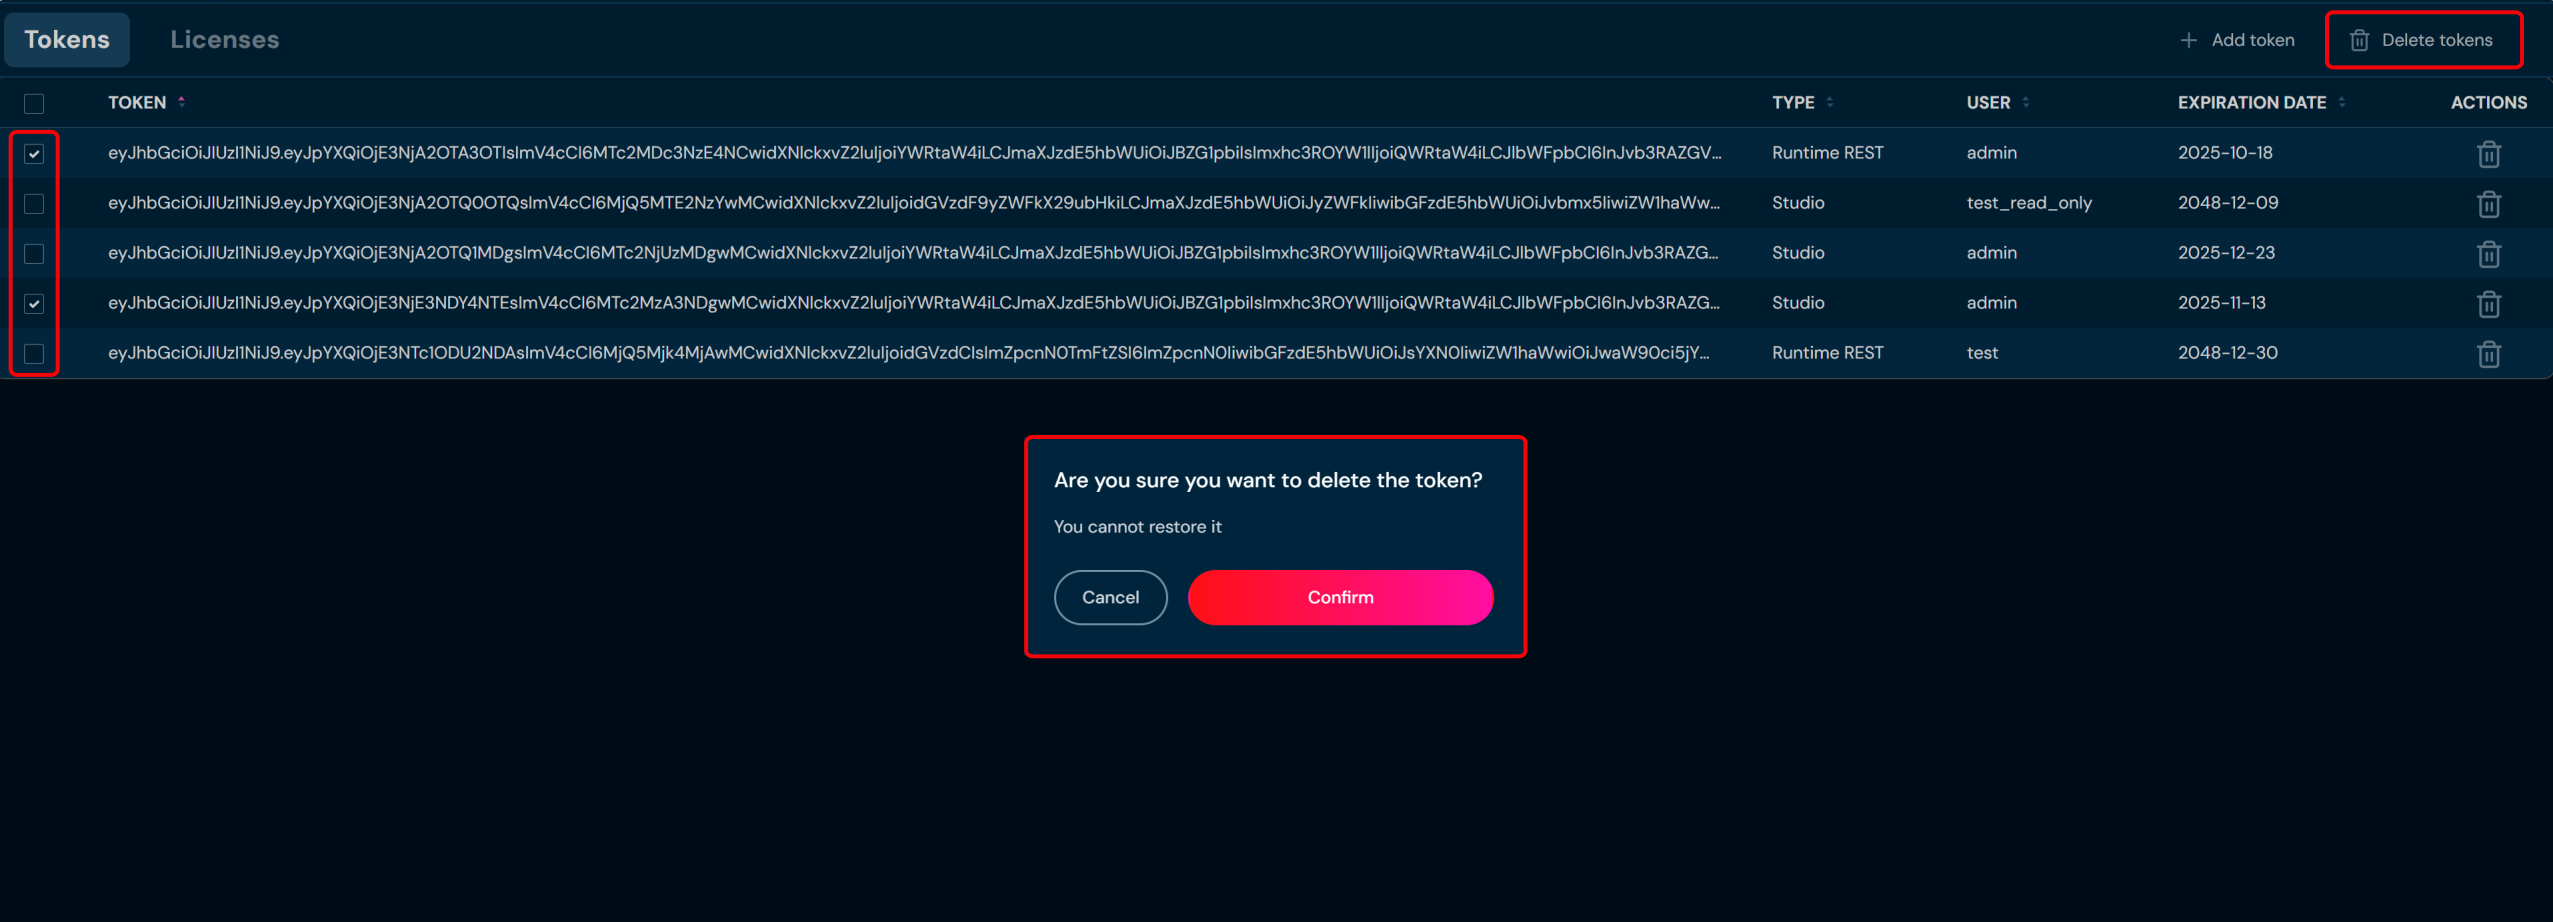
If you want to delete more than one token, you can use the checkbox on table left side and press Delete tokens. You will see the confirmation pop-up where you can Confirm or Cancel your action.
Delete Single Token#
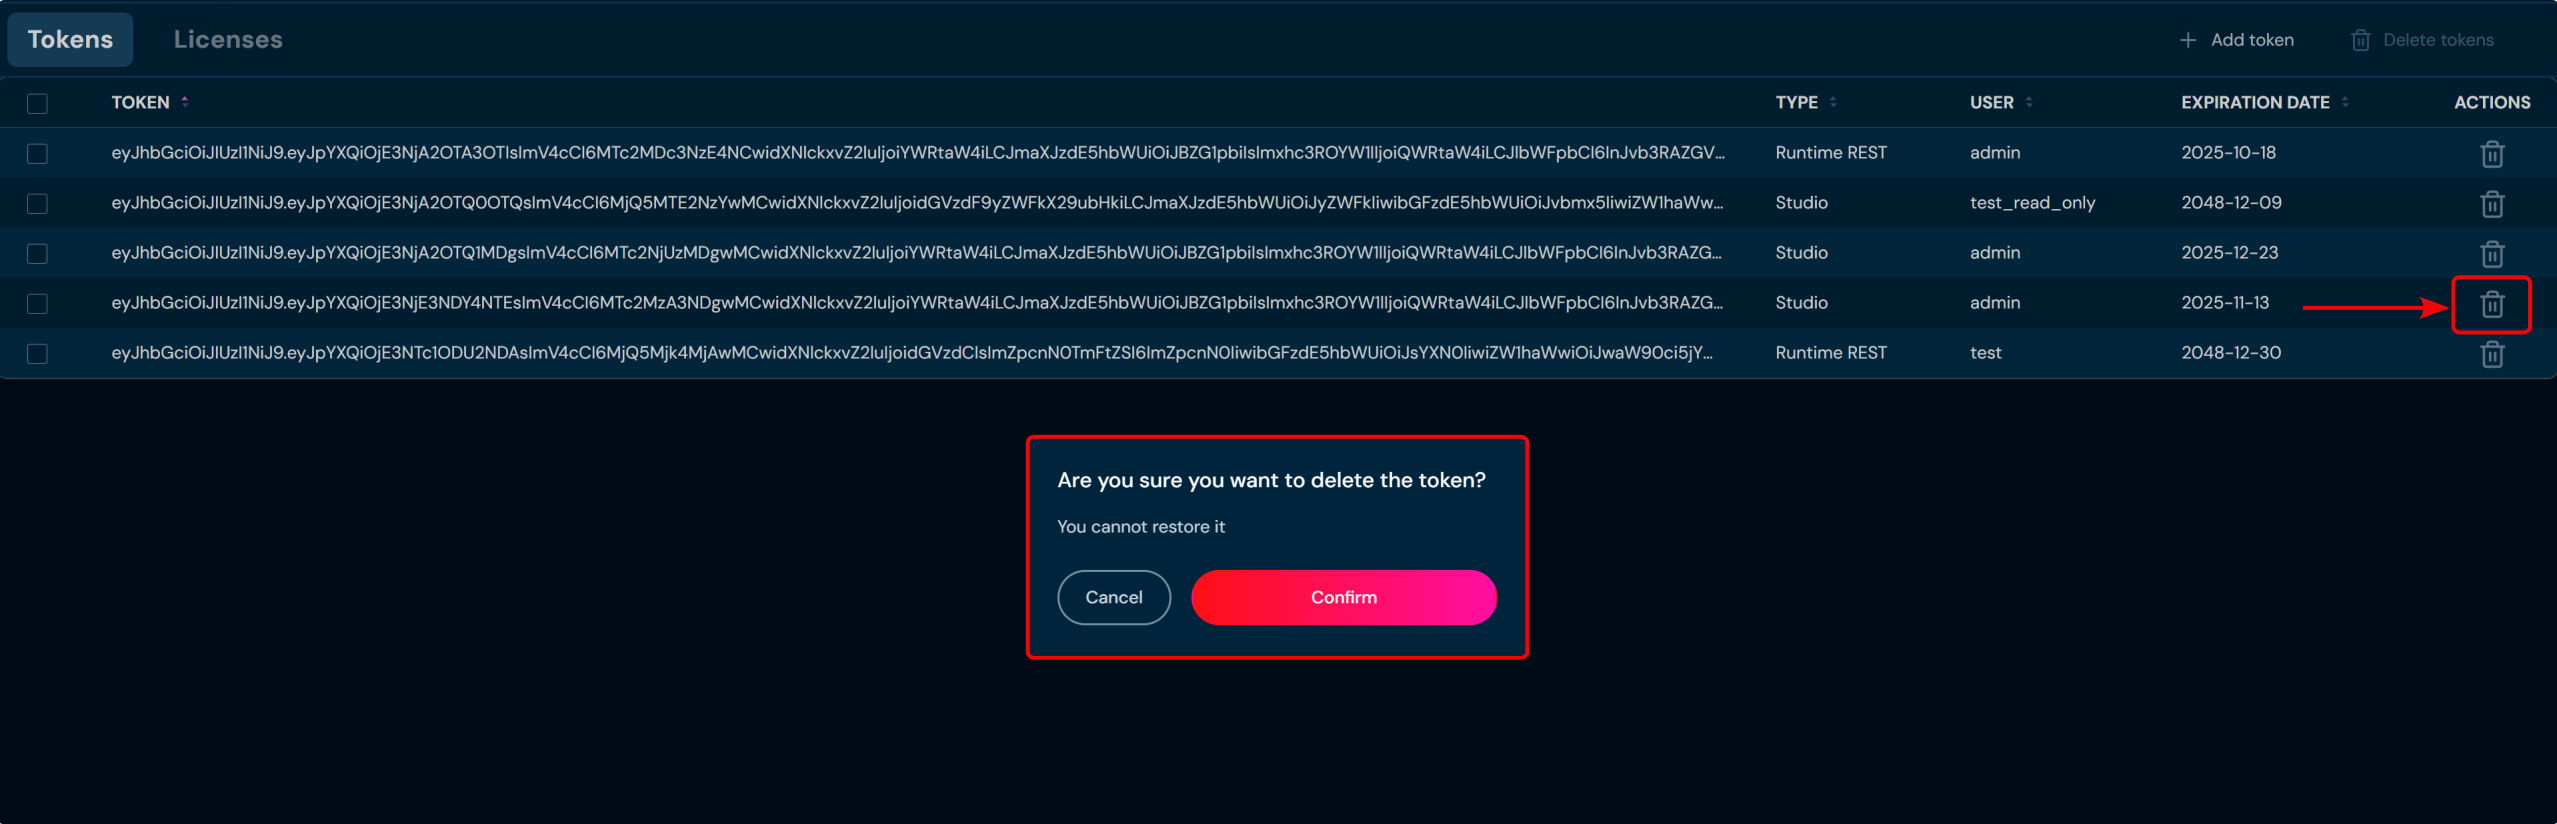
If you want to delete only one token, you can click on the trash bin icon in the Actions column. You will see the confirmation pop-up where you can Confirm or Cancel your action.
License Overview#
Higson Studio requires a valid license to operate. Without a loaded license, Higson Studio will be blocked and access to all features will be unavailable.
License Protection#
Starting from version 4.3, Higson introduces a license protection system with Runtime usage diagnostics and clear notifications inside Higson Studio about upcoming renewal deadlines. From now on, users:
- Receive clear, progressive notifications about expiring licenses, without blocking the Runtime.
- Get improved service support - environment analysis based on a diagnostic file.
- Benefit from greater security - easy detection of system use approaching license expiration thanks to visible, escalating alerts.
- Maintain consistency with the Diagnostic Panel - license and diagnostic data become part of a broader monitoring ecosystem.
Production License#
A production license must be loaded on every production environment. To obtain a production license, contact oktawia.jakubik@decerto.com
Developer License#
Starting from version 4.3, a developer license is required for all non-production environments. The developer license is unlimited in terms of both the number of CPU cores and its duration. This means it can be used without any restrictions on the number of CPU cores and has no expiration date. Clients migrating from earlier versions of Higson are encouraged to reach out for a developer license. To obtain one, contact:
- Product Manager: oktawia.jakubik@decerto.com
- Sales team: lukasz.niedospial@higson.tech
Trial License#
Users interested in testing Higson can now run the environment on their own infrastructure and work with Higson for 3 months under a developer license, with no obligations.
License Management#
Licenses are a screen that allows you to manage licenses. You can add new licenses and remove old ones. To access the license screen, please select Tools in Main Toolbar and select Licences and tokens
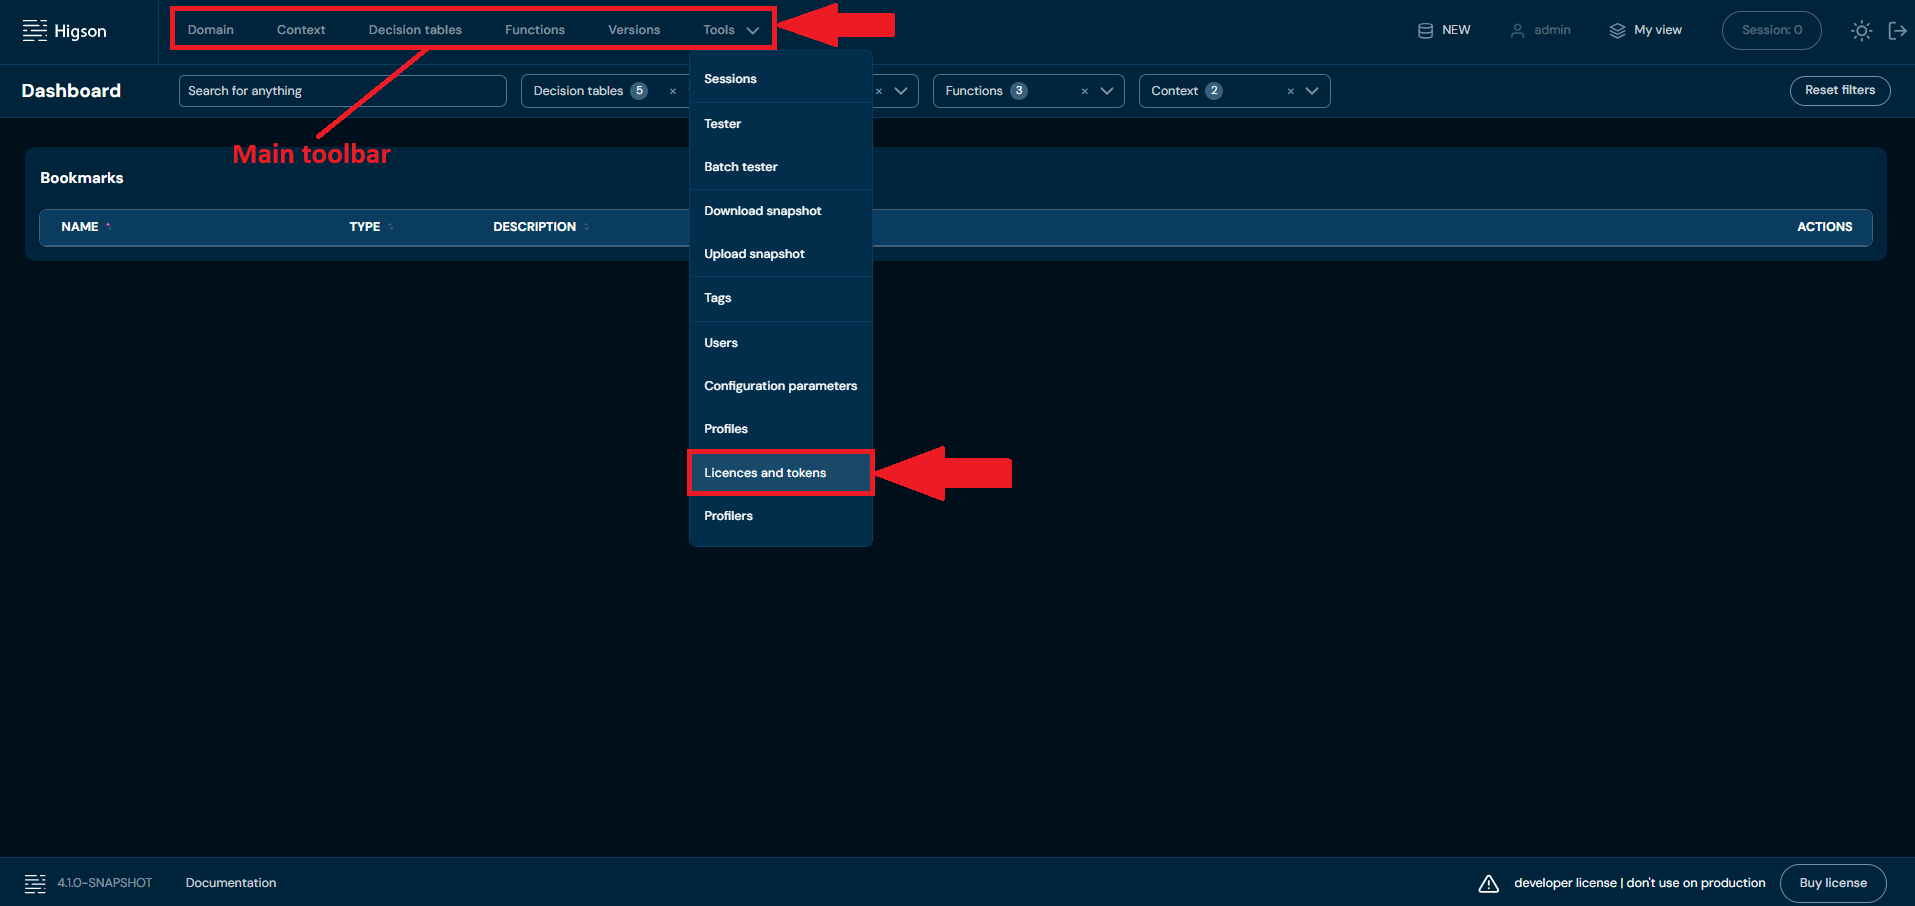
And go to Licenses tab
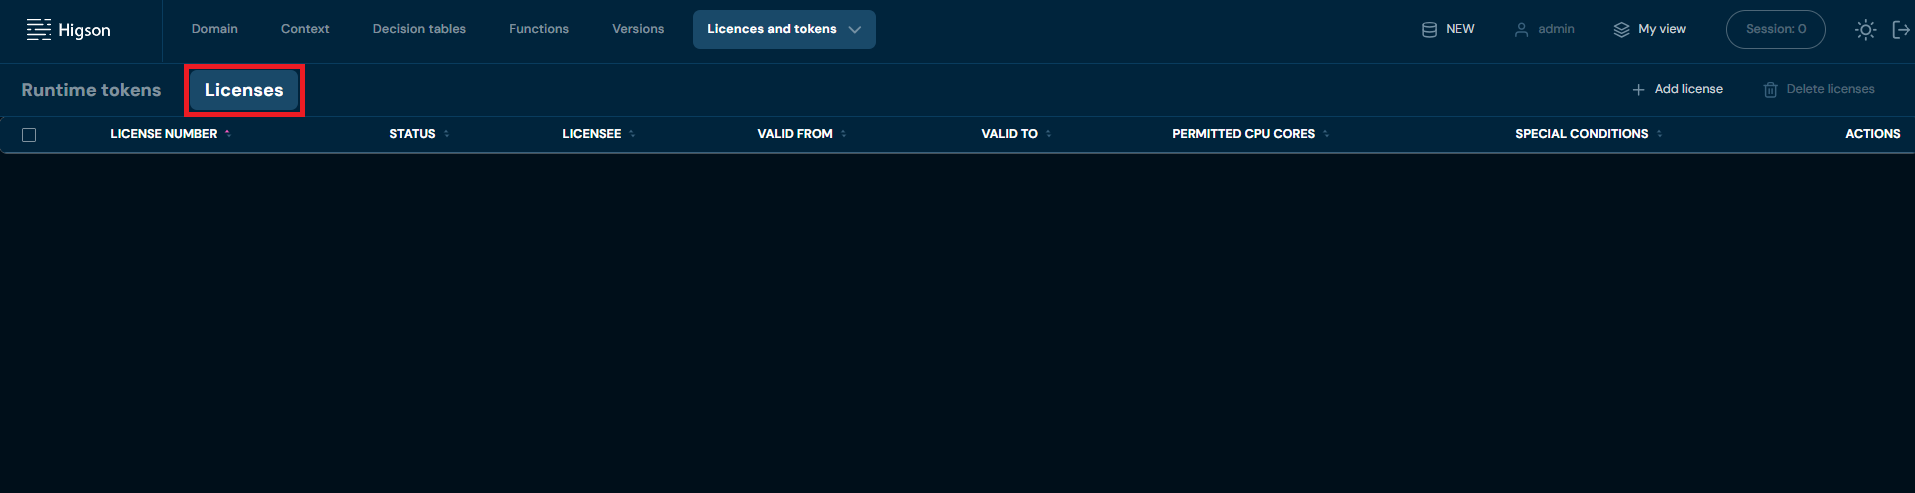
After you enter Licenses you will see screen of all licenses:
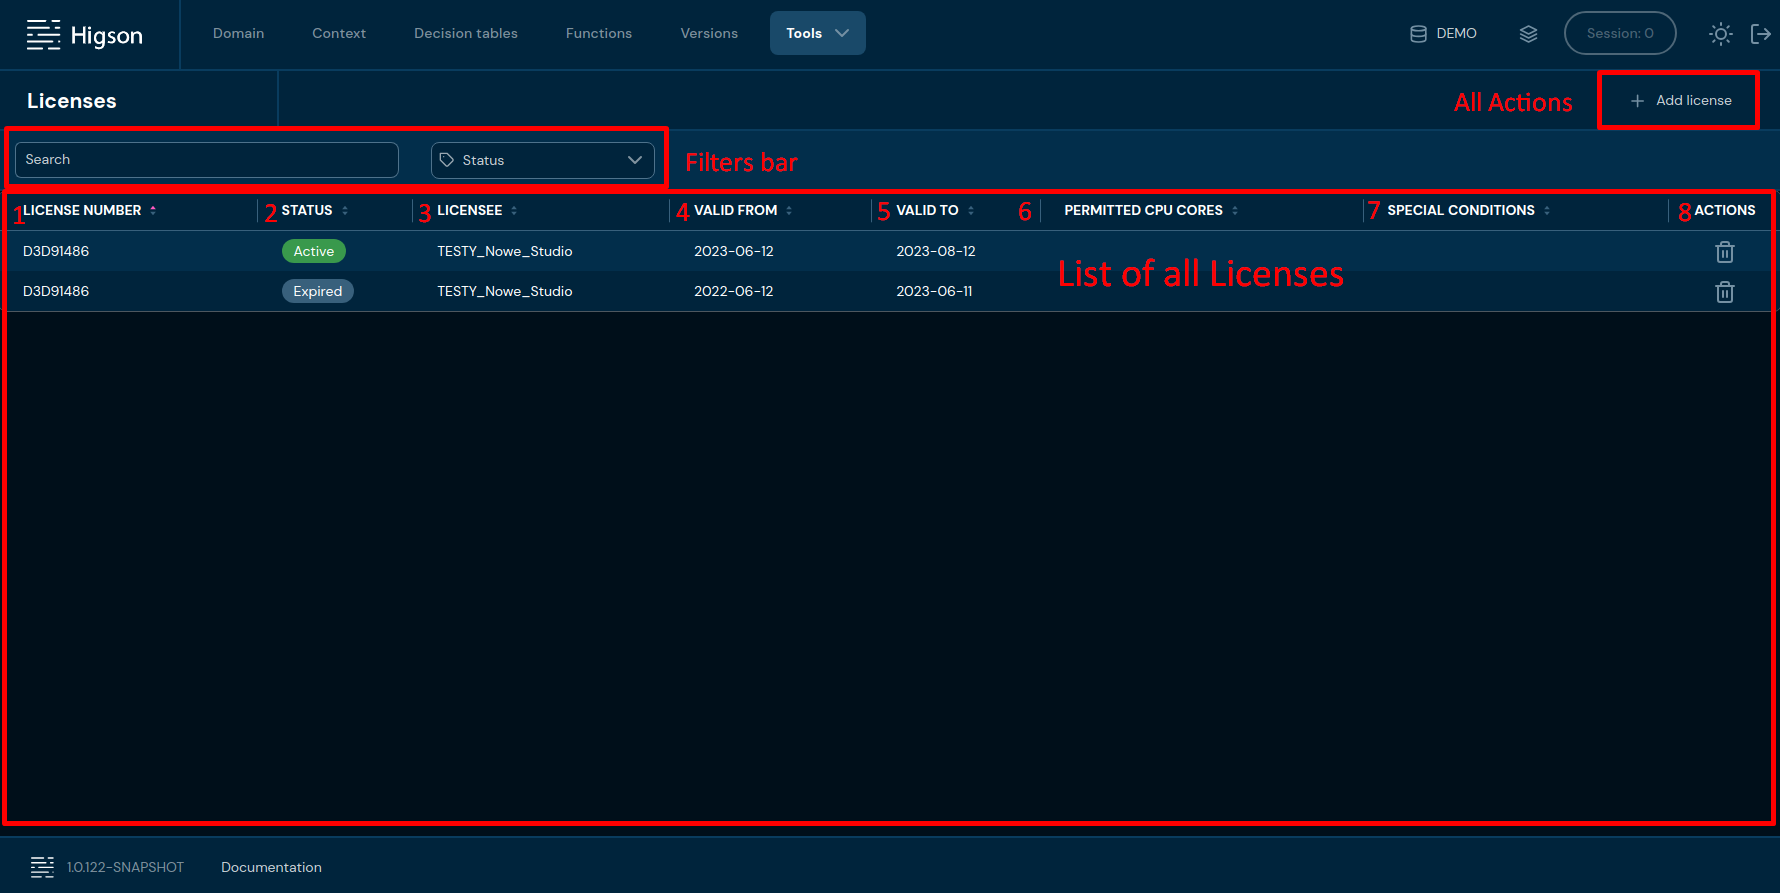
| No. | Column name | Description |
|---|---|---|
| 1. | License number | Unique license identification number. You can sort table by License number pressing arrow icon. |
| 2. | Status | This column indicates the current status of the license. It can have several possible labels such as active, expired. The status provides a quick way to determine if the license is currently valid and its scope. You can sort table by Status pressing arrow icon. |
| 3. | Licensee | Title of the License. You can sort table by Licensee pressing arrow icon. |
| 4. | Valid from | Date of the license validity. You can sort table by Valid from date pressing arrow icon. |
| 5. | Valid to | Date of the license expire. You can sort table by Valid to date pressing arrow icon. |
| 6. | Permitted CPU | Information about the maximum number of CPU cores cores which the software or service covered by the license can be used. You can sort table by Permitted CPU cores pressing arrow icon. |
| 7. | special | Additional license conditions. You can sort table conditions by Special conditions pressing arrow icon. |
| 8. | actions | List of quick access actions. Currently only Remove action is available here. Remove action delete desired license |

| No. | Filter name | Description |
|---|---|---|
| 1. | Search text field | Filter by any string provided by the user. |
| 2. | Status | Filter by selected license status |
Add License#
If you want to add a new license follow these steps:
-
Select Tools in Main Toolbar and select Licensee
-
Choose + Add license
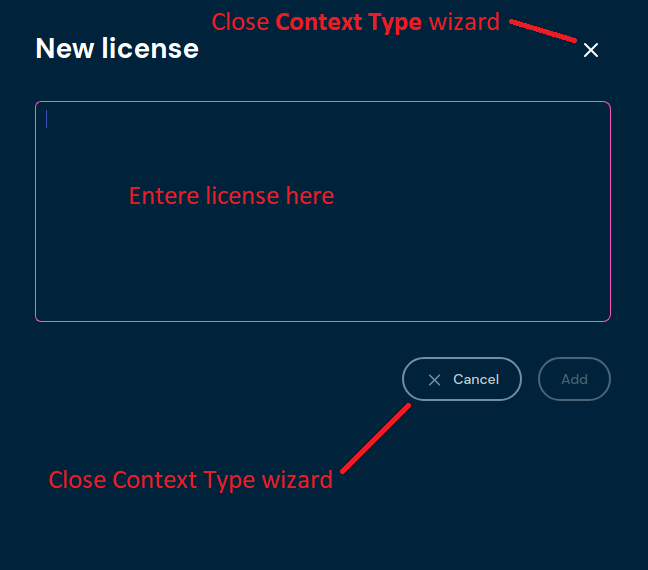
-
Enter your license code and press Add button
a. If a valid license code is entered, information about the license will appear.
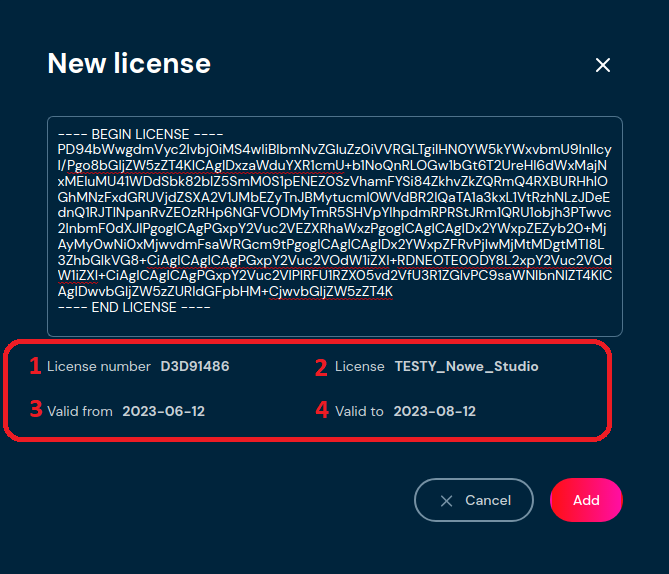
No. Column name Description 1. License number Unique license identification number. 2. License Title of the License 3. Valid from Date of the license validity. 4. Valid to Date of the license expire b. If an invalid license code is entered, an error message about the incorrect license code will appear.
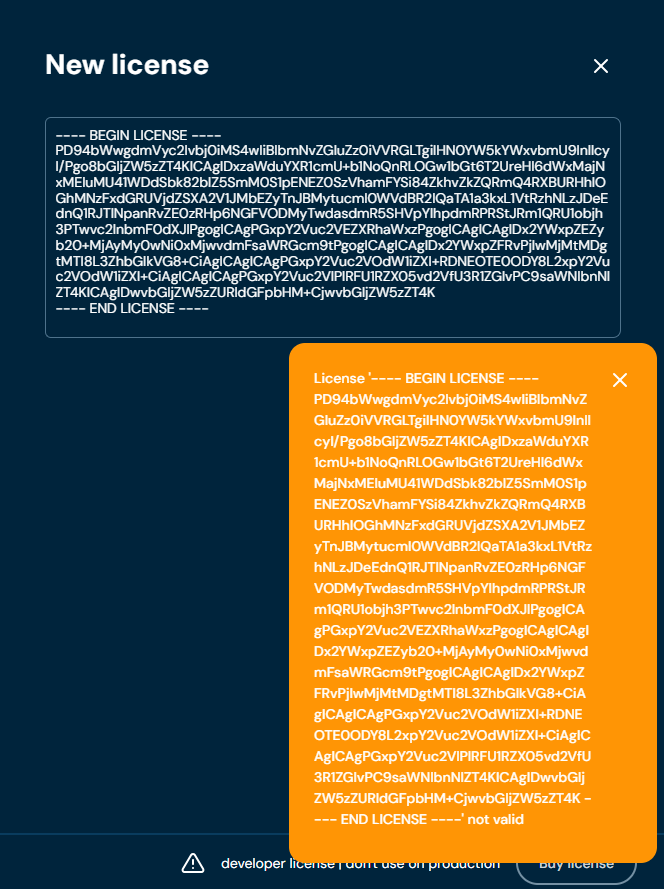
Remove License#
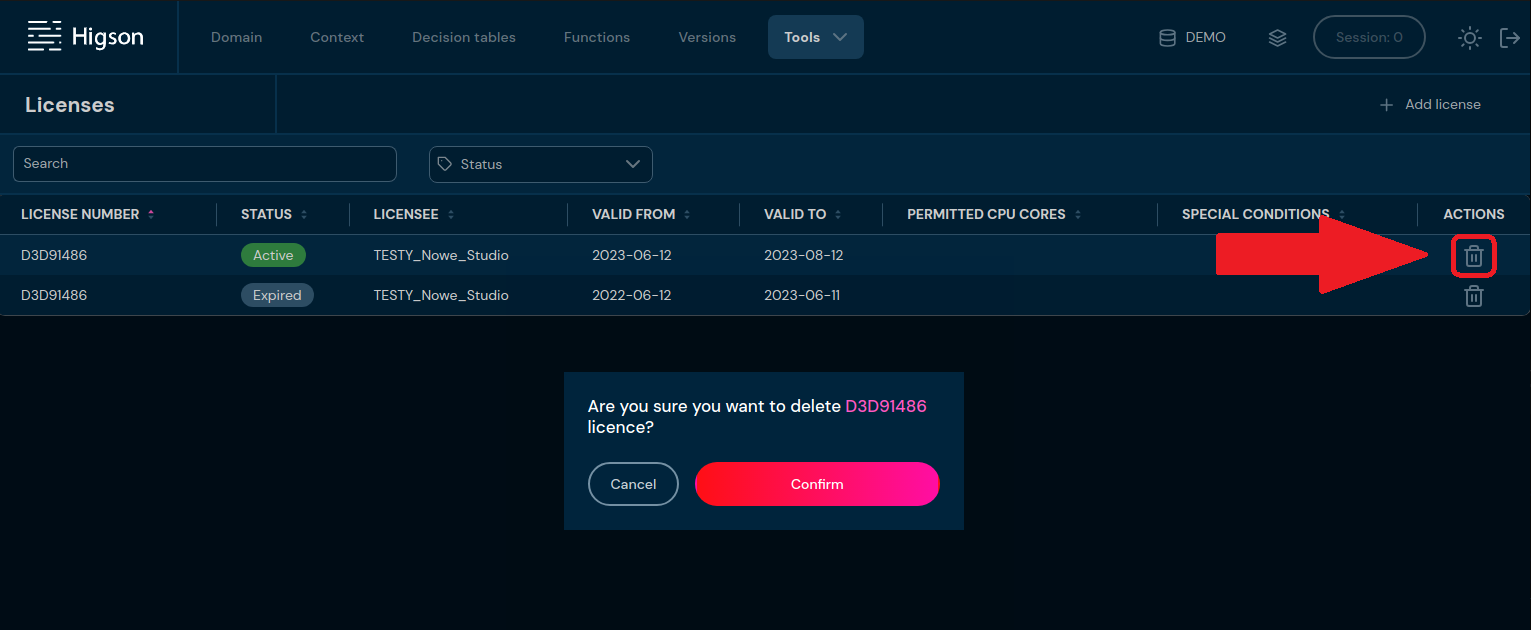
If you want to remove license choose Delete icon and confirm it pressing Confirm button
commit
What is the Diagnostic Panel?#
The Diagnostic Panel is an advanced administrative tool built into Higson Studio, designed for monitoring, profiling, and diagnostics of the Higson decision engine instances. It enables administrators and developers to gain insight into the internal system state, operation performance, and licence management.
Who is it intended for?#
- System administrators — server health monitoring, licence management, resource control
- Developers — cache debugging, business rule performance analysis, SQL query optimization
- DevOps teams — CPU, RAM, JVM thread monitoring
- Support teams — real-time production issue diagnostics
Key Capabilities#
| Feature | Description |
|---|---|
| Cache profiling | Viewing the contents of the engine’s cache. |
| Execution statistics | Metrics for function, flows, domain, and decision table call times. |
| Resource monitoring | Real-time CPU, RAM, thread, GC charts. |
| Performance analysis | Rule execution history with duration times. |
| Licence management | View limits, core usage, and compliance metrics. |
| JDBC monitoring | View SQL queries generated by the engine. |
The Diagnostic Panel is accessible from the main Higson Studio menu Tools → Diagnostic panel:
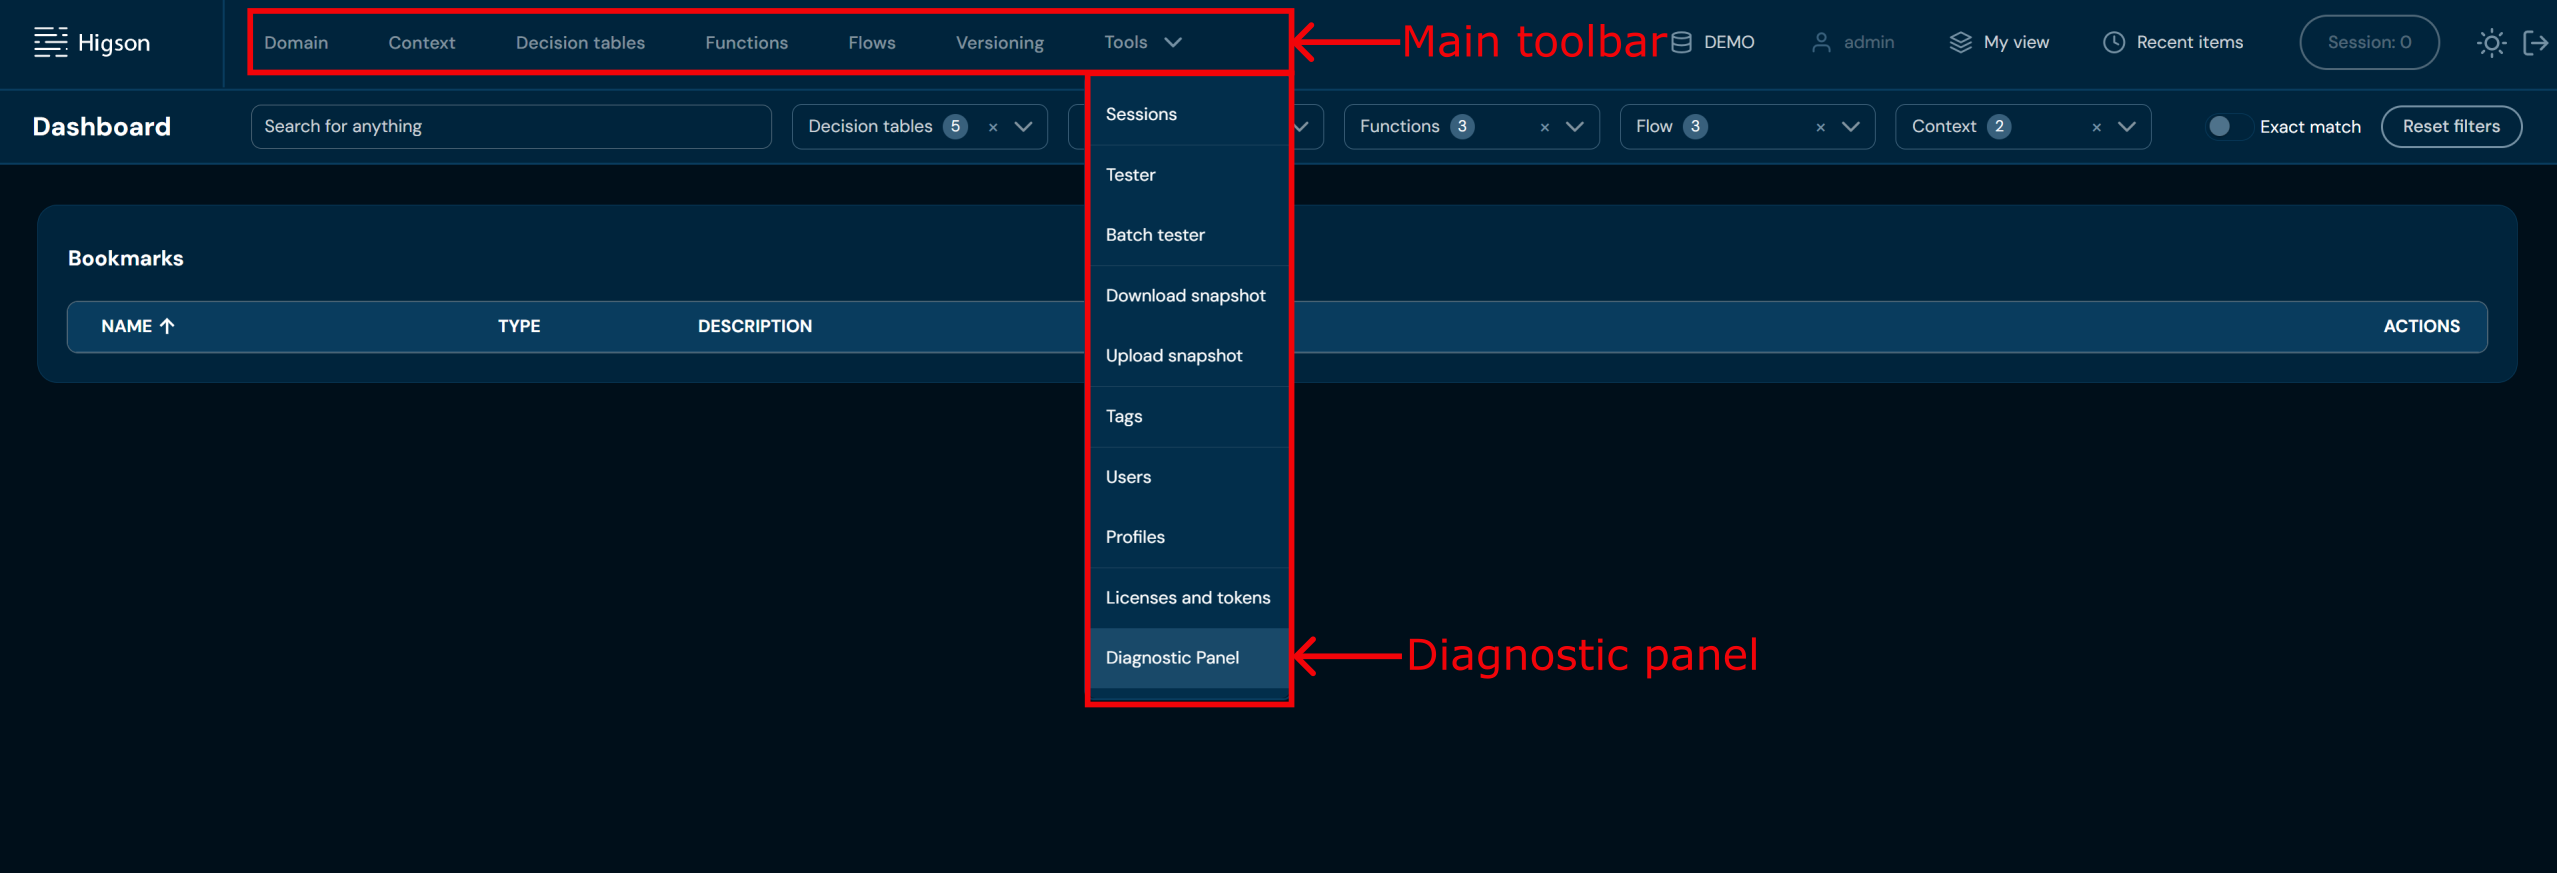
After clicking, the interface switches to the diagnostic panel with its own tabs. The panel opens with the default Profilers tab
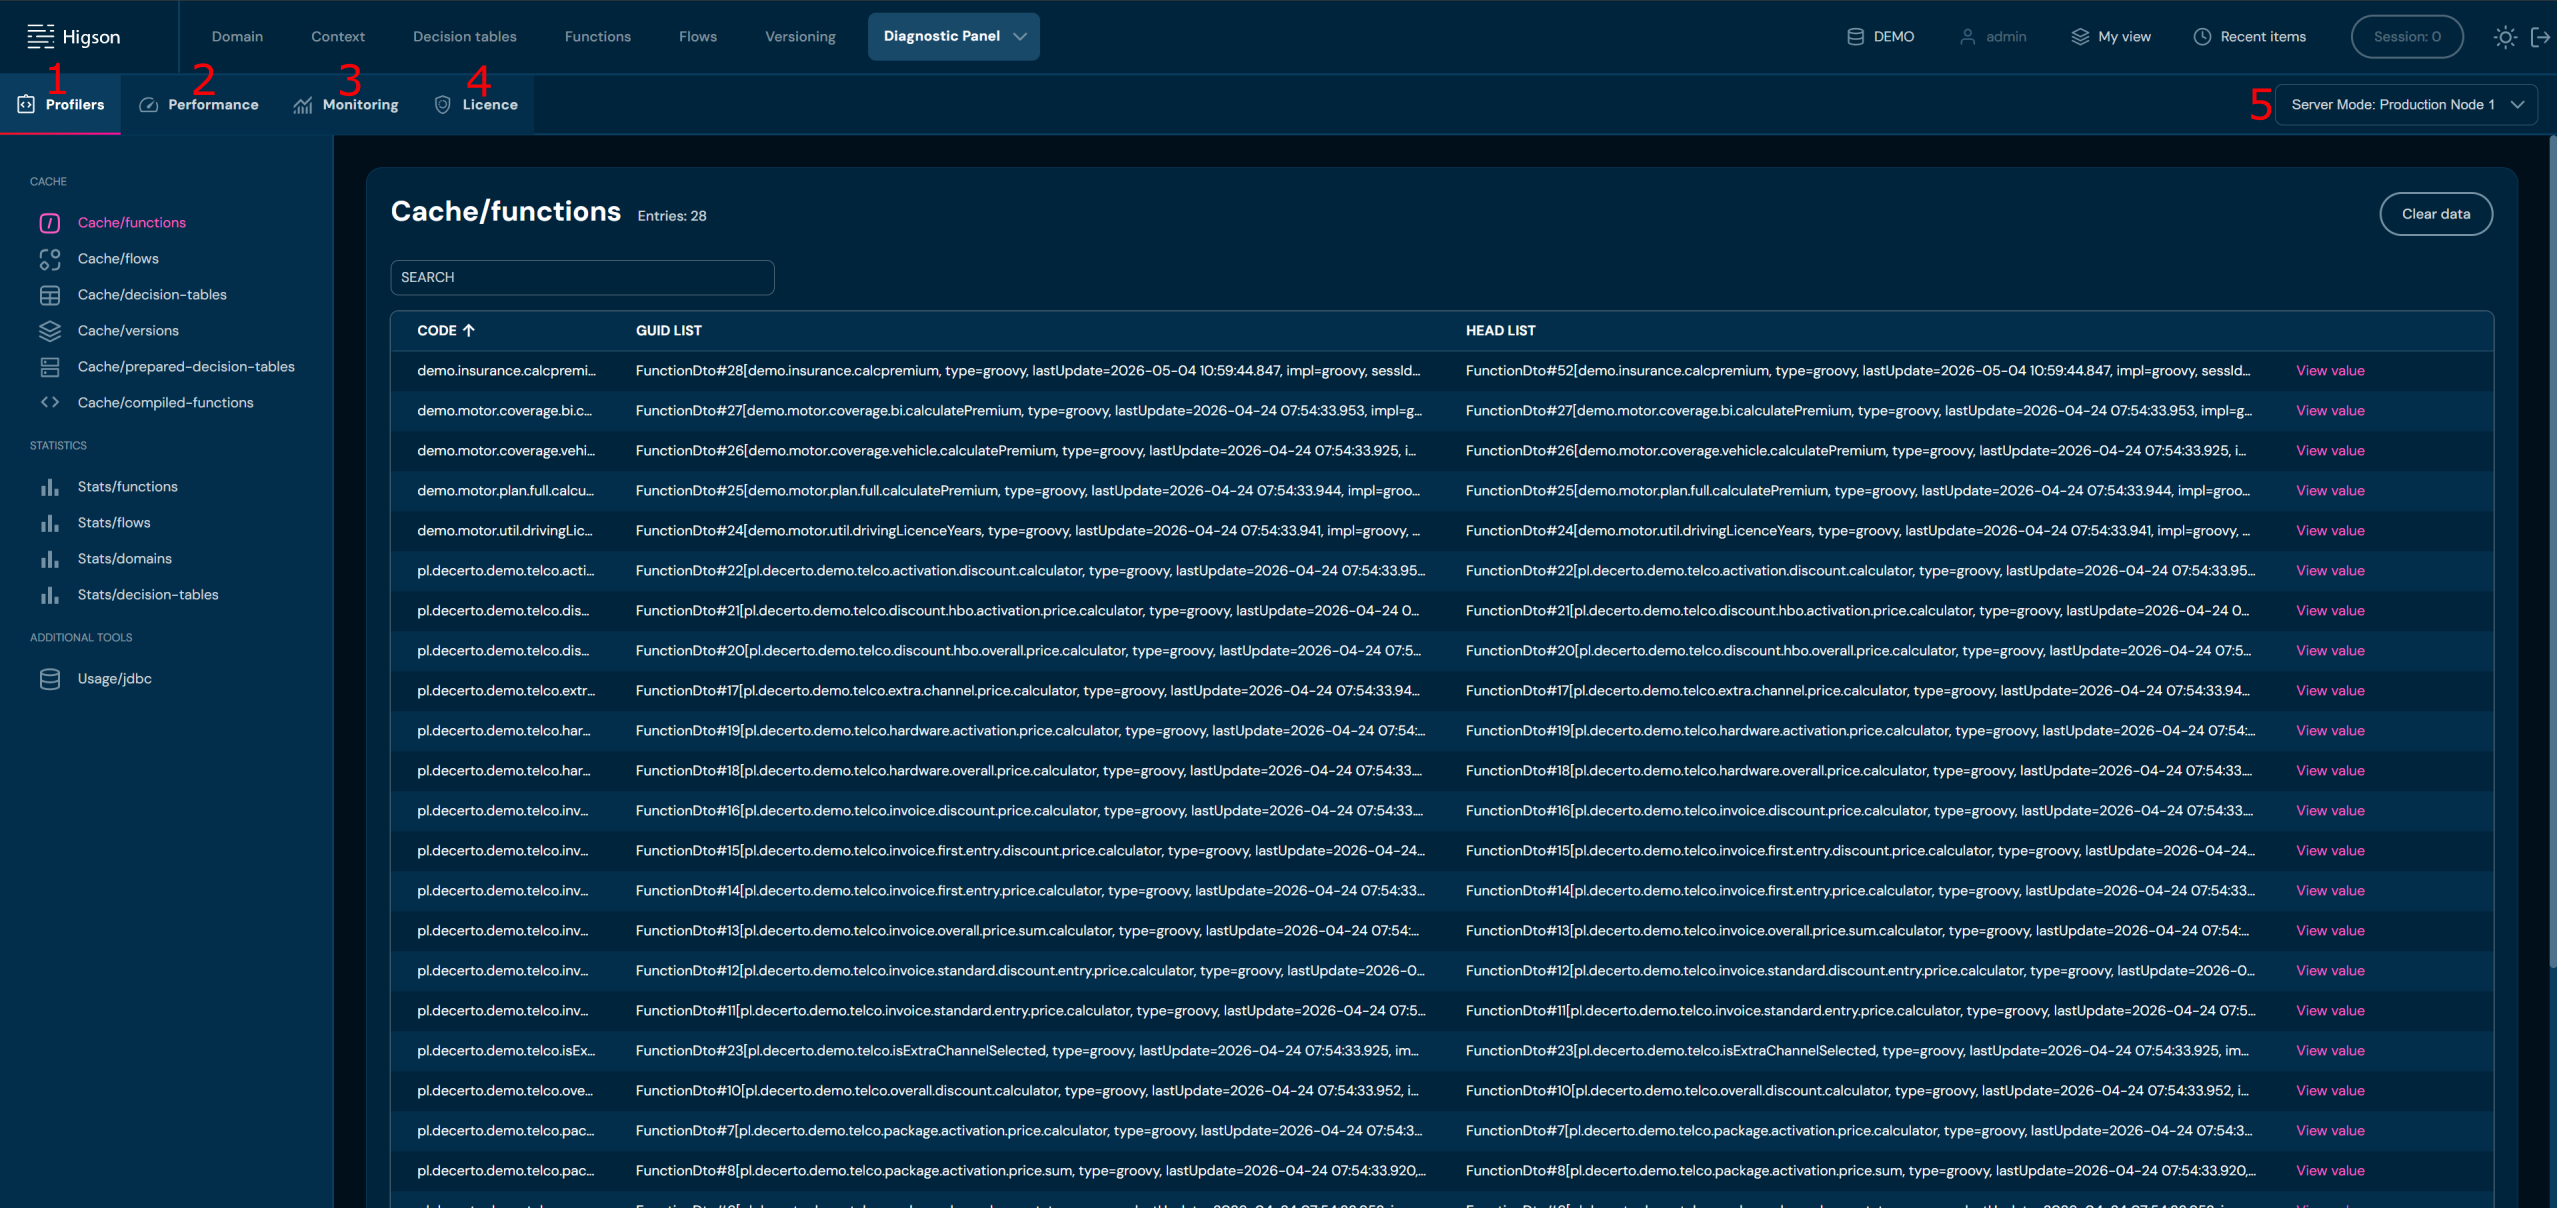
| No. | Name | Description |
|---|---|---|
| 1. | Profilers | The Profilers tab is used for inspecting cache and call statistics. |
| 2. | Performance | The Performance tab records a detailed history of business rule executions in the system. |
| 3. | Monitoring | The Monitoring tab provides real-time server resource monitoring. |
| 4. | Licence | The Licence tab provides full insight into the Higson licence status. |
| 5. | Server Mode Selector | The Server Mode selector which allows you to switch between different nodes in the Higson cluster. All data displayed in the panel relates to the selected node. |
The Server Mode selector which allows you to switch between different nodes in the Higson cluster. All data displayed in the panel relates to the selected node.
To select the data for analysis, click on Server Mode Selector and then:
- Select the data source. The selector operates in two modes:
- Server Mode — live data from a selected node, with the option to filter by date range (the ‘From’ / ‘To’ fields)
- File Mode — data from a previously exported diagnostic file (.hdiag), for offline analysis
- Select the node.
- Select the date range
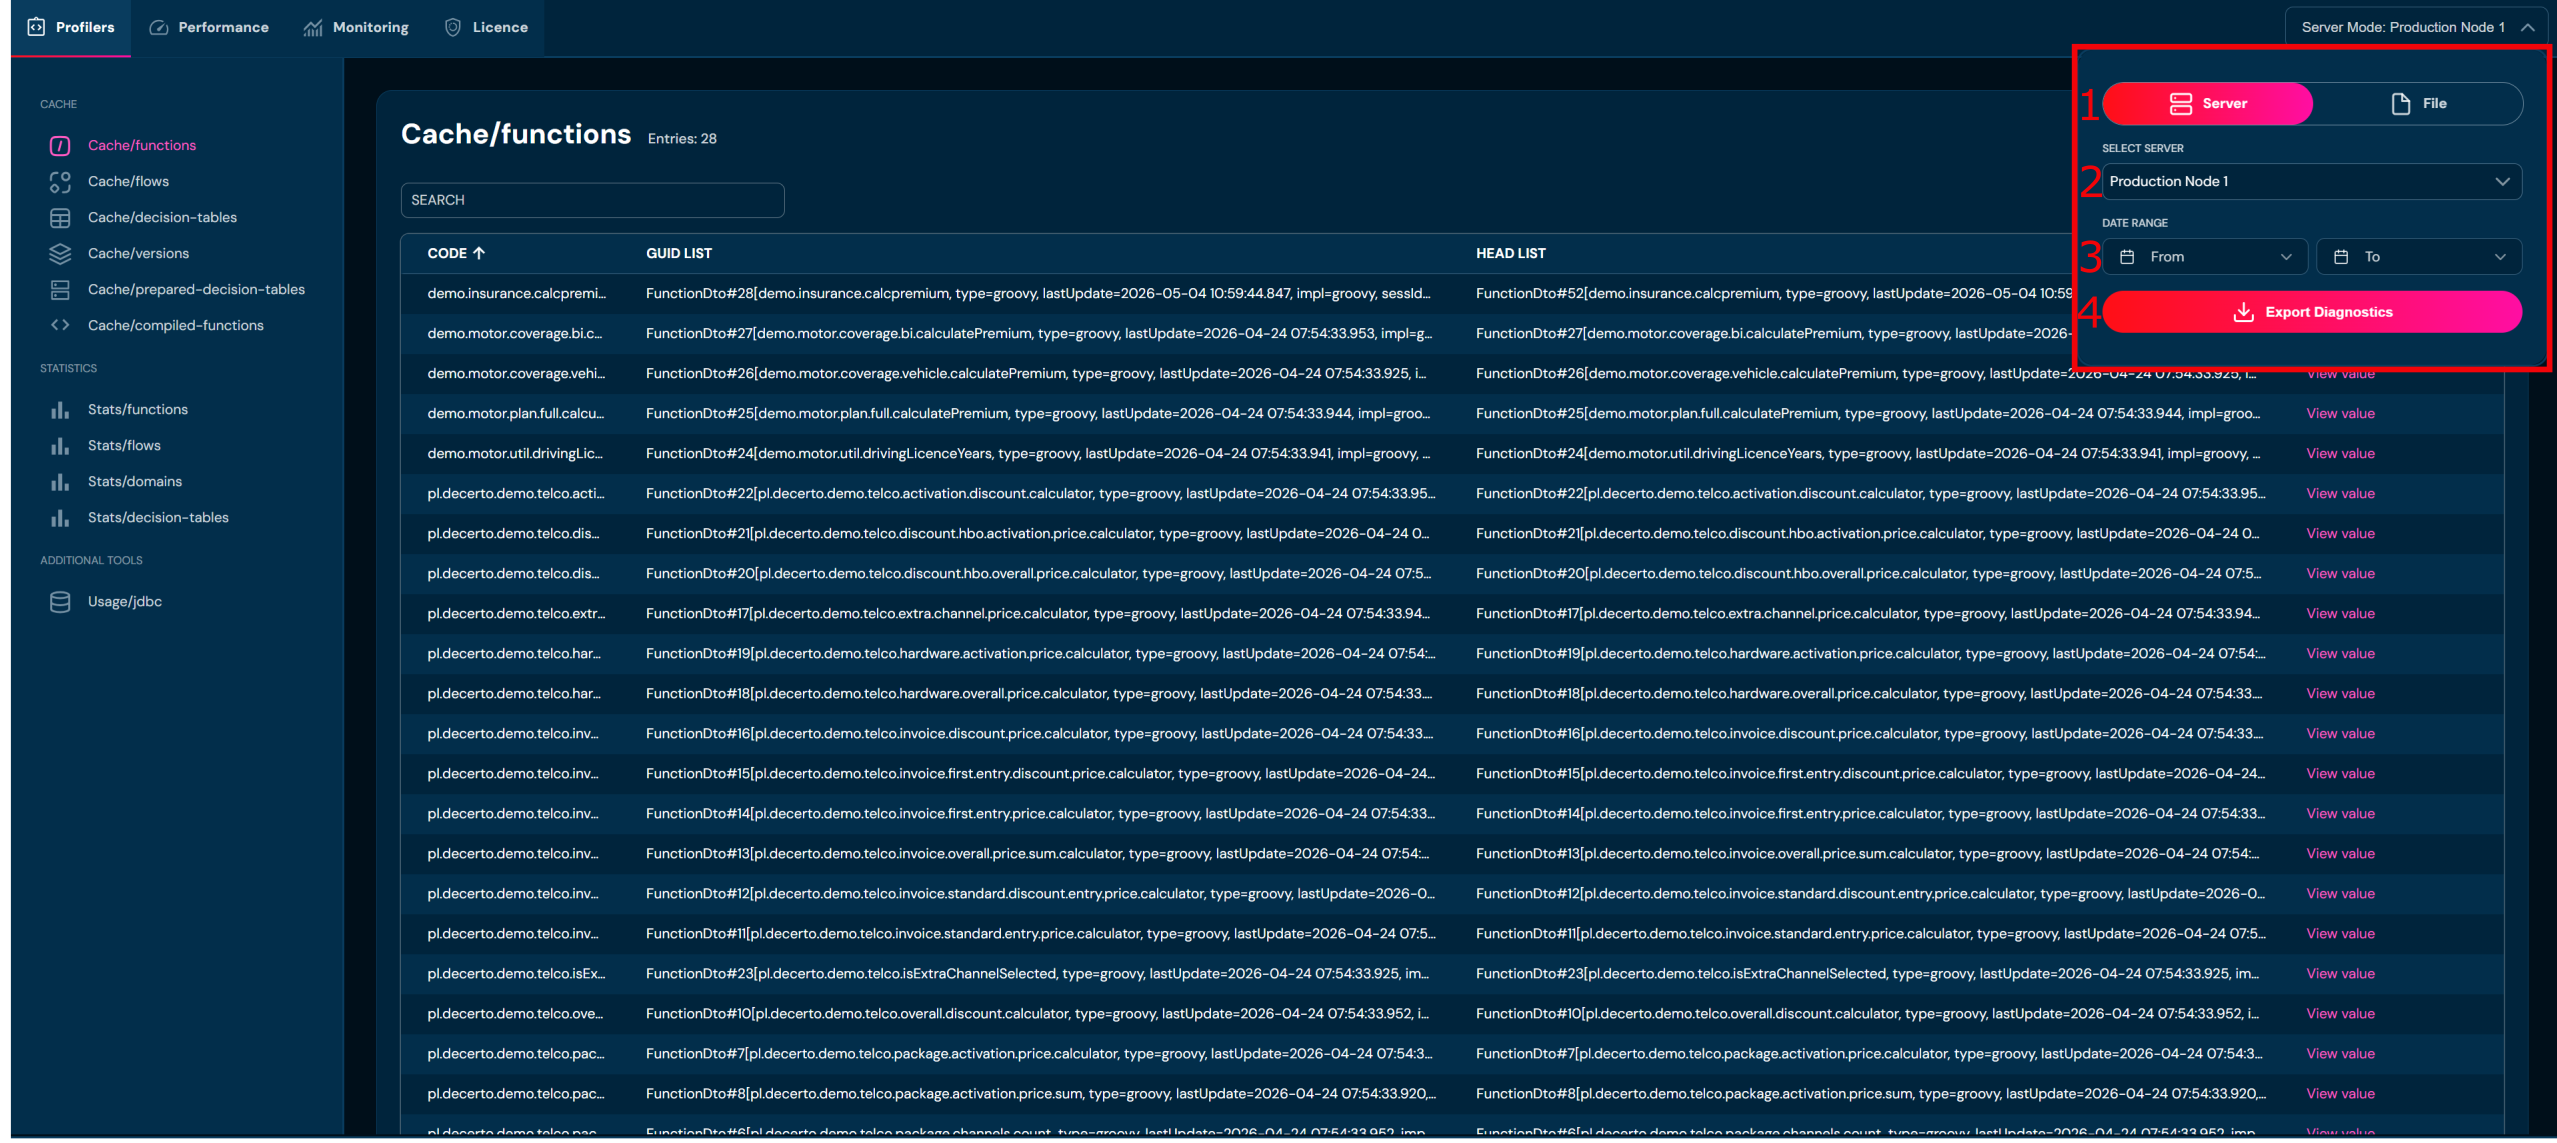
Export#
To export data, click on Selector and then Export. A pop-up window will open, in which you should:
- Select the date range.
- Select the node.
- Select the export range.
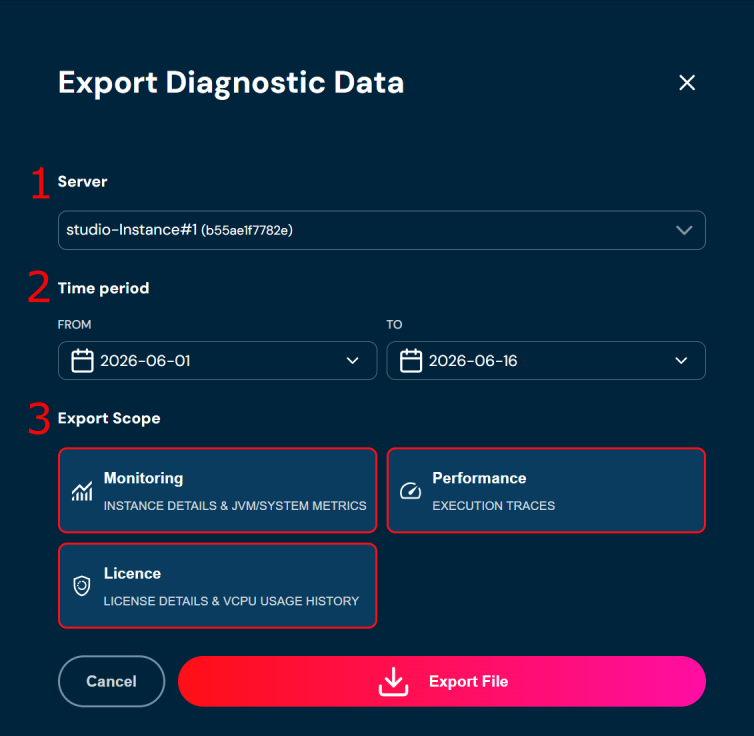
Required Permissions#
Access to the diagnostic panel requires the Higson system administrator role. If permissions are missing, the user will be redirected to the Dashboard with the message “No permissions — You have no permissions to view this page”.
Profilers Tab#
higson.runtime.diagnostic.profiler.enabled property reduces runtime performance. It is recommended to enable profiling only for diagnostic purposes and disable it in production environments where performance is critical.
The Profilers tab is used for inspecting the internal data structures of the Higson engine — primarily the cache contents and call statistics. It helps answer questions such as: “what is currently in the cache?”, “how many times has a given rule been called?” and “what SQL queries are being generated?”.
The side menu (left navigation panel) divides the tab into three sections: CACHE, STATISTICS, and ADDITIONAL TOOLS.
CACHE Section#
The CACHE section allows viewing the current contents of the Higson engine’s cache. Each subpage displays a different type of cached object.
Row Color Coding in Cache Tables#
In cache tables, rows may be highlighted with colors:
- Row highlighted in purple/pink — indicates an element that was recently modified or is currently selected/active in the working session context
- Row without highlighting — element in normal state
Cache/functions#
Displays a list of all functions currently stored in the engine’s cache.
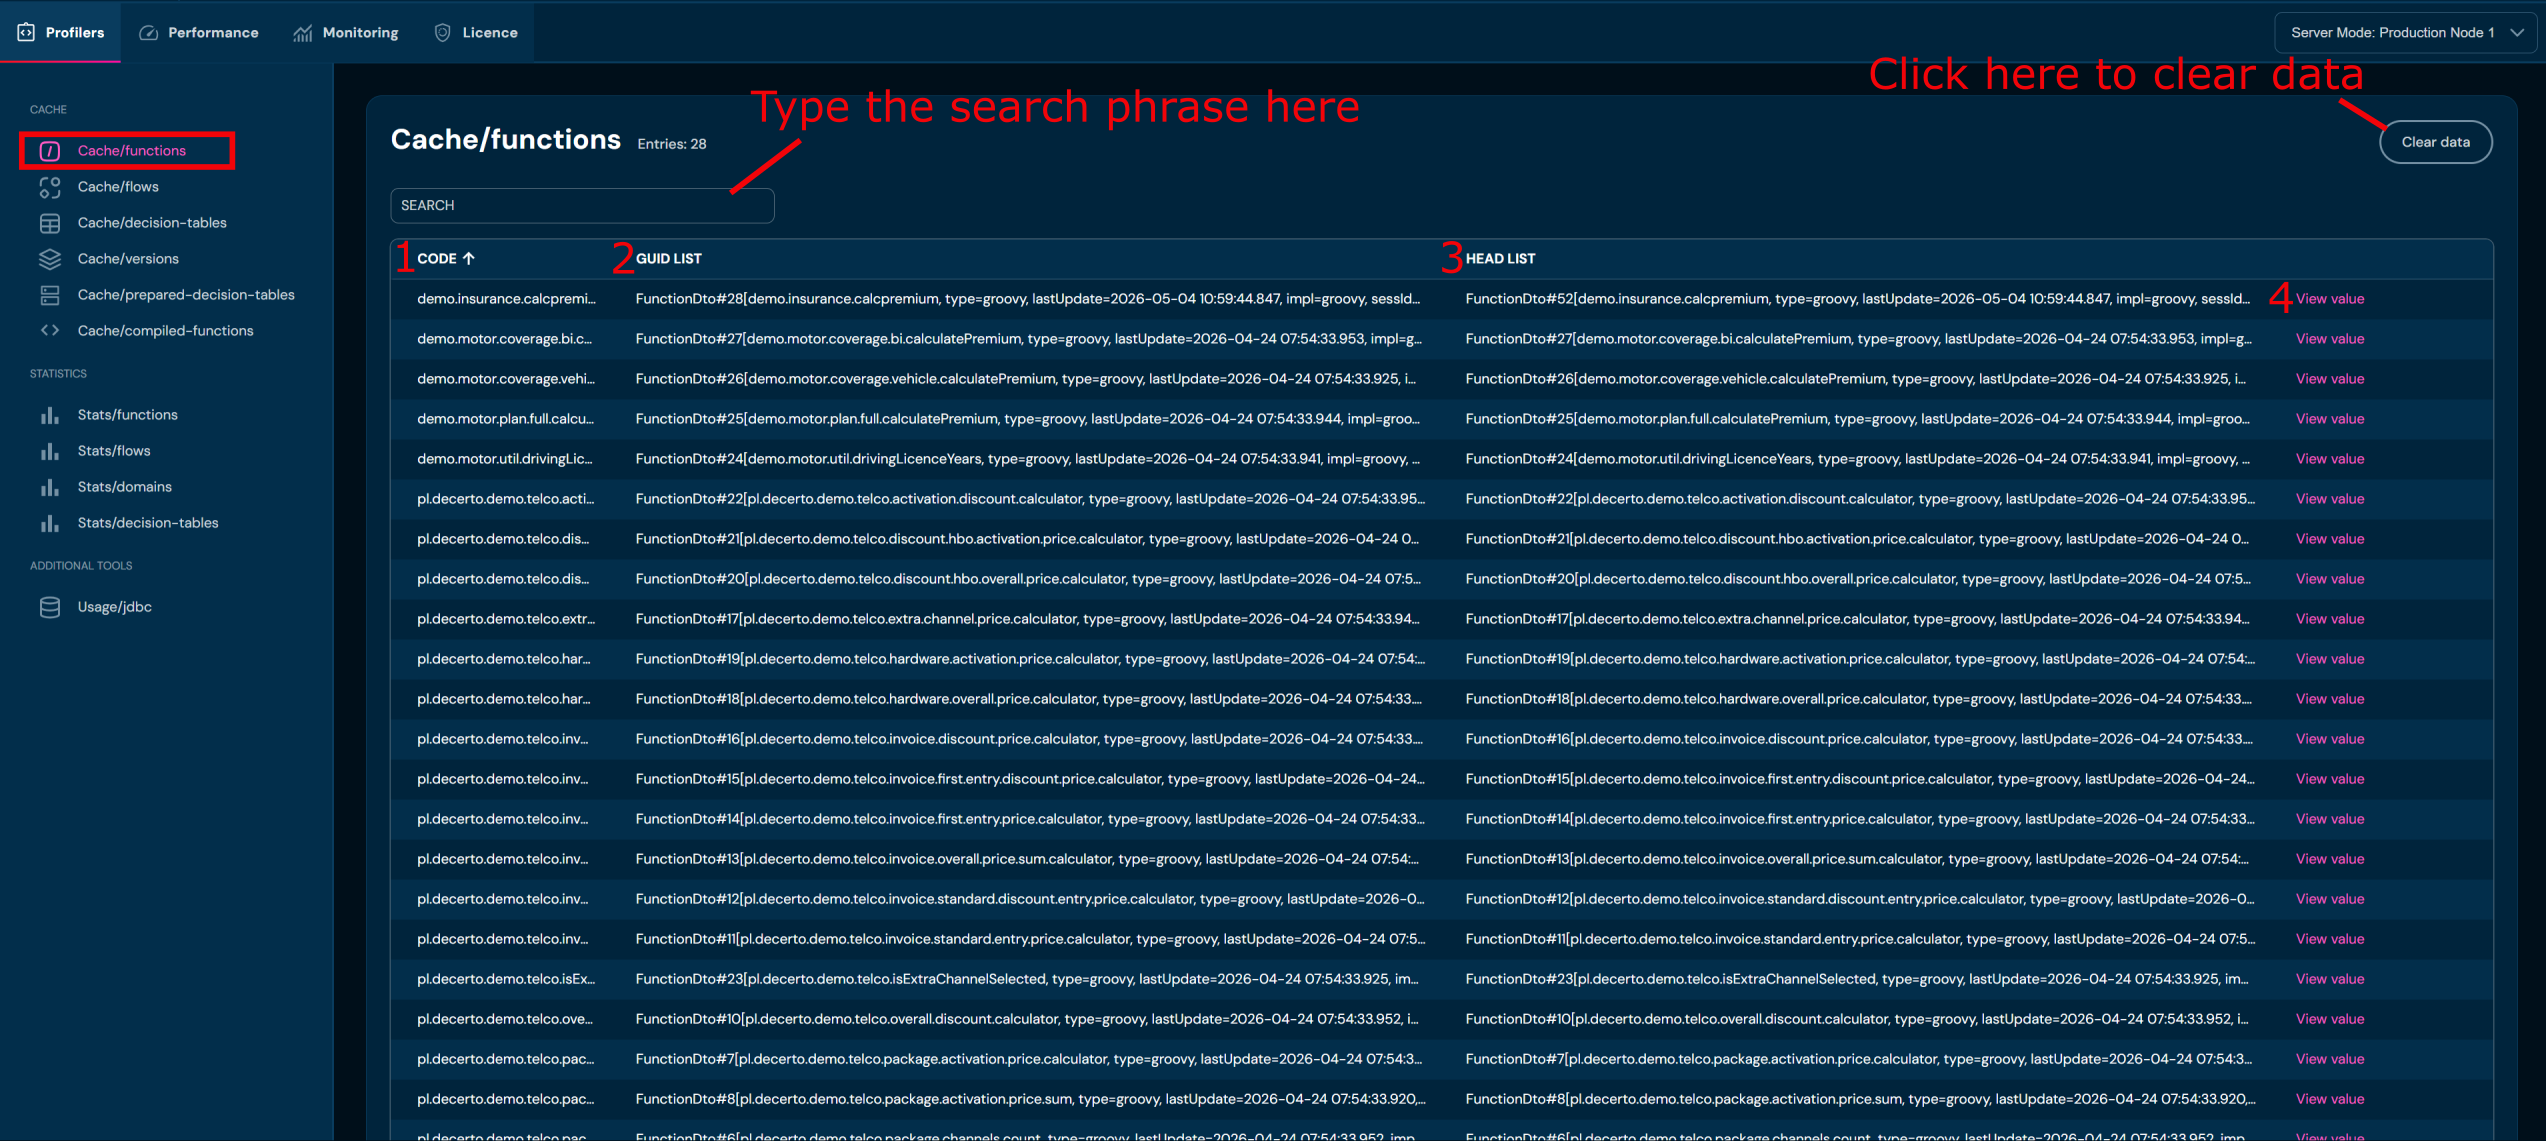
| No. | Column/Action Name | Description |
|---|---|---|
| 1. | Code | Code of the function. |
| 2. | GUID List | Cache version identifier of the function with metadata: language type (python/groovy), last update date, session ID. |
| 3. | Head List | Identifier of the newest (main) version of the function — comparison with GUID List allows detecting outdated versions. |
| 4. | View value | Link to view the full cache entry value (FunctionDto object details). |
Use cases:
- Verifying whether a given function is correctly loaded into the cache
- Checking the function version (whether HEAD matches GUID — no discrepancy)
- Identifying language types (Python vs Groovy) in the system
- Diagnosing function update problems (comparing
lastUpdatedates)
Cache/flows#
Displays a list of flows stored in the cache. Flows are complex business processes consisting of multiple steps, combining function calls and decision tables.
| No. | Column/Action Name | Description |
|---|---|---|
| 1. | Code | Unique flow code (name). |
| 2. | GUID List | Cache version identifier of the flow with metadata (update date, session ID). |
| 3. | Head List | Identifier of the newest flow version. |
| 4. | View value | Link to view the full cache entry value. |
Use cases:
- Verifying flow presence in the cache after deployment
- Checking whether the GUID version matches HEAD
- Diagnosing flow execution problems
Cache/decision-tables#
Displays decision tables stored in the cache. Decision tables are a key element of the Higson engine — they define business rules in tabular form.
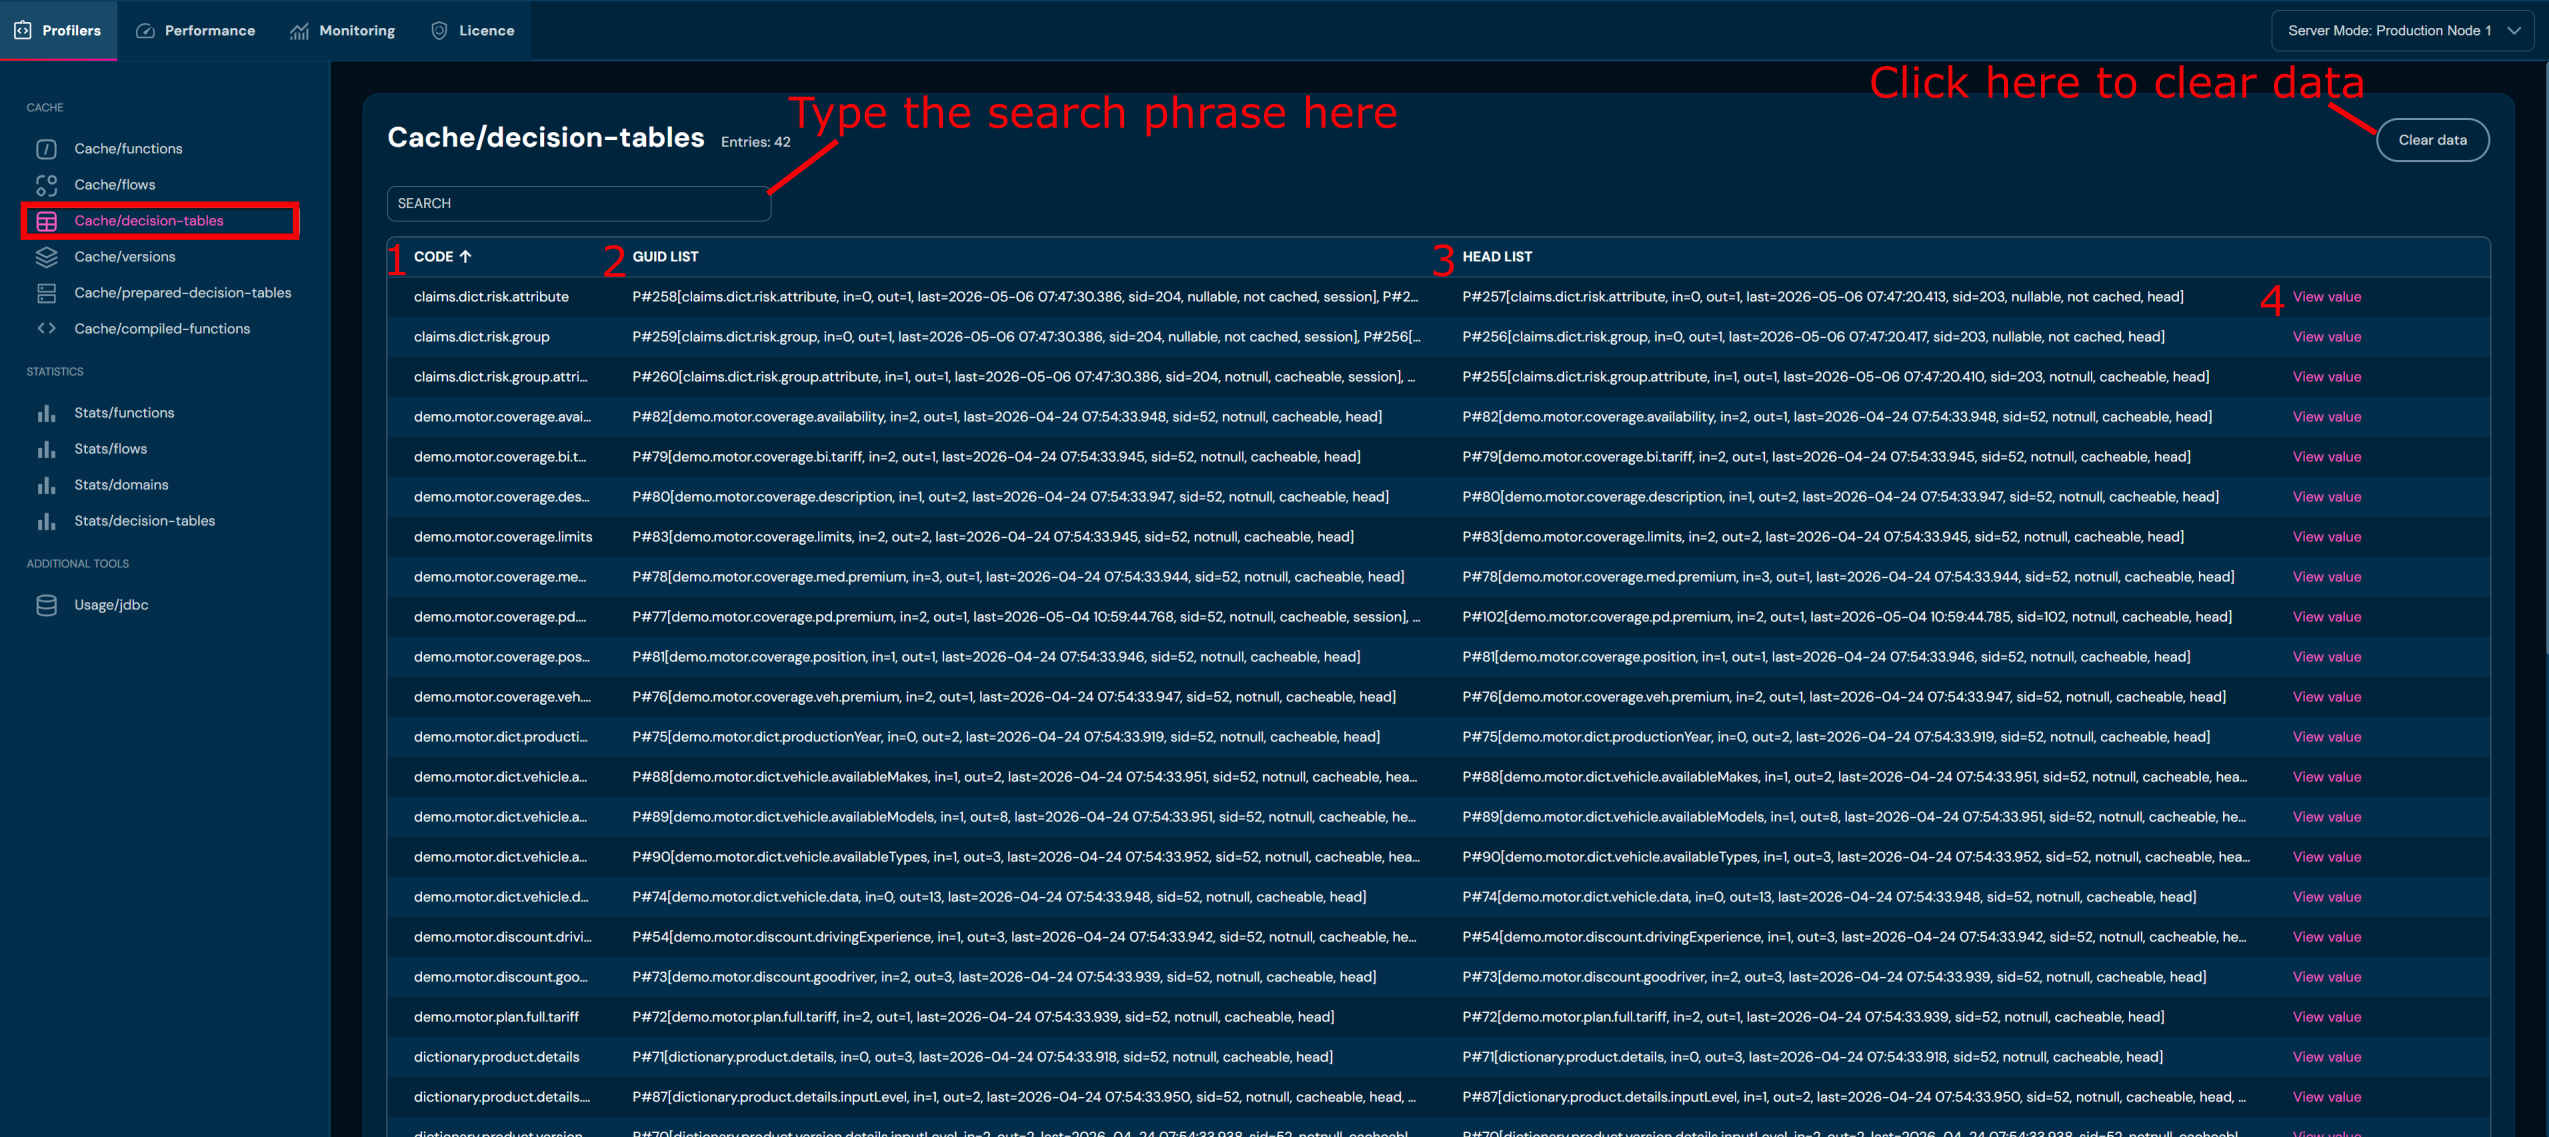
| No. | Column/Action Name | Description |
|---|---|---|
| 1. | Code | Decision table name (e.g., demo.motor.coverage.availability). |
| 2. | GUID List | Cache entry metadata with the number of input parameters (in=) and output parameters (out=), update date, session ID. |
| 3. | Head List | The newest version of the table in cache. |
| 4. | View value | Link to view the full cache entry value. |
Use cases:
- Verifying that decision tables are correctly loaded
- Checking table parameters (in/out)
- Identifying tables with outdated versions
Cache/versions#
Displays cached versions of the Higson engine. Versions allow managing different rule variants.
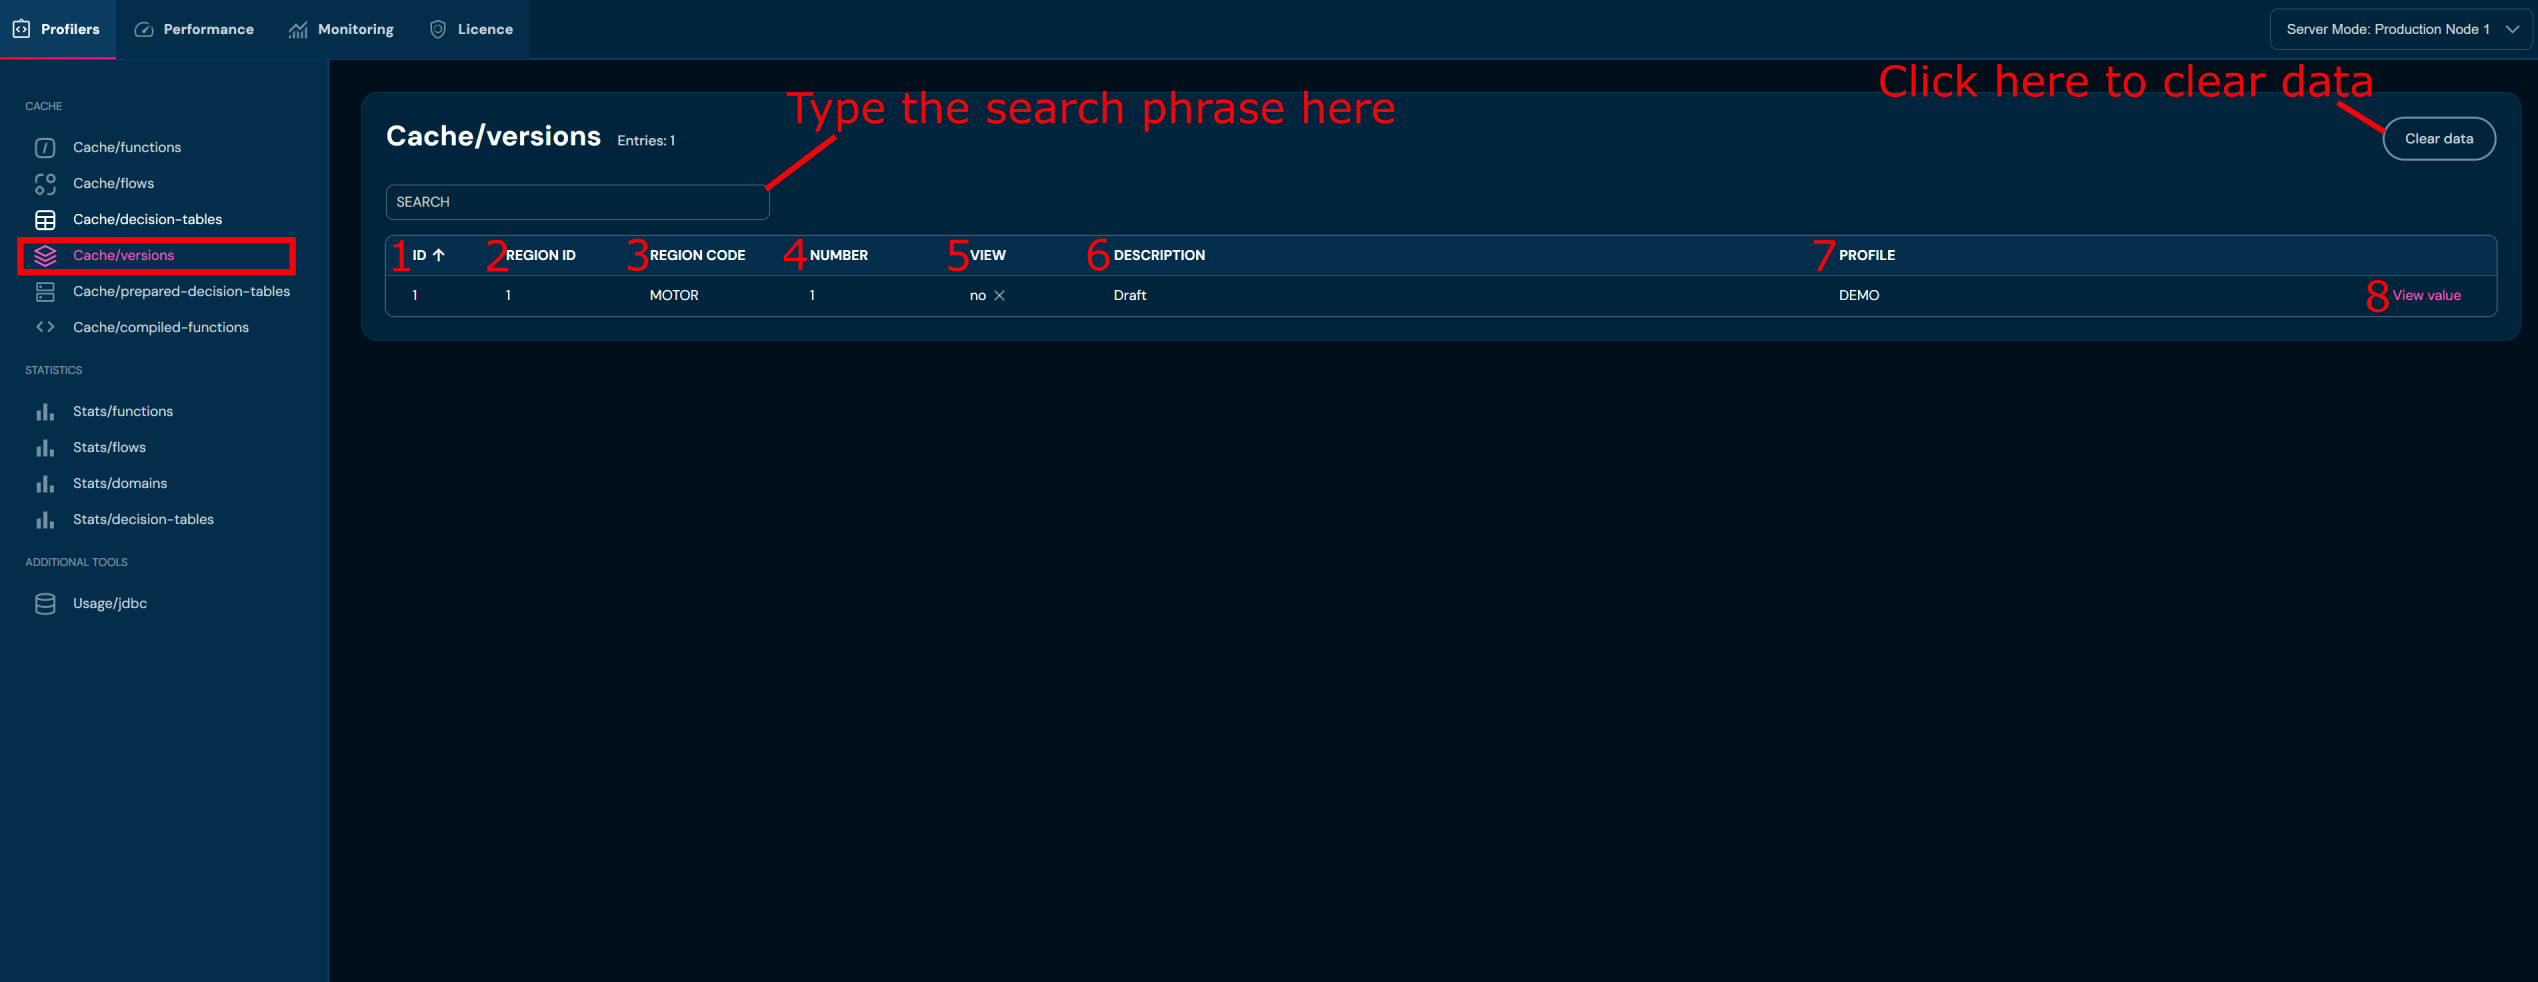
| No. | Column | Description |
|---|---|---|
| 1. | ID | Version identifier |
| 2. | Region ID | ID of the region the version belongs to |
| 3. | Region Code | Region code |
| 4. | Number | Version number |
| 5. | View | Name of the view associated with the version |
| 6. | Description | Version description |
| 7. | Profile | Profile associated with the region and version |
| 8. | View value | Presents full values |
Use cases:
- Verifying which configuration versions are currently loaded
- Checking the correctness of regions, views, and profiles
Cache/prepared-decision-tables#
Displays prepared decision tables — these are decision tables that have already been compiled and prepared for fast execution by the engine.
| Column | Description |
|---|---|
| Key | Key identifying the prepared table |
| ID | Table identifier |
| Last Update | Date of last processing |
| Region Version ID | Region version ID |
| Input Levels | Table input levels (input parameter definitions) |
| Output Levels | Table output levels (output parameter definitions) |
Use cases:
- Checking whether tables are correctly prepared for execution
- Diagnosing table performance issues (update dates)
- Verifying the input/output levels structure
Cache/compiled-functions#
Displays compiled functions — functions that have been compiled to executable form and are ready for immediate use.
Unlike Cache/functions (which shows function definitions — FunctionDto objects with metadata), Cache/compiled-functions shows the resulting compiled objects ready for direct execution by the engine. A function may exist in Cache/functions but not yet be compiled — it will appear here only after the first invocation.
| Column | Description |
|---|---|
| Code | Compiled function code (name) |
| Value | Information about the compiled object |
Use cases:
- Verifying that functions are correctly compiled
- Identifying functions that have not yet been compiled (missing from cache)
- Diagnosing compilation errors — if a function is in Cache/functions but not in Cache/compiled-functions, it may indicate a compilation error
STATISTICS Section#
The STATISTICS section presents performance metrics for calls to individual elements of the Higson engine. It helps identify bottlenecks and optimize configuration. Each subpage in this section has a Clear data button that allows clearing the collected statistics.
Stats/functions#
Statistics of function calls — how many times a given function was called and how long its execution took. The table structure is analogous to Stats/domains.
| Column | Description |
|---|---|
| Key | Function name (code) |
| Max Time | Maximum execution time (ms) |
| Min Time | Minimum execution time (ms) |
| Average Time | Average execution time (ms) |
| Total Time | Total time of all calls (ms) |
| Count | Number of function calls |
Use cases:
- Identifying the most frequently called functions (Count column)
- Detecting slow functions requiring optimization (Max Time column)
- Stability analysis — a large difference between Min Time and Max Time may indicate instability
Stats/flows#
Statistics of flow calls. The table structure is analogous to Stats/domains.
| Column | Description |
|---|---|
| Key | Flow name (code) |
| Max Time | Maximum execution time (ms) |
| Min Time | Minimum execution time (ms) |
| Average Time | Average execution time (ms) |
| Total Time | Total time of all calls (ms) |
| Count | Number of flow calls |
Use cases:
- Identifying the slowest and most frequently called flows
- Comparing performance across different flows
Stats/domains#
Statistics of operations on domain (business data structures) of the Higson engine. Presents the Invoke Stats section with time metrics.
| No. | Column | Description |
|---|---|---|
| 1. | Key | Operation name (e.g., getDomain) |
| 2. | Max Time | Maximum operation execution time (ms) |
| 3. | Min Time | Minimum execution time (ms) |
| 4. | Average Time | Average execution time (ms) |
| 5. | Total Time | Total time of all calls (ms) |
| 6. | Count | Number of operation calls (e.g., 476) |
Use cases:
- Identifying domain operations with the longest execution time
- Monitoring performance trends
- Comparing min/max/avg to detect anomalies
- Load analysis — the Count column shows how many times the operation was called
Stats/decision-tables#
Statistics of decision table calls. The table structure is analogous to Stats/domains.
| Column | Description |
|---|---|
| Key | Decision table name (code) |
| Max Time | Maximum execution time (ms) |
| Min Time | Minimum execution time (ms) |
| Average Time | Average execution time (ms) |
| Total Time | Total time of all calls (ms) |
| Count | Number of table calls |
Use cases:
- Identifying the slowest decision tables
- Comparing performance of tables with different complexity (number of in/out parameters)
ADDITIONAL TOOLS Section#
Usage/jdbc#
Displays a list of SQL queries (JDBC) generated by the Higson engine during operation. This is a key tool for diagnosing database layer performance. It has a Clear data button to clear the collected data.
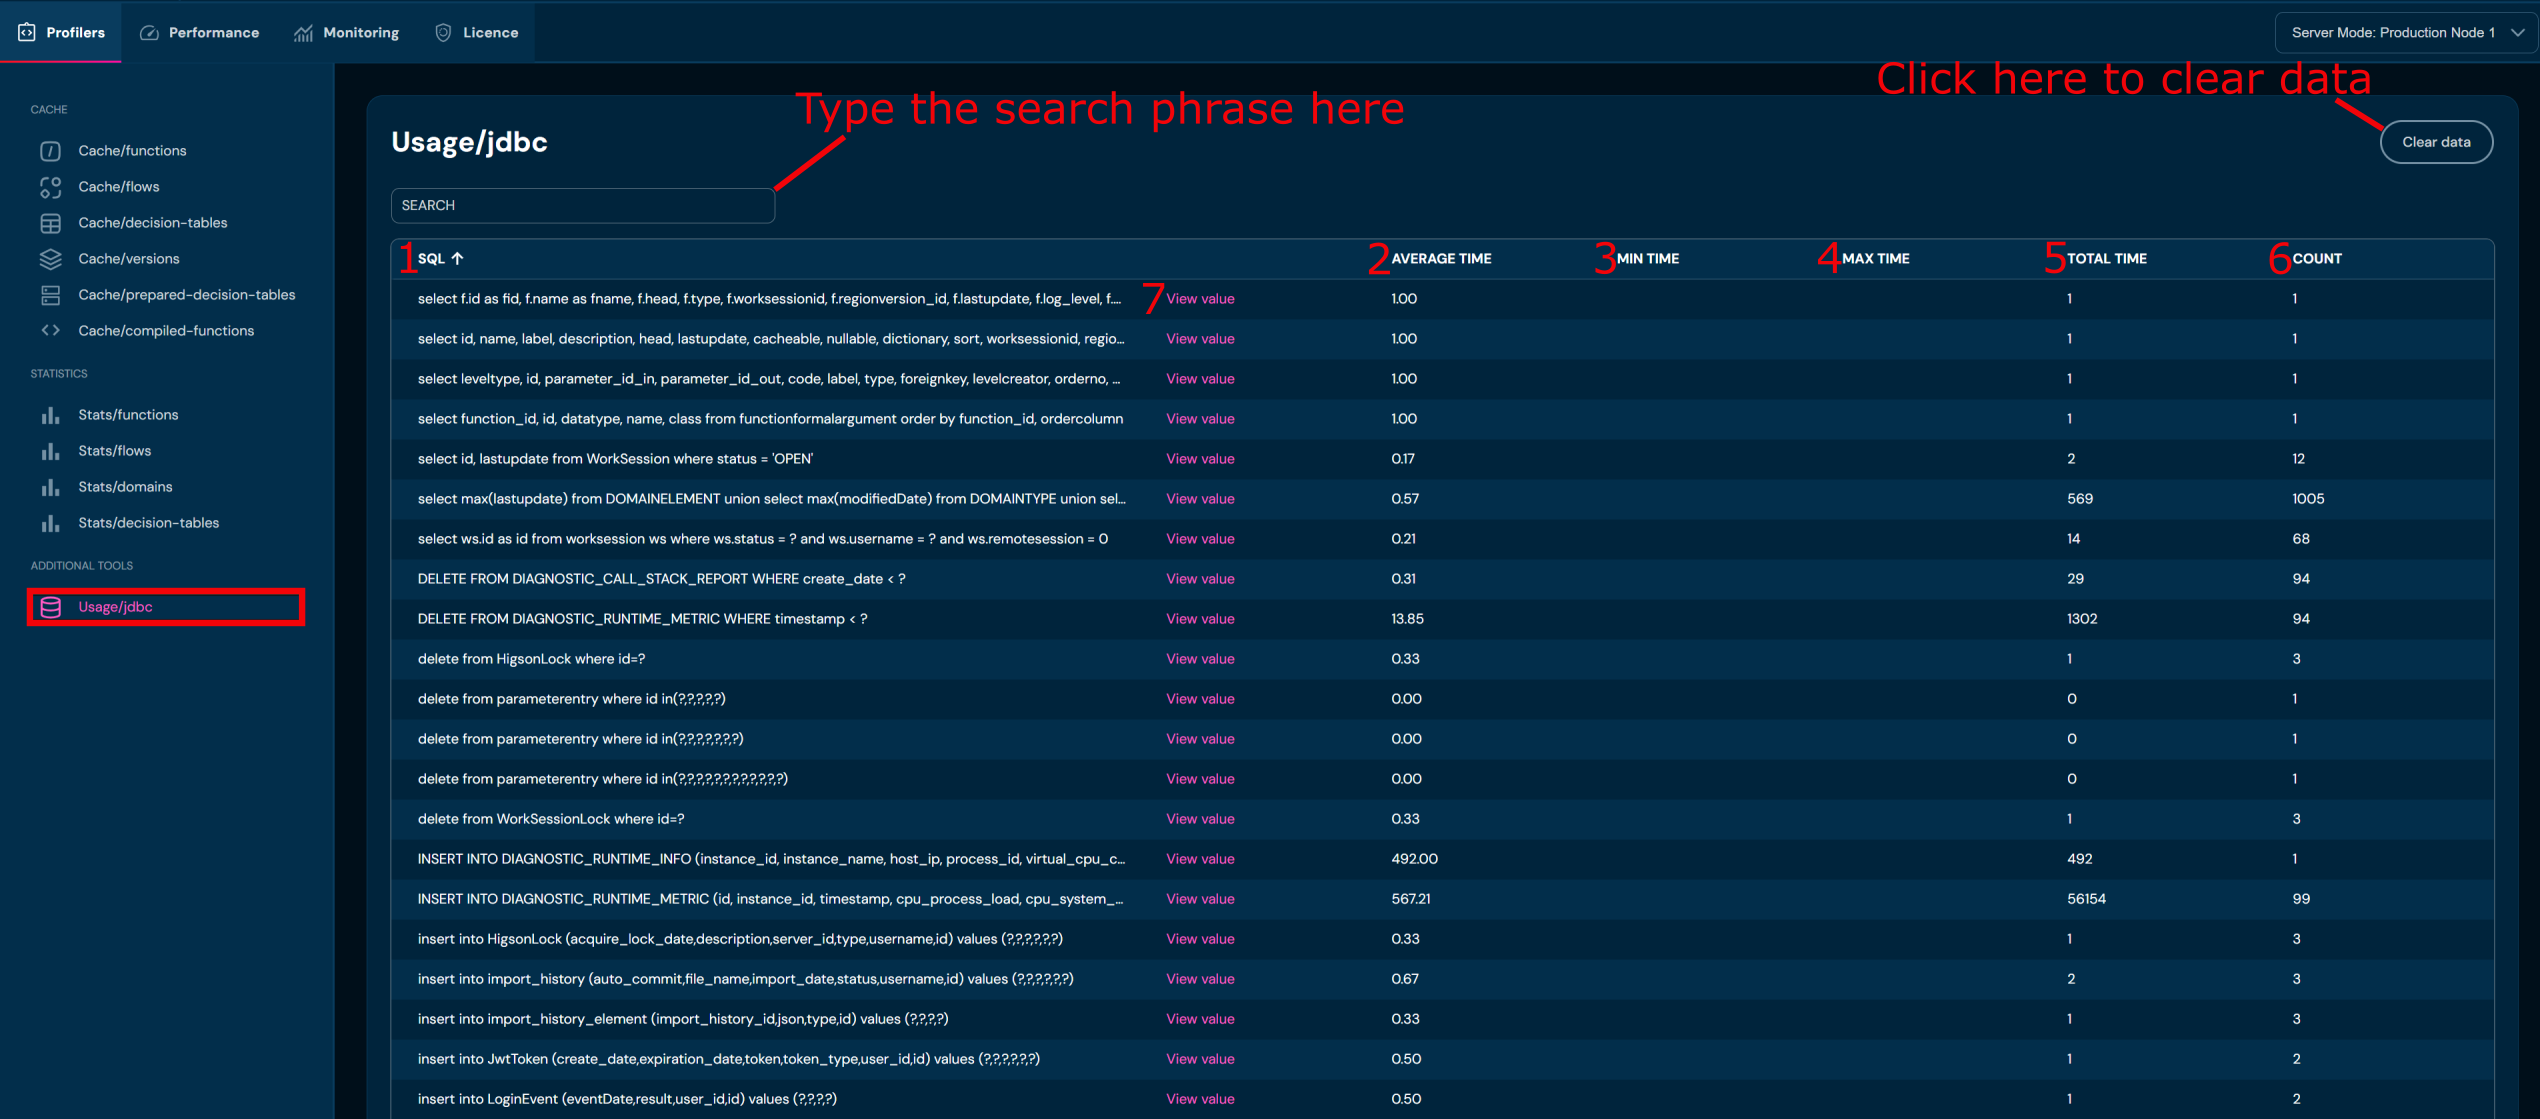
| No. | Column/Action name | Description |
|---|---|---|
| 1. | SQL | SQL query content (abbreviated, with the option to view the full text) |
| 2. | Average Time | Average query execution time (ms) |
| 4. | Min Time | Min time of all executions of the given query (ms) |
| 5. | Max Time | Max time of all executions of the given query (ms) |
| 6. | Total Time | Total time of all executions of the given query (ms) |
| 2. | Count | Number of executions of the given query |
| 7. | View value | NLink to view the full SQL query text along with statistics |
Use cases:
- Identifying slow SQL queries (sorting by Average Time)
- Identifying the most frequently executed queries (sorting by Count)
- Analyzing which queries the engine generates during various operations
- Optimizing the database layer (missing indexes, overly broad selections)
- Diagnosing database performance issues
Performance Tab#
The Performance tab records a detailed history of business rule executions in the system. Every function, decision table, flow, or domain operation call is logged with an exact timestamp and duration.
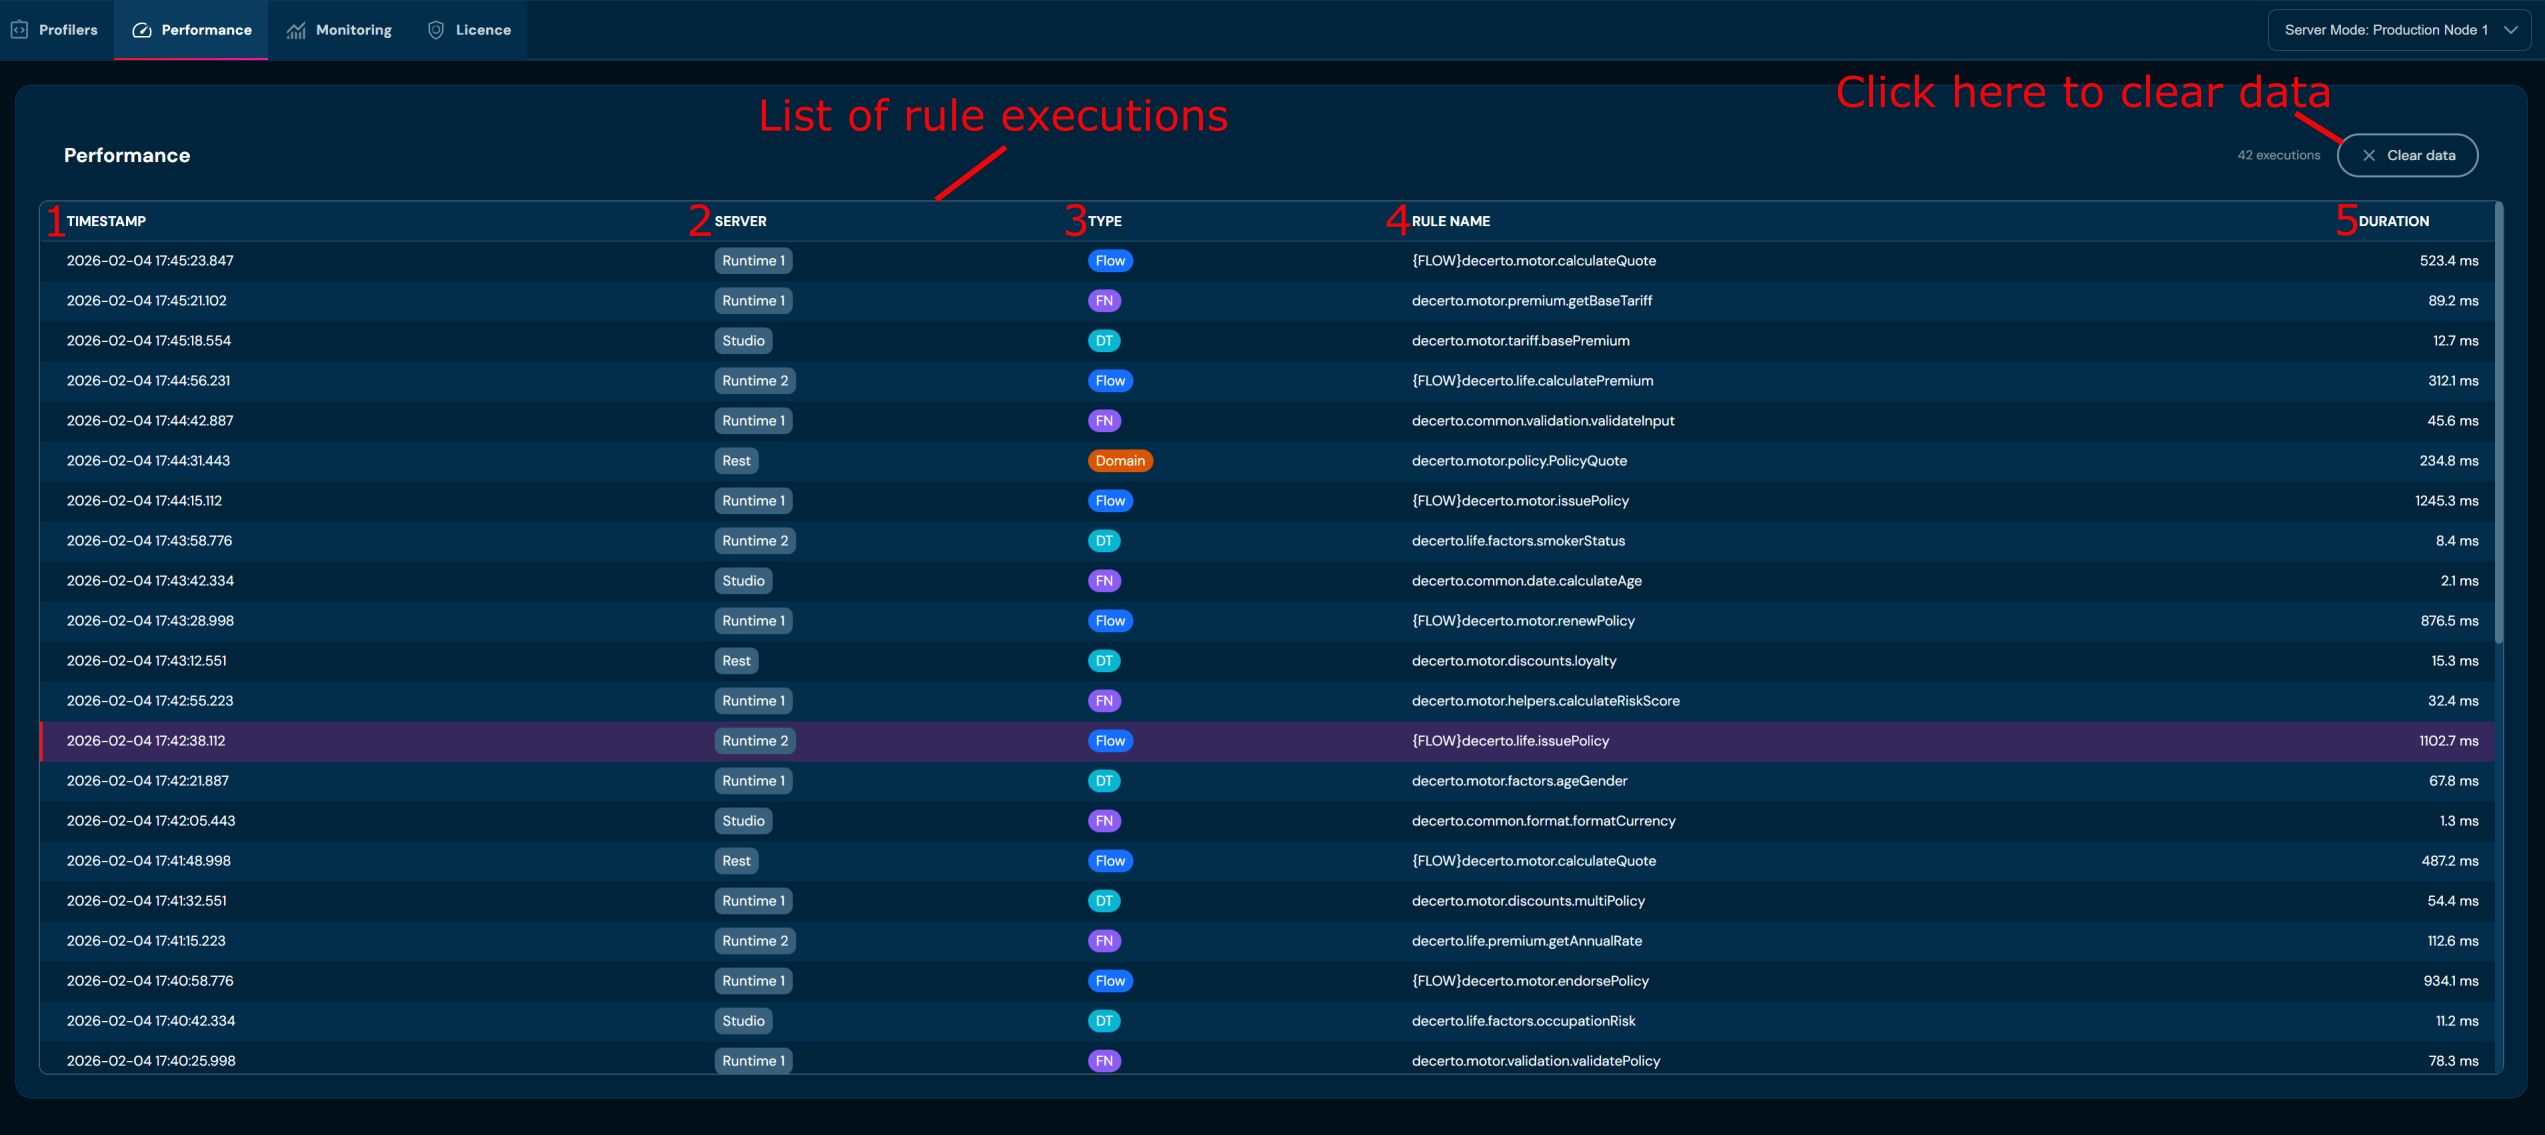
| No. | Column name | Description |
|---|---|---|
| 1. | Timestamp | Exact date and time of execution (with milliseconds), e.g., 2026-02-04 17:45:23.847 |
| 2. | Server | Server where the operation was executed. |
| 3. | Type | Business rule type — indicated by a colored badge: Flow (blue) — business flows;FN (purple) — functions ;DT (green) — decision tables;Domain (orange) — domain operations |
| 4. | Rule Name | Full name of the called rule, e.g., decerto.motor.policy.PolicyQuote |
| 5. | Duration | Execution duration in milliseconds, e.g., 523.4 ms |
Slow Operation Highlighting#
Rows with long execution times are clearly highlighted in red/pink, making it easy to immediately identify bottlenecks (e.g., an operation lasting 1245.3 ms). The coloring is automatic — the system itself determines the threshold above which an operation is considered slow.
Use Cases#
- Detecting bottlenecks — quick identification of the slowest rules
- Load distribution analysis — which servers (Runtime 1/2, Studio, Rest) handle which operations
- Performance comparison — between different rule types (Flow vs FN vs DT)
- Debugging — correlating timestamps with application logs
- Performance regression testing — comparing times before and after deploying changes
Monitoring Tab#
The Monitoring tab provides real-time server resource monitoring through interactive charts and tables. Data is automatically refreshed every few seconds. Each chart has a set of controls.
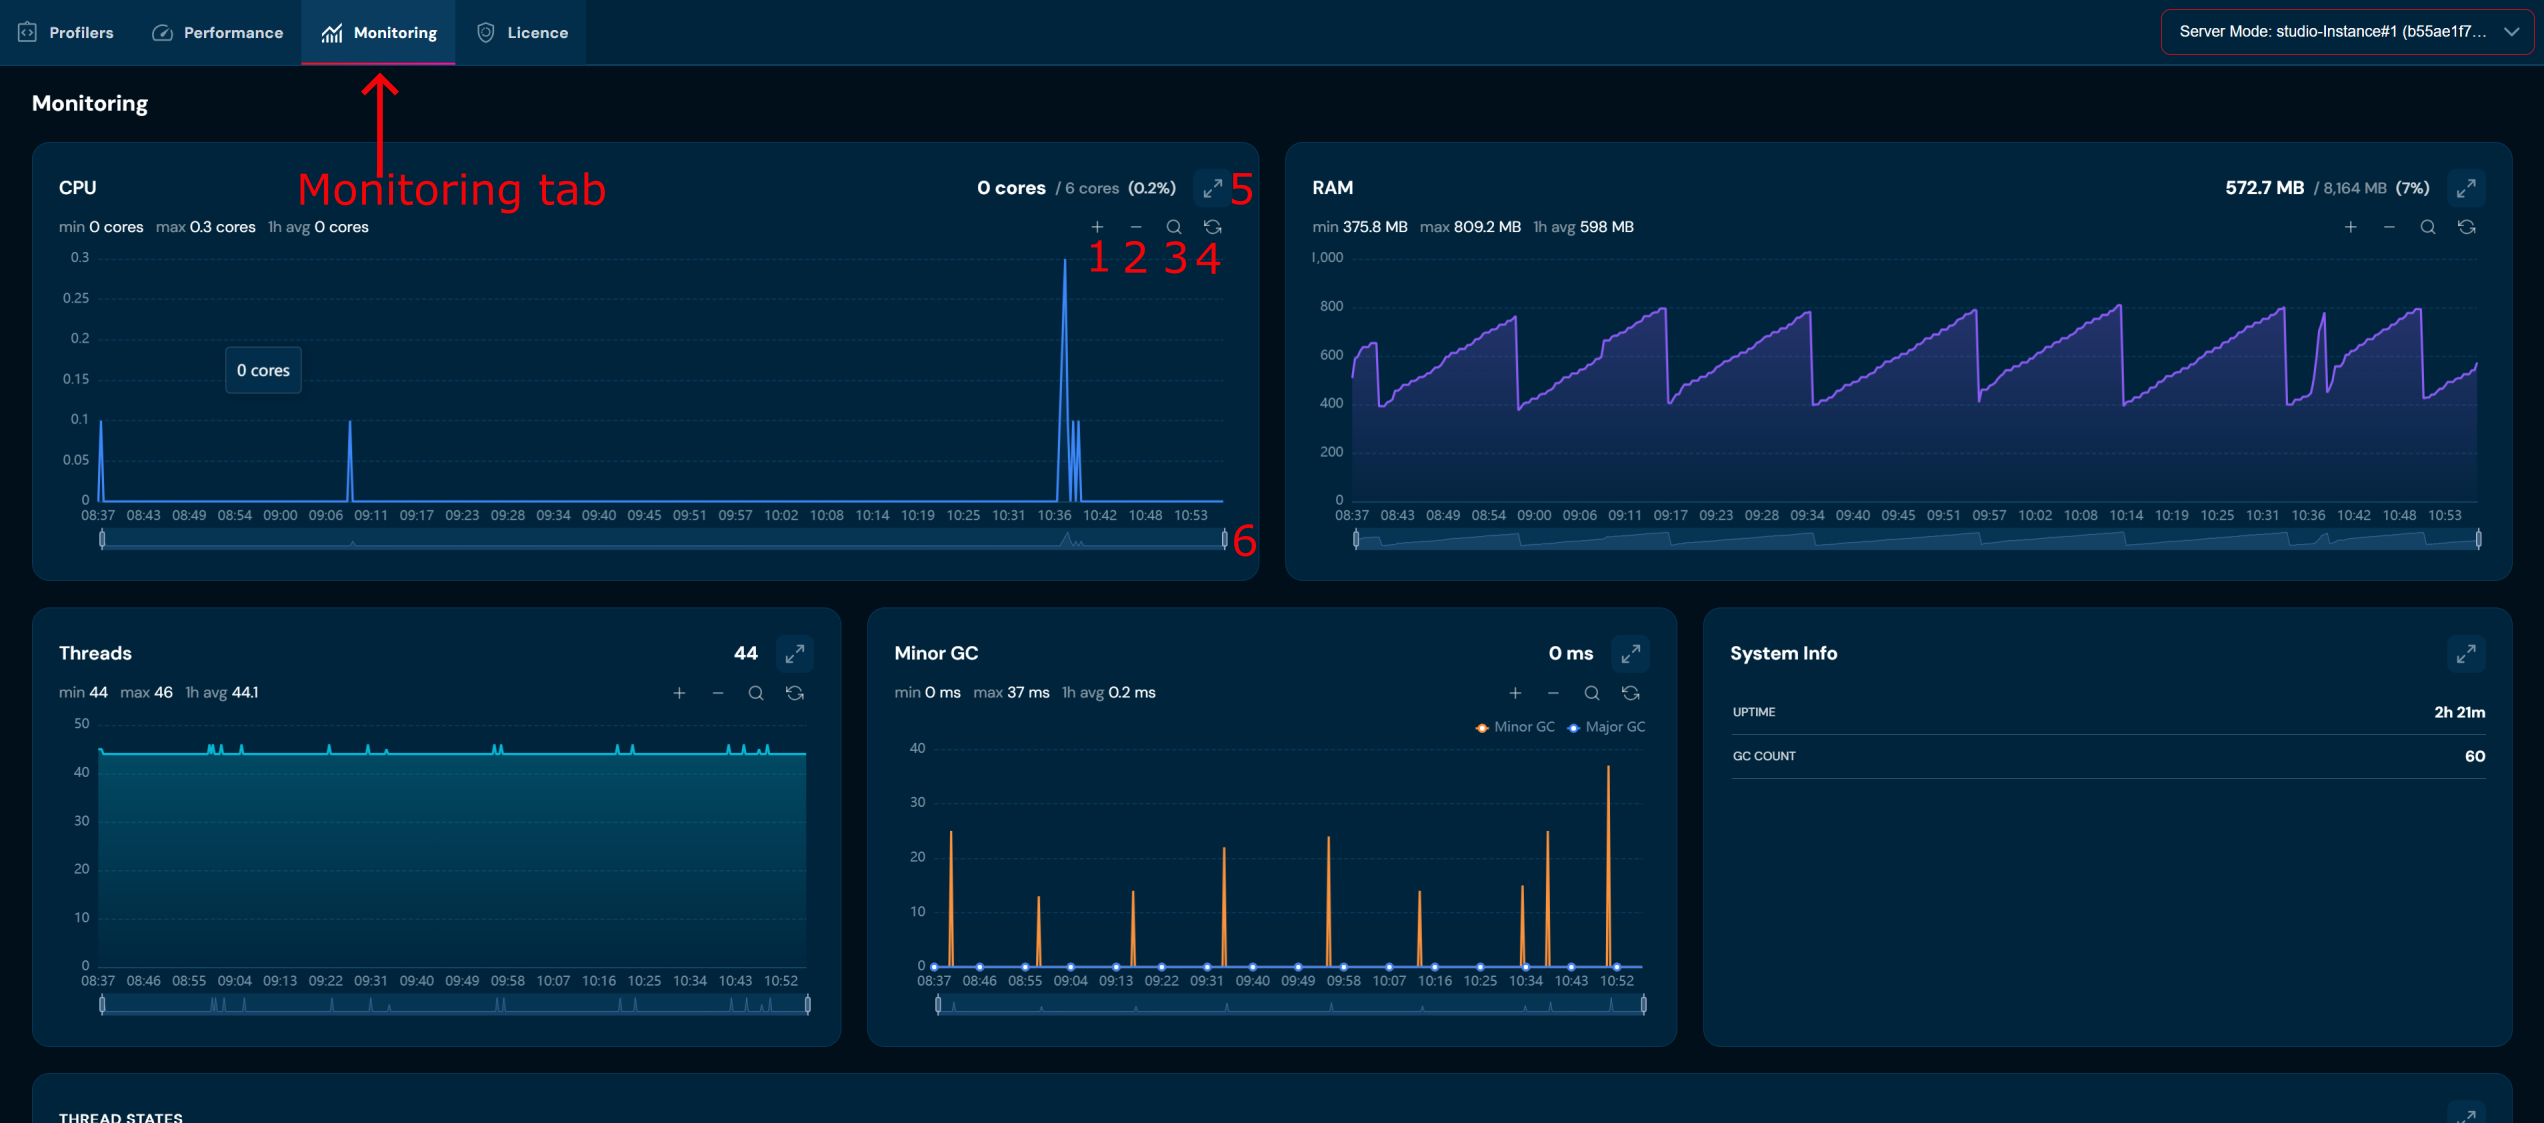
| No. | Name | Description |
|---|---|---|
| 1. | + | Click + to zoom in. |
| 2. | - | Click - to zoom out. |
| 3. | Magnifying glass | Select the Magnifying glass and highlight the area of interest. |
| 4. | Refresh | Manual data refresh. |
| 5. | Expand | Full-screen chart view. |
| 6. | Range slider | Move the range sliders to adjust the displayed view. |
Resource Charts#
CPU#
Server processor load chart over time. Displays:
- Current value (e.g., 42.6%)
- min / max / 1h avg — statistics for the last hour
- Interactive chart with zoom capability (+/-)
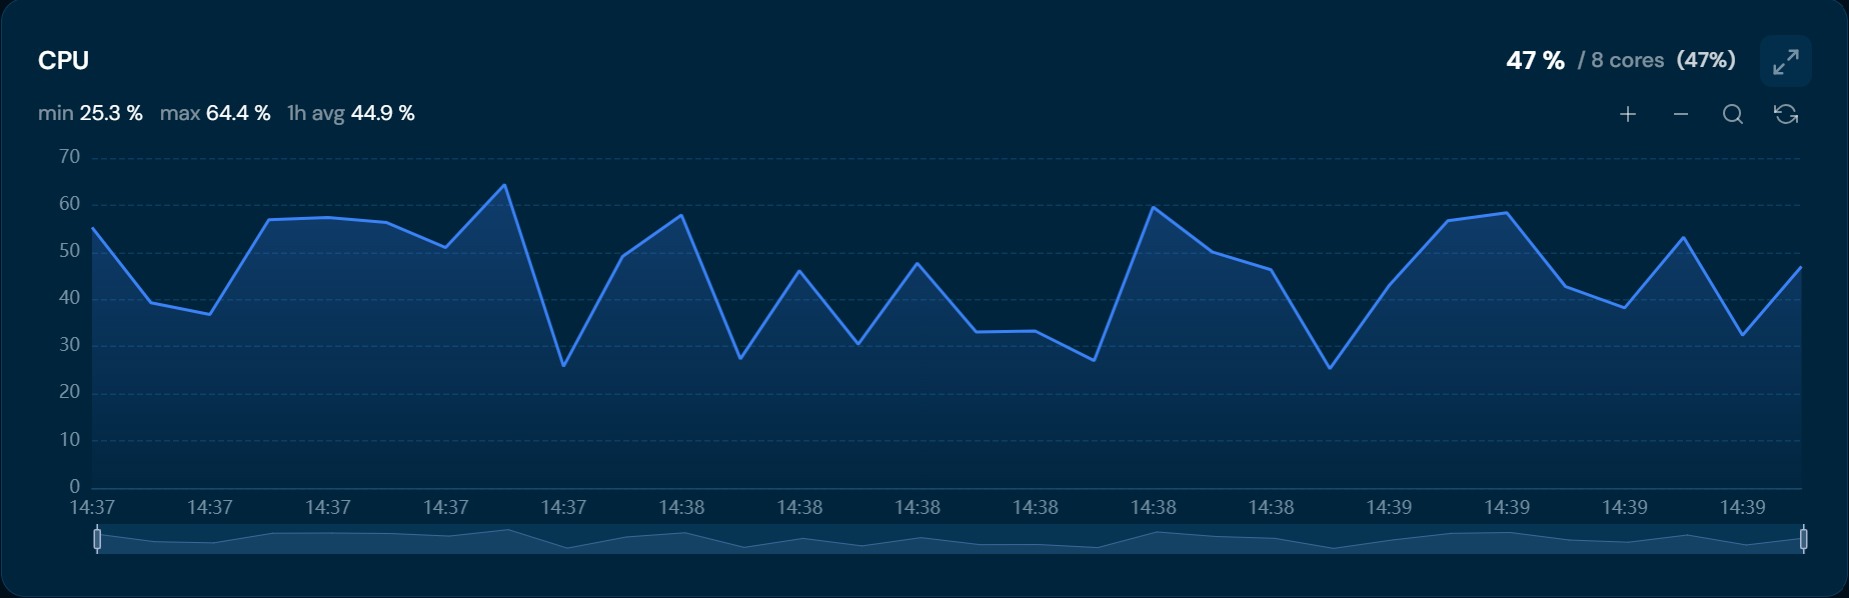
RAM#
Server memory usage chart:
- Current value (e.g., 497.9 MB)
- min / max / 1h avg — e.g., min 422.4 MB, max 610.5 MB, 1h avg 517.8 MB
- Chart with trend visualization
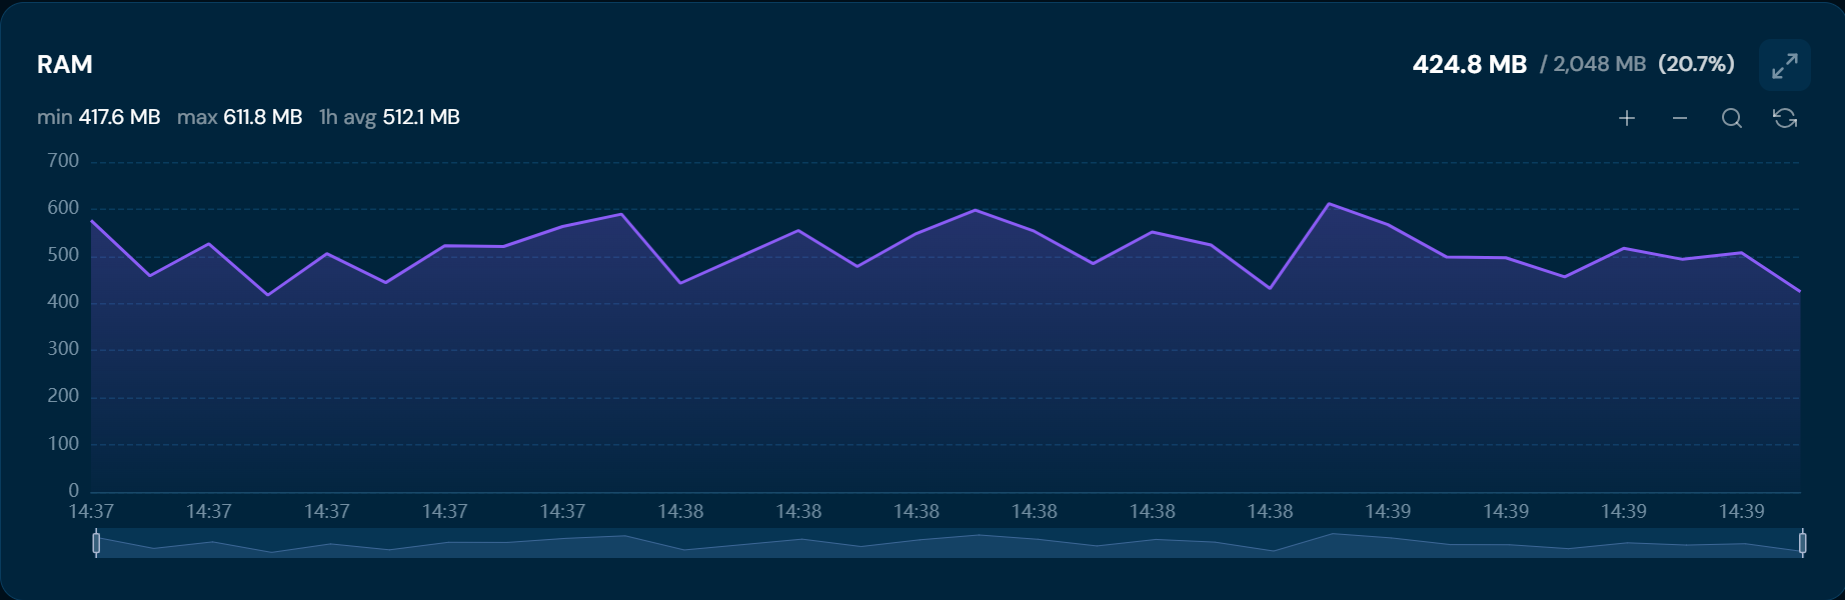
Threads#
JVM active thread count chart:
- Current value (e.g., 25)
- min / max / 1h avg — thread statistics
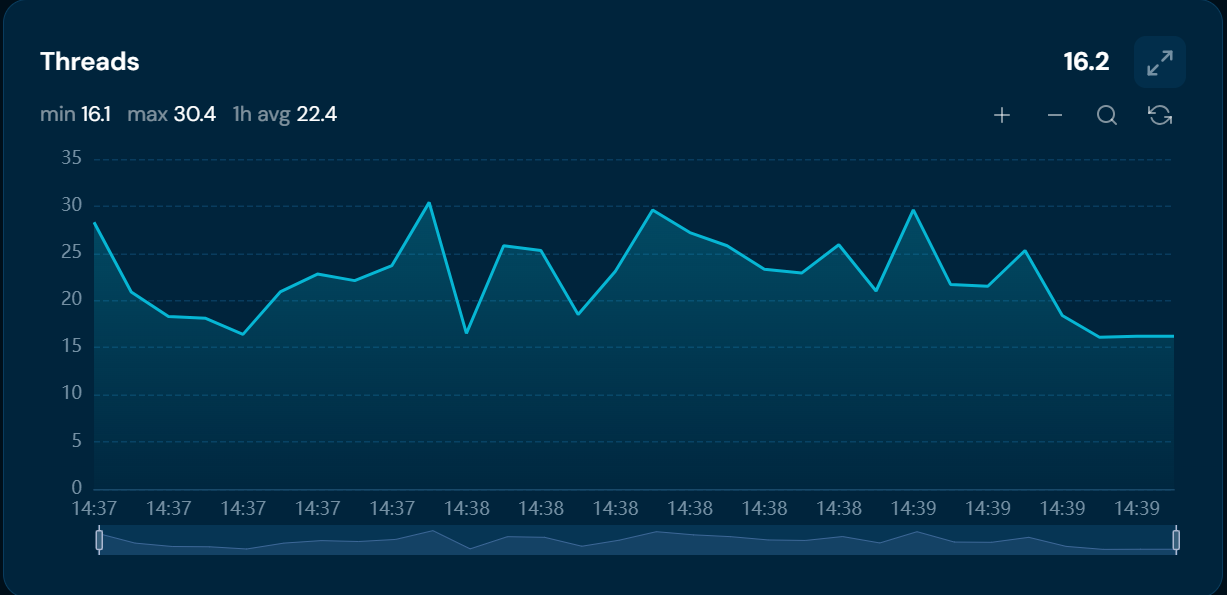
Minor GC (Garbage Collection)#
Garbage Collection operation time chart divided into:
- Minor GC (orange) — frequent, fast garbage collection
- Major GC (purple) — less frequent, longer operations
- min / max / 1h avg — e.g., min 4.2 ms, max 16.9 ms
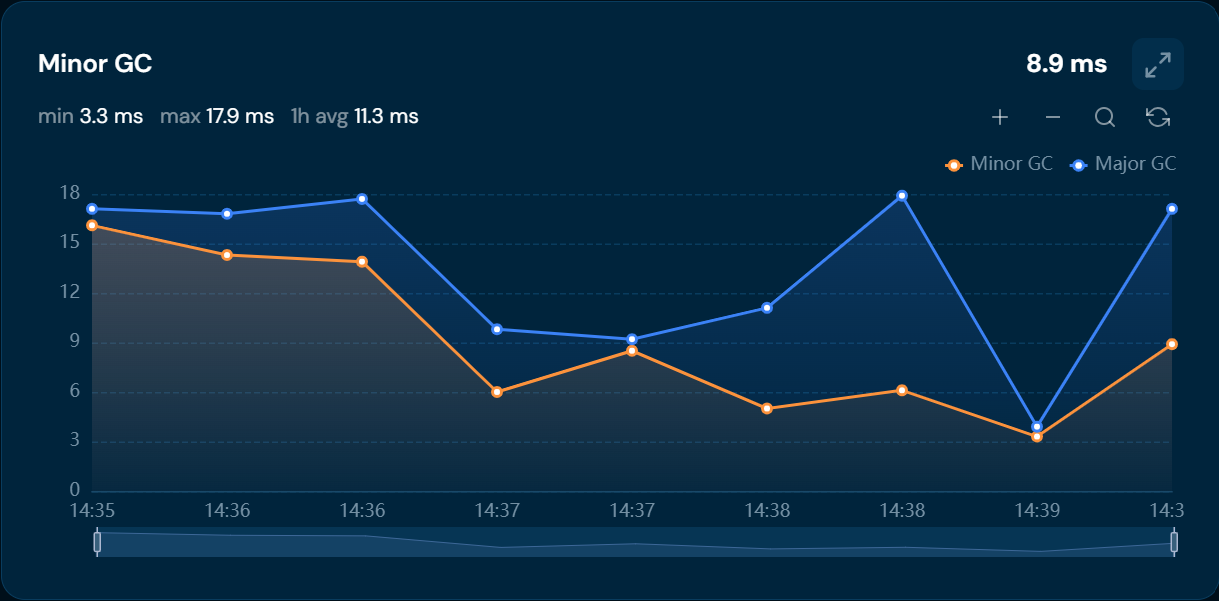
System Info#
Panel with key system metrics:
- Requests/sec — current throughput (e.g., 143 Req/s)
- Uptime — server uptime (e.g., 3d 14h 22m)
- GC Count — total number of GC operations
- Cached Functions — number of cached functions
- Cached DT — number of cached decision tables
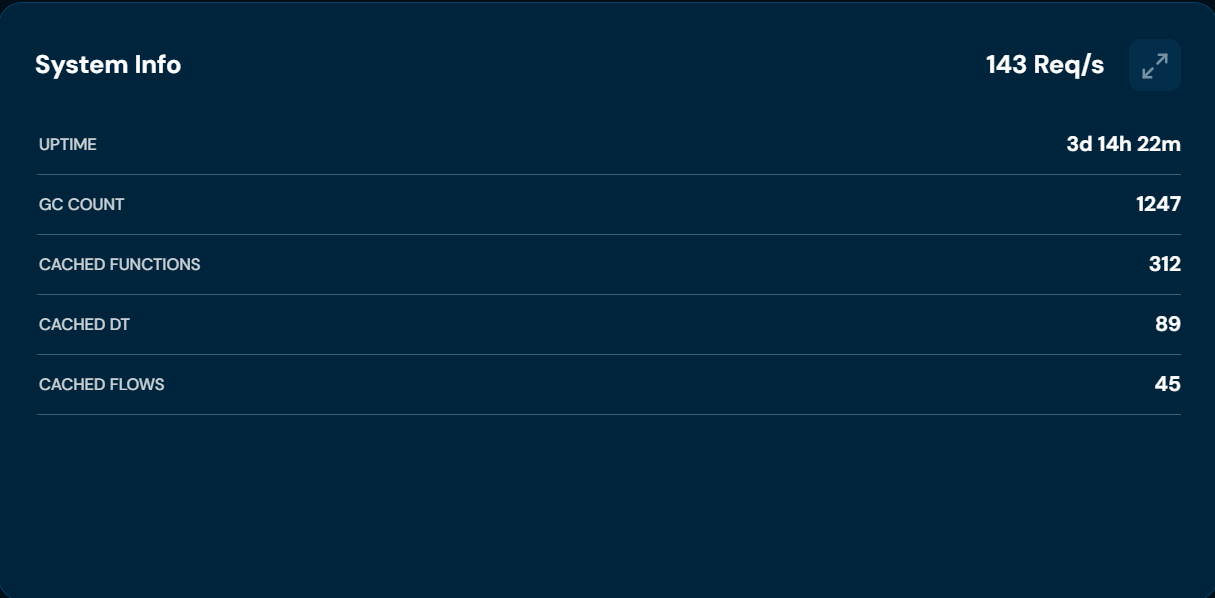
Thread States#
Table with the states of all JVM threads on the server:
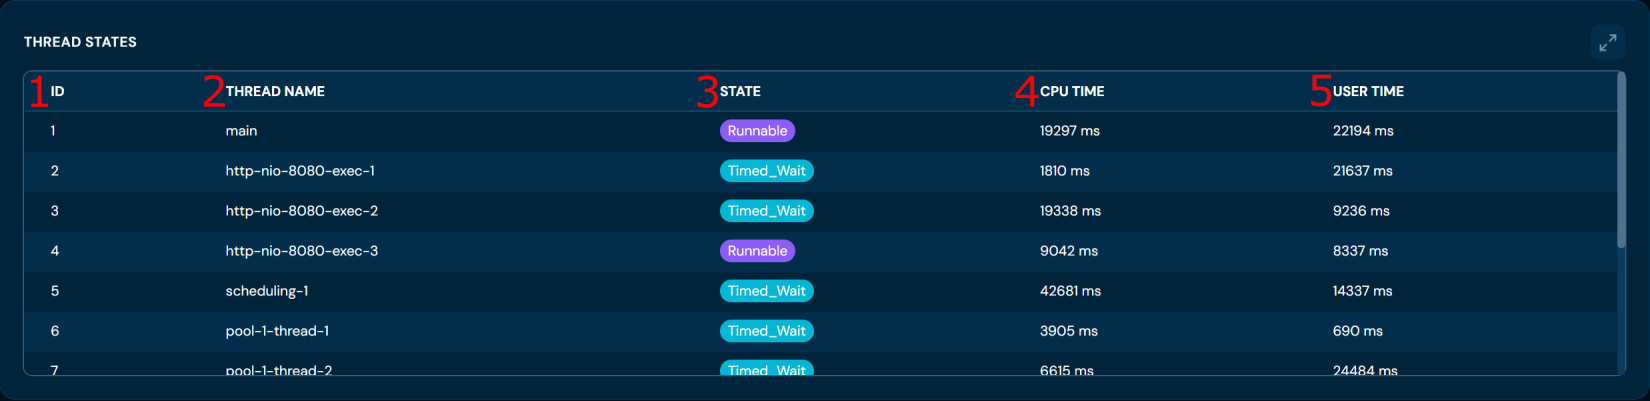
| No. | Column | Description |
|---|---|---|
| 1. | ID | Thread identifier. |
| 2. | Thread Name | Thread name (e.g., pool-1-thread-1, HikariPool-1-housekeeper, GC-worker-1). |
| 3. | State | Thread state — indicated by a colored badge: • Runnable (purple) — thread is actively executing code • Timed_Wait (turquoise) — thread is waiting with a time limit • Waiting — thread is waiting for a notification |
| 4. | CPU Time | CPU time consumed by the thread (ms). |
| 5. | User Time | CPU time spent executing application code in user mode (excluding kernel/system operations like I/O or memory allocation), sourced from JVM’s ThreadMXBean.getThreadUserTime. |
Use Cases#
- Load monitoring — ongoing control of CPU, RAM, thread count
- Memory leak detection — observing RAM trends over time
- GC diagnostics — identifying excessive Garbage Collection operations
- Thread analysis — detecting threads in deadlock state or with excessive CPU usage
Licence Tab#
The Licence tab provides full insight into the Higson licence status, its usage, and compliance with limits.
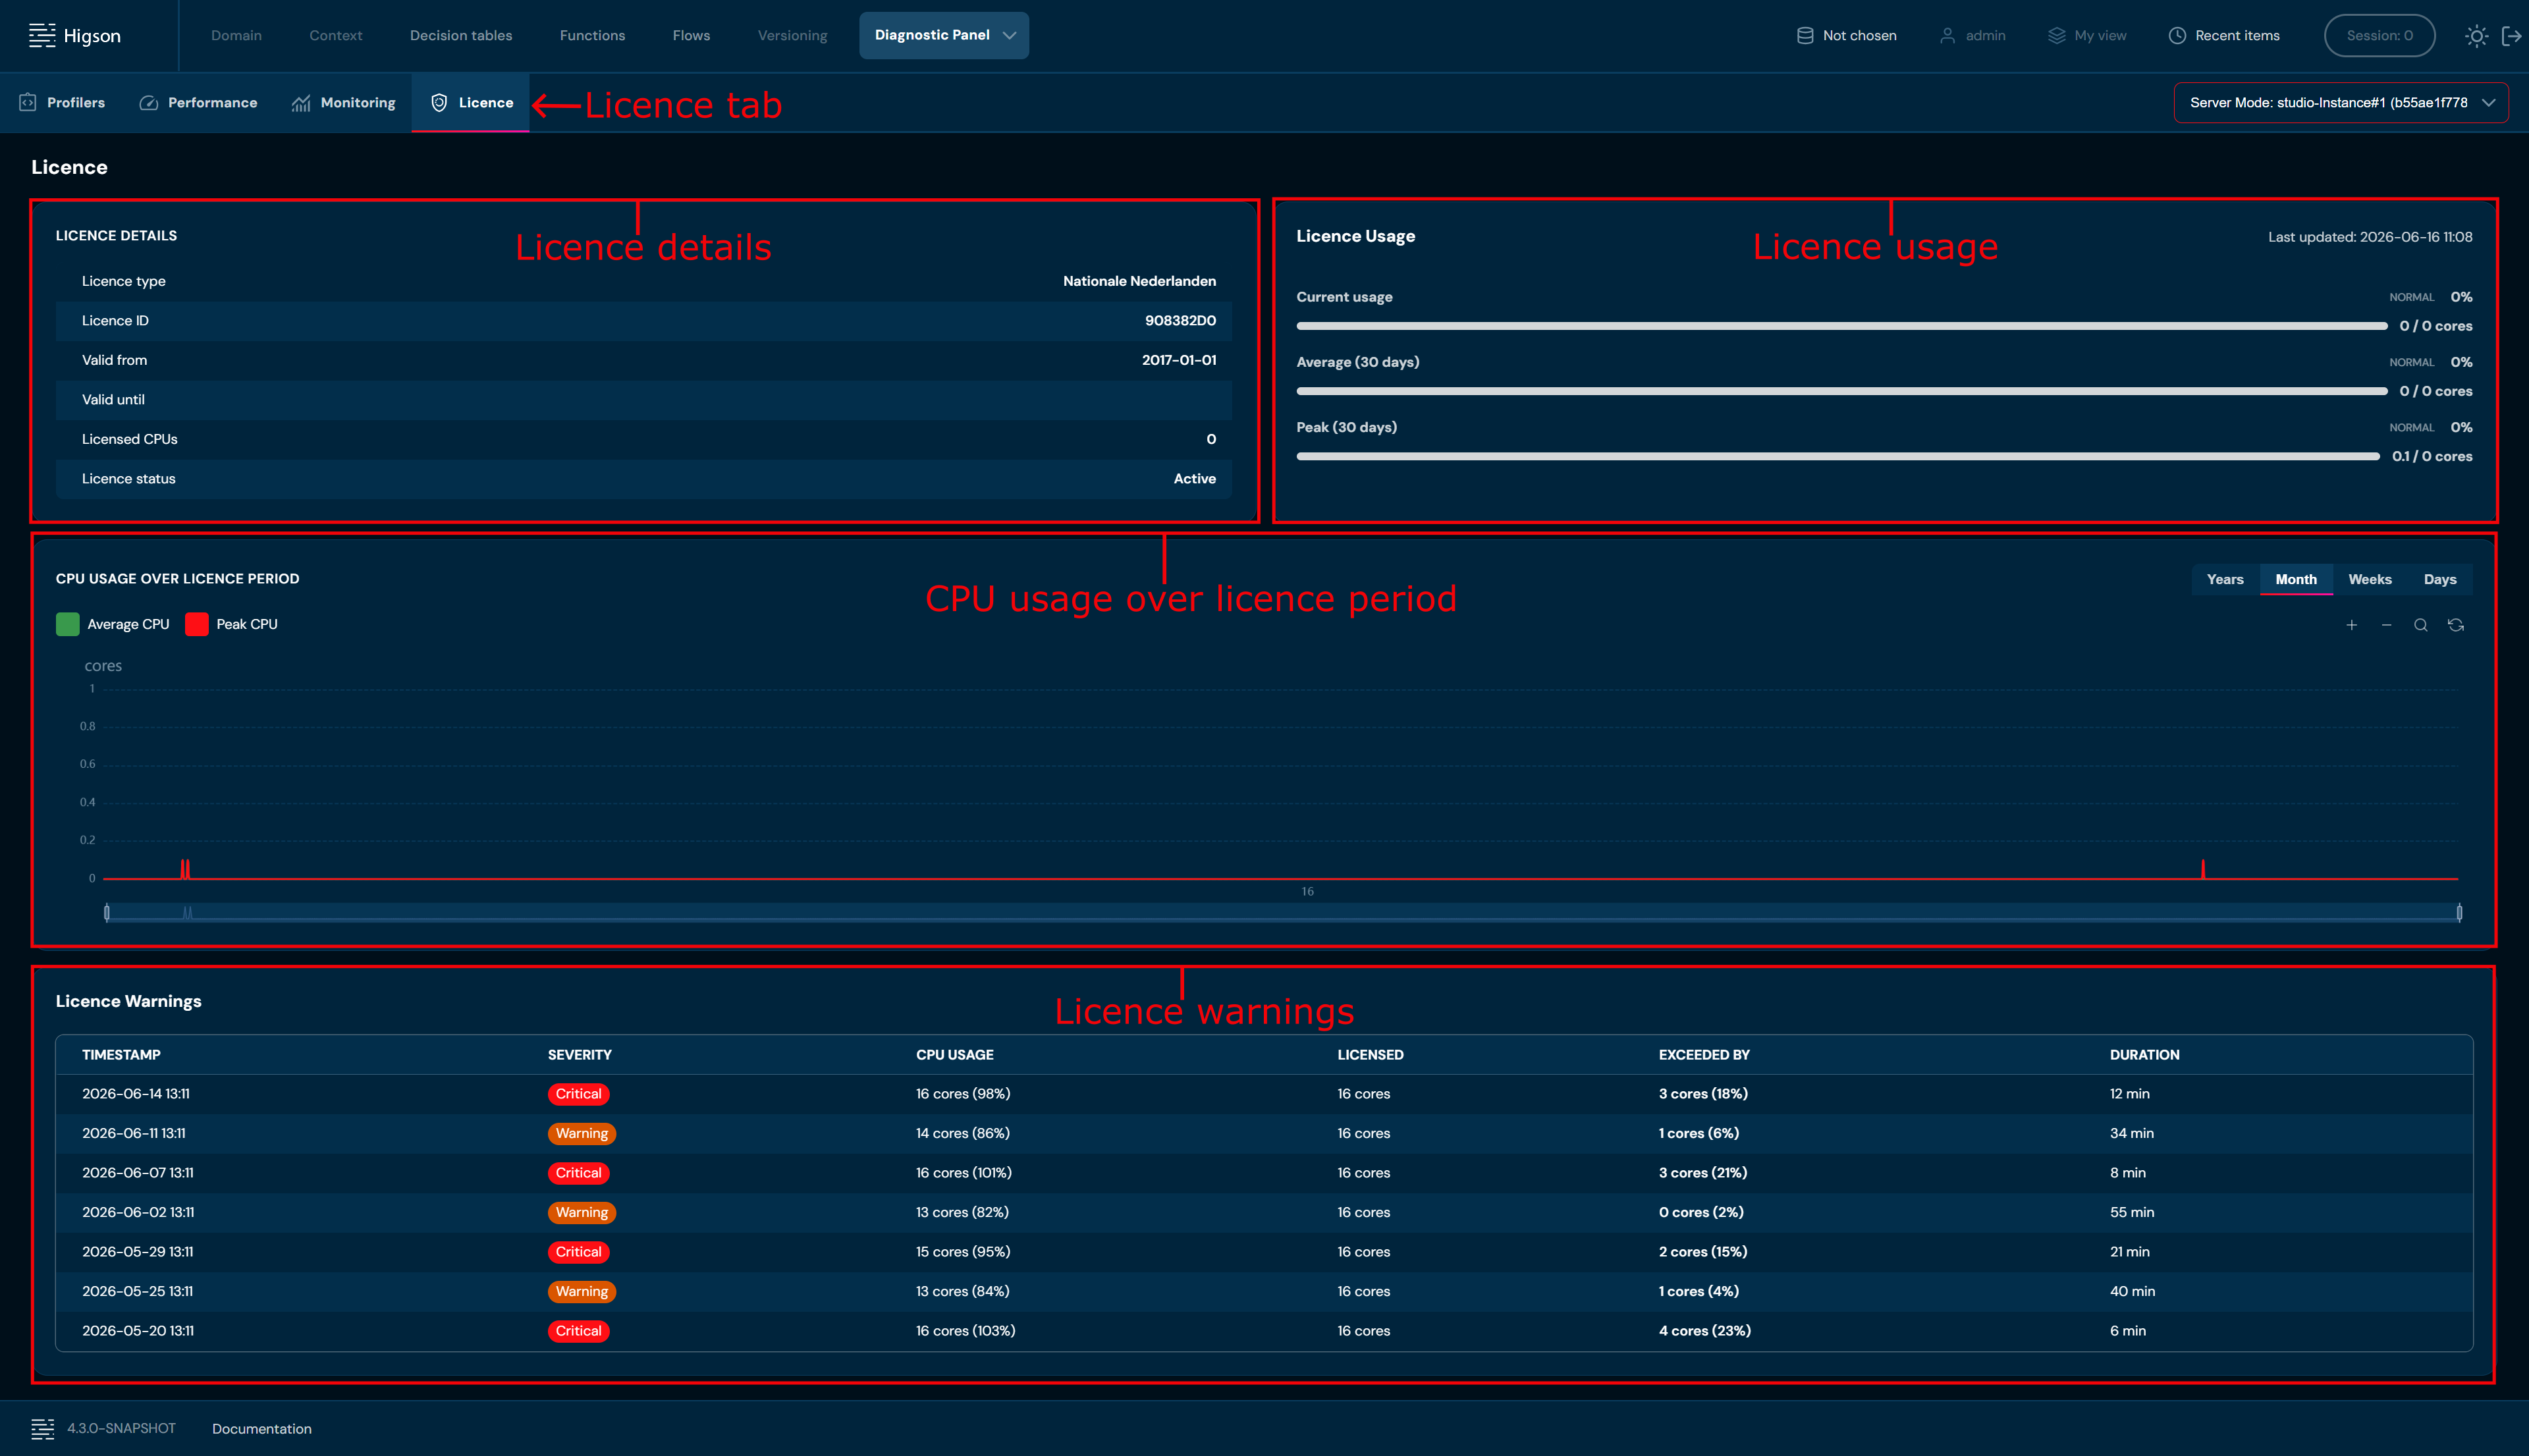
Licence Details#
Panel with licence details:
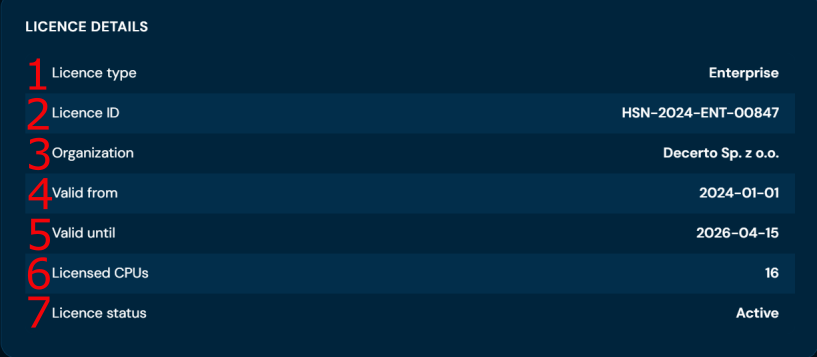
| No. | Parameter | Description |
|---|---|---|
| 1. | Licence type | Type of the licence (e.g., Enterprise Production, Developer). |
| 2. | Licence ID | Unique licence identifier. |
| 3. | Organization | Name of the organization the licence is assigned to. |
| 4. | Valid from | Licence validity start date. |
| 5. | Valid until | Licence expiration date. |
| 6. | Licensed CPUs | Maximum number of CPU cores allowed under the licence. |
| 7. | Licence status | Current licence status (e.g., Active, Expired). |
Licence Usage#
Visualization of current licensed CPU core usage with three indicators:
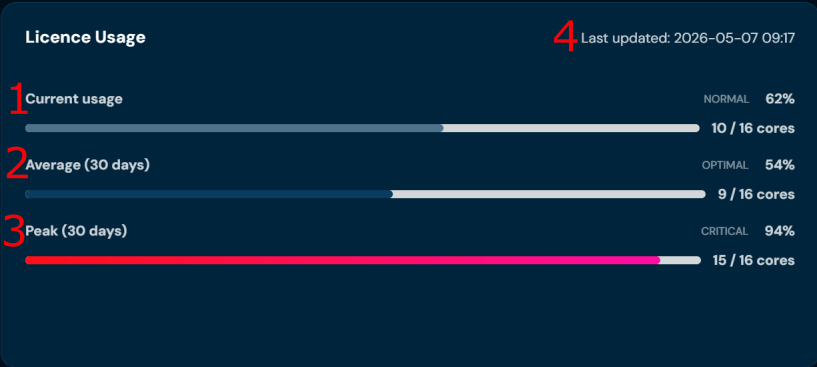
| No. | Metric | Description |
|---|---|---|
| 1. | Current usage | Number of CPU cores currently in use, shown as a ratio with percentage and status label. |
| 2. | Average (30 days) | Average CPU core usage over the last 30 days. |
| 3. | Peak (30 days) | Highest recorded CPU core usage over the last 30 days. |
| 4. | Last updated | Timestamp of the most recent data refresh for this section. |
Each indicator has a colored progress bar and a status label:
- OPTIMAL (blue) — usage within normal range
- NORMAL (gray) — acceptable usage
- CRITICAL (red) — usage near or exceeding the limit
Data in the Licence Usage and Performance Metrics sections includes “Last updated” information with the date and time of the last refresh. Data may be updated at different intervals.
CPU Usage Over Licence Period#
Historical chart of CPU usage over the licence period with two lines:
- Average CPU (green) — average core usage
- Peak CPU (red) — peak core usage
The chart contains two threshold lines:
- Yellow line (dashed) — warning threshold
- Red line (dashed) — critical threshold (licence limit)
Available time ranges: Years, Month, Weeks, Days

Licence Warnings#
Table listing all recorded licence limit violations. Each row represents a single event where CPU core usage exceeded the licensed limit.

| No. | Column | Description |
|---|---|---|
| 1. | Timestamp | Exact date and time when the violation occurred. |
| 2. | Severity | Violation severity level: Critical (significant breach) or Warning (minor breach). |
| 3. | CPU Usage | Actual CPU core usage recorded at the time of the violation. |
| 4. | Licence Limit | Maximum number of CPU cores allowed under the licence. |
| 5. | Exceeded By | How much the usage exceeded the limit, shown as absolute value and percentage (e.g., +2.4 cores (15%)). |
| 6. | Duration | How long the violation lasted before usage returned below the limit. |
Each row has an expand button (→) that opens the Warning Details modal with additional information. The modal contains two sections:
- Violation Summary — three cards with key metrics.
- Top Processes During Violation — table listing the processes that consumed the most CPU at the time of the violation.
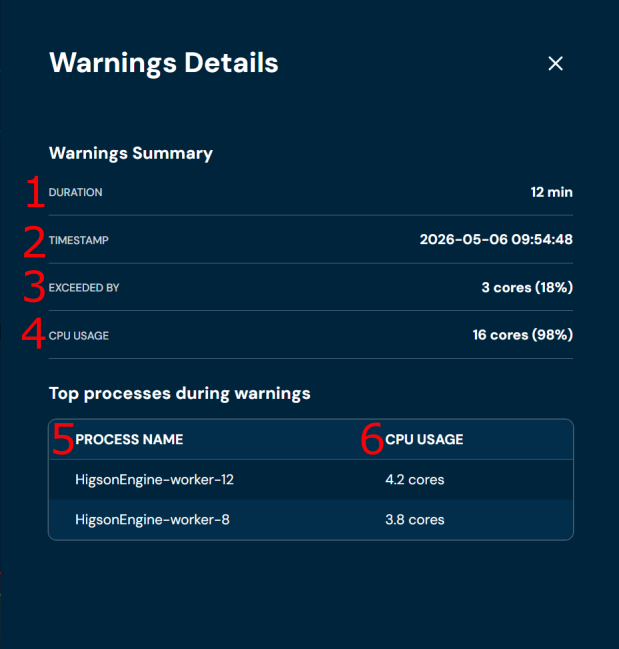
| No. | Element | Description |
|---|---|---|
| 1. | Duration | How long the violation lasted before usage returned below the limit. |
| 2. | Timestamp | Exact date and time when the violation occurred. |
| 3. | Exceeded By | How much the usage exceeded the limit, shown as absolute value and percentage. |
| 4. | CPU Usage | CPU core usage by that process at the time of the violation. |
| 5. | Process Name | Name of the JVM thread or process (e.g., HigsonEngine-worker-12). |
| 6. | CPU Usage | CPU core usage by that process at the time of the violation per process. |
Use Cases#
- Capacity planning — analyzing CPU usage trends vs licence
- Licence management — monitoring approaching expiration
- Compliance — controlling compliance with licence terms
- Billing — documenting actual resource usage
Higson 4.3 introduces an AI Assistant as a beta feature. It integrates a large language model (LLM) directly into Higson Studio, providing three categories of AI-powered support:
- Documentation Assistant — a persistent chat panel for asking questions about Higson documentation
- AI actions in Functions — explain or generate Groovy function bodies
- AI actions in Decision Tables — explain or generate decision tables
Higson does not supply or host an LLM model itself. Instead, it connects to an existing LLM provider.
Beta notice: The AI Assistant requires enabling a feature flag and configuring at least one LLM provider. See AI Assistant Configuration for setup instructions.
Documentation Assistant#
The Documentation Assistant is a persistent chat panel available on every screen in Higson Studio. It allows users to ask questions about Higson features, decision tables, flows, and configuration without leaving the application.
Opening the Documentation Assistant#
The Documentation Assistant panel is available on every screen in Higson Studio. To open it, click the > arrow button on the left edge of the screen.
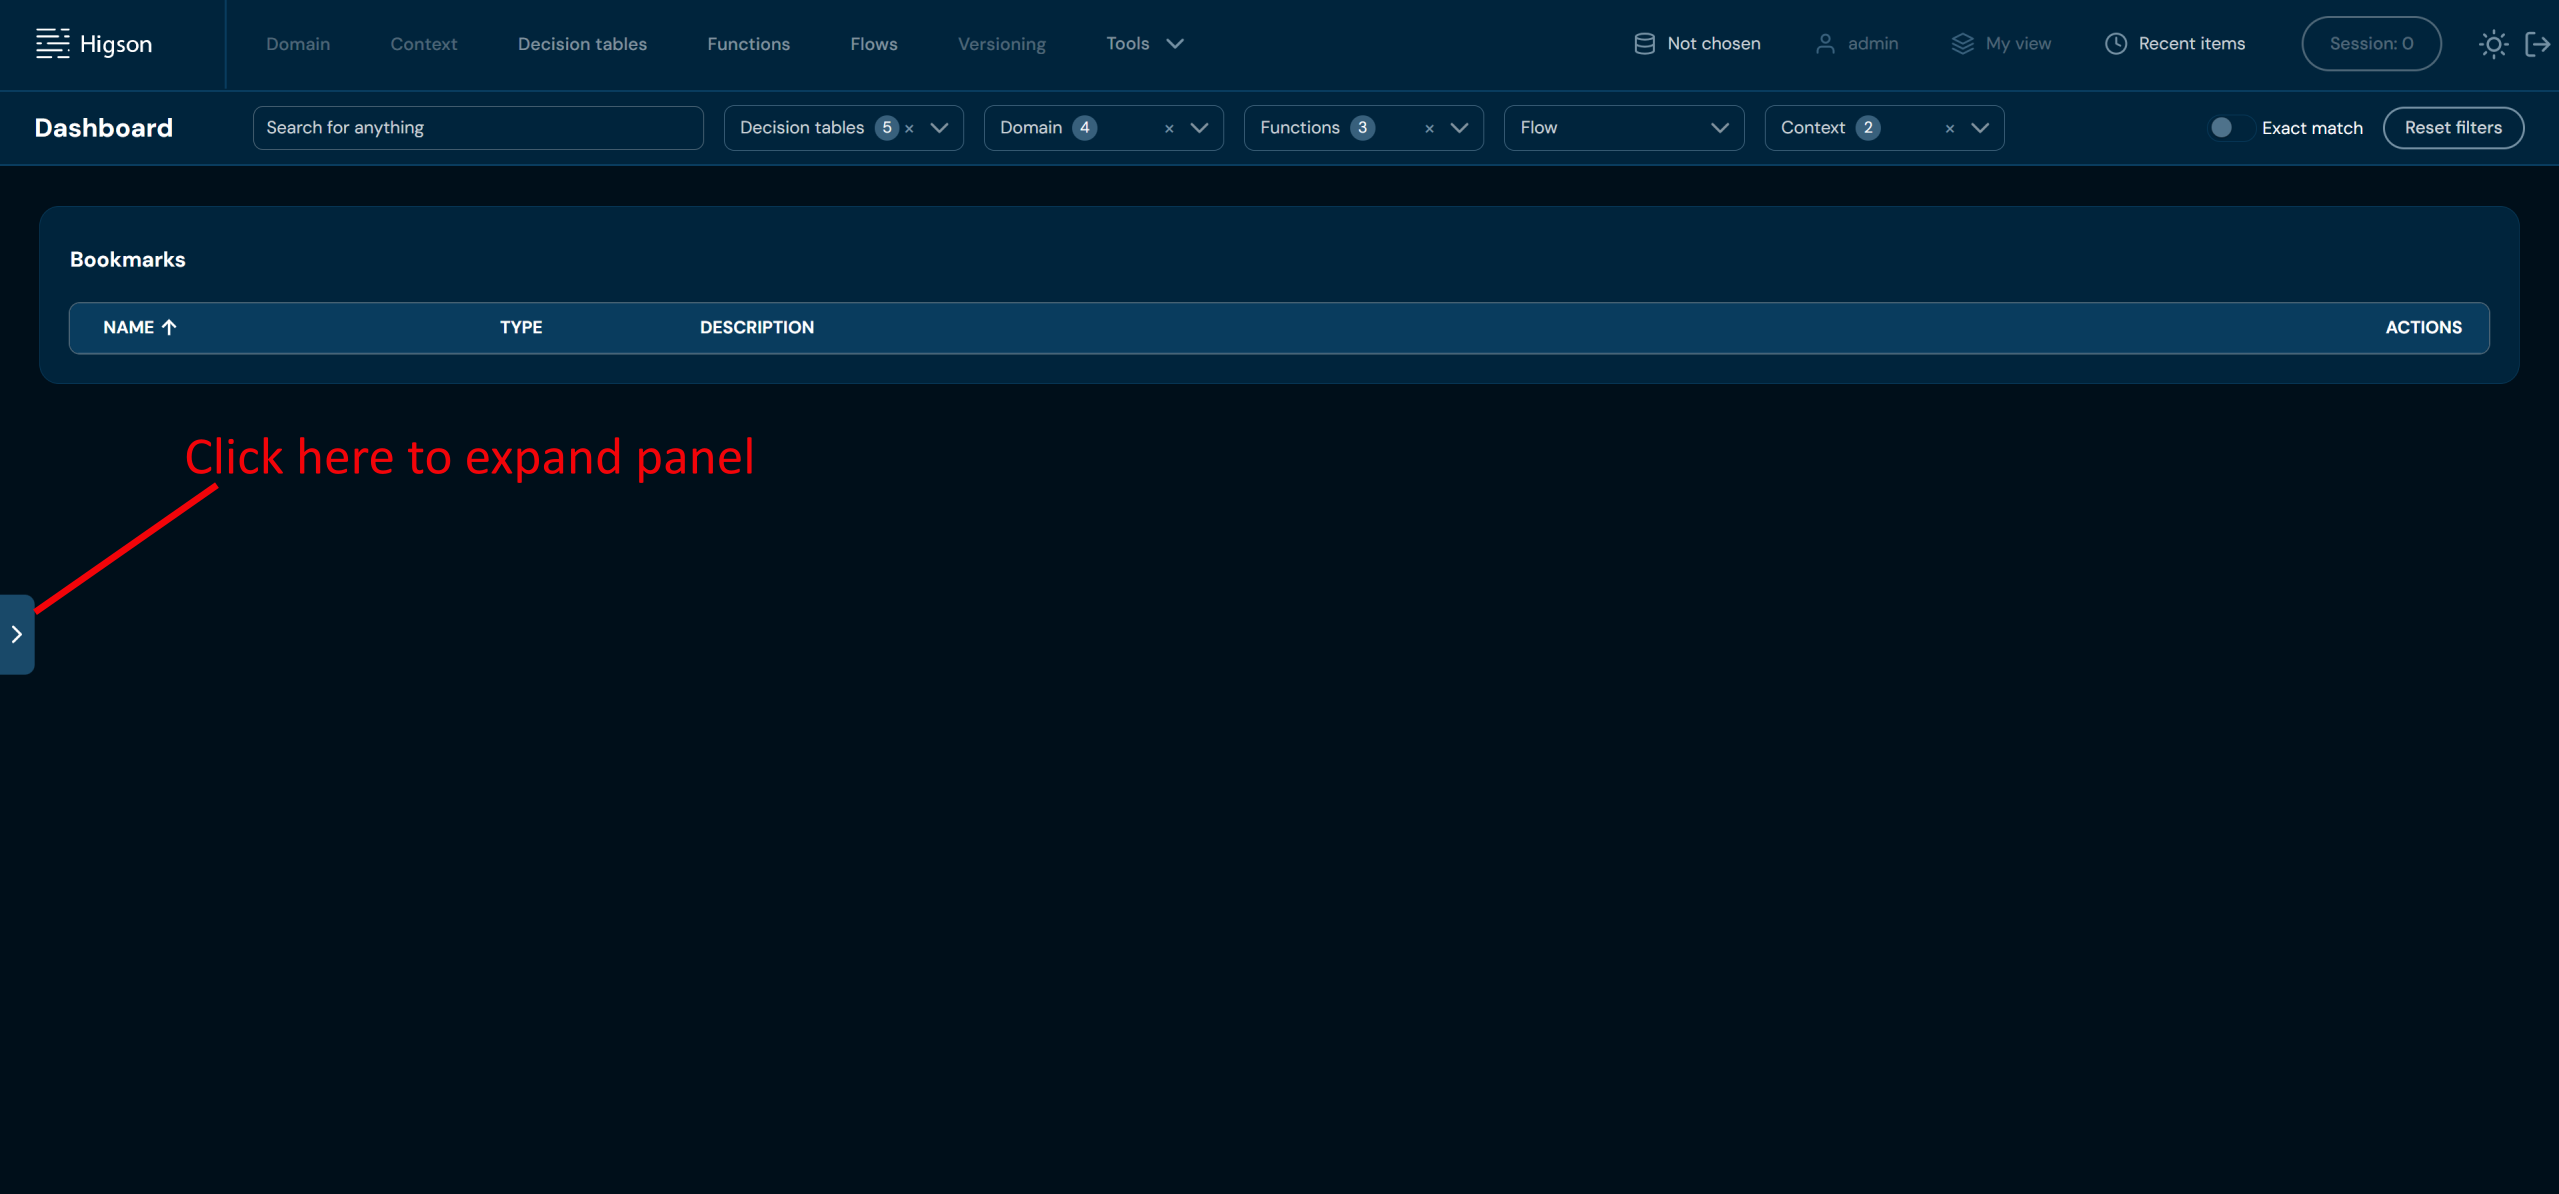
The panel expands to reveal the chat interface.
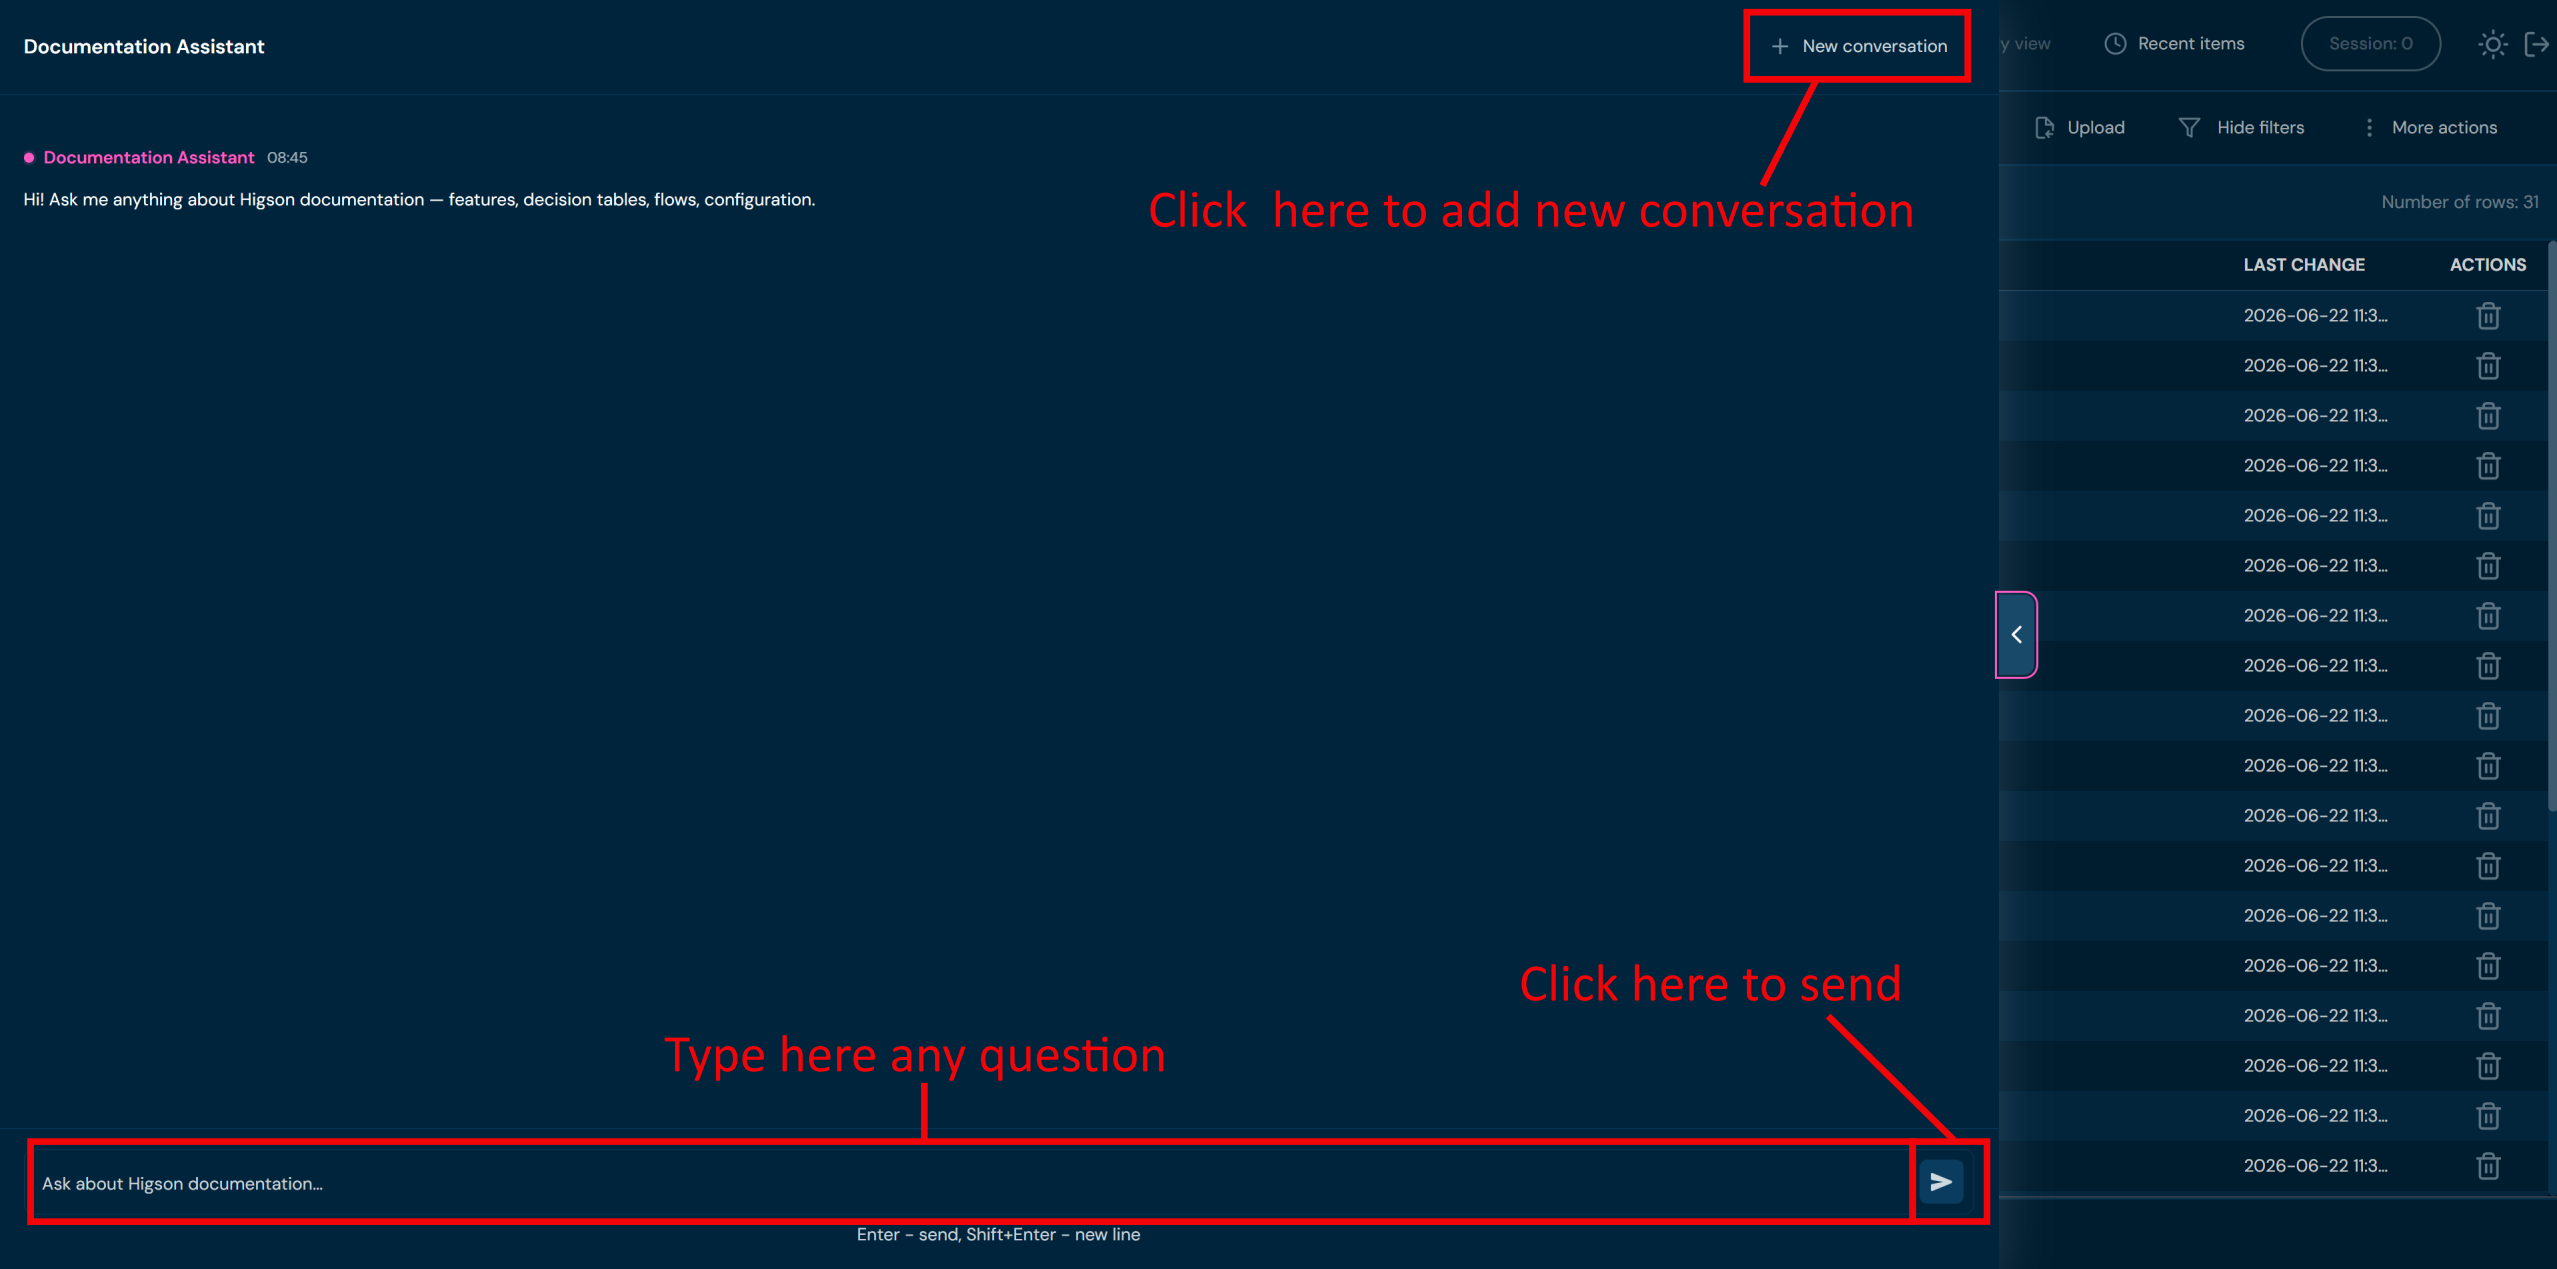
Use Shift+Enter to add a line break in your message without sending it.
Closing the Documentation Assistant#
To close the panel, click the < arrow button on the right edge of the open panel.
AI Features in Functions#
On the Function details screen, the AI button (✦ AI) is available in the actions bar. Clicking it opens a dropdown menu with two AI actions.
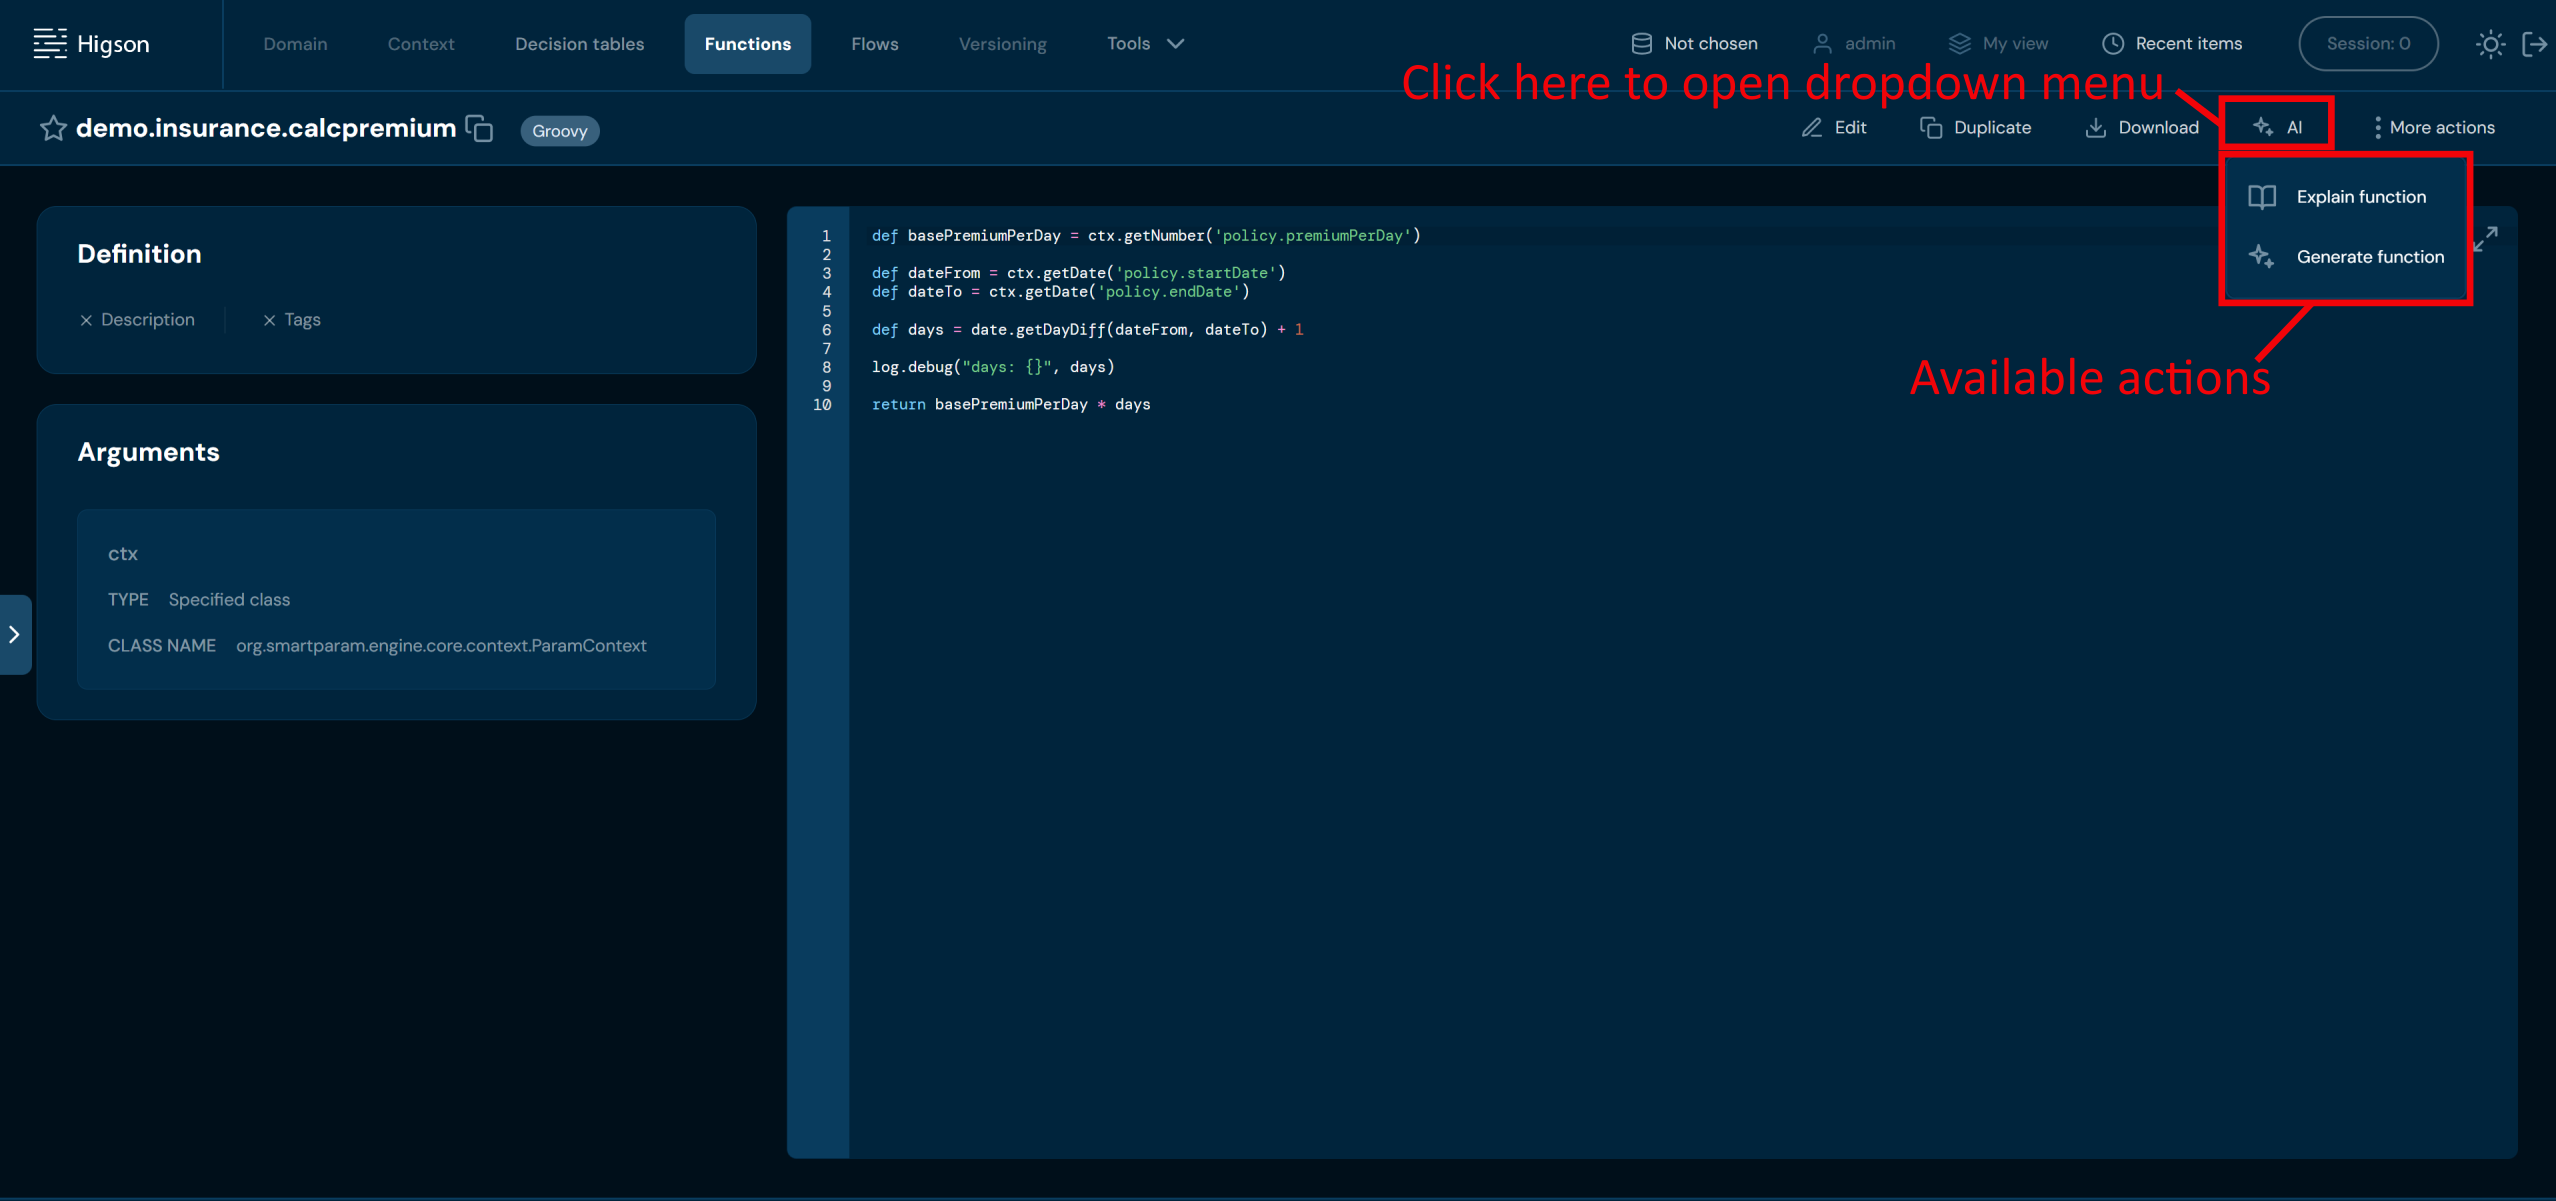
Explain Function#
Explain function generates a plain-language description of the current function. The explanation is produced from the function body and argument definitions.
To use Explain function:
- Open any function from the Functions list.
- In the actions bar, click AI.
- Select Explain function from the dropdown.
- The Function explanation dialog appears with the AI-generated description.
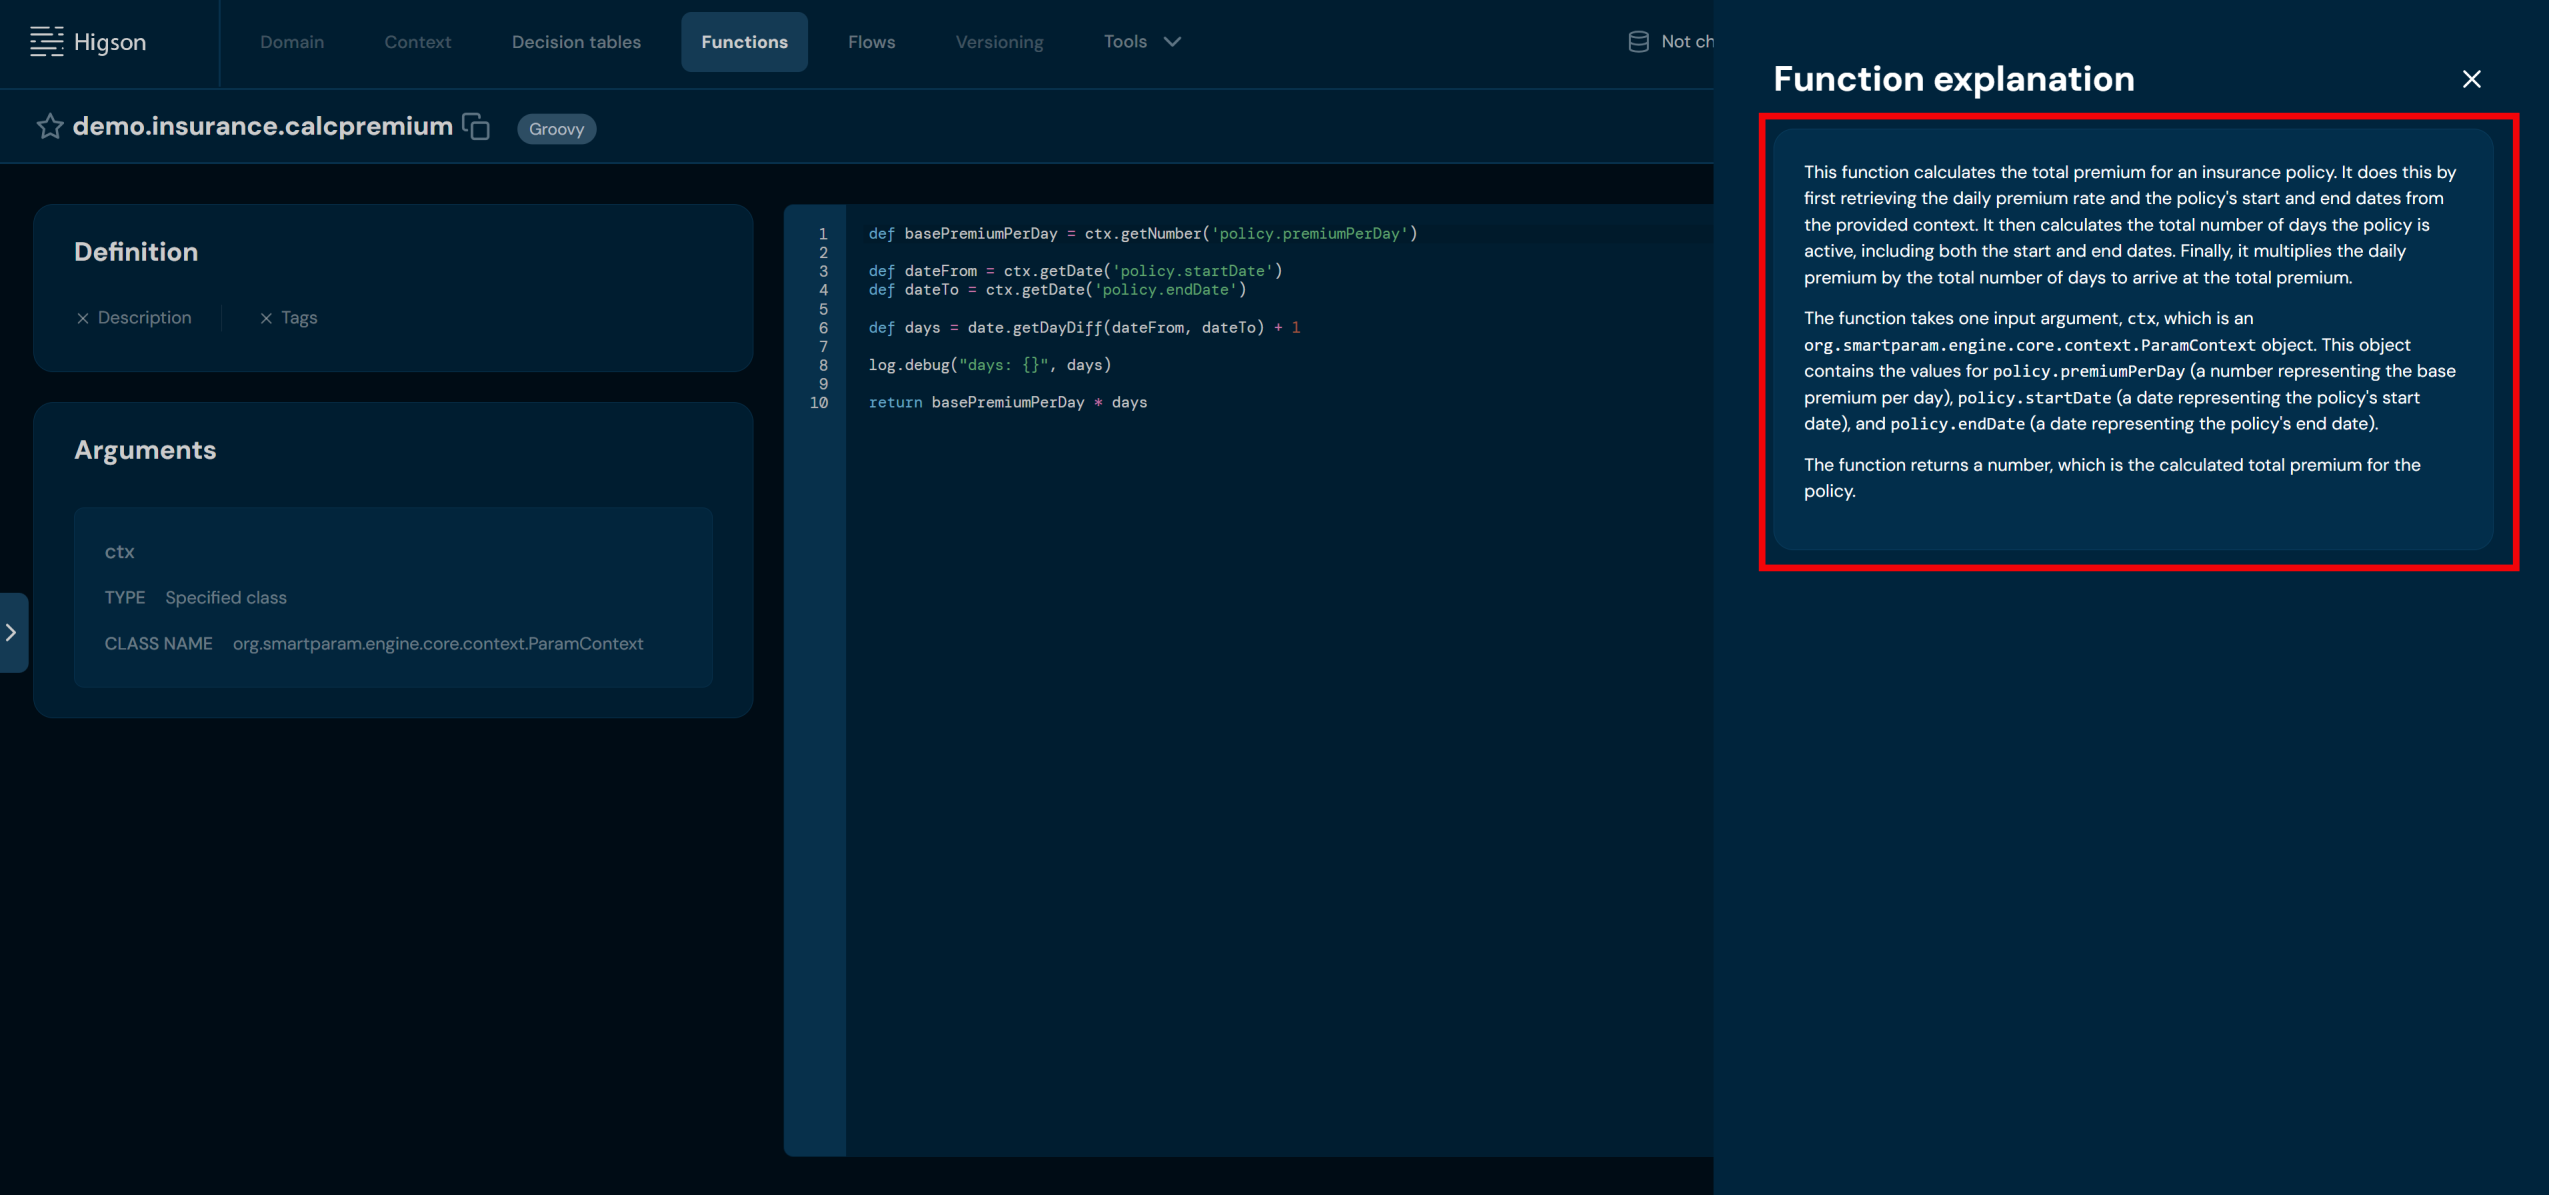
The explanation covers the function’s purpose, its input arguments and their types, and the value it returns.
Generate Function#
Generate function allows you to describe the desired behavior in natural language and receive a generated Groovy function body.
To use Generate function:
- Open any function from the Functions list.
- In the actions bar, click AI.
- Select Generate function from the dropdown.
- In the Describe the function dialog, enter a description of what the function should do in the Description field (required).
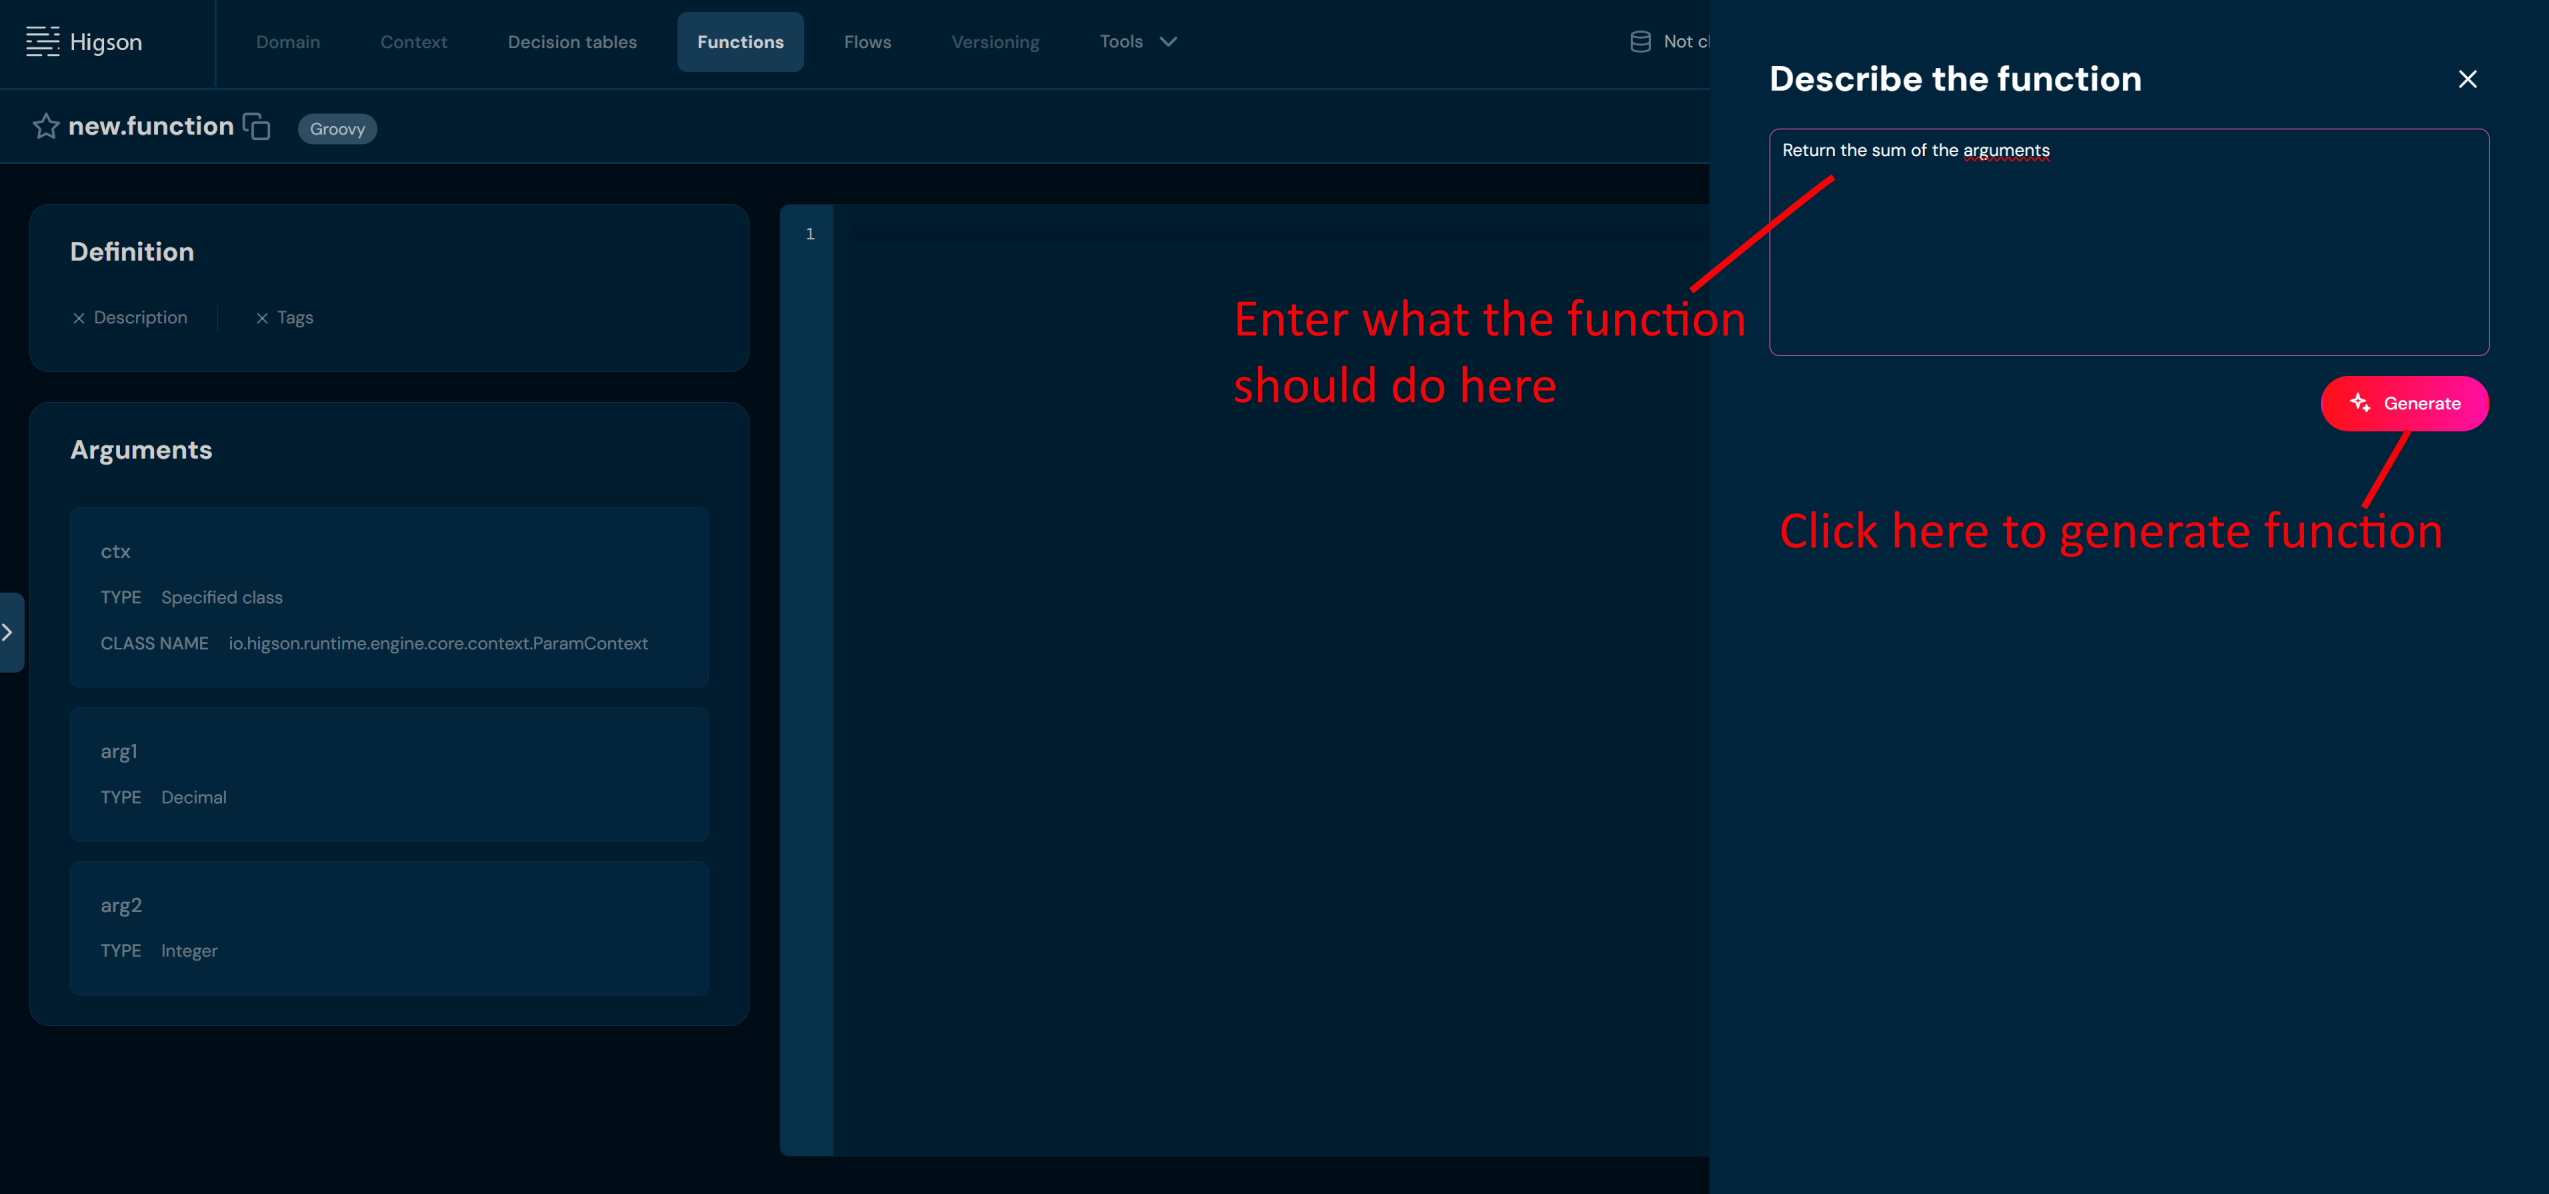
- Click Generate.
The AI generates a Groovy function body based on your description. The result is placed in the function body editor, where it can be reviewed before saving. You can discard the changes by closing the window.
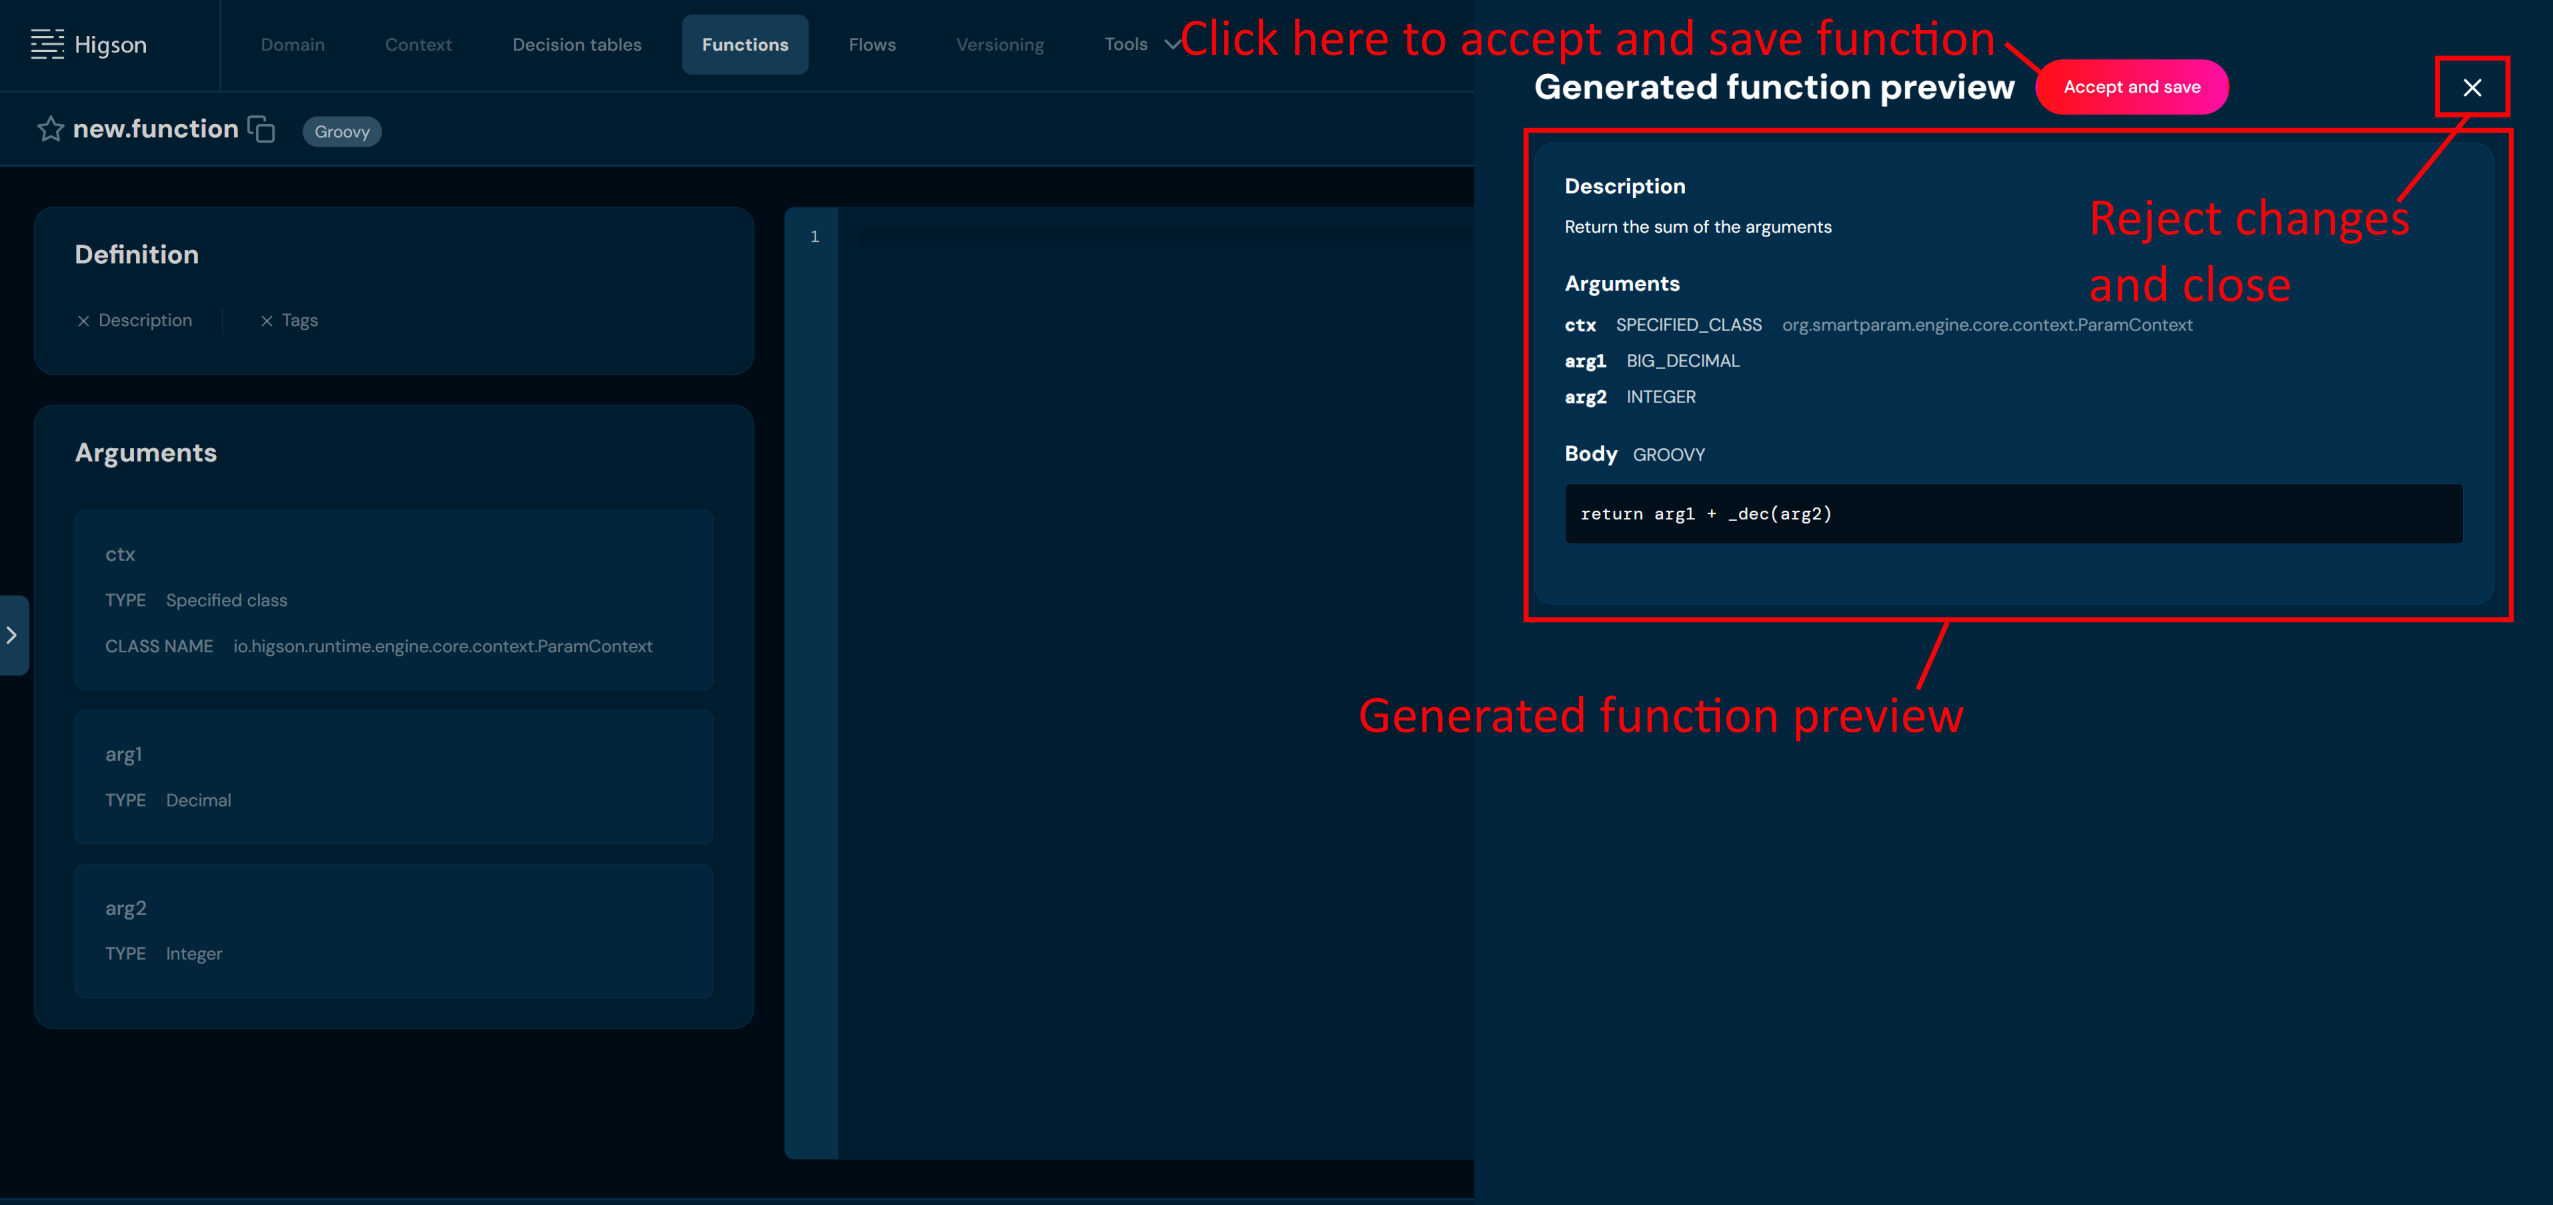
AI Features in Decision Tables#
On the Decision table details screen, the AI button (✦ AI) is available in the actions bar. Clicking it opens a dropdown menu with two AI actions.
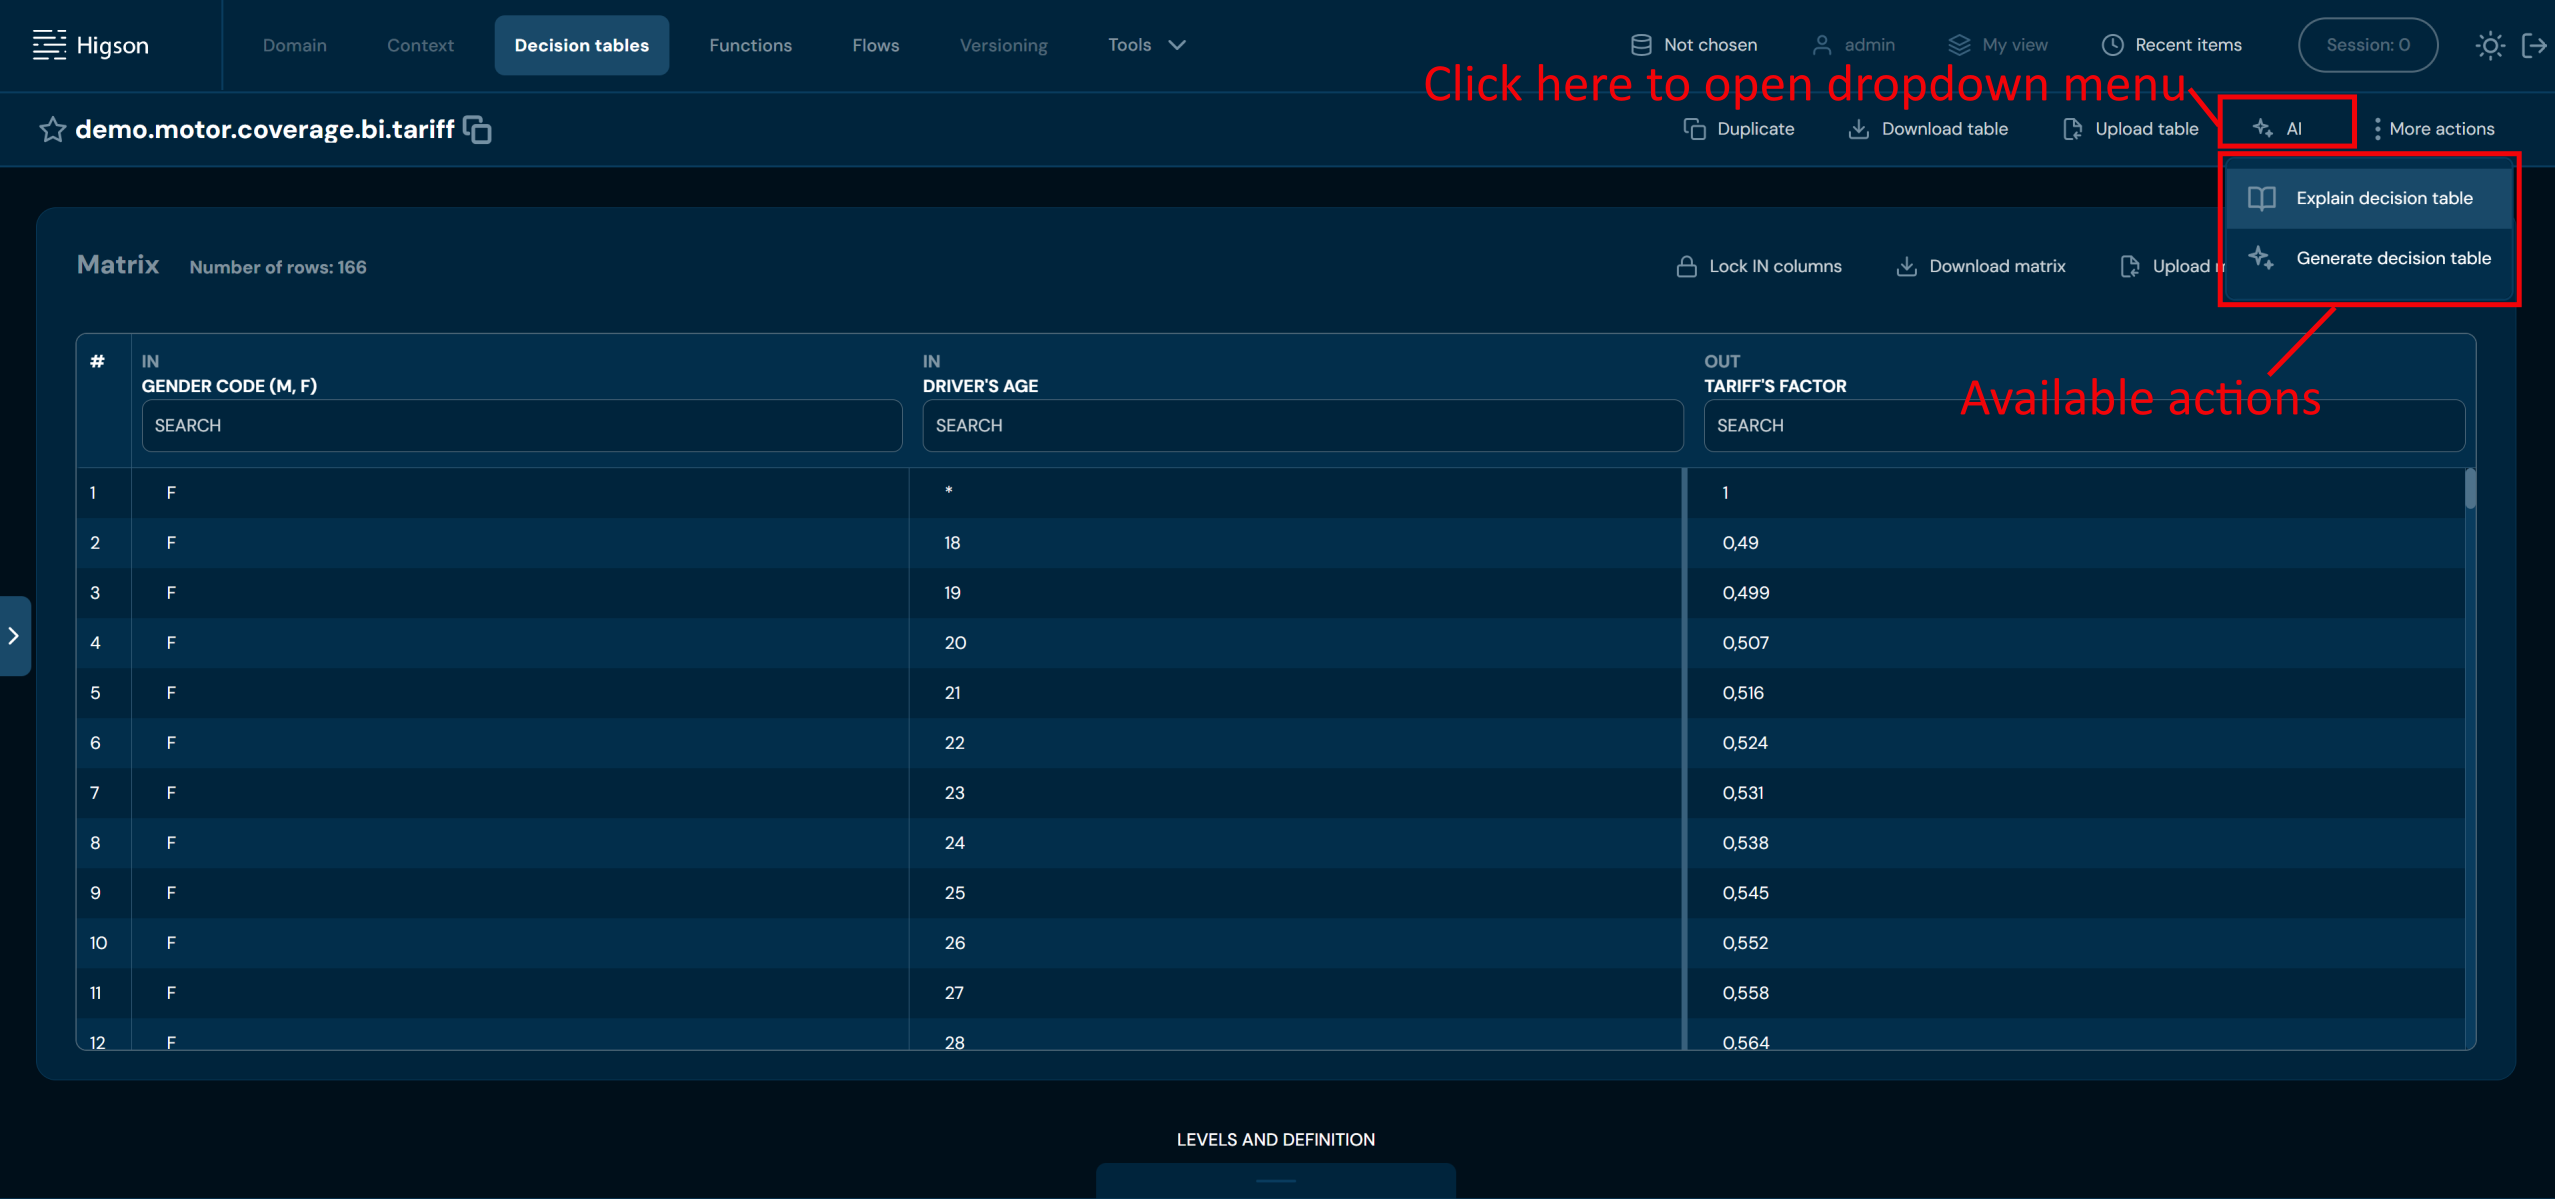
Explain Decision Table#
Explain decision table generates a plain-language description of the selected decision table — its inputs, outputs, and the logic it encodes.
To use Explain decision table:
- Open any decision table from the Decision tables list.
- In the actions bar, click AI.
- Select Explain decision table from the dropdown.
- The Decision table explanation dialog appears with the AI-generated description.
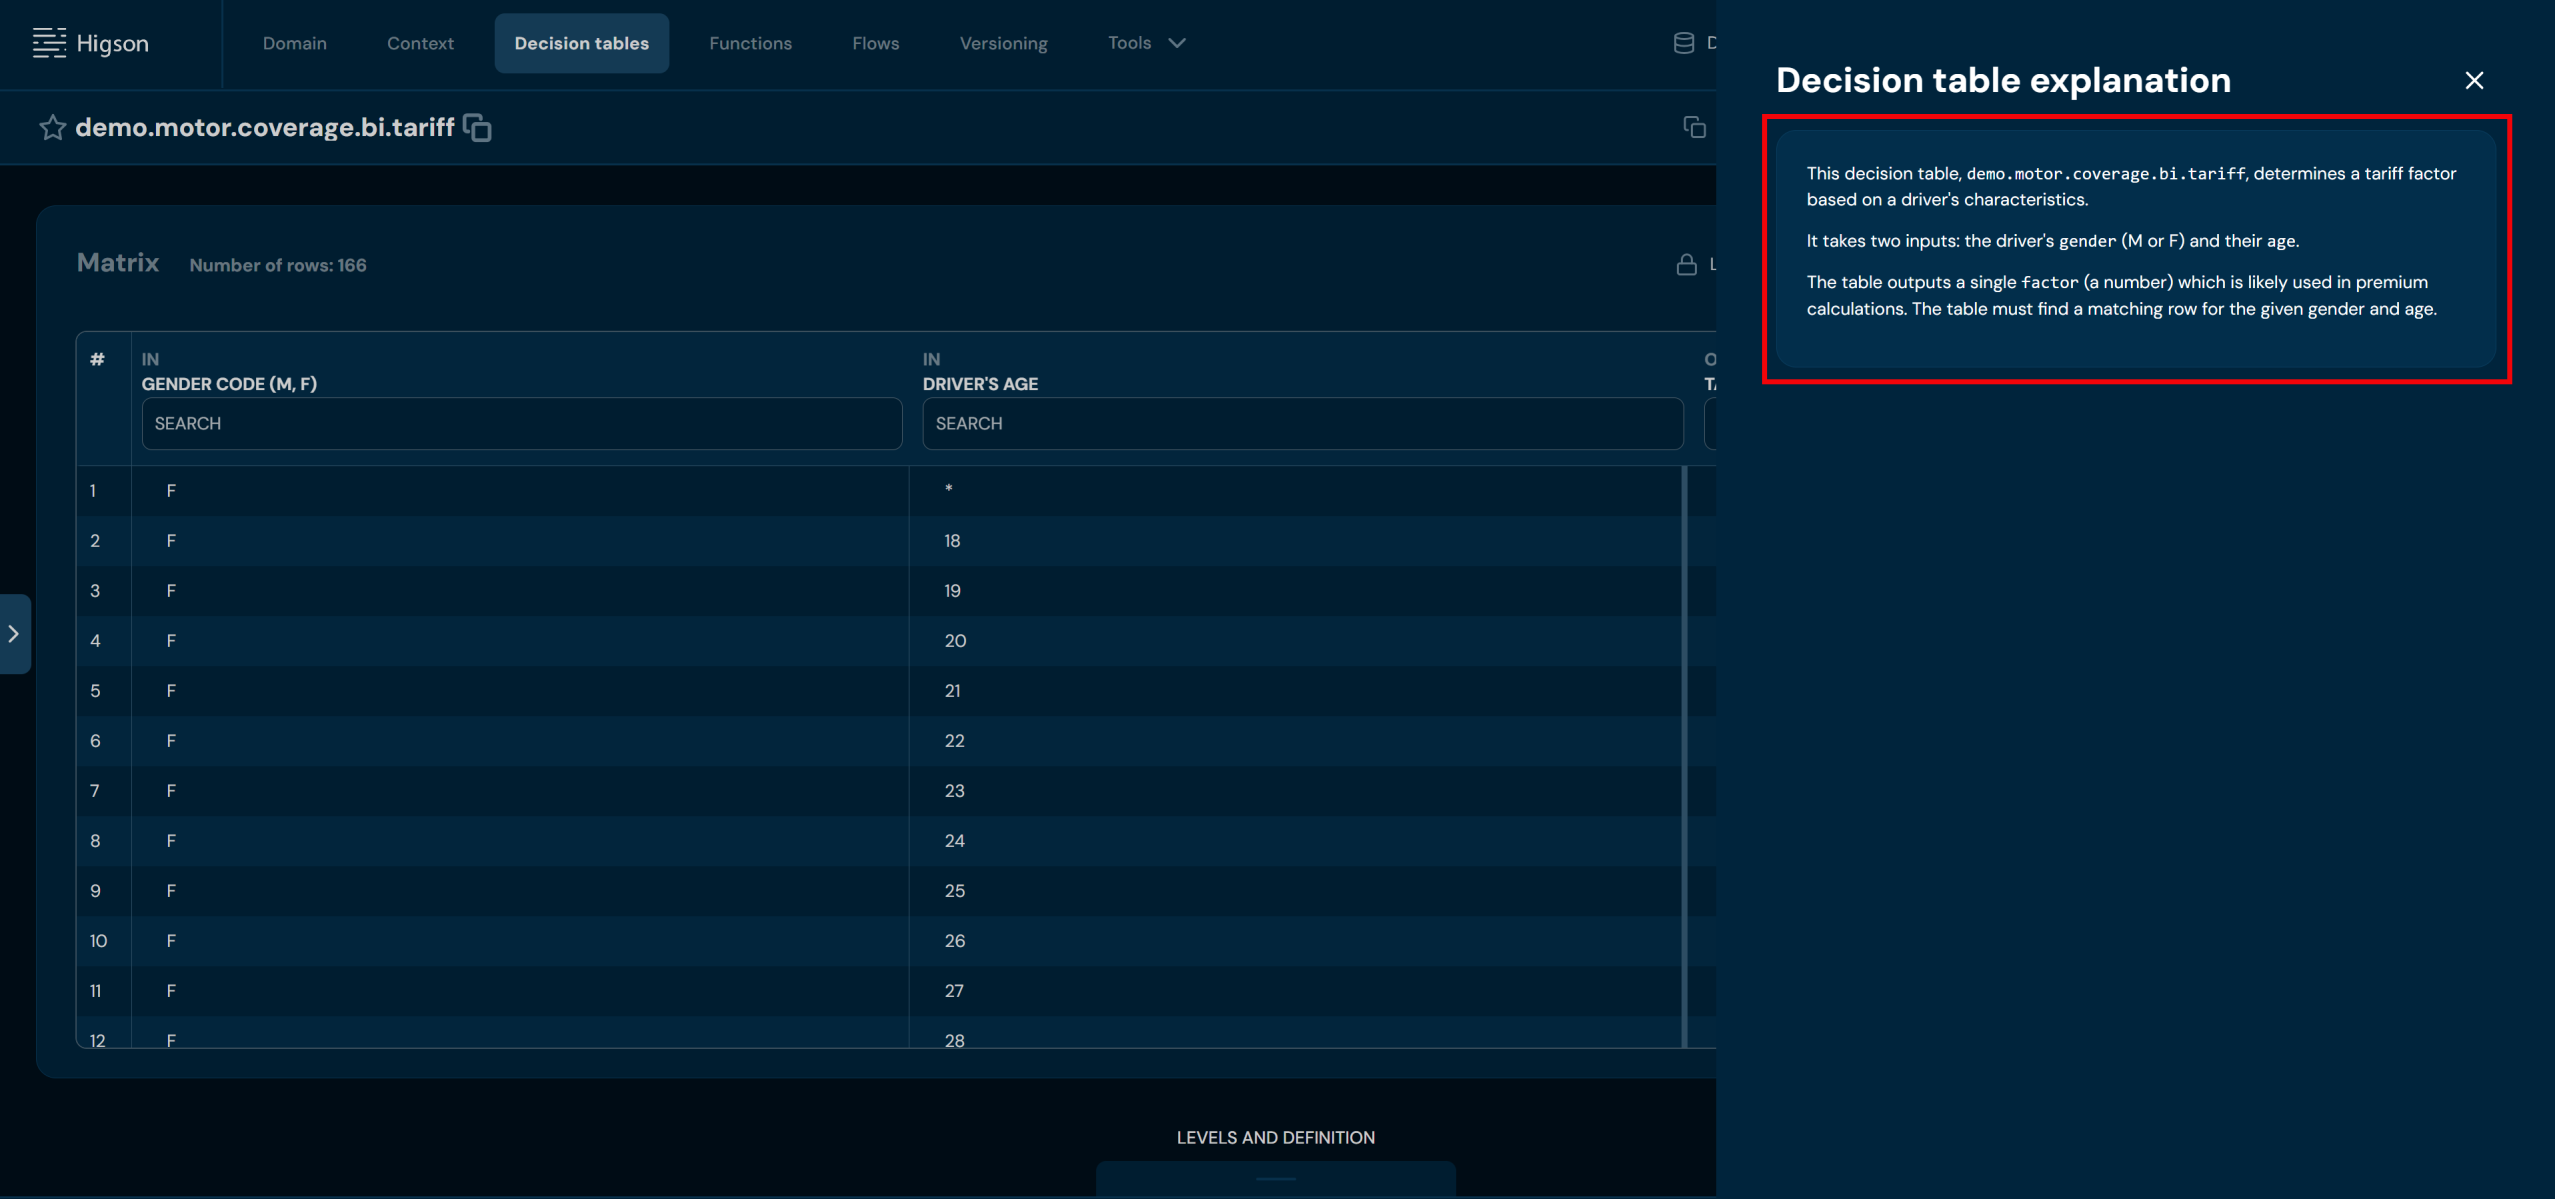
The explanation covers the table’s purpose and the meaning of each IN and OUT column.
Generate Decision Table#
Generate decision table allows you to describe the desired decision logic in natural language and receive a generated table — including the column definition and matrix rows.
To use Generate decision table:
- Open any decision table from the Decision tables list.
- In the actions bar, click AI.
- Select Generate decision table from the dropdown.
- In the Describe the decision table dialog, enter a description of the business logic the table should implement in the Description field (required).
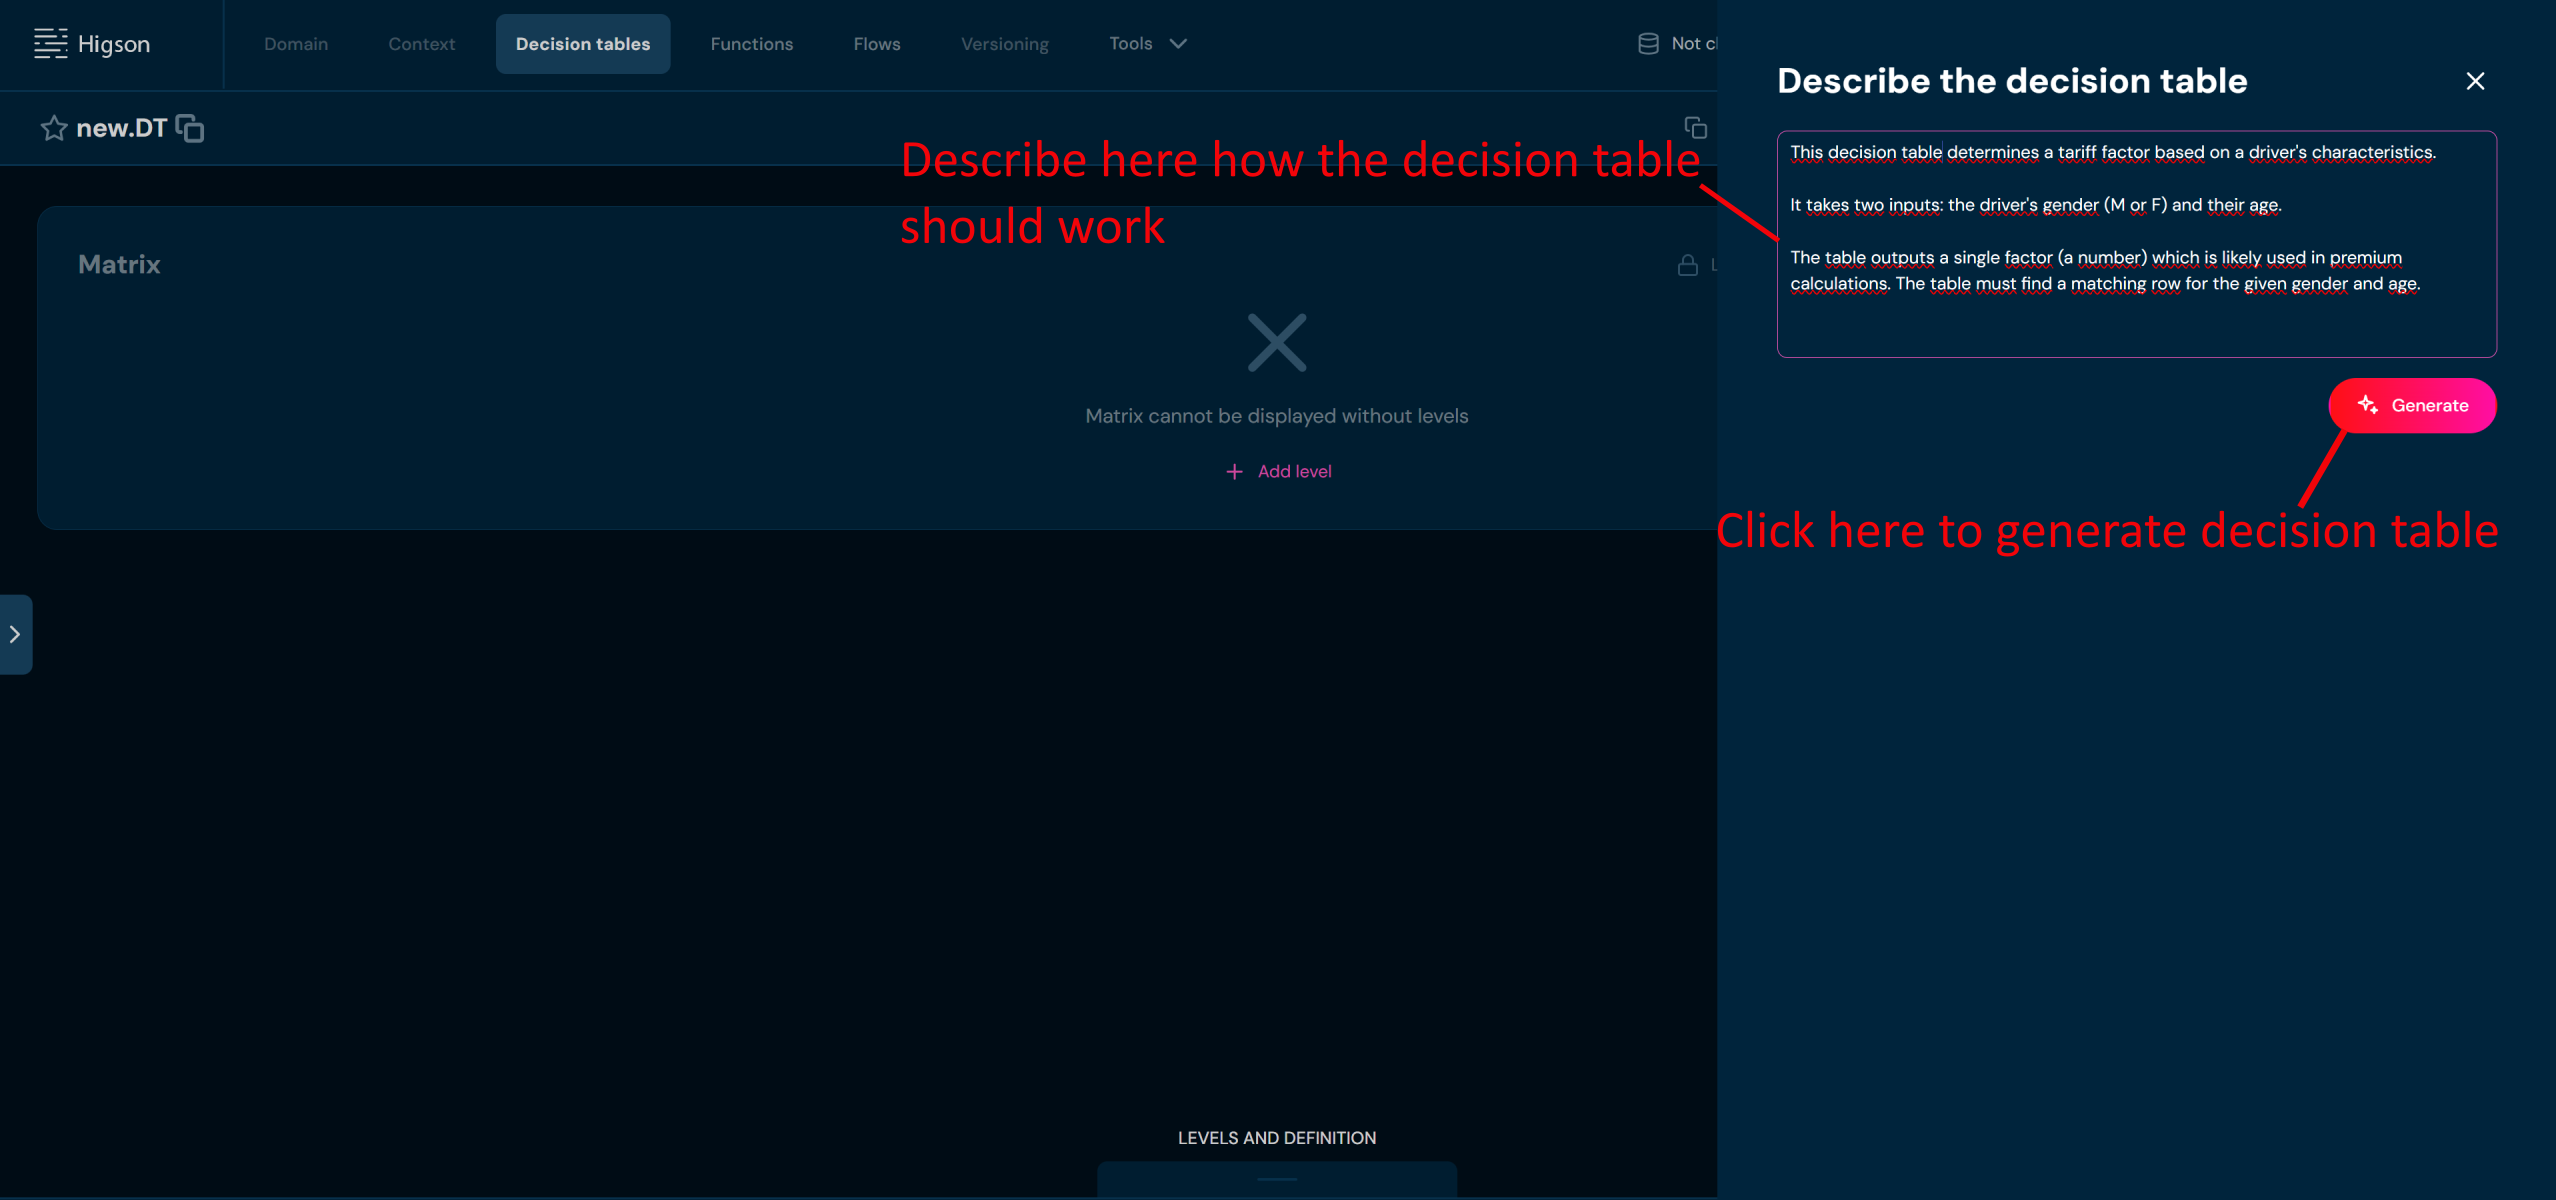
- Click Generate.
The AI generates the table structure and fills in the matrix rows based on your description. The result is displayed for review before saving. You can discard the changes by closing the window.
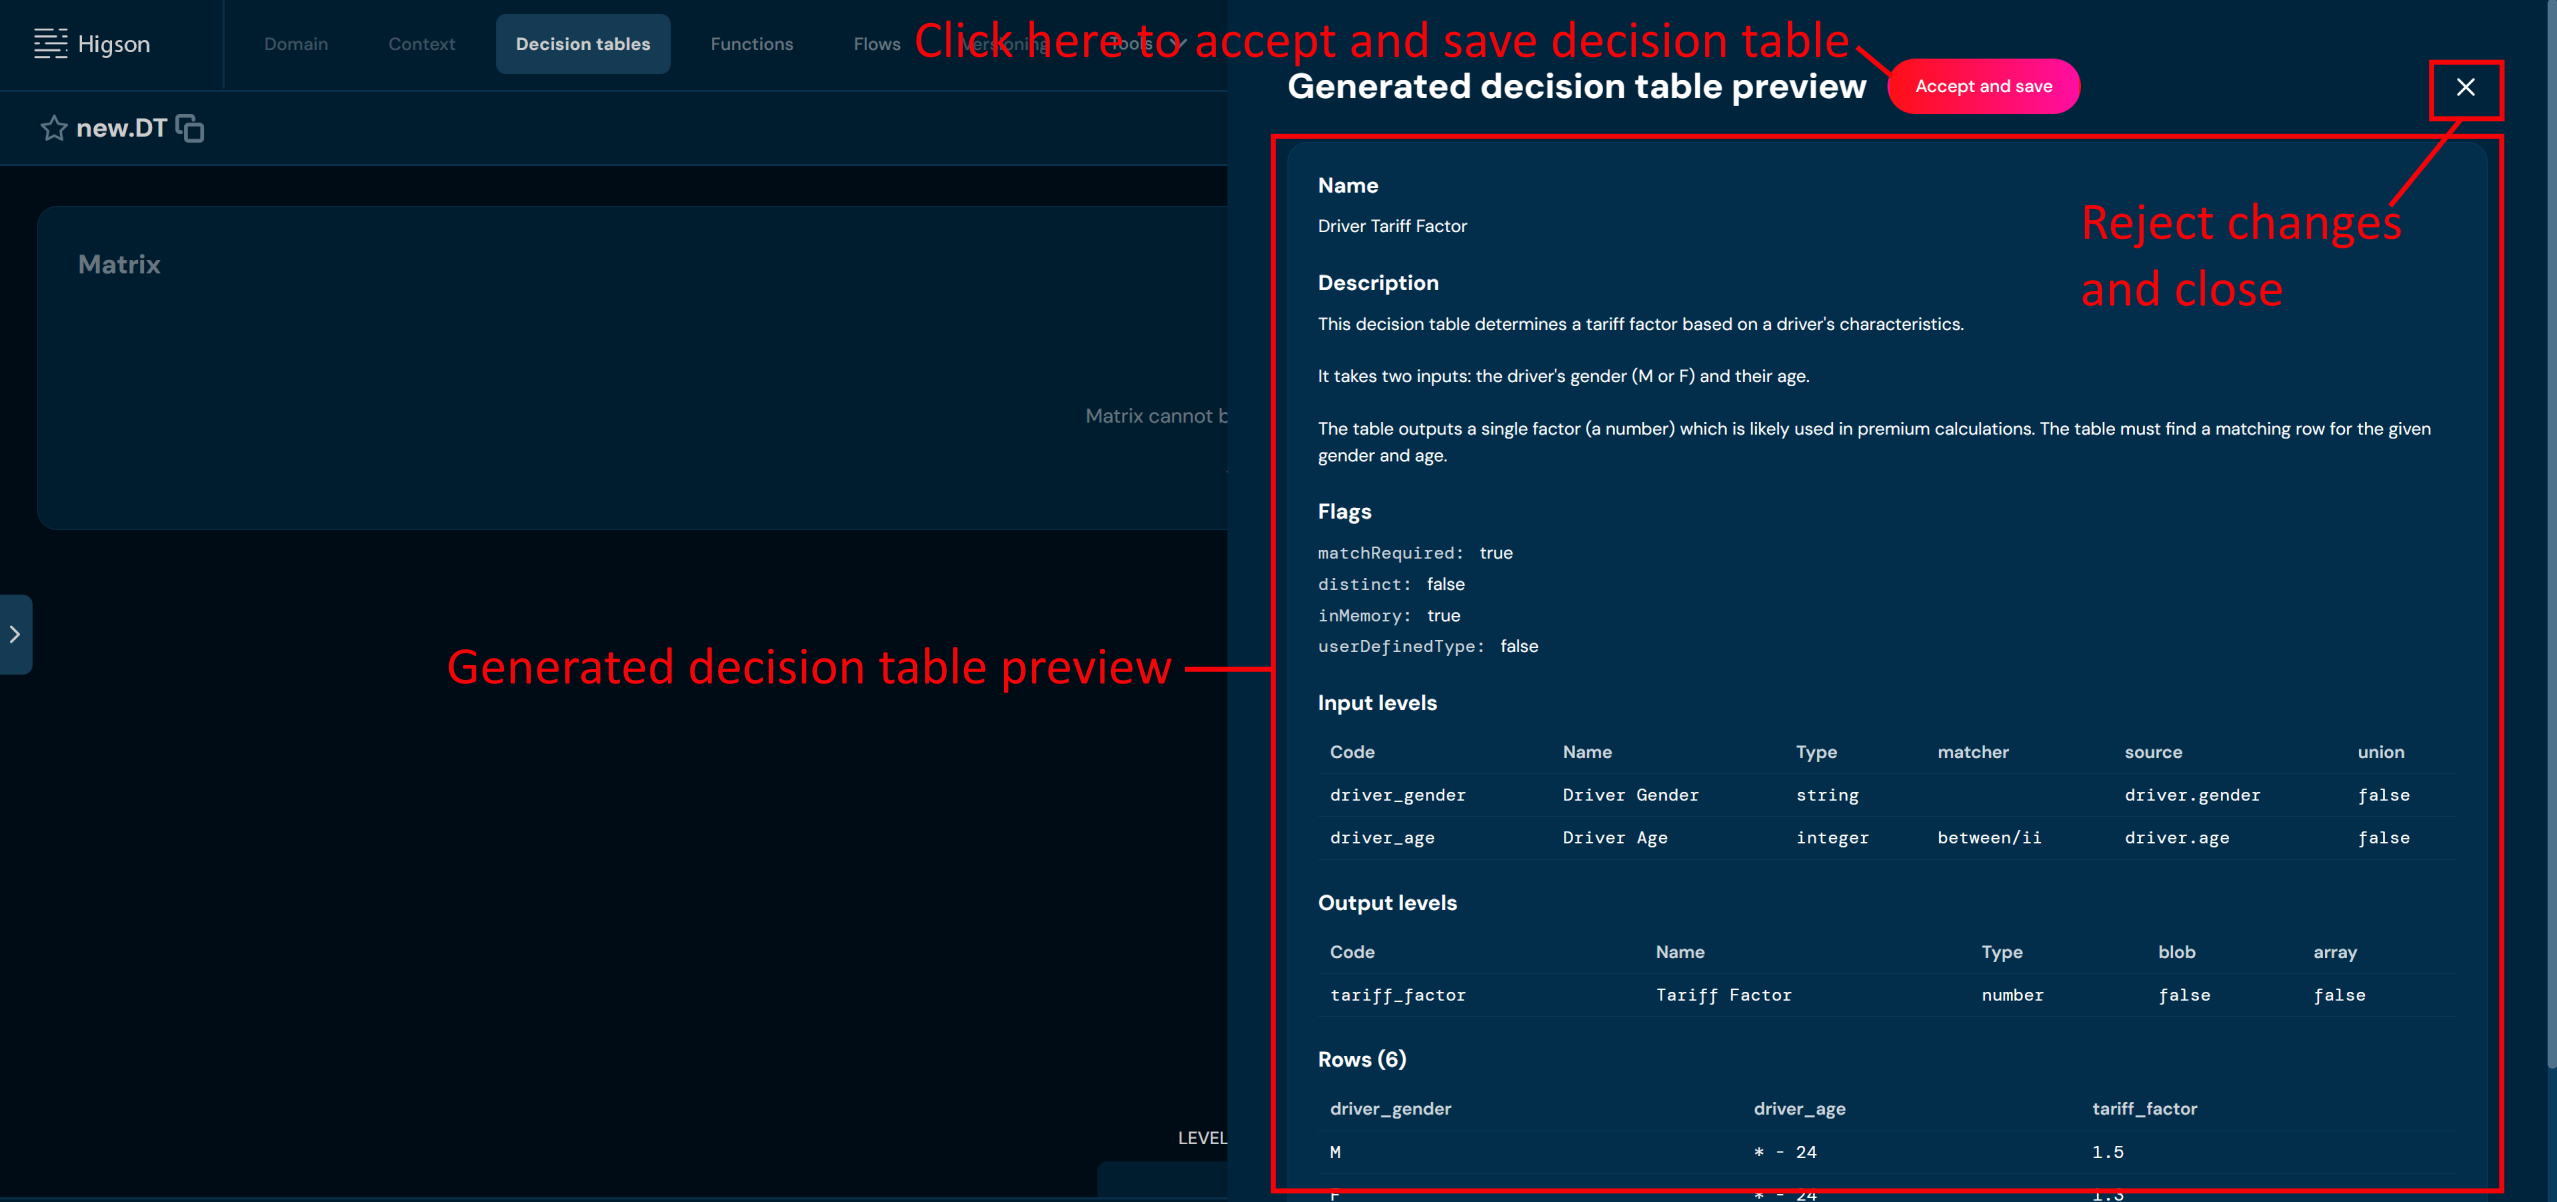
The new Higson MCP Server is a built-in bridge between your AI assistant and your live rules engine.
MCP (Model Context Protocol) is the emerging open standard for connecting AI assistants to the systems where real work happens: letting tools like Claude Code, etc securely read, understand, and act within your systems instead of guessing from the outside.
What it means in real life?:
- Explore and search every element in your configuration
- Create and edit decision tables, Groovy/Python functions, domain models, context types and flows
- Test before you publish run test cases and read the results
- Approve before it goes live - changes are staged for explicit sign-off
Because business rules are too important to hand off blindly, control is built in: AI changes are staged, then reviewed and published by a person - never applied on their own. Access runs through a secure token you manage.
There are dedicated skills available for the MCP Server that make it easier to work with Higson and speed up the assistant’s implementation in everyday tasks. To learn how to enable and configure the MCP Server, see MCP Server in the Technical Documentation.
The higson-plugins repository bundles a Higson skill with ready-made MCP server configuration for Claude Code and OpenAI Codex, letting your coding agent read, change, test, and publish Higson decision tables, functions, domain, and flows through natural-language requests.
Technical Documentation
Bootstrap
Higson Studio is a Java application and can be run at JVM machine equipped with:
- at least Java 17 JRE,
- 4 GB of RAM,
- 2 CPU,
- Linux, Windows or macOS machine.
Docker#
Higson Studio distribution only contains H2 and PostgreSQL drivers, the others have to be added manually. Every image contains description how to configure JDBC driver.
Full docker repository is available here.
Prerequisites:
- Java 17
- Maven 3.x
- Higson Studio
We will show how to configure Higson Engine using Spring Boot configuration
Maven Configuration#
Apart from standard spring boot dependencies, you need to include higson-runtime dependency, available in Maven Central.
|
|
Another needed dependency is the JDBC driver to the database of choice, e.g., H2, Oracle, Postgres, MsSQL or MySQL and database connection pool managing library:
|
|
Properties#
Add Higson Runtime data source properties to application.properties file.
|
|
Properties are available here
Spring Configuration#
Add required beans to your java class annotated with @Configuration:
|
|
The application is ready to start. After successfully starting the application, you can see similar log output:
Run Higson Runtime REST in Test Mode Using Snapshot-Based Configuration#
It is possible to run the Higson Runtime in test mode using a configuration loaded directly from a snapshot. In this mode:
- The runtime does not require a database connection, as the entire configuration is sourced locally from the snapshot.
- The environment operates in read-only mode.
- Watchers are disabled, as no changes to the configuration are expected.
- Test mode is mutually exclusive with development mode and cannot be used simultaneously.
- This setup does not support tables from external data sources.
To use runtime in test mode, you need the following configuration:
private String pathToSnapshot = "C:\Users\UserName\Downloads\snapshot.zip"

@Bean(destroyMethod = "destroy")
public HigsonEngineFactory getHigsonEngineFactory() {
    log.info("Engine factory begin creation...");
    HigsonEngineFactory higsonEngineFactory = new HigsonEngineFactory();
    higsonEngineFactory.setDataSource(new HigsonSnapshotDataSource(new File(pathToSnapshot)));
    return higsonEngineFactory;
}

@Bean
public HigsonEngine getHigsonEngine(HigsonEngineFactory higsonEngineFactory) {
    log.info("Engine begin creation...");
    return higsonEngineFactory.create();
}
Prerequisites#
- Java 17
- Maven 3.x
- Spring Boot 3
Maven Configuration#
Apart from standard Spring Boot dependencies, you need to include spring-boot-starter-higson-runtime dependency,
available in Maven Central.
Add spring-boot-starter-higson-runtime dependency to pom.xml file:
|
|
Another needed dependency is the JDBC driver to the database of choice, e.g., h2, oracle, mssql, postgresql:
|
|
Properties#
With the above setup, all the configuration that is needed is application.yml file with database properties:
|
|
If required properties are not available, spring-boot-starter-higson-runtime will return an adequate message.
To configure external sources, you have to set comma separated list of external sources names and connection properties for each of them. You can do it by using the properties below.
|
|
Using Auto-Configured HigsonEngine#
After successfully configuring properties while starting the application, spring will create HigsonEngine bean available in the spring application context, then which can be injected anywhere:
|
|
Overriding Default Configuration#
To override default auto-configuration, you need to define HigsonEngine bean in the @Configuration class:
|
|
Existing auto-configured DataSource and HigsonRuntimeProperties can be used simply by injecting them:
|
|
Disabling Higson#
If you want to disable higson temporarily for some reason, you can do it with property higson.runtime.enabled set
to false.
|
|
Higson Runtime REST is a web application that provides REST API for decision table/function/domain access. It is a REST implementation of Java’s Higson Runtime jar. It is available in two forms:
- Spring boot’s executable jar, available here: https://www.higson.io/docs/d-success
- Docker image, available here: https://hub.docker.com/repository/docker/decerto/higson-runtime-rest
Environment#
Higson Runtime REST is a Java application and can run with any Java 8 or higher on Windows, MacOS X and Linux/Unix.
CLI#
To run Runtime-Rest from cli you must pass four properties:
- loader.path - path to jdbc driver
- higson.database.url
- higson.database.username
- higson.database.password
Download latest version of higson runtime rest and database driver (postgresql for example)
|
|
Docker#
To run Higson Runtime REST as a docker image, there is need to build a separate docker image based on decerto/higson-runtime-rest image, add your database driver jar and run Higson Runtime REST jar with additional path.
Example:
|
|
Additionally, you need to pass 3 properties:
- higson.database.url
- higson.database.username
- higson.database.password
An invocation example:
|
|
Using Higson Runtime REST#
This short tutorial will guide you through the process of running Higson Runtime REST as a docker image and invoking decision table/function/domain element.
Prerequisites#
In order to run examples from this article you will need:
- running docker. See https://docs.docker.com/installation/#installation for details on setting Docker up for your machine.
- a favorite REST API Client to send requests such as Postman
- a favorite internet browser
Setting Up Docker Images#
The tutorial will be based on our motor insurance. It consists of the insurance web application, Higson Studio, and Higson Runtime REST modules. There is a docker-compose.yml file that makes the whole application easy to run. Just download a project from GitHub, open terminal in that directory, and run the following command:
|
|
If you look closely inside the docker-compose.yml file, you will see that Higson Runtime REST docker image needs three additional properties to be passed to run properly:
- higson.database.url : JDBC url to Higson’s database
- higson.database.username : Higson’s database username
- higson.database.password : Higson’s database password
If you want to connect to other database types such as Oracle, Postgres, MsSQL or MySQL, then you must build your own docker image and provide your database driver. Here’s a Docker file example that copies custom database driver and runs Runtime REST application:
|
|
- Demo app should be available at
localhost:48080/demo - Higson Studio should be available at
localhost:38080/higson/app - Higson Runtime REST should be available at
localhost:8081
To access higson services use followed credentials: User: admin Password: admin
Getting Decision Table Value#
We will be using a decision table examples from this article. Let’s get the value of a demo.motor.coverage.position decision table for the BI coverage code. Here’s the request we’re going to use:
|
|
It consists of 2 main parts: ctx and elements. The former represents the input values we want to pass to Higson. We can pass there simple as well as complex objects. The latter is a list of Higson elements to invoke.
When we send this request to the localhost:8081/api/execution/invoke url, we should receive the following response:
|
|
We receive a list of executed Higson elements with corresponding values.
Let’s see how the response will look like if more than one row will be returned from the decision table. In this example, we are going to use the demo.motor.dict.vehicle.available decision table. Here’s the request:
|
|
Besides a new decision table (parameter) code and context property, you can see how to invoke more than one Higson element in a single JSON request. Let’s see the response:
|
|
As we see, each element has its own JSON section in returned array. What’s more, each row in the decision table’s matrix corresponds to one complex element in the resultValue array.
Calling Function#
Let’s get the computed value of the demo.insurance.calc.premium function. Here’s the request we’re going to use:
|
|
It’s basically the same request as the one used in the decision tables section. However, we pass here three context key-value pairs instead of one. Here’s the response we should get by calling the localhost:8081/api/execution/invoke endpoint:
|
|
Again, the same response format as in the decision table’s.
Accessing Domain Attributes#
Last but not least, let’s see how to access domain attributes through invoke API. We’ll be using examples from this article. Let’s see how to evaluate a position attribute of a coverage BI domain element:
|
|
The main difference between domain element and decision table/function is the presence of 2 additional attributes: profileCode and attributeCode, which names are self-describing. Let’s look at the response:
|
|
As we see, the response format is the same as in the decision table/function section.
If you want to learn more or discover other available endpoints, there is a Runtime REST swagger online documentation available at: http://localhost:8081/swagger-ui/index.html.
Accessing Swagger UI#
The Swagger UI link is generated automatically based on the installation type (Docker or Bundle). The Swagger UI is accessible at the following address format:
http://[host]:[port]/[appname]/[apiname]/swagger-ui/index.html
For Docker-Based Deployments#
When the application is running in a Docker environment, the URL components are determined as follows:
- host: localhost (or the container’s IP address if accessed externally)
- port: retrieved from the server.port property (e.g., 8080)
- apiname: the value of server.servlet.context-path from the application’s configuration (e.g., /api)
Example: http://localhost:8080/api/swagger-ui/index.html
For Bundle Installations#
In the case of a bundle installation:
-
host: localhost
-
port: retrieved from the conf/server.xml configuration file by locating a line such as:
<Connector port="38080" protocol="HTTP/1.1" ... />In this example, the port is 38080.
-
appname and apiname: determined based on the directory structure within the webapps folder. For version 4.1, the typical folder name is higson#api, which translates to:
- appname = higson
- apiname = api
Example: http://localhost:38080/higson/api/swagger-ui/index.html
By following these rules, you can easily determine the correct Swagger UI URL regardless of the deployment method.
Generating Runtime REST JSON from Tester#
To generate a request to Runtime Rest, navigate to Tools -> Tester. Click “Add Test”, then add the elements for which you want to generate an example request. In the example below, the following elements have been selected:
- Decision Table,
- Function,
- Domain Element,
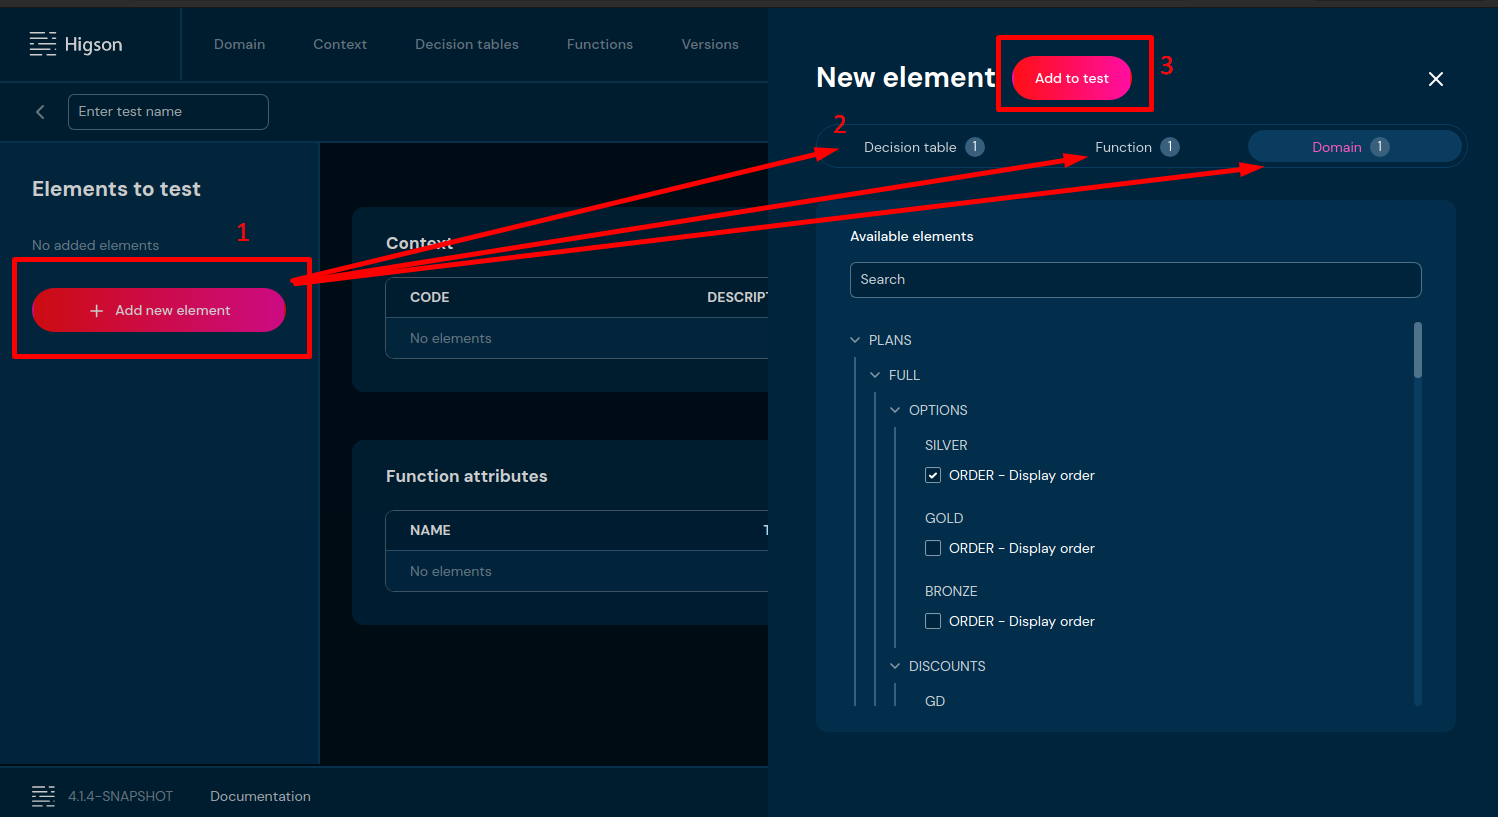
- Click “Add element” on the left side.
- Select the elements for which you want to generate an example request.
- Add the selected elements to the test.
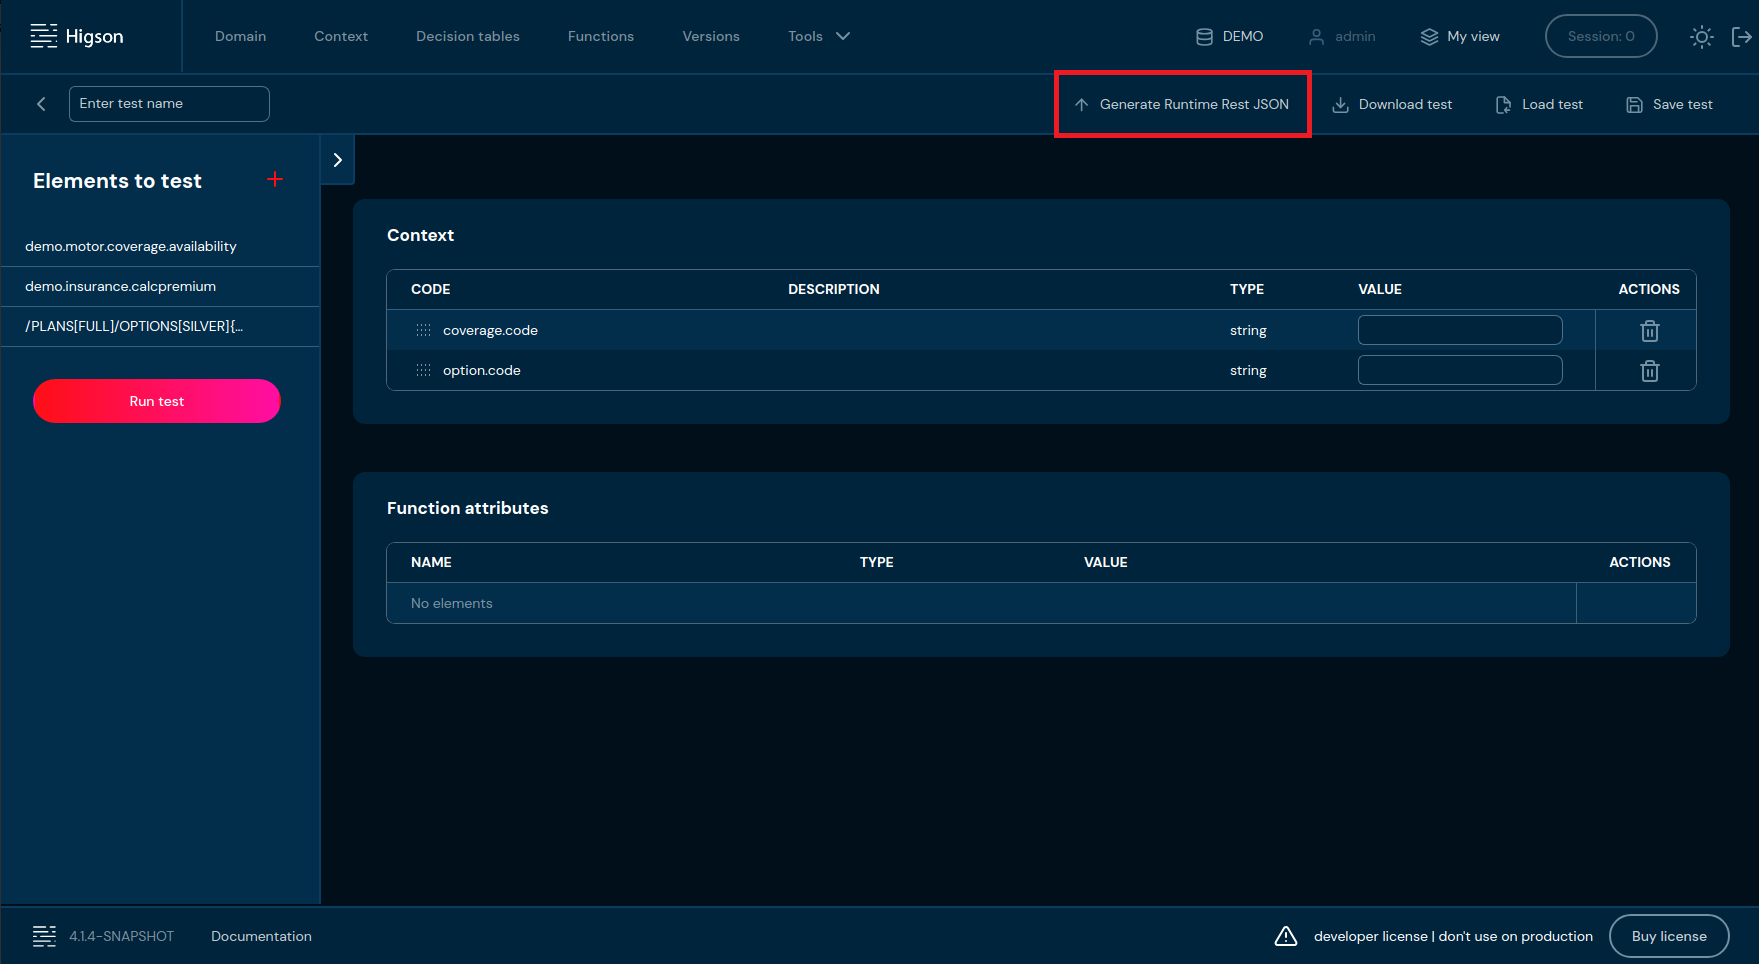
Now you can click the “Generate Runtime Rest JSON” button, which will generate an example request without context values.
|
|
If you need to generate an example request with context values, you must first run the test by clicking “Run Test” button. This will populate the Context table with all available context values.
Next, fill in the desired context values and click “Run Test” again.
Then click “Generate Runtime Rest JSON”.
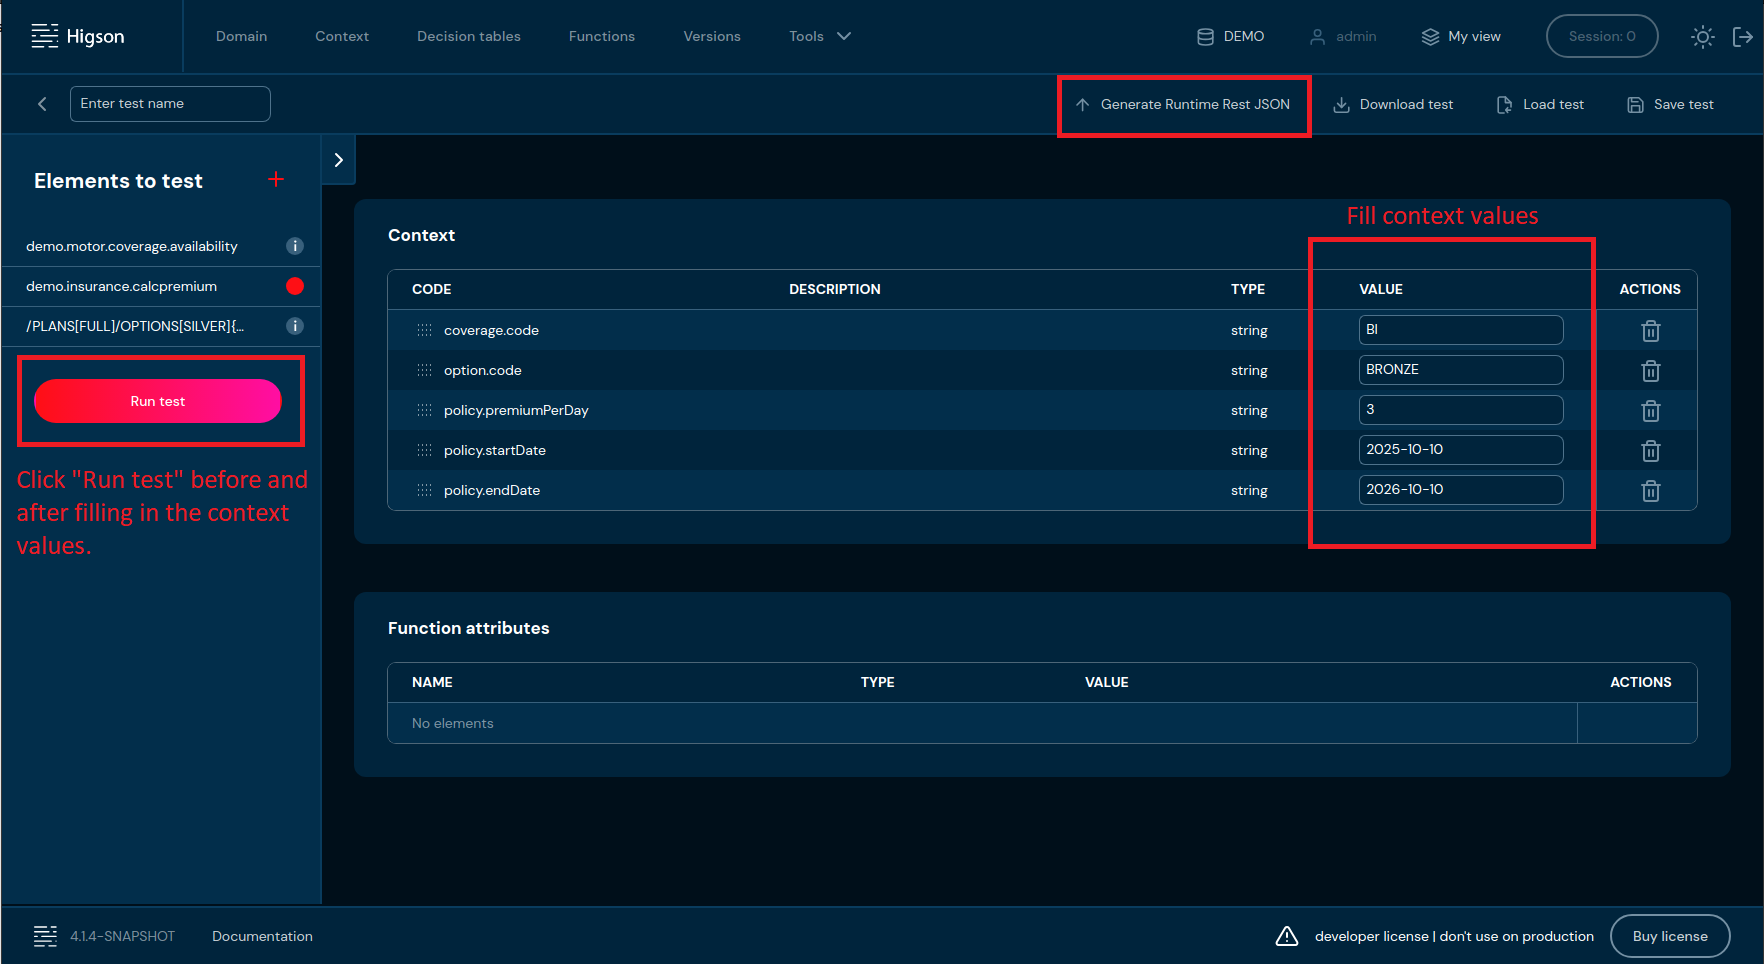
Now the generated example request will include the values from the context.
|
|
Cache Mechanism and the Role of Watchers in Higson Runtime REST#
Higson Runtime REST uses a caching mechanism to store computation logic, which significantly contributes to its high performance. The actual computation logic (e.g., functions or decision tables) is stored in a database managed by Higson Studio.
What happens when a Higson Studio user modifies a business configuration — for example, by editing a decision table? To ensure that Higson Runtime REST always operates on up-to-date data, the system must detect these changes and refresh its cache accordingly.
This is where watchers come in — specialized components within Runtime REST responsible for monitoring the state of business configuration in Higson Studio. By default, every 3 seconds, watchers check the current state of the Higson Studio database. If they detect any change in the configuration (e.g., in decision tables, functions, etc.), they signal the need to reload the cache. In response, Higson Runtime REST refreshes the configuration, ensuring that all computations are performed using the most recent data.
Thanks to this mechanism, Higson Runtime REST:
- Always holds an up-to-date business configuration in cache,
- Eliminates delays caused by accessing the database during computation,
- Ensures consistency between Higson Studio and the runtime environment.
Types of Watchers#
Higson Runtime REST defines nine types of watchers, categorized by the type of business configuration element they monitor:
- Decision tables
- Functions
- Versions
- Profiles
- My view - in dev-mode
- Domain
- Developer mode - unpublished changes in session
- Timeline
- Refresh
Each watcher is responsible for tracking changes in a specific resource type, enabling precise and efficient synchronization. Each watcher operates independently. This means that a change in one type of element (e.g., a decision table) does not trigger unnecessary cache reloads for other unrelated areas. This design significantly improves the system’s operational efficiency.
Watcher Properties#
The table below lists the properties related to each watcher type, along with their default values (expressed in seconds).
| Property | Description | Default value |
|---|---|---|
| Decision tables | ||
| higson.runtime.watcher.param-watcher-config.delay | Time after which the watcher starts following application launch [s]. | 10 |
| higson.runtime.watcher.param-watcher-config.pause | Interval at which the watcher monitors the state of decision tables. | 3 |
| higson.runtime.watcher.param-watcher-config.errorPause | Duration for which the watcher is suspended after a watcher error occurs. | 30 |
| higson.runtime.watcher.param-watcher-config.force | Set the time after which the watcher will force a full cache synchronization of decision tables. Currently only the param-watcher supports this setting. | 60 |
| Functions | ||
| higson.runtime.watcher.function-watcher-config.delay | Time after which the watcher starts following application launch [s]. | 10 |
| higson.runtime.watcher.function-watcher-config.pause | Interval at which the watcher monitors the state of functions. | 3 |
| higson.runtime.watcher.function-watcher-config.errorPause` | Duration for which the watcher is suspended after a watcher error occurs. | 30 |
| Versions | ||
| higson.runtime.watcher.version-watcher-config.delay | Time after which the watcher starts following application launch [s]. | 10 |
| higson.runtime.watcher.version-watcher-config.pause | Interval at which the watcher monitors the state of versions. | 3 |
| higson.runtime.watcher.version-watcher-config.errorPause | Duration for which the watcher is suspended after a watcher error occurs. | 30 |
| Profiles | ||
| higson.runtime.watcher.profile-watcher-config.delay | Time after which the watcher starts following application launch [s]. | 10 |
| higson.runtime.watcher.profile-watcher-config.pause | Interval at which the watcher monitors the state of profiles. | 3 |
| higson.runtime.watcher.profile-watcher-config.errorPause | Duration for which the watcher is suspended after a watcher error occurs. | 30 |
| My view - in dev-mode | ||
| higson.runtime.watcher.user-region-version-watcher-config.delay | Time after which the watcher starts following application launch [s]. | 10 |
| higson.runtime.watcher.user-region-version-watcher-config.pause | Interval at which the watcher monitors the state of users perspective (in Higson Studio set under the My View button). | 3 |
| higson.runtime.watcher.user-region-version-watcher-config.errorPause | Duration for which the watcher is suspended after a watcher error occurs. | 30 |
| Domain | ||
| higson.runtime.watcher.domain-watcher-config.delay | Time after which the watcher starts following application launch [s]. | 10 |
| higson.runtime.watcher.domain-watcher-config.pause | Interval at which the watcher monitors the state of the domain. | 3 |
| higson.runtime.watcher.domain-watcher-config.errorPause | Duration for which the watcher is suspended after a watcher error occurs. | 30 |
| higson.runtime.watcher.domain-watcher-config.invalidate | Works in tandem with higson.runtime.watcher.domain-watcher-config.time-unit — defines how long the domain value may remain unchanged in the cache. |
24 |
| higson.runtime.watcher.domain-watcher-config.time-unit | Works in tandem with higson.runtime.watcher.domain-watcher-config.invalidate — defines how long the domain value may remain unchanged in the cache. |
HOURS |
| Developer mode - unpublished changes in session | ||
| higson.runtime.watcher.dev-mode-watcher-config.delay | Time after which the watcher starts following application launch [s]. | 10 |
| higson.runtime.watcher.dev-mode-watcher-config.pause | Interval at which the watcher monitors the state of objects modified in session. | 1 |
| higson.runtime.watcher.dev-mode-watcher-config.errorPause` | Duration for which the watcher is suspended after a watcher error occurs. | 30 |
| Timeline | ||
| higson.runtime.watcher.schedule-runtime-watcher-config.delay | Time after which the watcher starts following application launch [s]. | 10 |
| higson.runtime.watcher.schedule-runtime-watcher-config.pause | Interval at which the watcher monitors the state of the version timeline. | 10 |
| higson.runtime.watcher.schedule-runtime-watcher-config.errorPause | Duration for which the watcher is suspended after a watcher error occurs. | 30 |
| Refresh | ||
| higson.runtime.watcher.refresh-watcher-config.delay | Time after which the watcher starts following application launch [s]. | 15 |
| higson.runtime.watcher.refresh-watcher-config.pause | Checks each cached decision table (in-memory index). Evicts decision table from cache if: - the decision table’s auto-refresh period has expired - the decision table’s max idle time exceeded |
10 |
| higson.runtime.watcher.refresh-watcher-config.errorPause | Duration for which the watcher is suspended after a watcher error occurs. | 30 |
Run Higson Using AMI#
Launch the AMI#
The latest Higson versions are available as AMI (Amazon Machine Images) at Amazon Marketplace.
Higson Studio#
Visit the Higson Studio Amazon Marketplace. You can read basic information about Higson Studio. Click Continue to subscribe and read Terms and Conditions. After getting yourself familiar with the license, click Continue to configuration. On the next screen, you can choose the Higson Studio version and region you want to launch your instance in. Next, click Continue to launch. Select Launch through EC2 in the Choose Action section.
Higson Runtime#
Visit the Higson Runtime Amazon Marketplace. You can read basic information about Higson Runtime. Click Continue to subscribe and read Terms and Conditions. After getting yourself familiar with the license, click Continue to configuration. On the next screen, you can choose the Higson Runtime version and region you want to launch your instance in. Next, click Continue to launch. Select Launch through EC2 in the Choose Action section.
Configure#
This step is required to be able to specify the user-data script, which allows passing environment variables to the application without the need to log in to the instance.
AWS Systems Manager Parameter Store#
By default, Higson Studio uses AWS Systems Manager Parameter Store to fetch properties at the start of the application. You need to specify AWS_ACCESS_KEY_ID and AWS_SECRET_KEY in the user-data script to connect to the AWS Systems Manager Parameter Store. If you do not define those properties, Studio will not launch.
Default Configuration#
- key: /config/higson-studio/higson.database.url
description: JDBC address of dedicated postgresql database
value: jdbc:postgresql://address_to_your_postgressql_server:port/postgres?currentSchema=public - key: /config/higson-studio/higson.database.username
description: username for application’s connection to the dedicated database
value: admin - key: /config/higson-studio/higson.database.password
description: password for application’s connection to the dedicated database
value: admin
If you prefer to connect to H2 database in order not to setting up a standalone database - you can set up following properties:
-
key: /config/higson-studio/higson.database.url
description: JDBC address of dedicated postgresql database
value: jdbc:h2:/home/ec2-user/higson.test.db;AUTO_SERVER=TRUE;NON_KEYWORDS=VALUE -
key: /config/higson-studio/higson.database.username
description: username for application’s connection to the dedicated database
value: sa -
key: /config/higson-studio/higson.database.password
description: password for application’s connection to the dedicated database
value: sa
Environment Properties#
To set up environment variables for containers you can manually create a /home/ec2-user/environment.conf file or prepare user-data-script like in the example below. Both are available and its main aim is to configure instance system environments.
|
|
AWS_ACCESS_KEY_ID and AWS_SECRET_KEY you will be able to generate from your IAM page.
Both are needed if you want to use your AWS Parameter Store to pass your configuration.
You can inject this script directly into your container in EC2 console using:
Actions -> Instance settings -> Edit user data button.
Following script add 2 environment variables to your container.
You can learn more about bootstrapping AWS EC2 instance here.
Configure Without AWS Parameter Store#
If you don’t want to use AWS Parameter Store simply turn this off with AWS_PARAMSTORE_ENABLED=FALSE
Now you have to pass HIGSON_DATABASE_URL, HIGSON_DATABASE_USERNAME, HIGSON_DATABASE_PASSWORD properties in your user-data script
Properties Customization Precedence#
Higson Studio allows you to define properties in several locations. The properties are processed in the order as defined below. This implies that the last one overwrites other overlapping properties if you define the same property in two different locations.
- /home/ec2-user/conf/application.properties
- /home/ec2-user/higson-studio/conf/mpp-sensitive.properties
- /home/ec2-user/higson-studio/conf/application.properties
- /home/ec2-user/application.properties
- /home/ec2-user/higson-studio/conf/higson.properties
- “HIGSON_CONFIG_PATH” environment variable (can be defined in user-data script)
- environment variables (from/home/ec2-user/environment.conf)
- AWS Systems Manager Parameter Store
Instance Launch Options#
Below, you can find a few instance launch options:
- version - by default you should launch the latest version available on Amazon Marketplace.
- region - select the region you would like to launch your instance in. The image is available in all of Amazon’s publicly available regions.
- EC2 Instance Type - select the instance type you would like to use for your launched Higson Studio.
- Security Groups - Expose ports to access EC2 instances and Higson Studio:
- TCP/22 – SSH - used to administrate your instance remotely.
- TCP/38080 – default port for Higson Studio, this is the port on which you can access Higson Studio
- Key Value pair settings - generate or use an existing one key and secret pair that will be needed later to access the EC2 instance.
Connect the Instance#
In order to log in, you can use the following command:
ssh-i PATH_TO_PEM_FILE ec2-user@IP_HERE
You need to use a PEM file with a public key downloaded while creating the EC2 Instance.
Type the ssh command in a terminal. Application is deployed at /home/ec2-user/higson-studio-X.X.X where X.X.X is the version of
deployed Studio.
Systemd service is configured to manage the Higson Tomcat instance. You can use standard systemctl commands to
disable or check status such as sudo systemctl status higson-studio
All logs can be found under the following path /home/ec2-user/higson-studio-x.x.x/logs/
Log in to Running Higson Studio#
Studio stores temporary password at higson.log file. Login to your EC2 instance and grep a string ‘Copy password’ in the log file using:
|
|
as a result, you will find a string similar to: Copy password from file 'gifzWEZl' in home directory, where the filename
is different every time higson is bootstrapped. This file contains an admin user password. Copy the password. Now go to a browser and
open a page: http://IP_HERE:38080/higson/app . At login page please fill form with credentials: pass username: admin and password:
copied string here. You will be asked to change your temporary password. After that, you can login to higson as an admin with a
new set password
Supported Databases#
Higson supports various SQL databases, including PostgreSQL, Oracle, MySQL, Microsoft SQL and H2. By default, we have built the AMI with PostgreSQL and H2 support. This means that the PostgreSQL and H2 JDBC drivers are present in the Tomcat lib directory, and we only need you to provide the URL and credentials for the database. If you want to connect to another database, then add a proper JDBC driver to the Tomcat lib directory, which is located under the path: /home/ec2-user/higson-studio/lib
Run Higson Using ECS#
It is possible to run the Higson application in Amazon Elastic Container Service (ECS). The following steps will allow you to quickly and easily run Higson Studio or Higson Runtime REST:
- Log in to AWS Management Console
- Go to Elastic Container Service
- Create a Cluster:
- Define the cluster name (this is the only required field), e.g.: higson-cluster
- Verify the remaining optional settings
- Finish the process by creating a cluster
- Create a Task definition (using the configuration form):
- Define the task definition family name, e.g.: higson-studio or higson-runtime-rest
- Define the container name and the application image URI - an official DockerHub images for decerto/higson-studio or decerto/higson-runtime-rest are available at https://hub.docker.com/r/decerto/ (e.g.: decerto/higson-studio:4.2.0 or decerto/higson-runtime-rest:4.2.0)
- Define environment variables (check the list of required properties). Remember of correct environment variables notation!
- Configure log collection, e.g.: select Amazon CloudWatch
- Verify the remaining optional settings
- Finish the process by creating a task definition
- Go to cluster and create a service:
- Select task definition family, e.g.: previously created higson-studio or higson-runtime-rest
- Define service name, e.g.: higson-studio-service or higson-runtime-rest-service
- Finish the process by creating a service
- Verify the status of deployment and start using application!
If you would like to use Higson Studio and Higson Runtime REST both must have configured environment variable: HIGSON_SECURITY_JWT_SECRET_KEY with the same key value!
See an example of minimal required environment variables for Higson Studio:
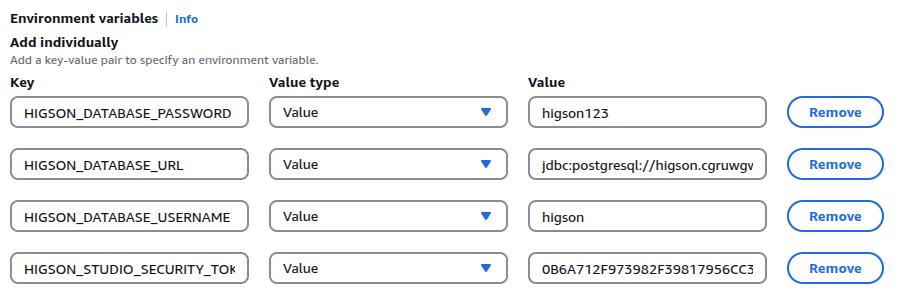
See an example of minimal required environment variables for Higson Runtime REST:
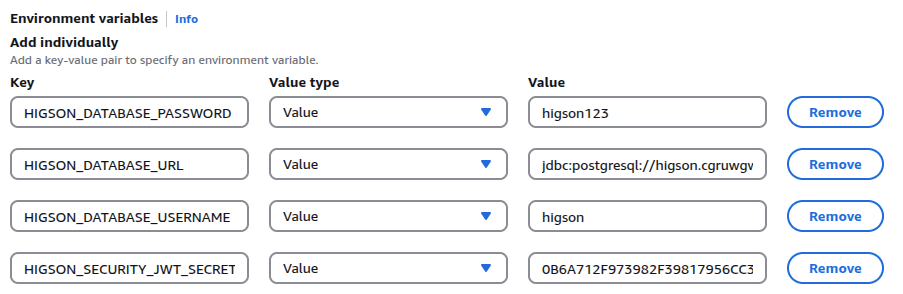
Properties
Higson gives user a possibility to configure and overwrite internal application properties. They are stored in dedicated file, named application.yml . File should be placed in container or may be pass using environment properties
|
|
Configurable Properties#
| Property | Description | Default value |
|---|---|---|
| Database | ||
| higson.database.dialect | Database dialect to use. Predefined dialects available in Higson: oracle,hsqldb, h2, mssql2012, postgresql, mysql | oracle |
| higson.database.hbm2ddl-mode | proxy for hibernate property hibernate.hbm2ddl.auto | validate |
| higson.database.autoddl-action | Action to be taken during Higson Studio startup with respect to database schema update:check - verify whether schema is correctupdate - chcek database schema and update, if neededskip - do nothing | update |
| higson.database.url | JDBC connection url | THIS PROPERTY MUST BE SET AT SYSTEM START BY THE USER |
| higson.database.username | Username that Higson will use to connect to database defined in mpp.database.url | THIS PROPERTY MUST BE SET AT SYSTEM START BY THE USER |
| higson.database.password | Password that Higson will use to connect to database defined in mpp.database.url | THIS PROPERTY MUST BE SET AT SYSTEM START BY THE USER |
| higson.database.schema | Database schema wherein Higson tables exist | |
| Environment | ||
| higson.studio.instance-name | Id identifying specific Higson Studio Instance. It is visible in Higson Studio below menu toolbar | |
| higson.studio.url | Higson Studio url used in few places, for example to create url for authentication token reset, CAS authentication etc. | http://localhost:8080/higson/app |
| higson.studio.region.updater.task-cron | CRON expression used to schedule job updating system region versions in Higson Studio | 0 1 0 * * * |
| Security | ||
| higson.security.basic.password-encode | Name of using password encoder | bcrypt |
| higson.security.basic.bcrypt.complexity | Password encoder complexity | 5 |
| higson.security.jwt.secret-key | Secret to decode JWT token (up to 256-bytes chars). To communicate with Runtime Rest client. | |
| higson.studio.security.token.verification.secret-key | Secret to verify JWT token (up to 256-bytes chars). To communicate with UI. | THIS PROPERTY MUST BE SET AT SYSTEM START BY THE USER |
| higson.studio.security.token.verification.algorithm | Determines JWT token verification algorithm (only HMAC256 supported) | HMAC256 |
| higson.studio.security.token.verification.studio-token-secured-paths | Comma-separated list of URL paths secured by Studio token verification. Required to protect MCP endpoints. | |
| higson.studio.security.token.generation.enabled | Determines if studio server works as authentication provider | true |
| higson.studio.security.token.generation.secret-key | Secret to sign JWT token (up to 256-bytes chars). To communicate with UI. | ${higson.studio.security.token.verification.secret-key} |
| higson.studio.security.token.generation.algorithm | Determines JWT token sign algorithm (only HMAC256 supported) | ${higson.studio.security.token.verification.algorithm} |
| higson.studio.security.token.generation.access-token-lifetime.value | Access token lifetime value | 5 |
| higson.studio.security.token.generation.access-token-lifetime.unit | Access token lifetime unit | Minutes |
| higson.studio.security.token.generation.refresh-token-lifetime.value | Refresh token lifetime value | 7 |
| higson.studio.security.token.generation.refresh-token-lifetime.unit | Refresh token lifetime unit | Days |
| higson.studio.security.token.generation.persist-refresh-token | Should persist refresh token to database (session idempotent) | true |
| higson.studio.security.login.attempts-limit | Limit of failed login attempts | 3 |
| higson.studio.security.login.attempts-cooldown | Time (in seconds) to freeze the ability to log in after reaching the limit of failed attempts | 20 |
| higson.studio.security.password.policy.min-length | Specifies the length of the password. Can take values between 10 and 128 | 10 |
| Features | ||
| higson.studio.mail.host | Mailer server host. If host and port are not set - mailer is not loaded | "" |
| higson.studio.mail.port | Mailer server port. If host and port are not set - mailer is not loaded | "" |
| higson.studio.mail.username | Mailer server username | "" |
| higson.studio.mail.password | Mailer server username’s password | "" |
| higson.studio.mail.from | Mailer from metadata | "" |
| higson.studio.snapshot.param.matrix.writer.order-by-all-level | Should sort by all levels during export decision table to file. Available: true/false | true |
| higson.studio.groovy.secured | Groovy function verification. Available: true/false. If set to true it is not possible to use a class of type System or Exception. If set to false the function body is not validated and possible security problems will not be caught. | true |
| higson.studio.function.validate-arguments | Flag determining whether function arguments data types should be validated before test execution | false |
| higson.studio.max-file-size | Specifies the size of the snapshot that can be uploaded | 100MB |
| higson.persistence.ui.enabled | Enables GMO in Higson Studio UI | false |
| MCP | ||
| higson.studio.mcp.enabled | Enables the MCP server. When set to false, the MCP endpoint is not exposed. |
false |
| Snapshot Async | ||
| higson.studio.snapshot.async.poll.interval-ms | How often (in ms) the poller checks the job queue for pending imports. | 5000 |
| higson.studio.snapshot.async.poll.initial-delay-ms | Delay (in ms) before the import poller starts after application launch. | 10000 |
| higson.studio.snapshot.async.poll.batch-size | Number of QUEUED import jobs fetched from the database in a single polling tick. | 10 |
| higson.studio.snapshot.async.poll.max-concurrent-jobs | Maximum number of snapshot imports running in parallel on a single instance. | 3 |
| higson.studio.snapshot.async.orphan.threshold-minutes | Number of minutes without a heartbeat after which a RUNNING import job is considered orphaned and reset to QUEUED. | 5 |
| higson.studio.snapshot.async.orphan.interval-ms | How often (in ms) the orphan watcher checks for orphaned import jobs (fixed delay). | 60000 |
| higson.studio.snapshot.async.orphan.initial-delay-ms | Delay (in ms) before the orphan watcher starts after application launch. | 60000 |
| Deduplication | ||
| higson.studio.deduplication.enabled | Enables or disables the hard link feature. See Background Deduplication Process. | false |
| higson.studio.deduplication.job-enabled | Enables or disables the background deduplication process. | false |
| higson.studio.deduplication.job-interval | Interval between consecutive runs of the deduplication process (if enabled). Format: number followed by a unit (s, m, h, d). |
30m |
| higson.studio.deduplication.matrix.min-size | The minimum number of matrix rows required for a matrix to qualify for deduplication by the background process. | |
| AI Assistant (beta) | ||
| higson.studio.ai.features.enabled | Enables the AI Assistant — the Documentation Assistant chat panel and AI actions (Explain / Generate) in Functions and Decision Tables. When false, all AI controllers and adapters are not loaded. See AI Assistant Configuration. |
false |
| higson.studio.ai.features.thinking-budget | Global override for the reasoning budget of models that support reasoning mode. 0 disables reasoning, a positive value sets the token limit, empty value uses the default settings of each feature. |
|
| higson.studio.ai.provider.code | Unique identifier for the provider (e.g., vertex-ai, openai). |
|
| higson.studio.ai.provider.name | Display name of the provider, used in logs and the interface. | |
| higson.studio.ai.provider.type | Adapter type: VERTEX_AI or OPENAI_COMPATIBLE. |
|
| higson.studio.ai.provider.base-url | Base URL of the provider API. | |
| higson.studio.ai.provider.api-key | API key / access token. Required for OPENAI_COMPATIBLE. |
|
| higson.studio.ai.provider.auth-header-name | Name of the authentication header. | Authorization |
| higson.studio.ai.provider.auth-header-prefix | Prefix for the header value (with a trailing space). | Bearer |
| higson.studio.ai.provider.additional-headers | Map of additional headers appended to every request. | |
| higson.studio.ai.provider.connection-timeout | Connection timeout in seconds. | 10 |
| higson.studio.ai.provider.response-timeout | Timeout for waiting for a response in seconds. | 300 |
| higson.studio.ai.provider.read-timeout | Data read timeout in seconds. | 120 |
| higson.studio.ai.provider.vertex-project-id | Google Cloud project ID. Required when type is VERTEX_AI. |
|
| higson.studio.ai.provider.vertex-credentials-path | Path to the service account key file (JSON). If not set, Application Default Credentials (ADC) are used. Required when type is VERTEX_AI. |
|
| higson.studio.ai.model.name | Display name of the model. | |
| higson.studio.ai.model.model-id | Model identifier used in the provider API (e.g., gemini-2.5-flash, gpt-4o-mini). |
|
| higson.studio.ai.model.max-output-tokens | Maximum number of tokens the model can generate in a single response. | 4096 |
| higson.studio.ai.model.context-window | Context window size of the model. Informational value. | |
| higson.studio.ai.model.supports-streaming | Whether the model supports streaming responses. | true |
| higson.studio.ai.model.supports-json-mode | Whether the model supports structured JSON output mode. | false |
| higson.studio.ai.model.supports-tools | Whether the model supports tool-calling. Required by the Documentation Assistant. | true |
Runtime#
Available for Higson Runtime Spring Boot Starter or Higson Runtime REST apps
| Property Name | Description | Default Value |
|---|---|---|
| Database | ||
| higson.database.dialect | Database dialect to use. Available values: oracle, hsqldb, h2, mssql2012, postgresql, mysql. |
oracle |
| higson.database.url | JDBC connection URL. | THIS PROPERTY MUST BE SET AT SYSTEM START BY THE USER |
| higson.database.username | Username that Higson will use to connect to the database defined in higson.database.url. |
THIS PROPERTY MUST BE SET AT SYSTEM START BY THE USER |
| higson.database.password | Password that Higson will use to connect to the database defined in higson.database.url. |
THIS PROPERTY MUST BE SET AT SYSTEM START BY THE USER |
| higson.database.schema | Database schema wherein Higson tables exist. | |
| Environment | ||
| higson.runtime-rest.url | URL of Higson Runtime REST. | |
| Authentication | ||
| higson.runtime-rest.security.type | Defines security type for Runtime REST. Possible values: jwt, active-directory. When not set, basic authentication is enabled. |
|
| higson.security.jwt.secret-key | Secret key to decrypt Runtime REST token. | THIS PROPERTY MUST BE SET AT SYSTEM START BY THE USER |
| higson.security.active-directory.domain | Active Directory main root. | |
| higson.security.active-directory.url | Active Directory server URL. | |
| higson.security.active-directory.root-dn | Active Directory root domain. | |
| Watchers | ||
| higson.runtime.watcher.param-watcher-config.delay | Time after which the watcher starts following application launch [s]. | 10 |
| higson.runtime.watcher.param-watcher-config.pause | Interval at which the watcher monitors the state of decision tables. | 3 |
| higson.runtime.watcher.param-watcher-config.errorPause | Duration for which the watcher is suspended after a watcher error occurs. | 30 |
| higson.runtime.watcher.param-watcher-config.force | Time after which the watcher will force a full cache synchronization of decision tables. Currently only the param-watcher supports this setting. | 60 |
| higson.runtime.watcher.function-watcher-config.delay | Time after which the watcher starts following application launch [s]. | 10 |
| higson.runtime.watcher.function-watcher-config.pause | Interval at which the watcher monitors the state of functions. | 3 |
| higson.runtime.watcher.function-watcher-config.errorPause | Duration for which the watcher is suspended after a watcher error occurs. | 30 |
| higson.runtime.watcher.version-watcher-config.delay | Time after which the watcher starts following application launch [s]. | 10 |
| higson.runtime.watcher.version-watcher-config.pause | Interval at which the watcher monitors the state of versions. | 3 |
| higson.runtime.watcher.version-watcher-config.errorPause | Duration for which the watcher is suspended after a watcher error occurs. | 30 |
| higson.runtime.watcher.profile-watcher-config.delay | Time after which the watcher starts following application launch [s]. | 10 |
| higson.runtime.watcher.profile-watcher-config.pause | Interval at which the watcher monitors the state of profiles. | 3 |
| higson.runtime.watcher.profile-watcher-config.errorPause | Duration for which the watcher is suspended after a watcher error occurs. | 30 |
| higson.runtime.watcher.user-region-version-watcher-config.delay | Time after which the watcher starts following application launch [s]. | 10 |
| higson.runtime.watcher.user-region-version-watcher-config.pause | Interval at which the watcher monitors the state of users’ perspective (in Higson Studio, set under the “My View” button). | 3 |
| higson.runtime.watcher.user-region-version-watcher-config.errorPause | Duration for which the watcher is suspended after a watcher error occurs. | 30 |
| higson.runtime.watcher.domain-watcher-config.delay | Time after which the watcher starts following application launch [s]. | 10 |
| higson.runtime.watcher.domain-watcher-config.pause | Interval at which the watcher monitors the state of the domain. | 3 |
| higson.runtime.watcher.domain-watcher-config.errorPause | Duration for which the watcher is suspended after a watcher error occurs. | 30 |
| higson.runtime.watcher.domain-watcher-config.invalidate | Duration the domain value may remain unchanged in the cache. Works with domain-watcher-config.time-unit. |
24 |
| higson.runtime.watcher.domain-watcher-config.time-unit | Time unit for domain cache invalidation. Works with domain-watcher-config.invalidate. Possible values: HOURS, MINUTES, etc. |
HOURS |
| higson.runtime.watcher.dev-mode-watcher-config.delay | Time after which the watcher starts following application launch [s]. | 10 |
| higson.runtime.watcher.dev-mode-watcher-config.pause | Interval at which the watcher monitors the state of objects modified in session. | 1 |
| higson.runtime.watcher.dev-mode-watcher-config.errorPause | Duration for which the watcher is suspended after a watcher error occurs. | 30 |
| higson.runtime.watcher.schedule-runtime-watcher-config.delay | Time after which the watcher starts following application launch [s]. | 10 |
| higson.runtime.watcher.schedule-runtime-watcher-config.pause | Interval at which the watcher monitors the state of the version timeline. | 10 |
| higson.runtime.watcher.schedule-runtime-watcher-config.errorPause | Duration for which the watcher is suspended after a watcher error occurs. | 30 |
| higson.runtime.watcher.refresh-watcher-config.delay | Time after which the watcher starts following application launch [s]. | 15 |
| higson.runtime.watcher.refresh-watcher-config.pause | Checks each cached decision table (in-memory index). Evicts decision table if: - auto-refresh period has expired - max idle time exceeded |
10 |
| higson.runtime.watcher.refresh-watcher-config.errorPause | Duration for which the watcher is suspended after a watcher error occurs. | 30 |
| Diagnostic Watchers | ||
| higson.runtime.watcher.diagnosticHeartbeatWatcherConfig.delay | Time after which the watcher starts following application launch [s]. Always active — cannot be disabled by higson.runtime.watchers.enabled=false. |
10 |
| higson.runtime.watcher.diagnosticHeartbeatWatcherConfig.pause | Interval at which the heartbeat watcher runs. | 3 |
| higson.runtime.watcher.diagnosticHeartbeatWatcherConfig.errorPause | Duration for which the watcher is suspended after a watcher error occurs. | 30 |
| higson.runtime.watcher.diagnosticRuntimeMetricWatcherConfig.delay | Time after which the watcher starts following application launch [s]. Always active — cannot be disabled by higson.runtime.watchers.enabled=false. |
10 |
| higson.runtime.watcher.diagnosticRuntimeMetricWatcherConfig.pause | Interval at which the runtime metric watcher collects metrics. | 3 |
| higson.runtime.watcher.diagnosticRuntimeMetricWatcherConfig.errorPause | Duration for which the watcher is suspended after a watcher error occurs. | 30 |
| higson.runtime.watcher.diagnosticFlushWatcherConfig.delay | Time after which the watcher starts following application launch [s]. Always active — cannot be disabled by higson.runtime.watchers.enabled=false. |
10 |
| higson.runtime.watcher.diagnosticFlushWatcherConfig.pause | Interval at which the flush watcher sends collected diagnostic data. | 3 |
| higson.runtime.watcher.diagnosticFlushWatcherConfig.errorPause | Duration for which the watcher is suspended after a watcher error occurs. | 30 |
| Other | ||
| higson.runtime.function.validate-arguments | Flag determining whether function argument data types should be validated before execution. | false |
| higson.runtime.normalization.throw-on-exception | Flag determining whether an exception should be thrown when a matrix value can’t be normalized. | false |
| higson.runtime.external-datasource.sql.names | List of external SQL data source names. | |
| higson.runtime.external-datasource.sql.%s.url | URL to data source. %s is a placeholder for the name of the data source. |
|
| higson.runtime.external-datasource.sql.%s.username | Username for data source. %s is a placeholder for the name of the data source. |
|
| higson.runtime.external-datasource.sql.%s.password | Password for data source. %s is a placeholder for the name of the data source. |
|
| higson.runtime.external-datasource.sql.%s.min-pool-size | Minimum size of connection thread pool. %s is a placeholder for the name of the data source. |
1 |
| higson.runtime.external-datasource.sql.%s.max-pool-size | Maximum size of connection thread pool. %s is a placeholder for the name of the data source. |
8 |
| higson.runtime.parameter.value-never-null | If true, decision tables return EmptyParamValue when no match is found; if false, decision tables return null. |
true |
| higson.runtime.ai-model.enabled | Enables the AI Model Source feature (ONNX-based decision tables). When false, the ONNX runtime is not initialized and decision tables backed by an AI model cannot be evaluated. Requires the com.microsoft.onnxruntime:onnxruntime dependency on the classpath. See the Implementation of AI in decision tables instruction. |
false |
| higson.runtime.watchers.enabled | Flag determining whether runtime watchers should start automatically. Does not affect diagnostic watchers (diagnosticHeartbeatWatcherConfig, diagnosticRuntimeMetricWatcherConfig, diagnosticFlushWatcherConfig) — those are always active. |
|
| Diagnostics | ||
| higson.runtime.diagnostic.profiler.enabled | Enables runtime profiling (call statistics collection for functions, flows, decision tables, and domain operations visible in the Diagnostic Panel). Enabling this property reduces runtime performance. Recommended for diagnostic purposes only — disable in production environments where performance is critical. | false |
Security#
| Version 4.0 | Version 4.1 |
|---|---|
| higson.security.jwt.access-token-lifetime.unit | higson.studio.security.token.generation.access-token-lifetime.unit |
| higson.security.jwt.access-token-lifetime.value | higson.studio.security.token.generation.access-token-lifetime.value |
| higson.security.jwt.authentication-server | higson.studio.security.token.generation.enabled |
| higson.security.jwt.algorithm | higson.studio.security.token.generation.algorithm |
| higson.security.password-encoder.name | higson.security.basic.password-encoder |
| higson.security.password-encoder.complexity | higson.security.basic.bcrypt.complexity |
| higson.security.jwt.refresh-token-lifetime.unit | higson.studio.security.token.generation.refresh-token-lifetime.unit |
| higson.security.jwt.refresh-token-lifetime.value | higson.studio.security.token.generation.refresh-token-lifetime.value |
| higson.security.jwt.secret-key | higson.security.jwt.secret-key |
| higson.security.jwt.persist-refresh-token | higson.studio.security.token.generation.persist-refresh-token |
| higson.security.password-encoder.name | higson.security.basic.password-encoder |
| higson.security.password-encoder.complexity | higson.security.basic.bcrypt.complexity |
Authentication
Standard / Username and Password#
No extra actions needed to use it, it is available by default.
SAML#
Configuration steps:
- Configure Tomcat to use HTTPS (if needed).
- Fill properties:
|
|
- Generate Studio metadata and import in your Identity Provider
On your IDP:
- Configure Identity Provider to send attributes with assertion response.
- Check that Identity Provider configuration for Assertion Consumer Service URL and Logout Service URL is correct.
Important! SAML Response signature must include message and assertions!
Attributes Mapping#
SAML Response must contain following attributes:
- Name ID (this is used as user login)
- firstname
- lastname
- roles
When a user logs into Higson Studio, their account is automatically created in the system with an external status.
Roles#
- if higson.studio.security.token.generation.authentication.saml.roles-origin=saml is specified roles are taken from assertion response therefore Identity Provider must be configured to send it with response. internal means Studio will take roles from database instead of SAML assertion response to authorize user.
Active Directory#
- Fill properties:
|
|
Requirements for Access Directory User#
Login - not empty, min size: 1, max size: 200
First name - not empty, min size: 1
Last name - not empty, min size: 1
E-mail address - if empty Higson generates default e-mail consistent with schema: ’login@local.com’
Roles - min one role consistent with Higson role.
Roles defined in Active Directory must be compatible with roles in Higson structure. When a user logs into Higson Studio, their account is automatically created in the system with an external status.
Hierarchy of Roles in Higson#
MPP_ADMIN - Higson Administrator
MPP_USER - Higson User
MPP_USER_READONLY - Readonly Higson User \
It is possible to create own roles in AD but remember to create same roles in Higson structure. It’s necessary to proper authentication process.
CAS#
Configuration steps:
- Configure Tomcat to use HTTPS.
- Fill properties:
|
|
When logging in using CAS, you must configure the corresponding users on the Higson Studio side. Roles are defined and managed on the Higson Studio side.
A refresh token is a special type of access key used to automatically renew a user session without the need to log in again. It is used together with an access token. It is used to ensure user convenience, as it means that users do not have to constantly log in to the application.
The following properties define the lifetime of tokens:
higson.studio.security.token.generation.access-token-lifetime.unit=Minutes
higson.studio.security.token.generation.access-token-lifetime.value=5
higson.studio.security.token.generation.refresh-token-lifetime.unit=Minutes
higson.studio.security.token.generation.refresh-token-lifetime.value=7
The refresh token has a longer lifespan and is used to obtain a new access token. The access token is included in requests and enables authorized access to the API. Once the access token expires, the browser automatically uses the refresh token to retrieve a new access token. If the refresh token also expires, the user will be logged out of the system. Modifying the access token lifetime affects how often it needs to be refreshed — in other words, how frequently the system must generate a new access token. Meanwhile, the refresh token lifetime determines how long a user can remain logged in, that is, how long they can obtain new access tokens without having to log in again.
It’s important to remember that when an automatic logout occurs, any unsaved changes will be lost.
JWT Based Authentication (Runtime Token)#
It is set by default.
The property higson.security.jwt.secret-key must be set in both Studio’s and client’s side
Runtime Rest application with same string sequence:
|
|
You can generate a new token in Studio. A view to see all existing tokens and to generate a new one can be found in Menu’s Tools tab.
When creating a new token, you can specify the expiry date. Admin users may also specify a user that a newly generated token will be assigned to.
To use generated token in REST API calls, you need to add an Authorization Header with the standard bearer format, such as
Authorization: Bearer your_jwt_token
Basic Authentication#
|
|
You can choose from the following password encoder security algorithms: bCrypt (default) or Pbkdf2
To select a Pbkdf2 algorithm, you must set higson.security.basic.password-encoder=Pbkdf2 property in the application.properties
You can choose the complexity of BCrypt algorithm by setting a property higson.security.basic.bcrypt.complexity with values
between 4 and 31 are accepted, 5 is used by default. Be careful, since the bigger the value the safer algorithm is, but the
performance impact is also increasing.
Active Directory#
|
|
Upgrade
This is wise to upgrade Higson applications (the Studio and Runtime) for a newer version as we are repairing bugs and adding new features, so let’s check how to do it in a few short steps. This article refers to patch installation.
IMPORTANT:
- As far higson-studio and higson-runtime are separate applications we truly recommend running them the same version.
- Higson Studio MUST BE STARTED FIRST! Higson Studio is managing the Database Schema!
Bump the Studio Application First#
Download Studio#
Firstly, download application from here. After filling the form, you will get mail with a link to your download page. Depending on your needs, download the file/files (probably you use a war file with your tomcat).
Shut Down Old Studio#
Turn off the Studio App. You probably want to stop all running applications which are using higson-runtime,
because we need to modify its database schema.
Remember to Create a Database Backup#
Due to the fact, there might occur database updates, it would be very helpful if you prepare a Higson’s database backup. Use a database client to create the backup. Do not use a snapshot (Higson Studio functionality), as snapshots do not store history.
Check out properties
Make sure that application properties are up to date.
Take a look at your property source (by default: {your_tomcat_dir}/conf/application.properties) and change them
regarding the table followed the link
Pay special attention to database connection properties.
Adjust ports
If necessary, modify the server.xml file (adjust ports as in previous version).
Start the Studio Application#
You should be able to see a standard login page
(by default: https://{serverUrl}/higson/app)
Bump the Runtime in Your Applications#
Since Runtime is available at Maven Central repositories, you should only bump its version at your building script, ie: build.gradle, pom.xml etc.
Developer License Requirement (version 4.3)#
Starting from version 4.3, a developer license is required on all non-production environments. Before completing the upgrade to version 4.3, ensure that a developer license has been obtained for each non-production environment.
To obtain a developer license, contact:
- Product Manager: oktawia.jakubik@decerto.com
- Sales team: lukasz.niedospial@higson.tech
Bump the Studio Application#
Understanding dependencies between applications:
- Higson Studio and Higson Runtime are separate applications but should run on the same version.
- Higson Studio must be started first, as it manages the database schema.
Download new Studio
The first step you should do is to head for new applications here. Search for version of 4.2
Shut down the Studio
Turn off the Studio App. You probably want to stop all running applications which are using higson-runtime,
because we need to modify its database schema.
Remember to create a database backup!
Due to the fact, there might occur database updates, it would be very helpful if you prepare a Higson’s database backup. Use a database client to create the backup. Do not use a snapshot (Higson Studio functionality), as snapshots do not store history.
Check out new properties
Make sure that applicatio properties are set up correctly.
Take a look at your property source (by default: {your_tomcat_dir}/conf/application.properties) and change them
regarding the table followed the link
Pay special attention to database connection properties and security properties.
Adjust ports
If necessary, modify the server.xml file (adjust ports as in version 4.0 or 4.1).
Start the Studio App
You should be able to see a standard login page
(by default: https://{serverUrl}/higson/app)
Bump the Runtime in Your Applications#
Since Runtime is available at Maven Central repositories, you should only bump its version at your building script, ie: build.gradle, pom.xml etc. Check out the new properties for Runtime App since there were a lot of changes.
Enabling a developer mode feature allows seeing all unpublished changes of a defined user by the Runtime application, which leads to faster development. Developer mode is disabled by default.
Enabling Devmode Programmatically#
|
|
Enabling Devmode Using Property File#
Configuration that is needed in application.yml to enable developer mode:
|
|
Using HigsonEngineFactory excludes a possibility to use application.yml.
The Higson CLI Maven Plugin (higson-cli-maven-plugin) allows you to synchronize the business logic configuration
stored in your project repository with a running Higson Studio instance directly from the command line or CI/CD pipeline.
The plugin uses the Studio snapshot API to perform pull (download) and push (upload) operations.
This eliminates the need to use the Higson Studio GUI for environment migrations and enables version-controlled, automated deployments of business rules configuration.
Prerequisites:
- Java 17
- Maven 3.x
- Running Higson Studio instance (4.2.x)
Quick Start#
Add the plugin to your pom.xml:
|
|
Pull the snapshot from Studio into your local directory:
mvn higson-cli:pull
Push local changes back to Studio:
mvn higson-cli:push
Authentication#
The plugin supports two mutually exclusive authentication methods.
Token (recommended)#
Provide a pre-obtained Bearer token directly. No login request is made. Recommended for CI/CD pipelines and automated environments.
|
|
Pass the token at build time:
mvn higson-cli:pull -DhigsonToken=eyJhbGciOiJIUzI1NiJ9...
The token must have the SNAPSHOT_DOWNLOAD permission for pull operations and SNAPSHOT_UPLOAD for push operations.
Studio Integration Tokens can be managed in Settings → Users.
Username and password#
The plugin will call the Studio login endpoint (/api/login) and obtain a Bearer token automatically.
Suitable for development environments. Do not hardcode credentials in pom.xml —
use Maven property references (${higsonPassword}) resolved from ~/.m2/settings.xml or CI/CD secret injection.
|
|
Pull#
The pull goal downloads a snapshot from Studio and writes the files into higsonSnapshotDir.
After extraction, the plugin prints a per-file status to the console: new (file did not exist locally),
modified (content changed), or skipped (file is unchanged).
If higsonSnapshotDir does not exist, the plugin creates it automatically.
mvn higson-cli:pull
Full goal reference:
mvn io.higson:higson-cli-maven-plugin:pull
Pull options#
All pull options are optional. When omitted, their default values apply.
|
|
Top-level pull options#
| Parameter | Type | Default | Description |
|---|---|---|---|
tags |
boolean | true |
Include tags in the downloaded snapshot. |
domains |
boolean | true |
Include domain configuration in the downloaded snapshot. |
profileWithContext |
boolean | true |
Include profile context data. |
sourceProfileCodes |
list of strings | empty | Limit the export to the listed profile codes. When empty, all profiles are included. |
eol |
string | none | Line ending conversion applied to all text files after download. Available values: LF, CR, CRLF. When not set, files are copied as-is. |
excludes |
list of glob patterns | empty | Files matching any of the patterns are not written to higsonSnapshotDir. |
Functions filtering#
| Parameter | Type | Default | Description |
|---|---|---|---|
nameStartsWith |
list of strings | empty | Include only functions whose names start with any of the provided prefixes. When empty, all functions are included. |
filterByTags |
list of strings | empty | Include only functions that have at least one of the listed tags assigned. When empty, tag filtering is not applied. |
onlyFromActiveSession |
boolean | false |
When true, includes only functions that have been modified in the currently active session. |
Decision tables filtering#
| Parameter | Type | Default | Description |
|---|---|---|---|
nameStartsWith |
list of strings | empty | Include only decision tables whose names start with any of the provided prefixes. When empty, all decision tables are included. |
filterByTags |
list of strings | empty | Include only decision tables that have at least one of the listed tags assigned. When empty, tag filtering is not applied. |
onlyFromActiveSession |
boolean | false |
When true, includes only decision tables that have been modified in the currently active session. |
Line ending conversion (EOL)#
By default, no line ending conversion is applied (files are copied as-is from the Studio response).
If you work on Windows with git config core.autocrlf=true, every pulled file may appear as modified
because of line ending differences. Setting <eol>CRLF</eol> normalises all pulled text files to Windows
line endings before writing them to disk, preventing false diffs.
| Value | Line ending | Platform |
|---|---|---|
LF |
\n |
Unix / Linux / macOS |
CR |
\r |
Classic macOS |
CRLF |
\r\n |
Windows |
File exclusions#
Use excludes to prevent specific files from being overwritten on pull.
Each entry is a glob pattern evaluated against the relative path of the file inside the snapshot.
|
|
Push#
The push goal zips the contents of higsonSnapshotDir and uploads it to Studio via the snapshot import endpoint.
Imported changes land in a new session — a set of pending changes that must be explicitly published before they
affect the live environment. See Sessions for how to review and publish sessions in Studio.
higsonSnapshotDir must exist and must not be empty.
mvn higson-cli:push
Publish the session immediately after a successful import:
mvn higson-cli:push -DautoCommit=true
Full goal reference:
mvn io.higson:higson-cli-maven-plugin:push
mvn io.higson:higson-cli-maven-plugin:push -DautoCommit=true
autoCommit#
| Parameter | Type | Default | Description |
|---|---|---|---|
autoCommit |
boolean | false |
When true, the imported snapshot is automatically published without requiring manual session approval in Studio. |
Push options#
The pushOptions block controls how Studio handles elements during import.
All parameters are optional and default to false.
|
|
These options mirror the Remove not in snapshot, Force Delete, and Search Within Parameter Matrix options available in the Studio snapshot upload UI. Refer to the Snapshot article for a detailed explanation of each behaviour.
Decision table configuration#
| Parameter | Type | Default | Description |
|---|---|---|---|
removeNotIncludedInSnapshot |
boolean | false |
Delete decision tables present in Studio but absent from the snapshot. Deletion respects the same name/tag filters that were used during export. |
forceDelete |
boolean | false |
Force delete decision tables even when they are referenced by other elements. May cause errors in dependent elements. |
searchWithinMatrix |
boolean | false |
When checking for references before deletion, also search inside decision table matrices (not only domain elements and IN-level value sources). |
Function configuration#
| Parameter | Type | Default | Description |
|---|---|---|---|
removeNotIncludedInSnapshot |
boolean | false |
Delete functions present in Studio but absent from the snapshot. Deletion respects the same name/tag filters that were used during export. |
forceDelete |
boolean | false |
Force delete functions even when they are referenced by other elements. May cause errors in dependent elements. |
searchWithinMatrix |
boolean | false |
When checking for references before deletion, also search inside decision table matrices. |
Domain configuration#
| Parameter | Type | Default | Description |
|---|---|---|---|
removeNotIncludedInSnapshot |
boolean | false |
Delete domain elements present in Studio but absent from the snapshot. |
Import result#
After a successful push, the plugin prints an import summary to the console grouped by element type (Decision Tables, Functions, Domain, Profiles, Tags, Tests, Test Packages). A detailed log is also written to the log file (see Log files).
The build fails if Studio reports any import error. A build with warnings completes successfully.
Log files#
The plugin writes operation logs to disk after each pull or push.
logFilePath sets the base path; the plugin automatically appends an operation suffix before writing:
- Pull:
higson-cli-pull.log - Push:
higson-cli-push.log
The default base is ${basedir}/higson-cli, which results in ${basedir}/higson-cli-pull.log and
${basedir}/higson-cli-push.log.
To use a custom base path, set logFilePath in the plugin configuration:
|
|
Or override at build time:
mvn higson-cli:push -DlogFilePath=/path/to/custom/higson.log
The pull log contains the full export request parameters and a per-file change summary (new, modified, skipped). The push log contains per-element-type import statistics and the status (imported, skipped, error, warning, deleted) for every individual element.
Full configuration reference#
The example below includes all available parameters with their default values.
|
|
Model Context Protocol (MCP) is an open standard developed by Anthropic that enables AI tools — such as Claude Desktop, Cursor, VS Code with GitHub Copilot, or other AI-powered development environments — to connect to external systems and services. MCP defines a uniform interface through which AI assistants can query data, execute operations, and interact with connected applications directly from within the development environment.
Higson provides a built-in MCP server that exposes Higson Studio’s capabilities to MCP-compatible AI tools. Through this integration, an AI assistant can interact with the Higson environment — for example, retrieve business configuration or inspect decision tables — without leaving the IDE.
Enabling the MCP Server#
To enable the Higson MCP server, add the following properties to your application.yml:
|
|
The studio-token-secured-paths property defines which Studio API paths require a valid Studio token for
authentication. The MCP endpoints (/mcp, /mcp/sse, /mcp/messages/**) must be included to ensure that
only authorized AI clients — authenticated with a token generated in Studio — can connect to the MCP server.
| Property | Description | Default value |
|---|---|---|
higson.studio.mcp.enabled |
Enables the MCP server. When set to false, the MCP endpoint is not exposed. |
false |
higson.studio.security.token.verification.studio-token-secured-paths |
Comma-separated list of URL paths secured by Studio token verification. | — |
Connecting an AI Client to Higson MCP#
Step 1 — Generate a Token in Studio#
- Log in to Higson Studio:
http://localhost:38080/higson - Go to the Licences and tokens tab (key icon in the top menu).
- Click New token.
- Set the following fields:
- User:
admin(or any other user) - Type:
Studio - Expiration Date: any future date (e.g.,
2049-02-02)
- User:
- Click Generate token.
- Copy the generated JWT token.
Step 2 — Configure the MCP Client#
Add the following entry to your AI client’s MCP configuration file:
|
|
Replace <YOUR_TOKEN> with the token copied in Step 6.
Replace http://localhost:38080 with the actual address of your Higson Studio instance.
Configuration File Locations#
| Client | Configuration file |
|---|---|
| Claude Desktop (macOS) | ~/Library/Application Support/Claude/claude_desktop_config.json |
| Claude Desktop (Windows) | %APPDATA%\Claude\claude_desktop_config.json |
| Cursor | .cursor/mcp.json in the project directory, or ~/.cursor/mcp.json globally |
| VS Code (GitHub Copilot) | .vscode/mcp.json in the project directory |
Example: Full Claude Desktop Configuration#
|
|
Available Tools#
The Higson MCP server exposes the following tools to AI clients, organized by domain:
Decision Tables (Parameters)#
| Tool | Description |
|---|---|
higson_list_decision_tables |
List all decision tables |
higson_get_decision_table |
Get table definition (columns, types, matchers) |
higson_get_decision_table_matrix |
Retrieve data rows |
higson_create_decision_table |
Create a new decision table |
higson_update_decision_table |
Update table structure |
higson_delete_decision_table |
Delete one or more tables |
higson_rename_decision_table |
Rename a table |
higson_get_decision_table_history |
View change history |
higson_open_decision_table |
Open a table |
higson_update_decision_table_matrix |
Update data rows |
higson_export_decision_tables |
Export decision tables |
higson_import_decision_tables |
Import decision tables |
Context Types#
| Tool | Description |
|---|---|
higson_list_context_types |
List all context types |
higson_get_context_type |
Get a context type definition |
higson_get_context_type_paths |
Get available paths for a context type |
higson_create_context_type |
Create a new context type |
higson_update_context_type |
Update a context type |
higson_delete_context_type |
Delete a context type |
higson_clear_context |
Clear context data |
higson_export_context |
Export context types |
higson_import_context |
Import context types |
Domain Configuration#
| Tool | Description |
|---|---|
higson_get_domain_configuration_tree |
Get the full domain configuration tree |
higson_get_domain_element_details |
Get details of a domain element |
higson_get_domain_collection_details |
Get details of a domain collection |
higson_create_domain_element |
Create a new domain element |
higson_update_domain_element |
Update a domain element |
higson_delete_domain_element |
Delete a domain element |
higson_set_domain_attribute |
Set a domain attribute value |
higson_export_domain_configuration |
Export domain configuration |
higson_import_domain_configuration |
Import domain configuration |
higson_get_domain_definition |
Get the domain type definition |
higson_update_domain_type |
Update a domain type |
higson_delete_domain_type |
Delete a domain type |
higson_export_domain_definition |
Export the domain definition |
higson_import_domain_definition |
Import a domain definition |
higson_delete_all_domain_types |
Delete all domain types |
Flows#
| Tool | Description |
|---|---|
higson_list_flows |
List all flows |
higson_get_flow |
Get a flow definition |
higson_create_flow |
Create a new flow |
higson_update_flow |
Update a flow |
higson_rename_flow |
Rename a flow |
higson_get_flow_history |
View flow change history |
higson_delete_flow |
Delete a flow |
higson_export_flows |
Export flows |
higson_import_flows |
Import flows |
Functions#
| Tool | Description |
|---|---|
higson_list_functions |
List all functions |
higson_get_function |
Get a function definition |
higson_create_function |
Create a new function |
higson_update_function |
Update a function |
higson_delete_function |
Delete a function |
higson_rename_function |
Rename a function |
higson_get_function_history |
View function change history |
higson_export_functions |
Export functions |
higson_import_functions |
Import functions |
Profiles & Regions#
| Tool | Description |
|---|---|
higson_list_profiles |
List all profiles |
higson_assign_to_profile |
Assign an entity to a profile |
higson_detach_from_profile |
Detach an entity from a profile |
higson_list_regions |
List all regions |
higson_attach_to_region |
Attach an entity to a region |
higson_detach_from_region |
Detach an entity from a region |
Snapshots#
| Tool | Description |
|---|---|
higson_export_snapshot |
Export a full configuration snapshot |
higson_import_snapshot |
Import a configuration snapshot |
higson_get_snapshot_import_job |
Get the status of a snapshot import job |
Tests#
| Tool | Description |
|---|---|
higson_list_tests |
List all tests |
higson_get_test |
Get a test definition |
higson_run_test |
Run a test |
higson_create_test |
Create a new test |
higson_update_test |
Update a test |
higson_delete_test |
Delete a test |
higson_export_tests |
Export tests |
higson_import_tests |
Import tests |
Other#
| Tool | Description |
|---|---|
higson_search |
Search across Higson entities |
higson_get_version |
Get the Higson version |
higson_generate_runtime_request |
Generate a runtime request |
higson_list_work_sessions |
List active work sessions |
higson_publish_changes |
Publish pending changes |
higson_reject_changes |
Reject pending changes |
Verification#
After saving the configuration, restart your AI client. Higson should appear as an available tool (MCP server).
You can test the connection by sending a prompt in the chat:
“List available Higson tools” or “Show me the decision tables from Higson”
Claude Code Skills#
Claude Code skills are pre-written prompt templates stored as Markdown files in the .claude/skills/ directory
of a project. Each skill defines a slash command (e.g., /higson:review) that a developer can invoke in Claude Code
to trigger a specific, repeatable AI-assisted workflow.
Why Use Skills#
Skills are useful when a team wants to standardize how AI assistance is used across a project. Instead of writing the same prompt from scratch each time, a developer invokes a named skill and Claude Code executes the predefined workflow. This improves consistency, reduces onboarding time, and ensures that AI-assisted tasks follow the same quality standards across the team.
Using Skills in Claude Code#
To invoke a skill, type the skill’s slash command in the Claude Code input field:
/higson:review
Claude Code loads the corresponding skill file and runs the workflow defined in it.
Adding Skills to a Project#
Skills are stored as .md files in the .claude/skills/ directory:
.claude/
  skills/
    review.md
    validate.md
Each file contains the prompt template for that skill. The filename (without the .md extension) becomes
the skill name used in the slash command. For example, review.md is invoked as /higson:review
(where higson is the project namespace defined in Claude Code settings).
The Higson AI Assistant is a beta feature that integrates an LLM provider directly into Higson Studio. Before the AI Assistant can be used, two steps are required: enabling the feature flag and configuring an LLM provider with a model.
Enabling the AI Assistant#
| Property | Description | Default value |
|---|---|---|
higson.studio.ai.features.enabled |
Enables the AI Assistant — the Documentation Assistant chat panel and AI actions (Explain / Generate) in Functions and Decision Tables. When false, all AI controllers and adapters are not loaded. |
false |
higson.studio.ai.features.thinking-budget |
Global override for the reasoning budget of models that support reasoning mode. 0 disables reasoning, a positive value sets the token limit, empty value uses the default settings of each feature. |
— |
Configuring an LLM Provider#
The provider is configured under higson.studio.ai.provider.
Provider Properties#
| Property | Required | Description | Default value |
|---|---|---|---|
higson.studio.ai.provider.code |
yes | Unique identifier for the provider (e.g., vertex-ai, openai). |
|
higson.studio.ai.provider.name |
yes | Display name of the provider, used in logs and the interface. | |
higson.studio.ai.provider.type |
yes | Adapter type: VERTEX_AI or OPENAI_COMPATIBLE. |
|
higson.studio.ai.provider.base-url |
yes | Base URL of the provider API. | |
higson.studio.ai.provider.api-key |
for OPENAI_COMPATIBLE |
API key / access token. | |
higson.studio.ai.provider.auth-header-name |
no | Name of the authentication header. | Authorization |
higson.studio.ai.provider.auth-header-prefix |
no | Prefix for the header value (with a trailing space). | Bearer |
higson.studio.ai.provider.additional-headers |
no | Map of additional headers appended to every request. | |
higson.studio.ai.provider.connection-timeout |
no | Connection timeout in seconds. | 10 |
higson.studio.ai.provider.response-timeout |
no | Timeout for waiting for a response in seconds. | 300 |
higson.studio.ai.provider.read-timeout |
no | Data read timeout in seconds. | 120 |
higson.studio.ai.provider.vertex-project-id |
for VERTEX_AI |
Google Cloud project ID. | |
higson.studio.ai.provider.vertex-credentials-path |
for VERTEX_AI |
Path to the service account key file (JSON). If not set, Application Default Credentials (ADC) are used. |
vertex-project-idandvertex-credentials-pathapply only to theVERTEX_AIadapter.api-keyapplies only toOPENAI_COMPATIBLE. All other provider and model properties are shared between both adapter types.
Model Properties#
| Property | Required | Description | Default value |
|---|---|---|---|
higson.studio.ai.model.name |
yes | Display name of the model. | |
higson.studio.ai.model.model-id |
yes | Model identifier used in the provider API (e.g., gemini-2.5-flash, gpt-4o-mini). |
|
higson.studio.ai.model.max-output-tokens |
no | Maximum number of tokens the model can generate in a single response. | 4096 |
higson.studio.ai.model.context-window |
no | Context window size of the model. Informational value. | |
higson.studio.ai.model.supports-streaming |
no | Whether the model supports streaming responses. | true |
higson.studio.ai.model.supports-json-mode |
no | Whether the model supports structured JSON output mode. | false |
higson.studio.ai.model.supports-tools |
no | Whether the model supports tool-calling. Required by the Documentation Assistant. | true |
The Documentation Assistant requires a model with
supports-tools: true. Models that do not support tool-calling can still be used for simpler actions such as Explain and Generate.
See Also#
If you want to connect an external AI client (such as Claude Desktop, Cursor, or VS Code) to Higson instead of using the built-in AI Assistant, see Enabling the MCP Server.
4.3.0 July 21, 2026
Added:
- Diagnostic panel — a dedicated view for Runtime monitoring and analysis, comprising:
- real-time monitoring dashboard with JVM memory, GC, threads and per-minute CPU usage,
- performance profiler with flamegraph and call-stack profiling for functions, flows and domain attributes,
- diagnostic export and import for offline analysis,
- light theme support,
- Licensing — a license is now required to run Higson, with:
- developer license for non-production environments,
- production license for commercial use,
- license diagnostics — current license, usage and vCPU exceedance episodes,
- expiry warnings — footer banner, daily popup and notifier,
- Rule encapsulation based on profiles; rule elements can now be explicitly assigned to a profile, with:
- profile assignment for decision tables, functions, flows and regions,
- profile-aware read/write authorization,
- profile-scoped filtering, export/import and snapshots,
- Lighter versioning and faster snapshot export — memory and snapshot size optimization; when a new parameter version introduces no changes, Higson links to the previous version instead of storing a full copy, reducing footprint across Runtime, snapshot import/export, Excel import and region attach/detach, with merge, split and deduplication operations,
- Asynchronous snapshot import — imports now run in the background and, if an instance fails mid-import, are automatically resumed by another instance, making Higson more resilient and cloud-friendly; includes job status tracking and history,
- AI (beta) — LLM-powered assistance and AI-agent integration, with:
- AI assistant for functions — explain and generate function code,
- AI-assisted decision table generation,
- documentation chat assistant backed by the Higson knowledge base,
- Higson MCP (Model Context Protocol) server exposing Studio operations to AI agents, with per-user session scoping and tools for regions, profiles and versions,
Changed:
- Important: Higson Studio now requires a valid license to run,
- Refresh token stored in an HttpOnly cookie with the access token kept in memory,
- User tokens invalidated on role reduction,