Snapshot is one of the global download/upload tools available in the Higson system. This functionality allows you to download selected parts of the configuration to the .ZIP file and upload this into another environment. The contents of the .ZIP file are a directory structure with plain text files, making it easy to work with. Higson allows downloading and uploading snapshots.
Snapshot download#
To see the Download snapshot view select Download snapshot in Tools from Main Toolbar:
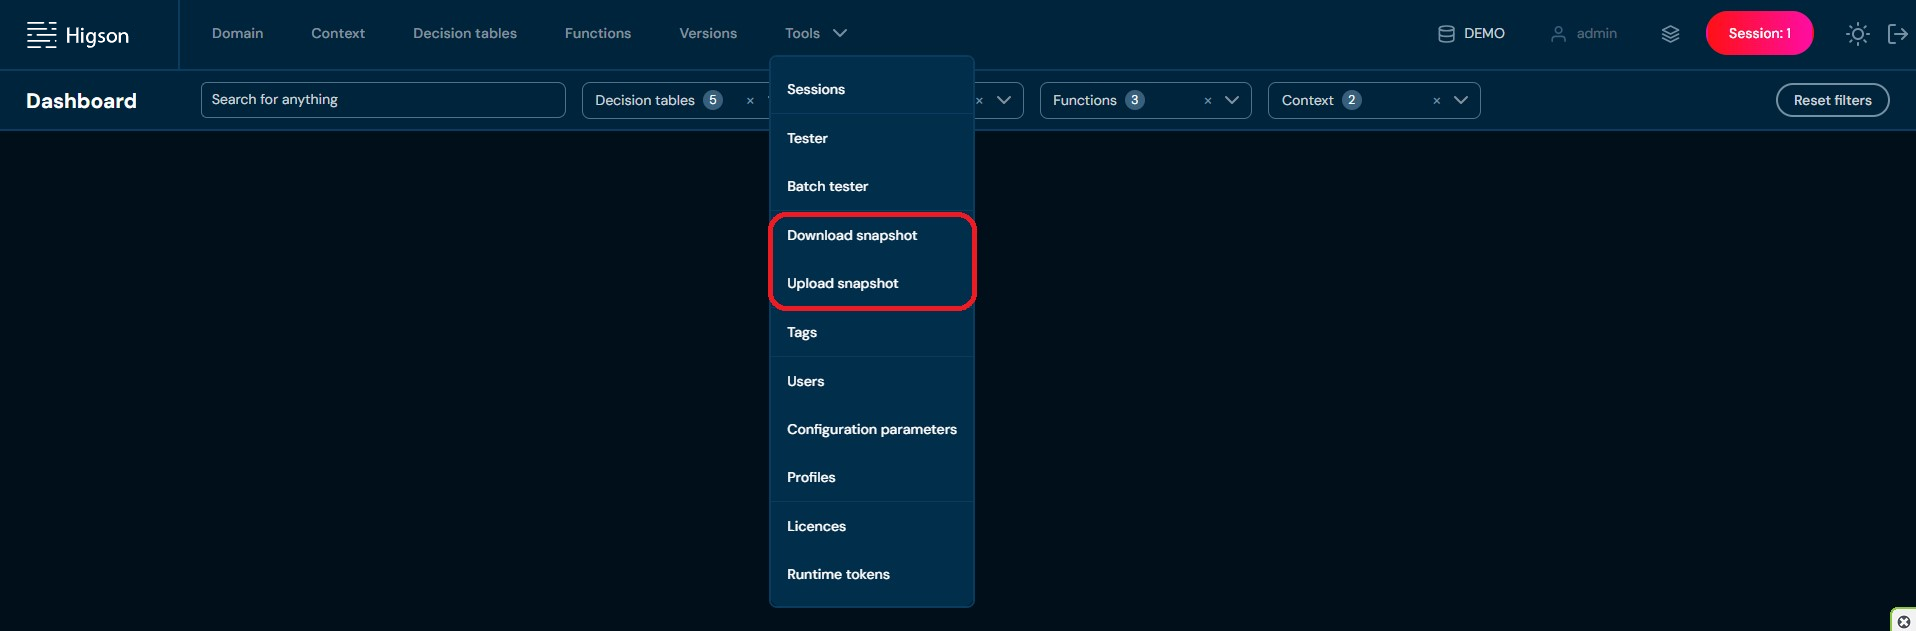
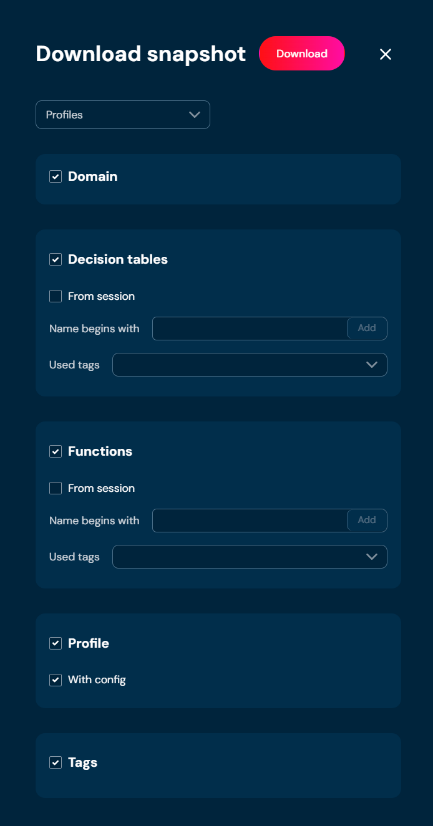
After that, you will see a screen allowing you to choose the elements that you want to be in a snapshot:
-
Profiles
-
Domain
-
Decision tables
-
Functions
-
Profile
-
Tags
-
Choosing the Profiles:
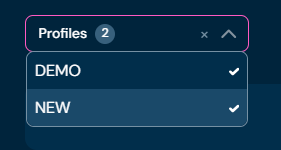
The snapshot download will contain functions and decision tables, which are versioned inside the selected **profiles **. You can choose one or more profiles. In this case, the snapshot download will contain functions and decision tables from two selected profiles:
-
Choosing the Domain:

When you choose Domain snapshot download will contain the domain with published changes and the current user’s session changes by default.
-
Choosing Decision tables:
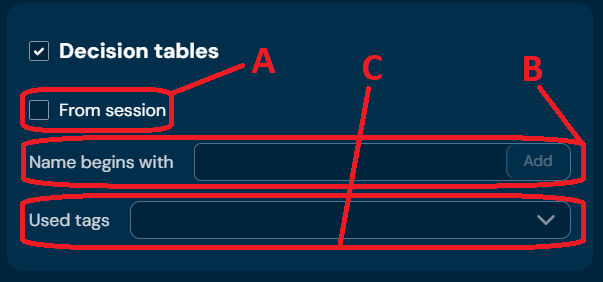
When you choose Decision tables snapshot download will contain decision tables:
a) which will be from the current session if marked (A)
b) which will be filtered by name if filled and added in (B)
c) which will be marked by a specific tag if selected in (C)
-
Choosing Functions:
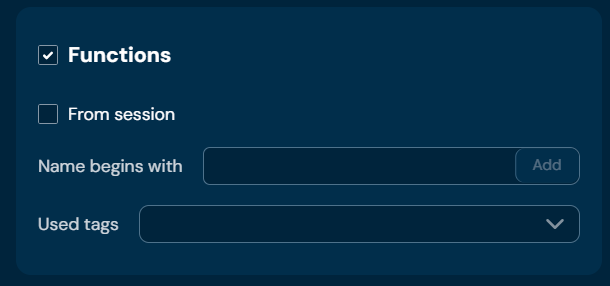
When you choose Functions snapshot download will contain functions - filtered the same way as Decision Tables in 1.3
-
Choosing Profile:
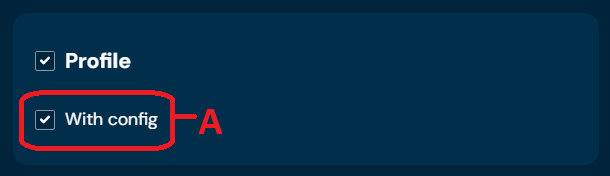
If you choose Profile, the snapshot download will contain the configuration of the profile.
The data contained in the snapshot may contain elements also from the context (A). Context definition can only be downloaded together with the profile definition. If you do not mark the checkbox Profile, the snapshot download will contain only functions, decision tables, and tags.
-
Choosing Tags:

When you choose Tags snapshot download will contain tags.
Finally, after applying configuration to snapshot download - to download the snapshot, you need to click the Download button (A):

Snapshot upload#
In order to see Upload snapshot view select Upload snapshot in Tools from Main Toolbar:
Then Upload snapshot view will appear:
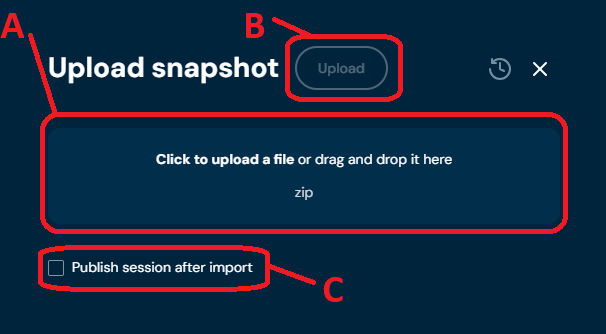
When you choose a file in (A) and click the Upload button (B), the upload will take place. When you choose the upload option (C) all changes from the snapshot will be published right away. After the snapshot uploads, summary results with detailed information will appear in a dropdown list form:
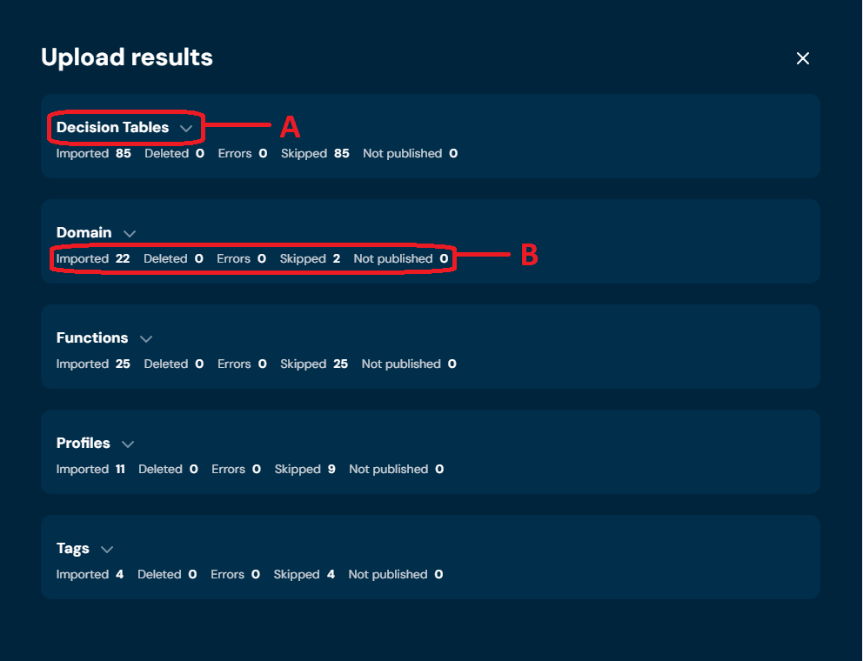
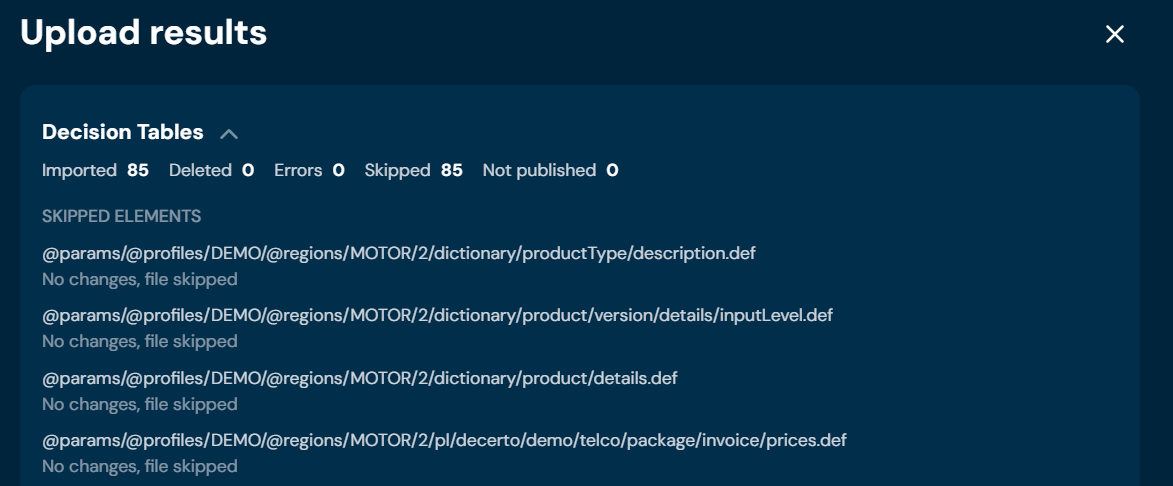
In summary, there is information on how many elements were in status:
| No. | Status | Description |
|---|---|---|
| 1. | Imported | Elements imported |
| 2. | Deleted | Elements deleted |
| 3. | Errors | Elements with errors occurred |
| 4. | Skipped | Elements skipped |
| 5. | Not published | Elements not published |
Every status section can be expanded (A) for more detailed information with a description per element, e.g.:
Historical Snapshot uploads#
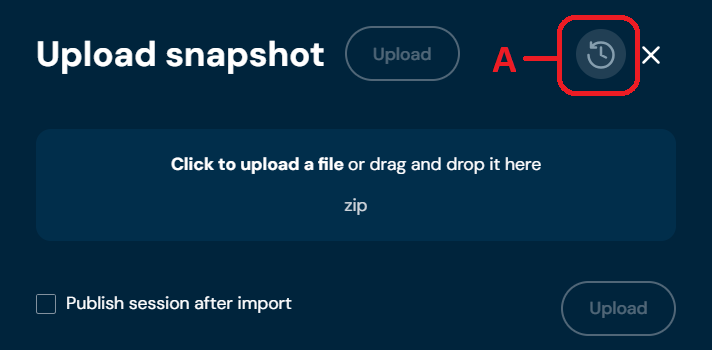
There is also a historical Snapshot uploads view available. After clicking on (A) from the Upload snapshot view:
you will see the Snapshot uploads view with historical uploads in the form of a table:
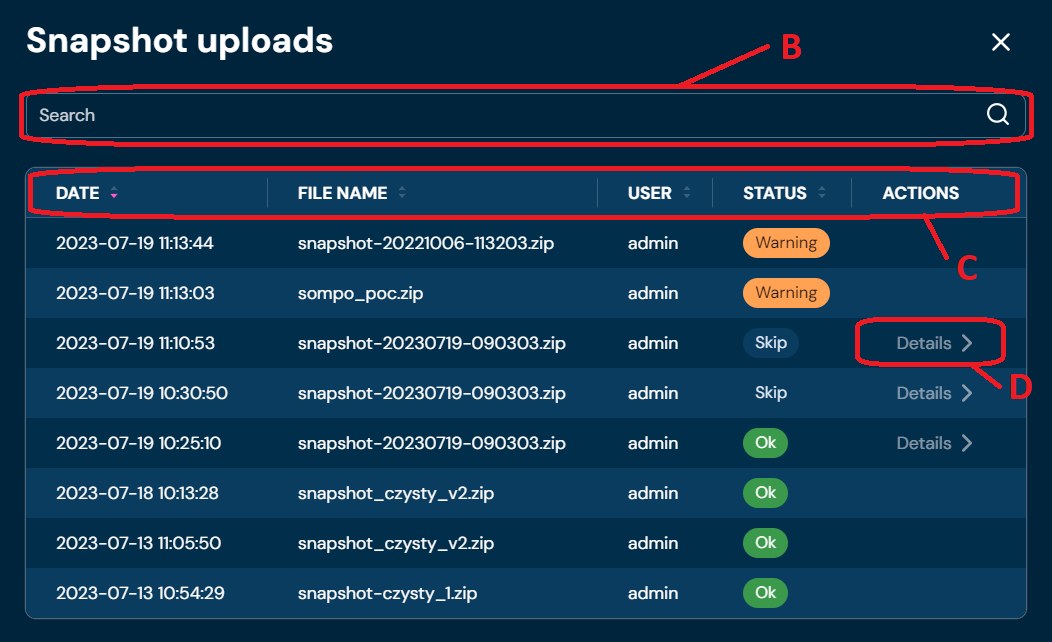
with column names (C):
| No. | Column name | Description |
|---|---|---|
| 1. | Date | Date of snapshot upload |
| 2. | File name | The file name of the file from which the snapshot was uploaded |
| 3. | User | User name which performed snapshot upload |
| 4. | Status | Summary status of snapshot upload: Warning, Skip, Ok, Error |
| 5. | Actions | Contains expandable Details (D) if any message upload exists |
After clicking on (D) you will be redirected to view with detailed information as a dropdown list like in the * Upload Snapshot* summary view.
Insertable field (B) allows filtering table data by Date and File name column.